If you are looking to add the little ESP01 board to your SKR board to control your MPCNC or Lowrider or whatever CNC device you are trying to wifi enable then I hope this post helps you avoid the struggles I went through. I really had trouble finding all the pieces required. I am doing this for an MPCNC with SKR Pro V1.2 with TFT35 E3 V3.0 running dual endstop V1 firmware V515. Just works!!!
First you need an ESP-01S like this (note: ESP-01 has less memory than ESP-01S so make sure you have an ESP-01S. You should be able to look at the markings on the flash chip on the ESP-01 and confirm that it is an 8Mb (8 megabit or 1 megabyte, 1MB) flash chip.

The ESP-01S is the small board on top and the red board with the yellow header is the programmer. There are a LOT of articles and posts on programming the ESP-01S using an arduino… and a lot using a board SIMILAR to this that you MODIFY to make them programmers but the feature with this one is the switch… That little side switch switches between normal run mode (UART) and programming mode (PROG). The switch has to be in PROG mode WHEN you plug the device into your PC. I am doing this on a Windows PC… I saw many posts saying people had issues getting these to work but with the correct options and understanding I find this programmer works well.
Then you need programming software. This is available from Expressif at https://www.espressif.com/en/support/download/other-tools
At the time of writing the tool is the flash_download_tool_3.9.3 for Windows. Too large for me to attach to this post.
Then you need all the software pieces that get programmed into and then loaded onto the ESP-01S module. Those pieces are the firmware that gets flashed into the ESP-01S that makes it a tiny wifi web server and then the web user interface (webui) that gets uploaded via the web server interface that has all the printer controls etc.
First step is the firmware itself. If I understand this properly, the firmware is ESP3D V3… and my struggle was primarily that there is an ESP3D available that is an older version. Using that results in a JSON error at the point when you think you are successful… boy the number of times I hit that was frustrating. I am attaching everything needed to this post here. This is nothing but the V1 Engineering posted files assembled into one place.
ESP01SWifiUI.zip (495.7 KB)
the ZIP file contains firmware.bin which is the proper ESP3D V3 firmware for the ESP-01S module added to the three files (favicon.ico, index.html.gz, preferences.json) required for the webui… Note that the indel.html.gz is indeed a zip file form inside a zip file… thats OK. The web server firmware understands the gz files… leave it as is… (too much knowledge makes you want to unzip it first… don’t…)
Download the flash download tool and unzip it. Download the ESP01WifiUI zip attached above and unzip it. Plug your ESP-01S into your programmer Flip the switch on your programming adapter to PROG mode and plug it into your USB port. Here is your first hurdle… does it show up as a COM port… The board uses a CH340 chip to communicate over USB and you may need a driver. The way you tell if it is working is using Windows Device Manager. In Device Manager, expand the COM ports tab and plug in the programming adapter and see if a new COM port shows up. Note that the COM port number may change depending on what USB port you plug it into on your PC and what other COM devices you have plugged in at the time. If the programmer shows up as a COM it should look like this
Before:
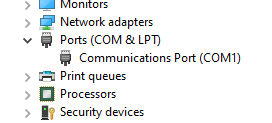
After:
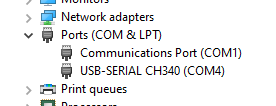
Mine showed up as COM4… success… If yours shows up as an Unknown Device then find CH340 drivers…
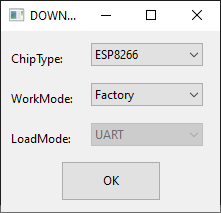
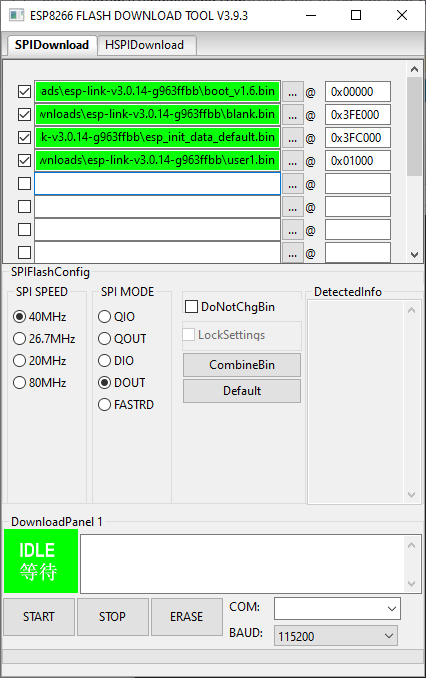
Now launch the Flash Download Tool. You should start with a window like this
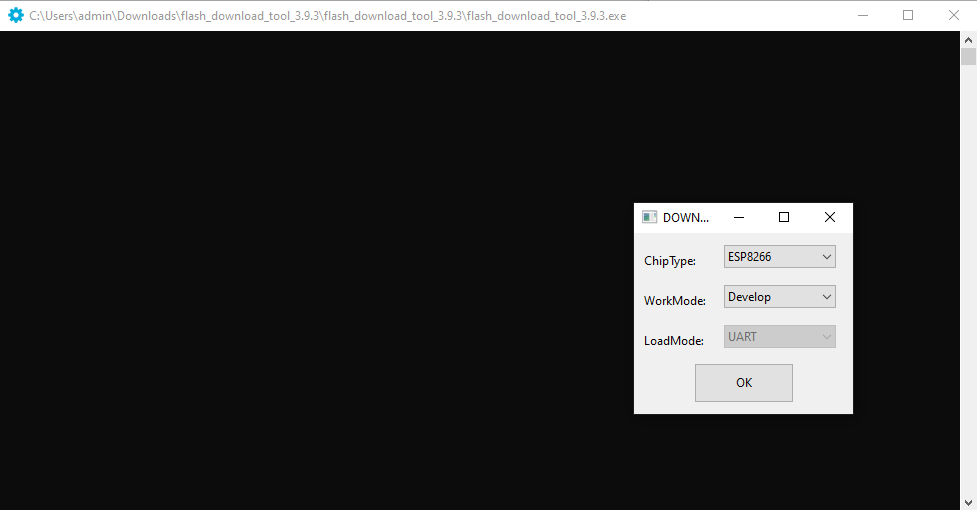
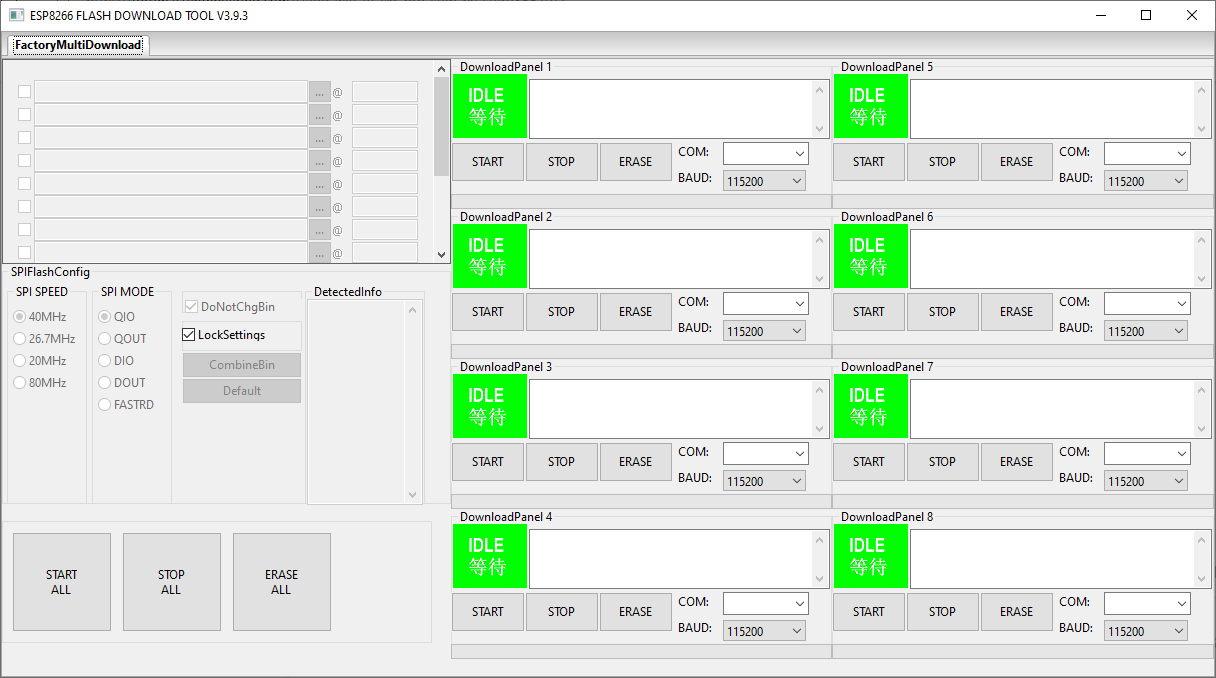
Make sure ESP8266 is selected and click OK. 8266 is the chip on the ESP-01S. That should open the programming interface:
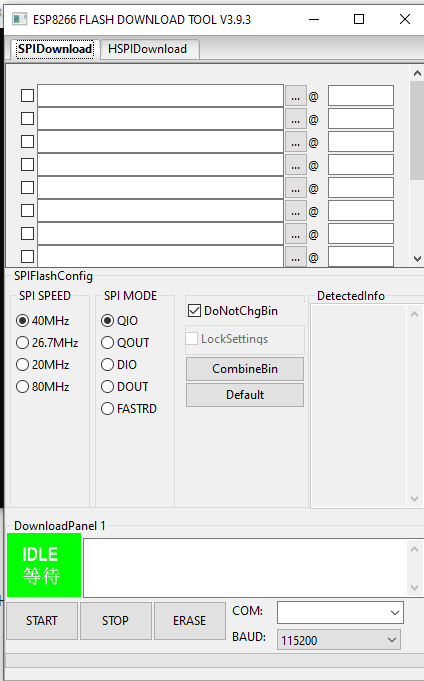
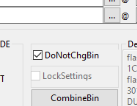
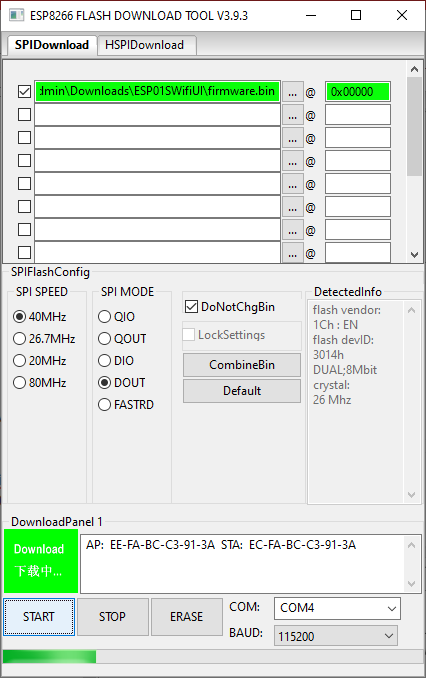
This interface is used to program the firmware.bin file (ESP3D V3) into the board. You NEED to set some options and while you may not NEED to do it, I recommend erasing the ESP-01S first.
Select the COM port of your programmer, mine was COM4.
Baud rate 115200 is correct.
SPI speed 40MHz is correct
SPI Mode must be set to DOUT
Click ERASE

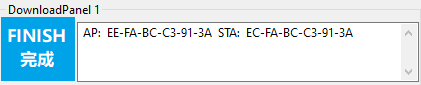
You should get a Finish message… If you get a fail check you settings.
Now we are ready to flash firmware.bin file… BUT… unplug and plug the programmer. You have to do this every time you flash the ESP-01S… leave the switch in PROG mode on the programmer.
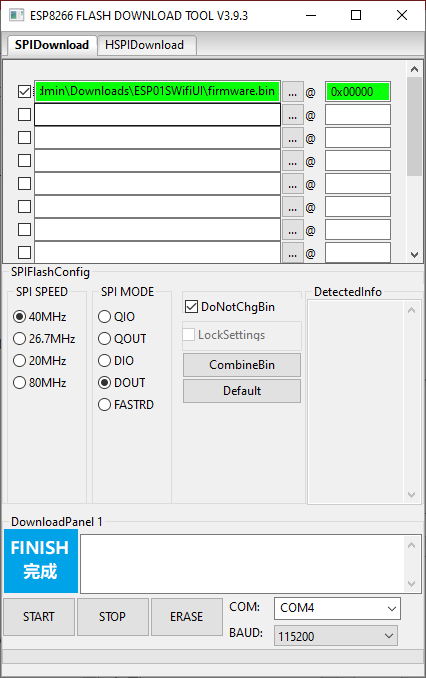
In the flash download tool click the 3 dots to select the file to program and select firmware.bin from the ESP01WifiUI file you downloaded and unzipped. in the field to the righ enter the offset 0x00000 and check the box to the left to tell the tool this is the file to download. Click START
You should see a progress bar as the programming happens
When done you will get a Finish
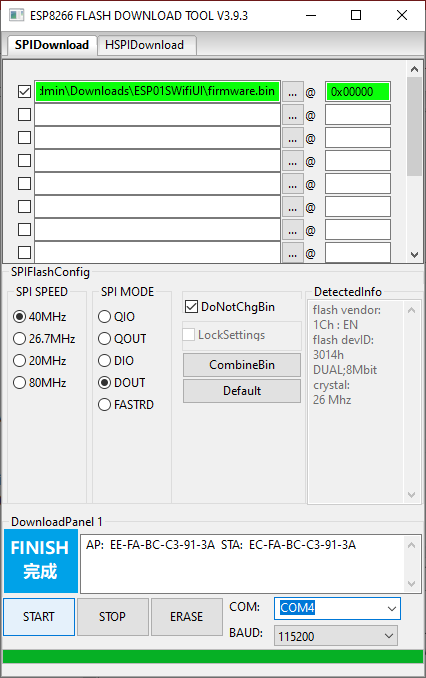
Thats it, done programming the flash tool, now we can flip the switch on the programmer and put the programming tool into UART mode and plug it into a USB port and it should start operating as a little Wifi device!
Open up your Wifi connections and look for a WIFI network SSID called ESP3D which should be a secured network. Connect to it. The password is 12345678 when you connect to it.
Once conected, open your favorite web browser and in the address bar type 192.168.0.1 (note, that address bar is at the top, you are not typing this into a Google search field…) and you should end up at the basic web interface provided by firmware.bin ESP3D V3 where you are going to add the rest of the UI files by clicking upload

In the file select dialog, you want to select 3 files to upload from the ESP01WifiUI file.

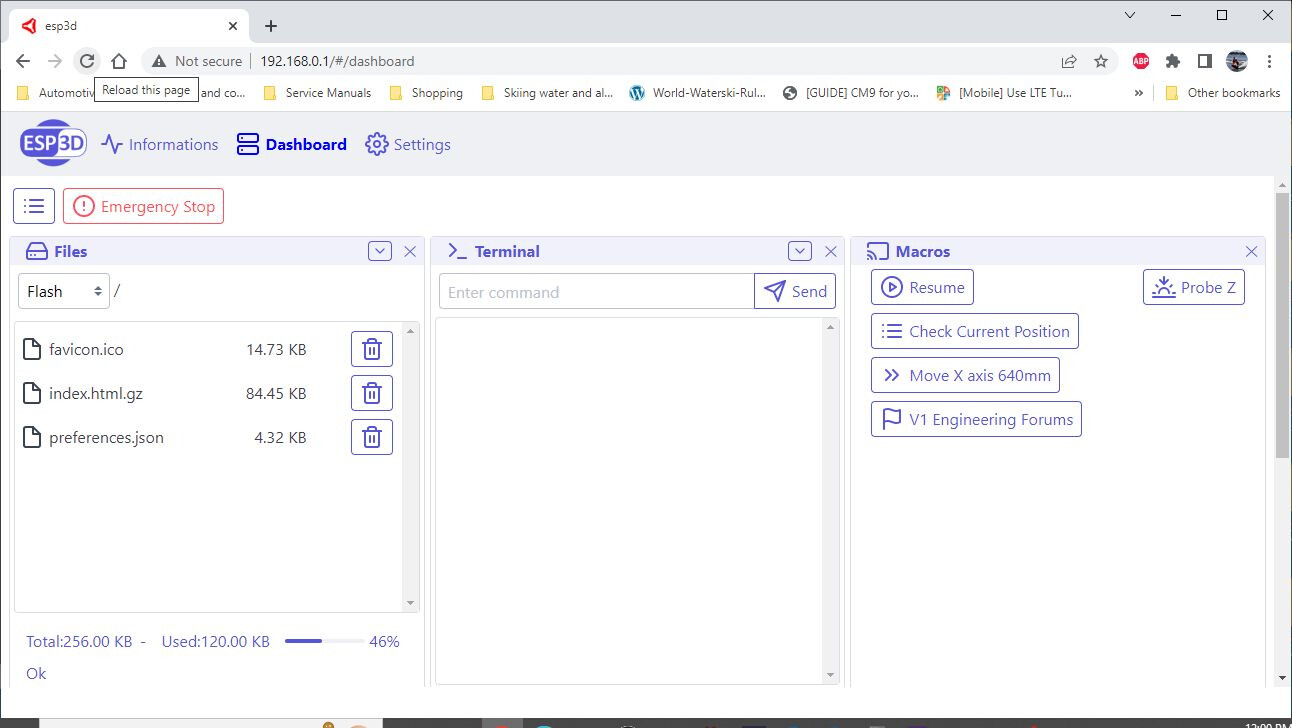
Once the upload is complete you should still have the basic web userinterface showing the uploaded files

Now comes the magic… refresh your browser (best is holding Ctrl key while clicking refresh to force a reload). You SHOULD see the full user interface now
We aren’t done yet… lots of settings to change…
I shrunk my browser window so I could capture one image with all the settings… you may have to scroll around to change the settings…
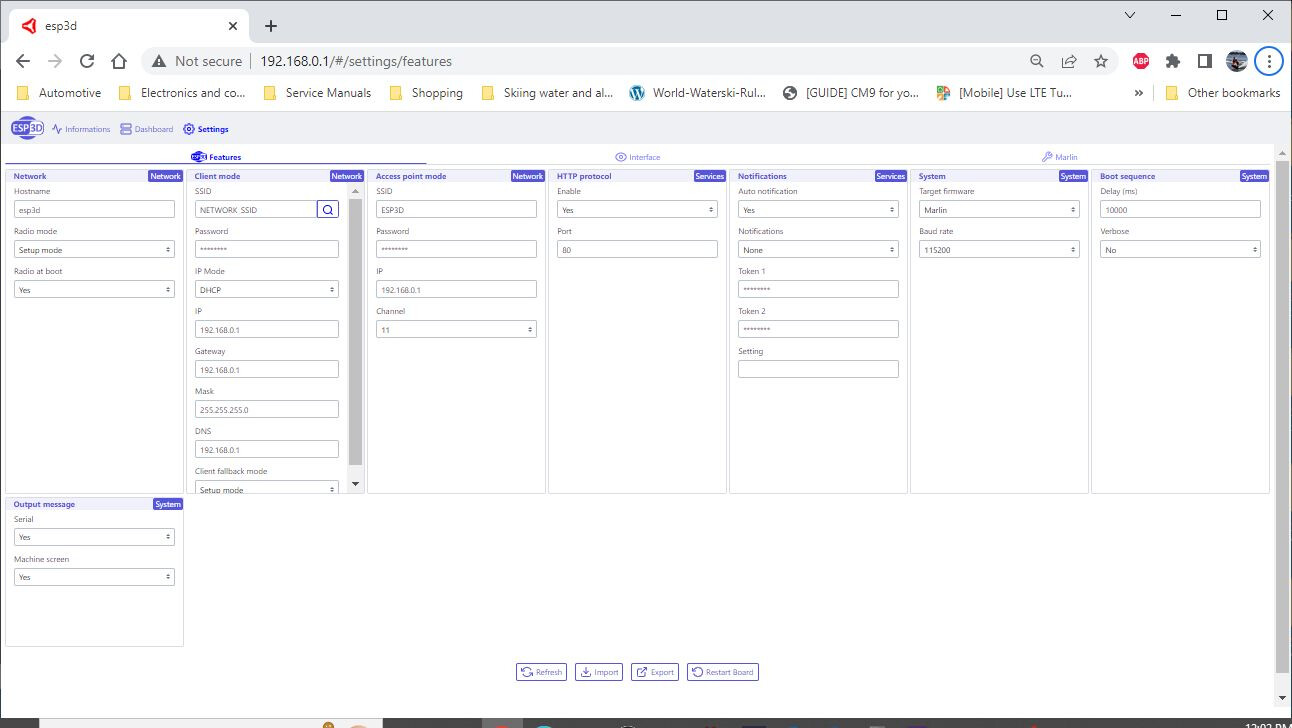
All the ones here in yellow on this image are the minimum you need to change.

You must set Client mode means it is going to connect to an existing wifi… and you need to set the SSID and password for your existing wifi… The baud rate has to be set to 250000 (unless you have changed the Marlin firmware for some reason). OK, Hostname isn’t a MUST… but humour me…
When you click Save at the bottom you will be prompted to restart
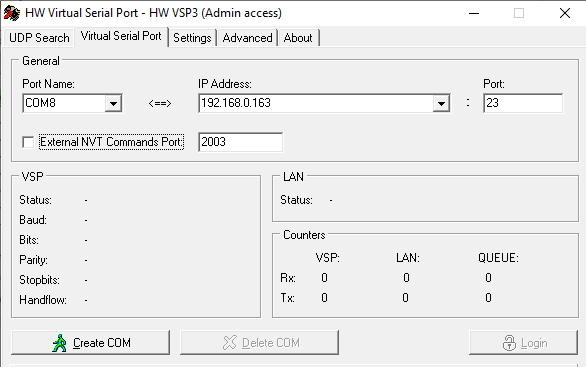
After restart, your EPS-01S wifi board SHOULD connect to your existing wifi… but… how do you access it on your wifi… well, that’s a bit tricky… it will get an IP address on your network automatically and figuring out that address might be a challenge… My wifi uses an app to manage it and I get notifications when a new device connects… I can look at the IP address it got via the app. Most home routers have a web interface that let you look at connected devices… To make matters worse, when you do find it, at some point down the road that IP address may change because you are assigned that address for a specific period of time and after that time it MAY get a different address. Another option is available on that settings page where you first set up your wifi… you can switch from DHCP to static and set a specific IP address… but that requires knowledge of your home network (subnet mask, gateway etc…) and also knowledge of what IP addresses are in use by existing devices… I can’t really advise you about this because there are many variables on your wifi network… but I will say you don’t HAVE to connect to your existing wifi… you could have left the ESP01 operating a its own AP (access point) and just connect to that ESP3D wifi when you want to control your CNC using 192.168.0.1. On my network, I am comfortable at findind devices, I found mine and using my wifi management app made that a DHCP reservation which means it will always get the same IP address. This is a networking rabbit hole… which is where I am leaving this post…
Long post, hope it helps…
P.S. As soon as I clicked SAVE when I was making this I realized that it was going to fail to connect to my WIFI because y wifi password is not really “mywifipassword”… What happens in the case where it cannot connect is it goes back to Access Point mode instead of Client Mode and you will once again see the wifi SSID ESP3D that you can connect to with 12345678 password and take another shot at entering your wifi information correctly. This approach allows you to reconfigure your ESP-01S wifi settings easily if you ever have a change of wifi networks…