LowRider-inspired Foam Ripper

An avid RC’er, Mark Moebes (“moebeast”) made waves with his wildly-successful FliteFest-East 2017 MPCNC foam-cutting exploits… Ryan even featured his FT article here on this site (https://www.v1engineering.com/moebeast-flight-test/).

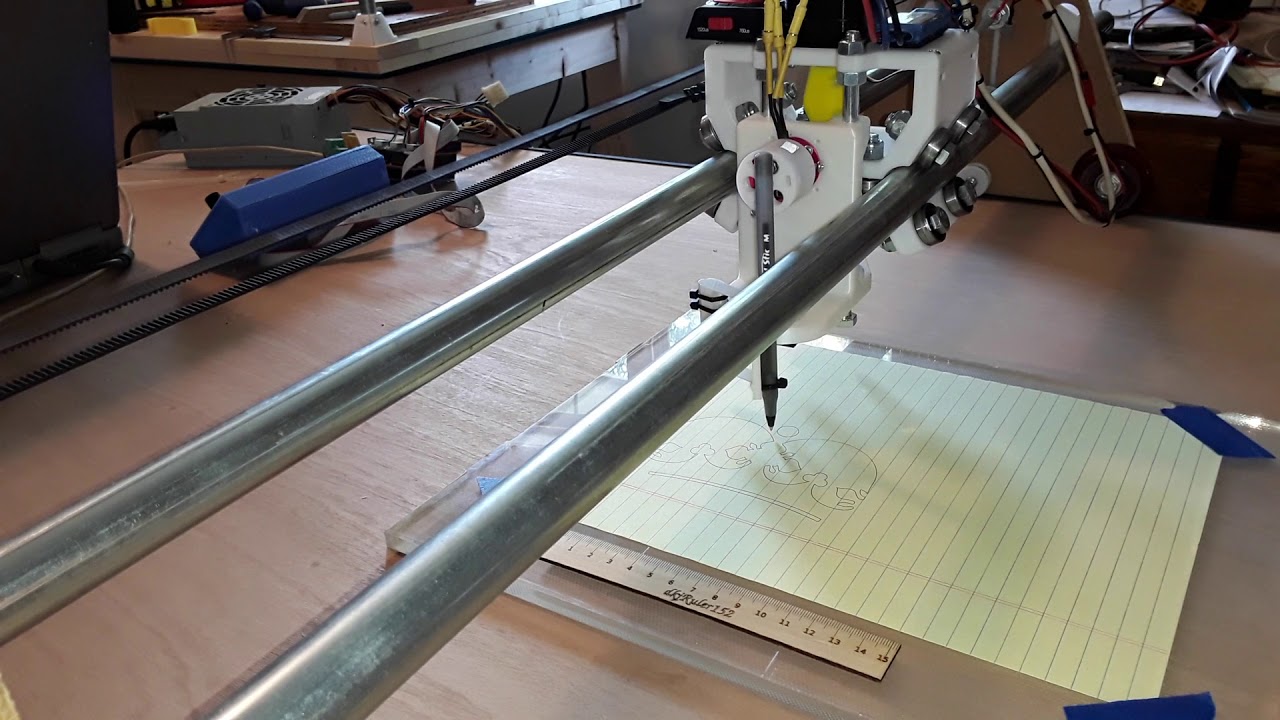
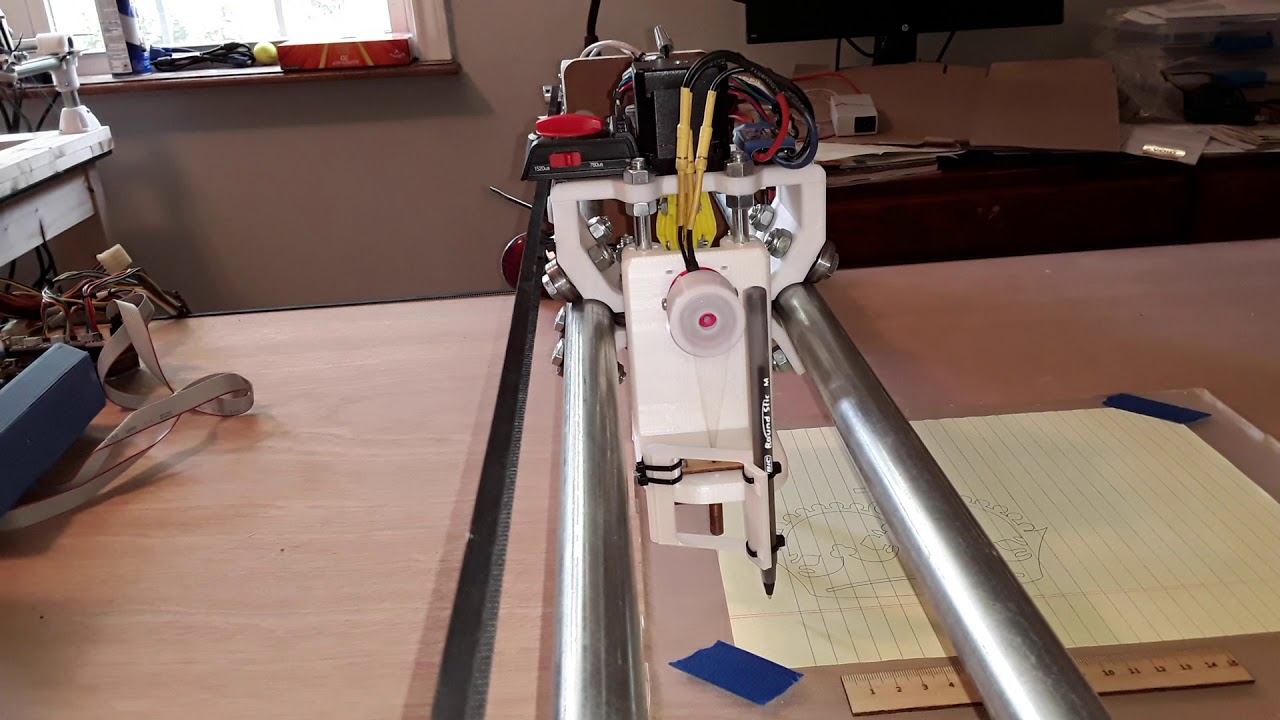
Well, soon after returning from FFE/2017, he set about to… in his words, “see how inexpensive a machine I could build.” The resulting, loosely LowRider-inspired, foam-cutting machine – which he calls “Foam Ripper” – is not a competitor/replacement for LowRider. It is a light-duty machine, using standard 3/4" EMT, having fixed-height (but adjustable) Y-axis rails, and sporting a Y-carriage with limited-range Z-lift and integrated needle cutter… and ultimately it uses one less stepper motor, about half the number of bearings, and a quarter of the hardware, of the MPCNC.

https://www.thingiverse.com/thing:2520214

He also wrote a second FT article describing its construction…

https://www.flitetest.com/articles/another-cnc-foam-board-cutter

And here it is in action…

My planets have now aligned… and with my new “Texas rebuild” milling capability and a new needle-cutter slip-on flywheel assembly in development, I have decided to build Mark’s machine. It’s a dedicated machine for light-loads – needle-cutter, pen/marker plotter, drag-knife, laser, etc. – and is best suited to a generally “smaller-than-LowRider” work area. I’ve begun documenting my build in my lengthy needle-cutting thread over on the FT forum…

https://forum.flitetest.com/index.php?threads/cutting-foam-sheets-with-a-needle.24251/page-110#post-427171

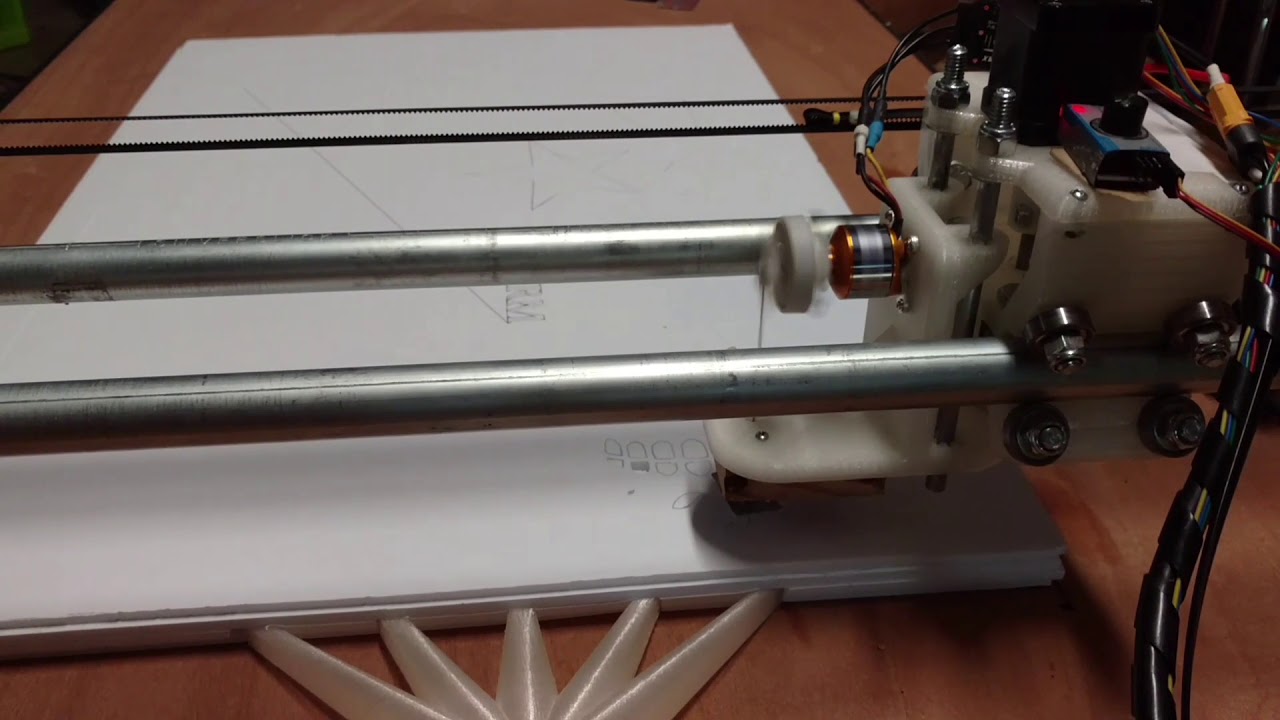
My build has progressed to the point that I can begin testing and fine-tuning… first, the obligatory crown plot

and a short run-up of the needle cutter, featuring the new slip-on (over the motor bell) flywheel assembly…

Not needing the size or rigidity of the LowRider machines, my build currently uses an 32" x 80" interior door for the work surface, perched atop a folding table.

[attachment file=68029]

[attachment file=68030]

[attachment file=68031]

[attachment file=68032]

[attachment file=68033]

[attachment file=68034]

[attachment file=68035]

One of my first tasks, is to needle cut three DTFB sheets to form the vacuum hold-down system featured in Mark’s article… Jason Hitesman (“jhitesma”) also did a video detailing its construction

As CNC machines go, this may be one of the easiest machines to find room for… it can be made “knock-down” for portability and/or storage. The bed needs to only be large enough to allow for cutting to the extremes of a sheet of DTFB, or whatever sheet material you want to cut. The rolling gantry is easily rolled off the bed, is not-too-heavy (20 lbs?), and will stand up in a corner. The belts are simply clamped along the edge of the bed for use. The bed is stored away like any other panel. Saw horses or a folding table hold it all up in use. No computer required to operate, the LCD controller and electronics can be attached to the end plate… so it stores with the gantry.

This has been a fun build. Eventually, I plan to down-size the work-surface and move this machine into the bedroom I’ve set aside for hobby storage and additional work-area. Cutting foam with the needle cutter is not terribly loud and generates little debris so hopefully it will be happy there, not occupying “center stage” in my living area… :wink:

– David


20180901_120343.jpg

20180901_120634.jpg

20180901_121802.jpg

20180901_145638.jpg

20180901_145834.jpg

20180901_150049.jpg

20180901_150102.jpg

2 Likes

That is really slick. I saw some of your vids on youtube amd I was wondering what this was. It seems like a great combination of parts. I think one of those 3W lasers on a machine like this would be very cool. If you made the base light enough, you could even drag it outside to avoid all those toxic gas problems.

Also, I like the square and straight edge trick.

Thanks, Jeff.

I really didn’t want to present it here until it was functioning pretty well. The build is being documented in my FT thread so don’t want to try keeping all threads in sync.

Putting a laser on it would be super easy… but I’ve built so many laser machines I was happy to do something different for a change :wink:


I decided, when I found a small scrap of foam (DTFB w/o paper), that I could start playing with the needle cutter and give a quick demo. These were the very first ever cuts with this particular needle cutter. The needle is a little long yet but the results are still reasonable, with a lot of small detail…

[attachment file=68050]

[attachment file=68051]

[attachment file=68052]

[attachment file=68053]

I made a video but it is uploading now… will post later.

– David

My apologies in advance. Intended to be entertaining, this video may be too painful to watch. Please feel free to turn away if you are squeamish. You may want to turn down the sound as well.

My story (and I'm sticking to it)... apparently a hairy gorilla broke in, rendered me unconscious, and thought he could do a better job of my needle-cutting demo than I could. Idiot! He was as ill-prepared, fumbled around, and was even more shakey than I am... ;);)

https://www.youtube.com/watch?v=vIpHJ0GC4kg

1 Like

Haha. Those gorillas are ornery!

Good looking cuts. What planes do you like to cut?

Far less the end user (building/flying) now, I seem more interesting in the tools/tooling nowadays. Shakey, spastic thumbs make the flying too much the challenge for me now :wink:

But back when my now-deceased buddy and I first started in the RC stuff, we were cutting all kinds of “foamies” and flying them in my pasture… most were only one or two sheets of foam. We had great fun…

Just a few…

[attachment file=68064]

[attachment file=“2014-10-17 08.38.32.jpg”]

[attachment file=“2014-10-08 14.25.06.jpg”]

[attachment file=“2014-09-30 00.46.39.jpg”]

[attachment file=“2014-09-24 15.07.27.jpg”]

[attachment file=“2014-08-29 13.05.49.jpg”]

[attachment file=“2014-08-29 13.06.05.jpg”]

[attachment file=“2014-09-01 22.45.25.jpg”]


3 Likes

I have tried a few flying wing (bank amd yank types) and a nutball (that was the most forgiving) and an FT arrow. They are all a ton of fun, but I have a hard time getting my head around pitch and speed when I’m “in the moment”.

Those planes look much tougher to fly though. Sometime, I’ll need to try fpv with one of these foamies.

I’m the same way with building tools and machines instead of really making things with them. The bar is much lower for shop projects.

I’m kind of the se way with planes and quadcopters, actually. Once I fly them, I lose interest and want to build another one.

My buddy, Henry, was the far better flyer than I was. I was really partial to the RCPowers parkjets with their 3d fuselages and score-and-fold methodology (perfect for needle cutting)… that was why I initially did my needle cutter development over on the RCPowers site. I enjoyed the cutting and building of airframes just to see what they looked like… and then I’d give them to Henry to actually fly. I never enjoyed finishing/painting… we would simply shoot them with a light coat of spray paint (me, orange… him, not orange) just to tell them apart and see them against the sky.

We began our journey on a quest to see just how cheaply a person could get into RC. As kids, in the 50’s and 60’s, RC was a rich man’s game… thousands of $$$ and hundreds of man-hours spent building balsa-and-tissue, gas-powered models that, more often than not, were destroyed when taking off on their maiden flight. Today, $2 worth of foam and hot glue, $35-$40 worth of servos, esc, motor, and receiver, a couple of batteries and a charger, and a $40-$50 transmitter… and you can go from “zero” to tons of fun in short order. Our pasture flight sessions were more like demolition derby - fly, crash, quick tape/glue field repair, throw it back into the air… and repeat. Last man flying wins! When a plane was beyond field repair and too far gone to fly again… we’d just go cut another one, quickly hot-glue it together, transfer the old electrics over to the new airframe… and we were ready for another flying session. What fun!

I suspect we’re exactly the same… I’m far more interested in functionality vs. form/finish. I never truly finish anything. I build things to the point my curiosity is satisfied and/or I get bored with it… and then I’m ready to move on to something else. – David

1 Like

I love the build. Perfectly suited for that foam. I think the gantry can use two less bearings and bolts sort of like my rollers have. Two on top 1 on the bottom. Lighter and cheaper, it looks to have enough weight to also ditch the lower wheels as well like the LR2. I haven’t had any issues with that yet.

I do think you should stick a sharpie on there and do a “tool change” add some offsets and decorate the foam a bit. Why do vinyl when you can draw directly on it!

I am the same with flying them. I can’t seem to find anywhere nearby for my amateur pilot fingers to get some air time without one heck of a drive. So I will stick with the machines and maybe one day I will find an open space without fences.

Thanks, Ryan.

For this first build, I’ve tried to stay true to Mark’s design as much as possible… with the exception of the Z-body/cutter, which allows for continued development of the needle cutter and flywheel assembly. As far as the lower wheels, I already had the wheels on hand (ordered when I was thinking of building a LR1) and the end-plate DXF already had the slot… so I populated it. When I decided to put the 32" wide door on the 30" wide folding table, however, I had to drop the lower wheels to their lowest position… and they are now just hanging there. And, it seems to work fine without them!

[attachment file=68100]

I don’t know, Ryan… that tool-change stuff is starting to get pretty fancy. I’ll have to warm up to it… :wink:


Adding some custom graphics might just get everyone on board…

This does make me want to try a little slow flyer. Something I could actually fly at a small park. It is getting so cheap to get into this stuff now. My friends kids are in 3rd and 4th grade. They need some old school fun in there lives. I bought one of them a estes rocket…but a plane would be more fun, maybe a lil wing.

1 Like

I flew a nutball and it was pretty forgiving:

Plenty of room for a logo on there.

All the FT plans are available as a free PDF download… and they have quite a few trainer and fun-fly designs to choose from, as Jeff is suggesting.

I would absolutely love to have you guys “pioneer” the combo decorate-and-cut procedures. I’m sure that would be a great selling point… and bring some folks on board. It doesn’t really have to be a Foam Ripper, either… a needle-cutter and marker holder combo could be devised and strapped to virtually any machine :slight_smile:

– David


Yours is already waiting…that pen is so sad that it just has to watch the needle cutter have all the fun. You are right though, I could get my feet wet as well.

I have seen the guys fly the nutball on the youtube videos a few times and they do really have a good time when they do. Seems most builds there is a ton of concentration going on and that nutball is so slow and funky they all just laugh and have a good time. Maybe that would be cool to try. I’ll check my calendar.

One of the advantages of “foamie” aircraft is that they are so cheap, the anxiety level is greatly reduced. At $1 a sheet from any dollar store and many/most fun-fly planes taking no more than a sheet or two, they are easily replaced if/when they need to be… especially if you are machine cutting them. The electrics/electronics most often survive typical crashes and are easily transferred to a new airframe, so this can be a reasonably economical hobby.

One of these days I want to go check out their new location. They’re about 3-ish hours away from me.


Also that F-15 is cool looking! Brings back memories!

If you are talking of the last plane in my post above… from that angle it does have a bit of a F-15 look to it but it was actually a RCPowers Mig-29 V3 airframe I built up.

[attachment file=“2014-09-01 22.45.25.jpg”]

[attachment file=“2014-09-01 22.45.42.jpg”]

[attachment file=“2014-09-02 09.28.39.jpg”]

They had a pretty neat Parkjet V3 PDF plan bundle I purchased… it included F-35, MiG-29, F-117, and F-18. I really liked the score-and-fold technique they used to get a 3d look to the fuselages… it’s was perfect for needle-cutting. The F-117 was my favorite of the bunch though…

[attachment file=68196]

It was fun to fly and really looked cool in the sky over my pasture! :slight_smile:


2014-09-01-22.45.25.jpg

2014-09-01-22.45.42.jpg

2014-09-02-09.28.39.jpg

117337_4e9869f35cad23a546abc41d5614f017.jpg

1 Like

My grandpa and his buddy was (according to my dad) in one of the model airplane magazines in the 60s for installing retractable landing gear in a model aircraft. My dad always was interested but even when he was making them in the 90s they were gas powered and it was expensive to learn. Luckily there were simulators.

Ahh, from that angle it does look different.