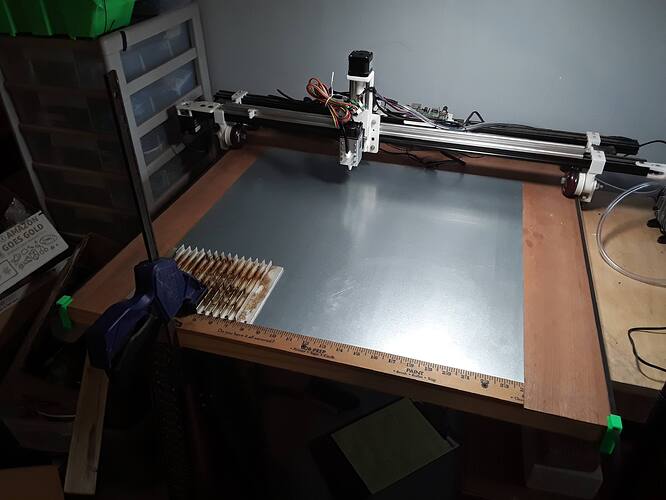
Rolling Plotter build

For automotive builds, there are a few ways thst we fit things with close tolerances

One of which is heat. For example in order to fit the wrist pins in my pistons, factory procedure is to put the pistons in a pot and boil them, then fit the room temperature pins through the piston and connecting rod.

While I don’t think I’d want to expose the bearings to boiling water, particularly when the sealed state of them is in question, I might put them in a water tight plastic bag and put that in hot water. A little heat will probably get you that tiny bit of extra tolerance that you need. Just be reasonably sure that you don’t need the bearings to slide back and forth afterwards. Put the rod in the freezer, or use an ice pack to increase your tolerances. (This might be enough with the bearings at room temperature, or maybe just a little warm, now that I think about it…)

You could also use a propane or butane torch, but that is likely to be a bit hard on the seals and any grease in the bearing. I think the more uniform and controlled application of heat with hot water is better. You could probably use hot oil, but then you could get hotter than the seal can take pretty easily, and cleaning the pan after is trouble.

If you need to change those bearings after, it may take a press to get them off of the rod.

The nice thing with that super close tolerance though is having the bearings stay in place under almost any usage, or, more like, not having to worry about axial shaft play. Even if it’s under high temperature usage, the shaft will expand too, keeping everything tight.

Note that you get nore rolling resistance if the center race on the bearing rotates on the shaft, so keeping that stationary is the best practice.

2 Likes

This is how they install the copper parts of a towerbell „beater“ (don‘t know the English word), really, really interesting and sounds like a great idea for parts that need to fit, never thought about adapting it for home use. :smiley:

1 Like

Someone on a discord server recommended using an M8 leadscrew instead. Looks like an M8 leadscrew might be a better way to go rather than an M8 smooth rod. Those 8.0mm ID bearings will fit on my 3d printer’s leadscrew. Measuring that M8 rod with my calipers, seems like the one I have might be a shade over 8.0mm in diameter. I can get an M8x1000mm leadscrew from aliexpress for $25 or from zyltech for $23+shipping. Those are probably a better tolerance than the M8 smooth rod since they have to fit those standard leadscrew brass nuts. I will have to consider getting one of those, but probably get it from aliexpress. Seems like I might get better accuracy if the bearings on that axle are a tighter tolerance.

Actually, another option that same guy mentioned was to go to local hardware store with that bearing & gets some tubing to match it. Lowes has 5/16"x6’ threaded rod for around $7.50. that would probably work.

Mmmmm, sous vide bearings. Done perfectly!

1 Like

I finally uploaded the files & BOM for this current design. I probably need to add more details for this.

I also added an optional TPU printed tire to replace the 6 O-Rings on each wheel.

5 Likes

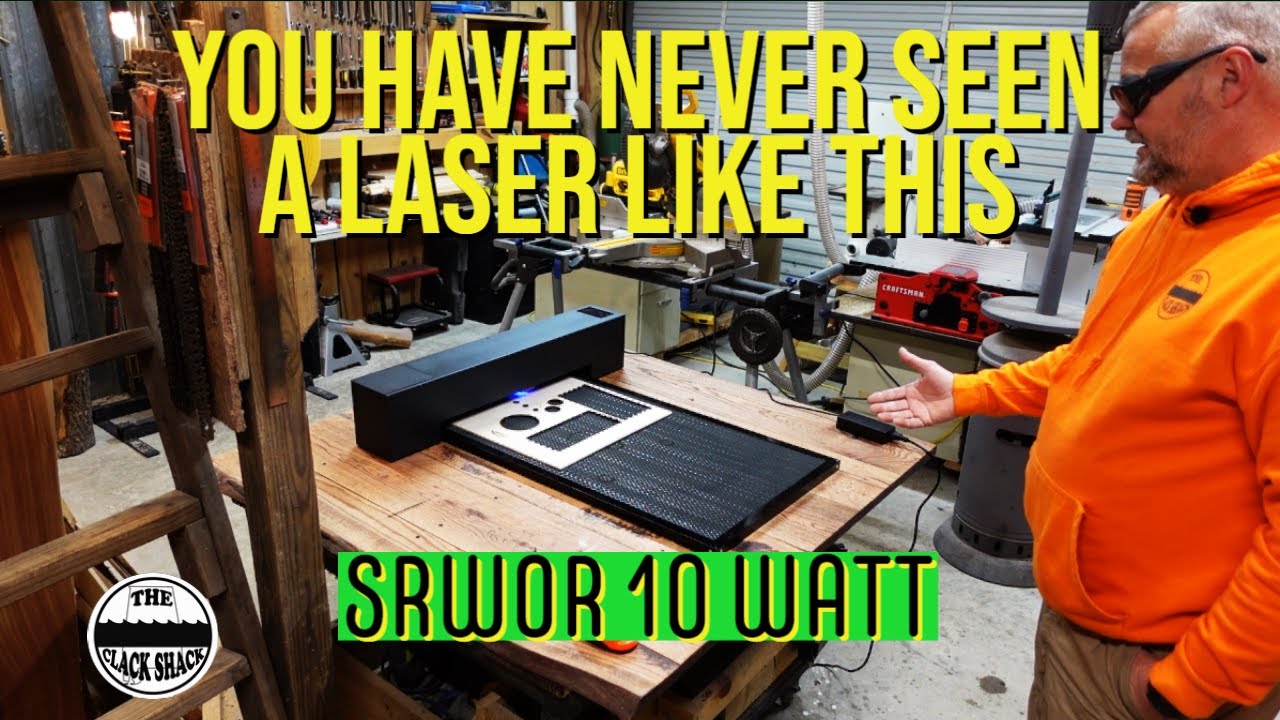
Speaking of rolling plotters… I just found this video of the SRWOR 10W self-propelled laser engraver. Just $700 and you can have one of your own! :smiley:

A pretty interesting machine, he puts it through a few tests that highlight some of the same issues I saw with my “free-rolling” system before it morphed into the gantry for my now dismantled LowRider-inspired Foam Ripper. Once I belted it up ala LR and constrained it to the worksurface with small training wheels, it became a reasonably accurate and repeatable machine…

– David
3 Likes

Pretty interesting. It would be interesting to see what the wheels look like & drive system. Looking a the link for that machine, I find it hard to believe that got that one long image burn done with that machine. I won’t have time to look at that video link in detail until next week, but from what you said sounds like he had similar problems I did. I am thinking of ordering those other more squishy O-Rings next week as they seem like they would give me more surface area contact for better grip, but from @jamiek comments in the past that might not be my problem. For $12-$15 it seems like a worth while try.

1 Like

I finally watched all of that video. Looks like it is more accurate than my current setup. He said it was quite heavy, so maybe more weight on mine would help it. I ordered the 70A hardness O-rings today & should be able to pick them up Wednesday. I just remembered this morning I had a MKS DLC32 board I was going to try on this machine with FluidNC. I have not played with FluidNC since 5/22 (V3.4.4 then & current version is 3.6.6), so it has probably improved quite a bit since then. Maybe I will get a chance to set that up sometime & use the servo Z setup that @turbinbjorn gave me his modification for. I can see where having an automatic Z height setup would be fairly easy with a laser on here. Just let the software drop the Z-axis down until a limit switch hits the working surface & then raise up the desired focus height.

1 Like

I took my plotter apart the other day and plan to do an assembly video just to do so. I picked up my new O-rings from Grainger, but they were the same as what I had. Either they sent me the wrong ones, or they were marked wrong on the website. I will call them & either return them or exchange them if they do indeed have 70A O-Rings.

While I had the machine apart, I was thinking of another option to drive the wheels with AWD (All Wheel Drive). I don’t plan to test this but thought I would add it to the blog in case someone else wants to try it. If you look at the attached image while reading this, it will probably make more sense. What I was thinking is this machine could probably be changed a little more to drive both wheels on each side by putting the 80T wheel gear near back plate instead of the front plate for one of the wheels on each side. I don’t know if there is any advantage to doing this as my 1st design did drive both wheels on each side, but in a different way. The first problem is your M8 rod would have to be 22mm longer than the aluminum extrusion you use, since the bearing that was on the inside of the back plate would now need to go to the outside of that plate. The main assembly problem would be getting the 240T closed loop timing belts on each side since there would not be a way to adjust them easily. I think it could be done by having the wheels not bolted to plates 1st & tensioned them in place to tighten the belt. You would also need 2 more of the 240T belts & 2 more GT2 Timing Pulleys 20T bore 8mm. One of the spacers would also have to be a different thickness. After redrawing this, I did notice I had the back plate located 2mm too close as the wheel spacer on that side intruded into the back plate 2mm. That error doesn’t affect this assembly unless you create the AWD. 2020 hindsight, I should have had the bearings on both sides of the wheel the same offset from the most outside edge of wheel. Here is what that idea looks like.

2 Likes

I was looking at adding some weight to this machine which would probably give it better traction since it seemed to help that Chinese rolling laser that @dkj4linux mentioned. I figured the best way to add weight without putting some objects on top, would be to add some BB’s or something similar to the cavity of the 2040s (Not using sand as it is too messy). Rather that figure it out myself, thought I would see how well chatGPT handled it. It could not come up with the correct area of the cavity, so I gave it that number after checking it on a profile in fusion 360. It could not figure out the cavity area of the V-Slot, so I gave it an equivalent Cylinder diameter based on the area I came up with. It came up with approximately 3,904 BB’s & a weight of 1.4kg. Not sure I want to buy 8,000 BB’s though (need for 2 - V-Slot 2040). I can get a 6,000-count container of them from Walmart for $11.23.

how many daisy bb’s will fit in a 13.834 mm diameter 1 meter long cylinder and how much would it weigh

To calculate the volume of the cylinder, we need to use the formula:

V = πr²h

Where V is the volume, r is the radius (half the diameter), and h is the height (in this case, the length of the cylinder).

First, we need to find the radius (r) of the cylinder:

r = d/2 = 13.834/2 = 6.917 mm

Now we can calculate the volume of the cylinder:

V = πr²h = π(6.917 mm)²(1000 mm) = 150,295.33 mm³

Next, we need to determine the volume of one Daisy BB. Unfortunately, I don’t know the exact dimensions of a Daisy BB, but let’s assume it’s a sphere with a diameter of 4.5 mm. The formula for the volume of a sphere is:

V = (4/3)πr³

where r is the radius (half the diameter). Thus, the volume of one Daisy BB would be:

V = (4/3)π(2.25 mm)³ = 38.485 mm³

Now we can divide the volume of the cylinder by the volume of one Daisy BB to find out how many BBs would fit inside:

150,295.33 mm³ ÷ 38.485 mm³ ≈ 3,904.7 BBs

Note that this is an estimate, and the actual number of BBs that could fit inside the cylinder may vary depending on how tightly they are packed.

Finally, to calculate the weight, we need to know the weight of one BB. Again, I don’t have this information, but let’s assume it weighs 0.36 grams (which is the weight of a different brand of BB).

Thus, the total weight of the BBs would be:

3,904.7 BBs × 0.36 grams/BB = 1,405.1 grams

So the BBs would weigh approximately 1,405.1 grams (or 1.4 kg).

1 Like

chatCPT is scary. :smiley:

It has the possibility of being a useful tool if it is not abused.

2 Likes

For equal spheres in three dimensions, the densest packing uses approximately 74% of the volume. A random packing of equal spheres generally has a density around 63.5%.

So multiply that 3900 by .63 to get a better estimate. It is probably even worse than that, because the cylinder limits are close to the number of bbs wide.

Did you check the diameter of the bbs against its guess (4.5mm)? I don’t know what a daisy bb is.

2 Likes

The 4.5mm seems to be correct. I figured it was going to be a little off because of the way they randomly stack. That .63 factor gets the number down to around 4900 BBs. With that in mind this 6000ct BBs might be worth trying. It might even be less than that since the cavity shape is odd shaped. Will see if I can get a less expensive source 1st, but $12.54 does not seem to bad a price. Daisy Precision Max BB’s 0.177 Caliber BB Zinc Plated Steel, 6000ct. - Walmart.com
[Edit] And looks like it is in stock at local Walmart. Maybe I will go by there tomorrow

You might also try lead shot, like in those dead blow hammers. Smaller diameter, plus more dense material.

I did look into shot. I used to reload shotgun shells many years ago. Shot seems to be a lot more expensive and mostly comes in 25lb bags. I just looked at the weights of a couple of other materials related to lead to see if they were worthwhile substitutes. I have a pile of hematite beads that are 4x5mm tube beads. Hematite is about half the weight per same volume of lead.

My wife uses flaxseed for heating pads which are microwavable. I could get those a lot more compact in those cavities, but according to ChatGPT, “The density of flaxseed varies depending on factors such as moisture content and variety, but it is typically around 0.5 to 0.8 grams per cubic centimeter. The density of lead, as mentioned in the previous answer, is approximately 11.3 grams per cubic centimeter.” That puts the weight of lead a14.1 - 22.6 heavier than flaxseed. Because of the more compactness of flaxseed, you could proably1/2 or 1/3 that number or maybe even more. The same would go for sand if you used that.

While I was at it, thought I may as well look at what sand would be. Here is ChatGPT responce to that. “The density of sand can vary depending on its composition, but it typically ranges from 1.2 to 1.6 grams per cubic centimeter. As previously mentioned, the density of lead is approximately 11.3 grams per cubic centimeter.”

Flaxseed might be a good choice to use as beanbag weights put on top on both sides and it is relatively inexpensive.

1 Like

Another option would be to use 5/16" washers on the M8 axle rod. One of my 5/16" washers weigh 0.69 ounce each with a thickness of 1.5mm. A little over 550 washers would fit on the space left of the 1000mm length of rod I am using. The bearings, spacers & idlers currently on there, take up about 130mm. 500 washers are about 3.6lbs. With all that extra weight pulling down on that rod, there would have to be 2 -4 more bearings added which would of course give me some more ballast weight. Cost wise, it is not too bad. Bolt Depot has them $2.88 per 100 or $23.50 per 1000. SAE flat washers, Zinc plated steel, 5/16" - Bolt Depot

What about stainless tumbling media?

2 Likes

Good idea, but pricier than the BBs.

I got the 6000ct Crossman BBs for $10 today. With the container they weigh 4lbs 10.6oz. After adding the BBs to the V-Slot 2040 Cavity, it adds 1lb 14.8oz to the weight of one of those V-Slots. To get a good average weight of a BB, I weighed 100 BBs on my accurate weight scale & that came out to 1.4oz. That comes out to an average weight of 0.014 oz per BB. If my math is right, based on that average weight, seems like I got 2200 BBs in that cavity. I could probably get a few more in there if I shook it some as I added them to get them to settle more. On this 1st test, looks like that 0.63 number @jeffeb3 gave me is closer to 0.56 to 0.57. I was able to get 20 more BBs in there after shaking it, which brought that weight from 1lb 14.6oz to the 1lb 14.8oz mentioned above. I suspect, 100 or more BBs could be added if I agitated it more while adding them.

Here are some photos. I picked up one of those Inch/metric flexible rulers from Walmart while I was there. The one I have had for a few years has the lettering started to wear off & I really like that ruler. Of course, I had to 3d print a funnel to make it easier to add these & made some simple endcaps to keep the BBs in place. I was smart enough to add these above a towel & scatter rug in case some came out they would not roll across the floor. I did not spill any on the floor though.


4 Likes

Geometry is amazing.

So is unit analysis.

If we were just talking about atoms instead of bbs, this would be graduate level physics.