1 Like

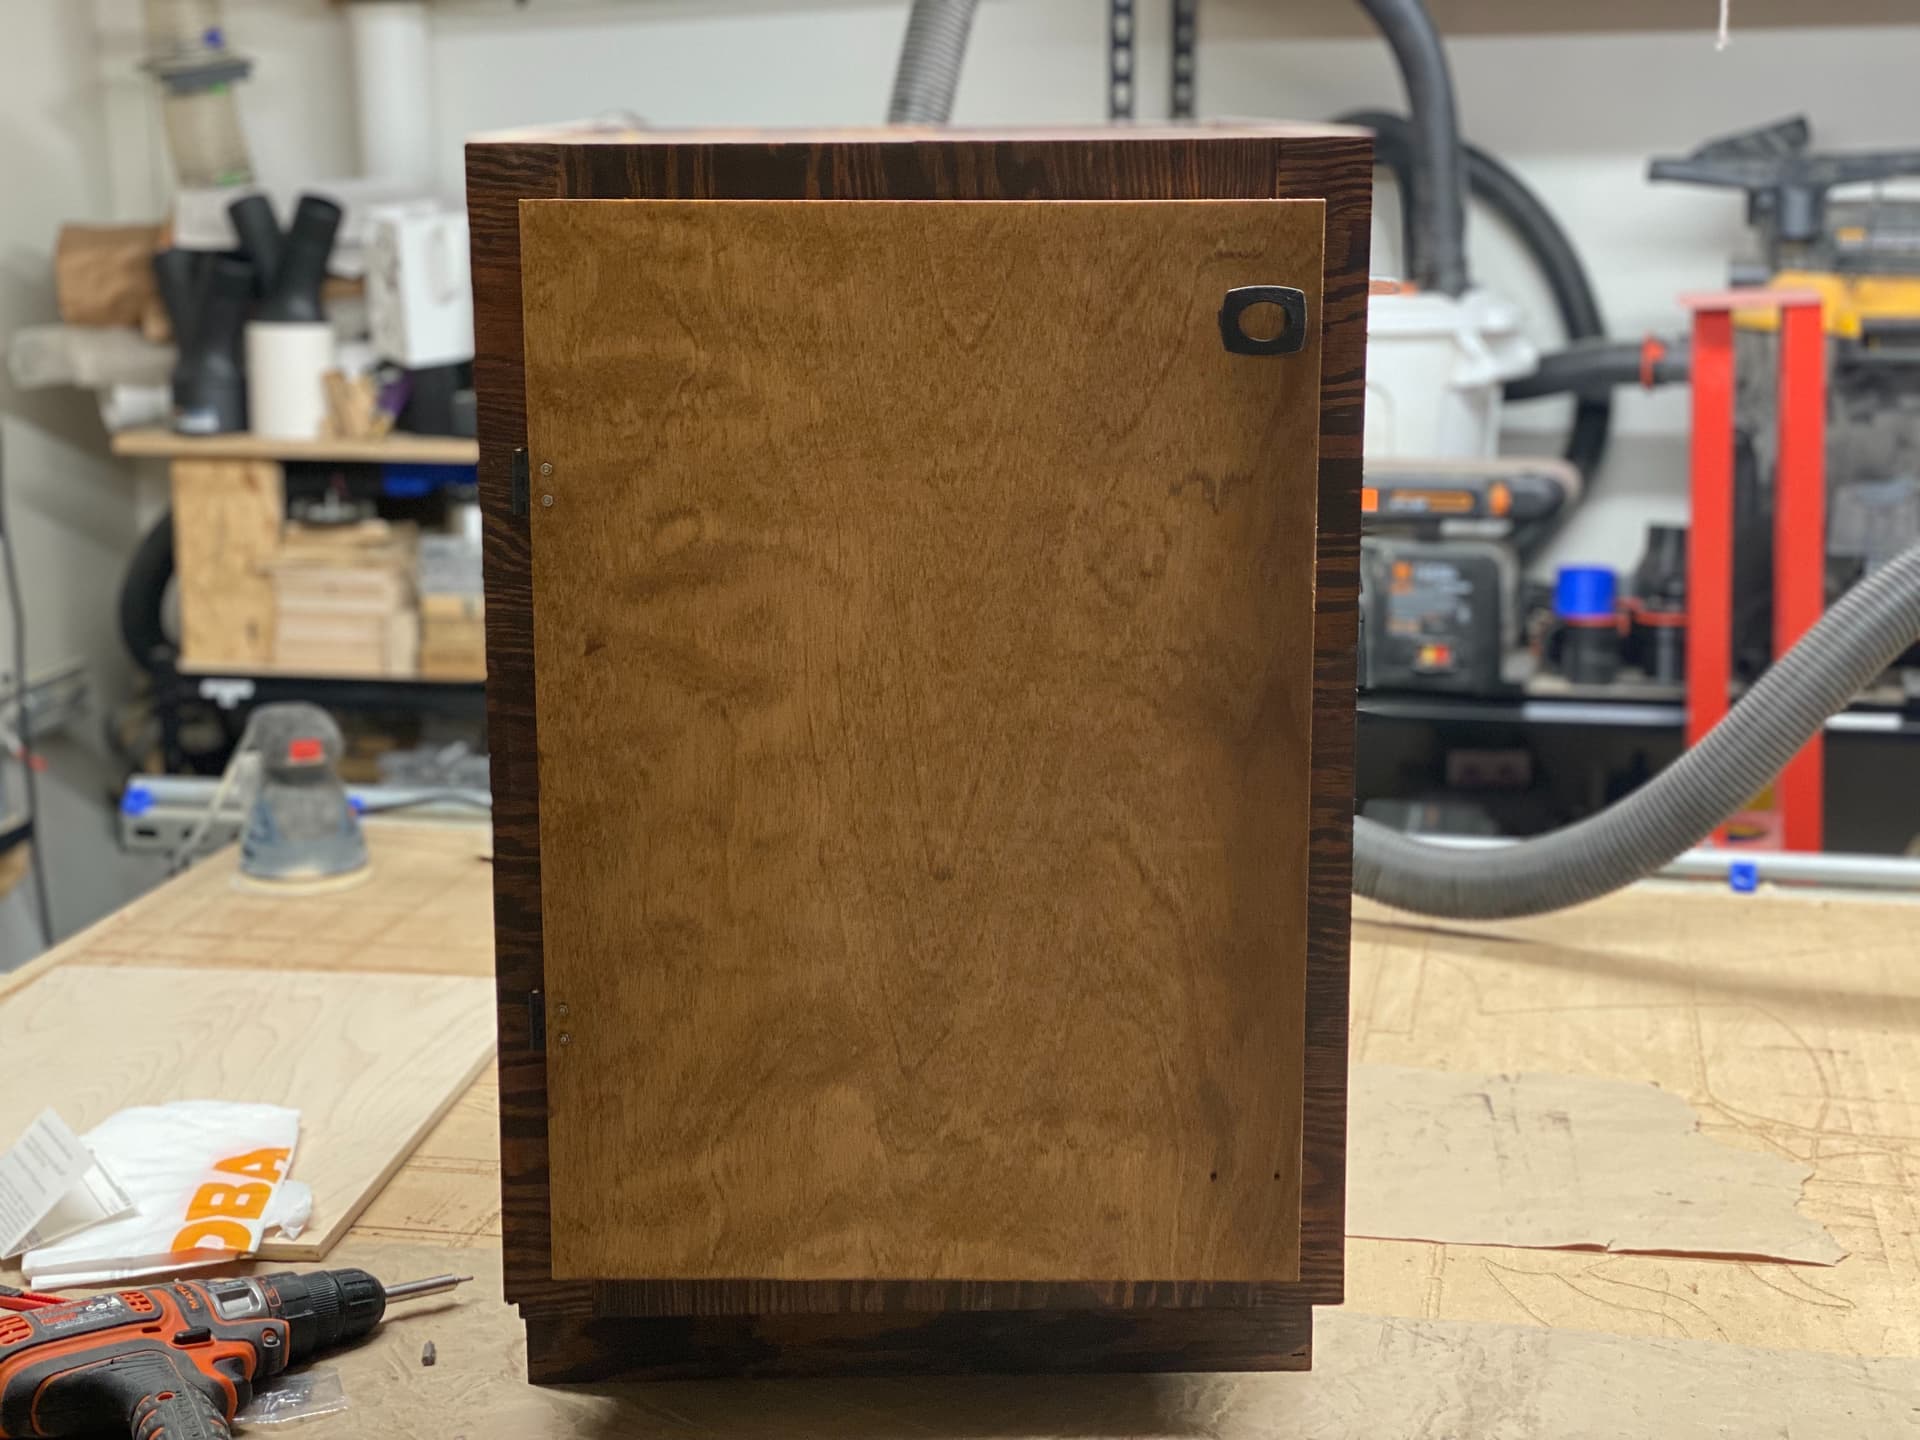
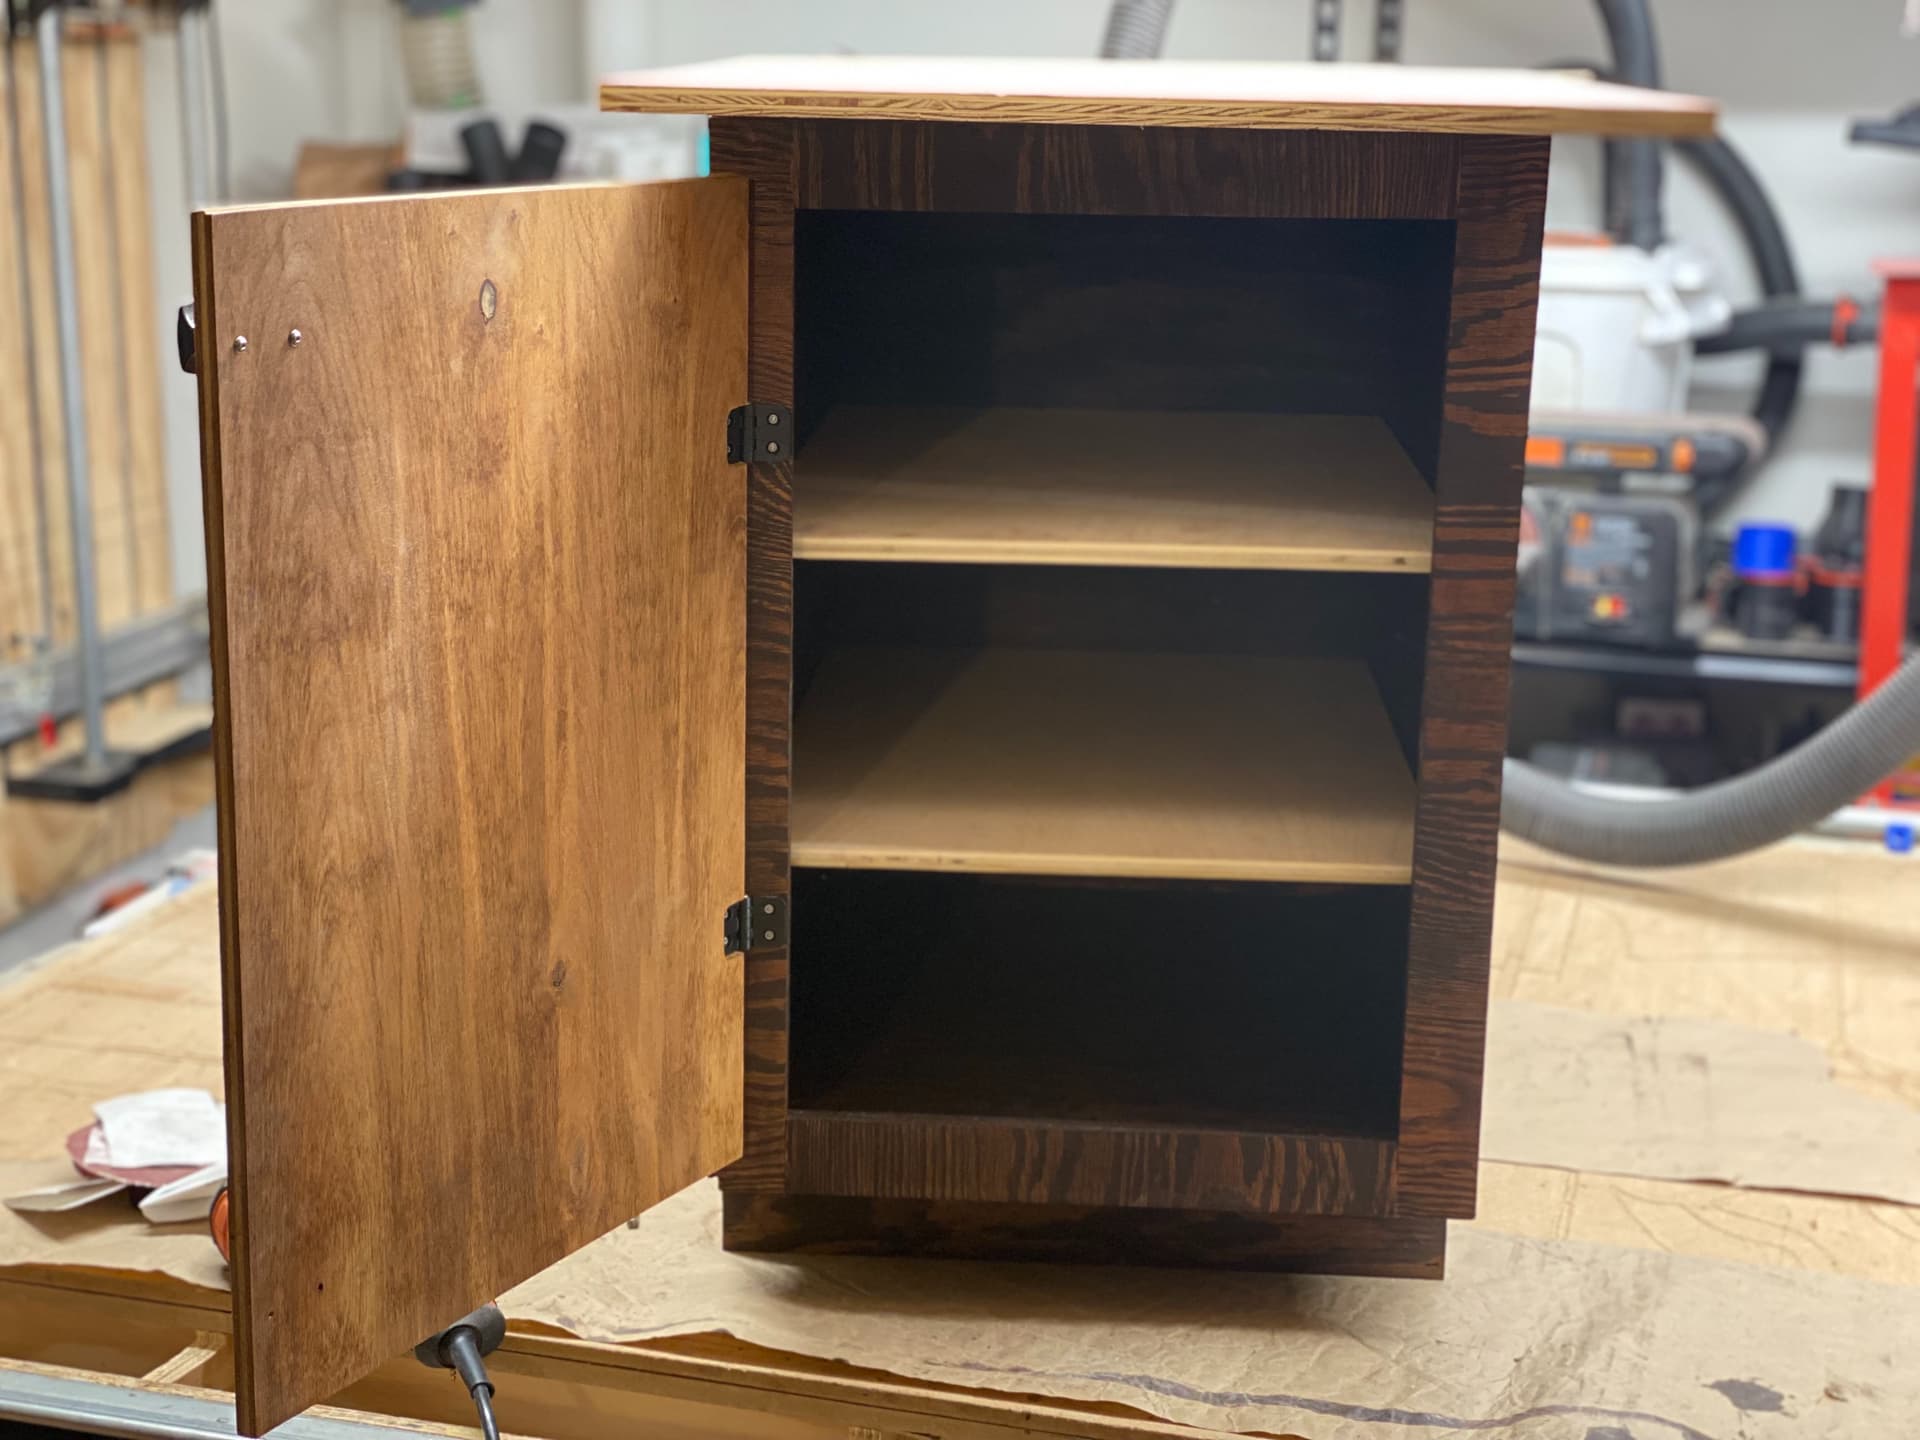
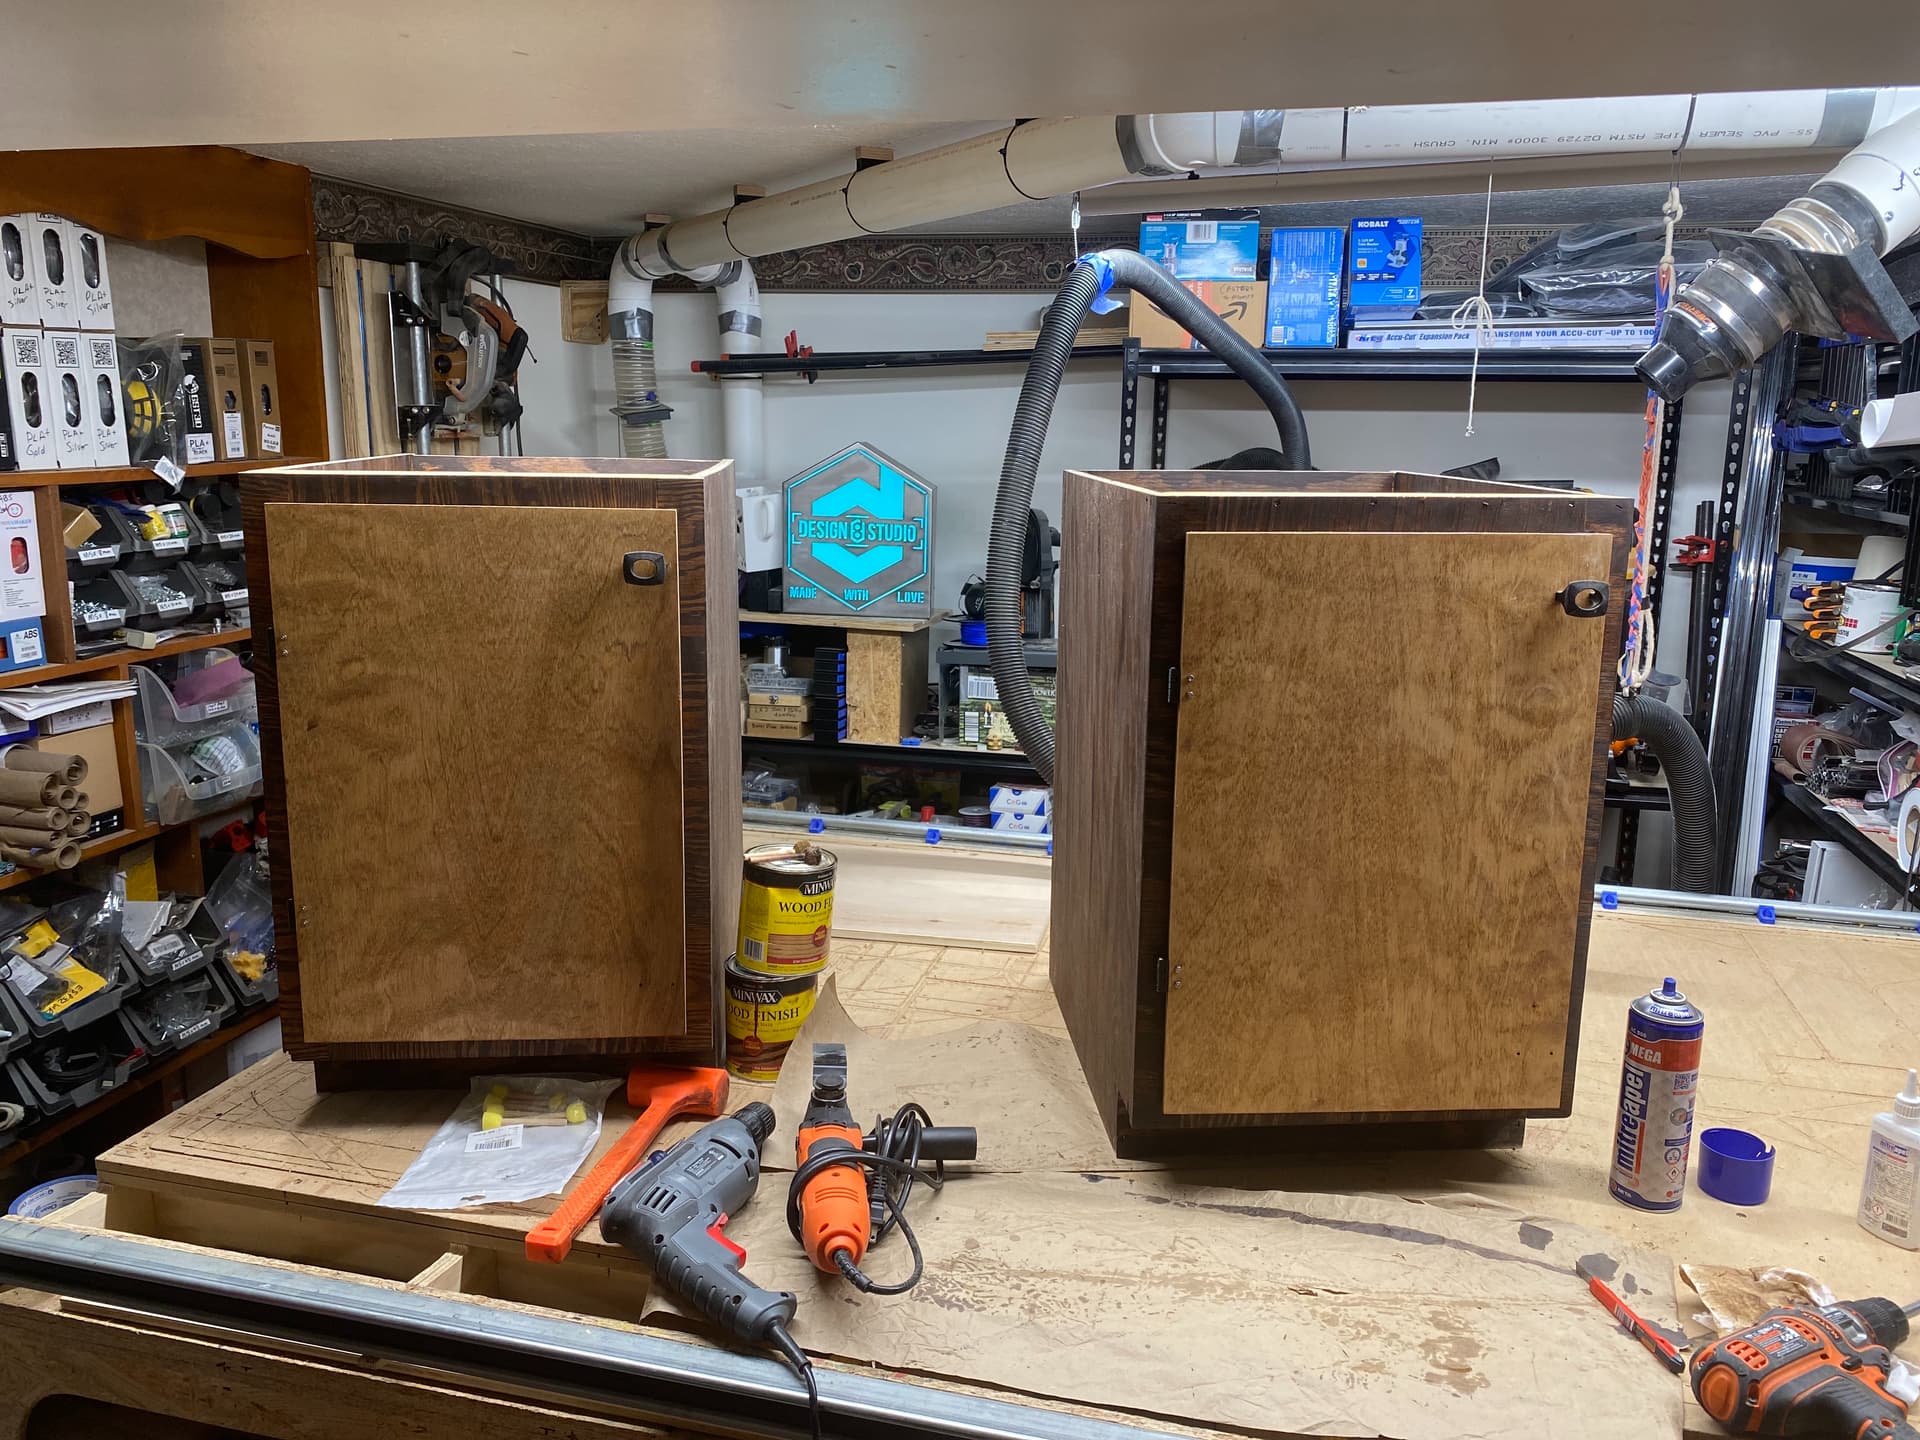
I got the first of two base cabinets completed. All the wood cabinet parts were cut on my LowRider v3 mostly-printed CNC. The second cabinet is all cut out, waiting to be assembled and stained etc.
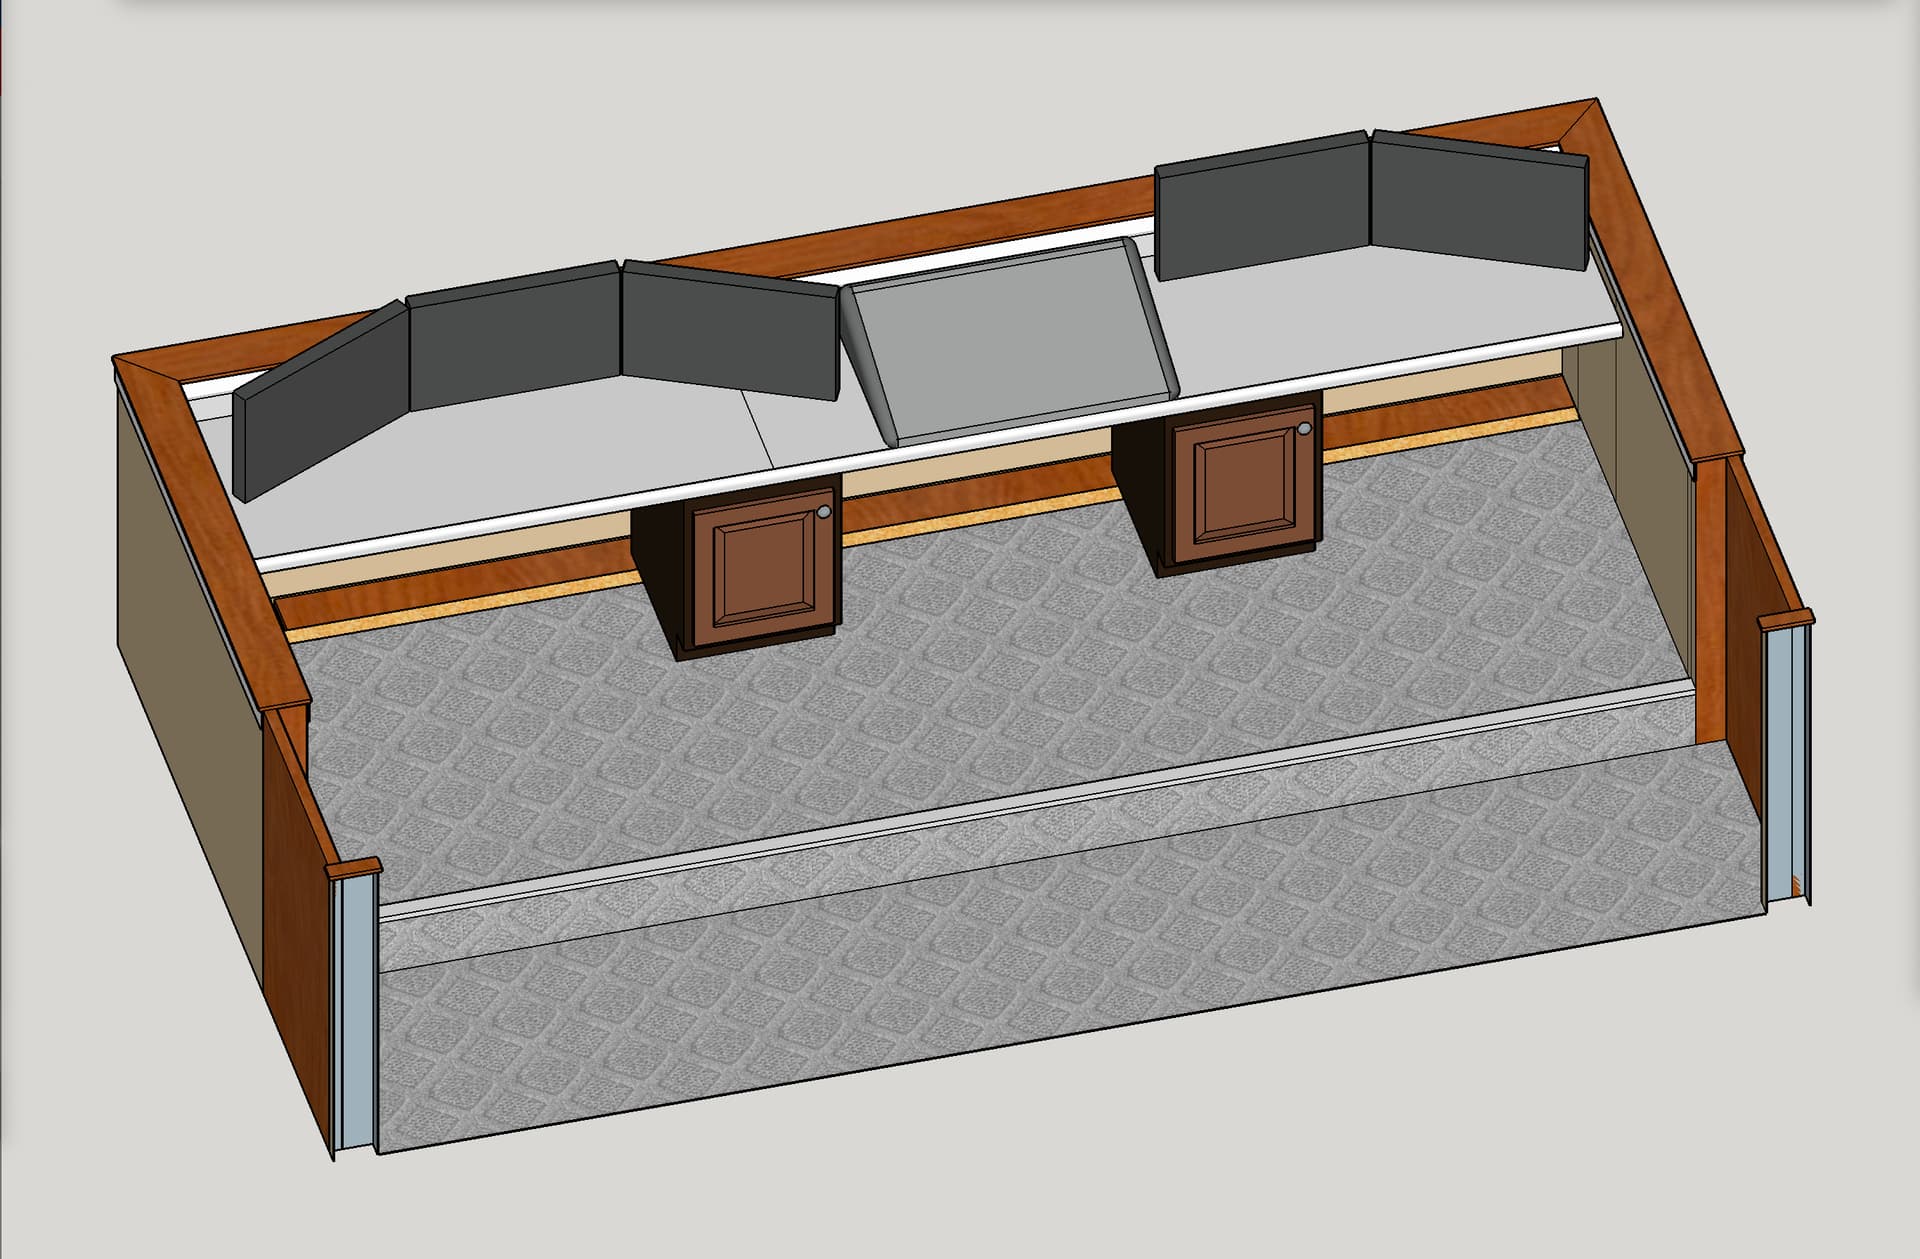
These needed to be a custom height, shorter than normal base cabinets, because they are to support a “desk height” table surface for the Audio Visual mixing and monitoring work in the back of our church sanctuary. Normal height cabinets are for supporting countertops at a height for a standing adult. These are for a seated adult.
Screen shot of my 3D plans for a new AV booth at the back of our church sanctuary:

In addition to a cool printed knob design I found on Printables (link)…

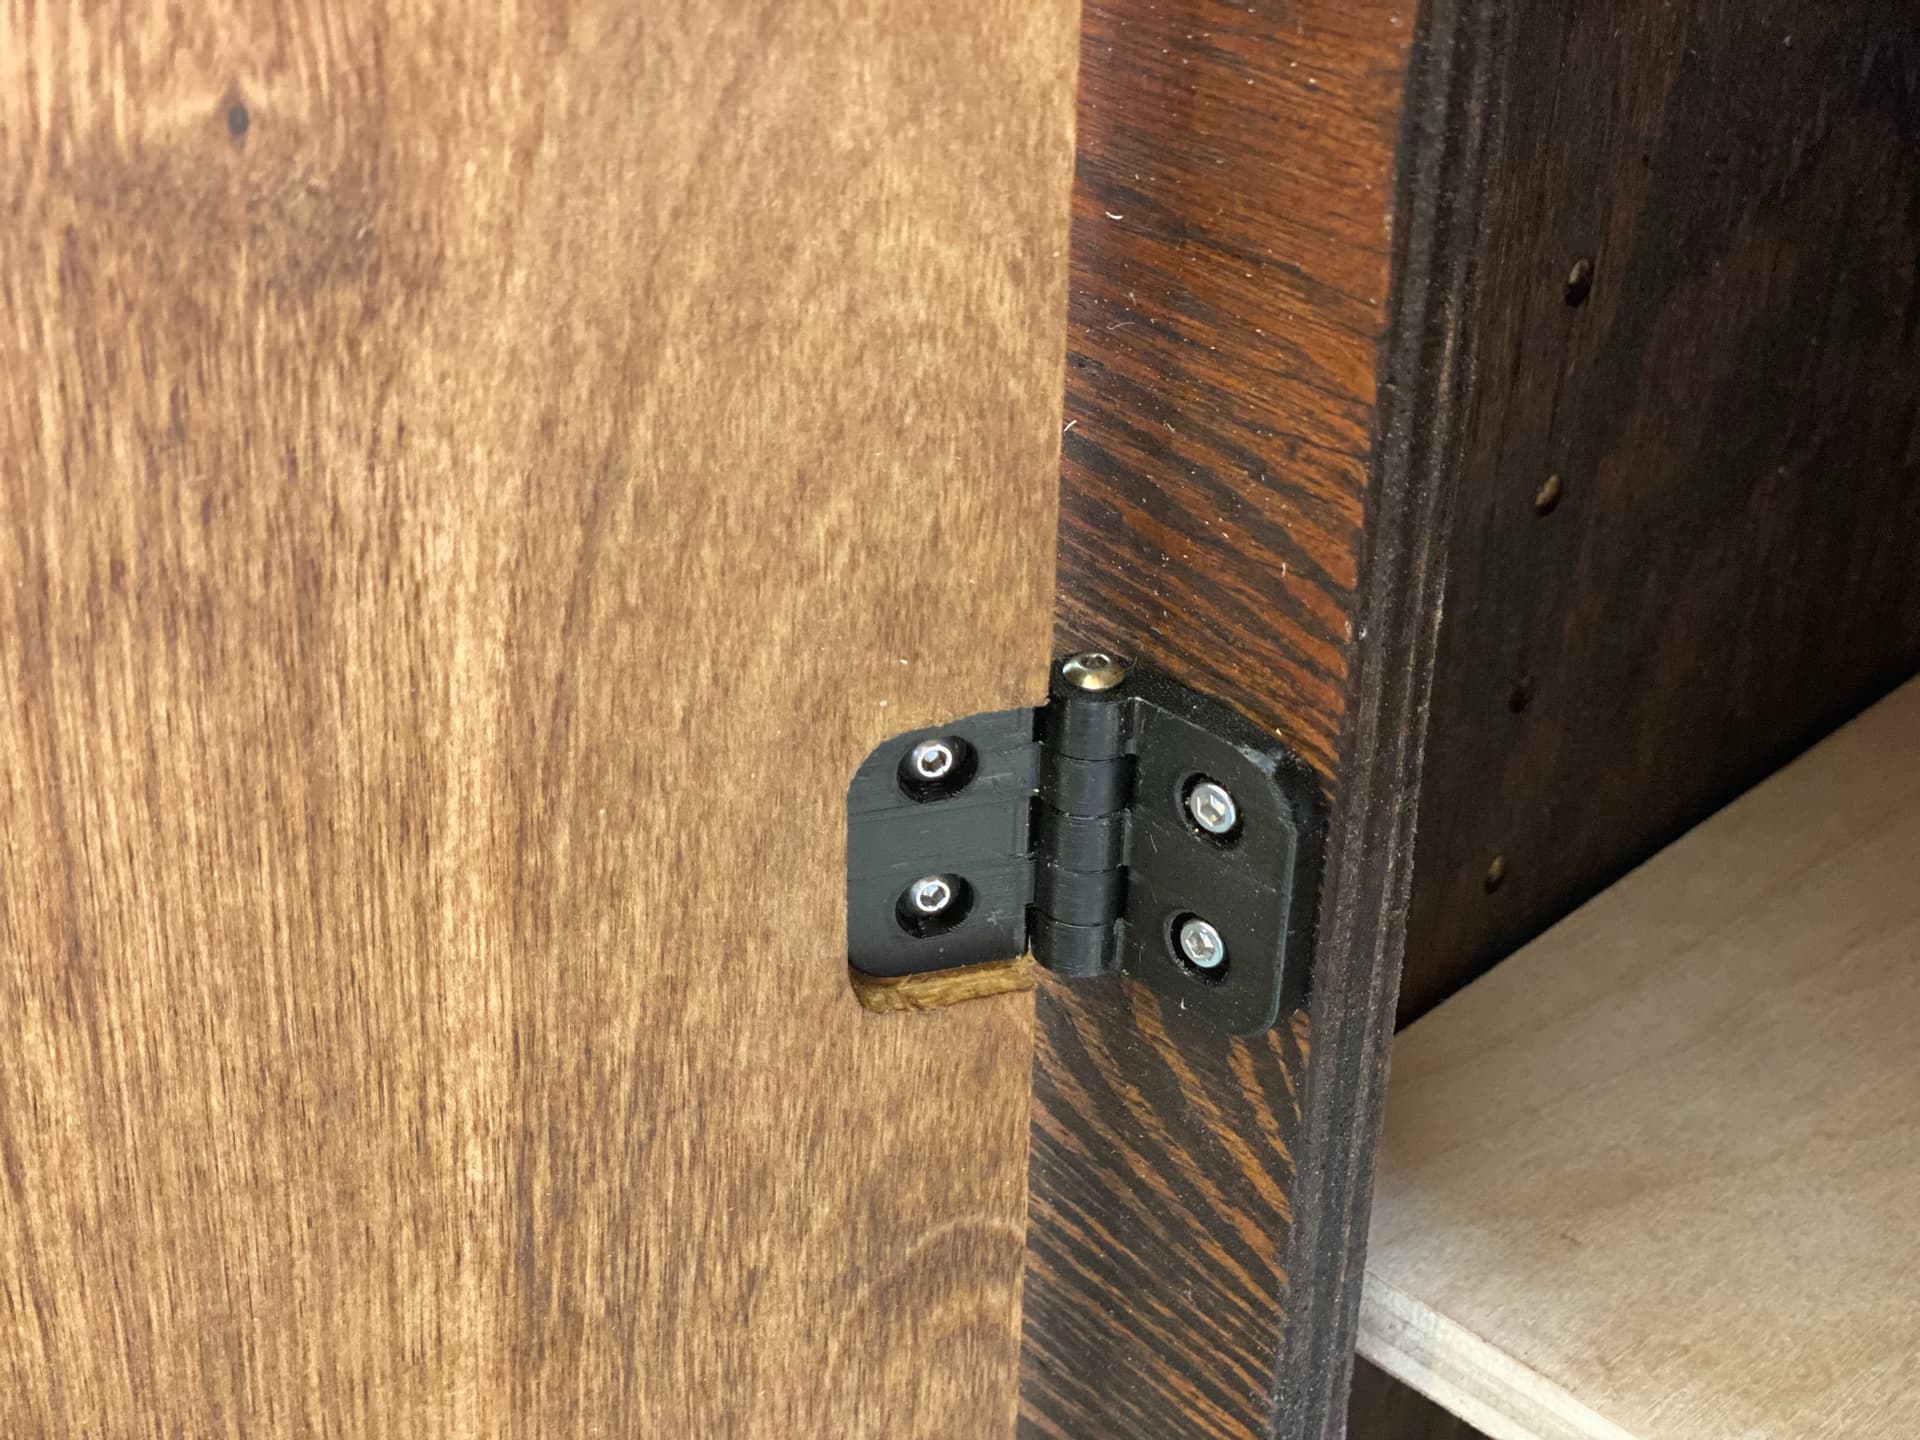
… I am also using some print-in-place hinges that I designed — Printables link: Printables
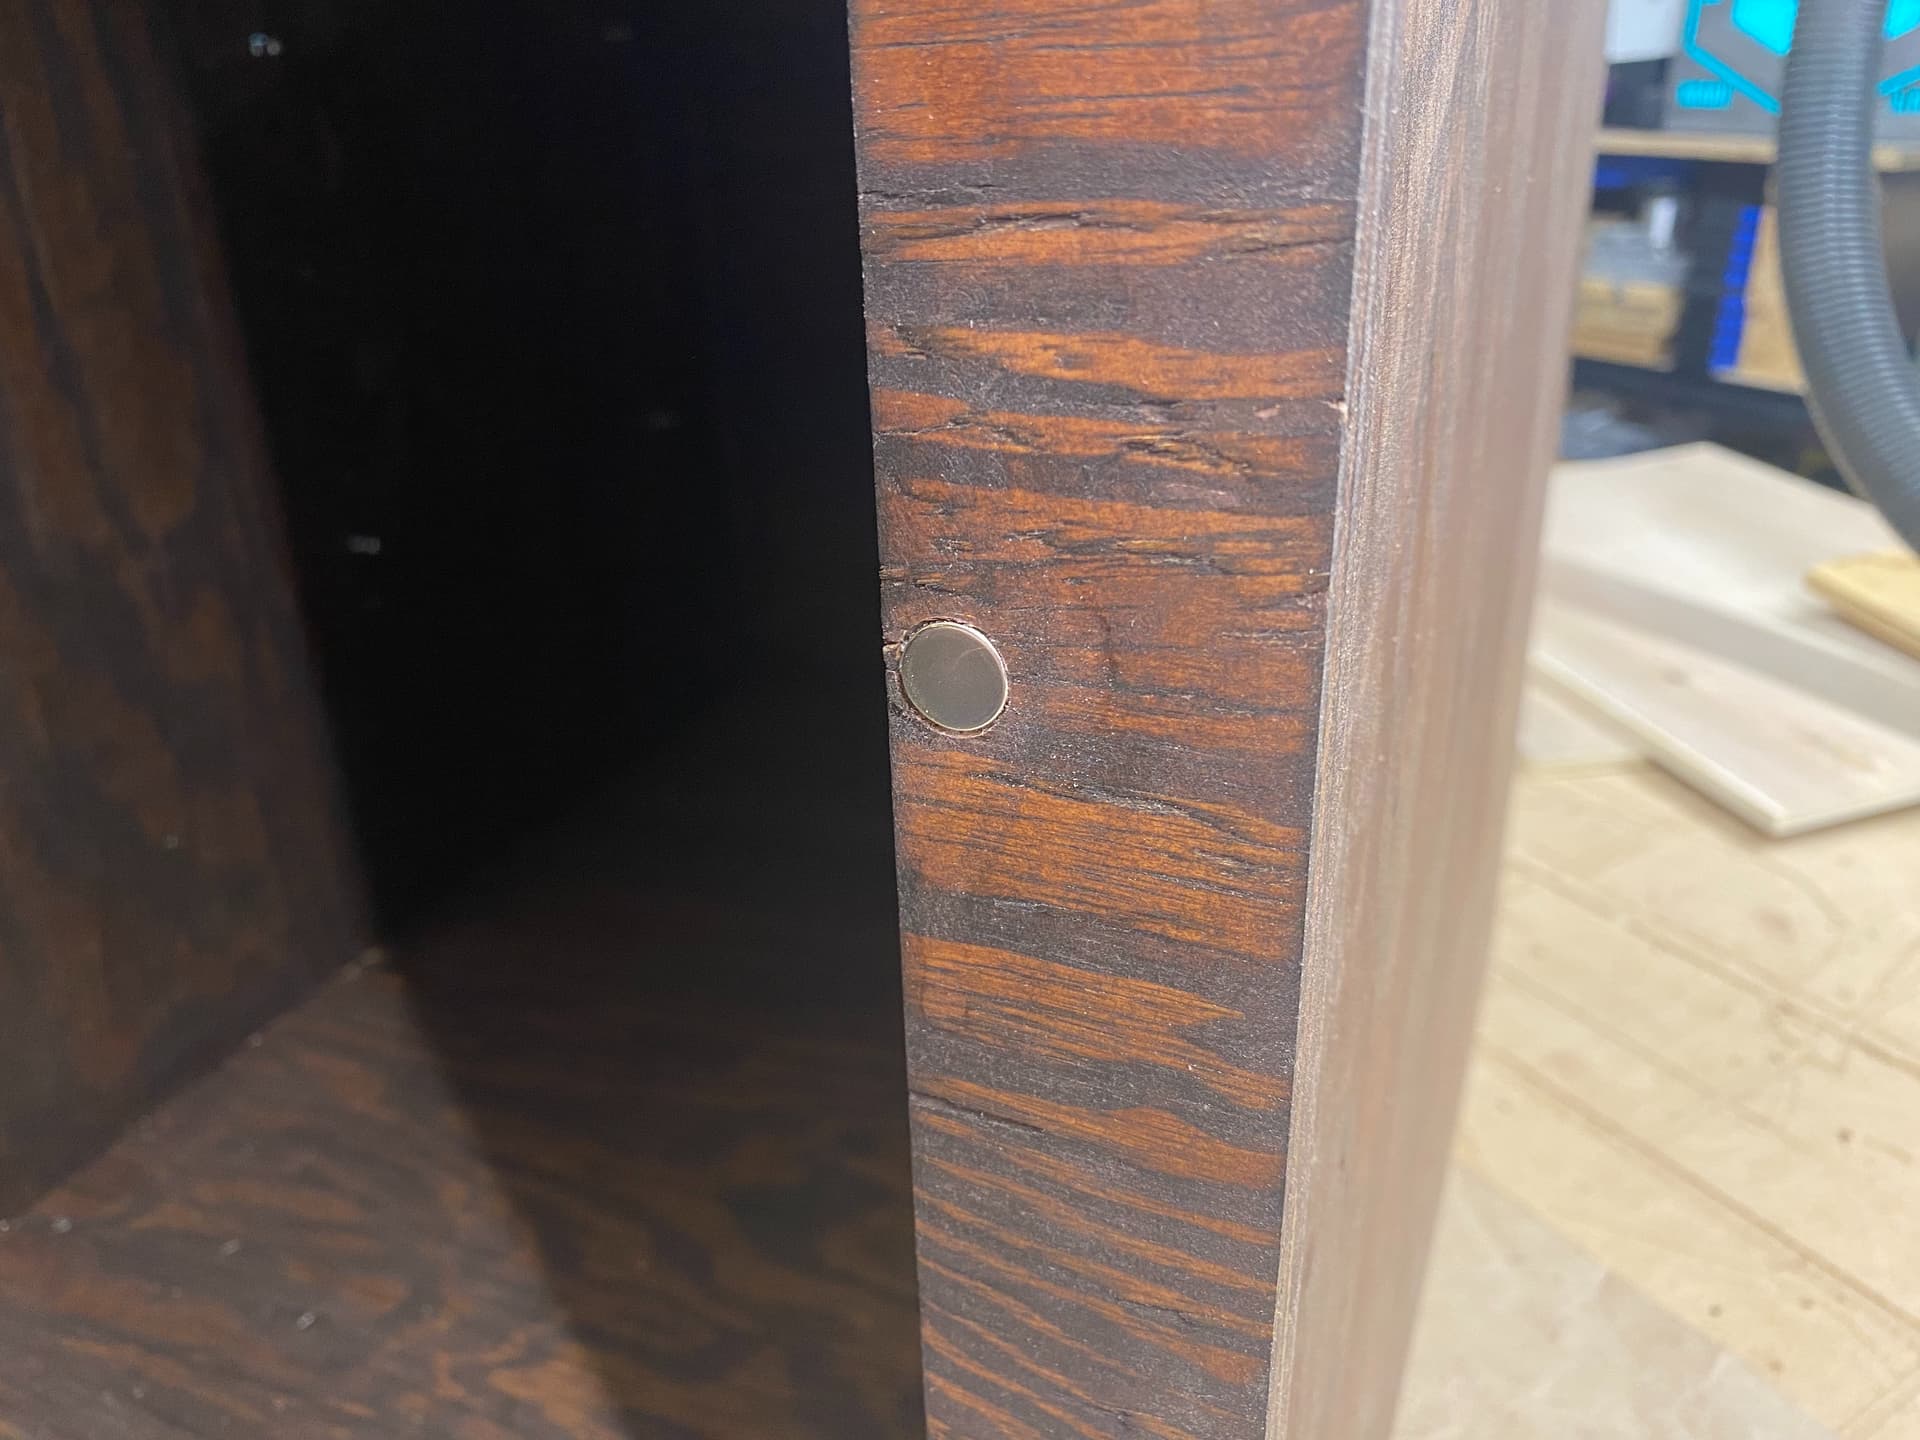
For a magnetic door latch, I used a ½" Forstner bit ( I bought this set (affiliate link) Amazon.com but this other set has fewer bits and costs less (affiliate link): Amazon.com ) to drill out a recess in the cabinet face to glue in a 12 x 3mm neodymium disc magnet (affiliate link: Amazon.com ), and then I attached a thin square strip of metal to the door, positioned so it would stick to the magnet when the door closes.

These are kind of “shop quality+” type cabinets, so even though I made them look somewhat decent, they do not need to be of the quality of nice kitchen cabinets. Still, they will serve nicely and look decently OK.
8 Likes
Does a MP3DP V5 Count?
3D Printed Parts for the build were all printed from ASA on the MP3DP V4
Aluminum Parts, Polycarbonate and Plywood Panels were all cut on my Fully Sheet LR3


9 Likes
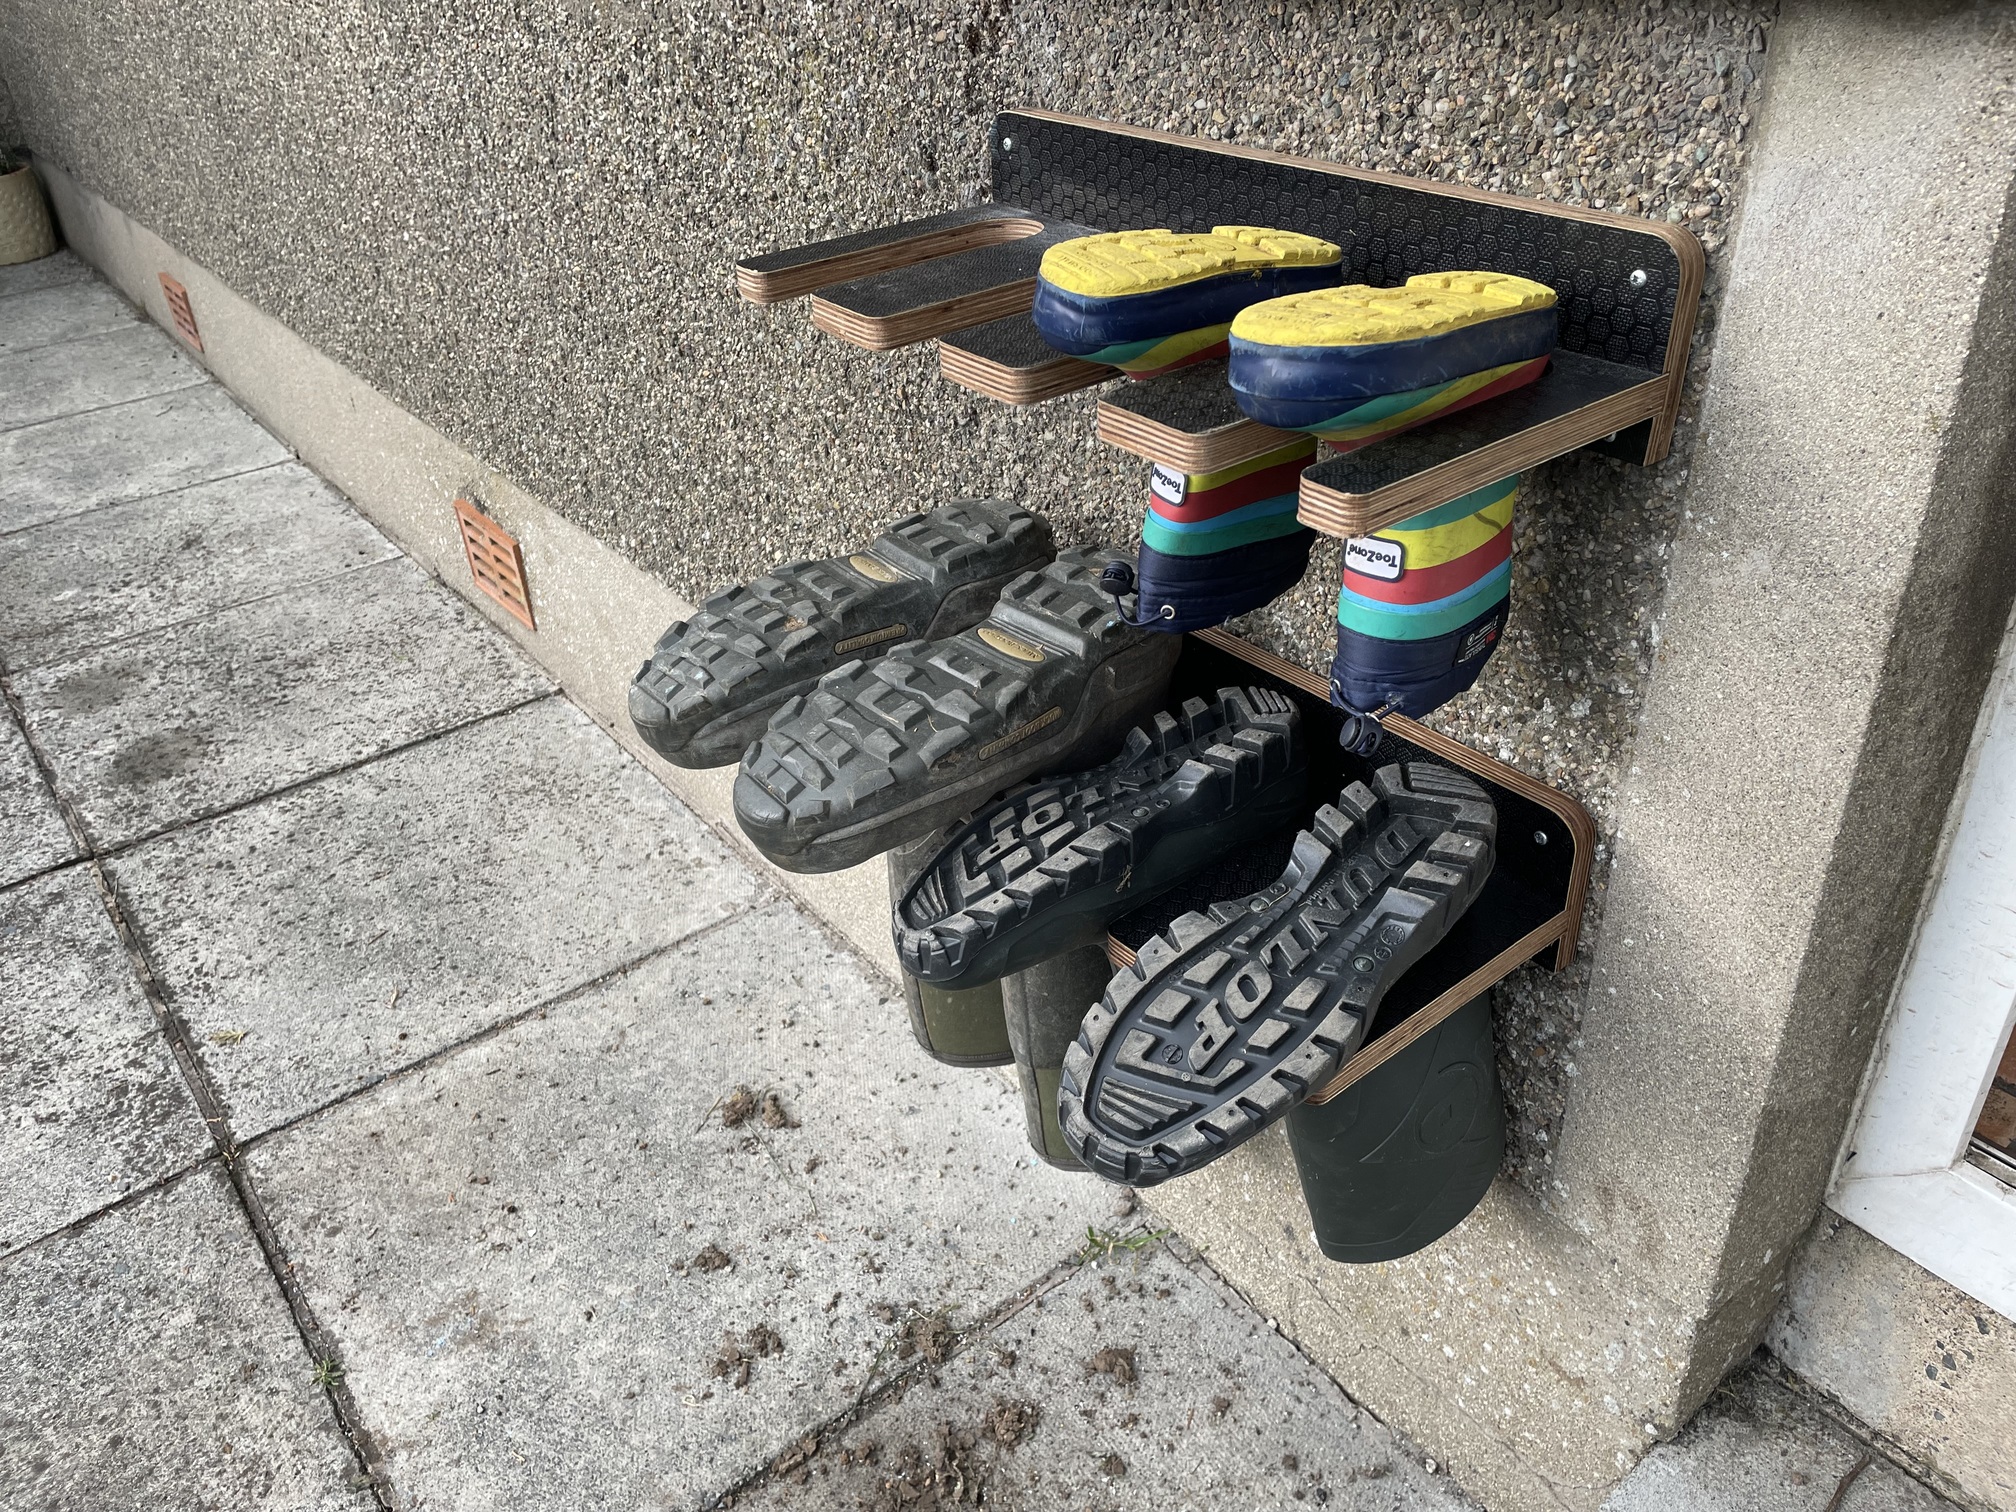
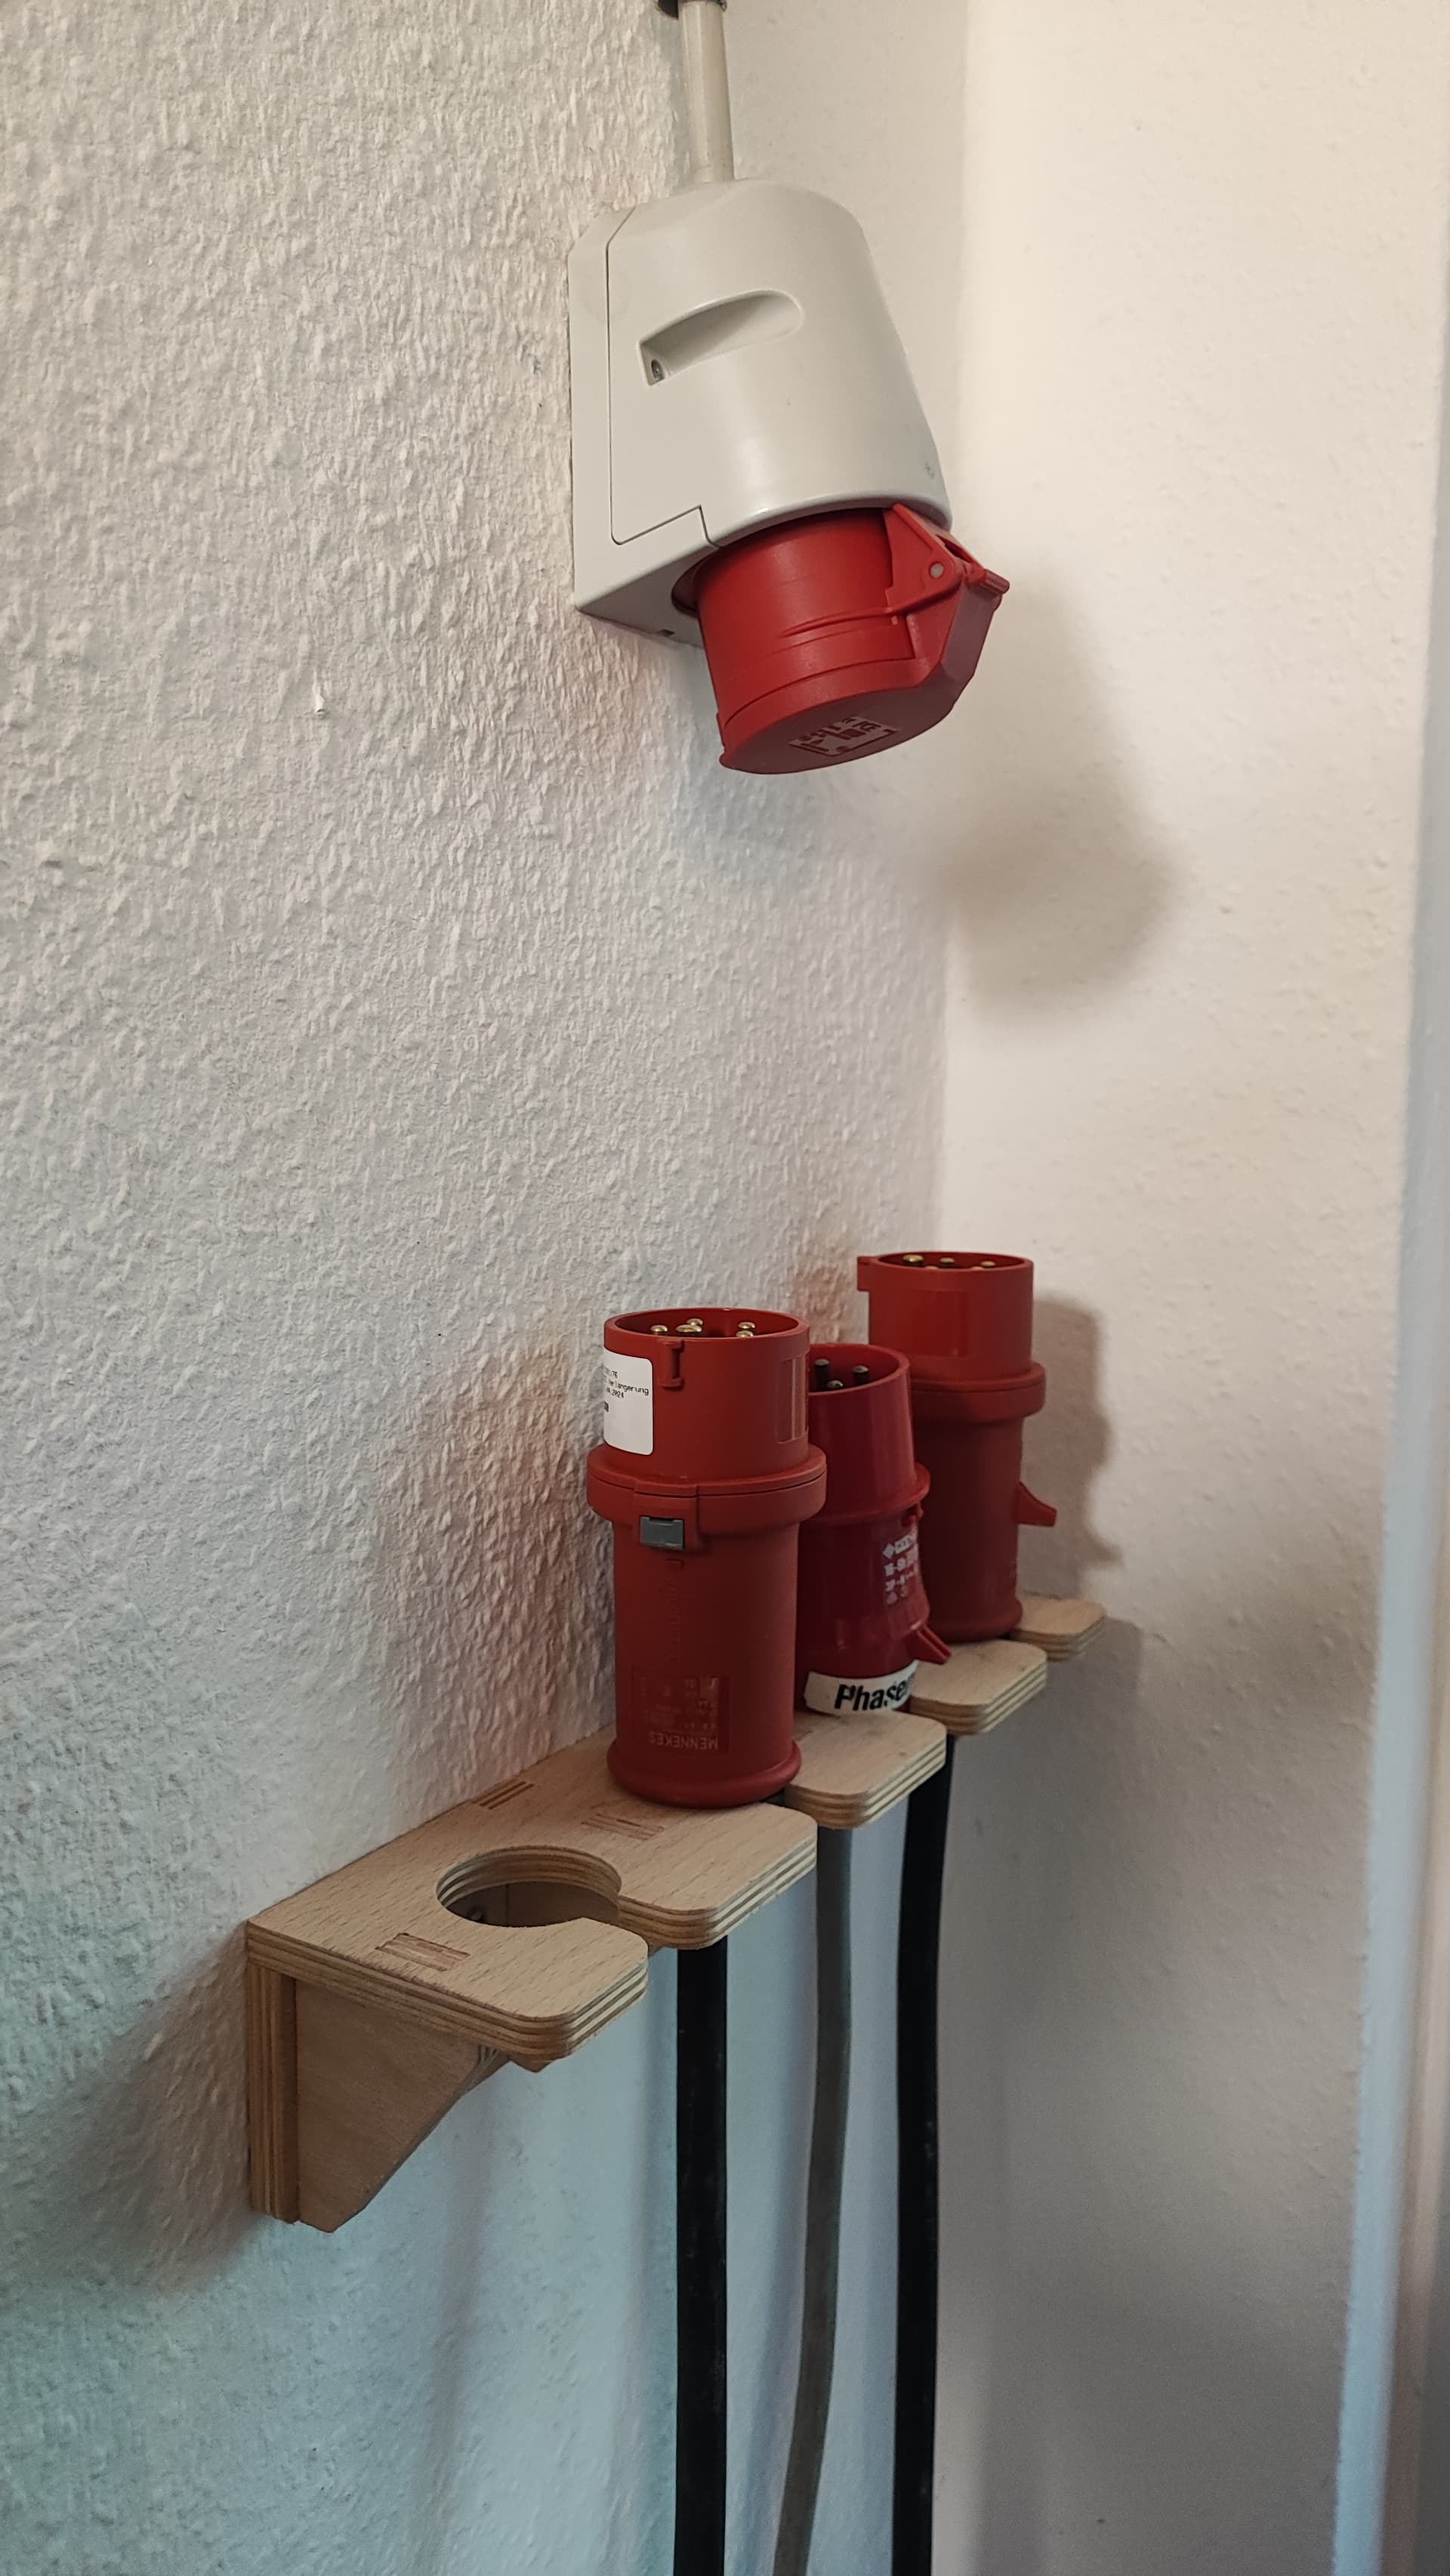
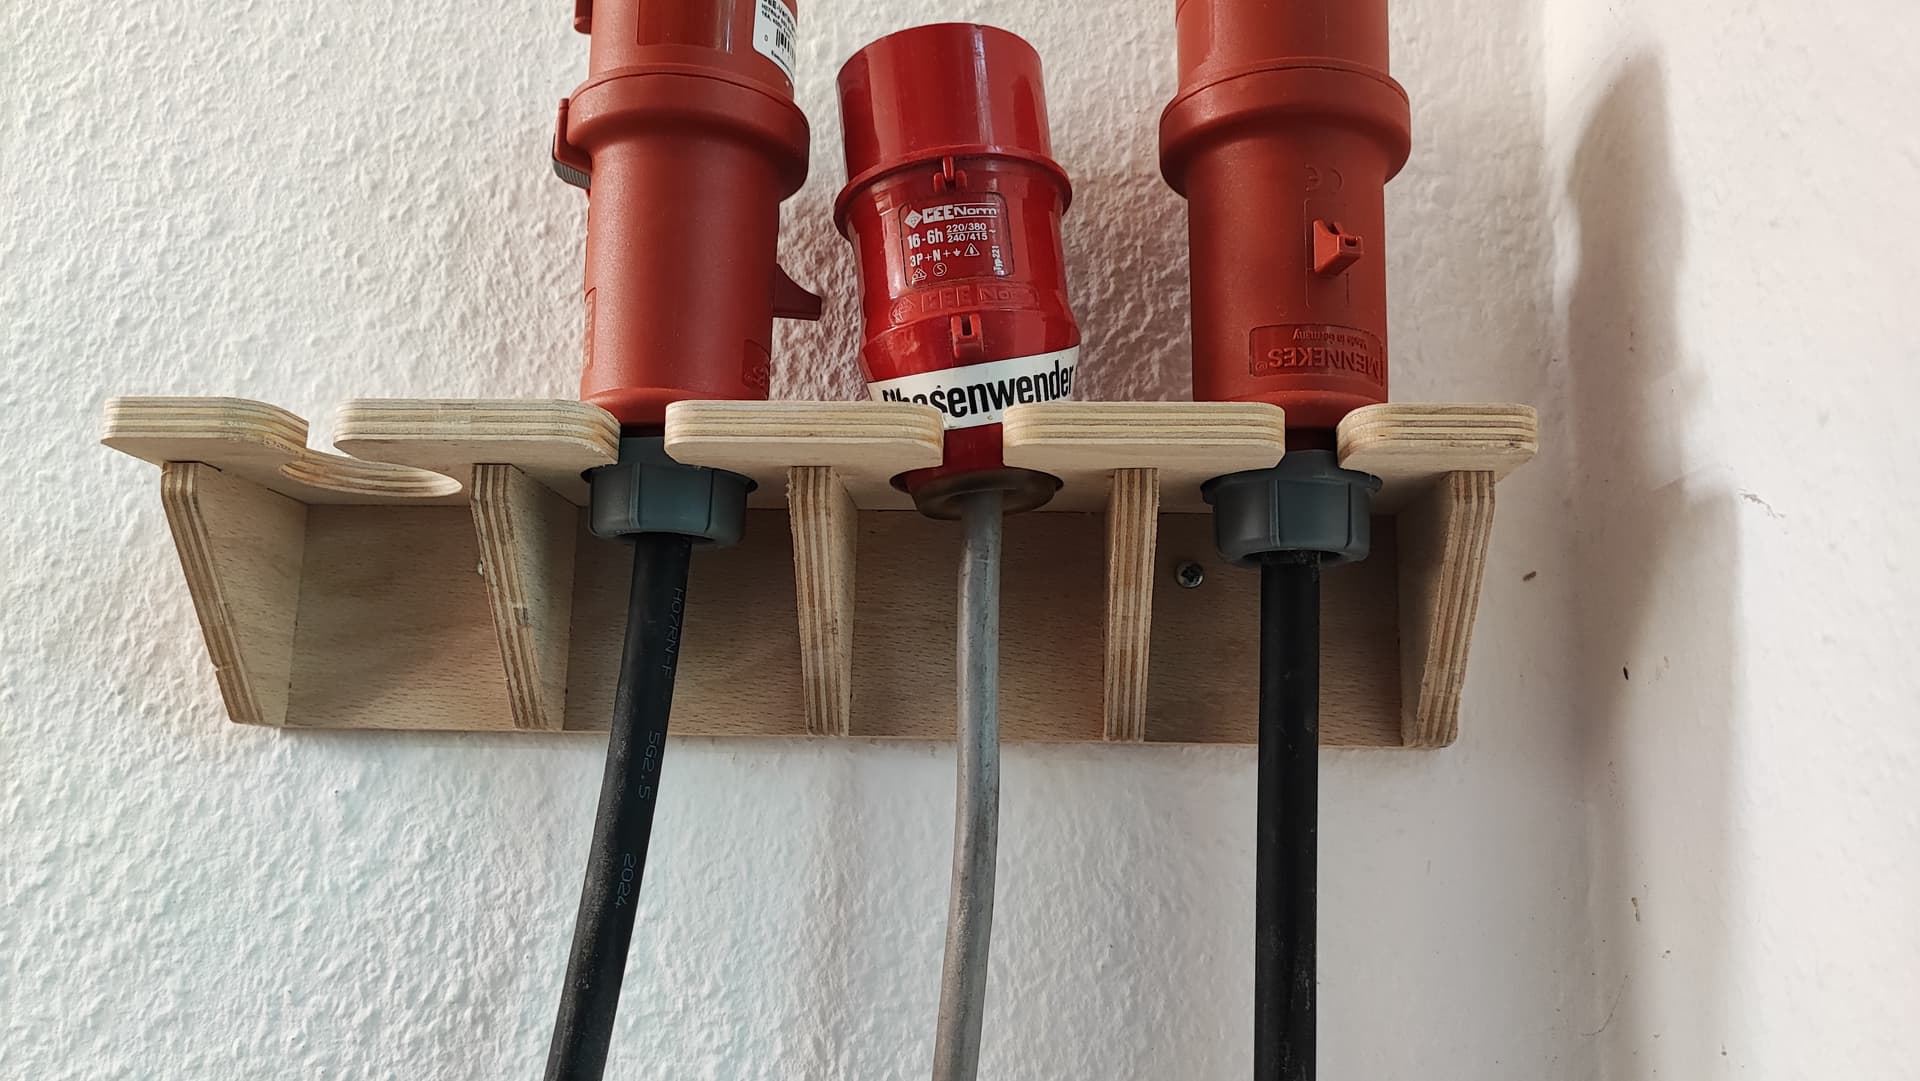
My wall mounted boot rack, made on a (gently broken) Lowrider
Edit: I can’t see how to add a tag to a post ![]()

10 Likes
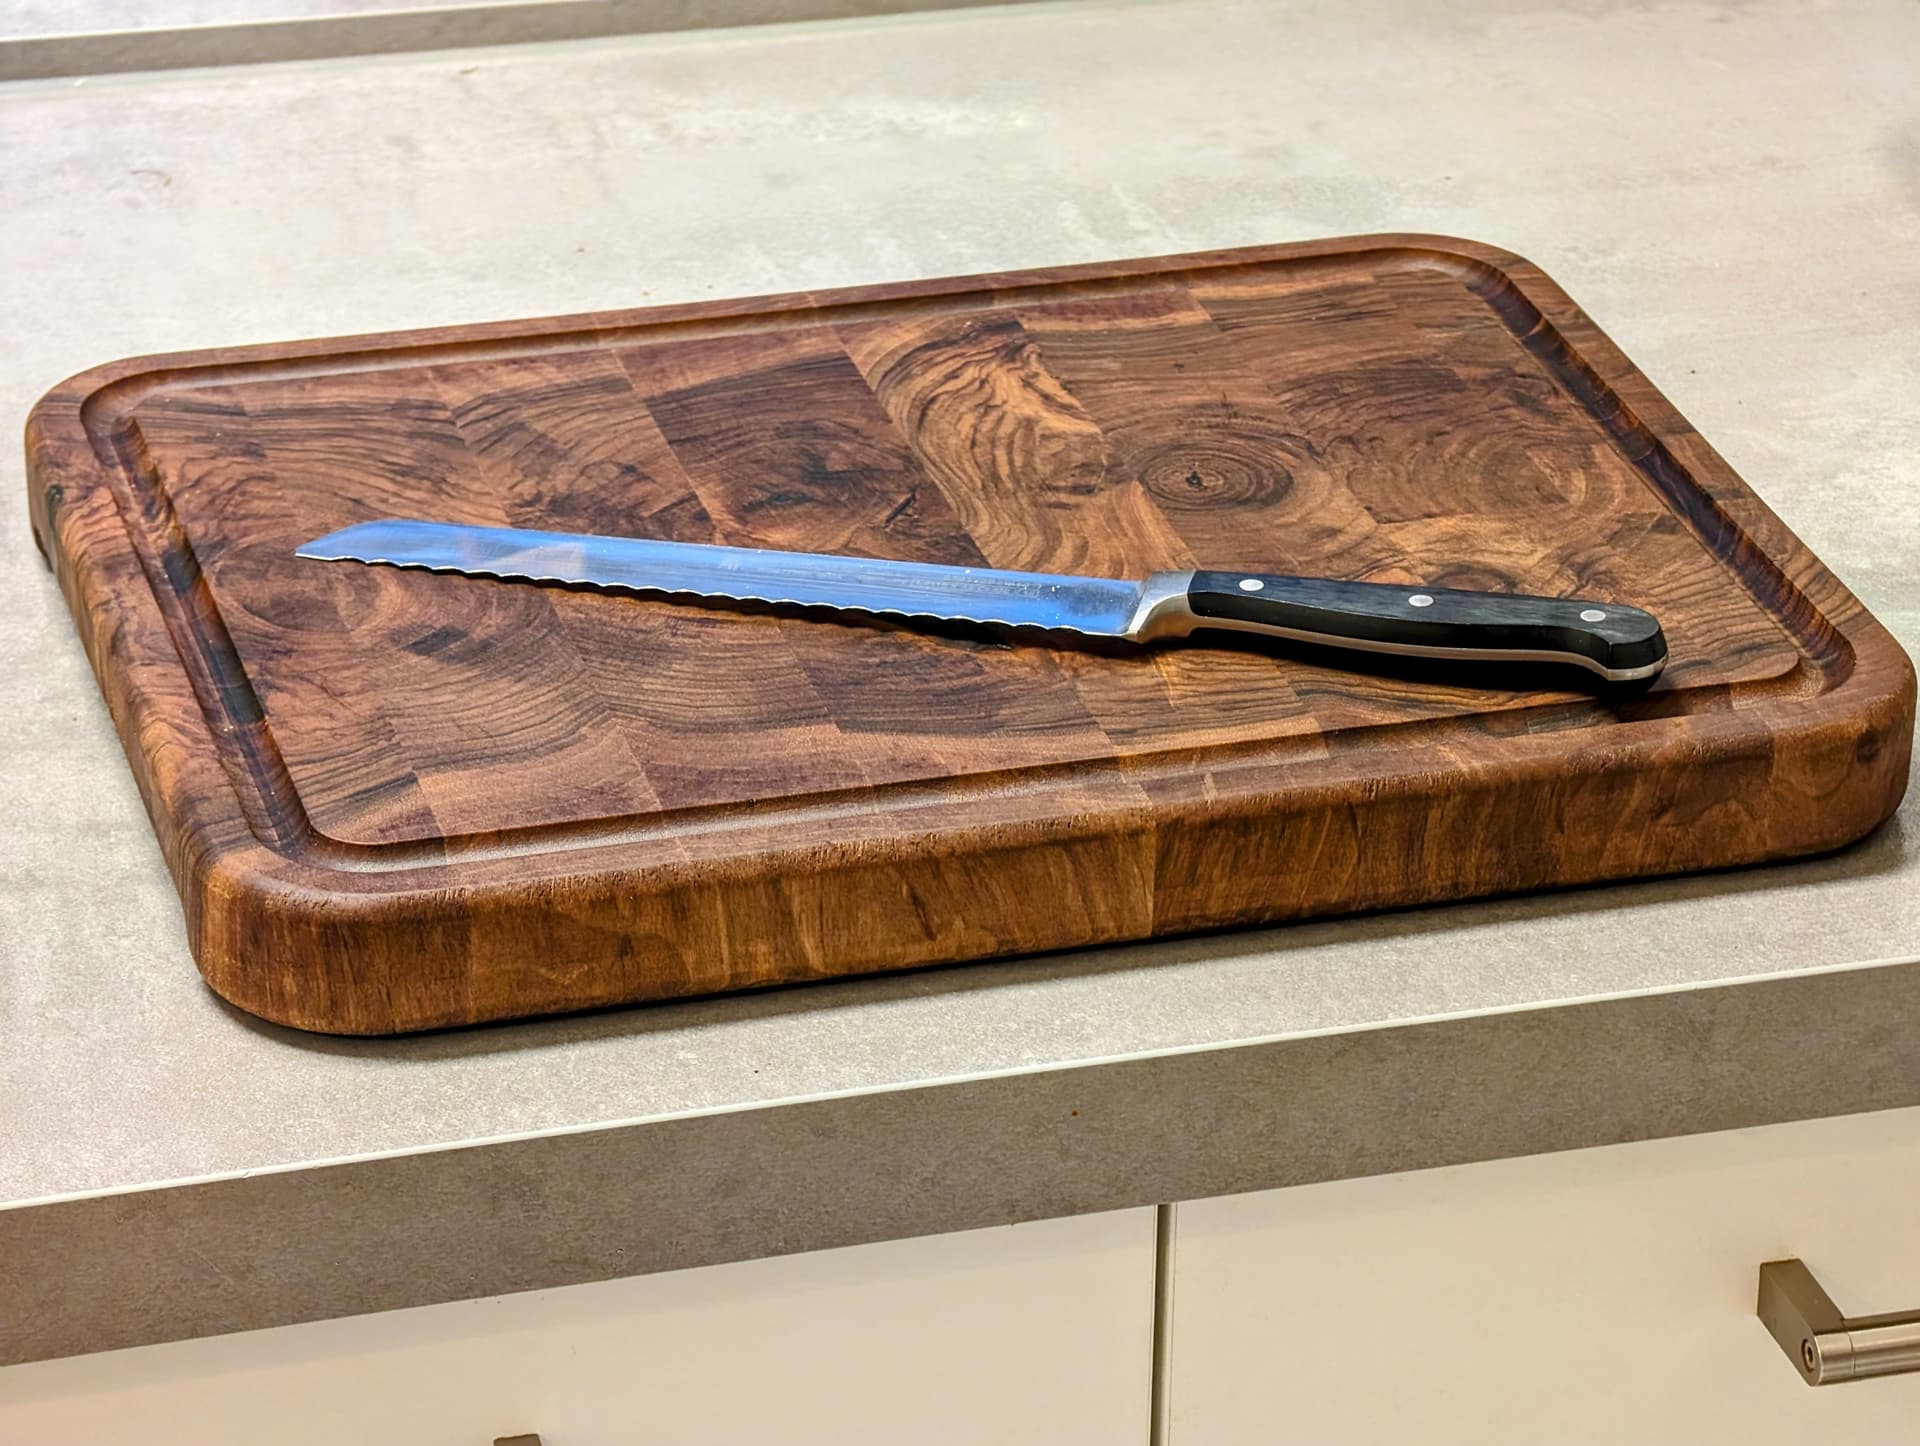
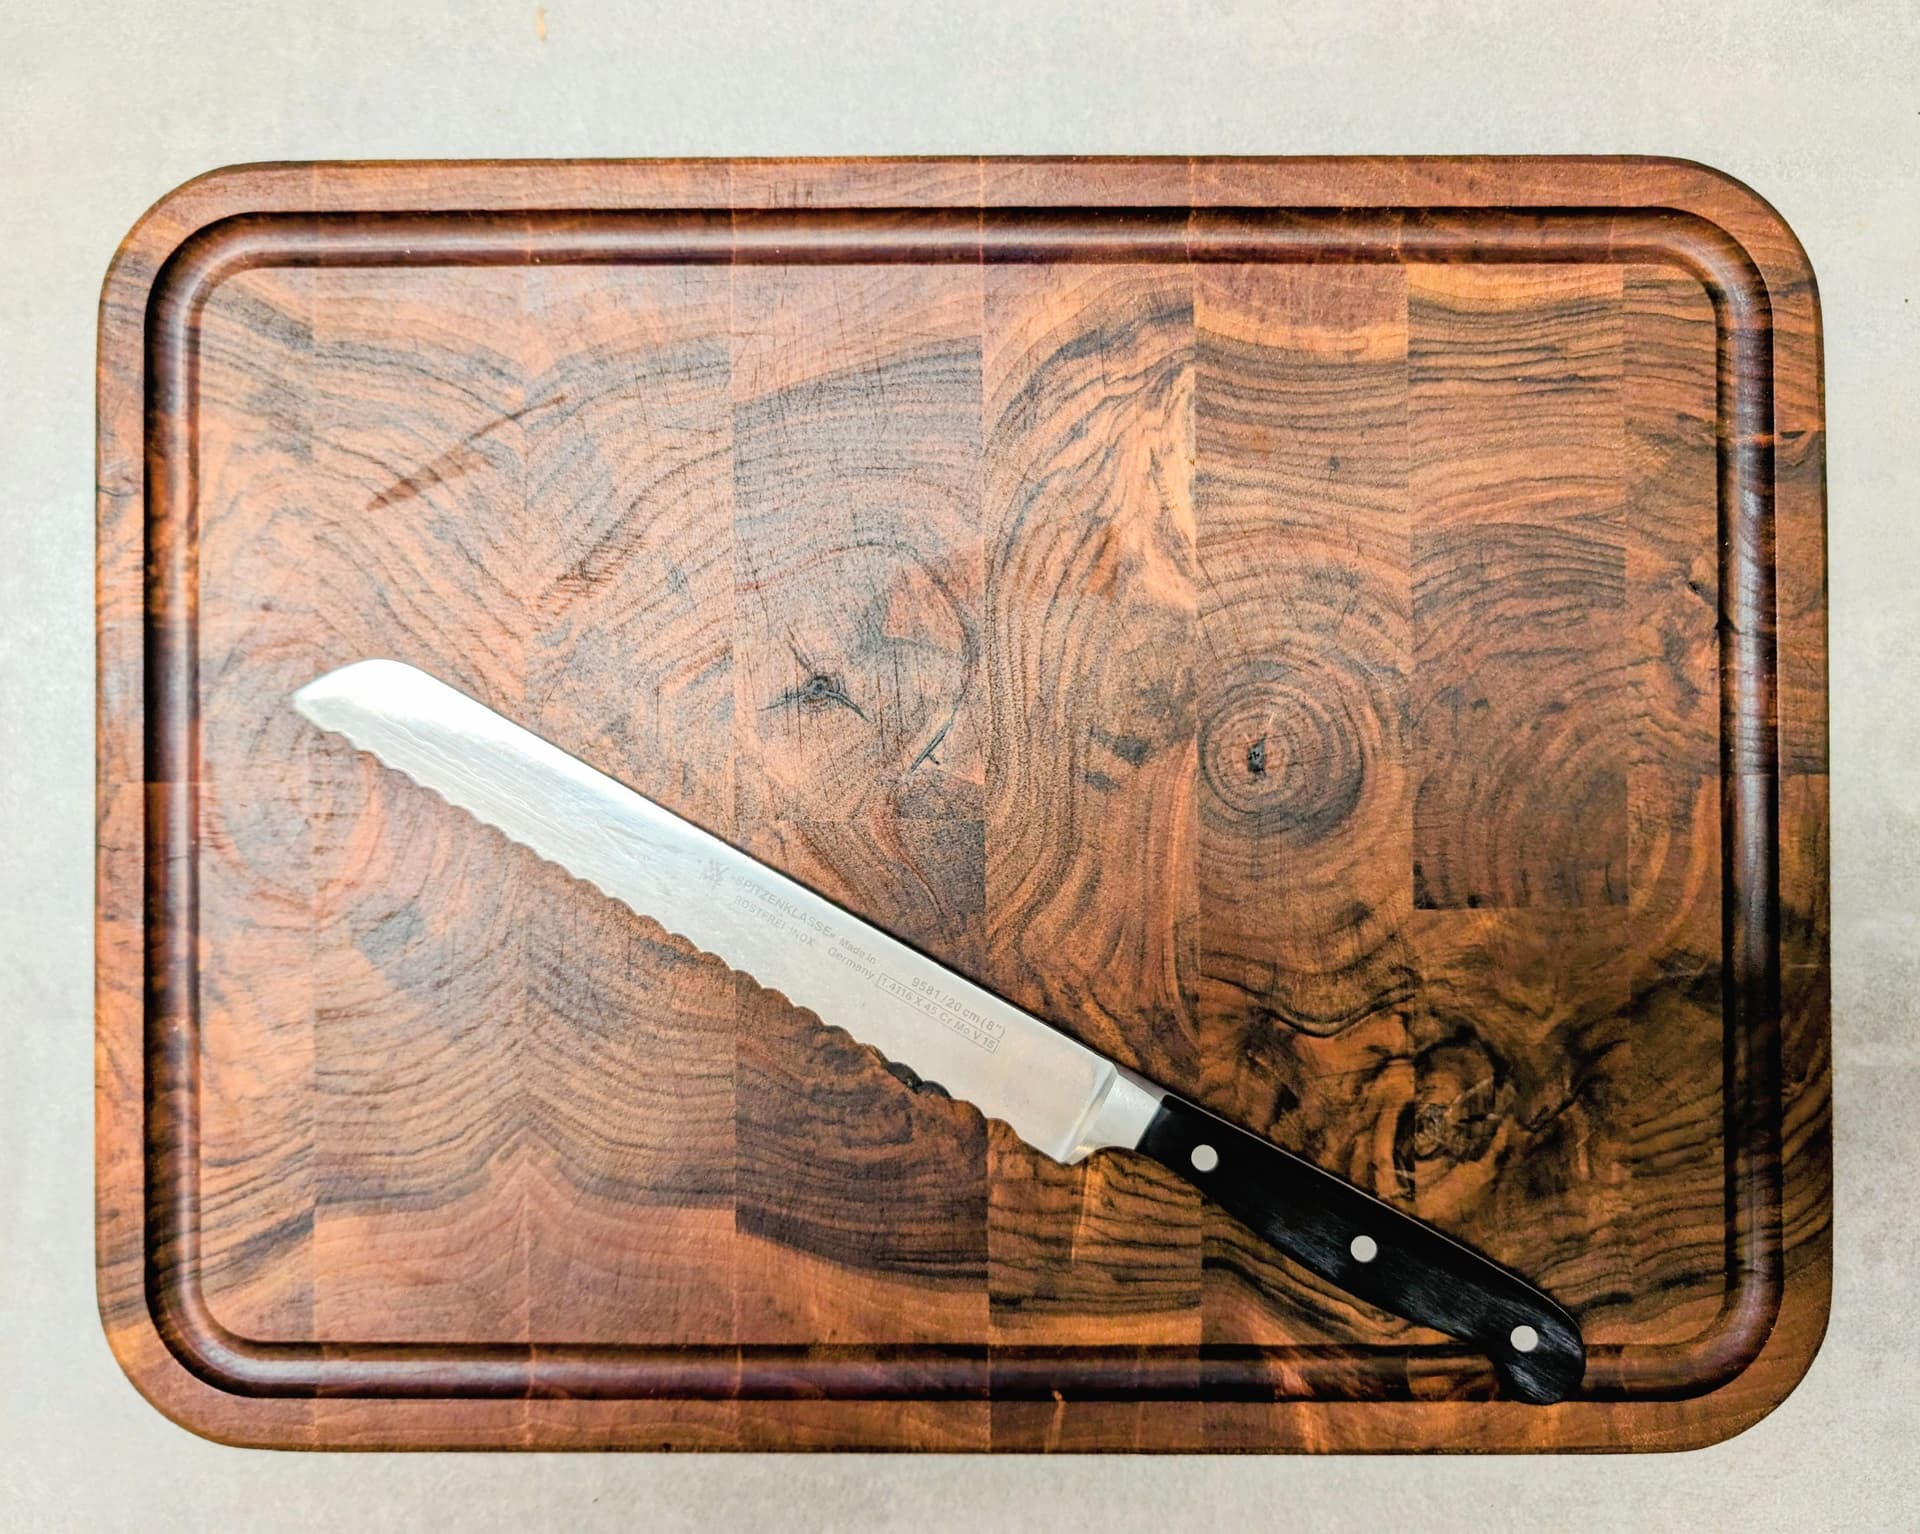
Made an end grain cutting board from some walnut I had lying around. The Primo made surfacing a breeze - didn’t have to build a router sled ![]()
My wife like the juice groove and the rounded corners, which are much easier when you have a CNC.
12 Likes
Not really a big deal for most of you but:
First cut with the new LittleLR3
First time using text in EstlCAM
First engraving with a “pointy” bit
First time using foam for learning a new CNC skill
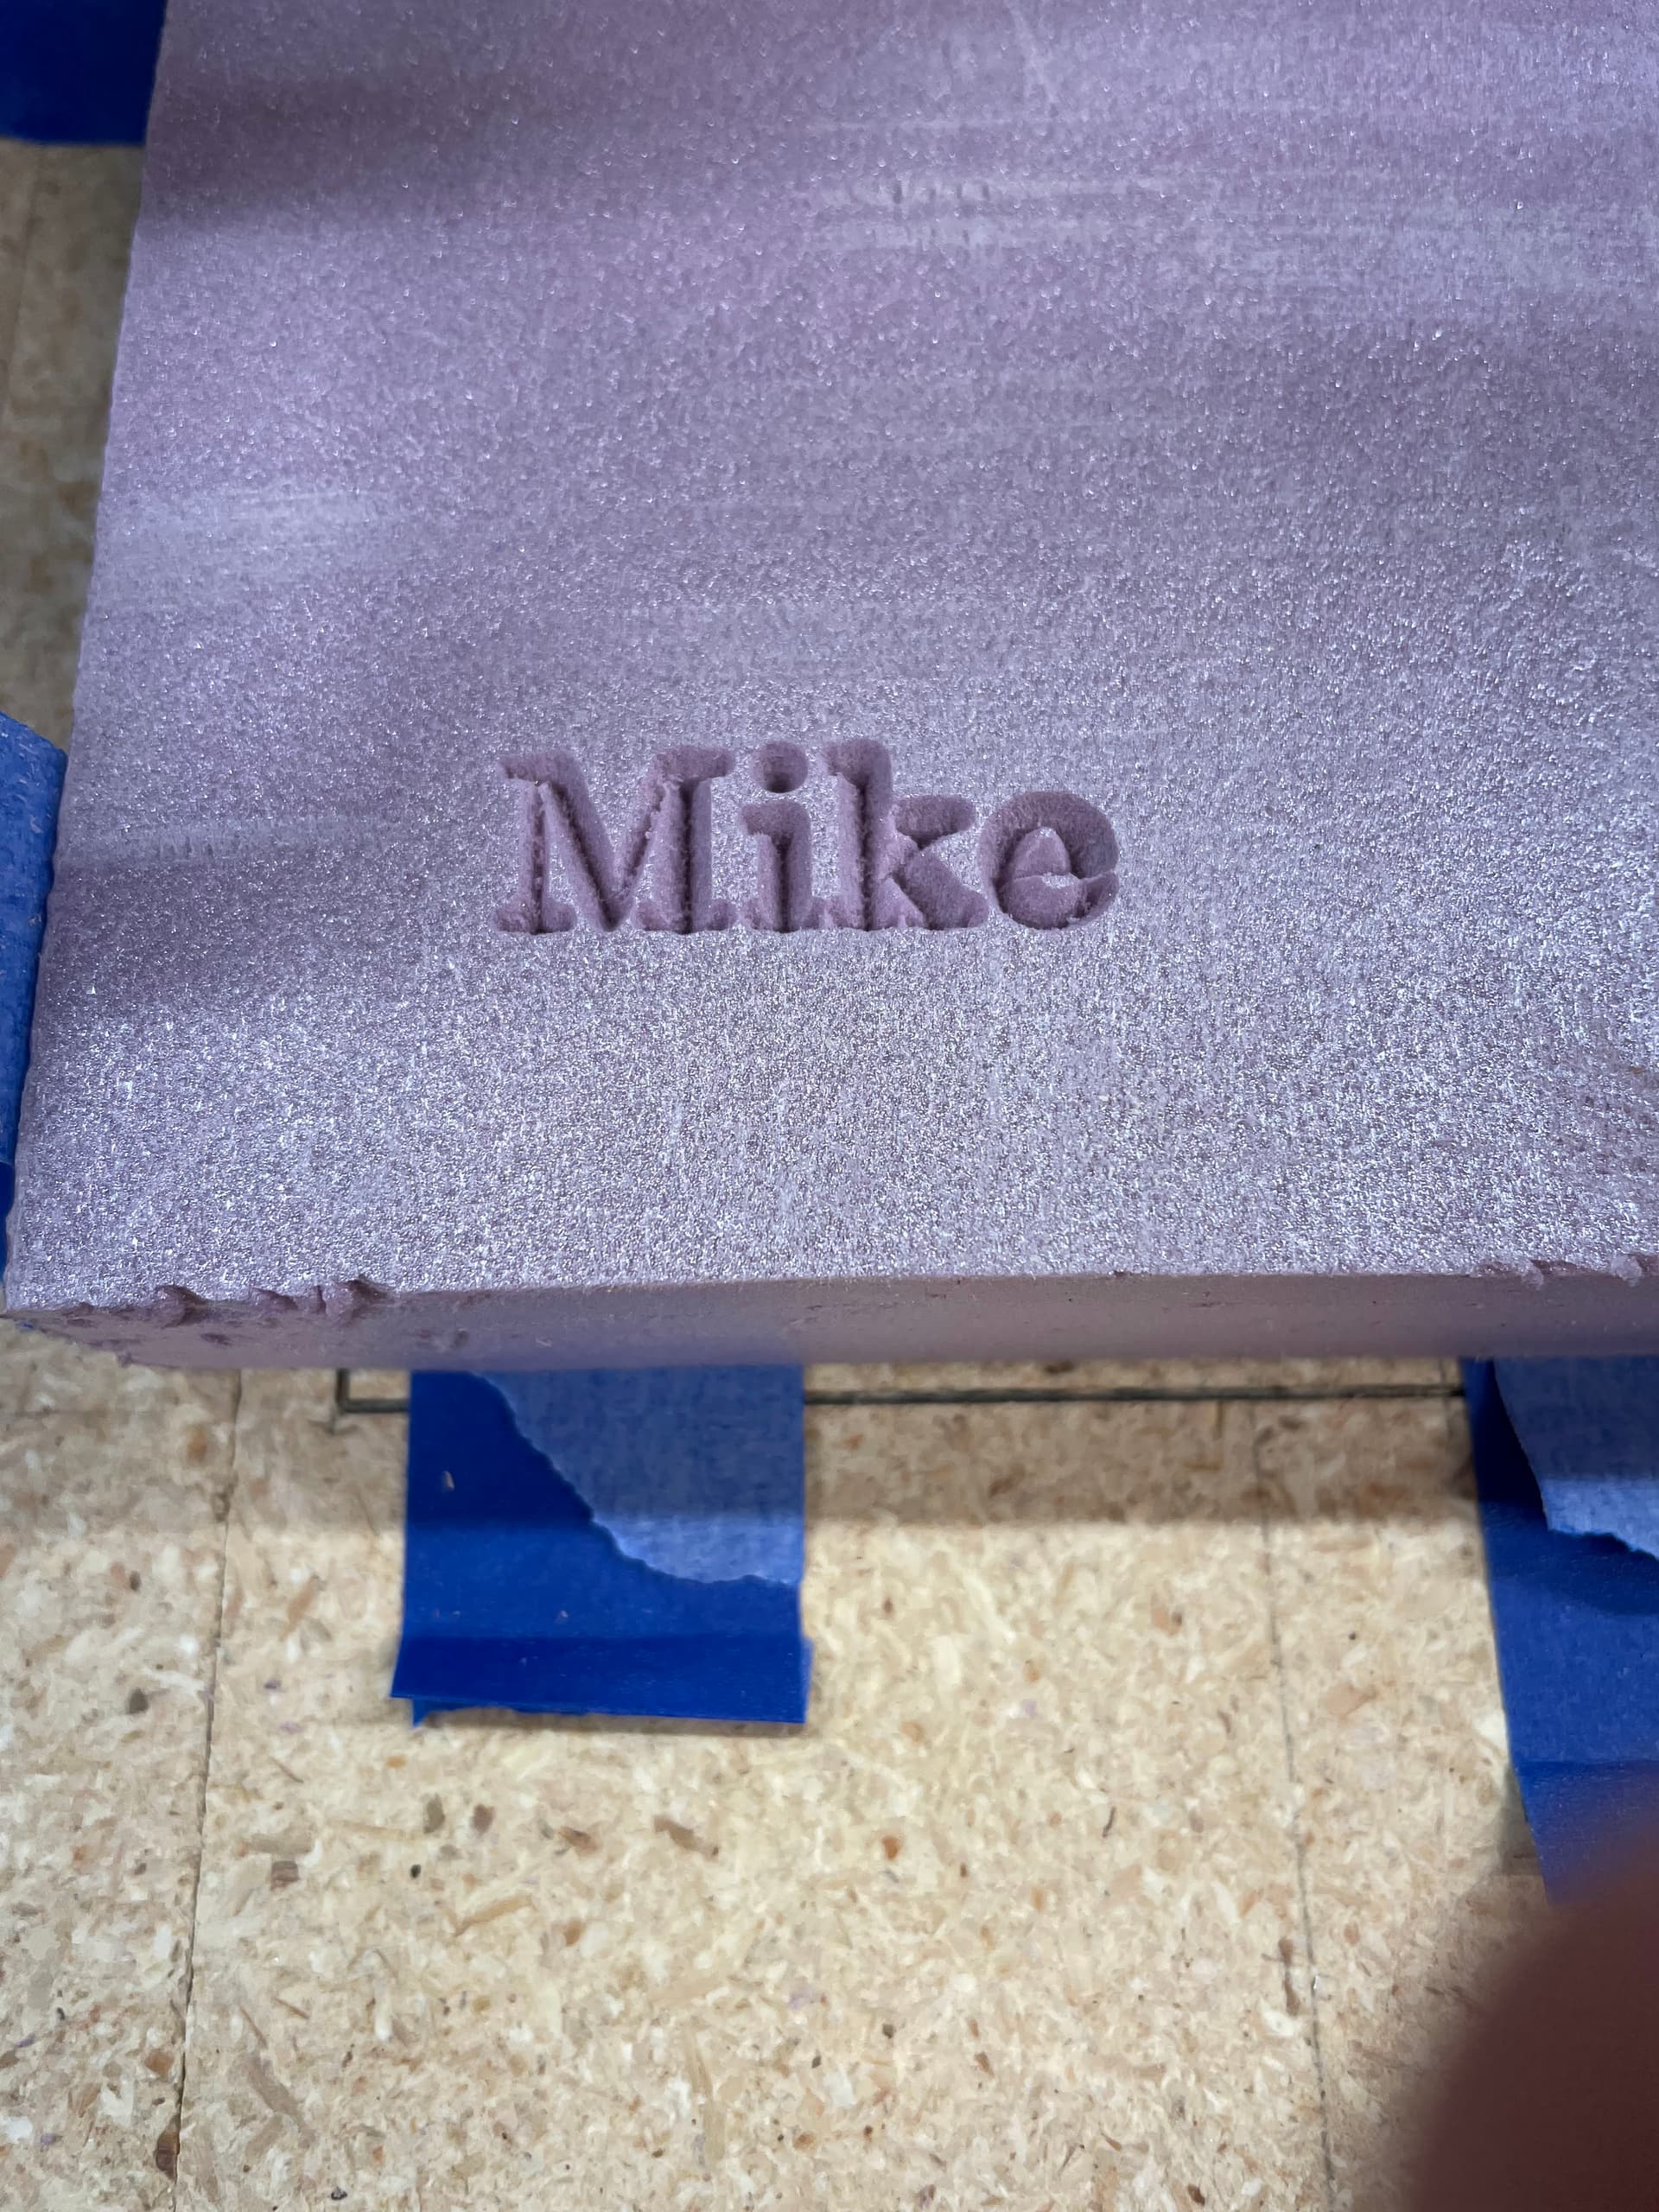
Now on to the 3d carving.
Mike
17 Likes
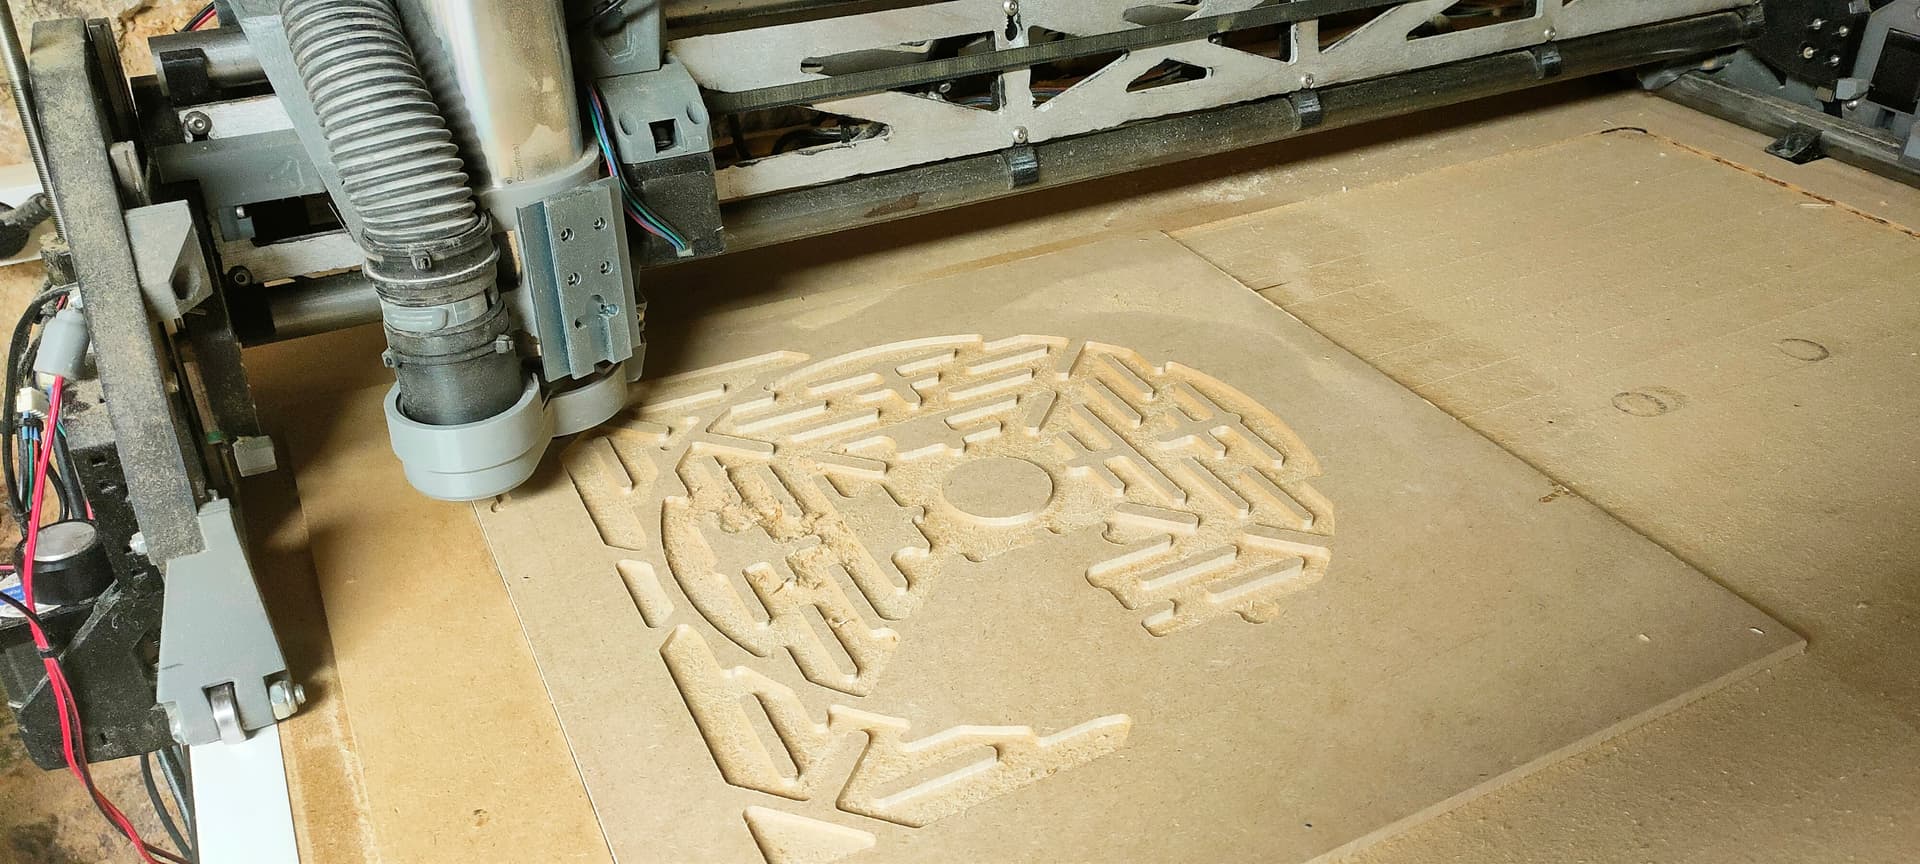
Quick little project for the kid : a “maze”/“faux manhole cover” to play marbles
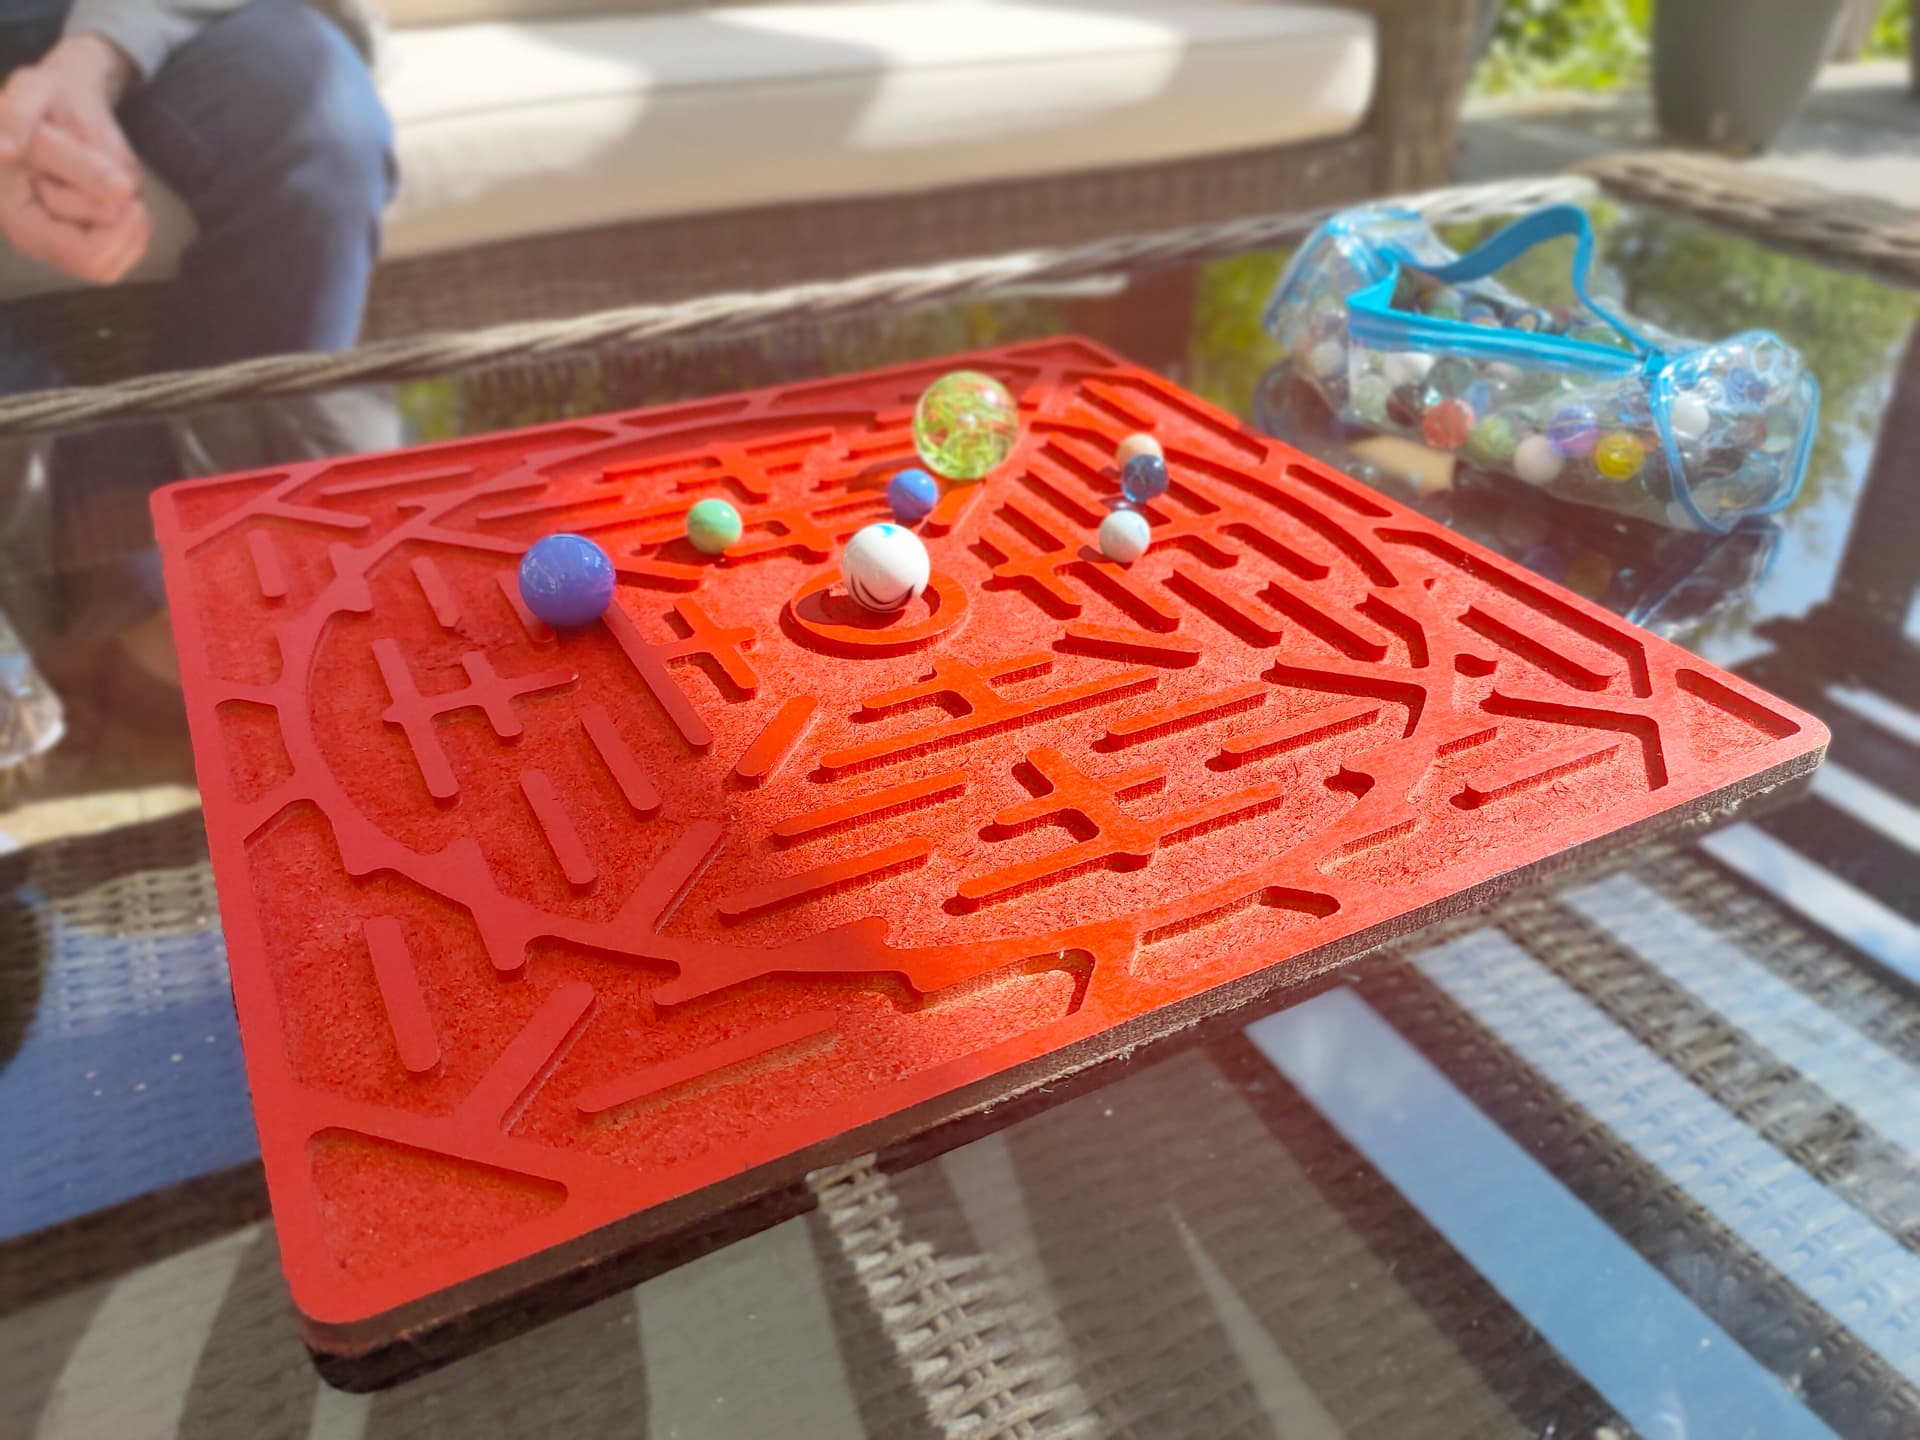
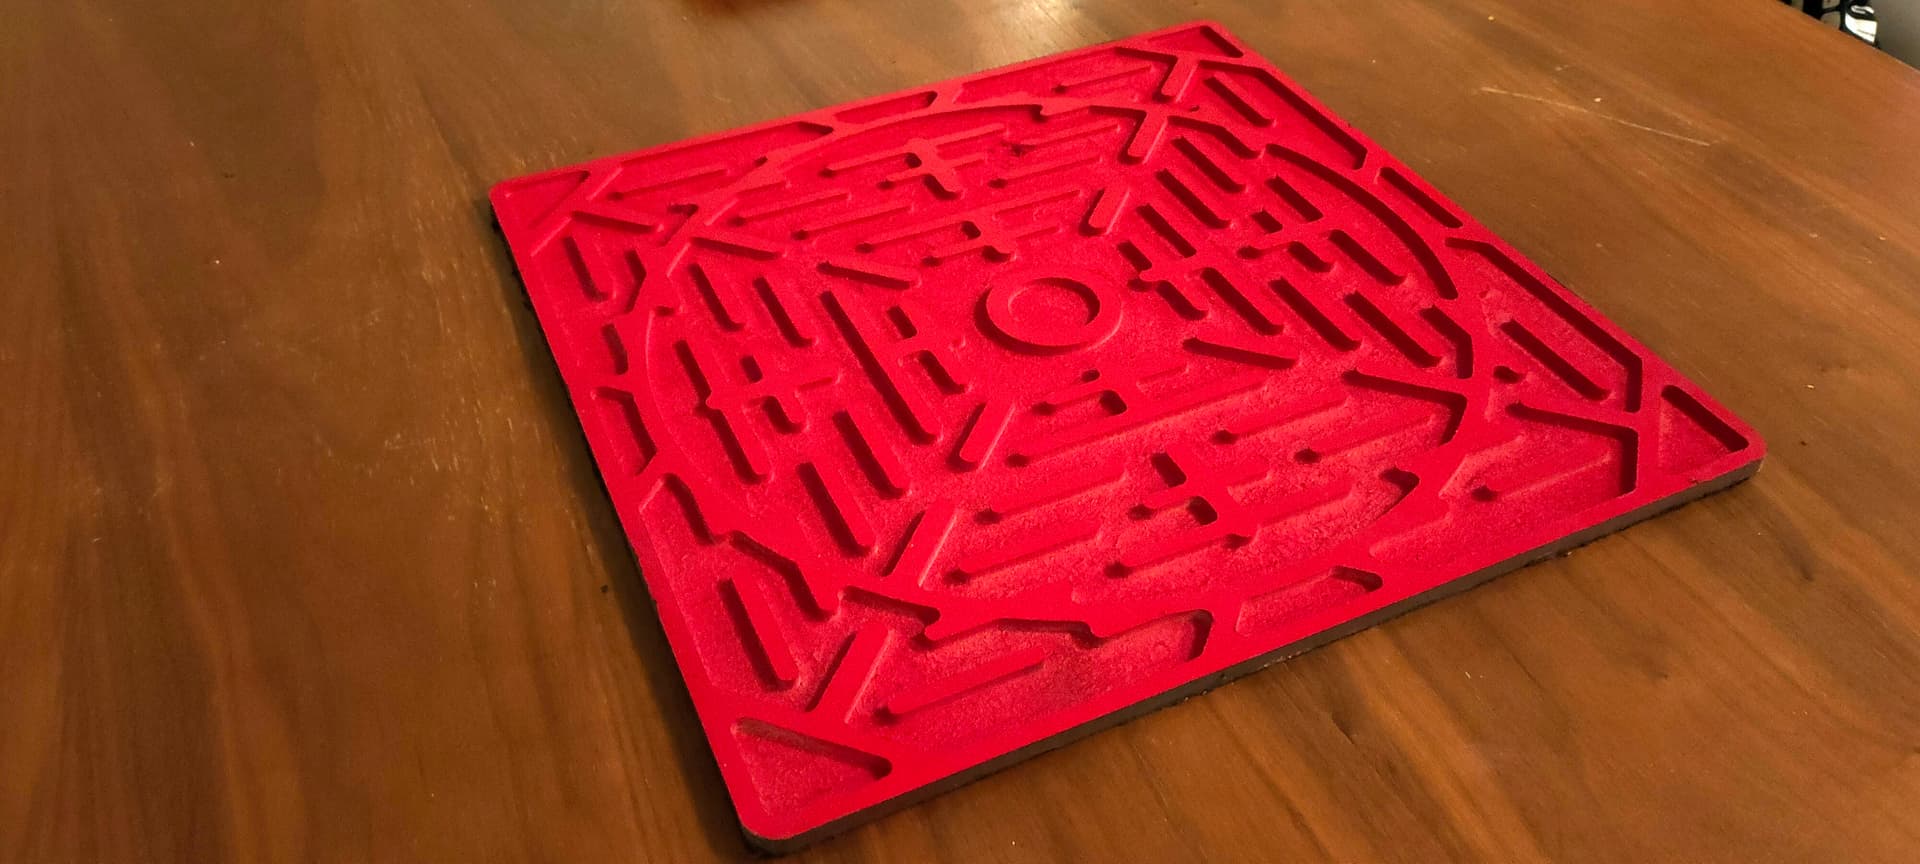
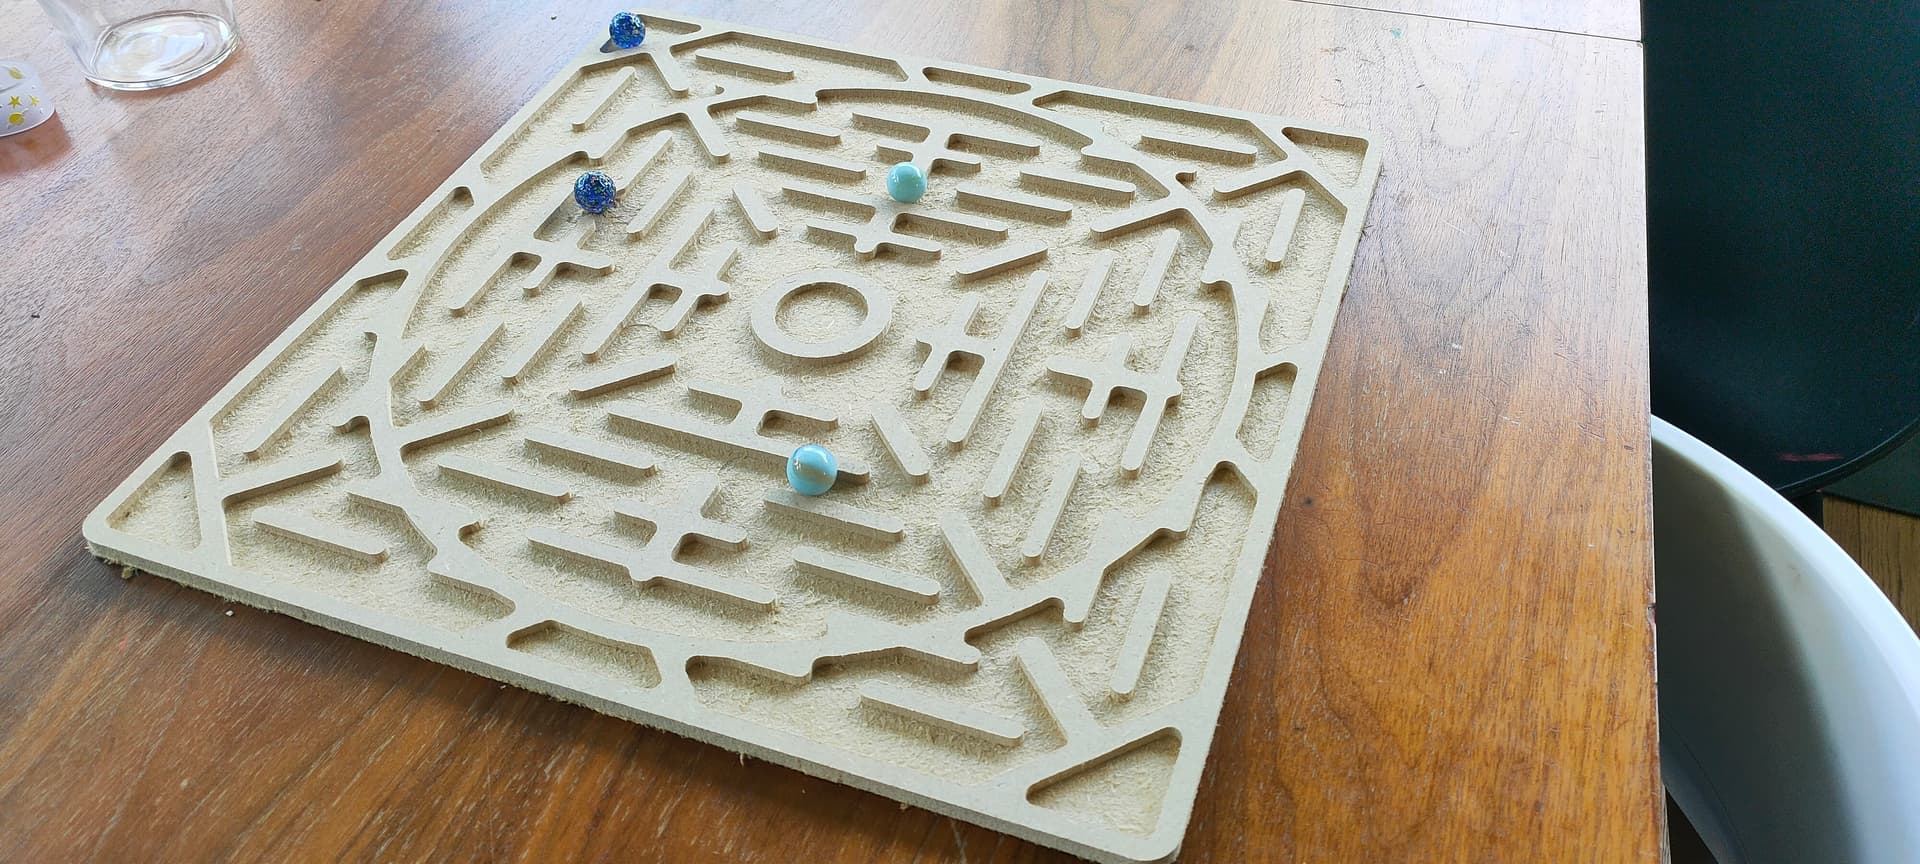
Cut on the LR3 in 6mm thick MDF
I may try a silicone cast at some point to make this a foldable mat
10 Likes
3d printed on MP3DPv4…
It’s a demo of a “fidget sleeve” my 5th grade son’s team came up with for a shark tank type competition he’s having in his class. This was all his team’s design. He even drove the mouse for a portion of the CAD work.
The different bumps represent different types of fidgets that we don’t have the time to actually make work.
Plus the wall thickness is only 2mm, so not really sure how I’d add buttons and rotating gears to this thing.

7 Likes
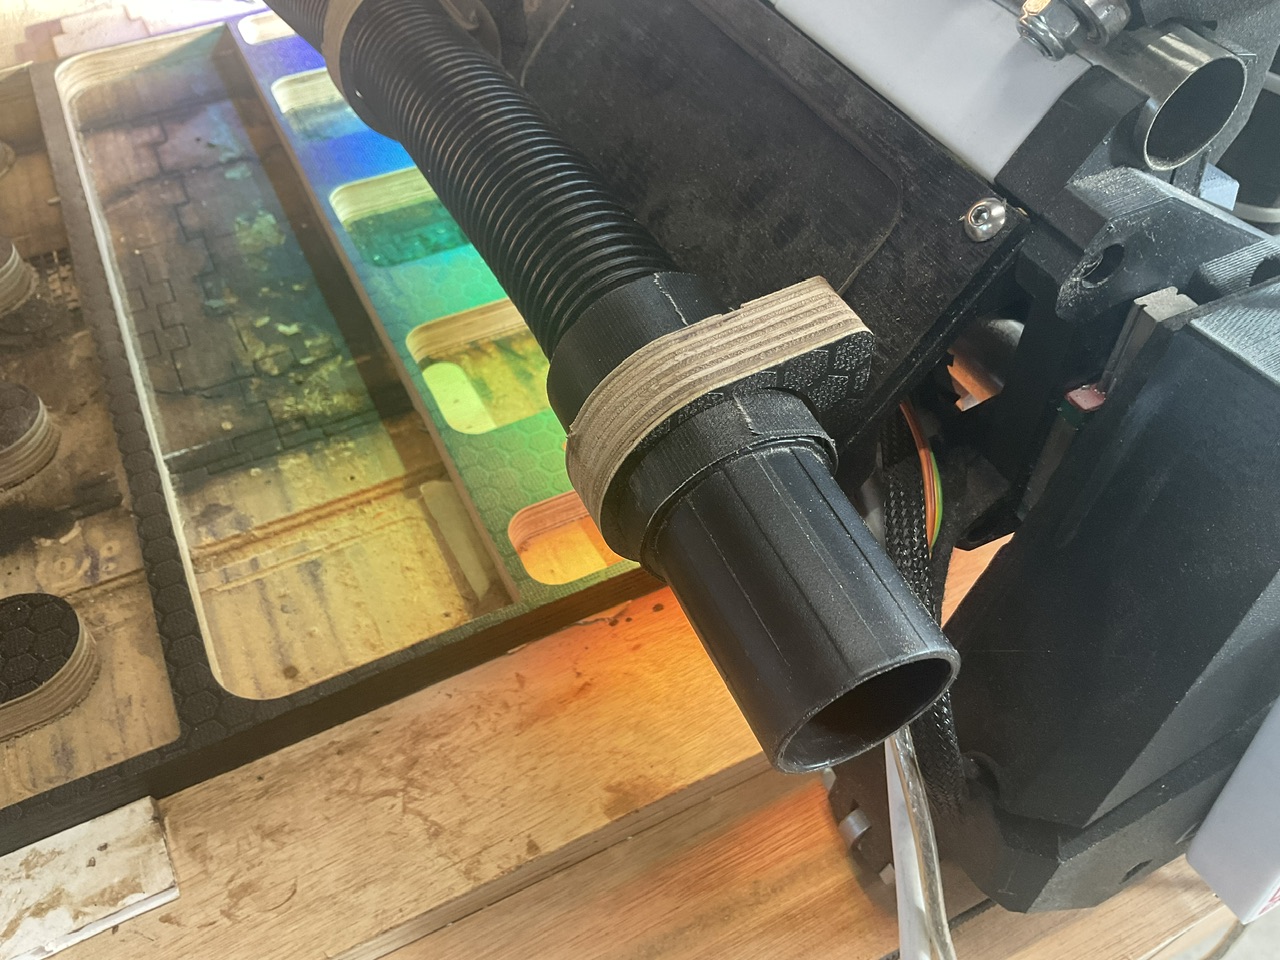
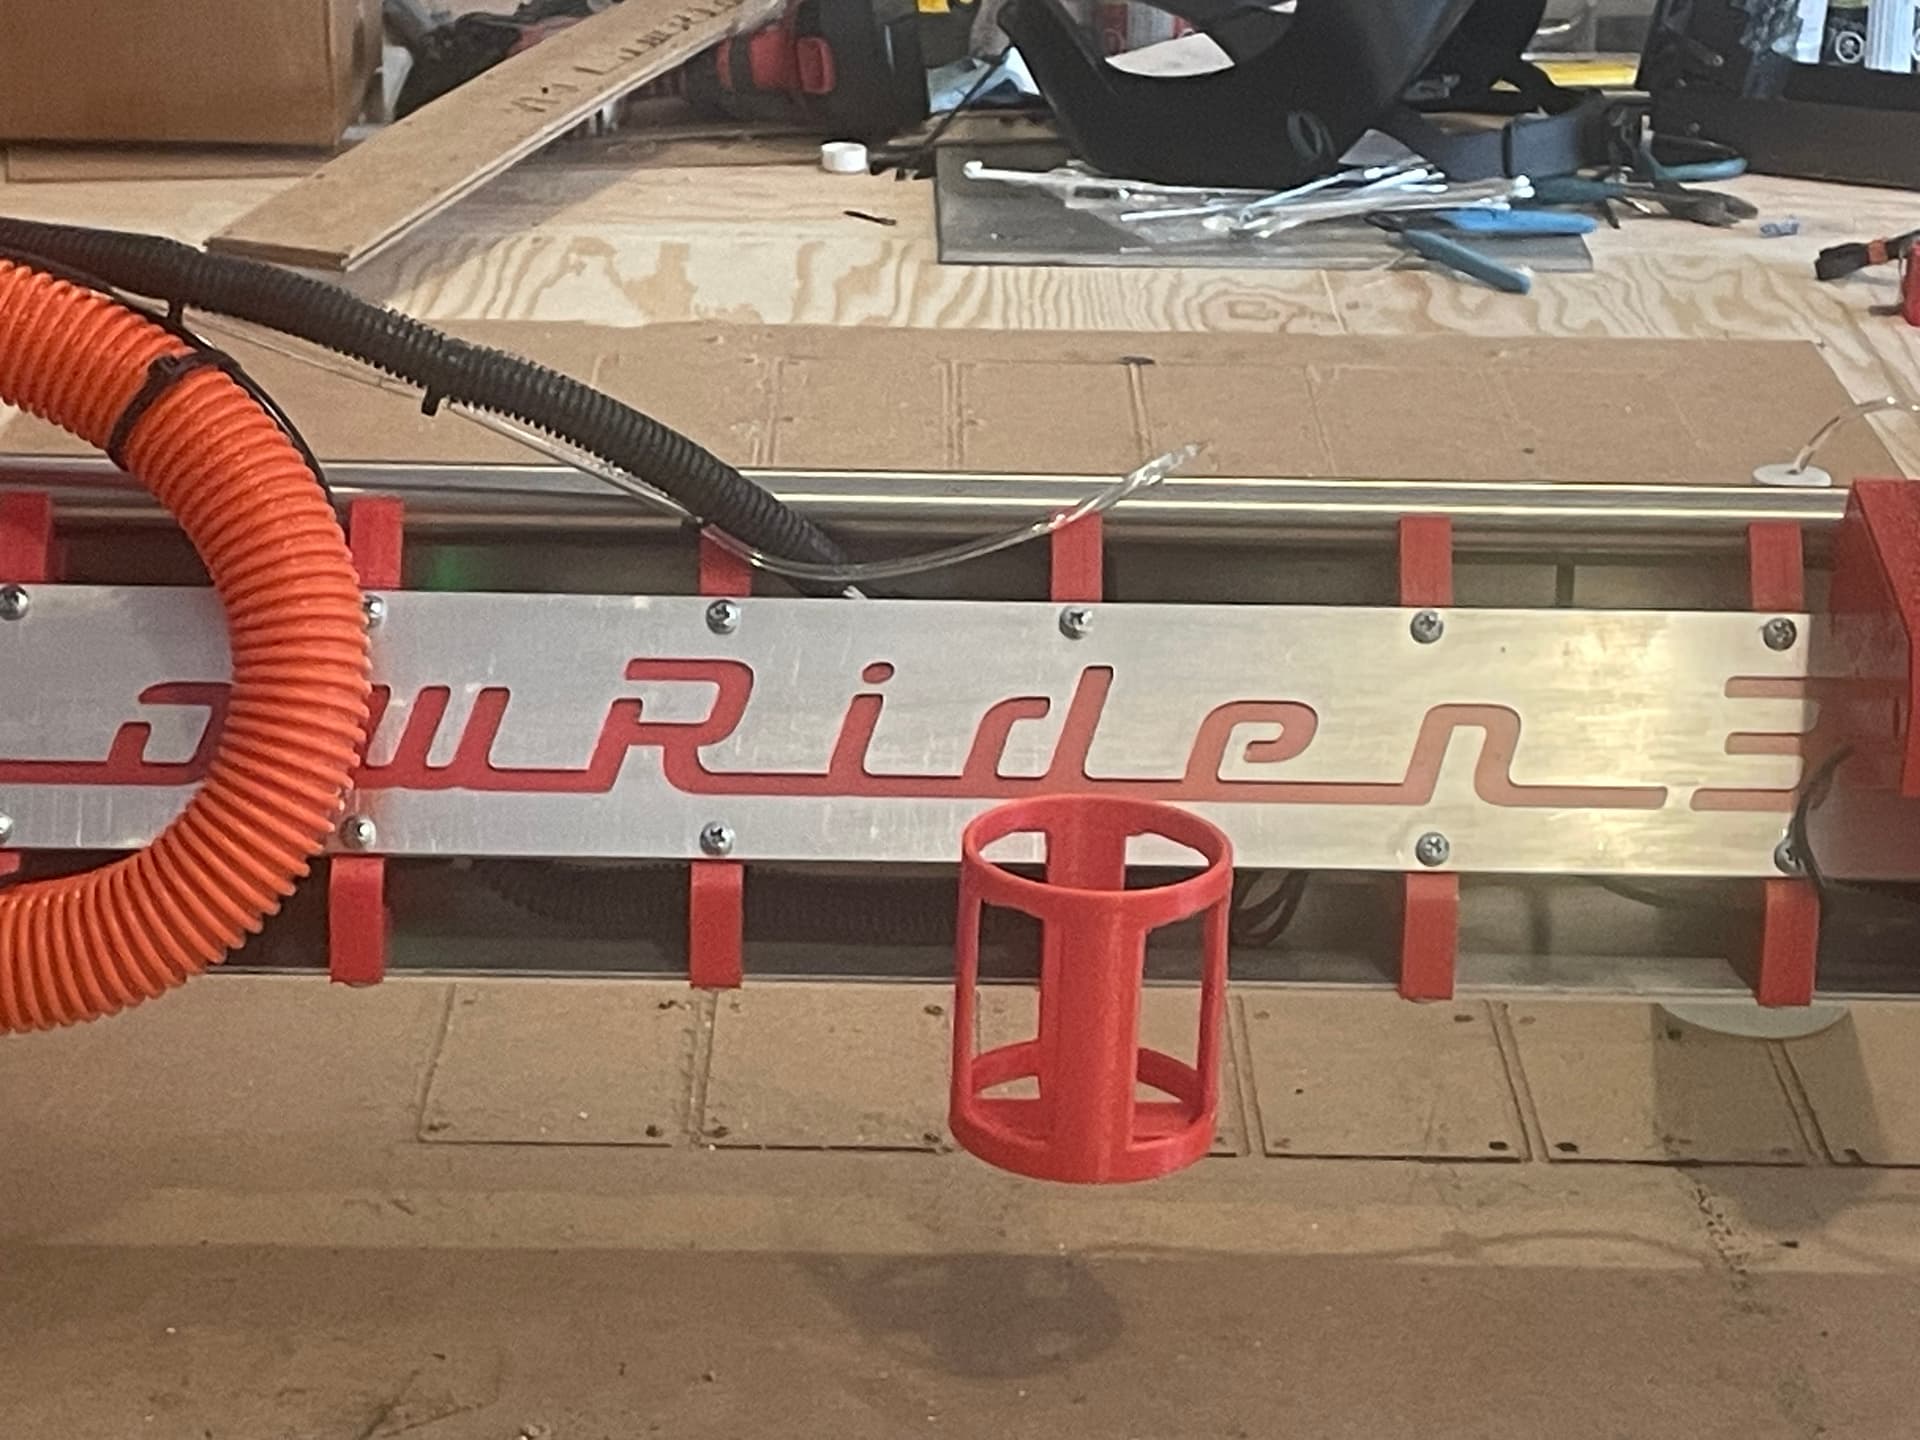
A small project and an upgrade to capture my vac hose and keep it clear from the Y belts.
Material chosen on its “it’s already on there” qualities. ![]()
I’ve included a flat on the top so that if I choose to add a cable chain at some point it can ride on there.
Took a couple of goes to get the size right, I’ve realised my output is quite a bit different to the tool path - 2-3mm different! I think it’,l be defection/bit size and my suspicion is that the fact it’s a down cut bit is making it worse- chips in the slot pushing the bit about maybe? I’m fairly confident if I put the laser on the sizes would be fine with the lack of lateral forces.

5 Likes
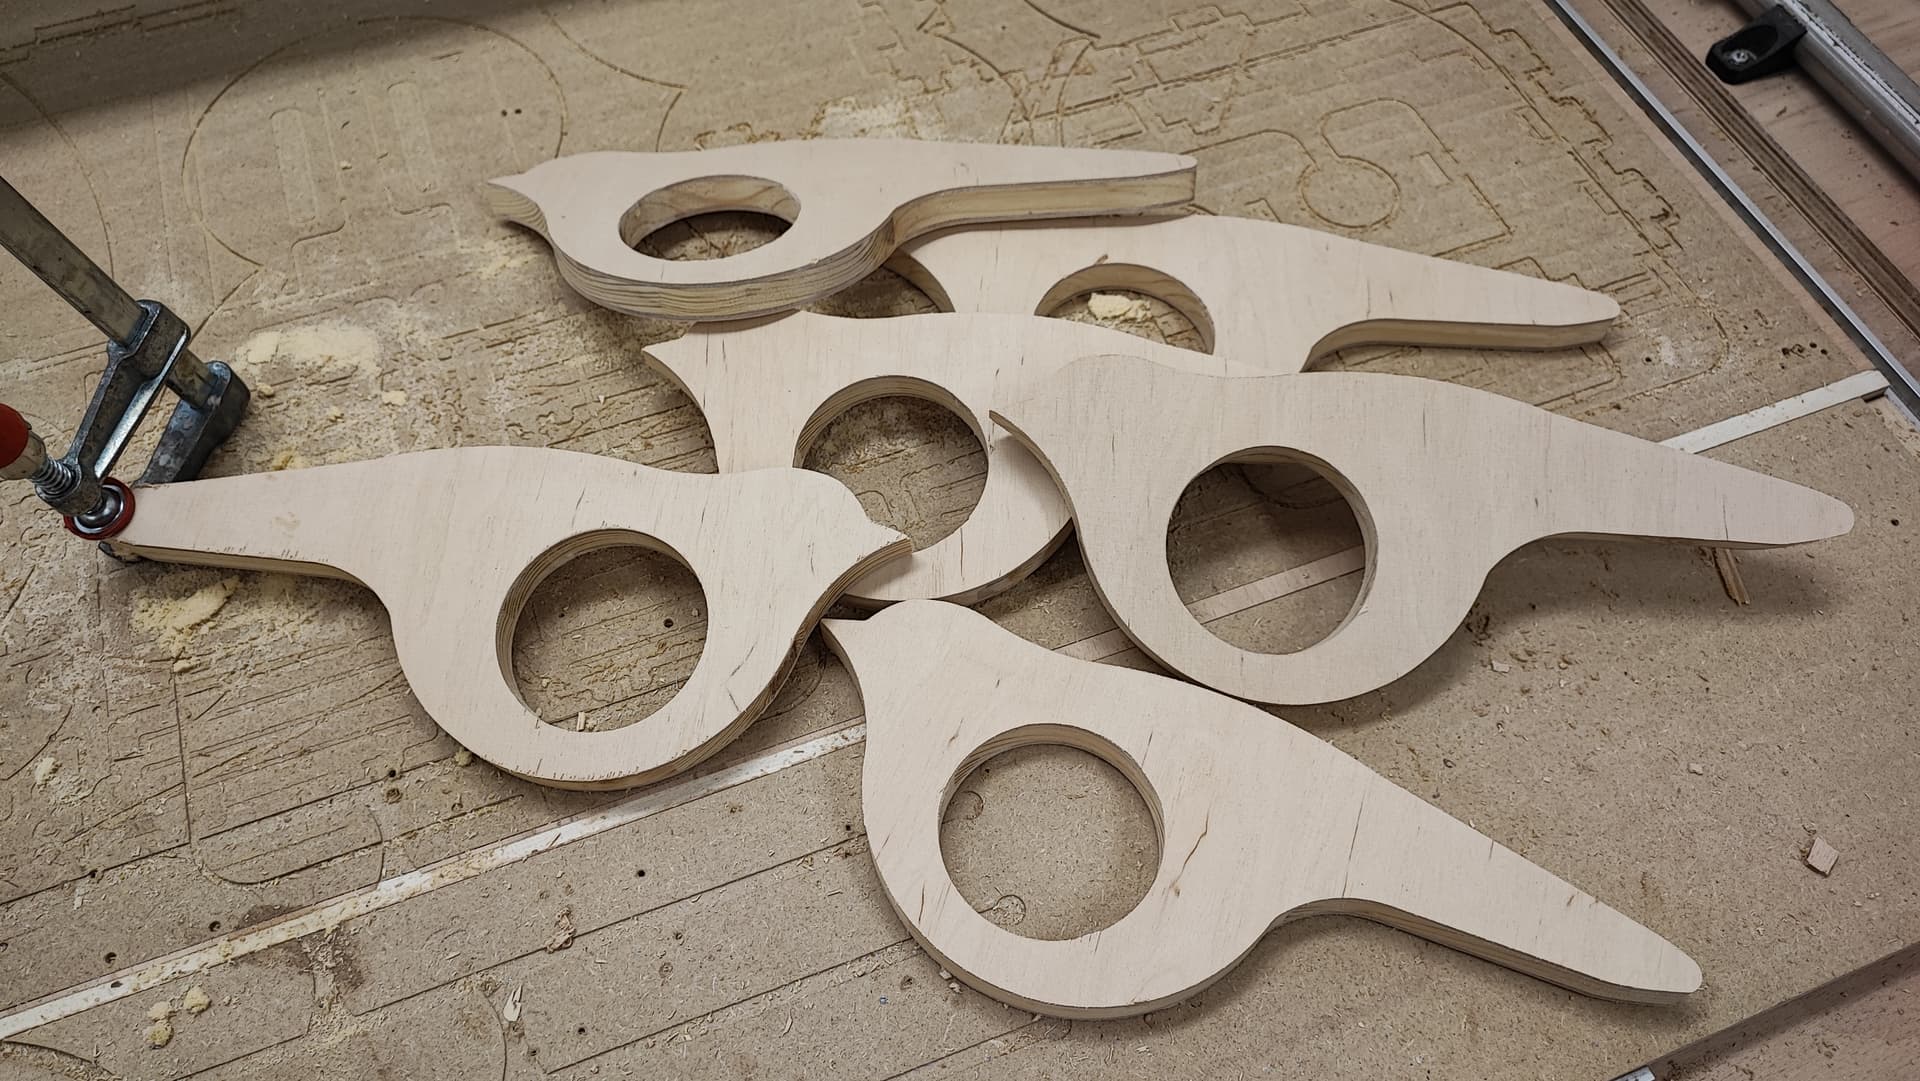
Bird-feeder birds. You put an apple or one of those food-balls in the middle, fixing it with a small spike. Still missing a few holes and colour, but that’s my mom’s job. ![]()

8 Likes
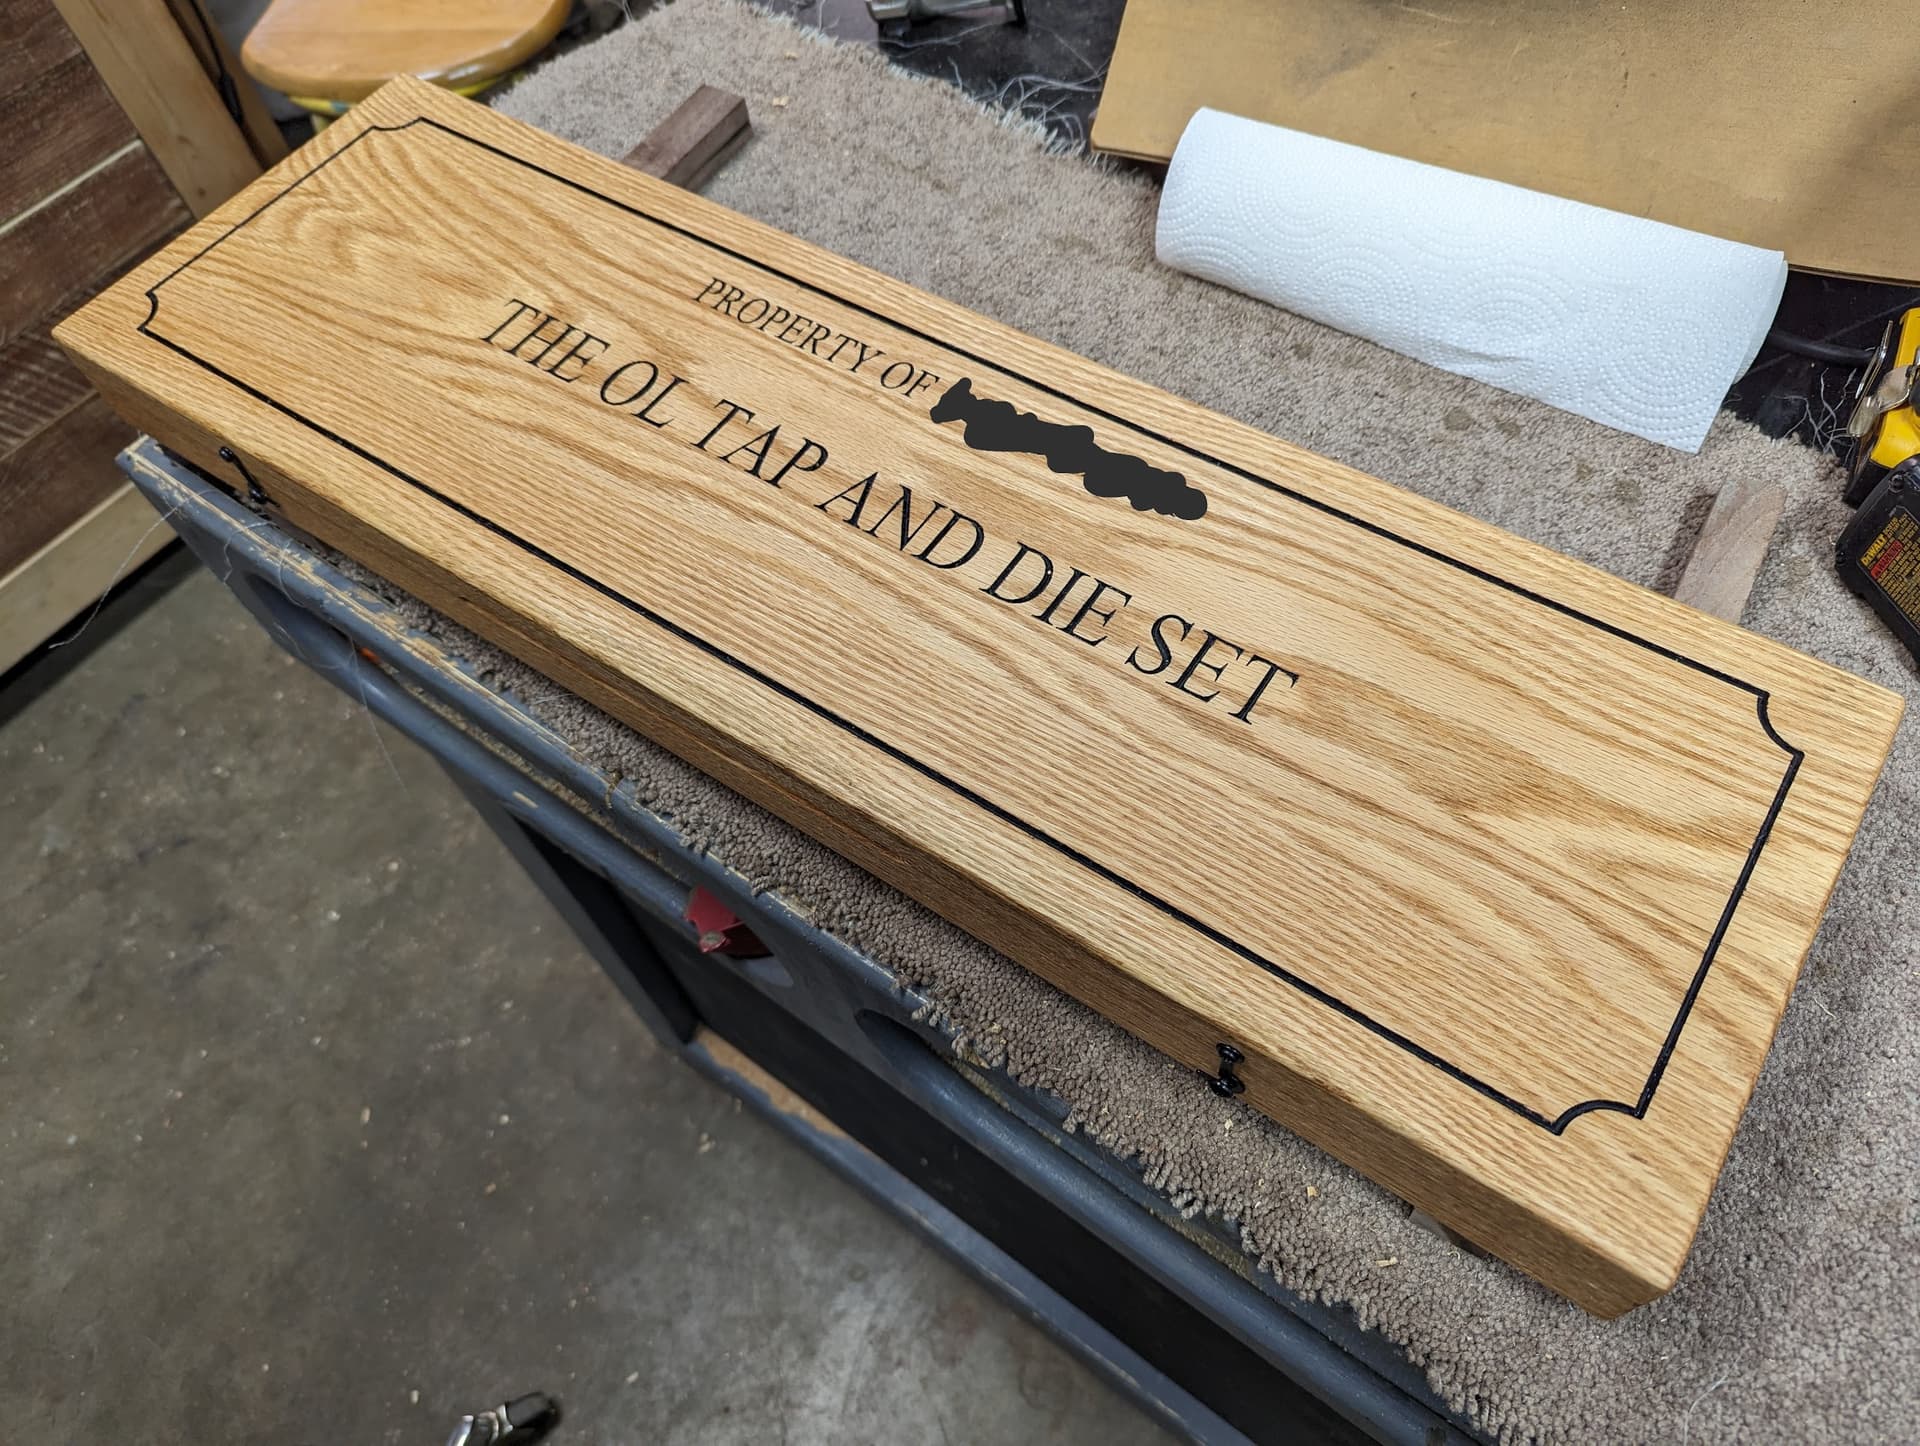
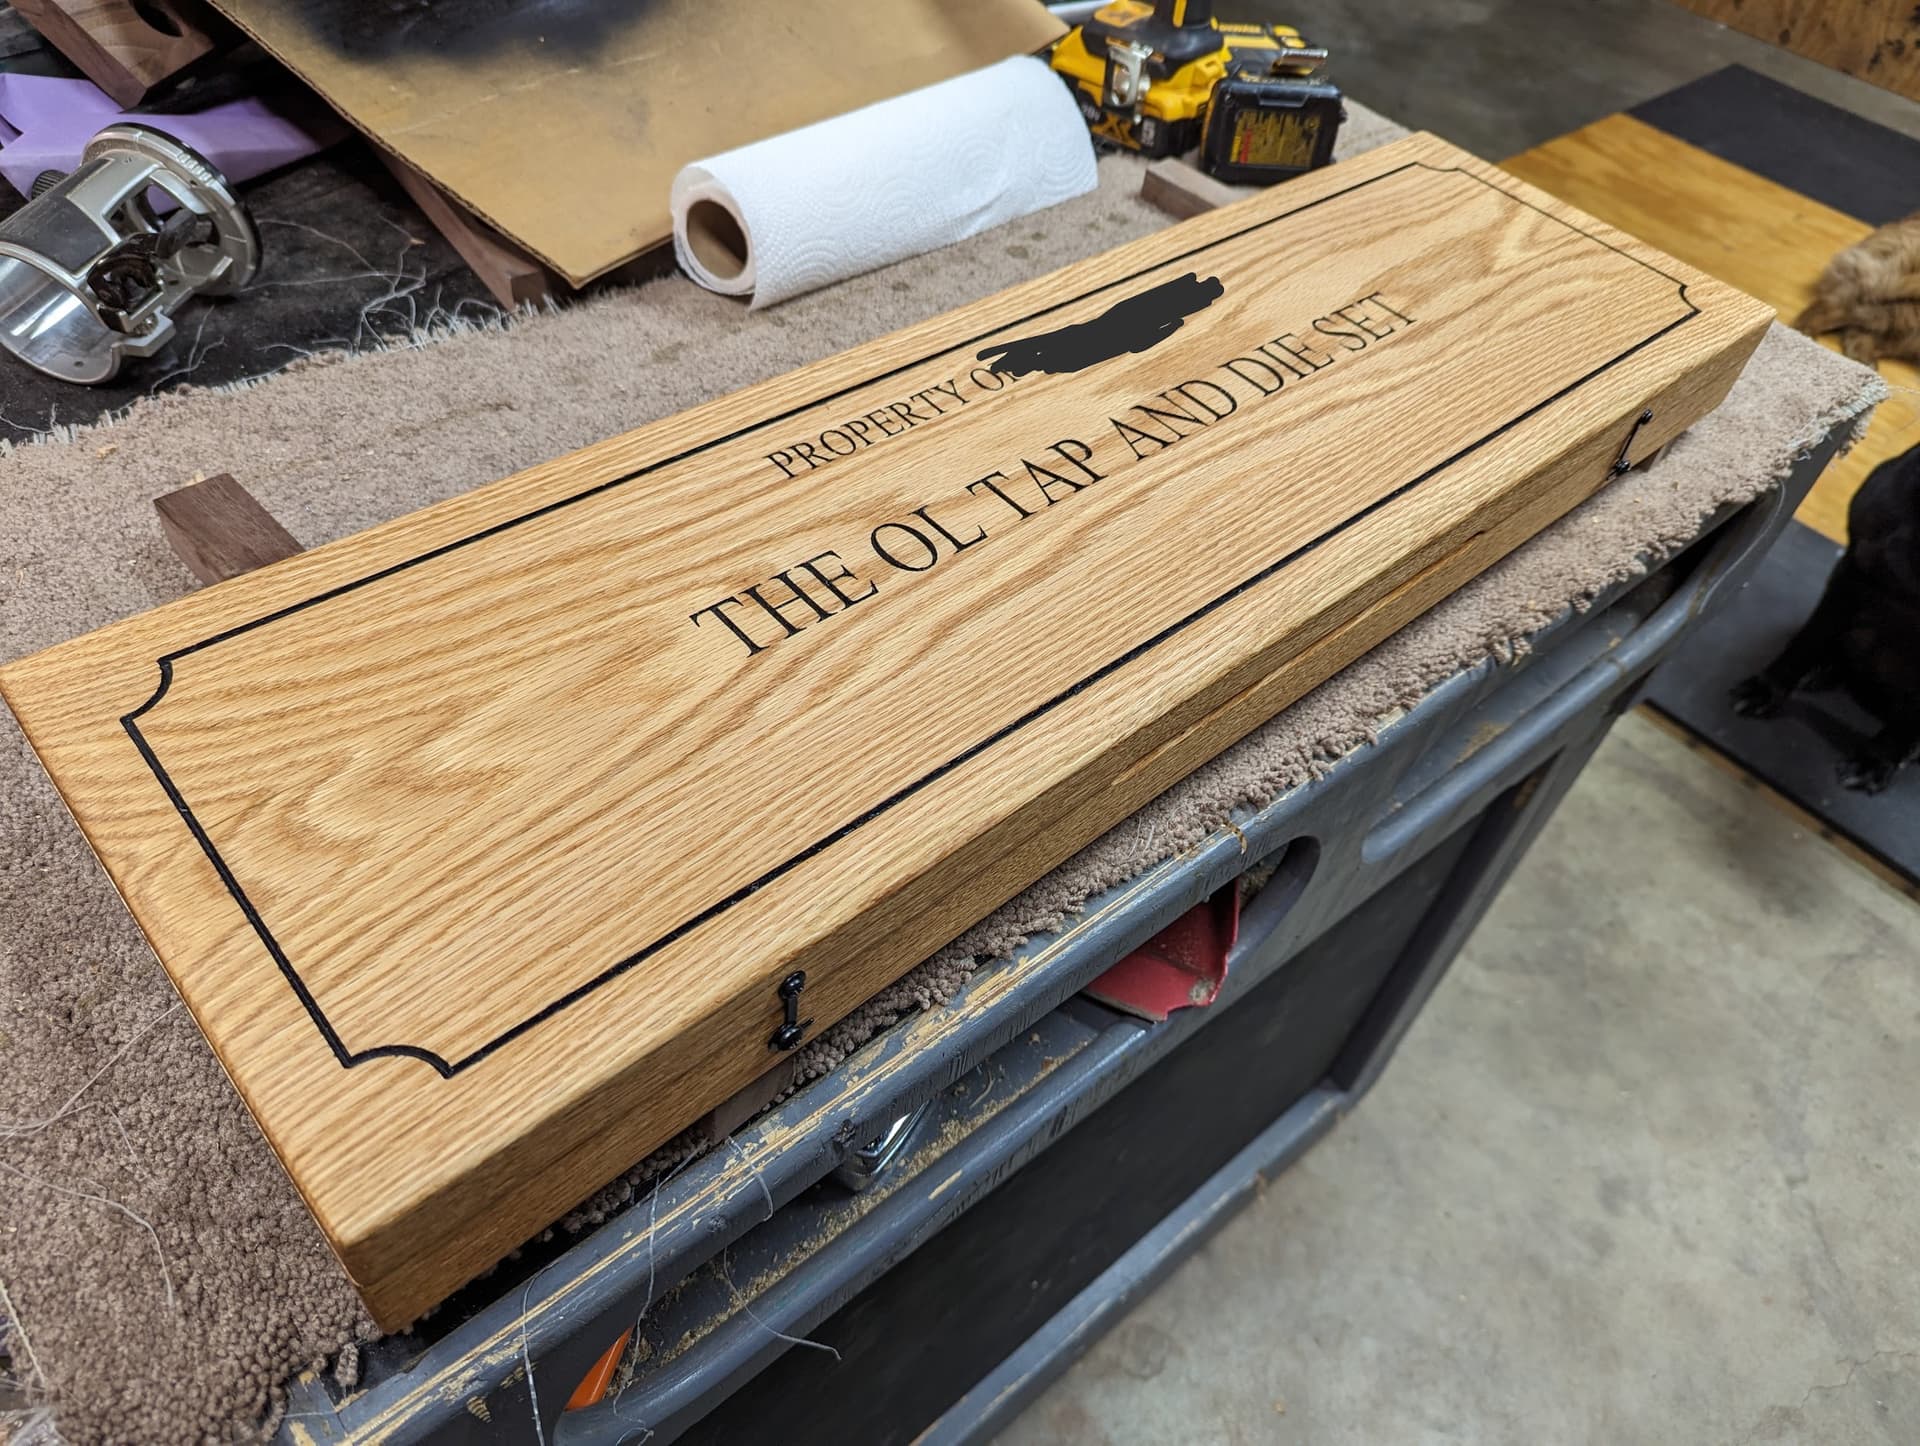


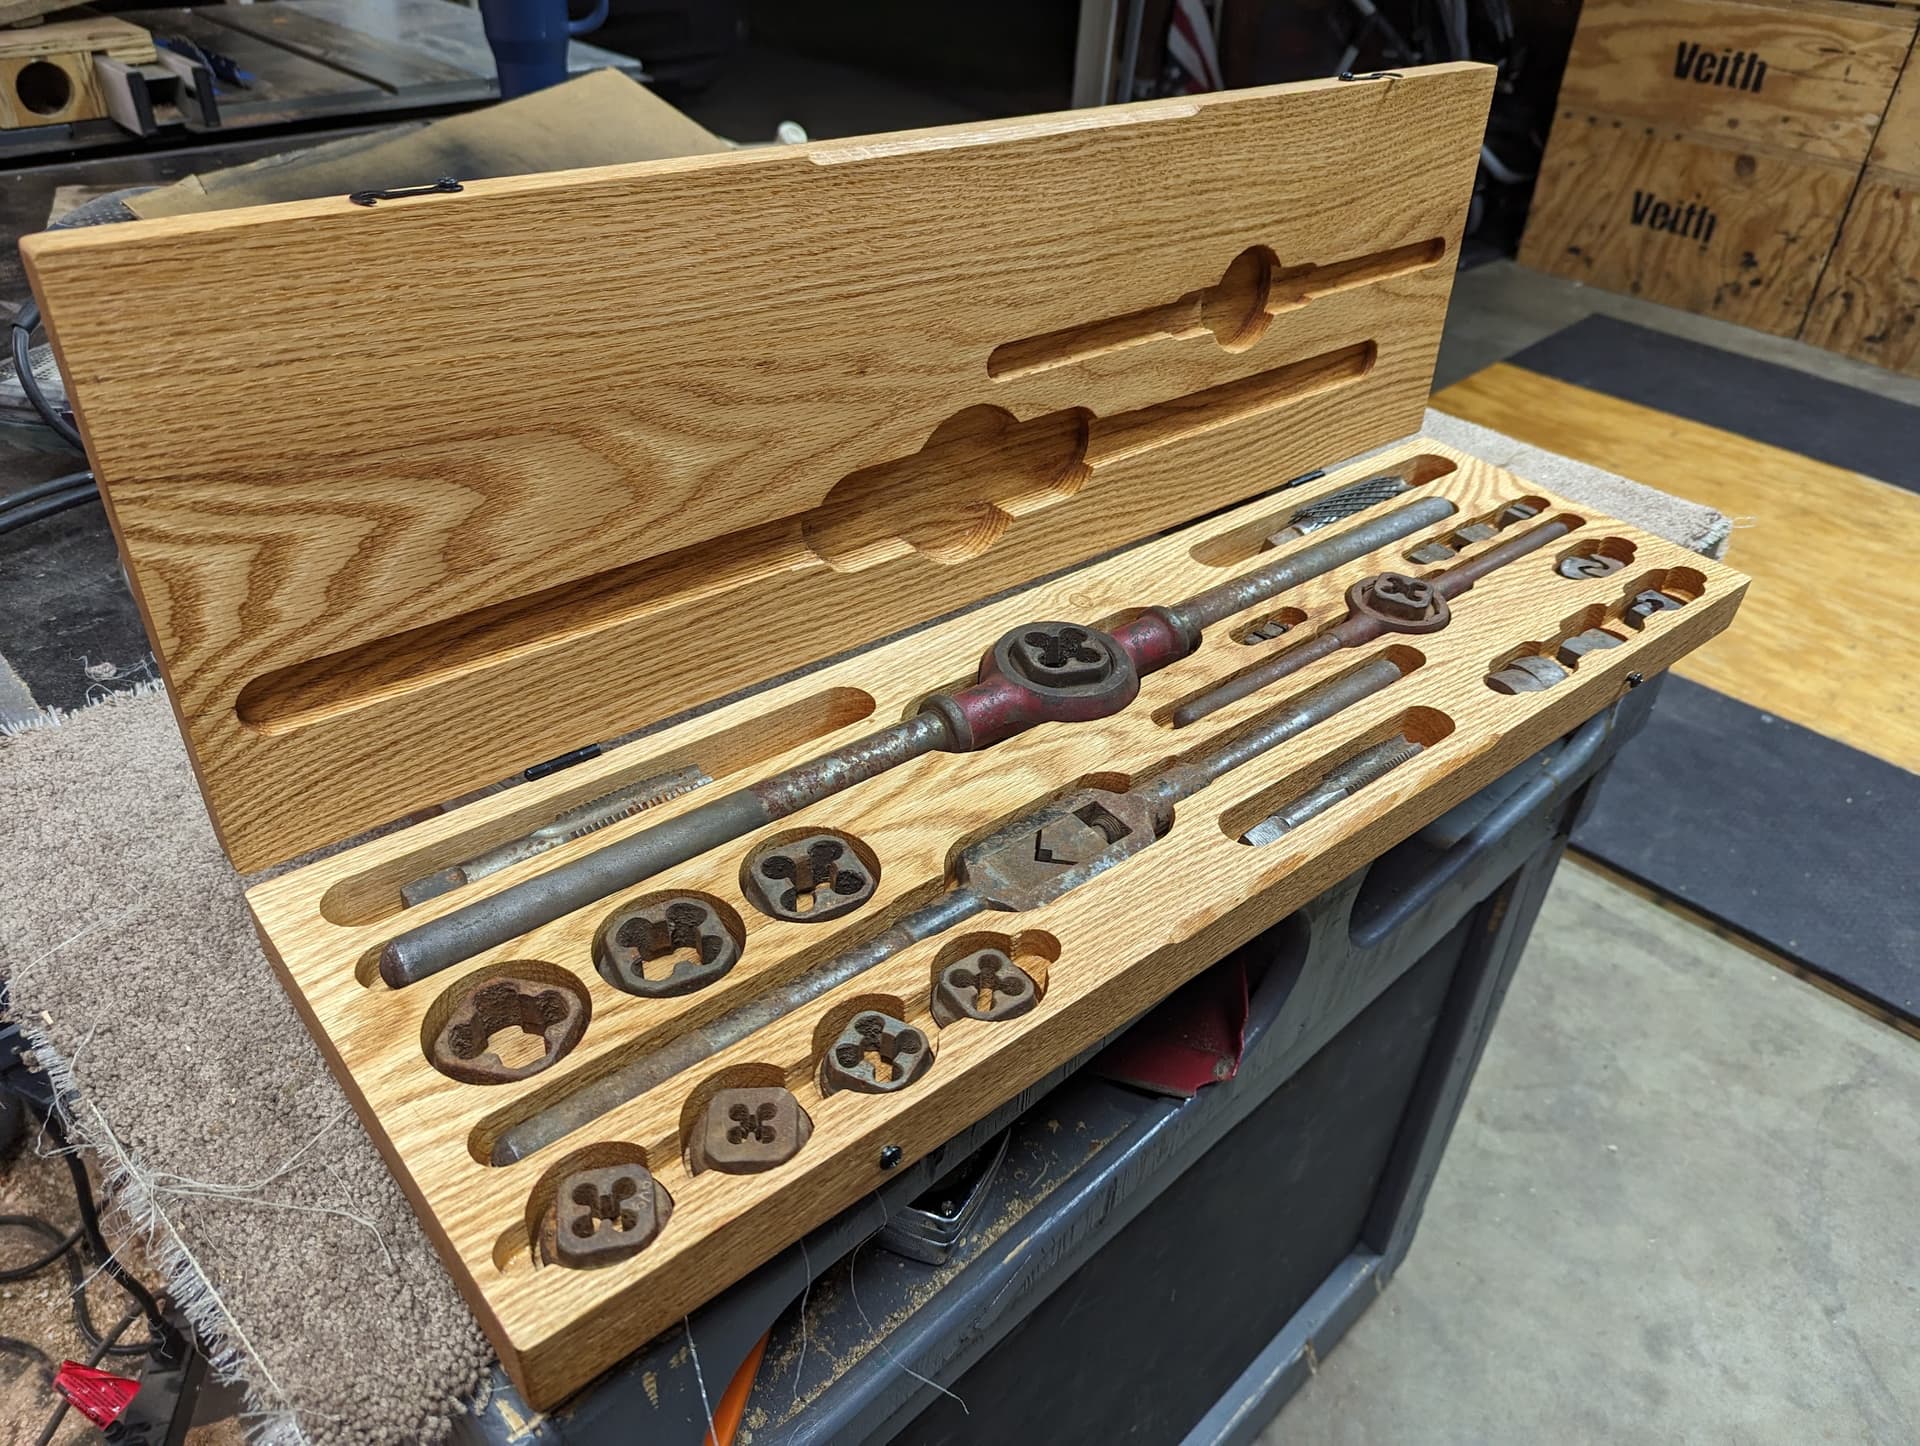

Tap and die box. Sorry I had to blur out the name of the person this goes to. Pockets and engravings done on MPCNC.
22 Likes
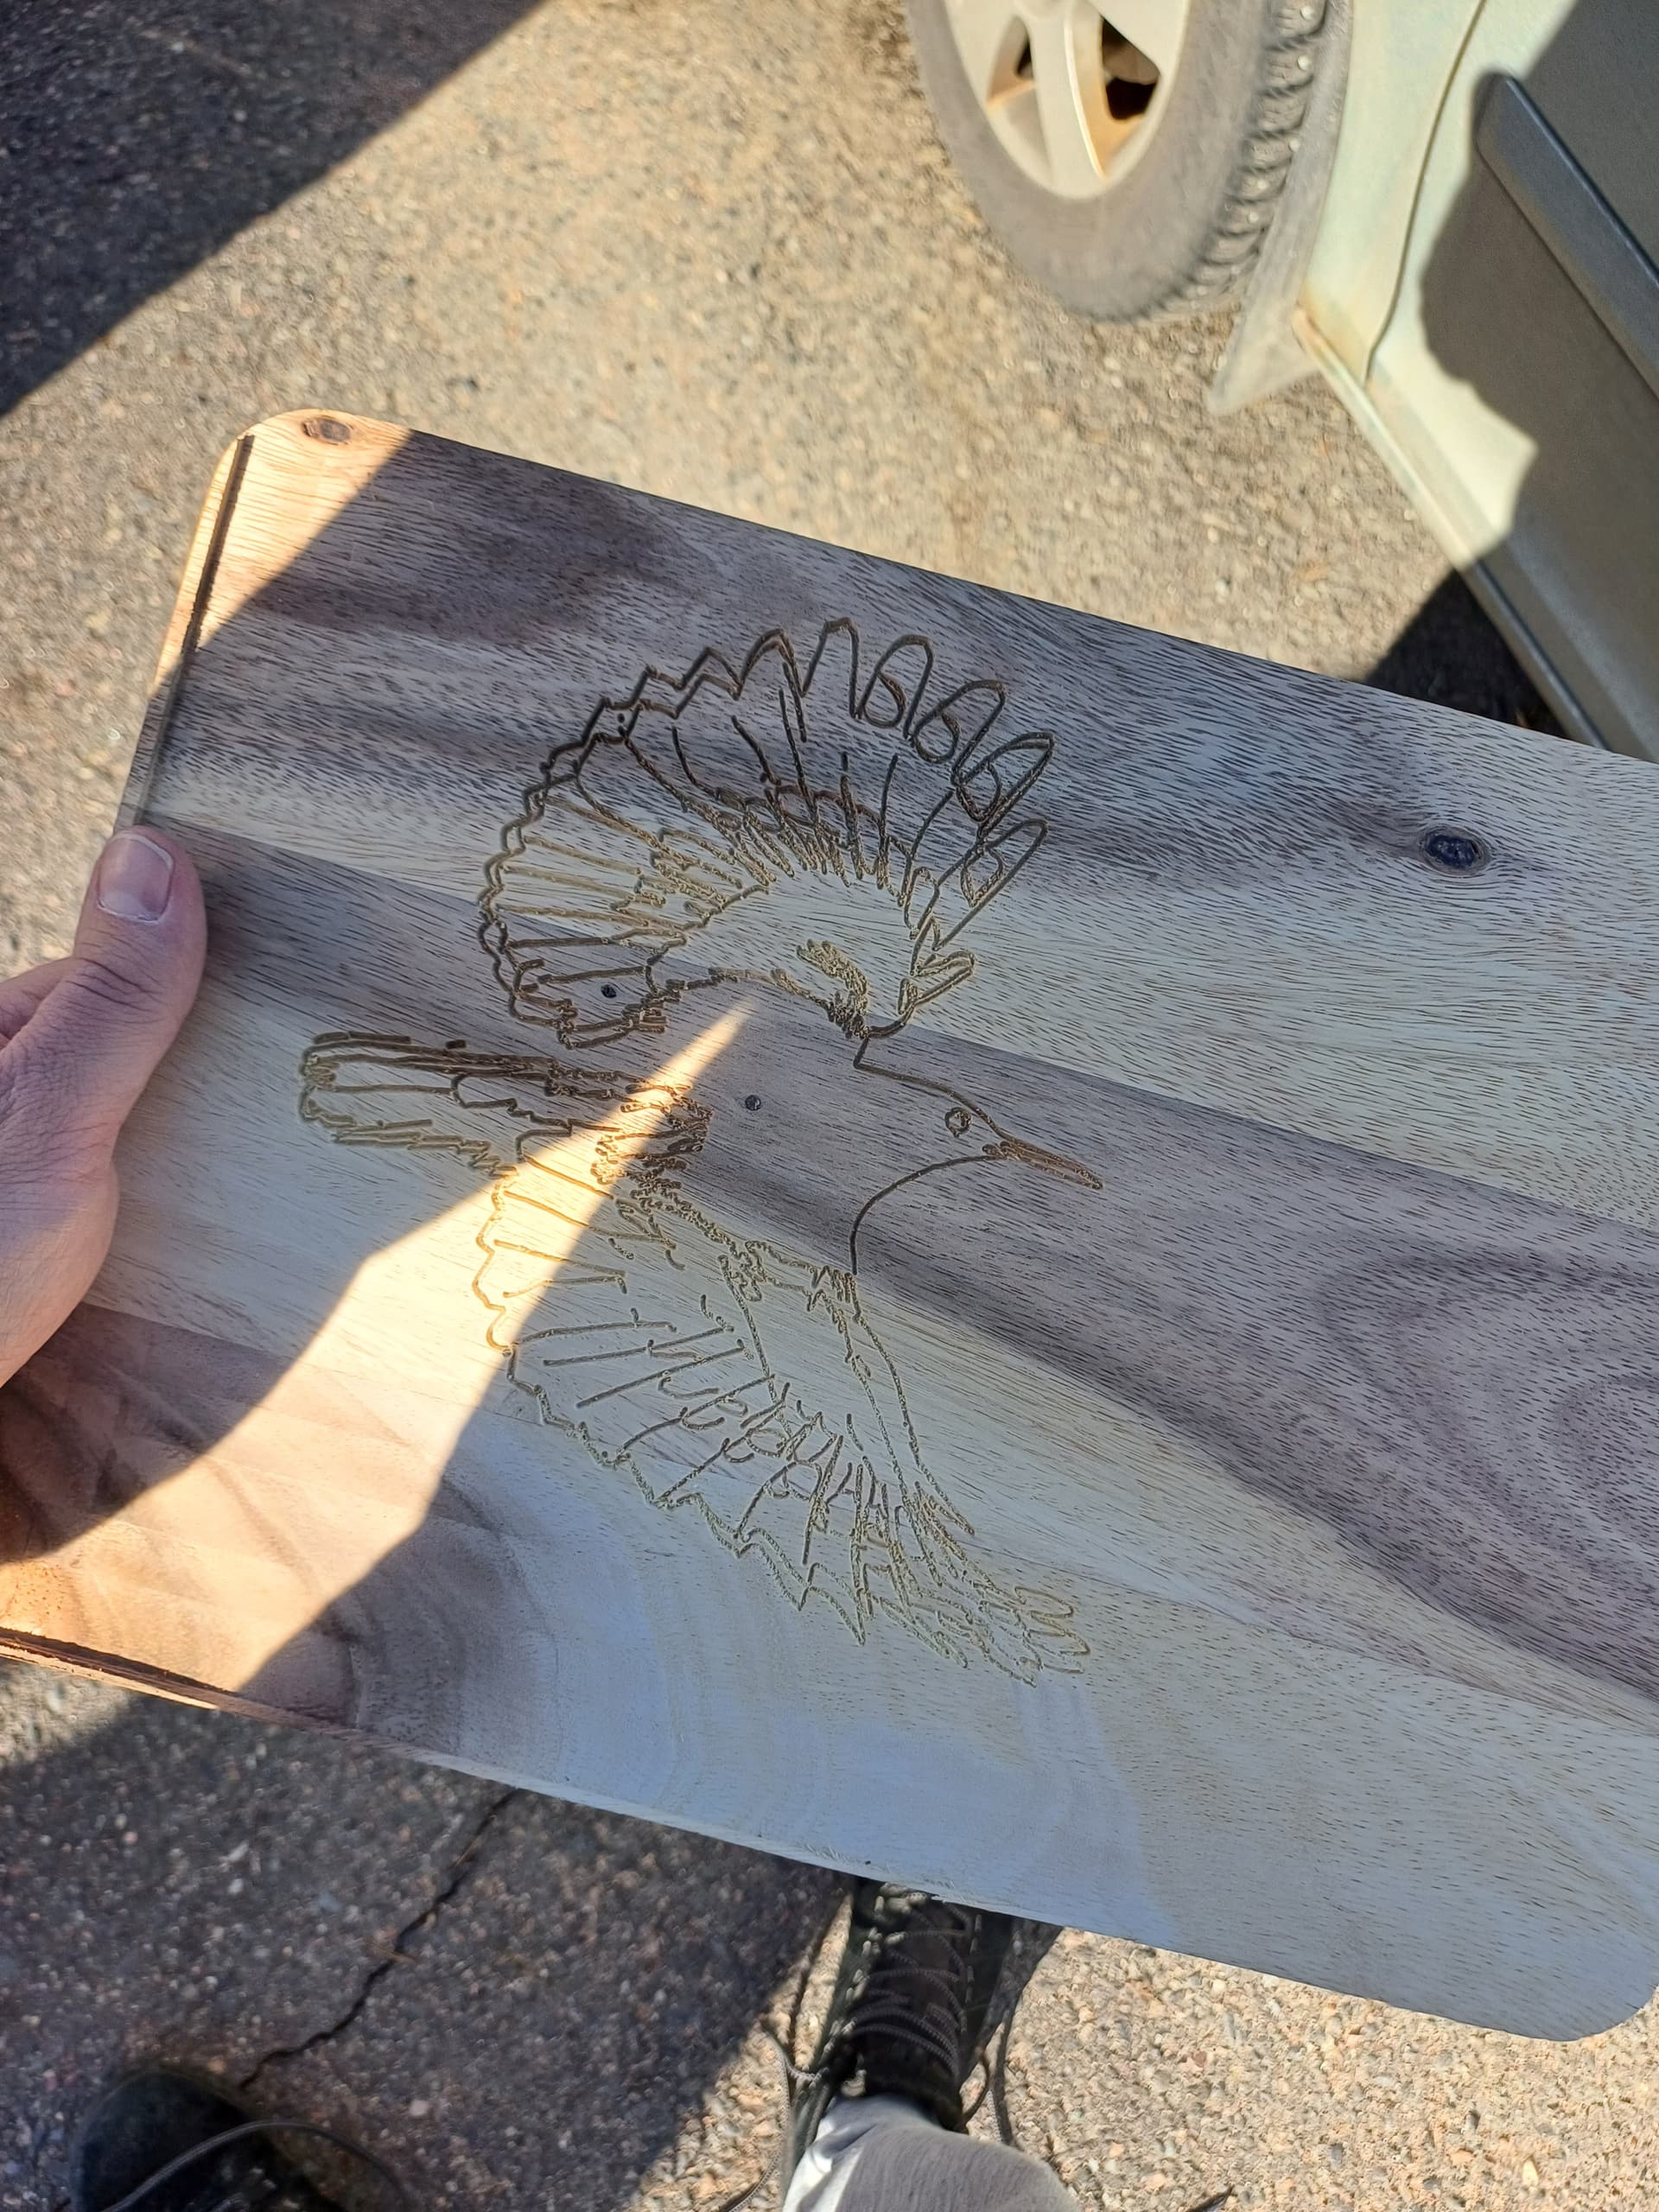
Spring at last! It’s -30 degrees in my garage in winter, so I haven’t been able to use lr3 for six months. There is a small gift for my graduated friend, an engraved acasia cutting board with lr3. More woodworking is on the way. There will also be some upgrades to the lr3 table and dust collection system. I would also like to move the control box away from the moving bar.


9 Likes
<<Re-post of Bartman's LR3 build thread - A New(bie) Adventure! - #130 by Bartman >>
Well where did those last six weeks go? Time seems to accelerate, and progress on the LR3 seems to creep along.
I ordered a few more end mills from V1E, then edited the g-code to resume the cutting where the previous effort left off. I managed to finish the cuts without breaking or welding aluminum to the new end mill, so I have no idea why the earlier one broke where it did.
The LR3 seemed to cut through the 2mm aluminum really easily. I used Trochoidal Milling for most of the cuts, and Regular Milling for the smaller text on one of the struts, and both worked great.
Feeds and Speeds:
Trochoidal: RPM 20000, DOC 2.75mm, FR 2250mm/min, Plunge 500mm/min, Plunge Angle 90, Trochoidal Stepover 7.9%, Trochoidal Width 35%, Finish 0.35mm
Regular: RPM 20000, DOC 2.75mm, FR 475mm/min, Plunge 475mm/min, Plunge Angle 90, Finish 0.35mm
Some video highlights of the non-trochoidal cut:

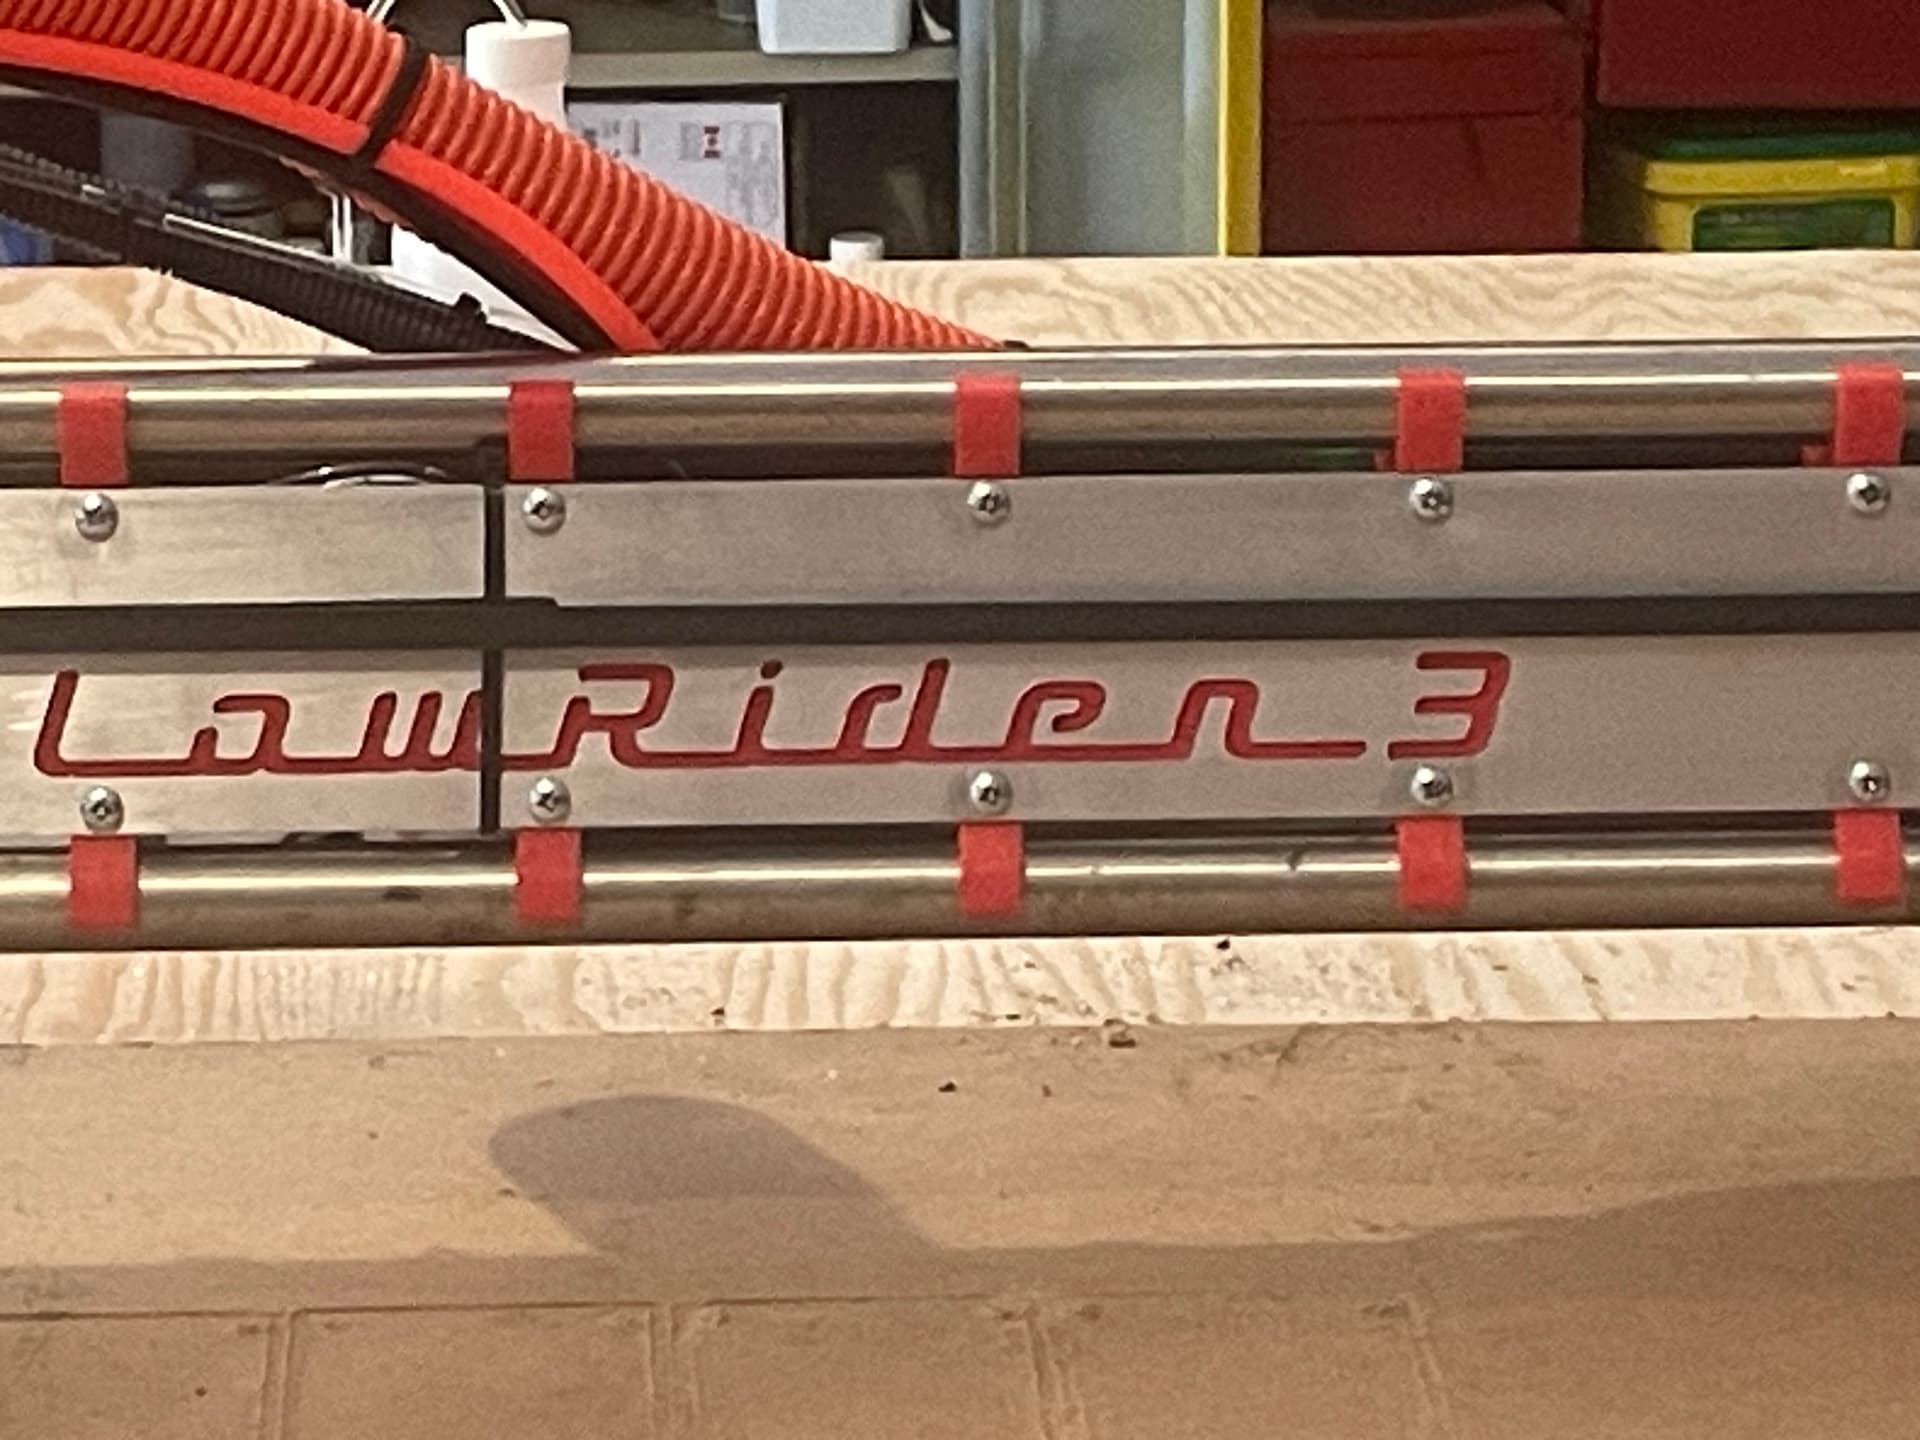
The 2mm aluminum seemed a little thin, and still had a bit of flex when cut to the 80mm width of the strut. So I cut a total of 6 struts, and doubled them up . Two of the struts had the Lowrider 3 logo cut out for the top layer of the front and back struts:

(The top two aren’t as shiny because I cleaned the others with IPA and a ScotchBrite before taking this picture, but hadn’t done the last two yet)
I painted the lower strut and then laid the upper strut on top, for a very nice contrast (at least IMO).


Next up is cutting of aluminum XZ plates (6mm) and YZ plates (9mm). Stay tuned…
11 Likes
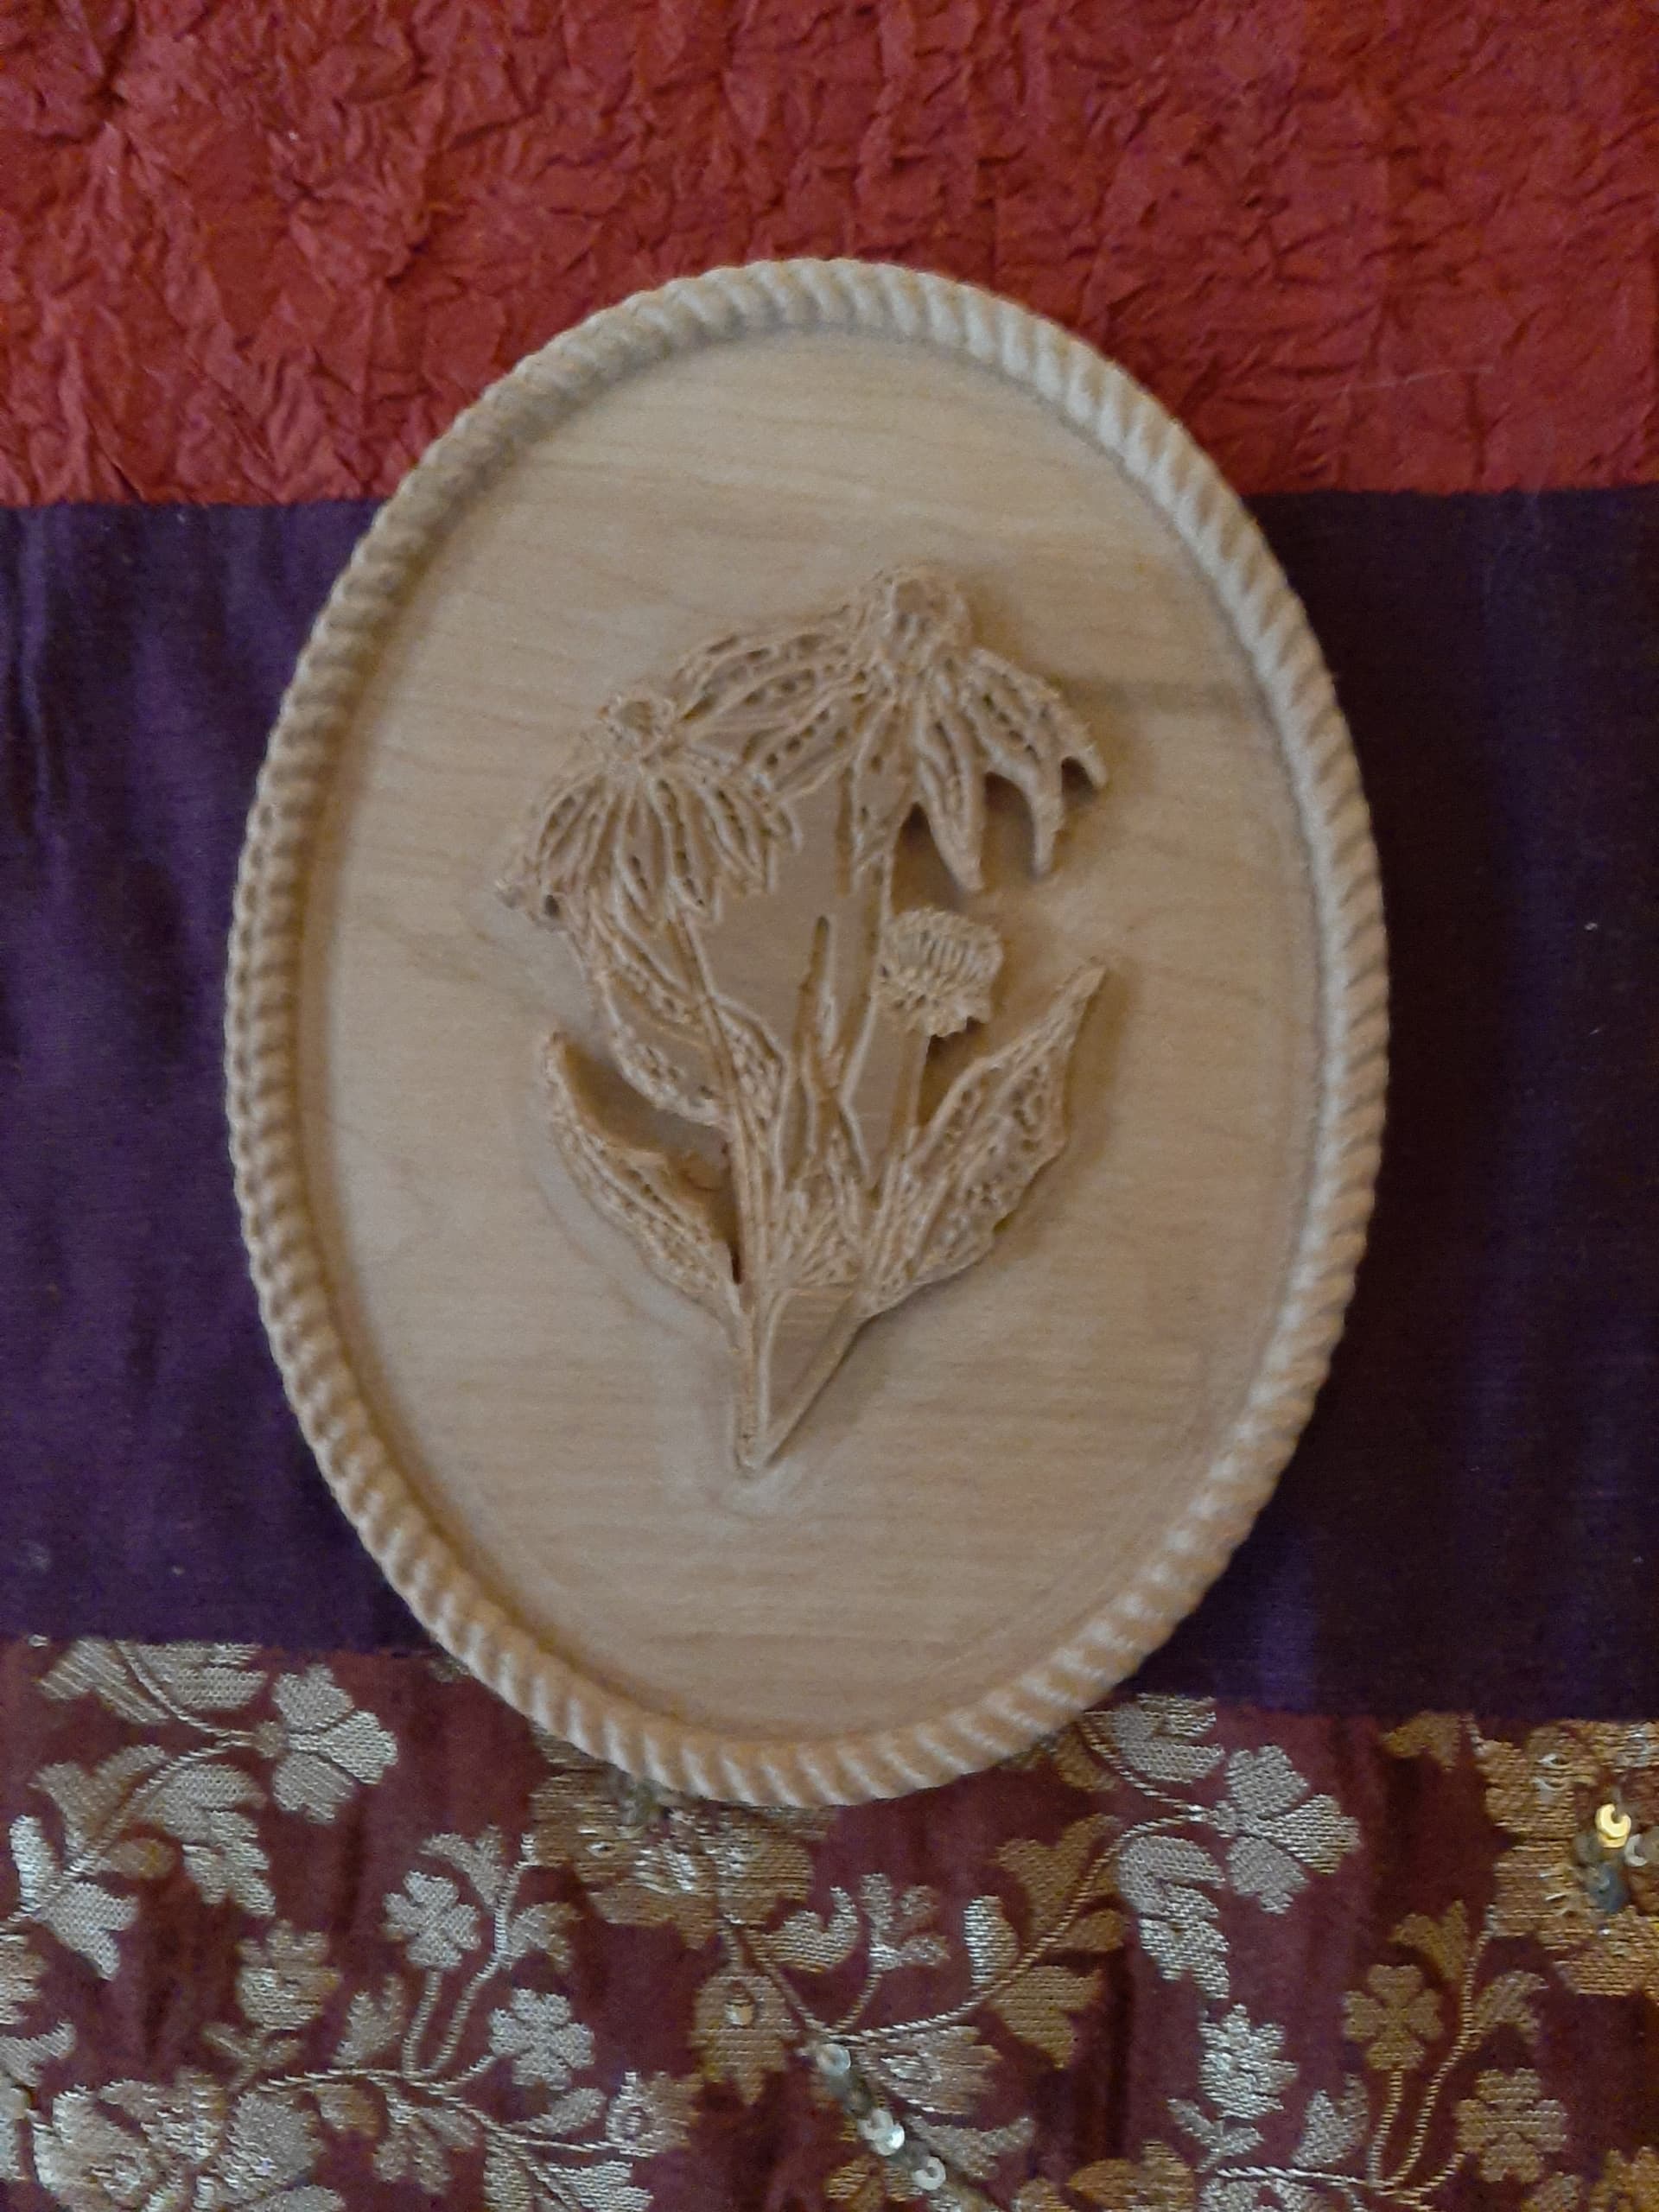
This is a laser engraving project using my first MPCNC, the Burley. It was converted to use the laser (A 5W Sculpfun diode laser) when I built the Primo.
This particular item is a simple name tag for our siberian husky, Makita. It is engraved onto a tag that is anodized aluminum. This process takes less than 2 minutes per side.
Here’s a link to the short video of all the action (including the actual product at the very end):

5 Likes
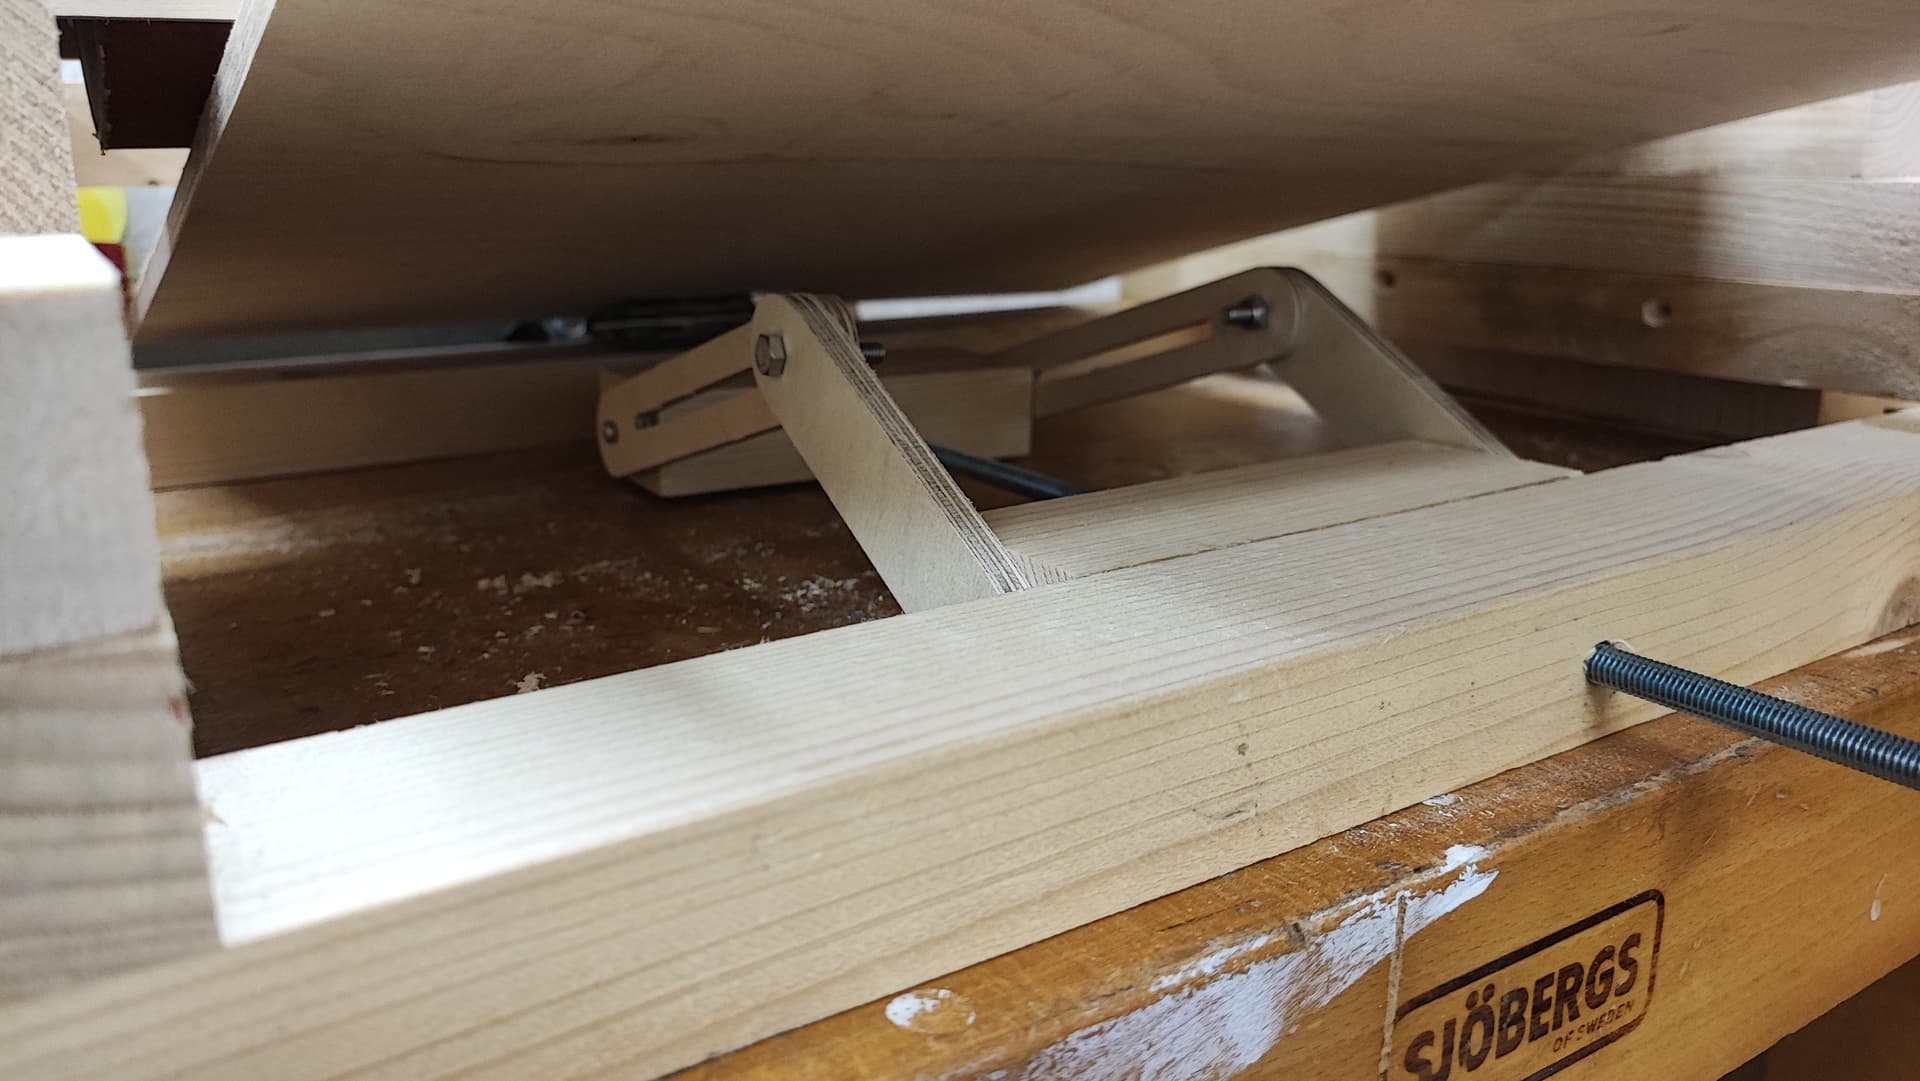
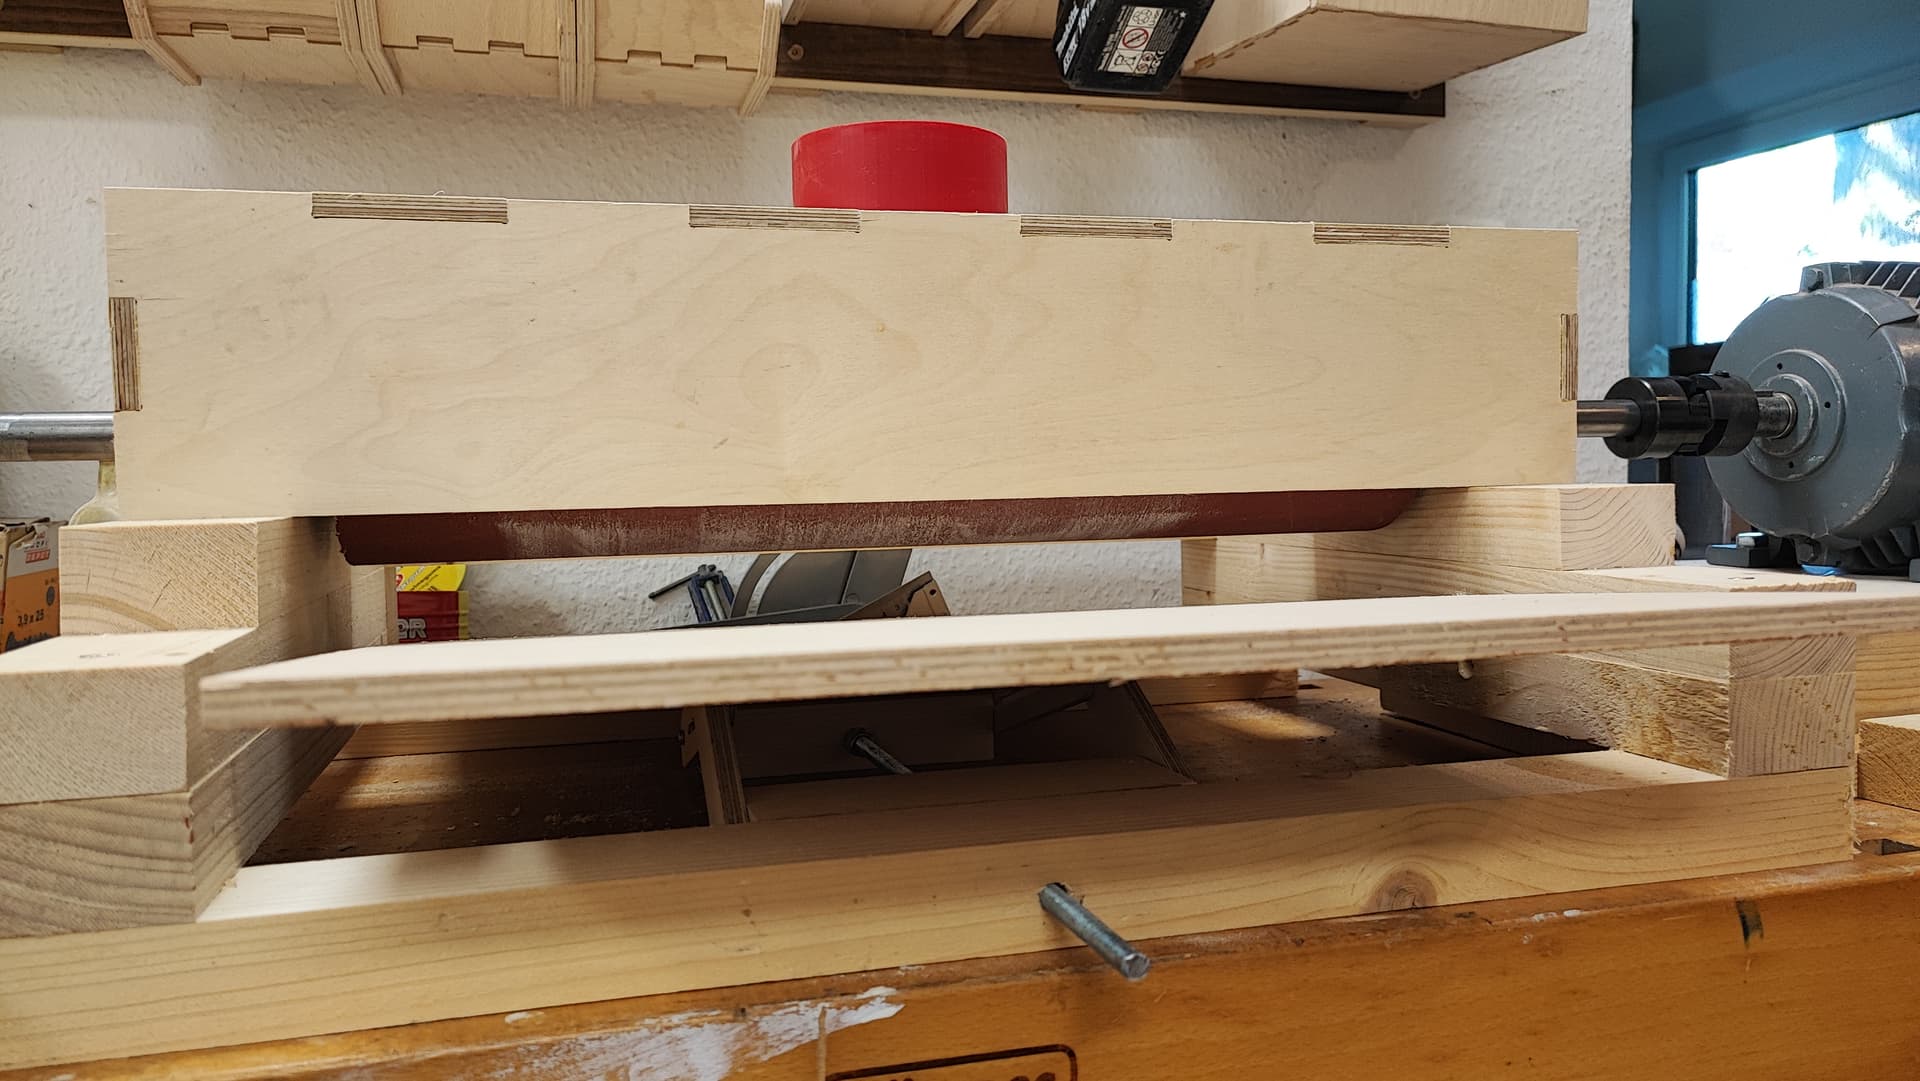
Built a drum sander. The dust hood and the riser for the board (first prototype that’s now going to be used for several years) and the circles inside the drum were made with the LowRider. Needs a thicker board later on.

15 Likes
8 Likes

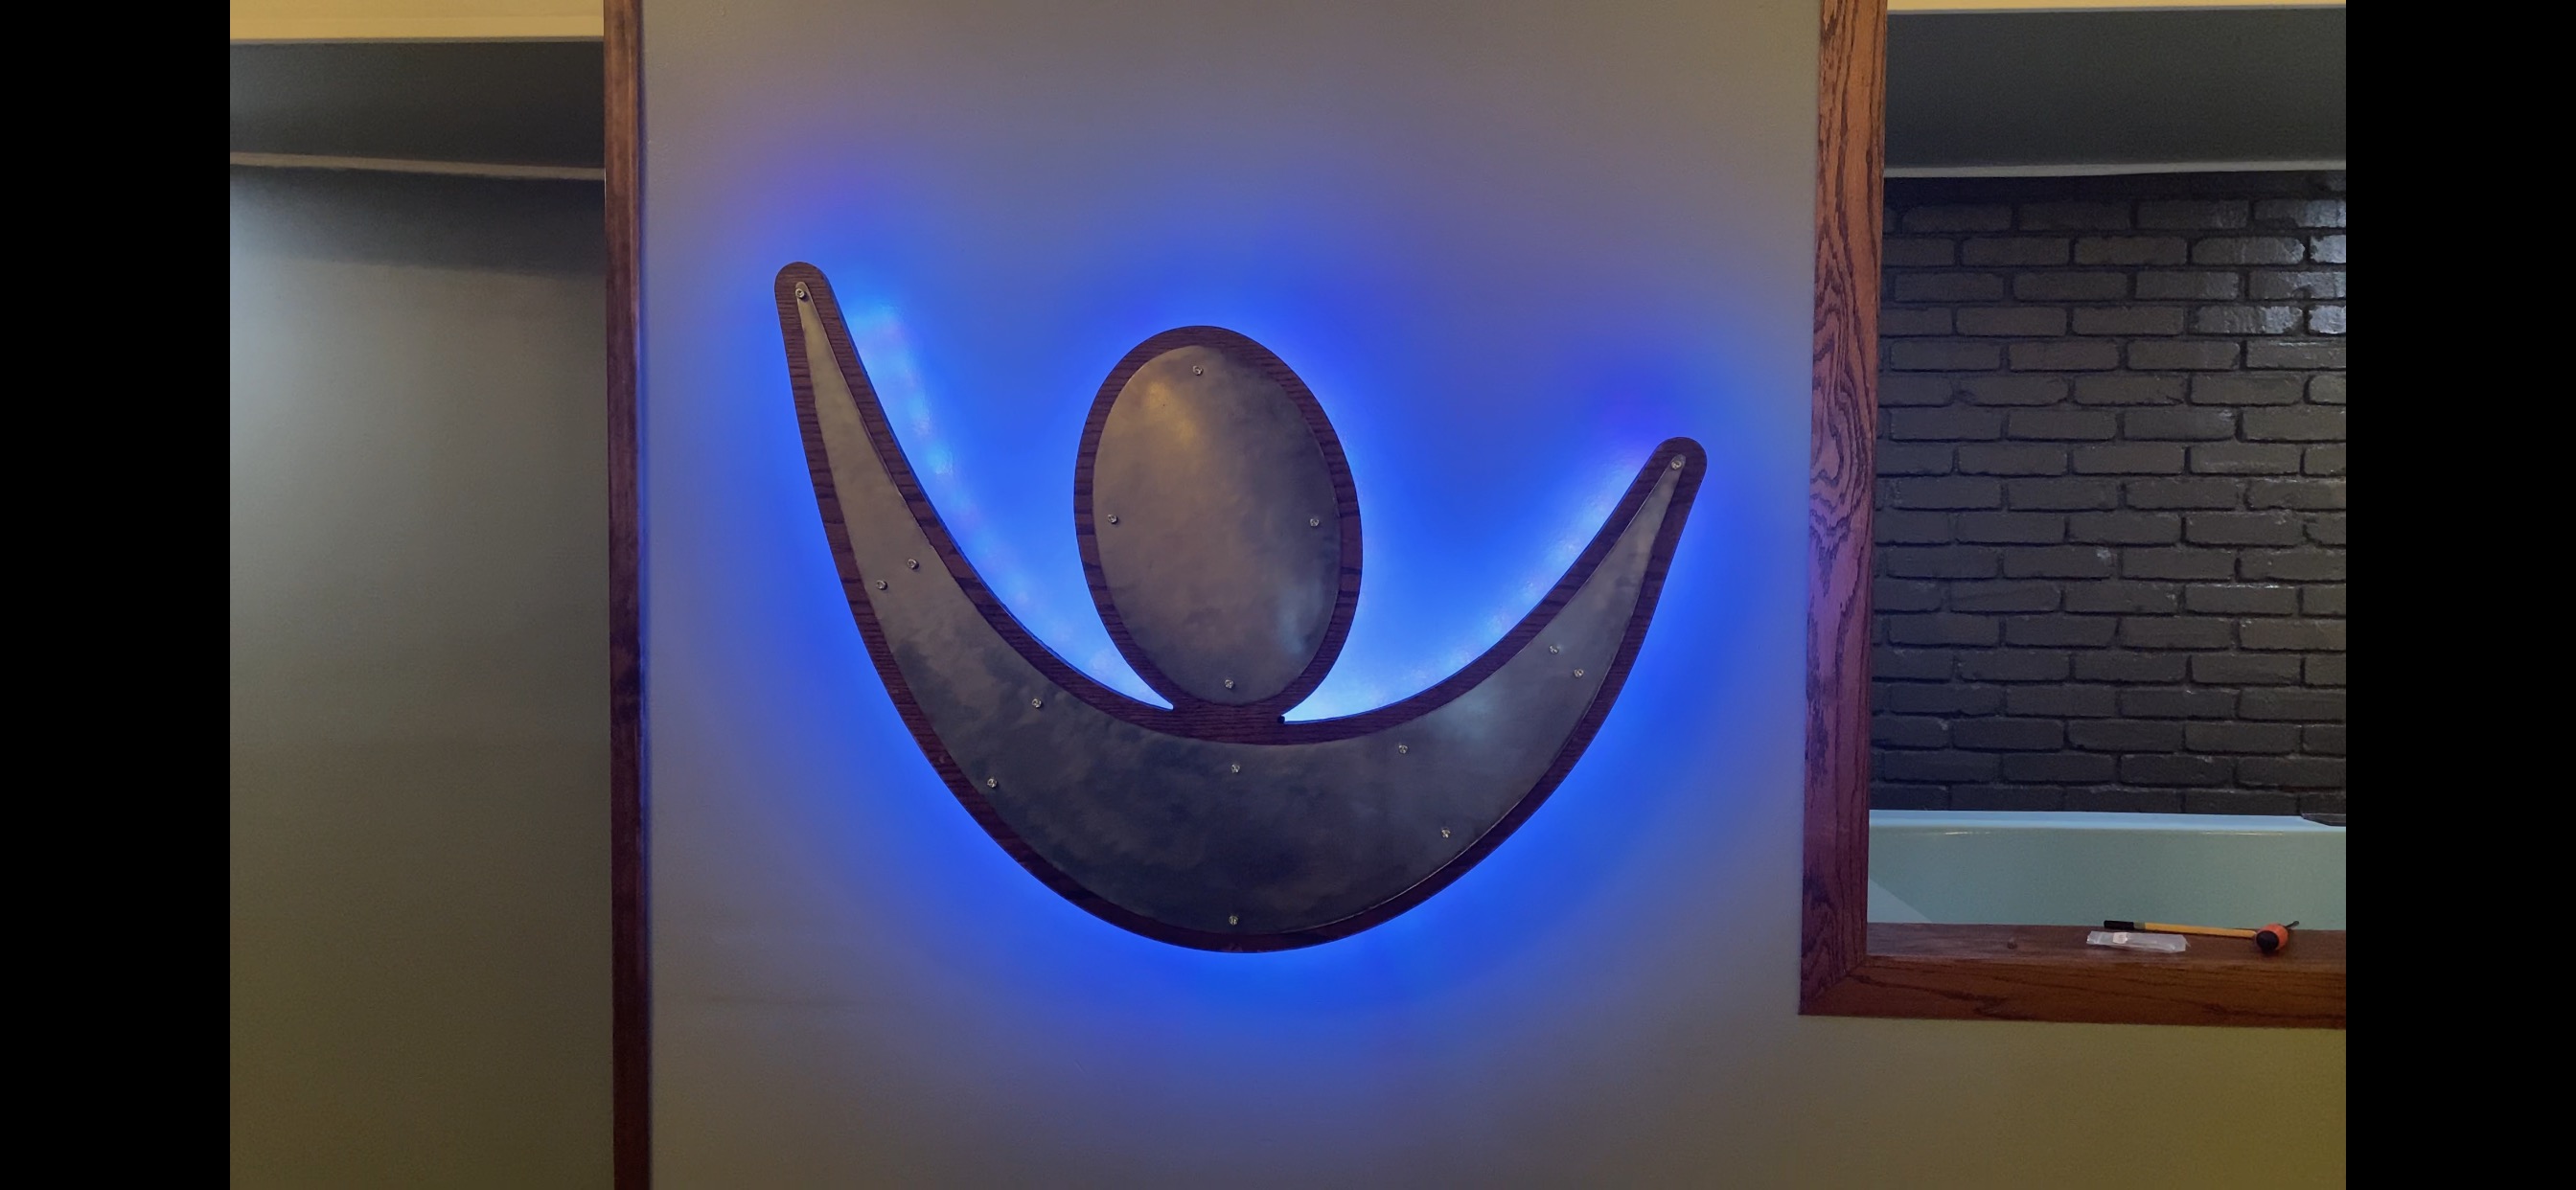
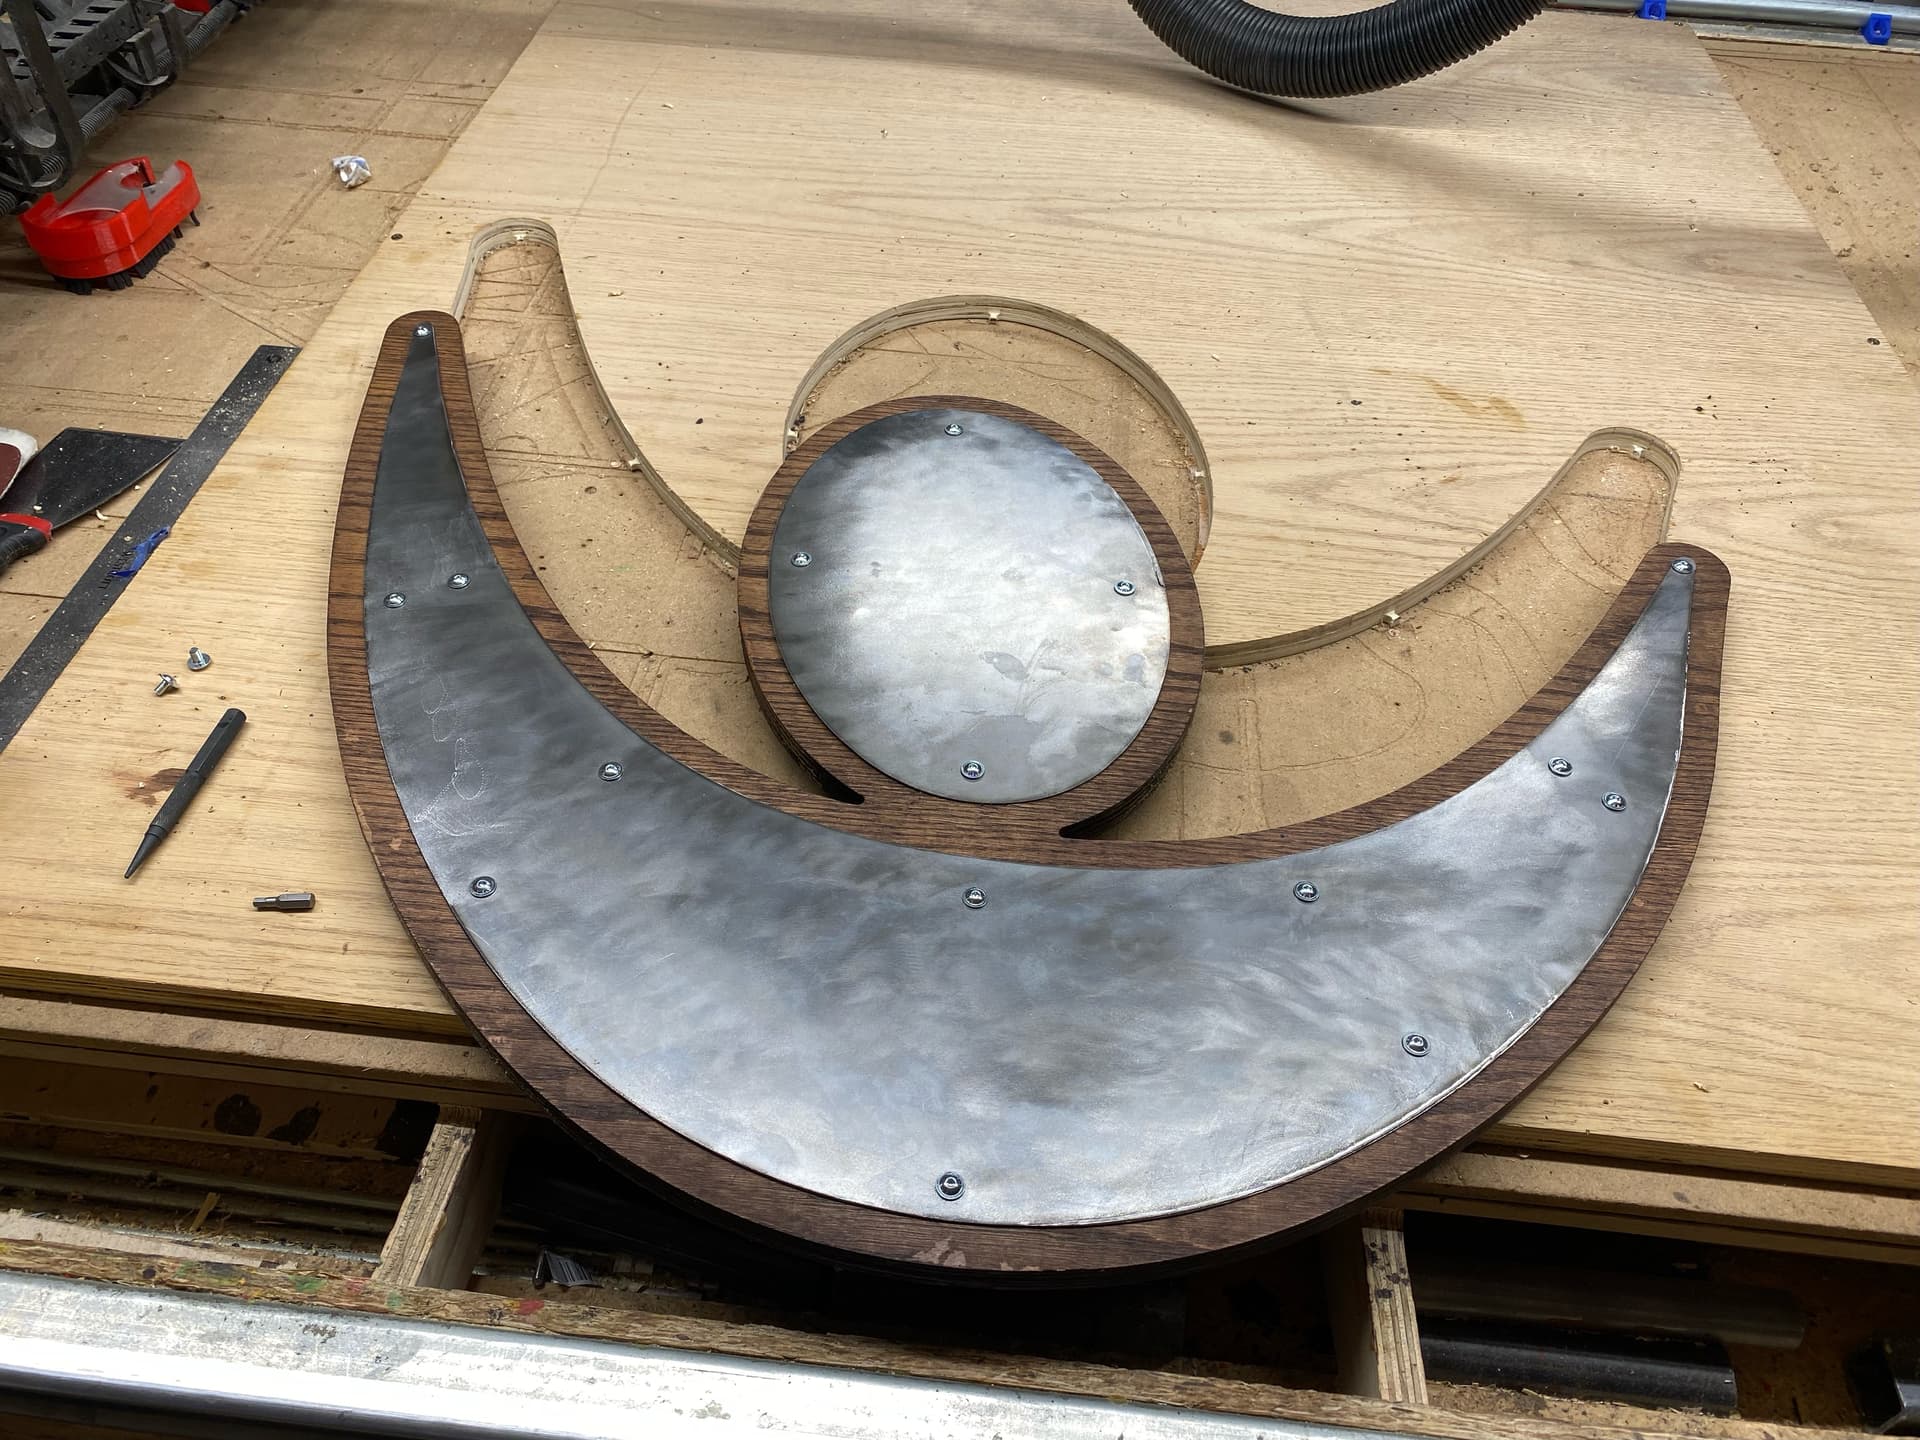
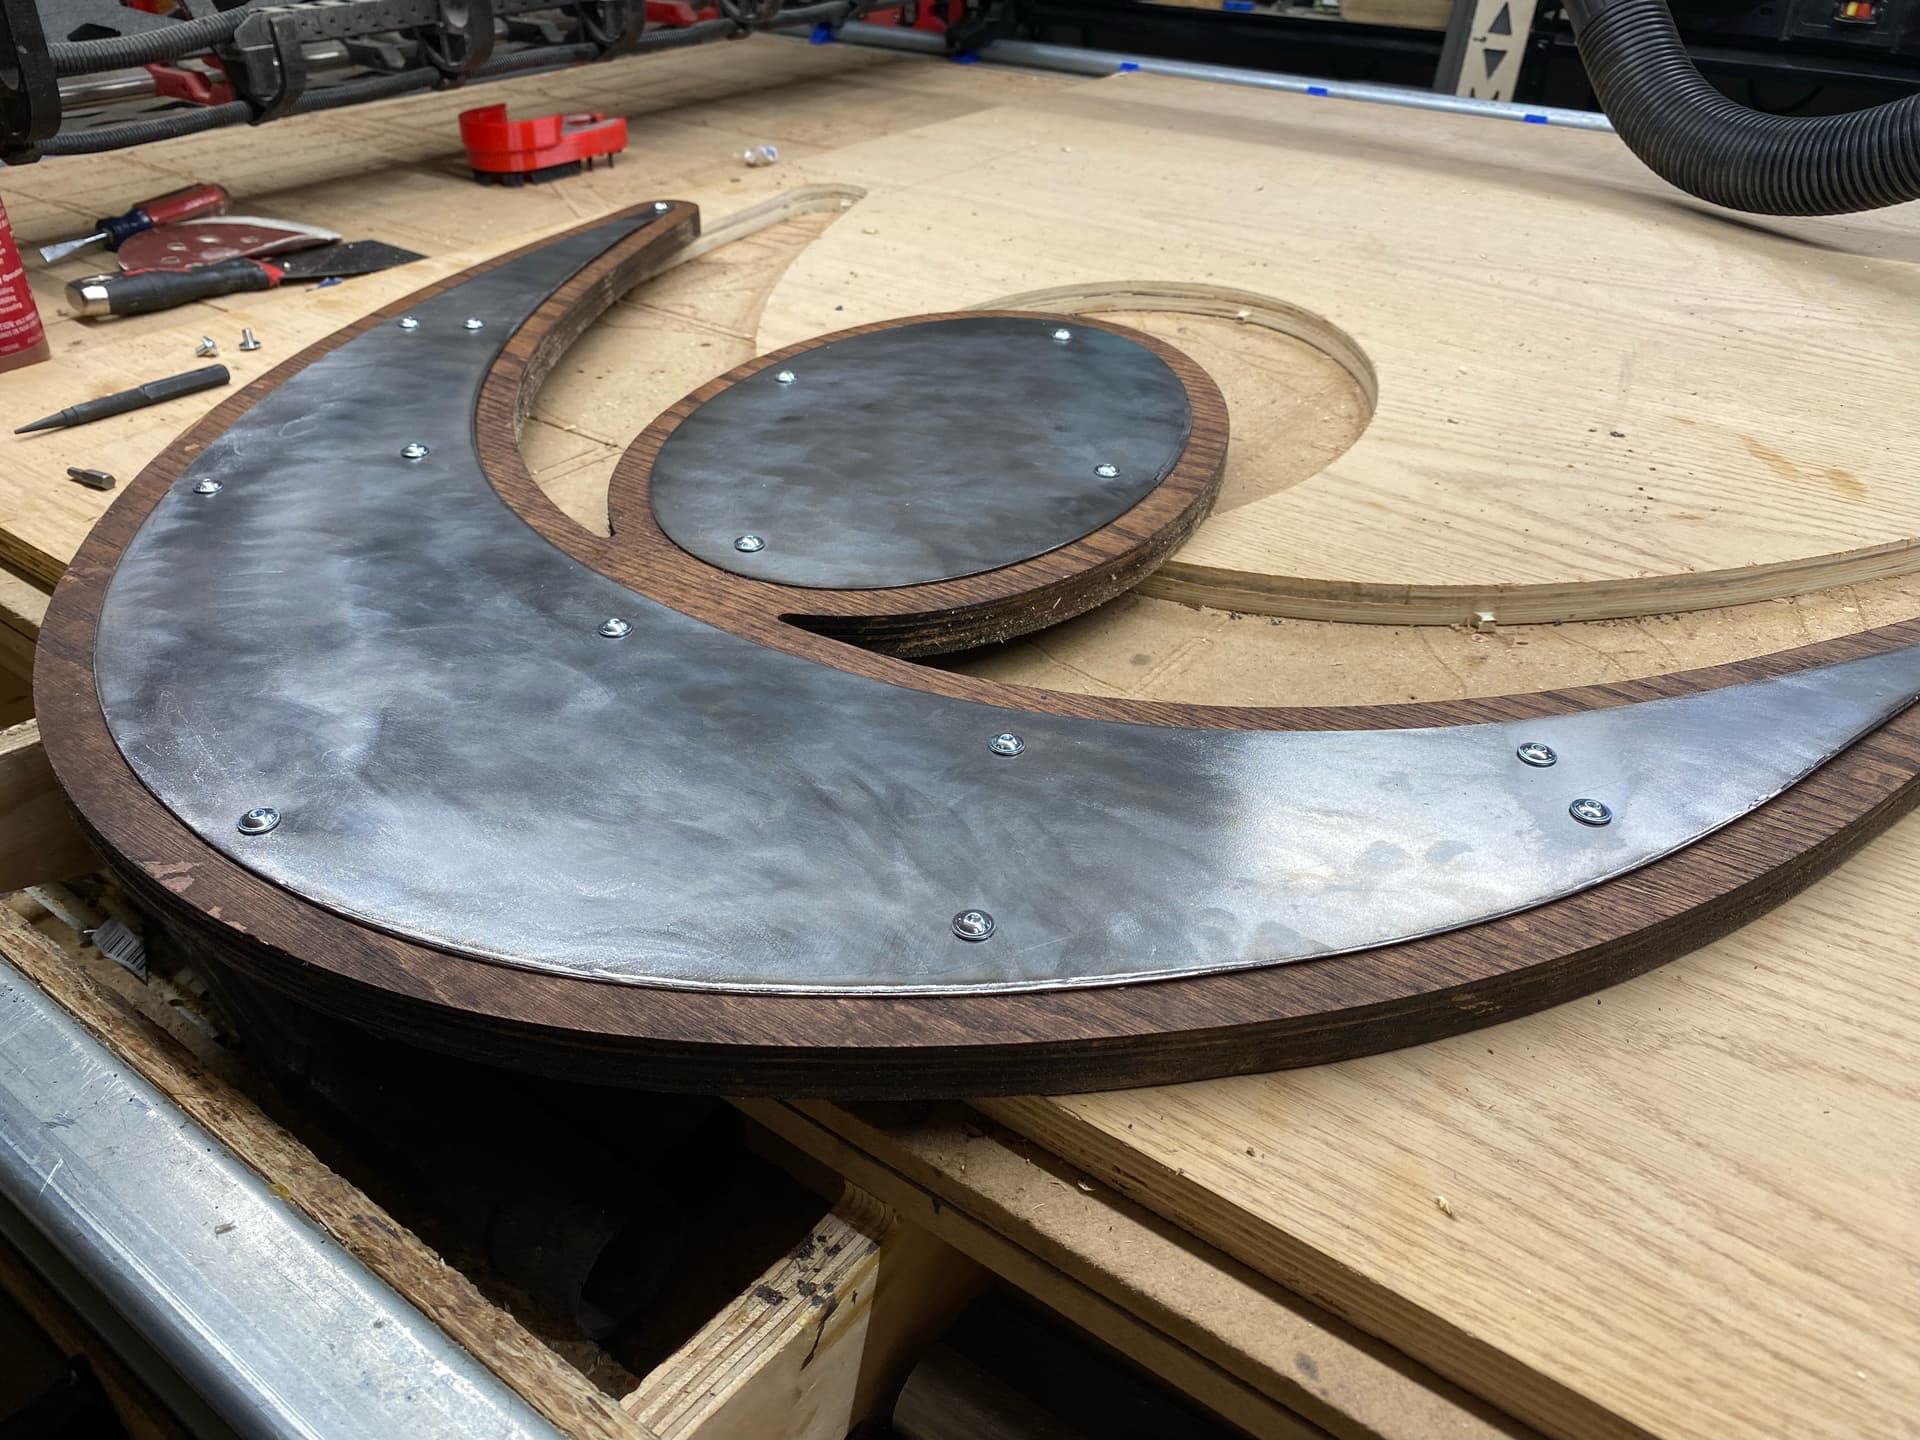
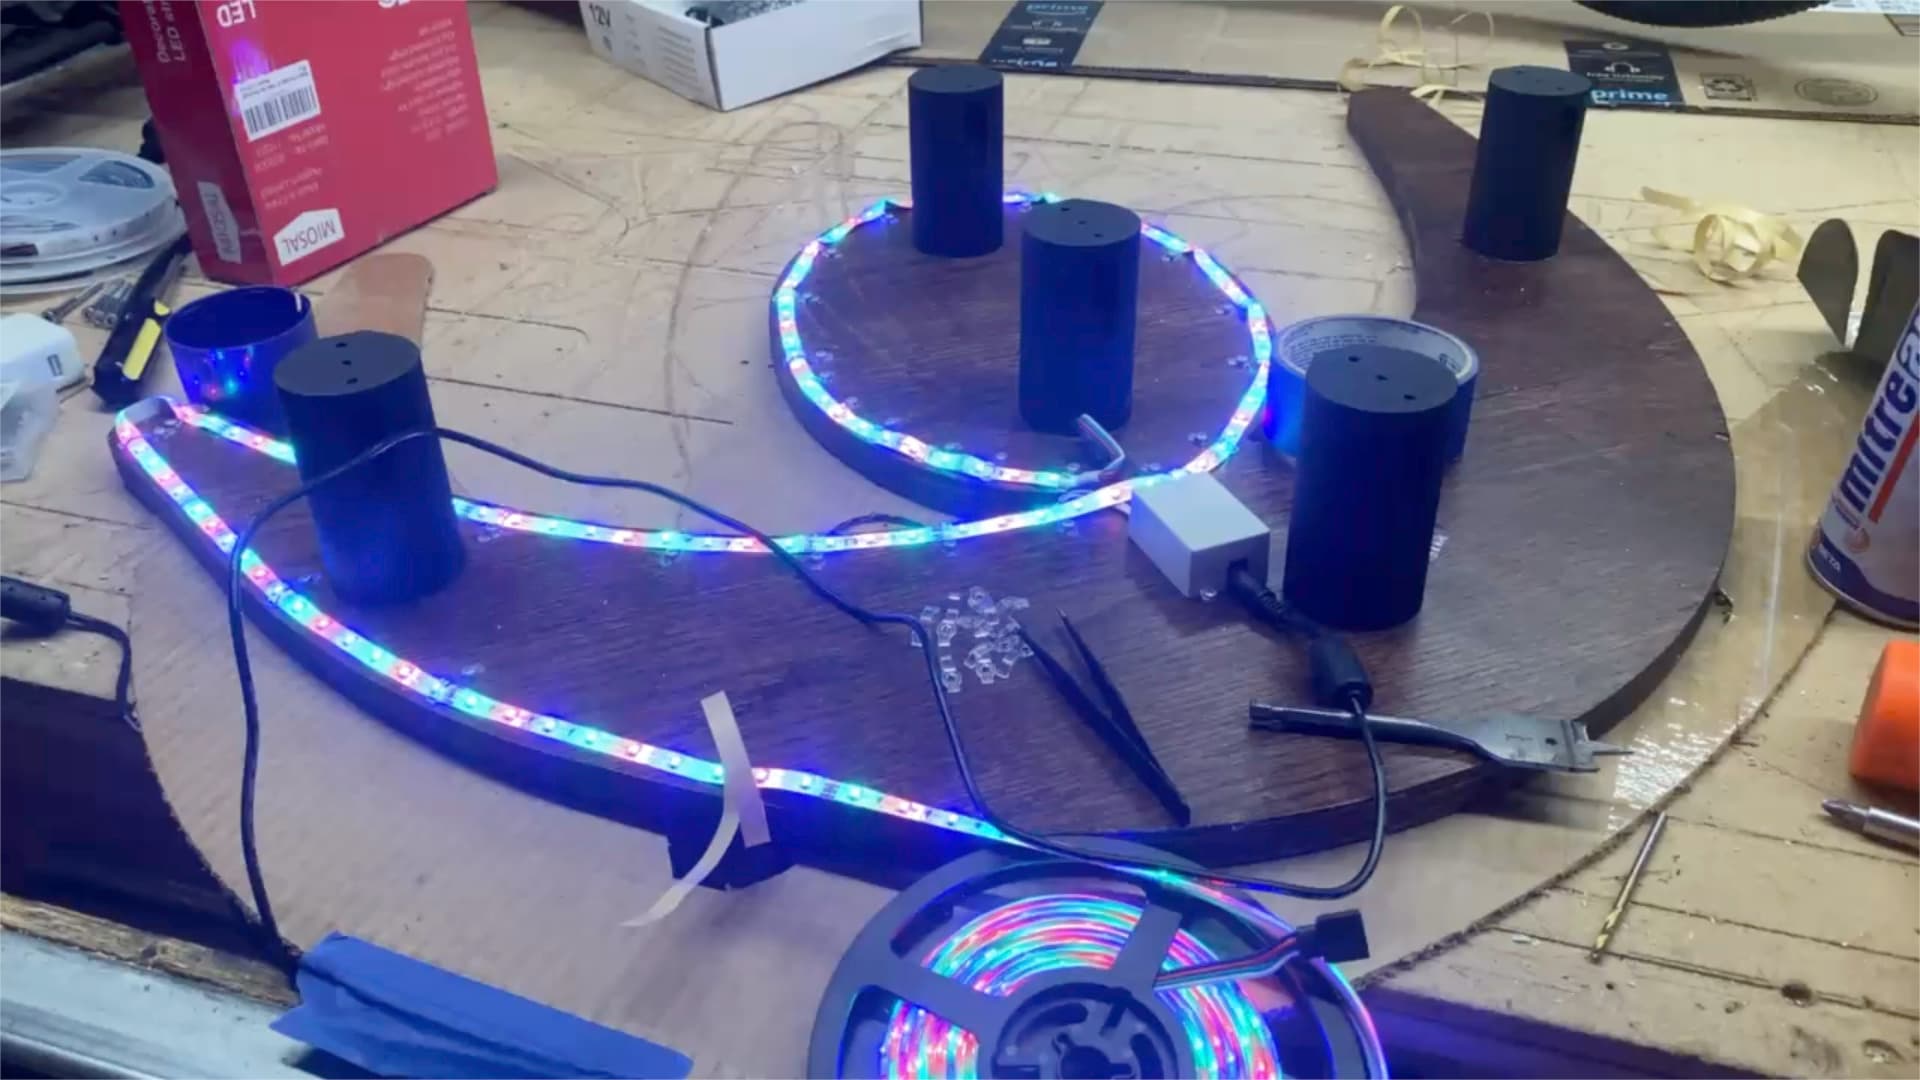
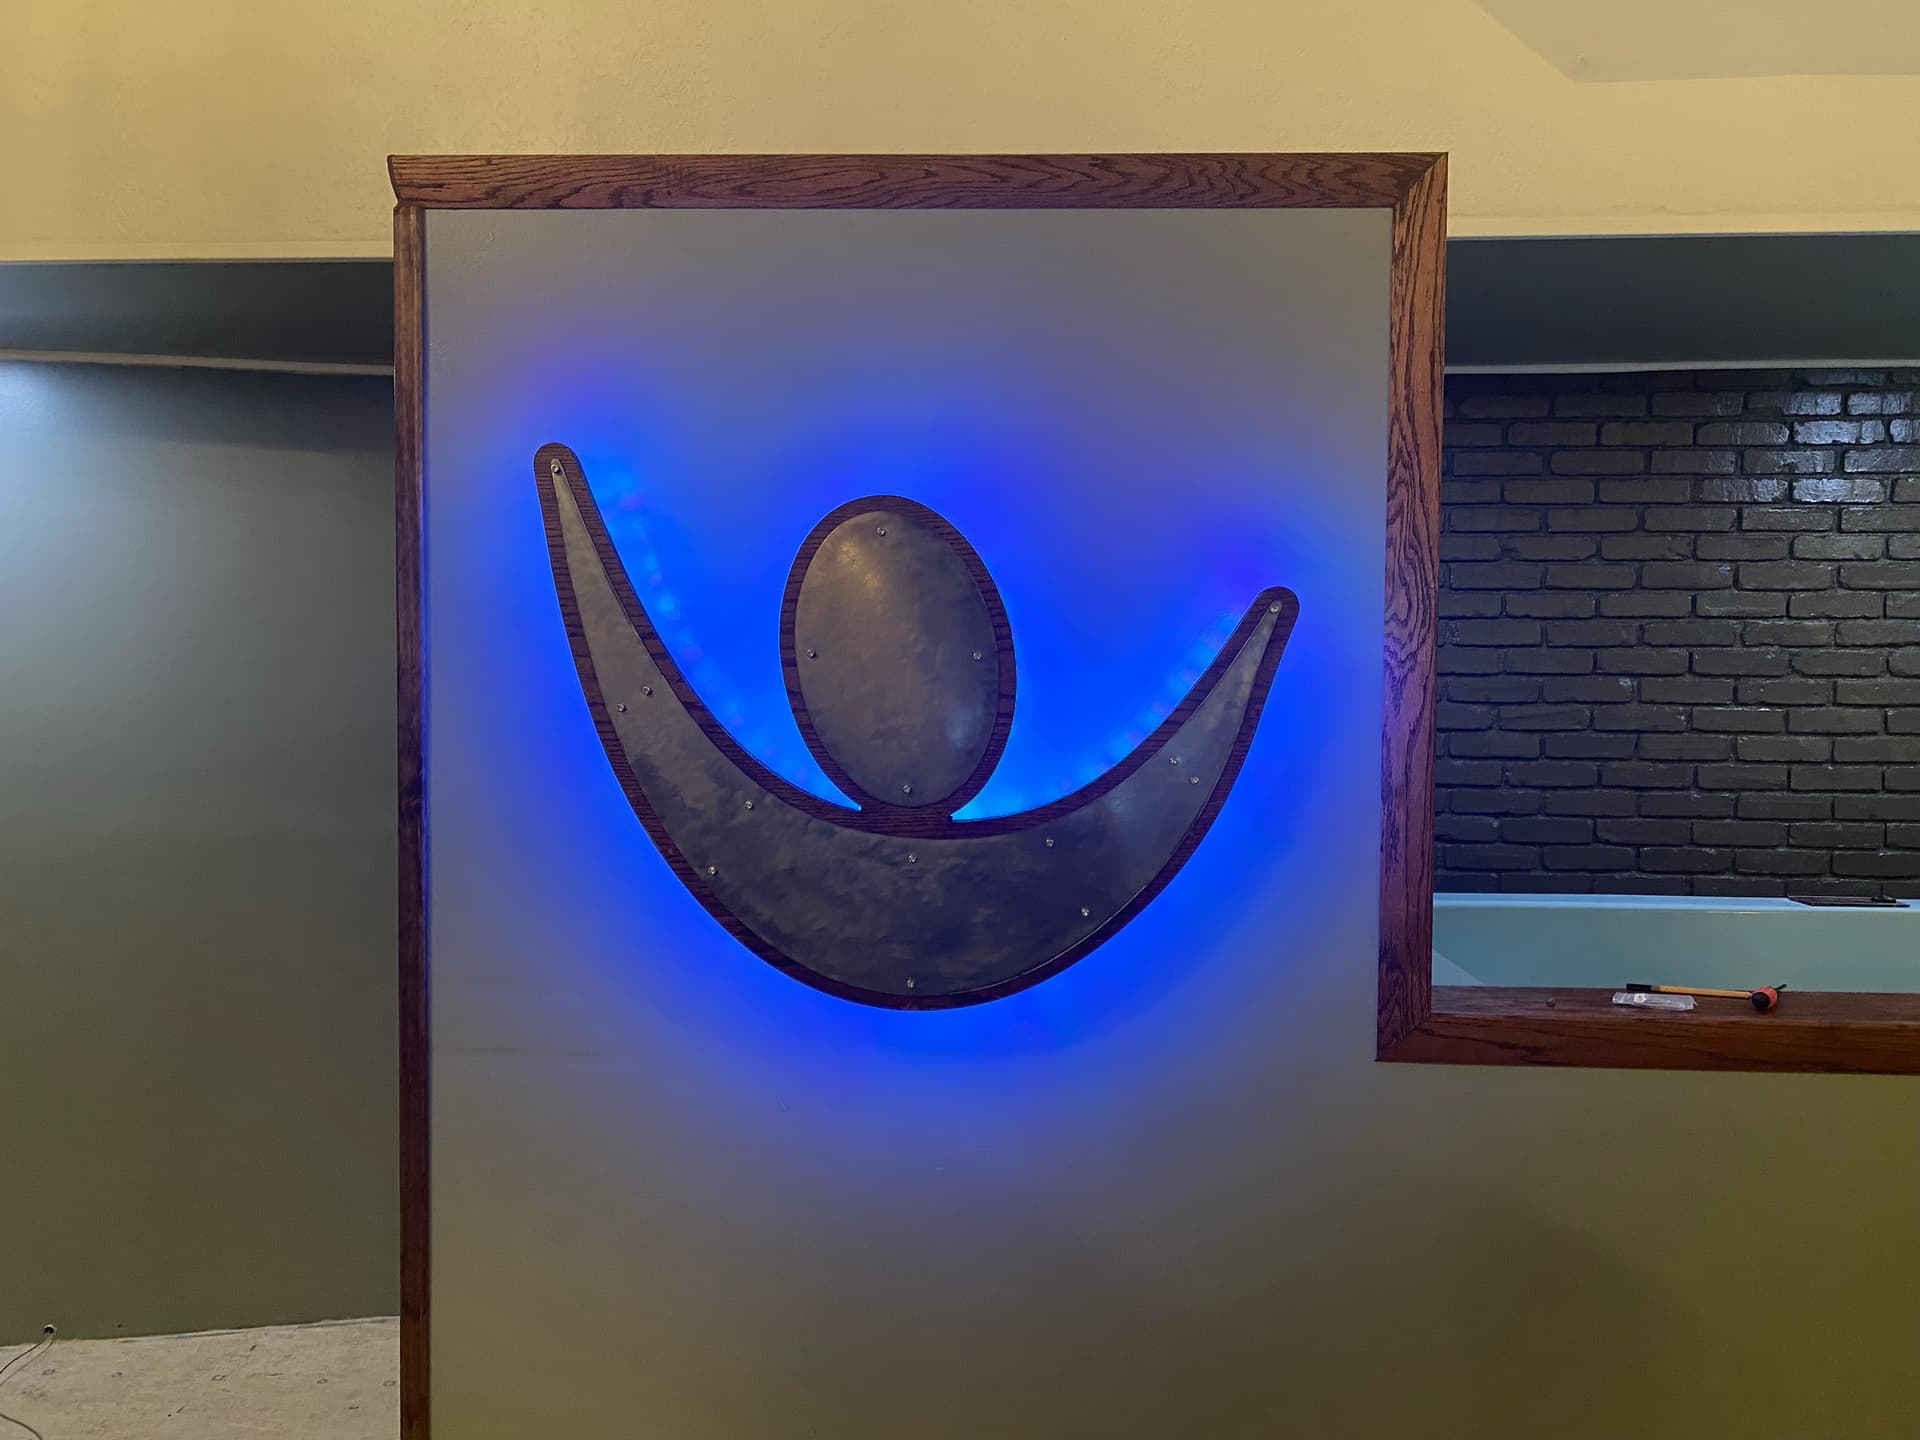
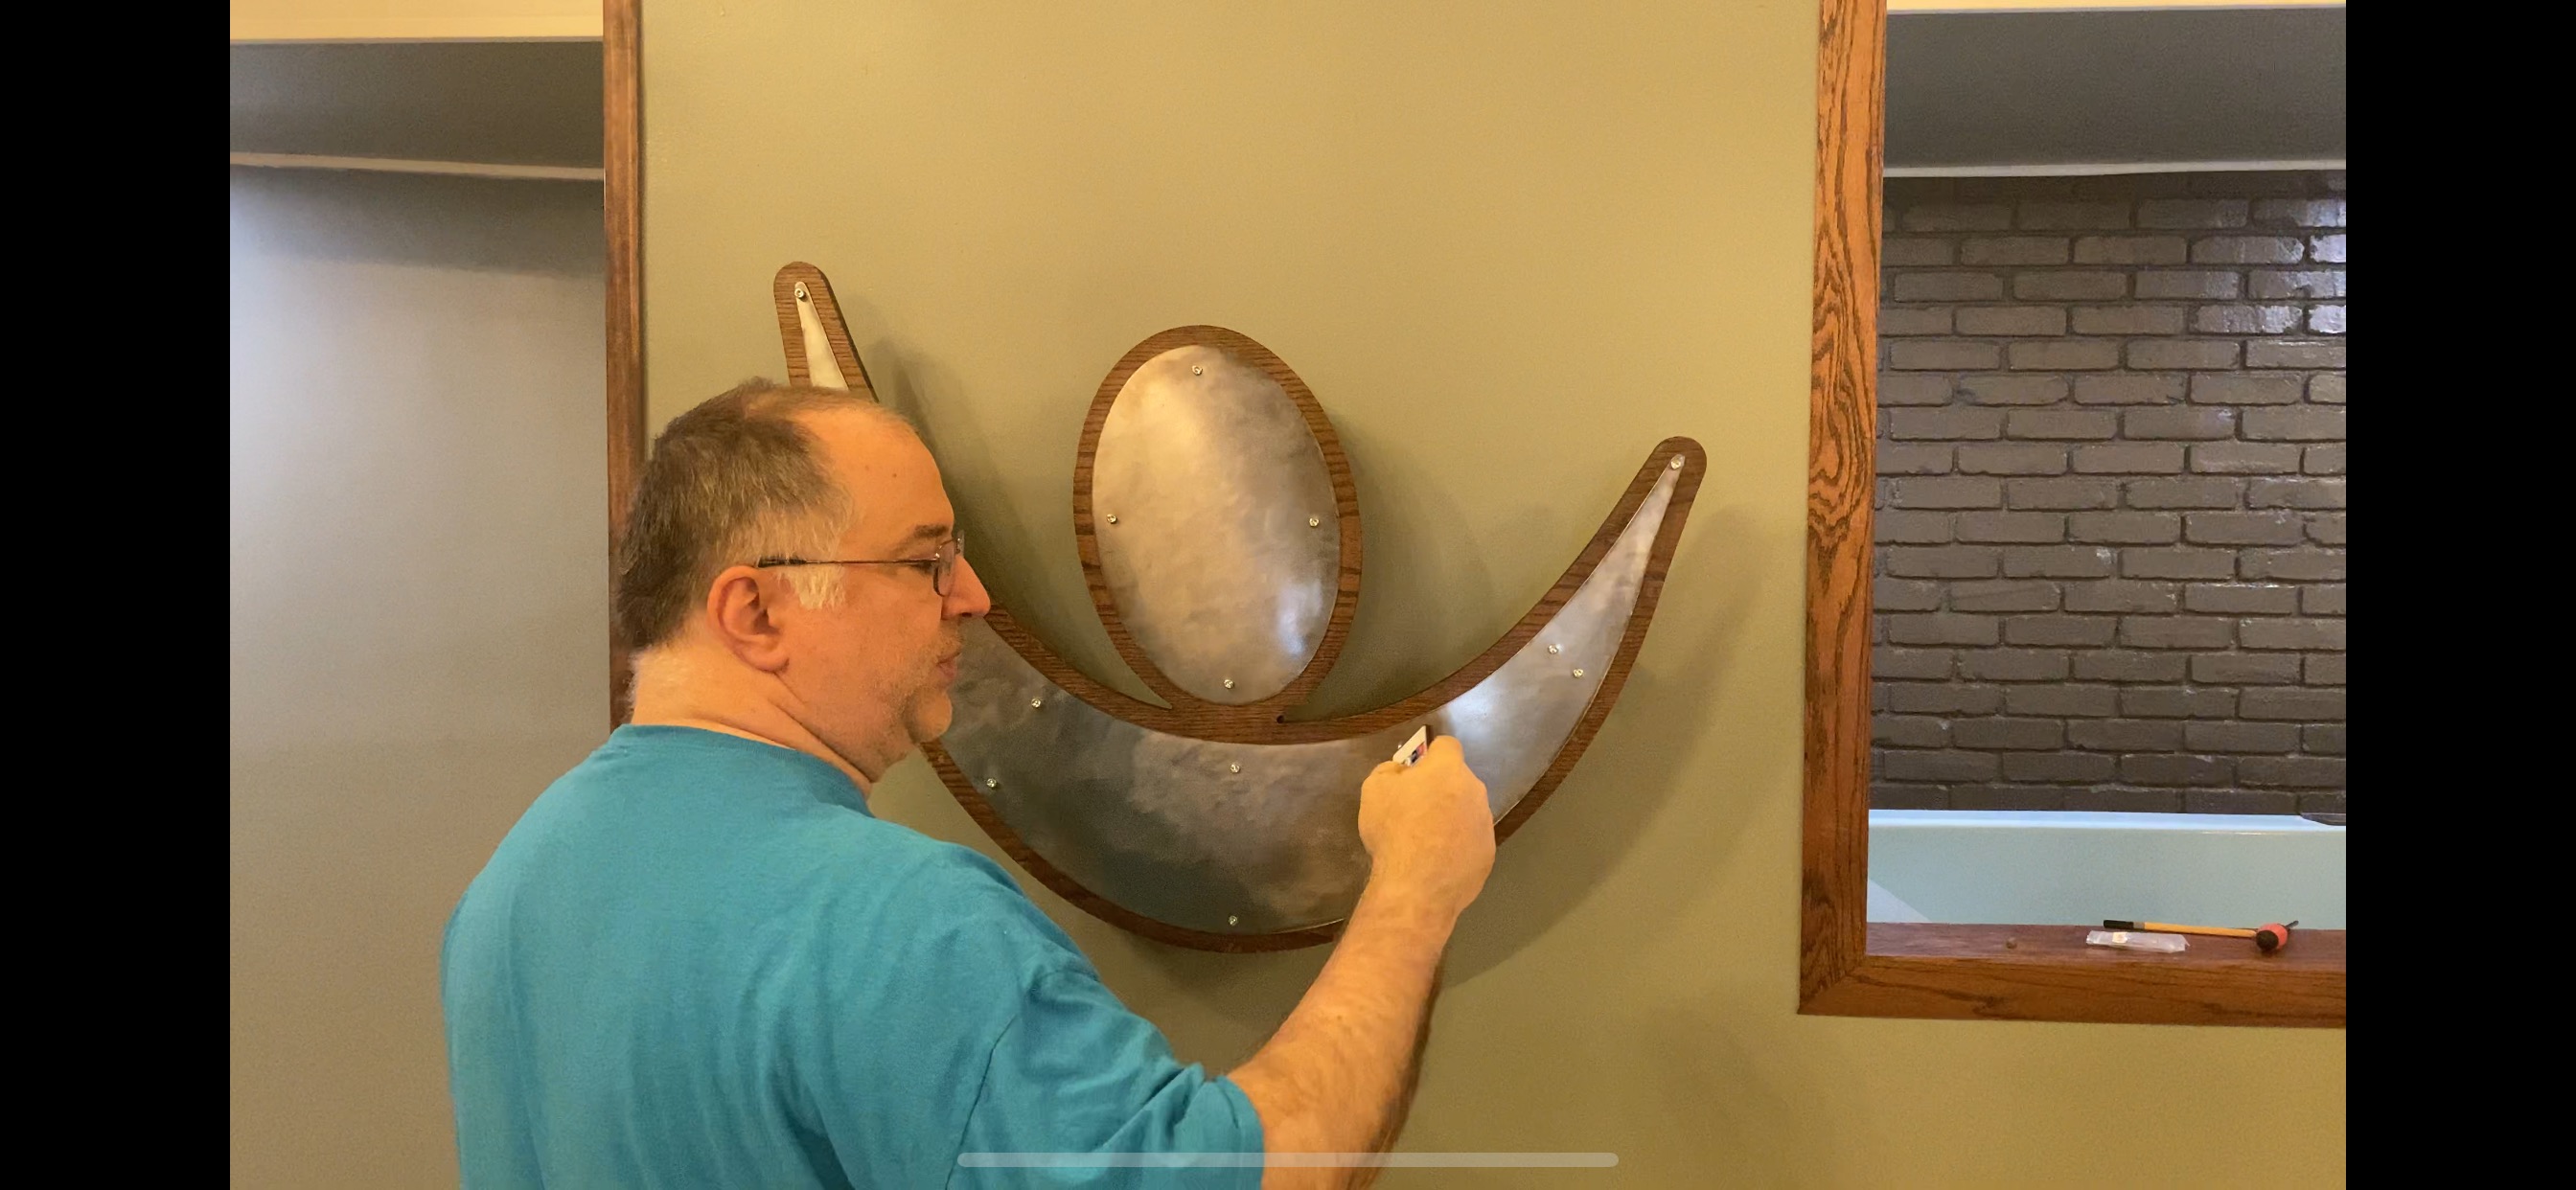
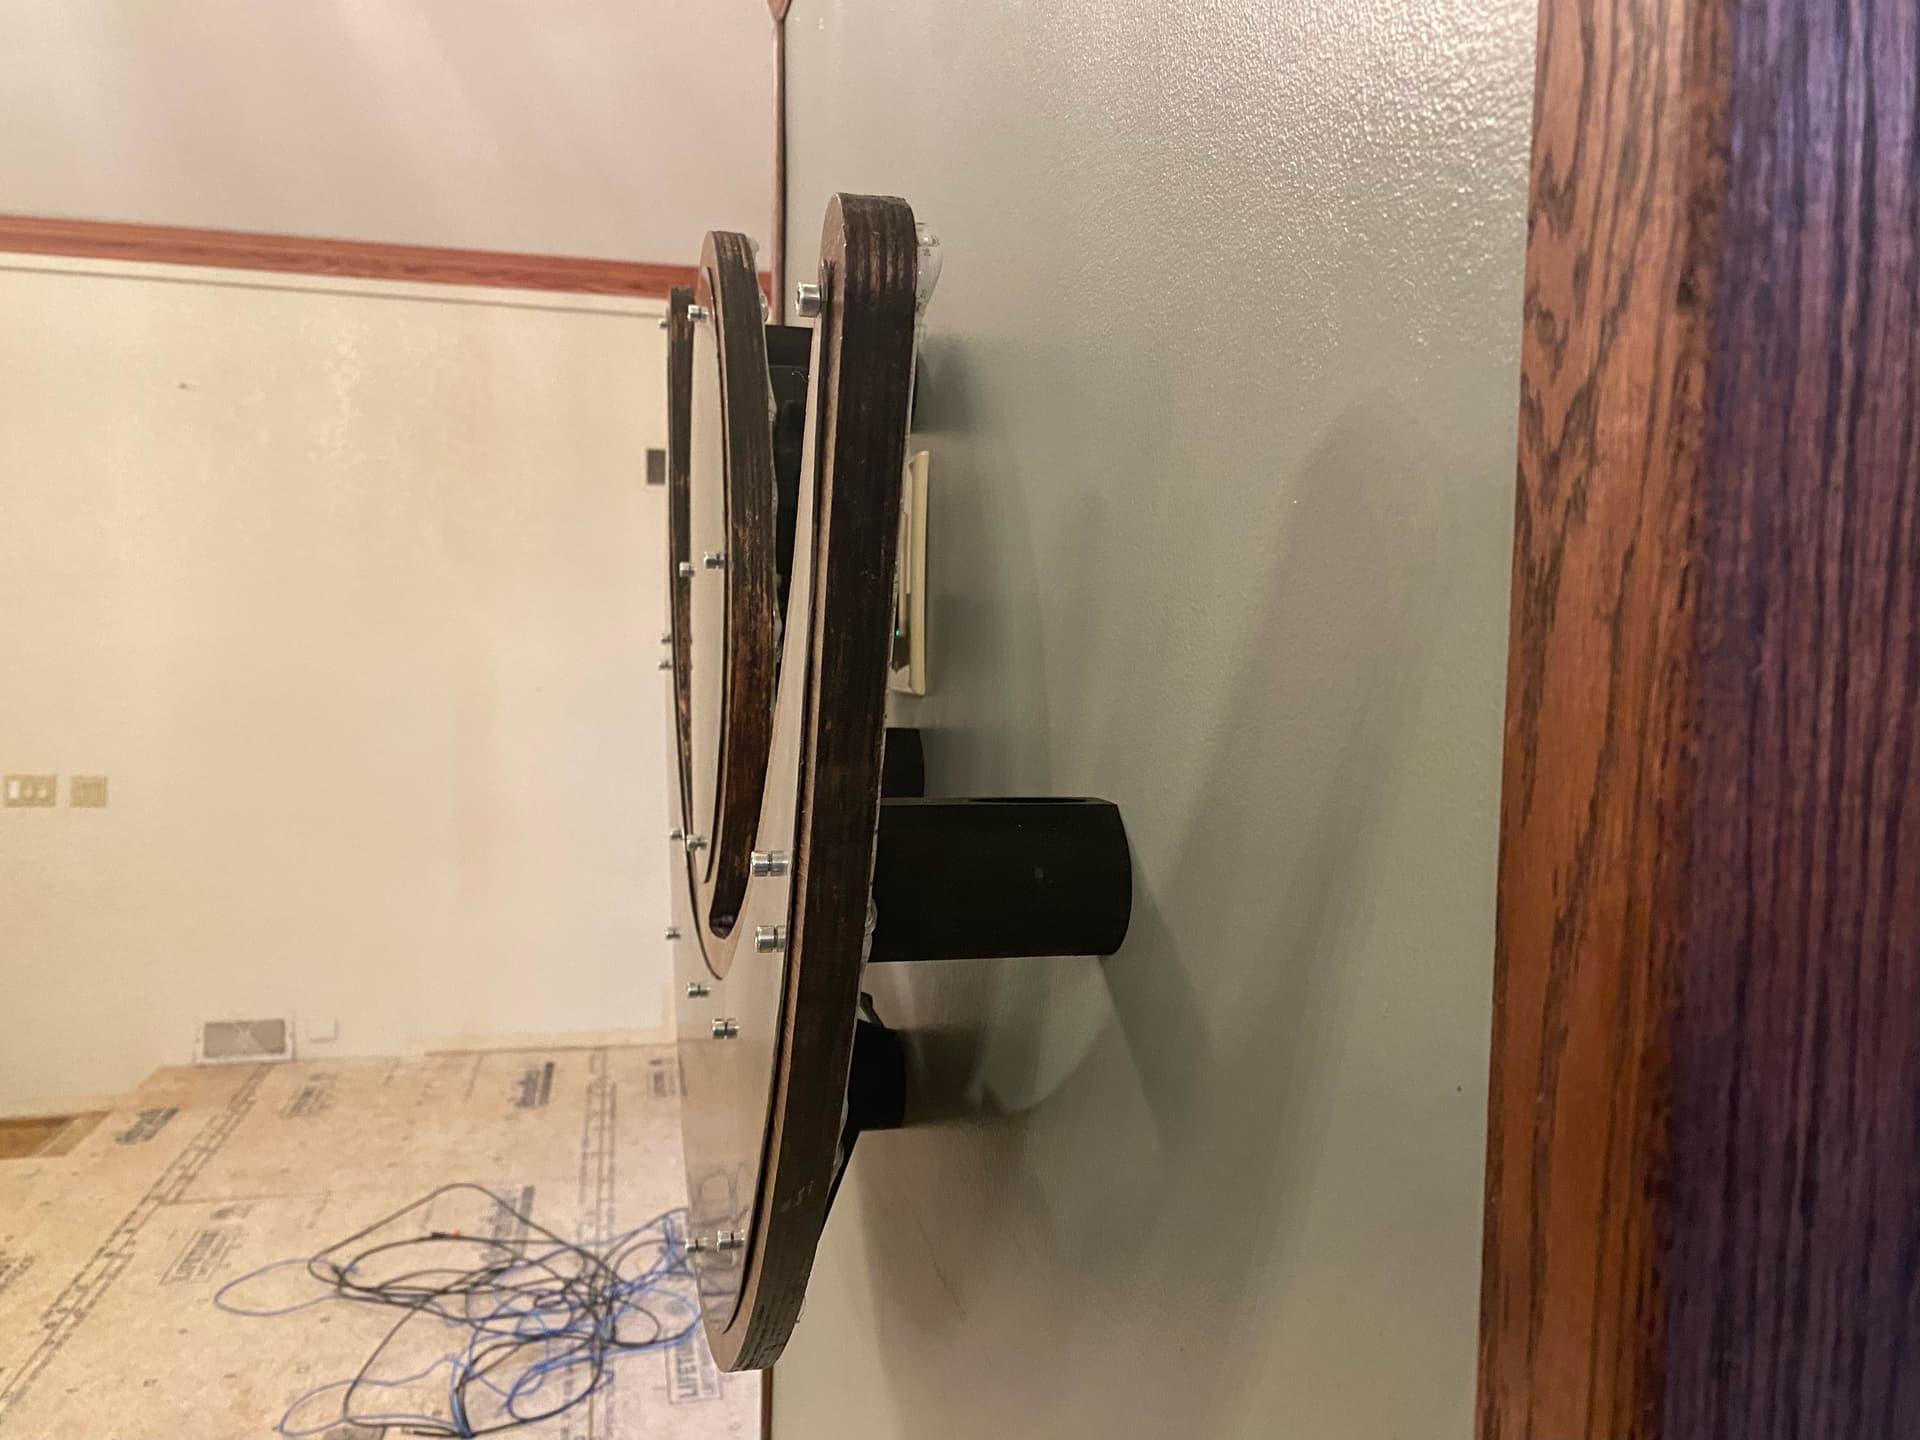
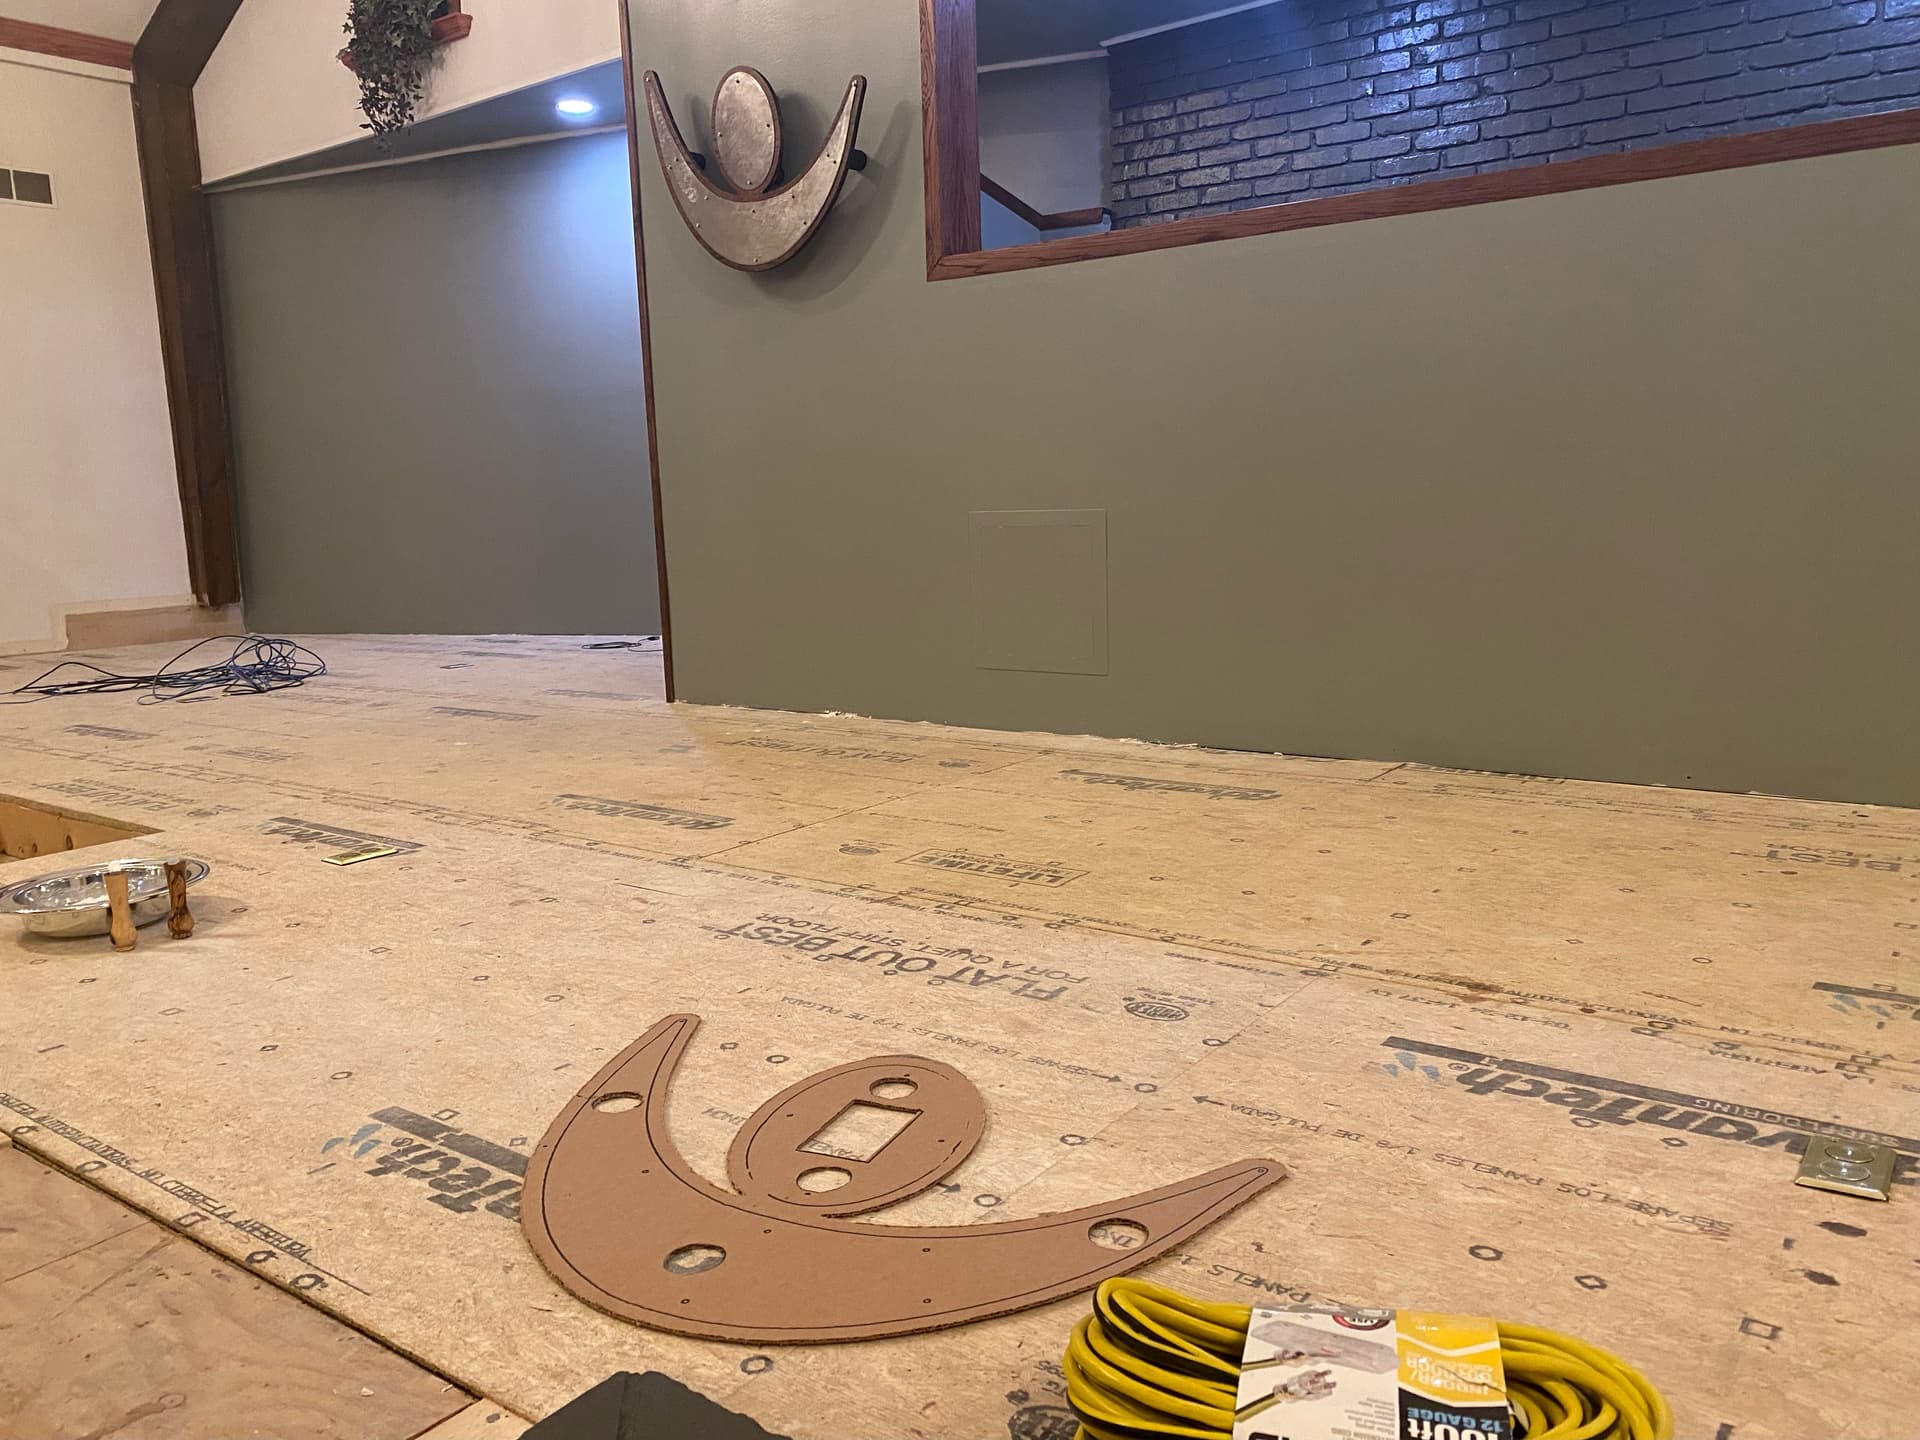
Church Logo - architectural signage - on new baptistery enclosure
- Steel cut using my second LowRider v3 that carries a plasma torch.
- Wood cut using my first LowRider v3 that carries a router.
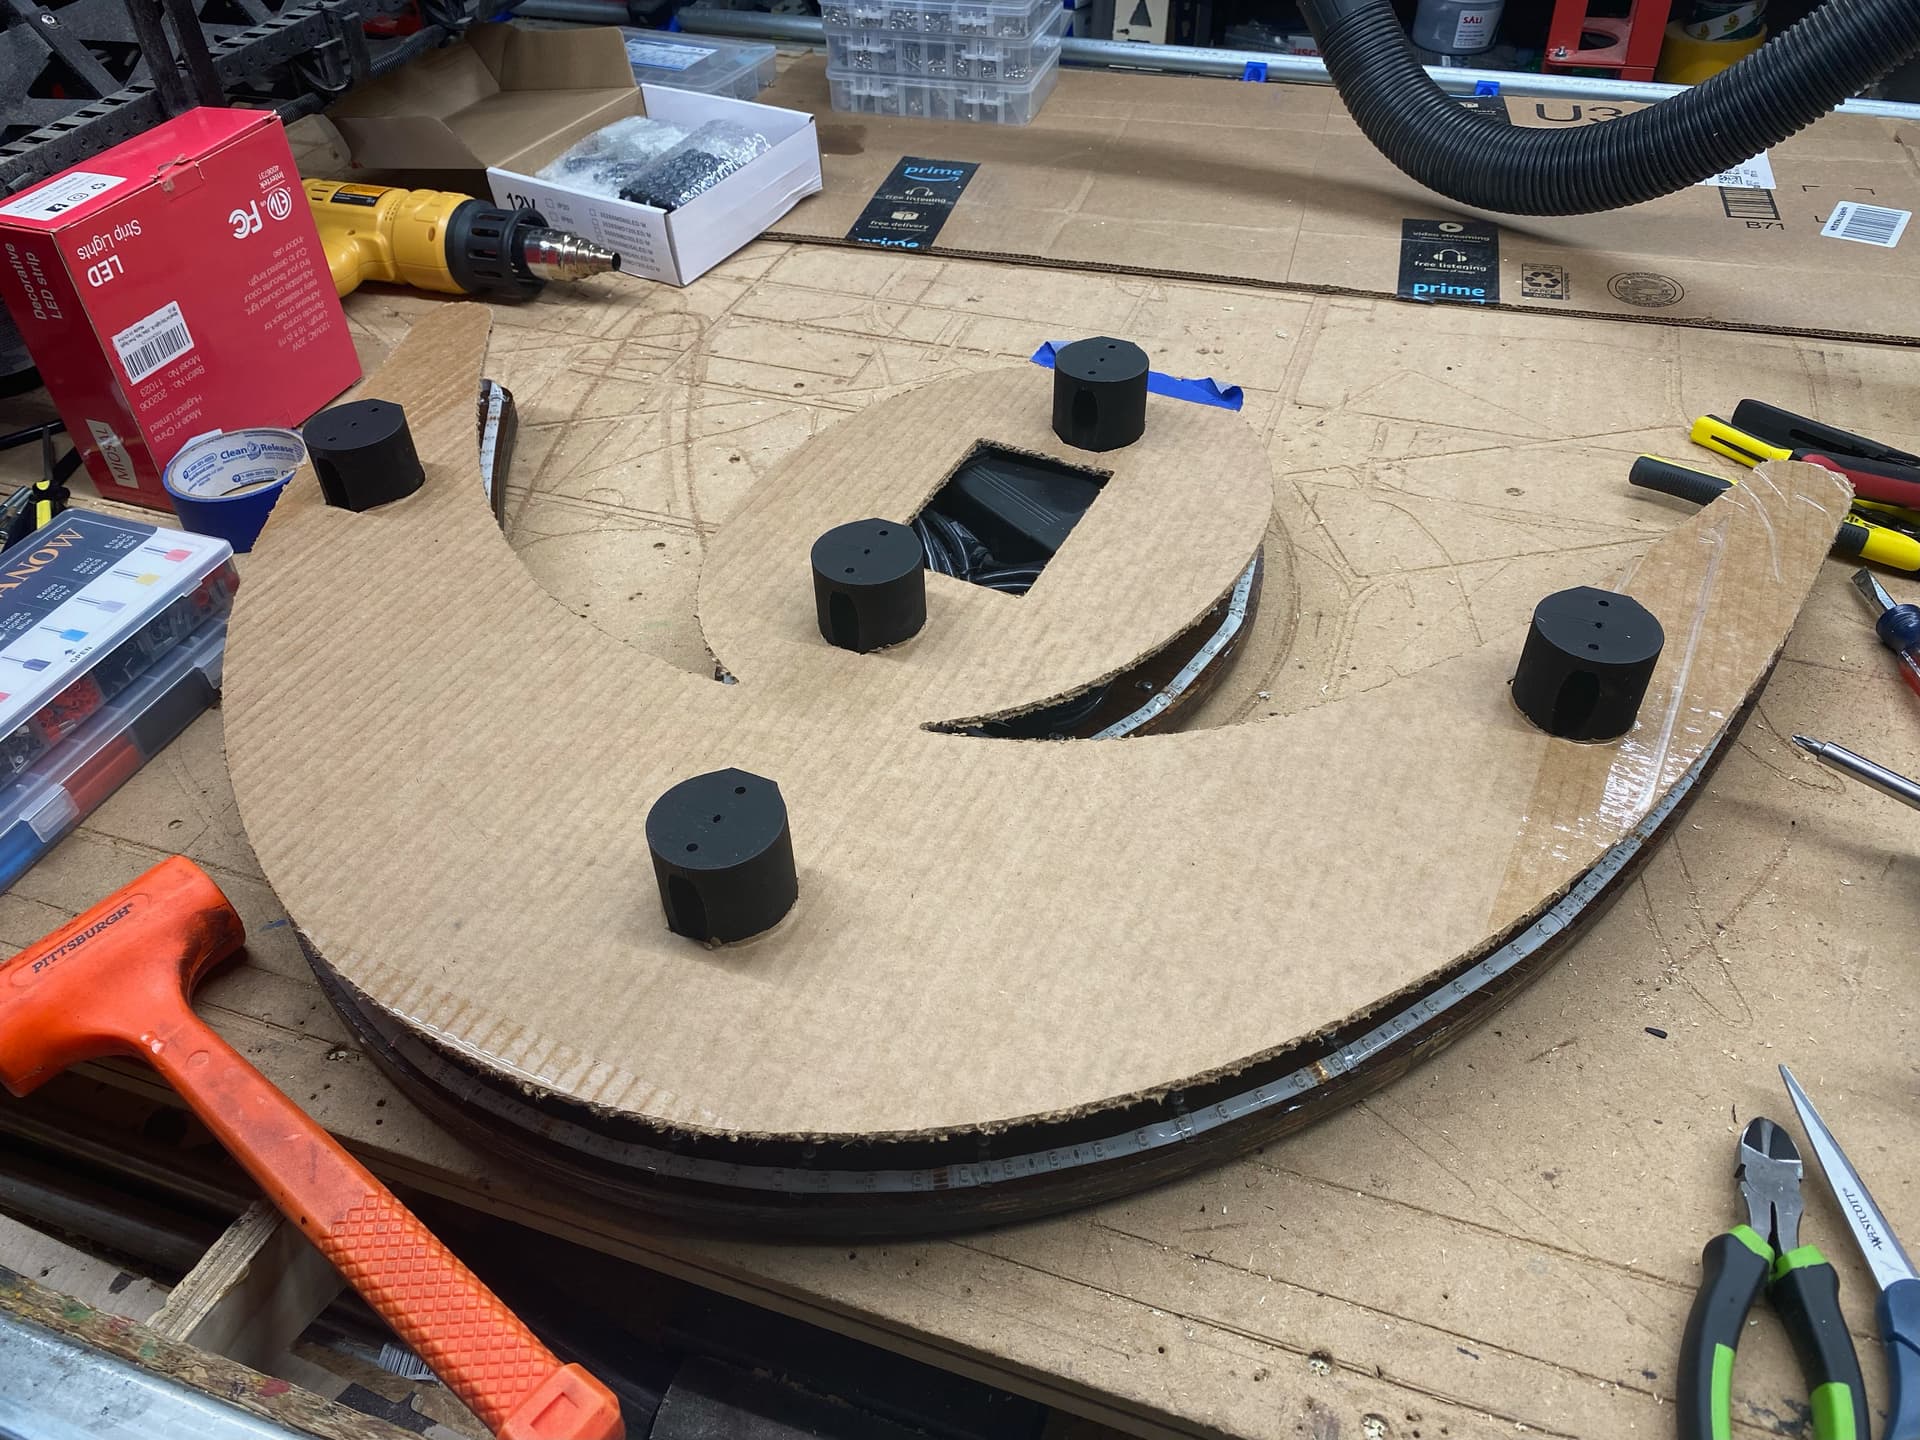
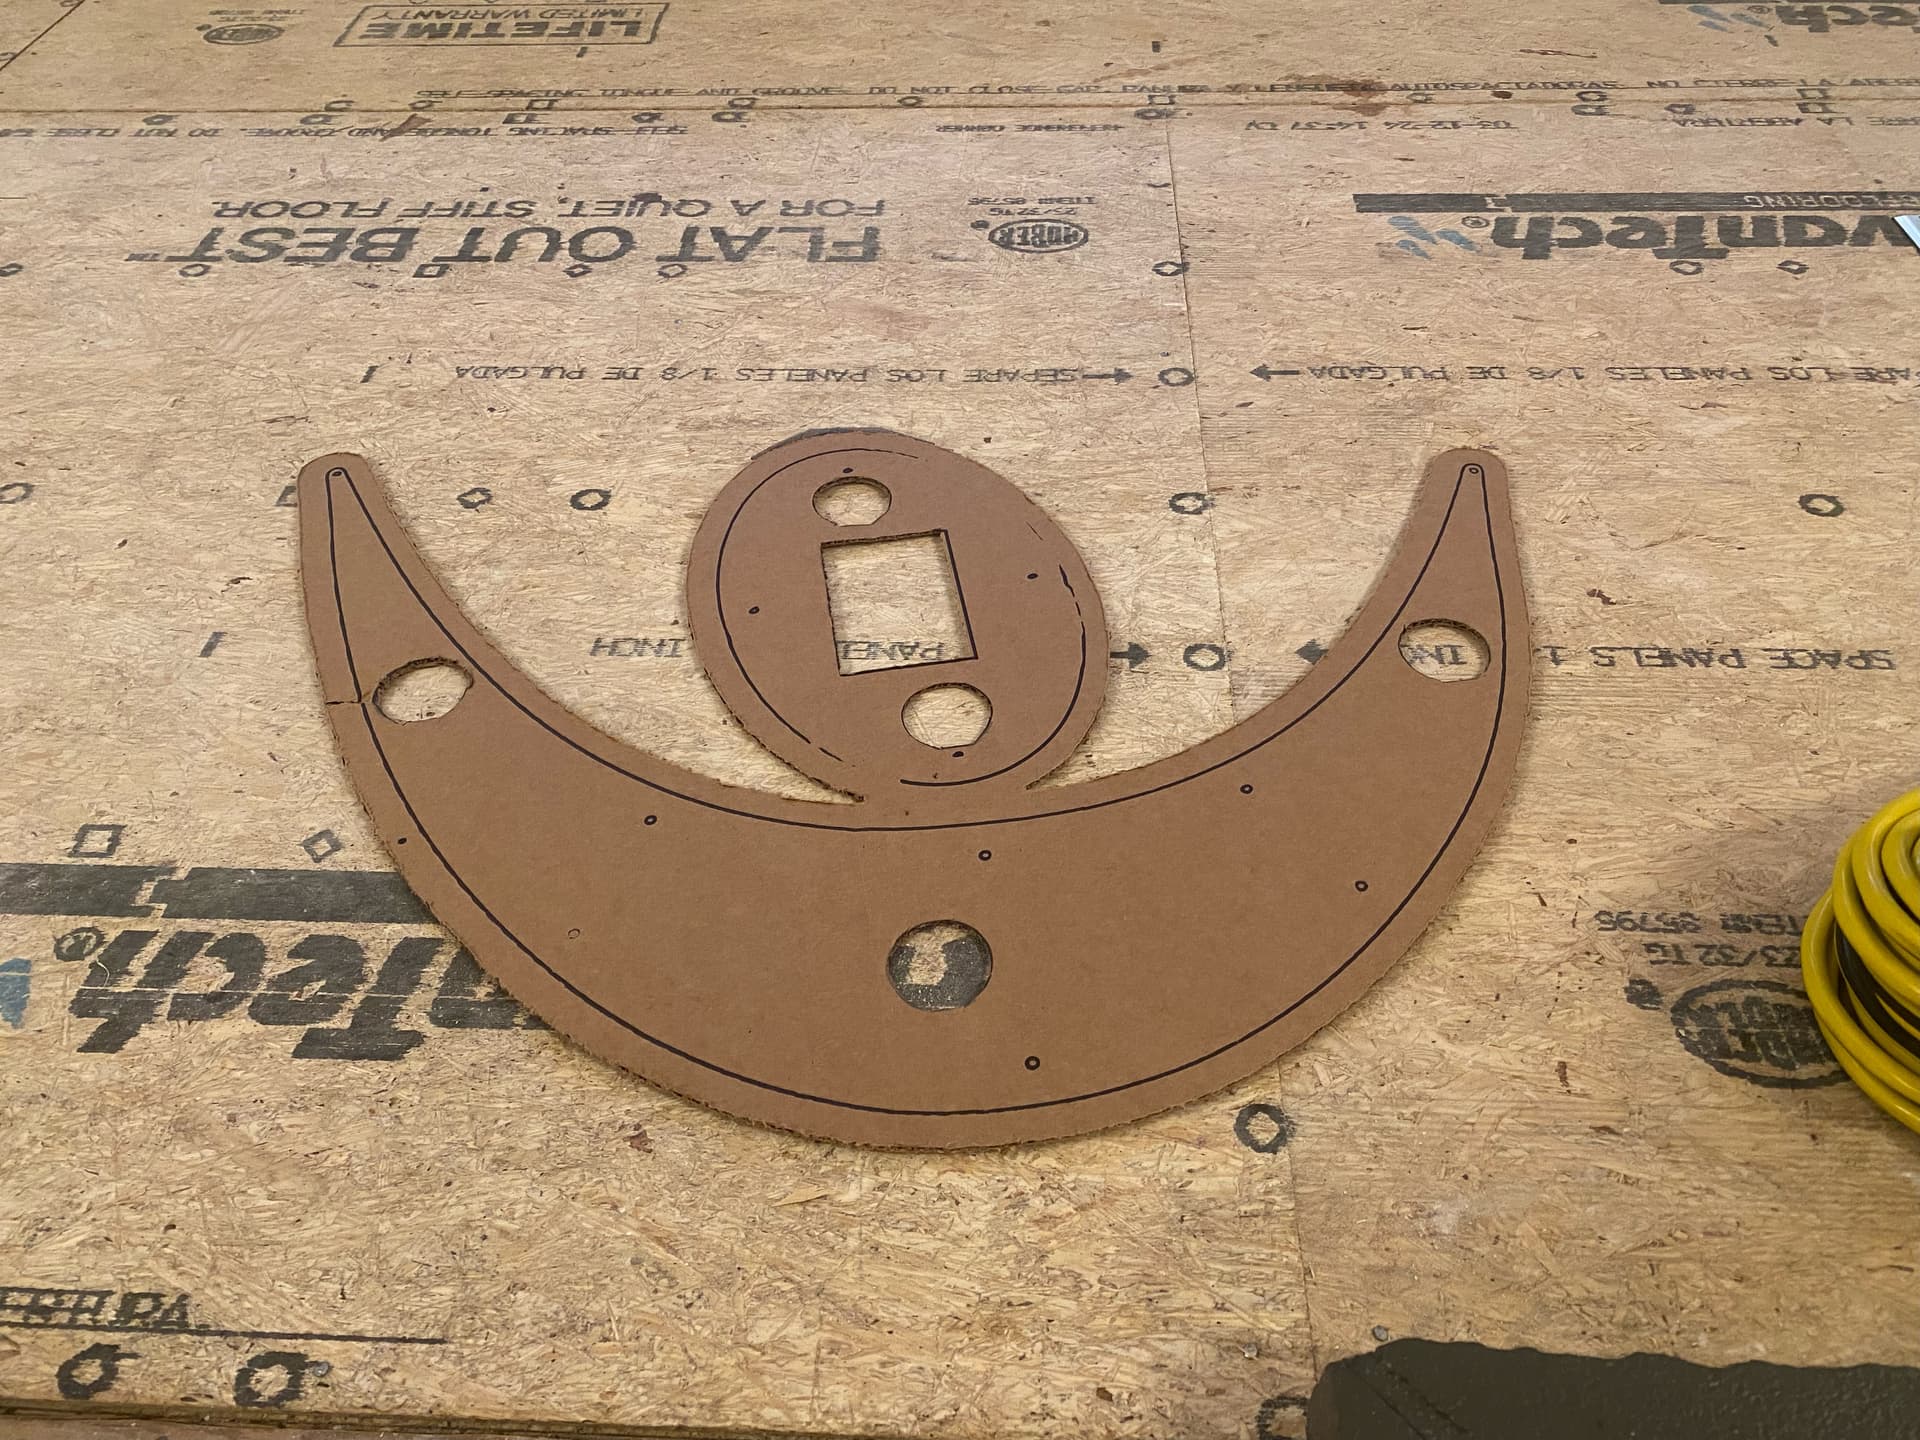
- Cardboard template used for mounting the stand-offs was Sharpie-marked and cut using my first LowRider v3 that carries a router
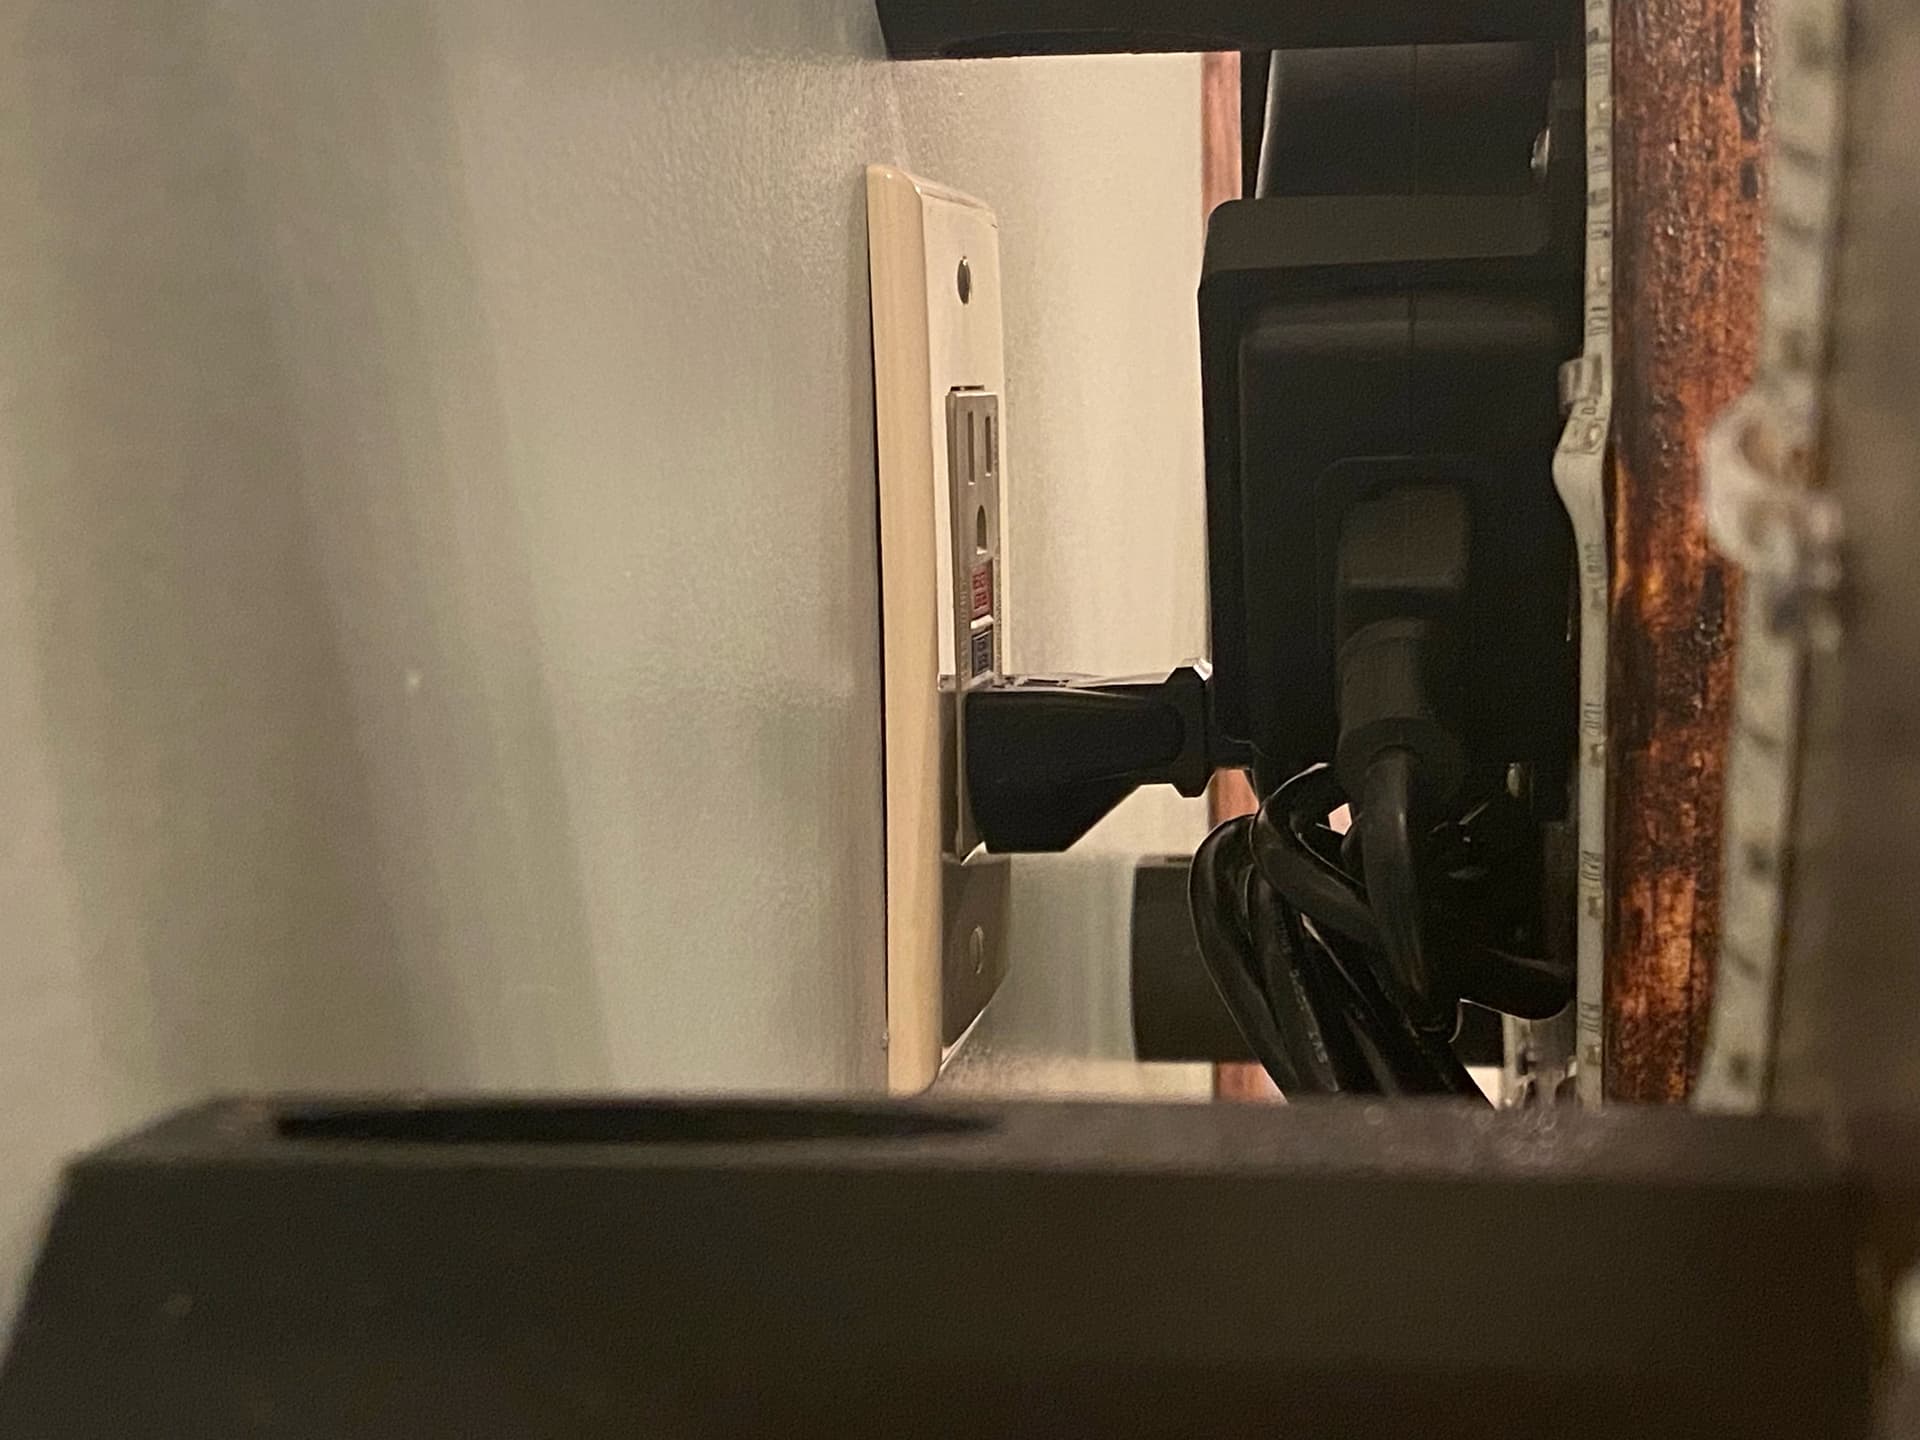
- LED lights on reverse side to cast a backlight / back-glow on the wall of the enclosure.
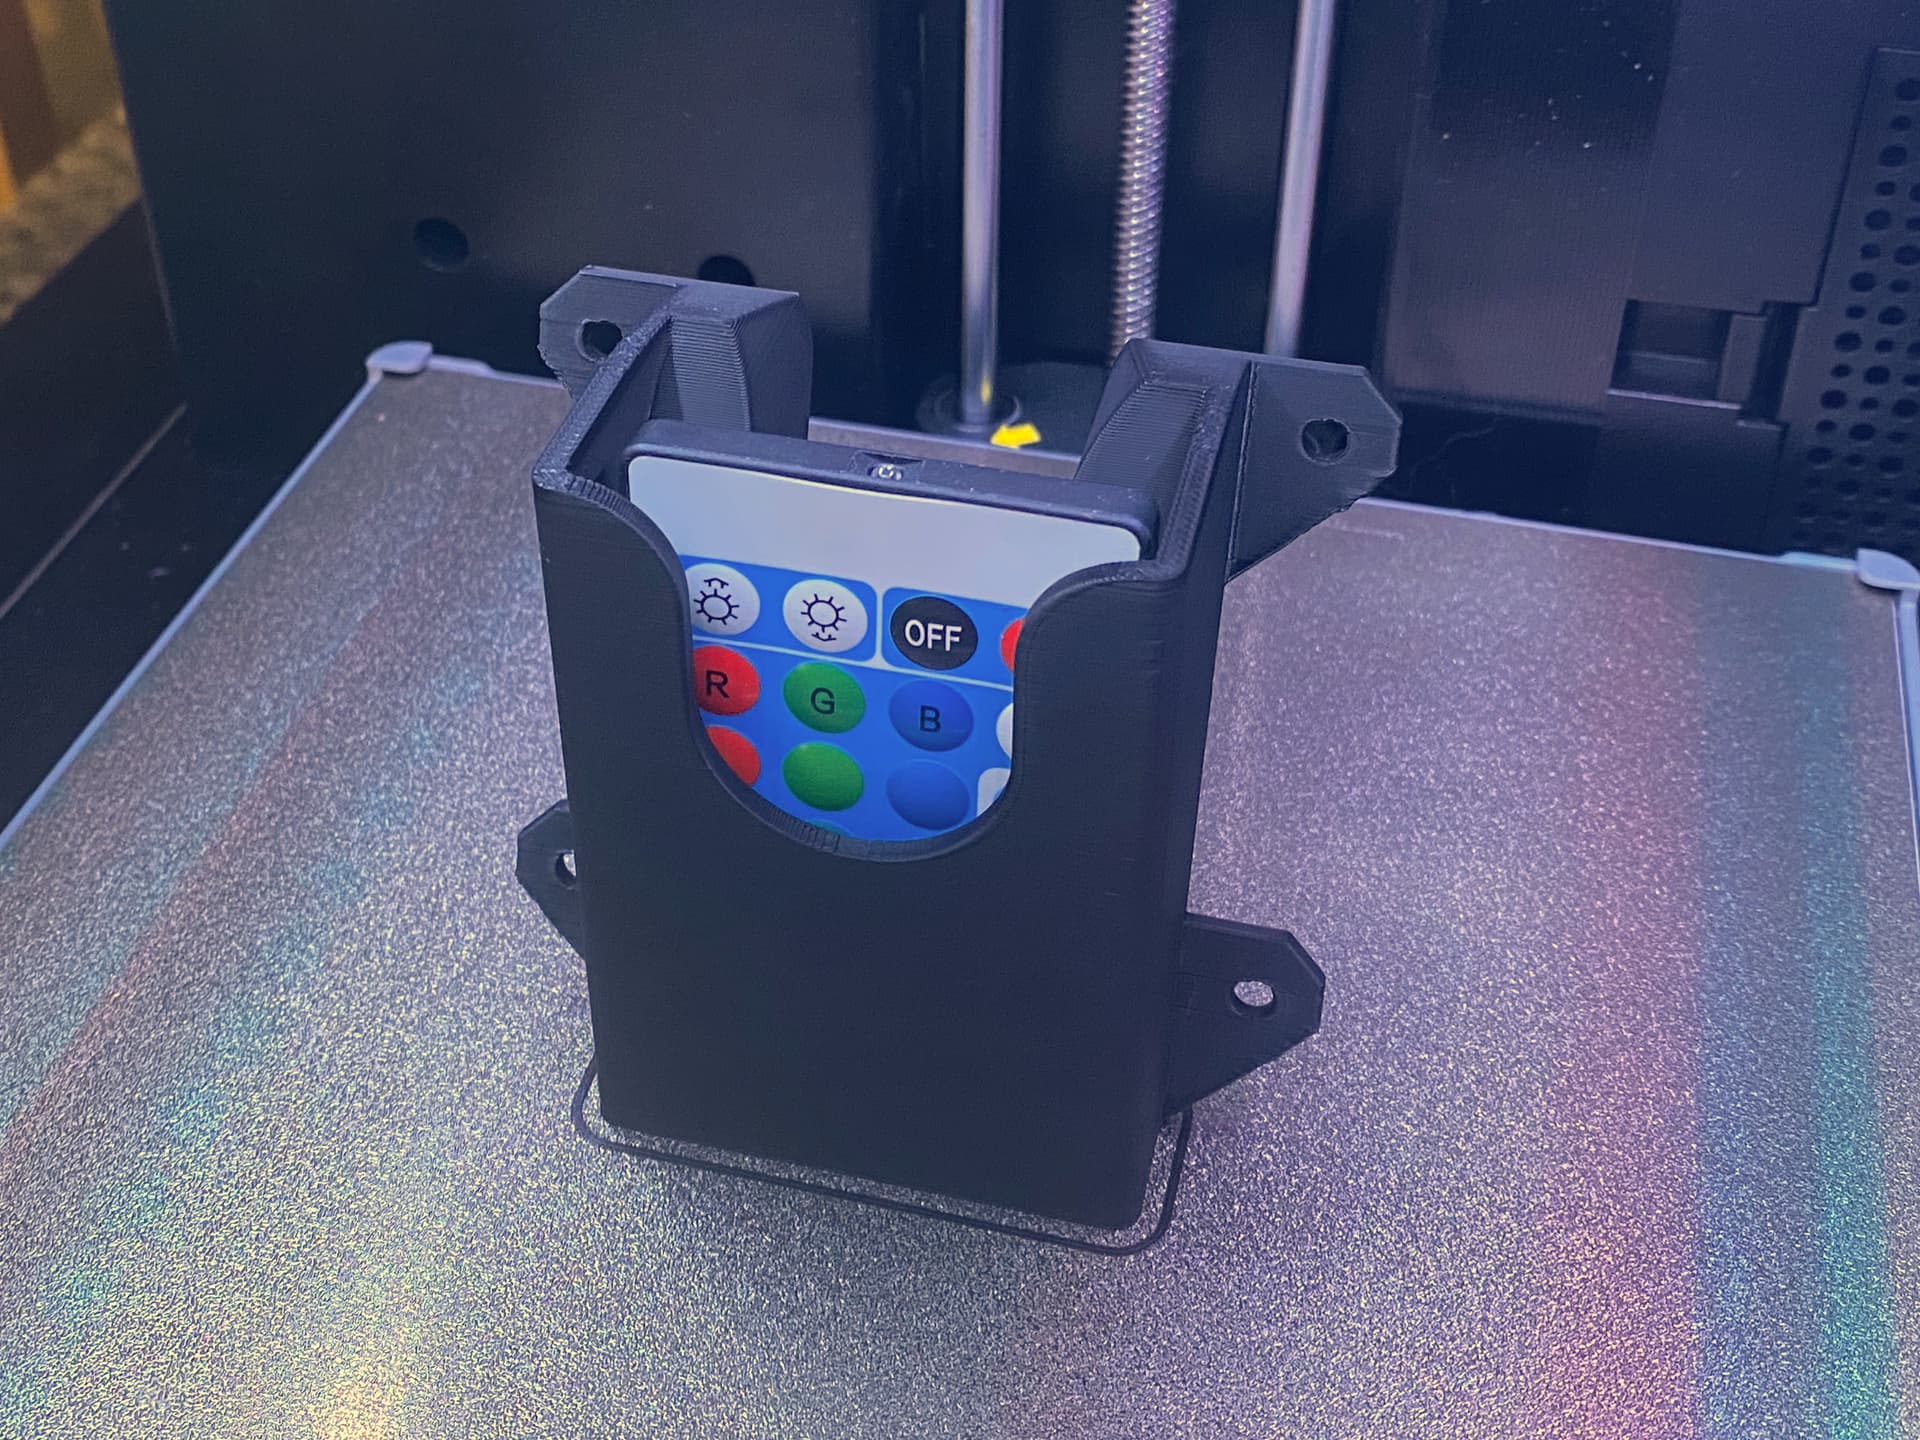
- LED remote control has a home on the reverse side using a 3d printed holder I designed.
- LED power supply and LED control box mounted to reverse side using a 3d printed clips I designed.
- Sign mounted to wall of enclosure using 3d printed “stand-offs” I designed. Each has a screw hole in front and two pocket holes in back, oriented at top and bottom.
7 Likes
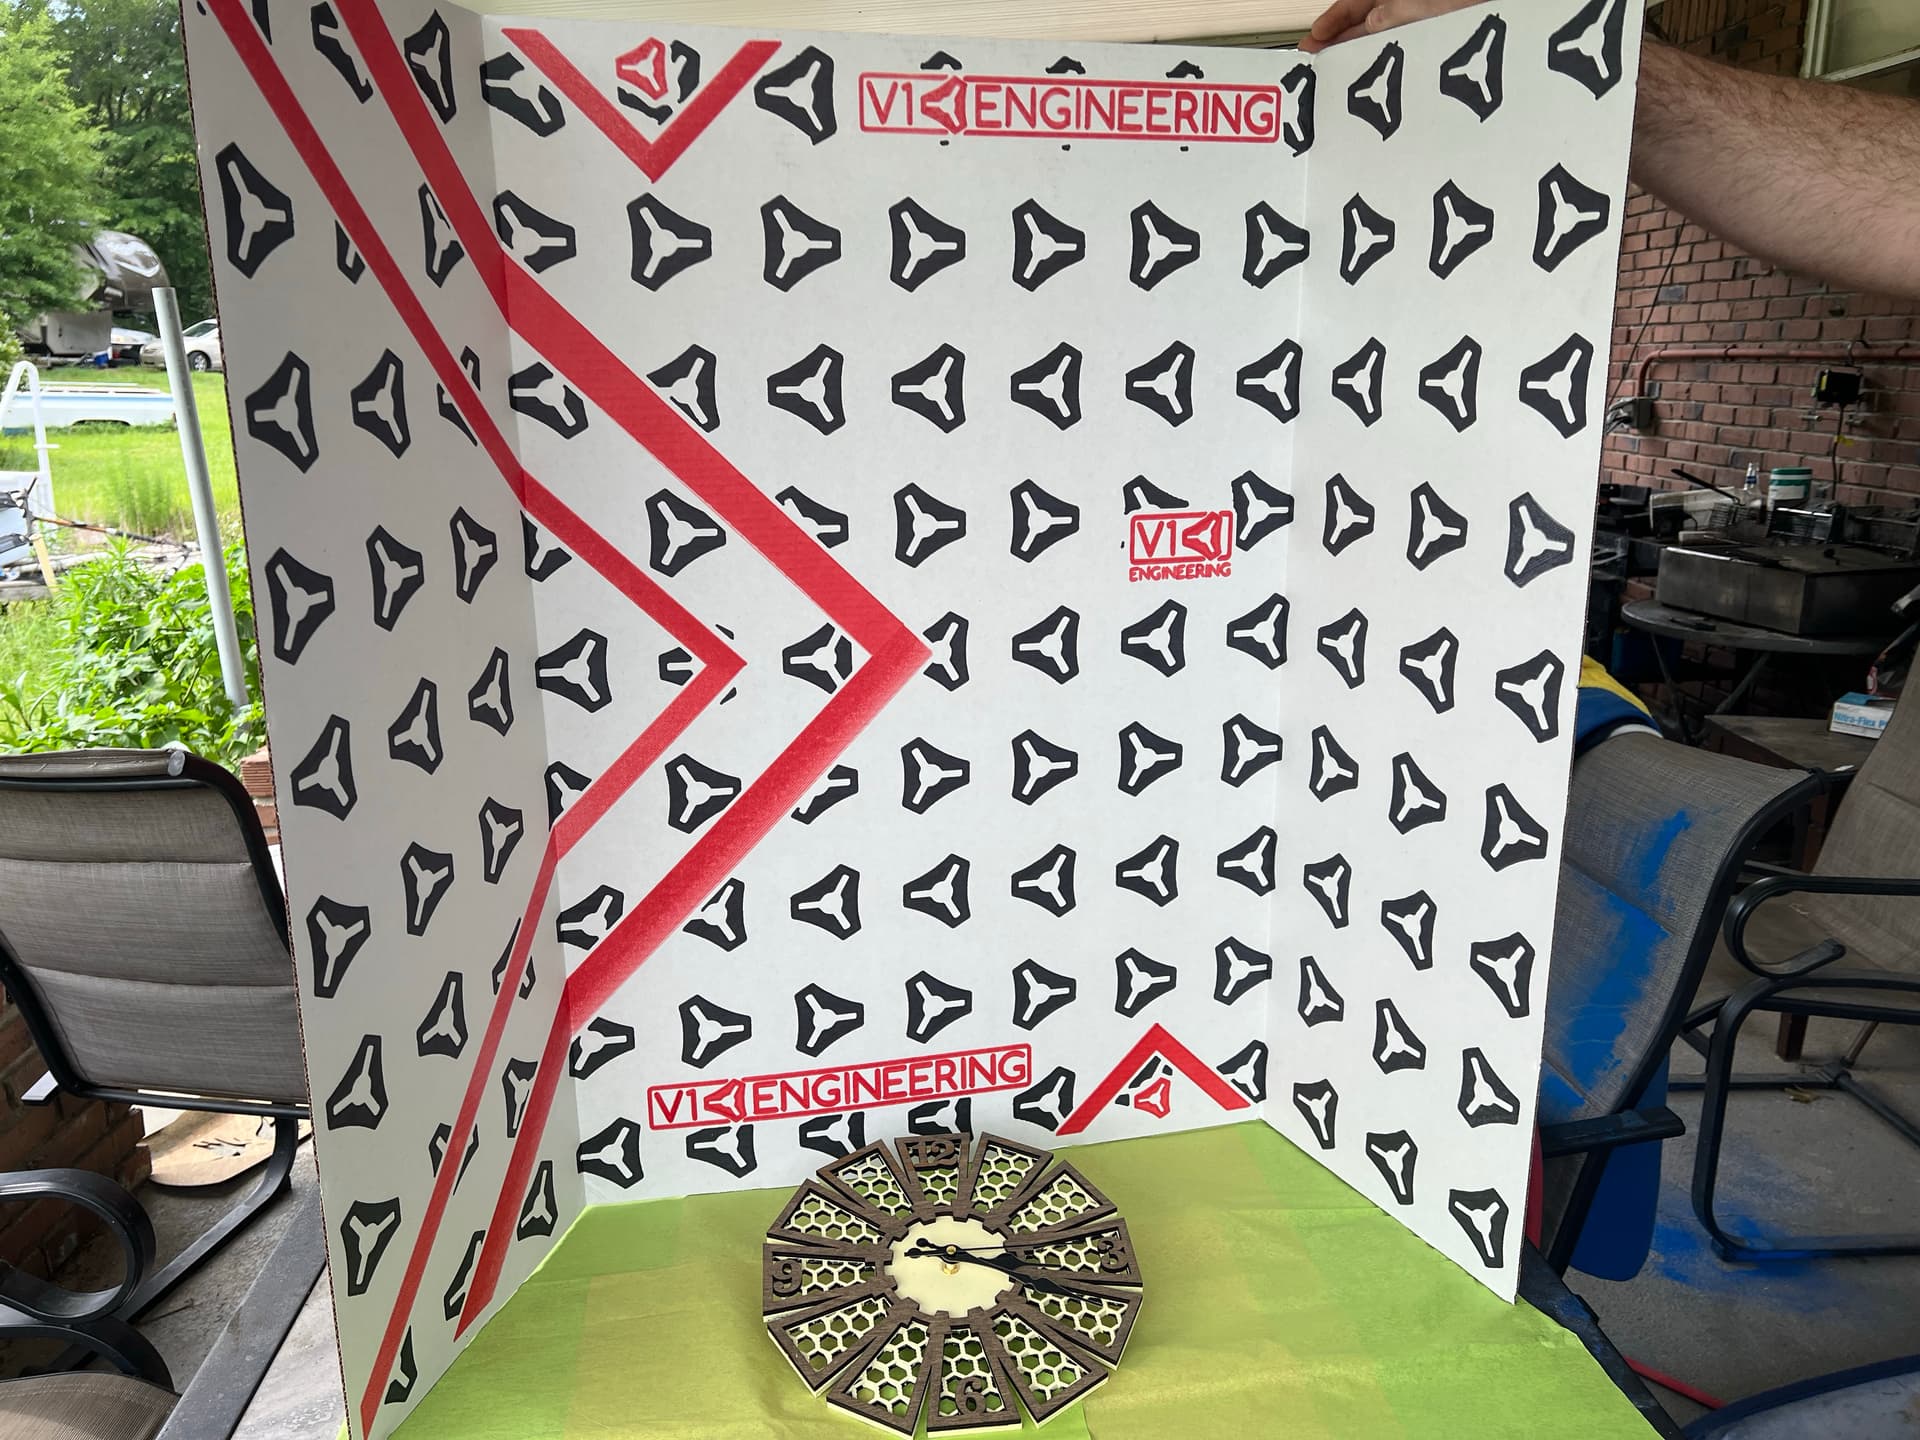
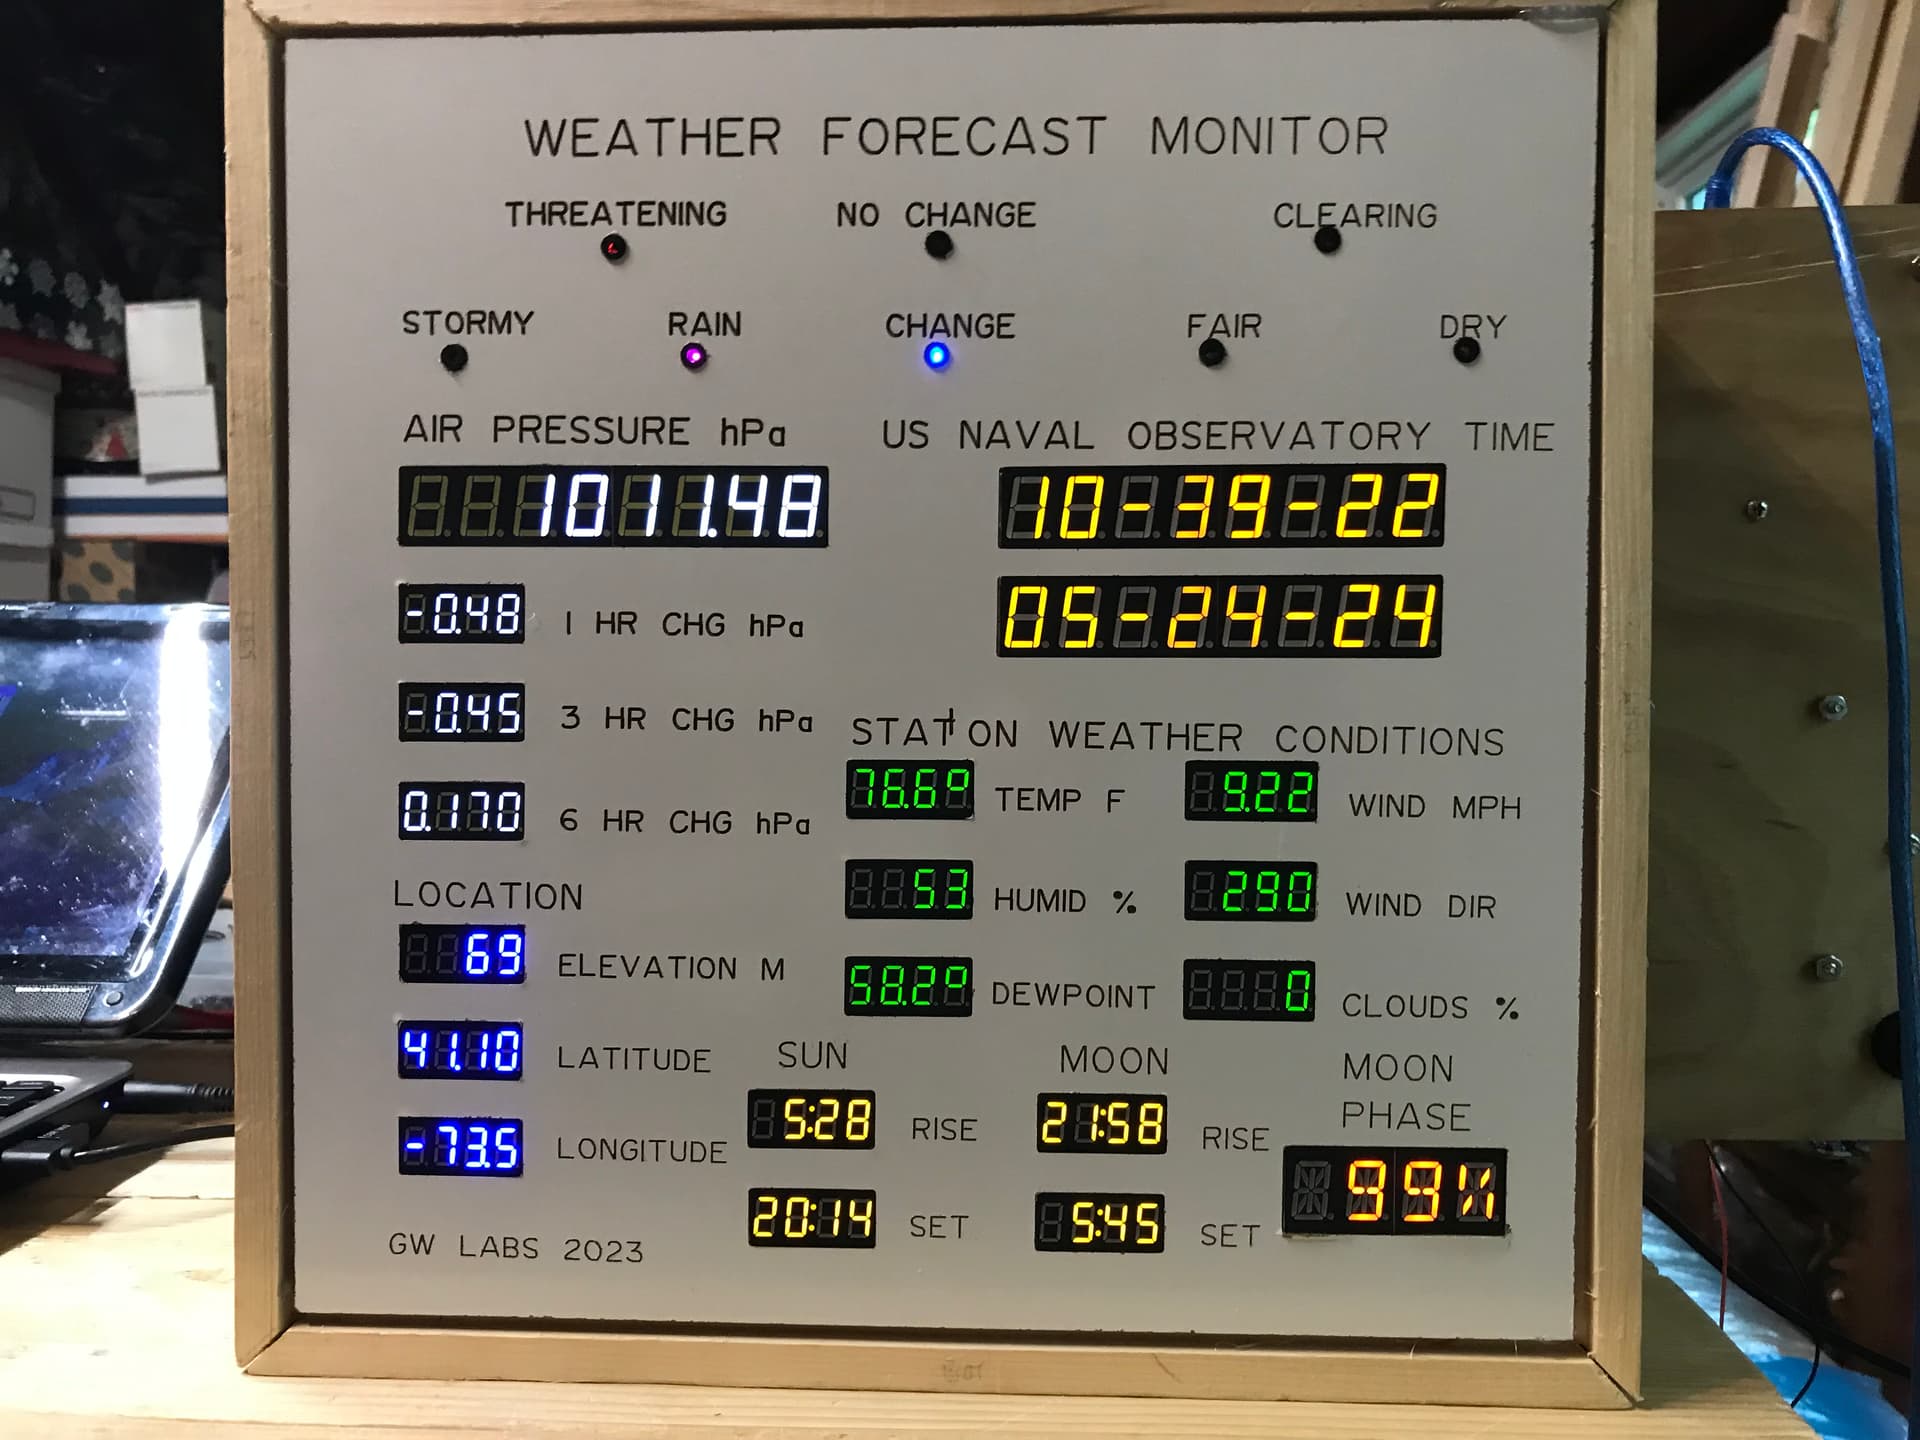
Zambretti-OpenWeatherForecaster
A digital display of open weather data for the user’s gps location with Zambretti forecasting [1] using LEDs.
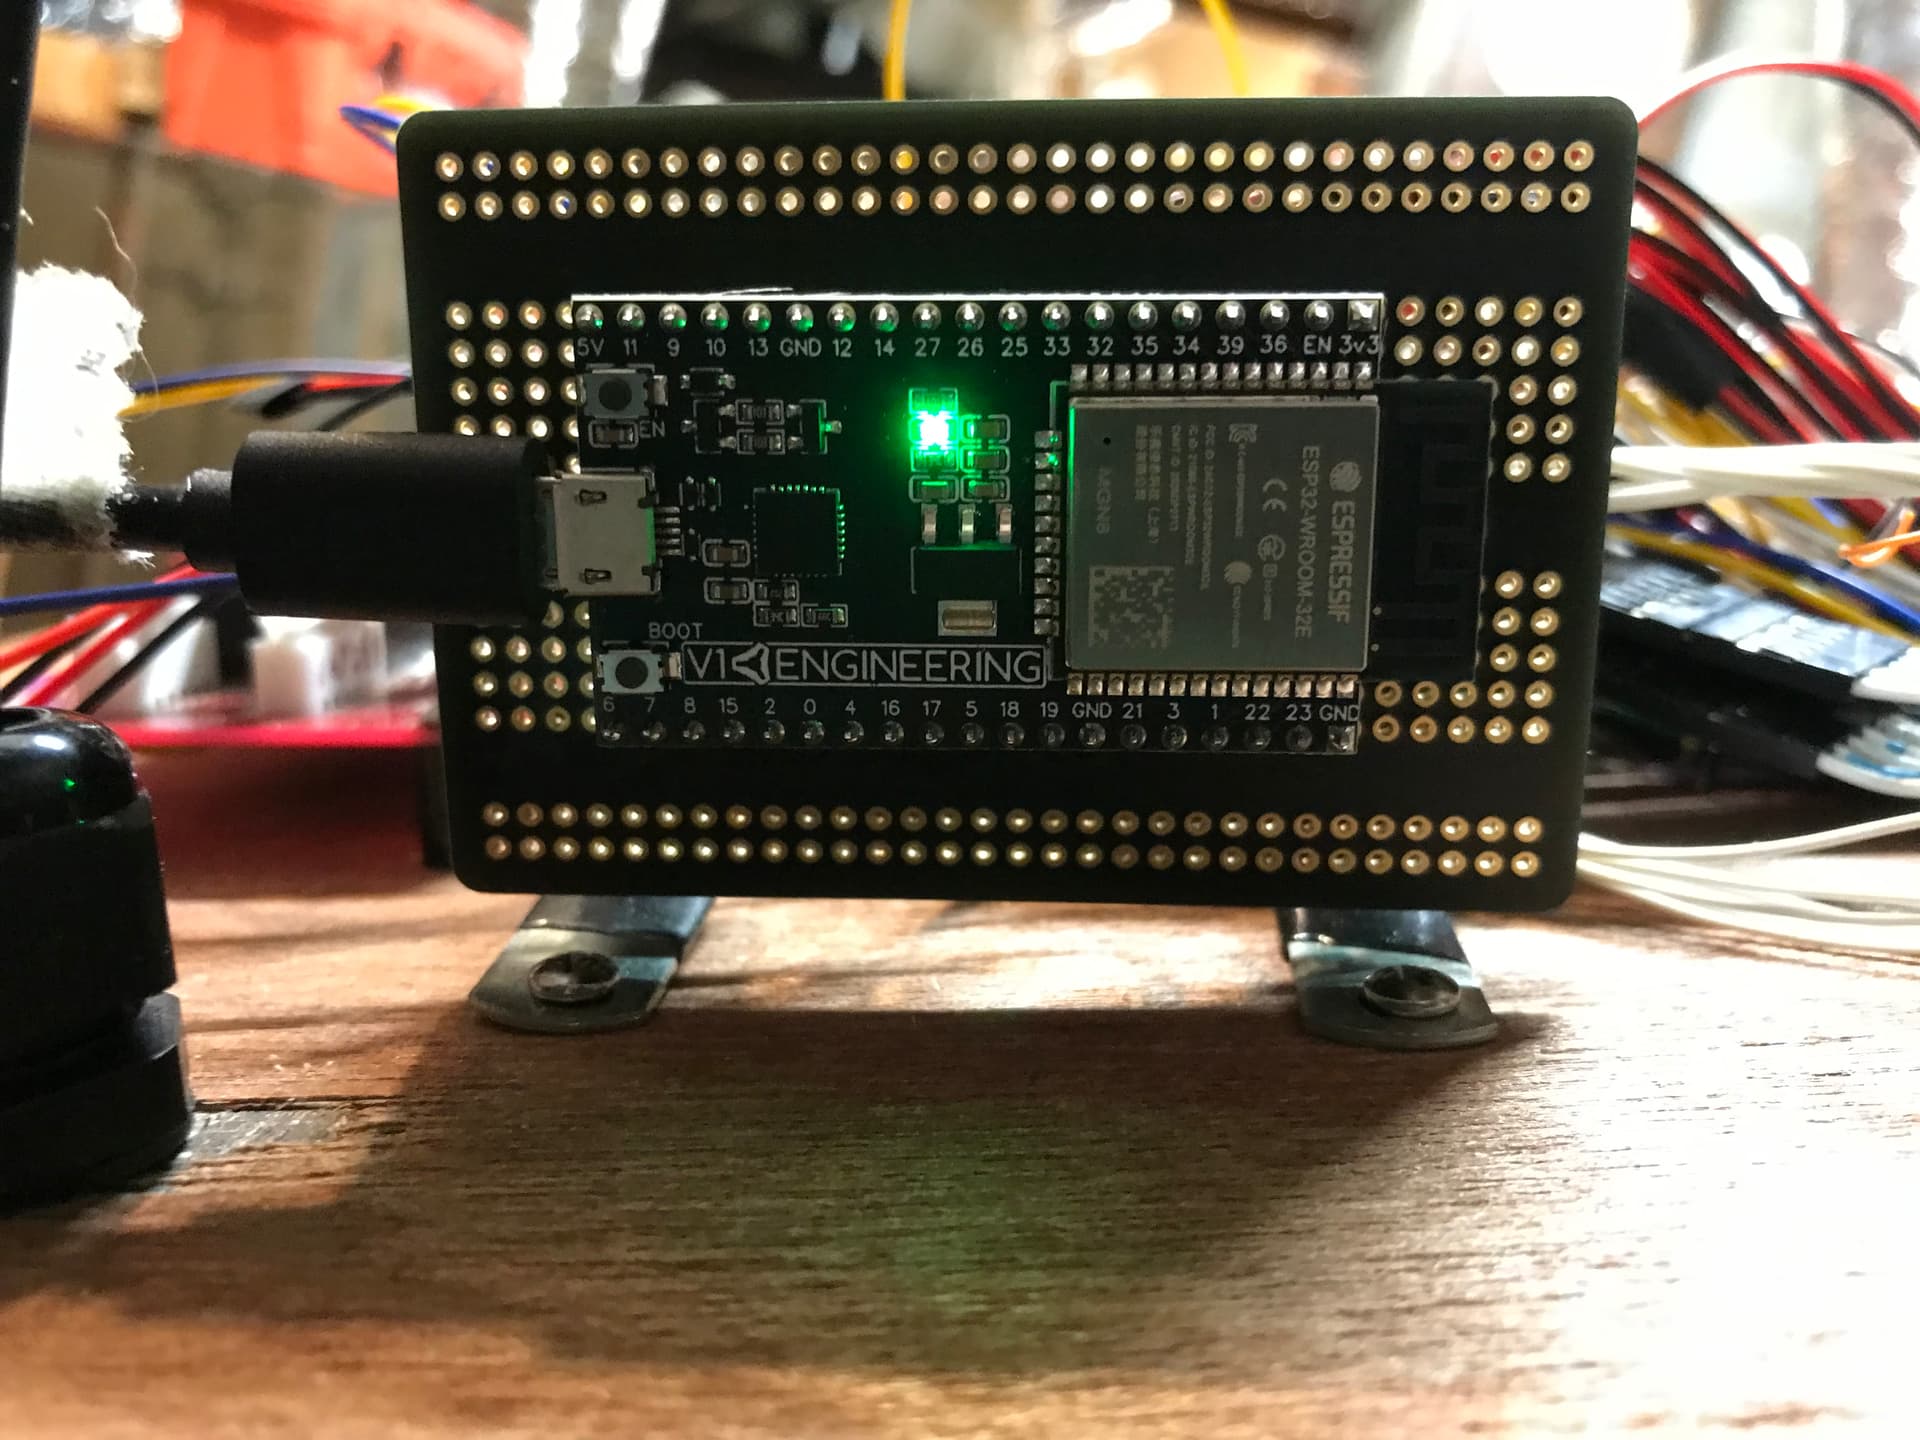
V1 Engineering MPNC project with V1E ESP32 devkit module
What can be better than V1 Engineering[2], Blinkenlights[3], and a good weather forecaster!
Features
-
Front panel engraved and holes cut by MPCNC primo (V1 Engineering) built by the author.
-
ESP32 Microcontroller module using genuine components (V1 Engineering). Monitors the following:
- Wifi Manager [4] allows user to enter and save SSID and Password, as well as save open weather API Key and Adafruit IO API Key.
- GPS device (Ublox Neo 6M) receives latitude and longitude for use by open weather.
- DPS310 pressure sensor measures location pressure in hPa (Adafruit).
- API calls to open weather 3.0 [5] once every two minutes (free) for temperature, humidity, wind-speed, wind-direction, and cloud coverage.
- Seapressure and dewpoint are calculated using temperature and elevation.
- API call to open-elevation.com [6] using latitude and longitude once per hour if needed (glitch protection). GPS elevation wanders a bit.
- API calls to io.adafruit.com [7] to record two minute intervals of weather data. Graphical history on iphone or computer browser.
- Controls 8 colored leds using Zambretti calculations with 3 hour pressure changes, wind direction and calendar month as inputs.
- Controls pressure display (HT16K33 driven 8 digit 7-segment) in hPa,
- Controls (HT16K33 driven 8 digit 7-segment) NTP time-date displays.
- Controls (HT16K33 driven 4 digit 14-segment) moon phase display in percent and words (like ‘FULL’).
- Astronomical [8]: calculation of sunrise, sunset, moonrise, moonset from observer location and time-date.
- Sends JSON packet [9] of time and weather, astronomical, and pressure change data once a second to STM32 Nucleo64 microcontroller.
-
STM32 Nucleo64 F103RB module for:
- Receives JSON data packet from ESP32.
- Numerous GPIO on morpho pinout.
- TM1637 4 digit 7-segment displays:
- Sea pressure changes 1 hour, 3 hour, and 6 hours.
- Location: Elevation, Latitude & Longitude.
- Open Weather: Temperature, Humidity, Dewpoint (calculated), wind speed, wind direction, cloud coverage.
- Astronomical: display of sunrise, sunset, moonrise, moonset.
-
Build:
- Front panel engrave and hole cutout with V1 Engineering MPCNC Primo
 . Board material is 3/16th marker board 2x4ft from Home Depot.
 - Carcase is constructed with handtools (yes 45 degree miters with a plane, and splines for strength).
- V1 Engineering genuine ESP32 module . Stable, better than ESP8266 and more GPIO pins.
- STM32 Nucleo64 F103RB ($10 powerful arduino compatible microcontroller with lots of GPIO).
- Lots of dupont crimping of pins/wires and plastic shells!! These were a source of intermittent behavior.
- TM1637 4 digit seven segment display modules of various colors.
- HT16K33 modules (Adafruit) to drive larger .56 inch seven segment displays.
- Many, many iterations of experimenting and burn-in periods exposing design flaws.
- Front panel engrave and hole cutout with V1 Engineering MPCNC Primo
-
Inspiration:
- V1 Engineering and fantastic forum with advice.
- Brett Oliver for barometer idea and amazing projects

11 Likes