Not if I steal yours! ![]()
In any case yes. Finish the LR. Probably make the ZenXY first as well, to distract said partner enough whilst I build this ![]()
Not if I steal yours! ![]()
In any case yes. Finish the LR. Probably make the ZenXY first as well, to distract said partner enough whilst I build this ![]()
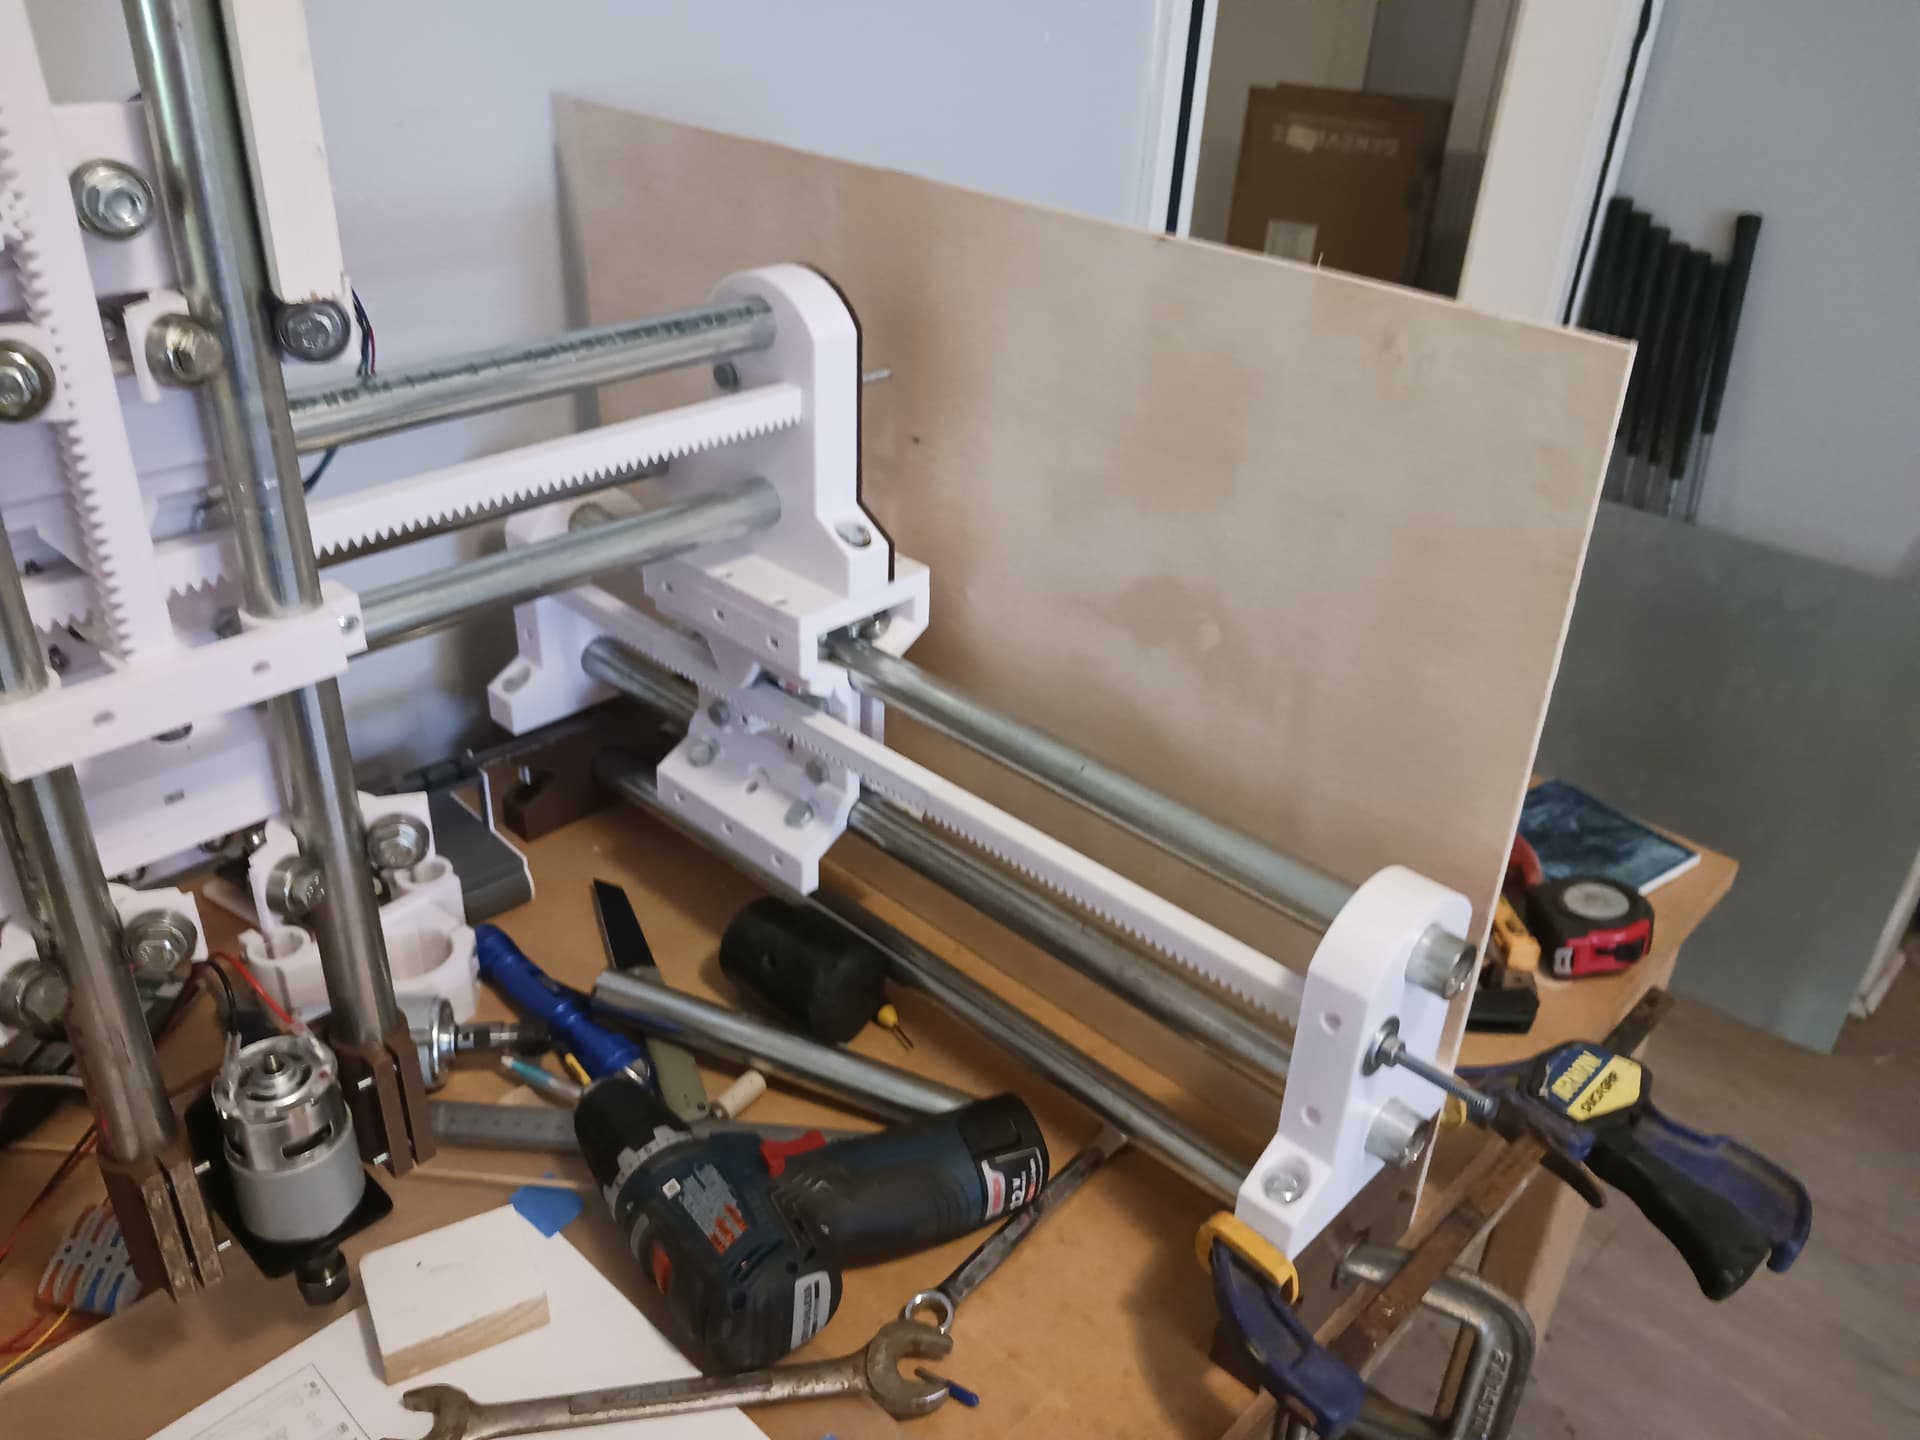
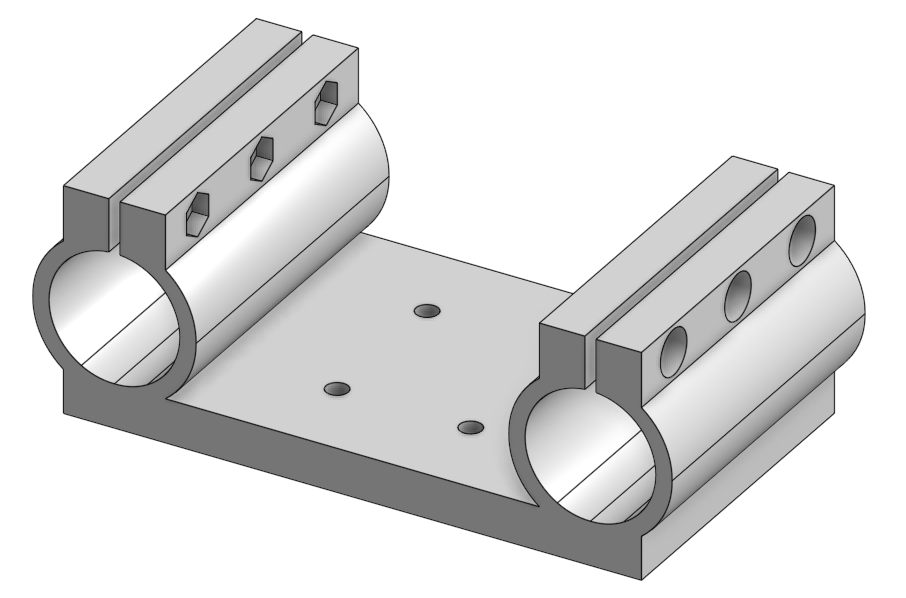
I have new carriages and caps printed, still have to get them installed.
Love seeing and hearing the machine operating.
Really looking forward to seeing what can be achieved with the 775 spindle.
I’m sorry about all the foot-dragging and break in the action on MPR&P. Since I had latched on to the only clear spot (at the time) in my house for assembly of MPR&P… turns out that it wasn’t a good spot in which to operate MPR&P. Don’t laugh…
Finally decided on a spot to move the machine but, of course, there was no electricity on that wall (old farmhouse). There is electricity for the workshop just through the wall near the corner however so decided the easiest and quickest way to get adequate-for-my-need power was to tap into it there. Had a section of 100’ extension cord that the riding mower had “eaten” so made a small hole through the wall and fed it through to the workshop power entry. Put a power strip on the leg of my bench and plugged it in… viola! I have power!
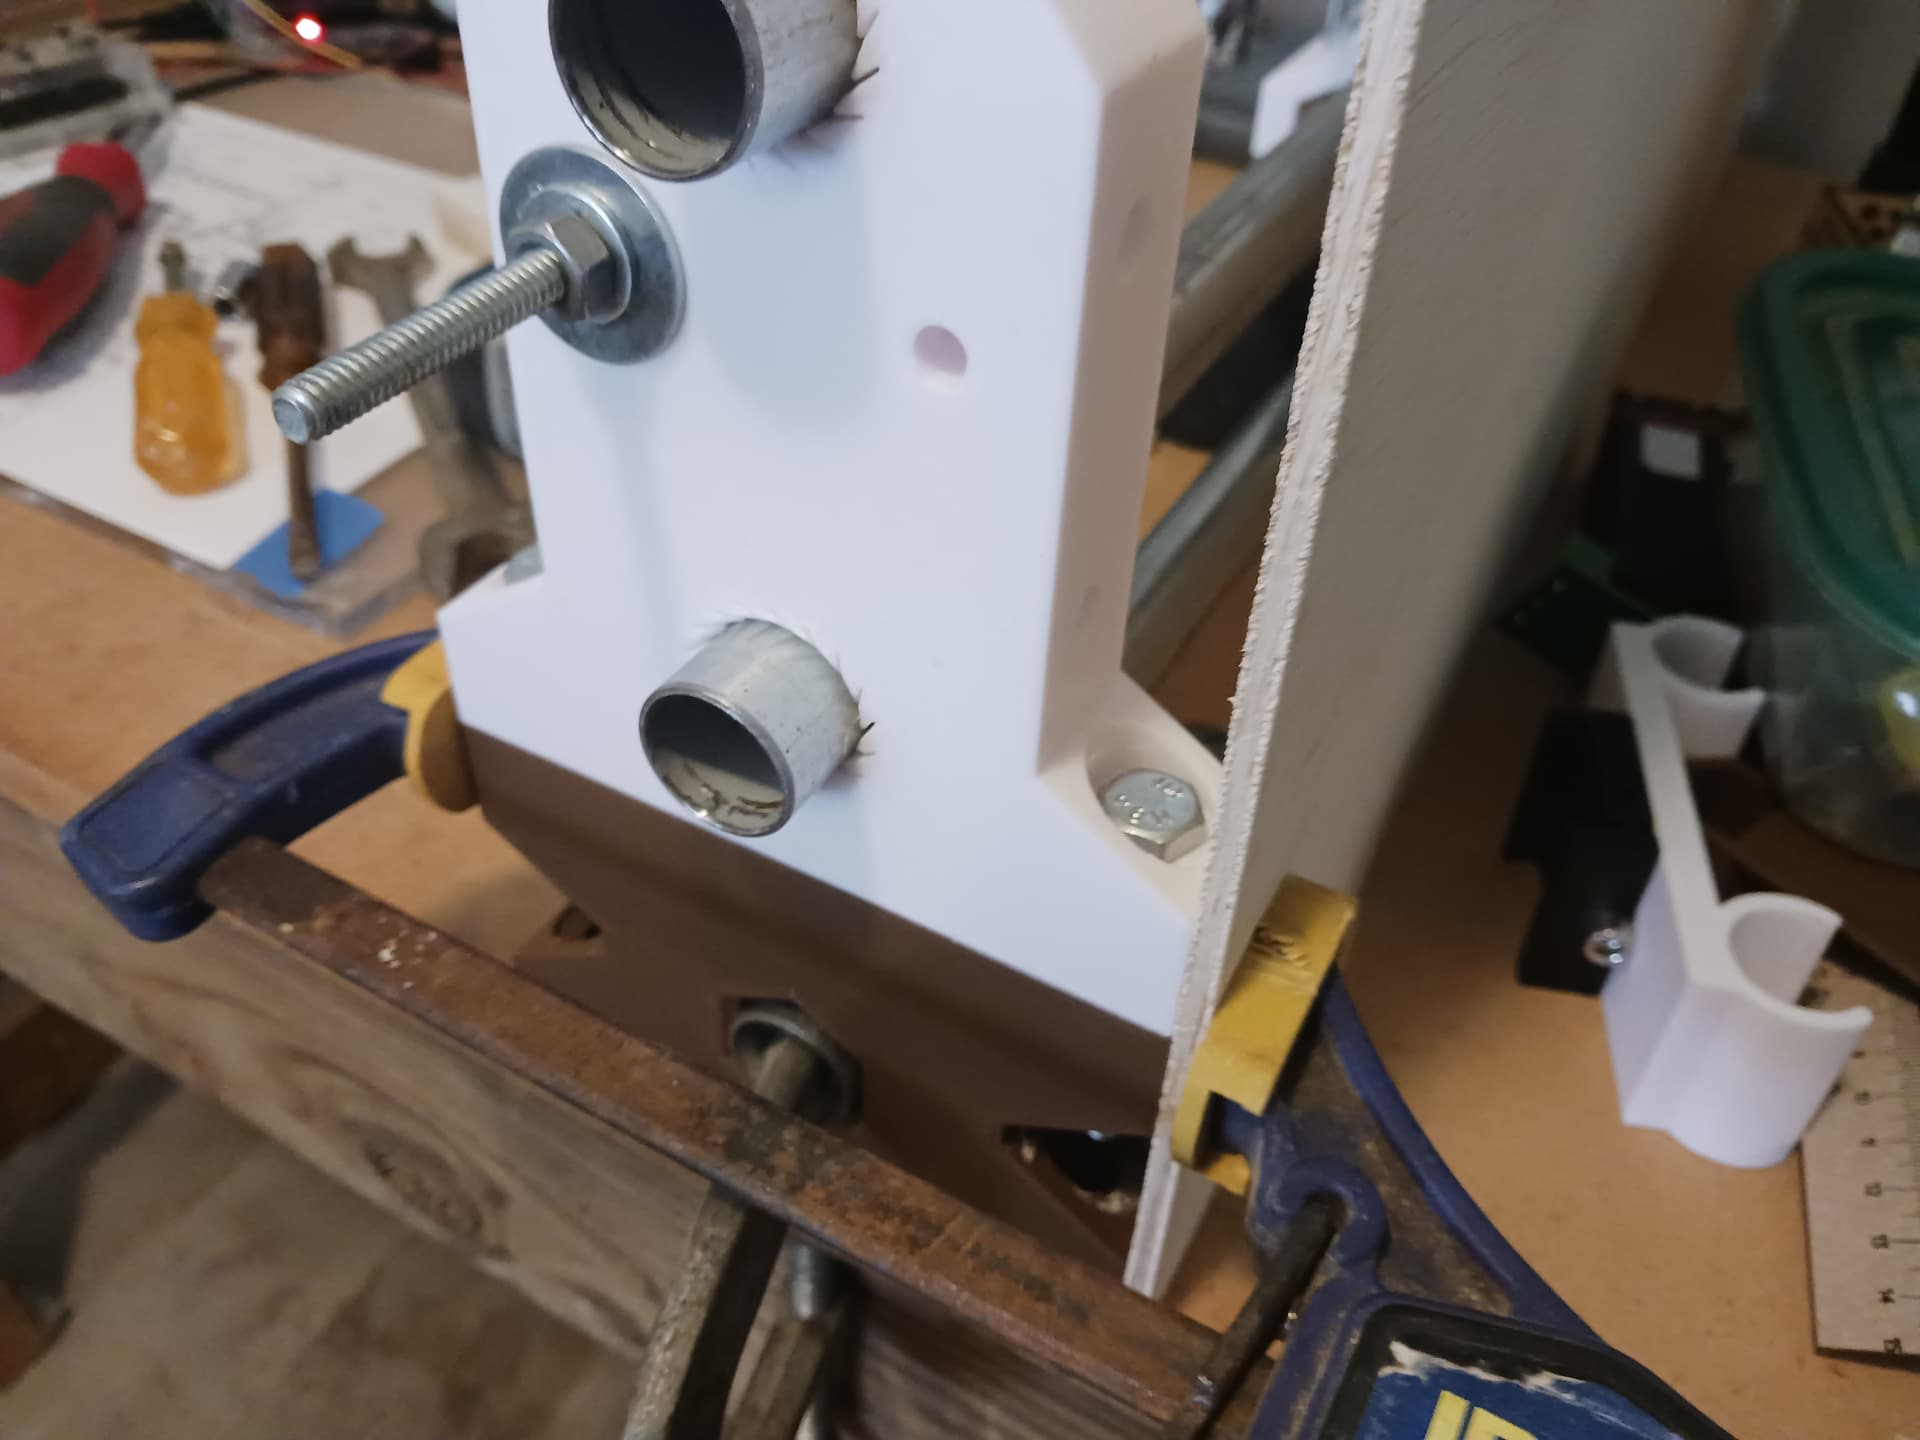
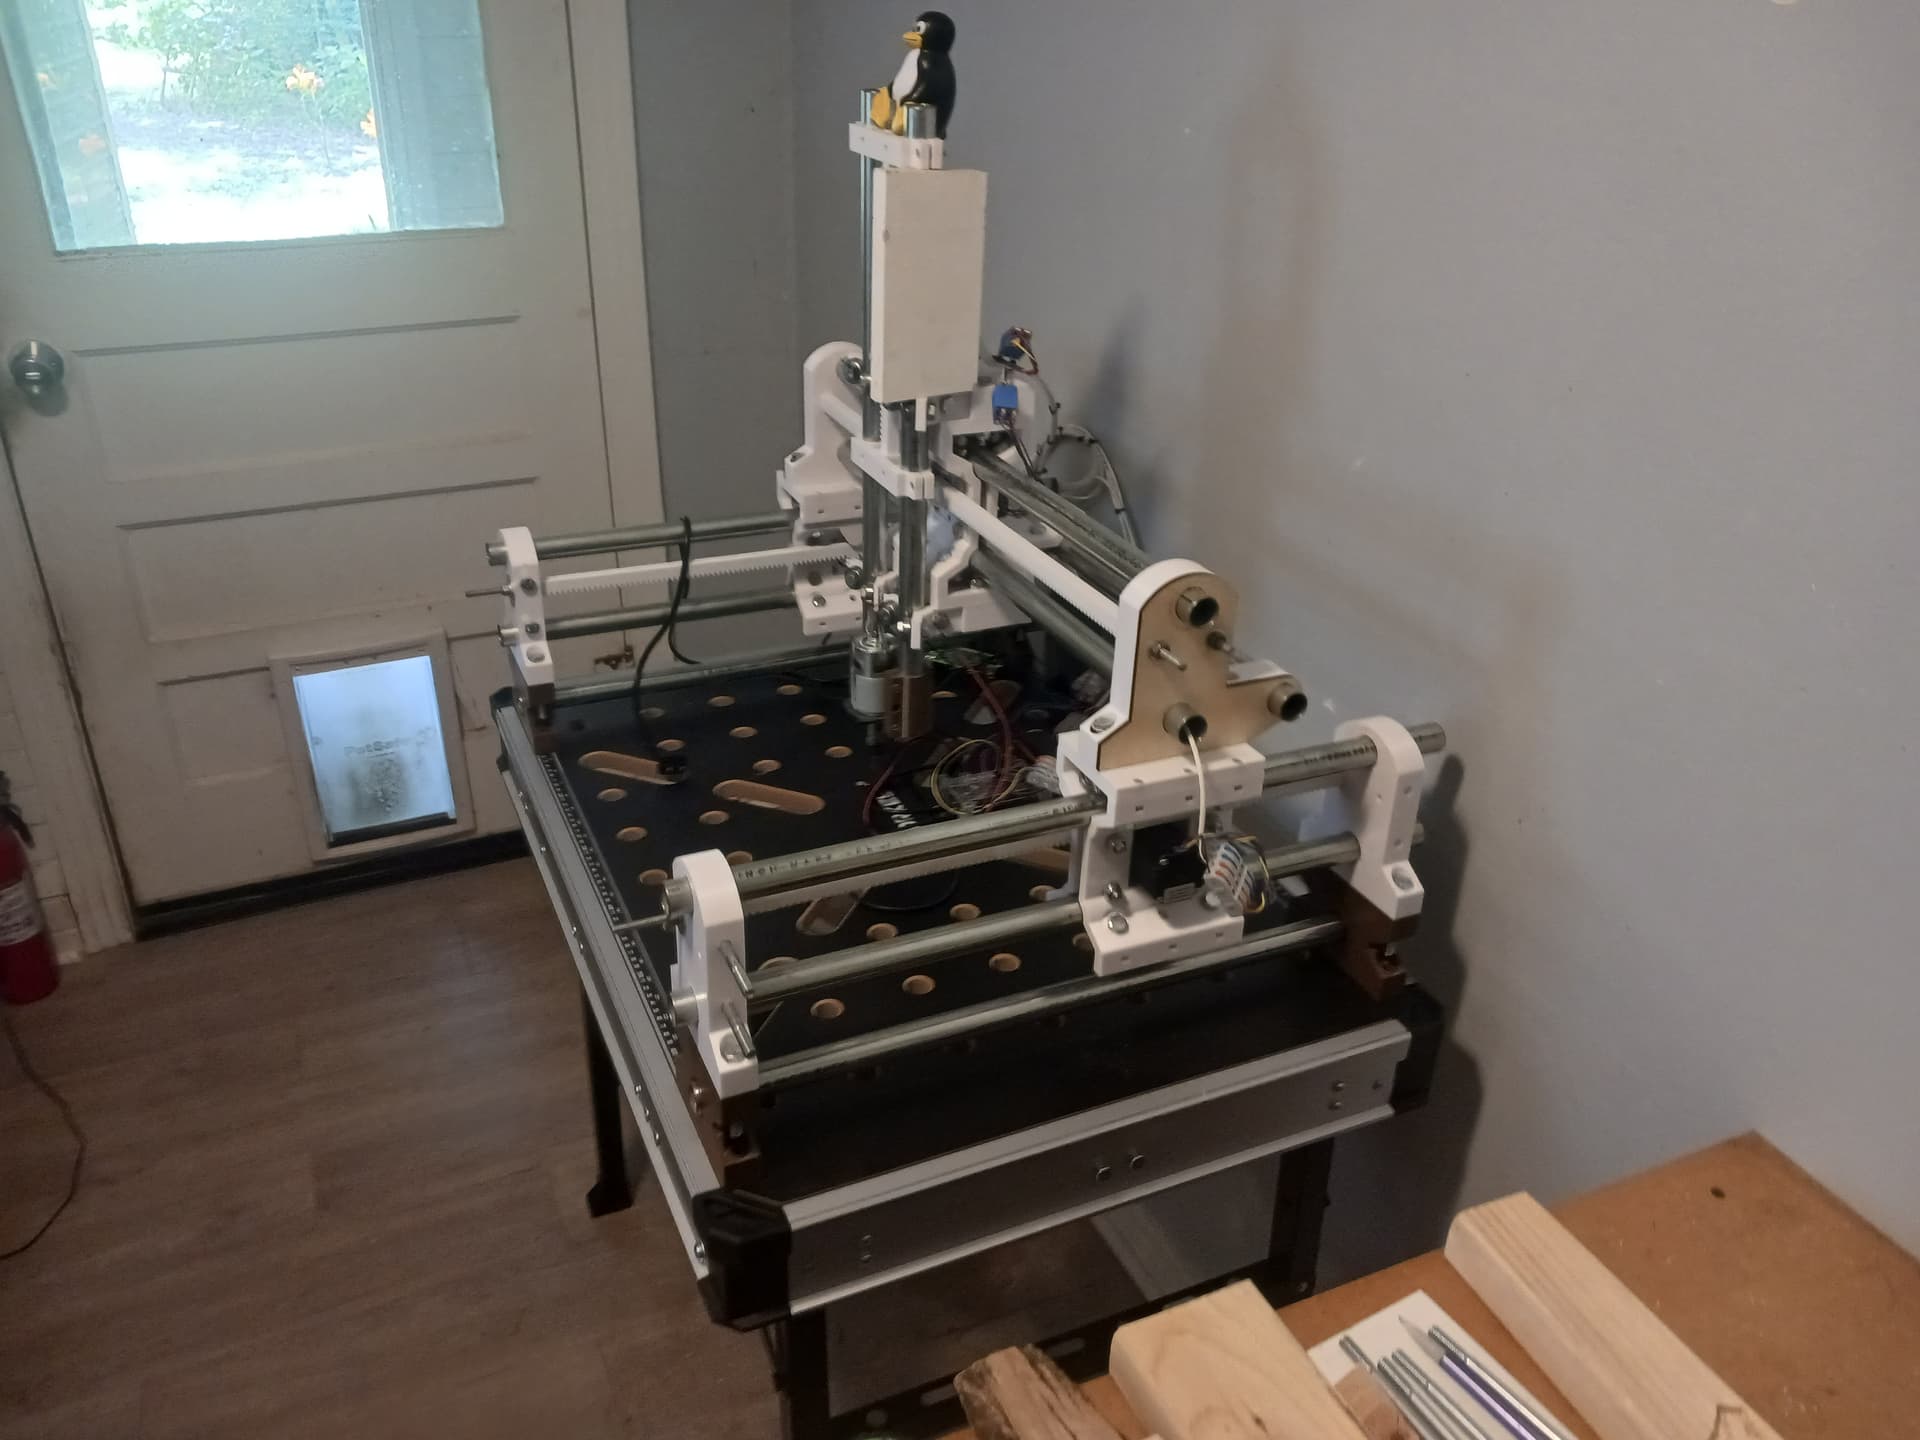
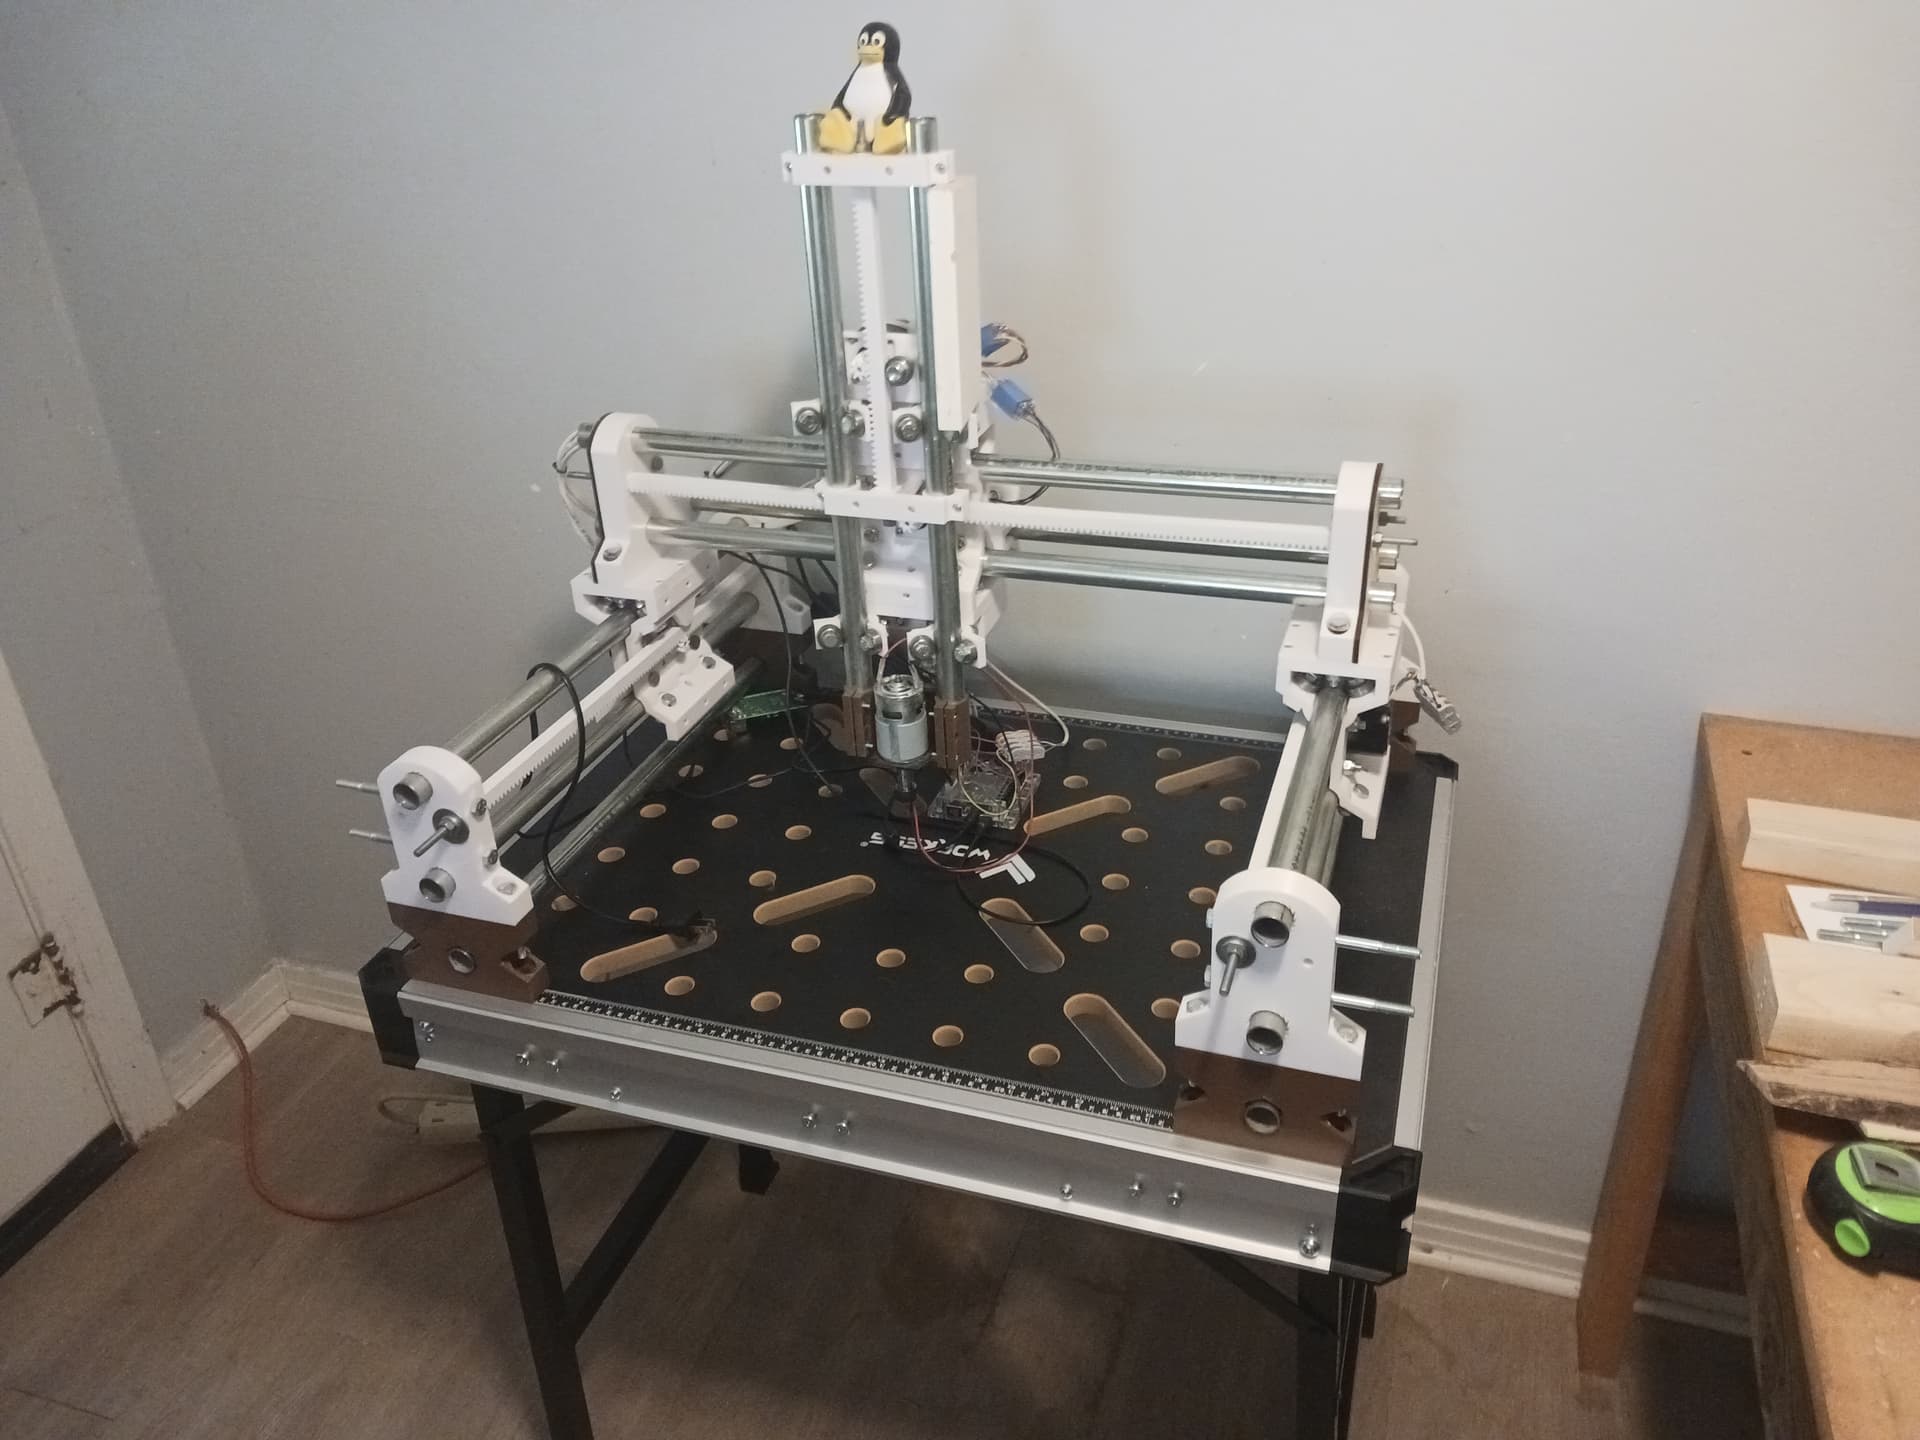
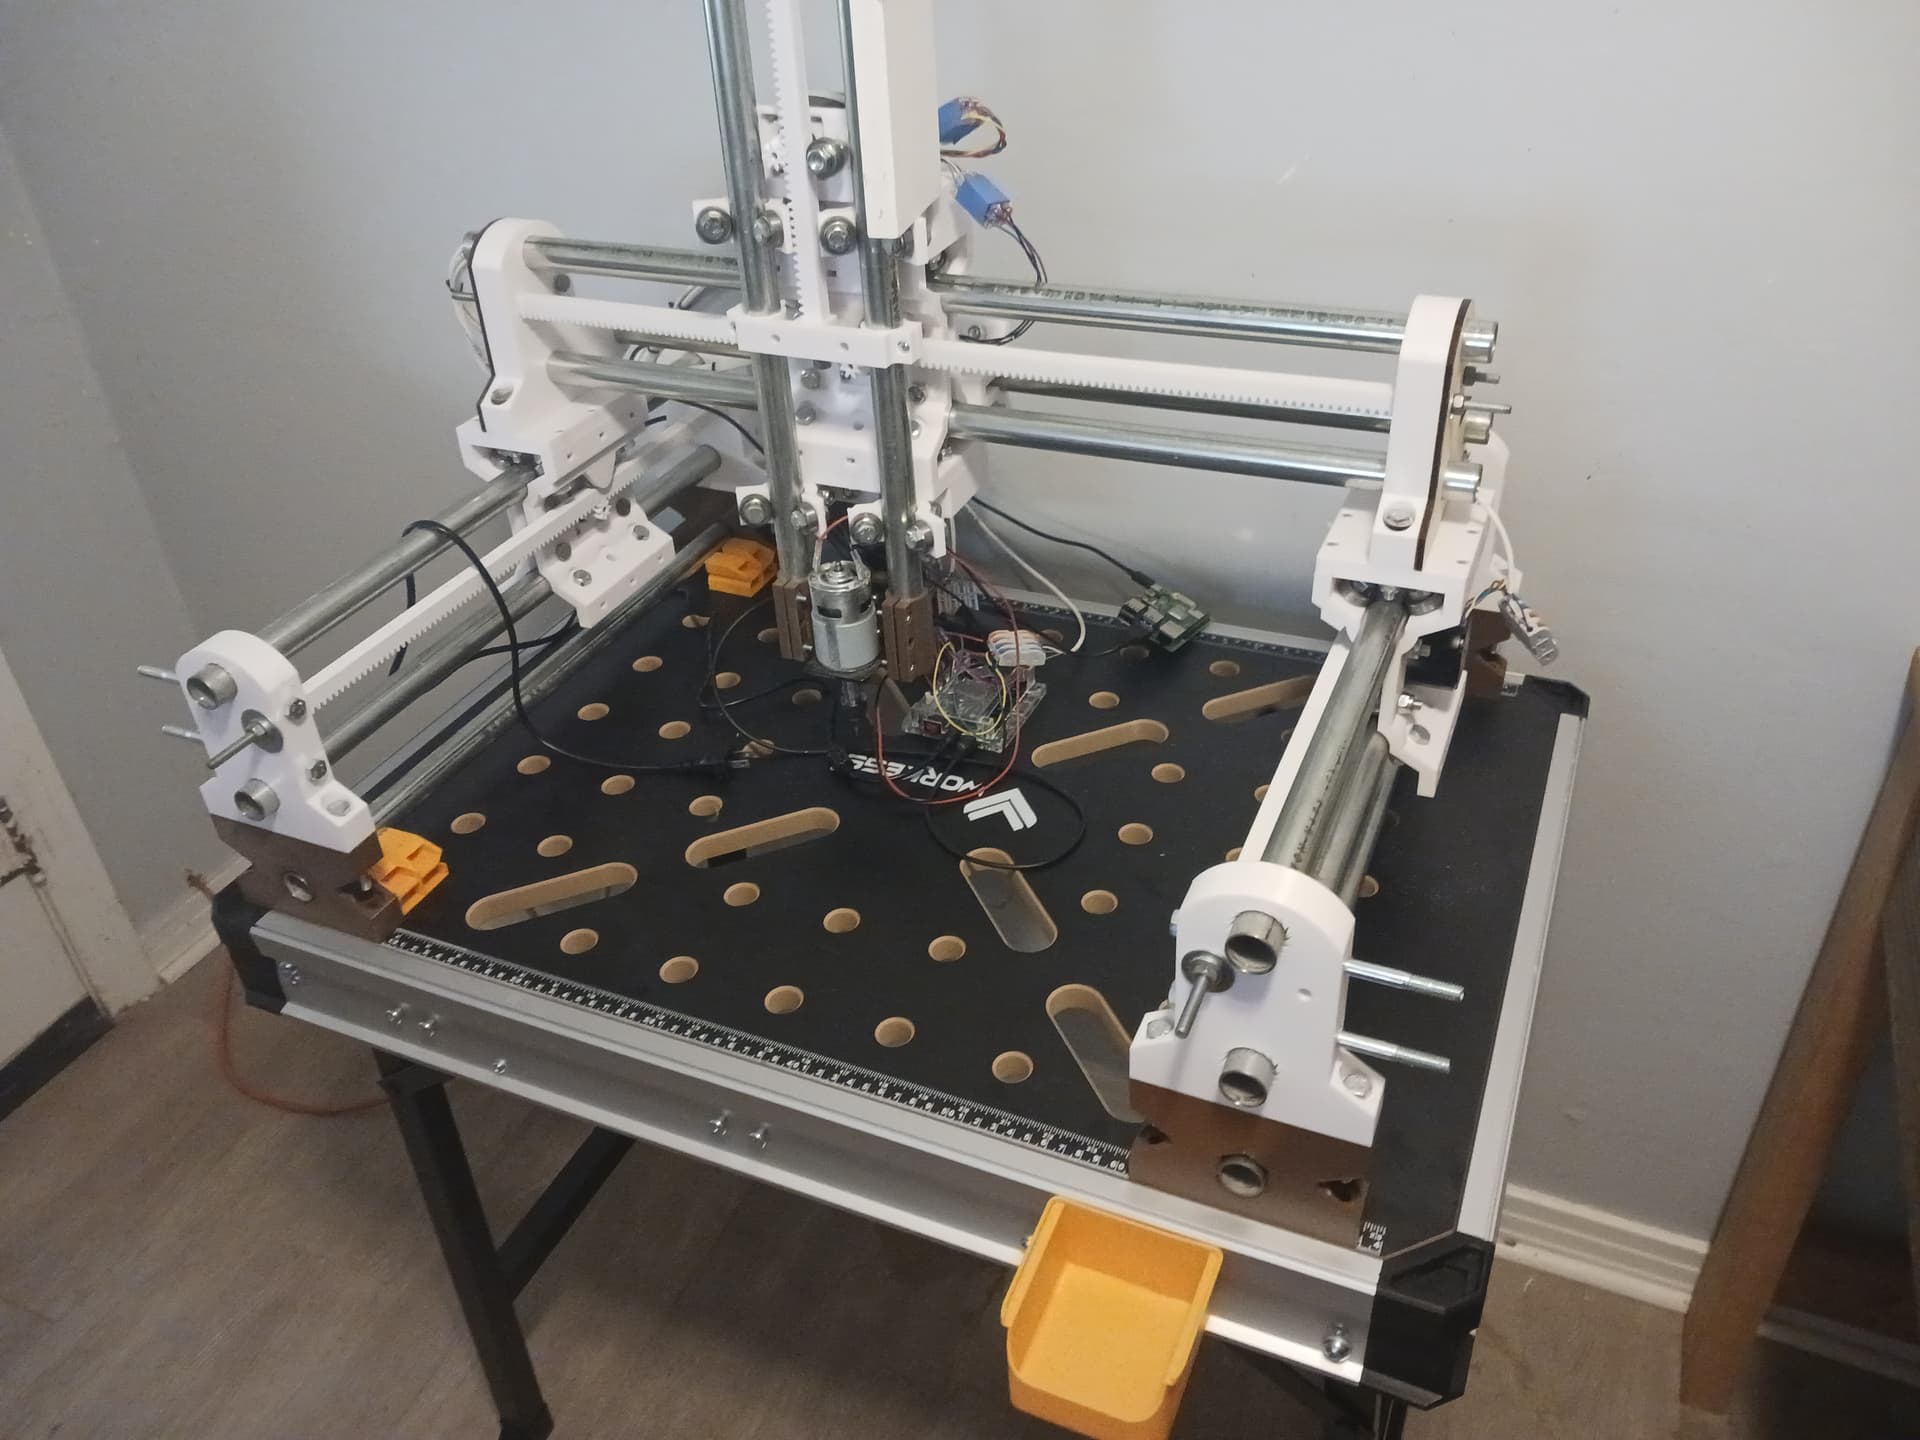
So, meanwhile I’ve been pondering what might be done to keep from making too big a mess in the house once I start testing “spindle” operations again… and now that I have a relatively clean area to work in. Looking at it, I think it’d be a relatively simple matter to attach panels on the sides and back of the machine to help contain/confine the debris to the worksurface area. Panels about 24" x 16" for the sides and 30" x 16" for the back looks like a good starting point on my machine… and maybe I could use printed spacers and the existing holes in the Y-axis end supports for attachment.
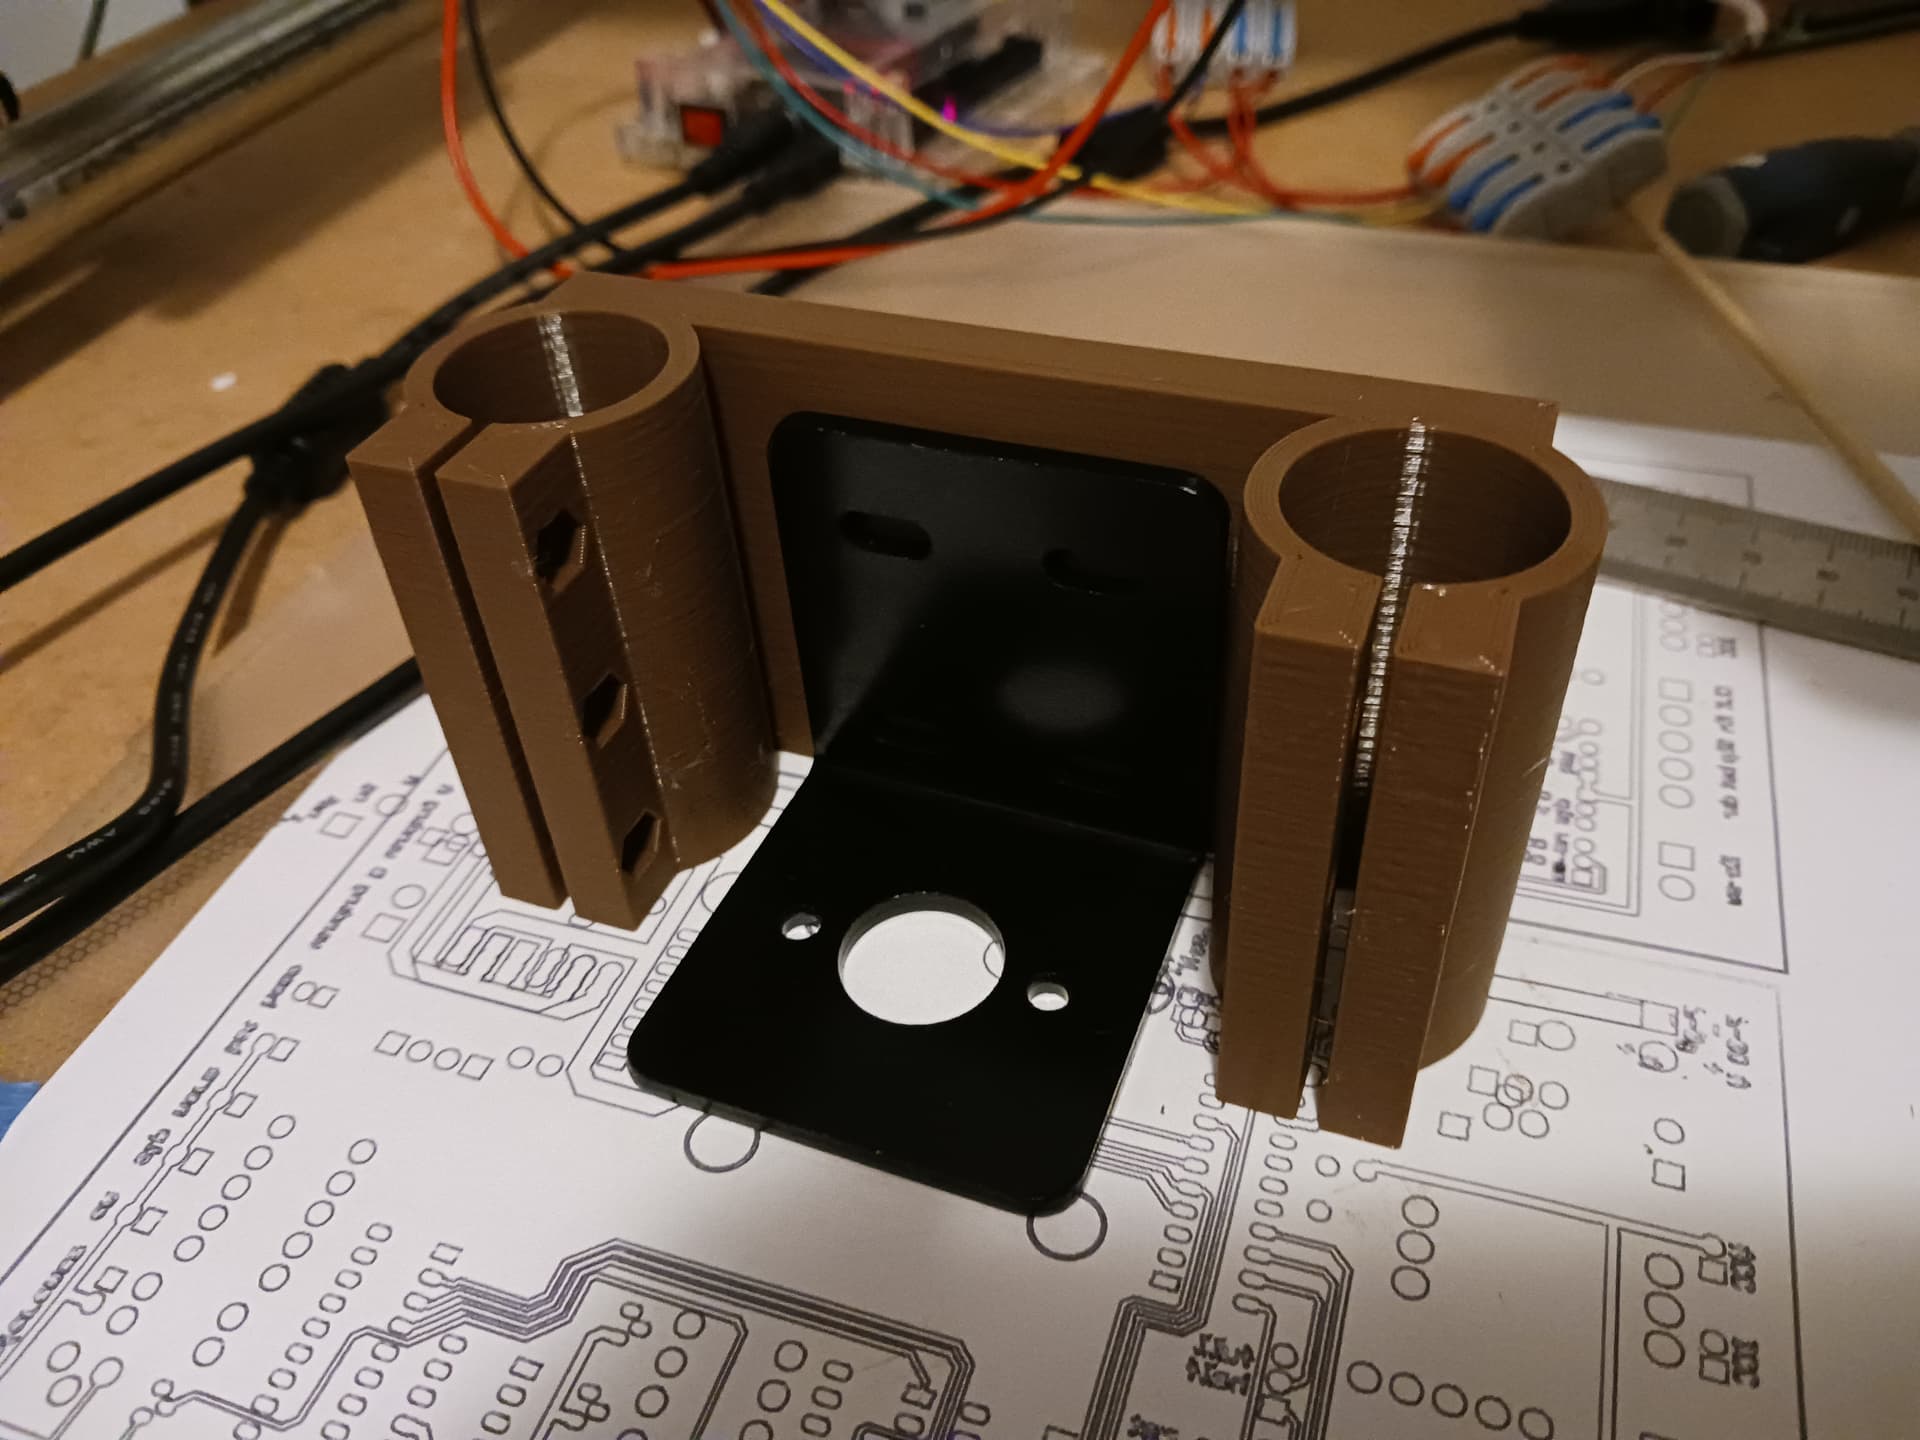
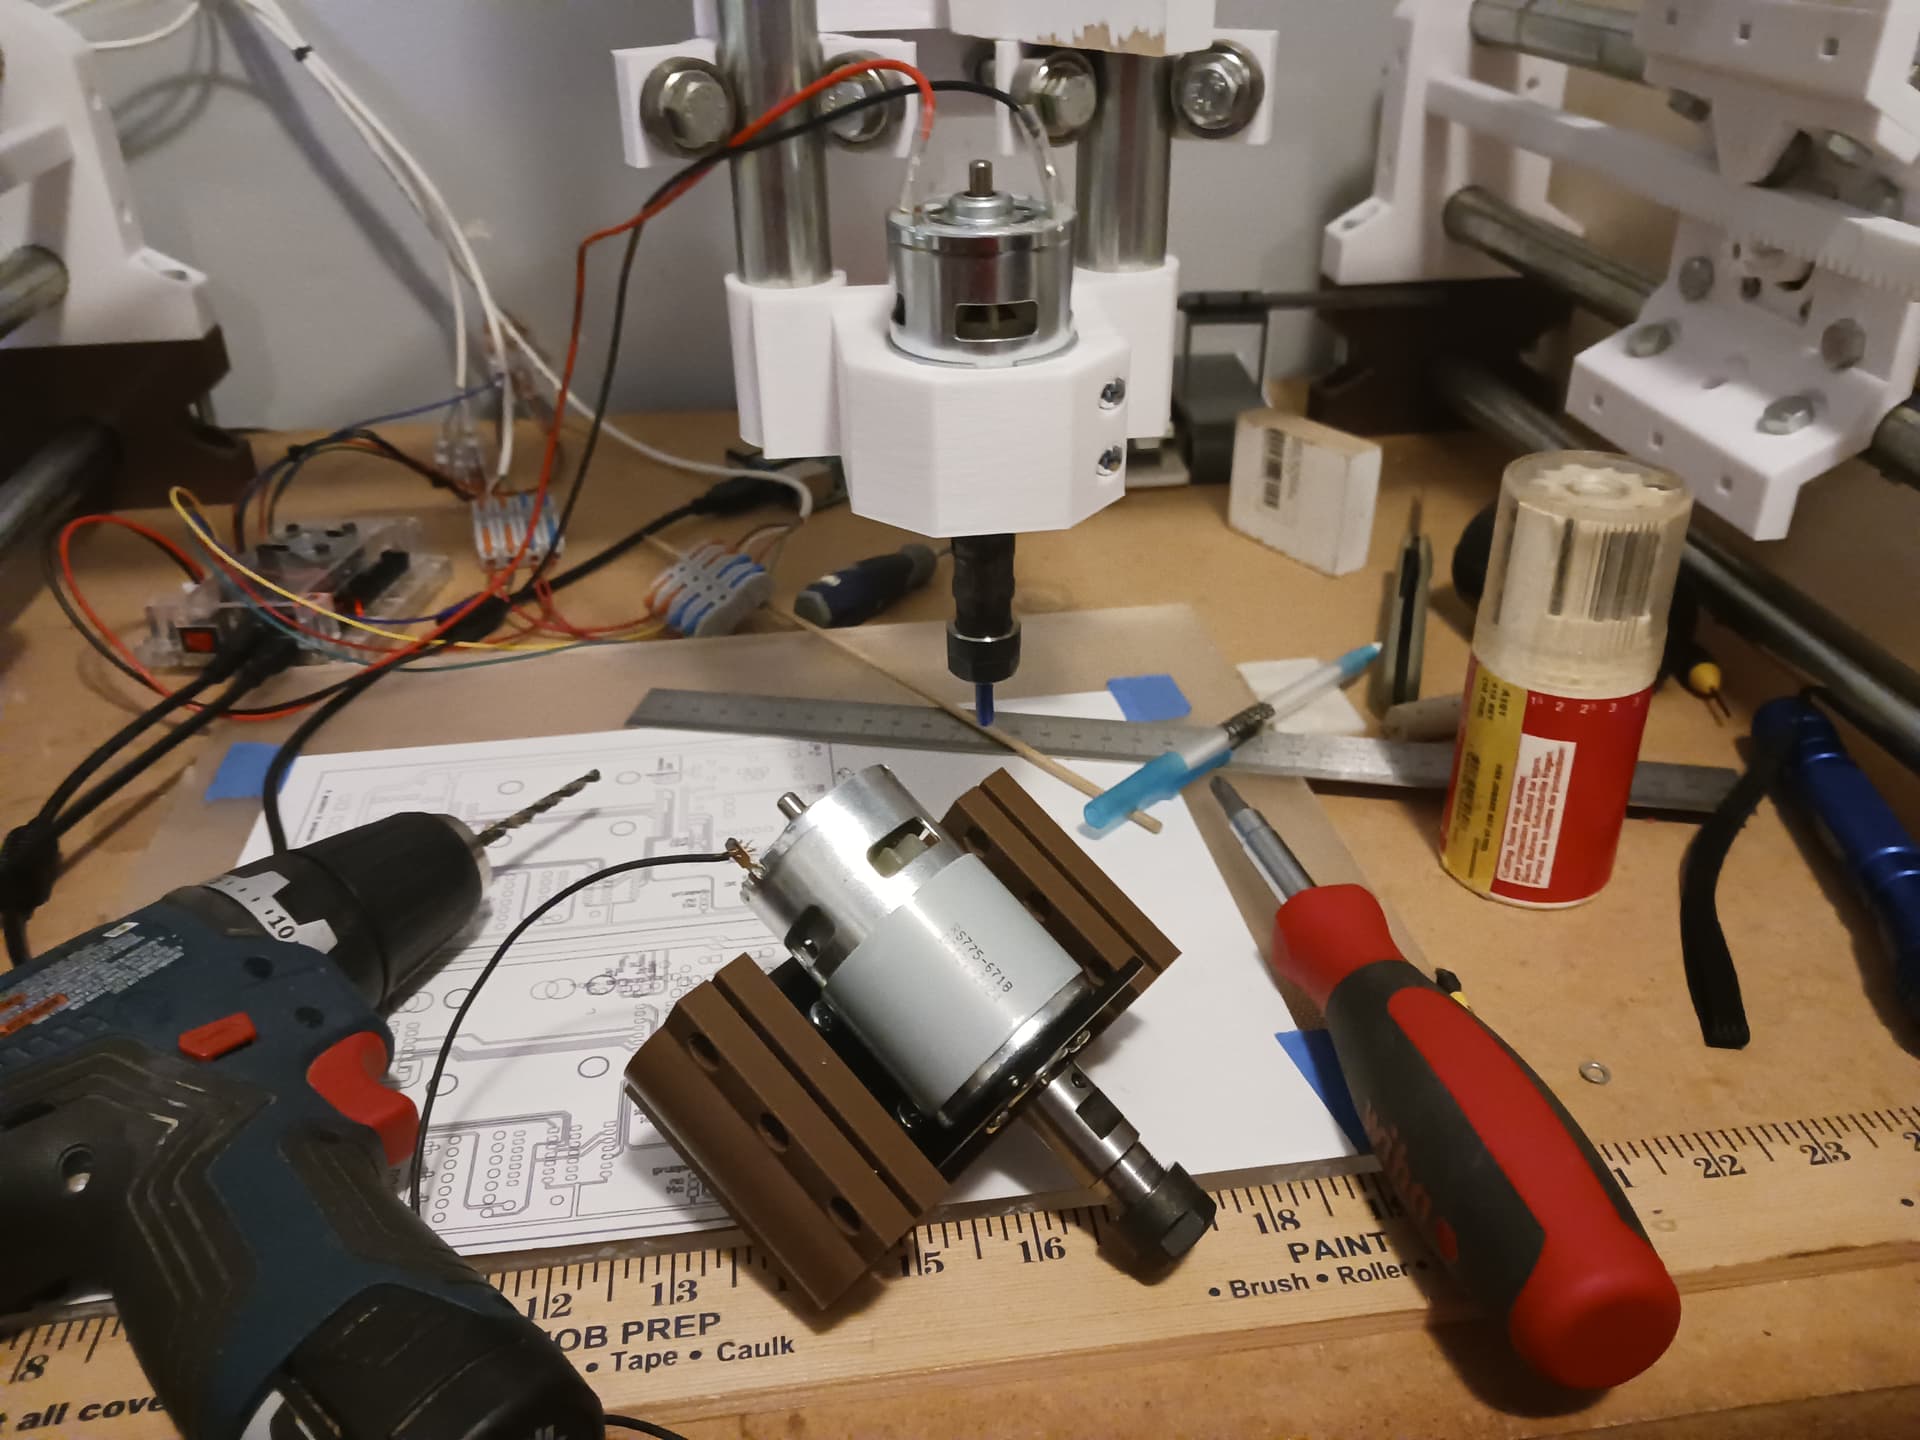
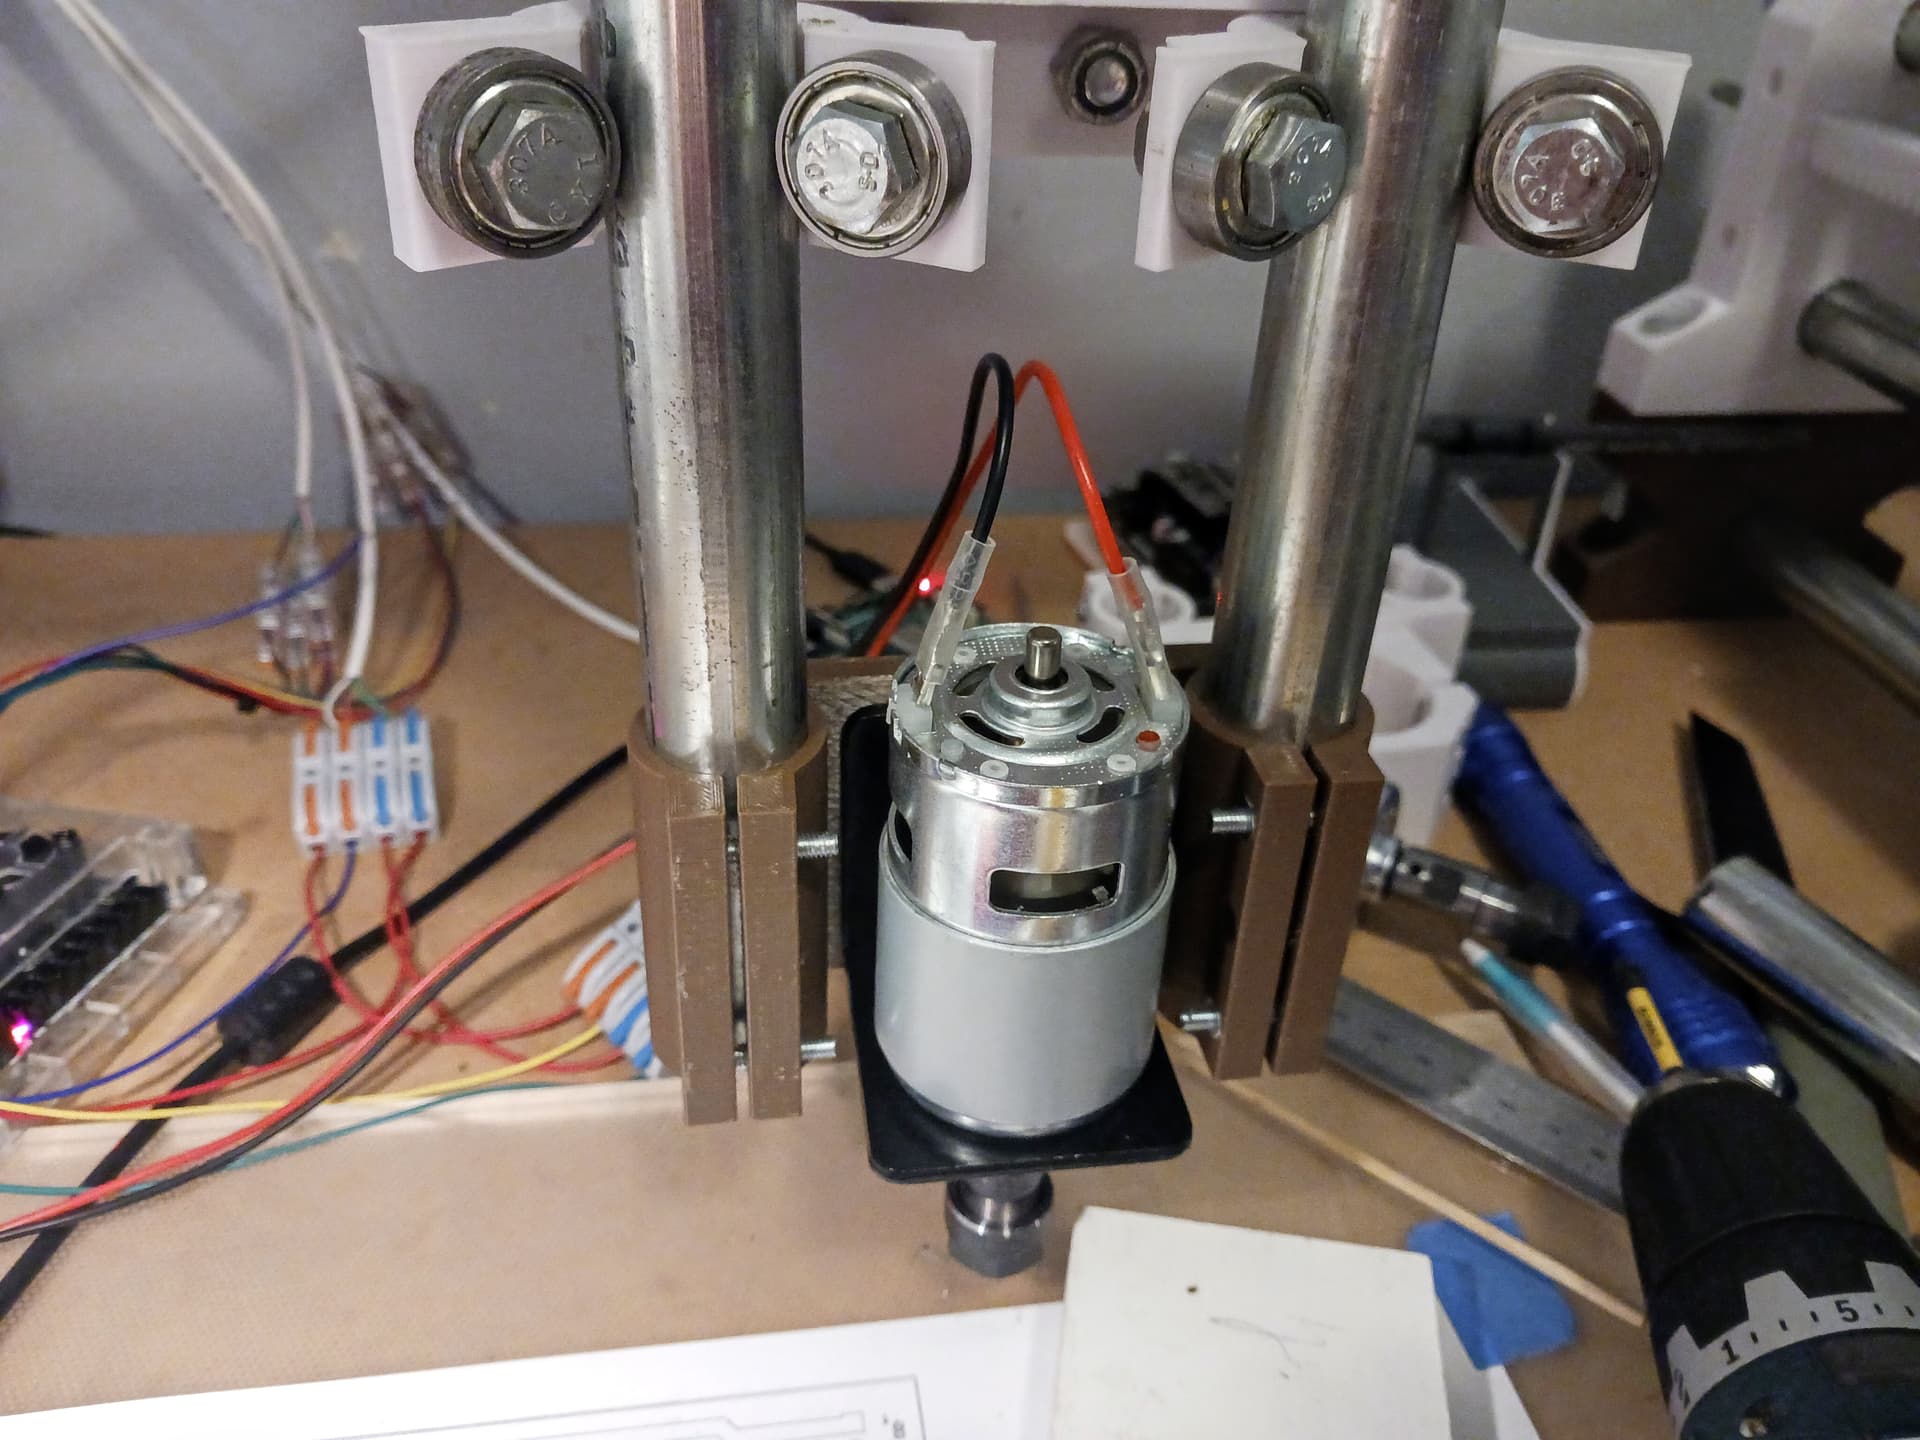
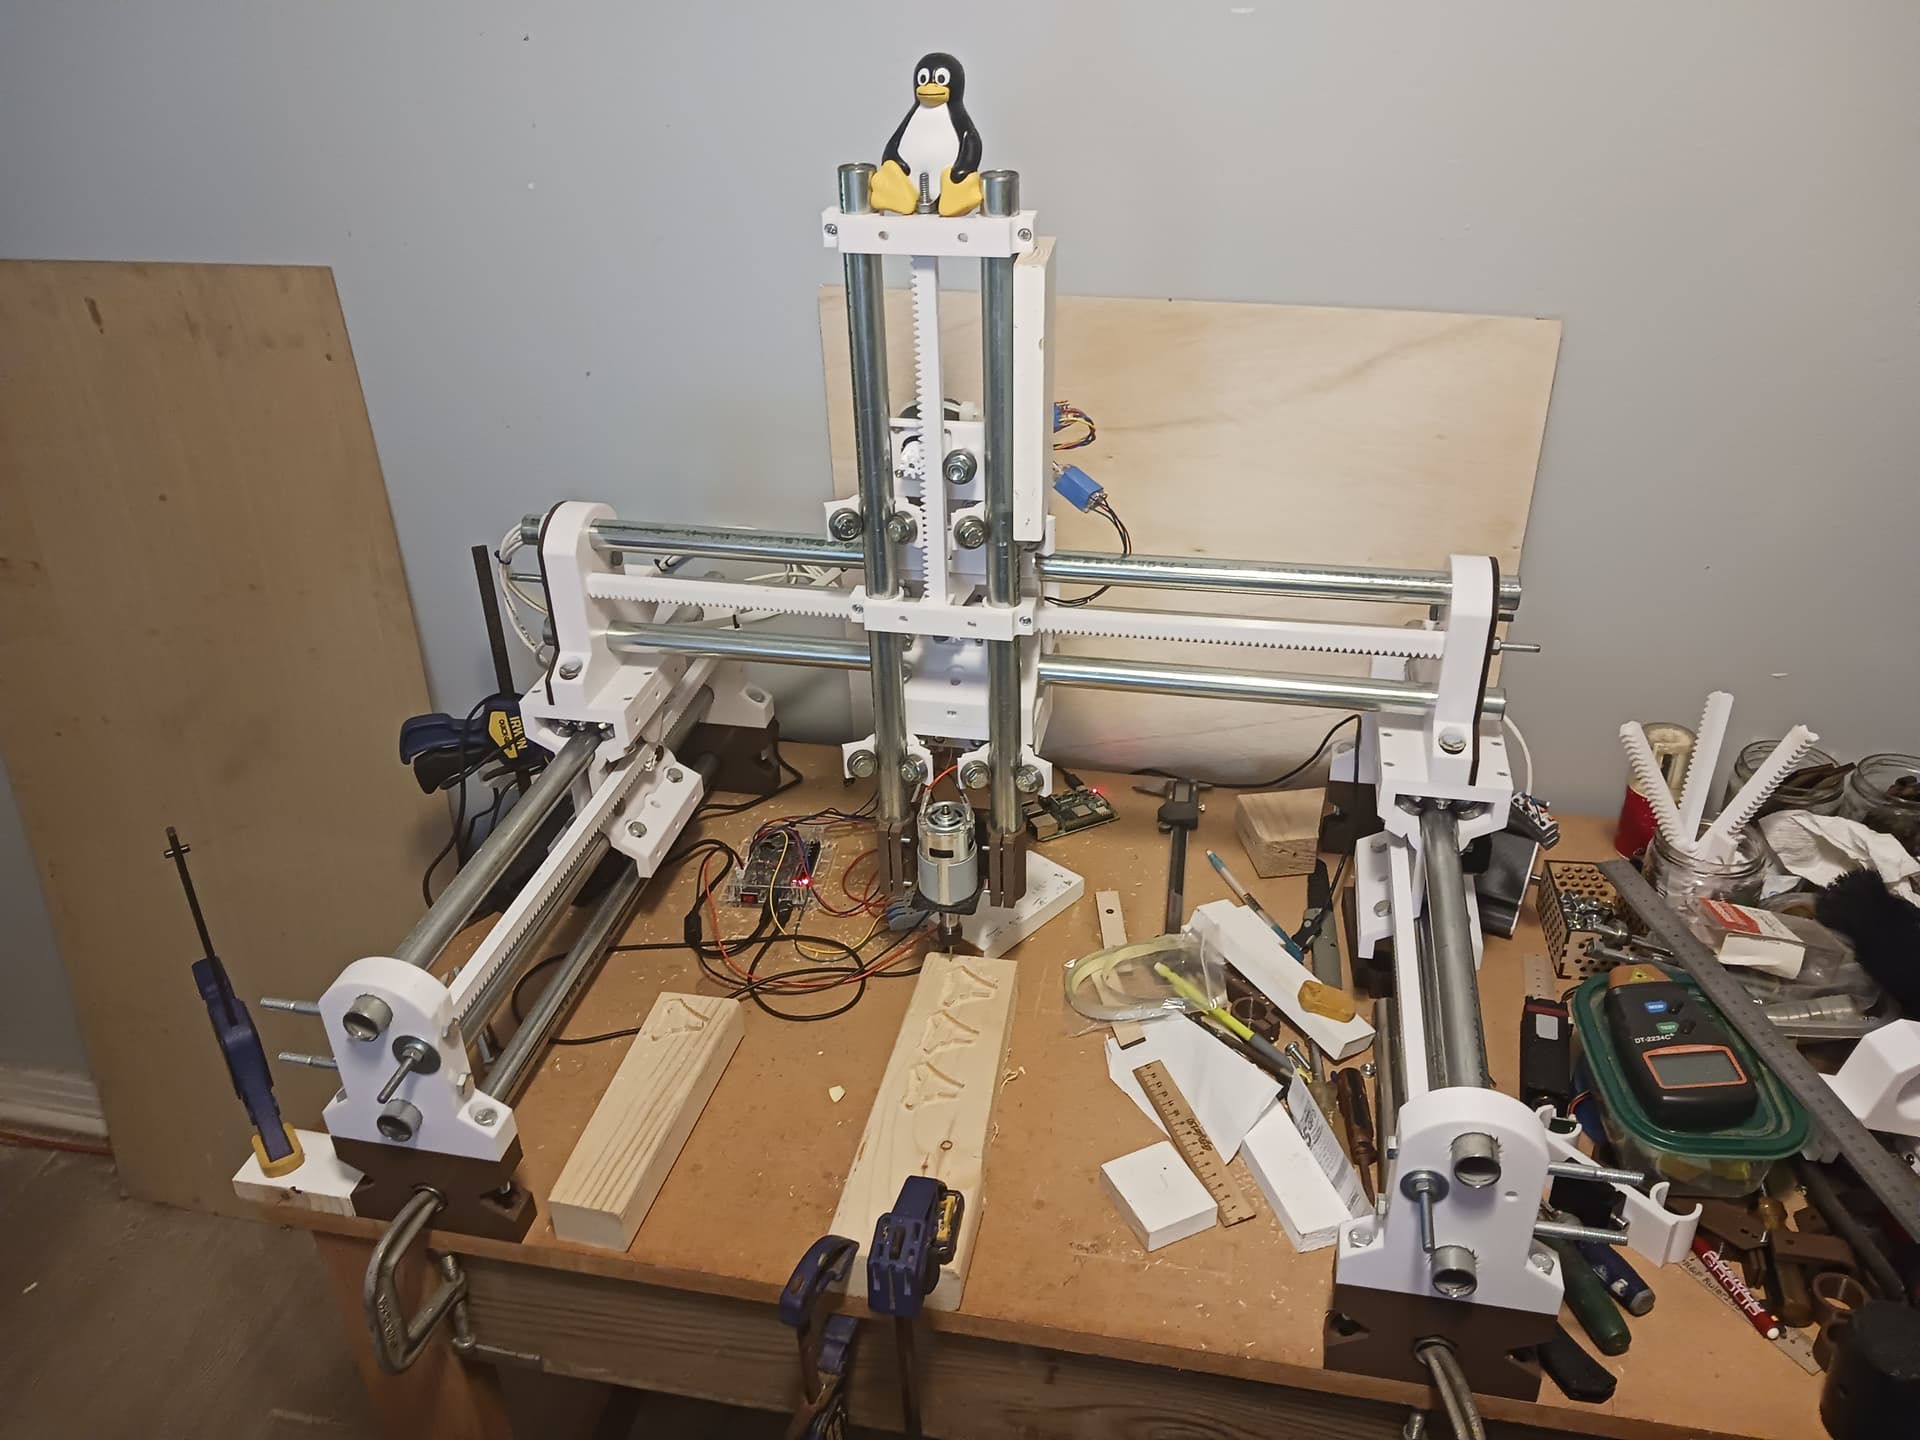
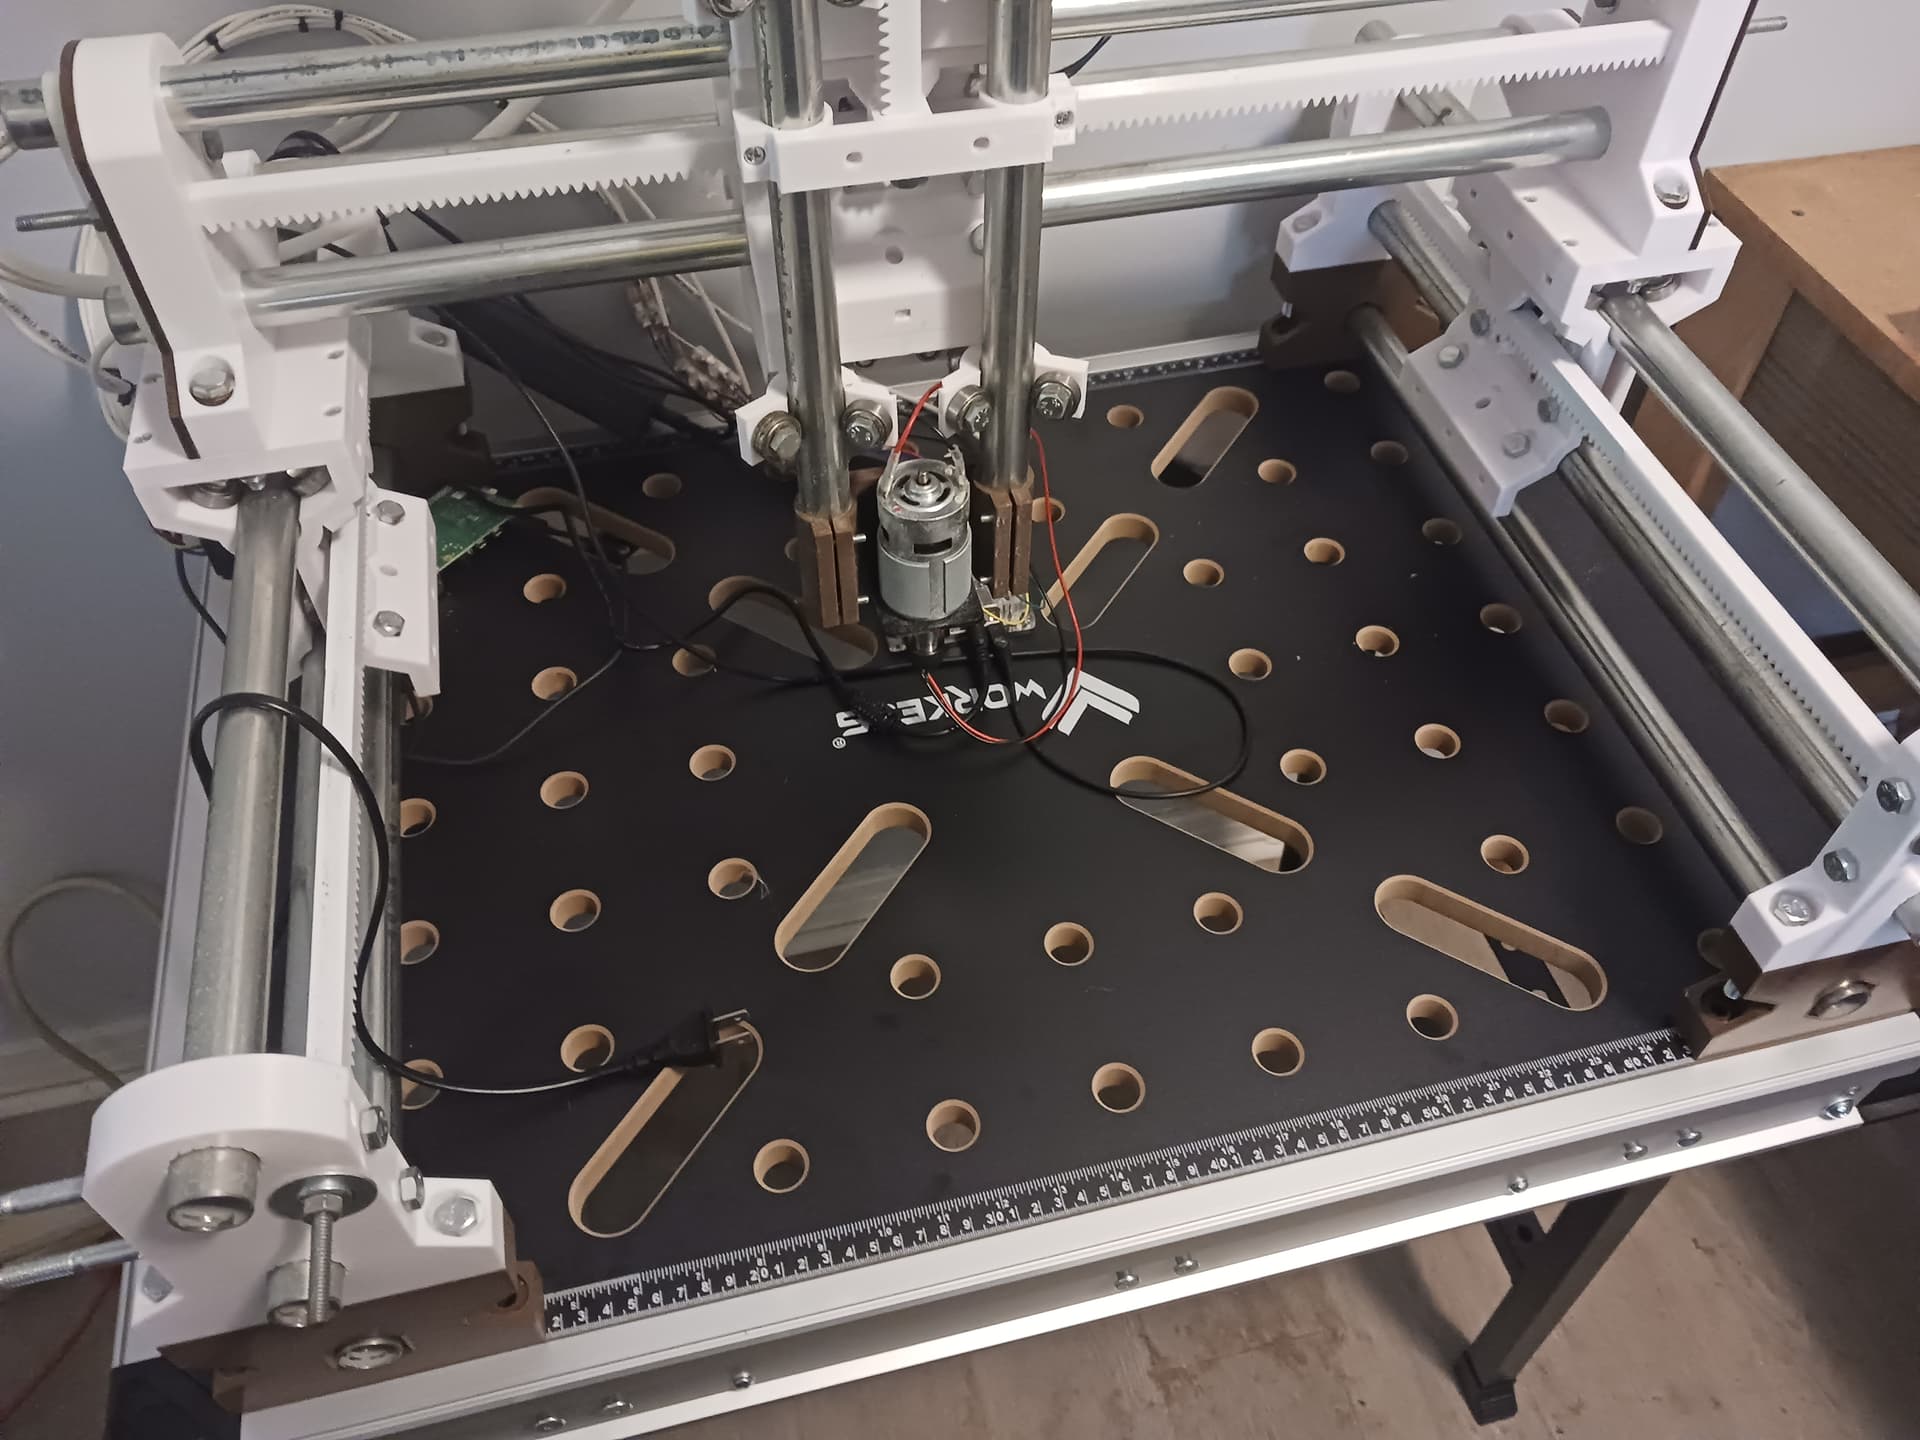
I also printed an alternative mount for the 775 motor I want to use for initial “spindle” testing. I had previously bought a couple of 775 motors that came with sturdy metal mounts that allow the “spindle” to easily fit between the conduit rails, much closer to the center-line of the Z-axis. It’d also be easy to put a wooden insulator between the metal motor mount and printed mount should the motor ever get warm enough during a prolonged job to soften the PLA plastic.
Other than that, I managed to blow out the Y-axis driver on a +24V GRBL controller board I was using with the 775 spindle. I forgot – just once! – to turn off the motor power before messing with the Y-stepper wiring and it blew out the driver. I was rewiring to connect the MPR&P Y-steppers in series since this controller board has only one Y-axis connector, where the previous +12V controller I was using had two Y- axis connectors. However, ONCE AGAIN those lever-connectors saved the day and I was able to make the series connection using the existing wires and a couple of jumpers, visible in the last photo above. And luckily, I had another identical controller board…
I think that about brings this thread up to date. Sorry about being so slow but I still have to eat and get a nap or two, in… ![]()
– David
Not laughing at you: Laughing with you as my space is also very attractive to collecting anything and everything. Looks really good. That stinks about blowing the driver though. I did that recently, but was able to use 2 boards and between them have all the needed channels.
We want you at your best, David. Naps, meals, and snacks are required for being in peak shape.
Once again I feel a bit embarrassed that I procrastinate the way I do… I could have accomplished what I’m about to share a couple of weeks ago. But I guess it’s as they say, better later than never…
I stumbled across – not sure how I missed it for so long (too caught up in lasers at the time, I guess!) – the CNC drag races that Ryan instigated some several years ago. What a great read. It’s truly impressive what has been accomplished since… 16 minute runs that eventually plummeted all the way down to under 40 seconds. Ryan, Philipp, Doug, and others put out some spectacular YT videos showing their results… and Jamie concocted a super interesting “hog-out” method to measure progress toward taking maximal cuts in a material with your machines.
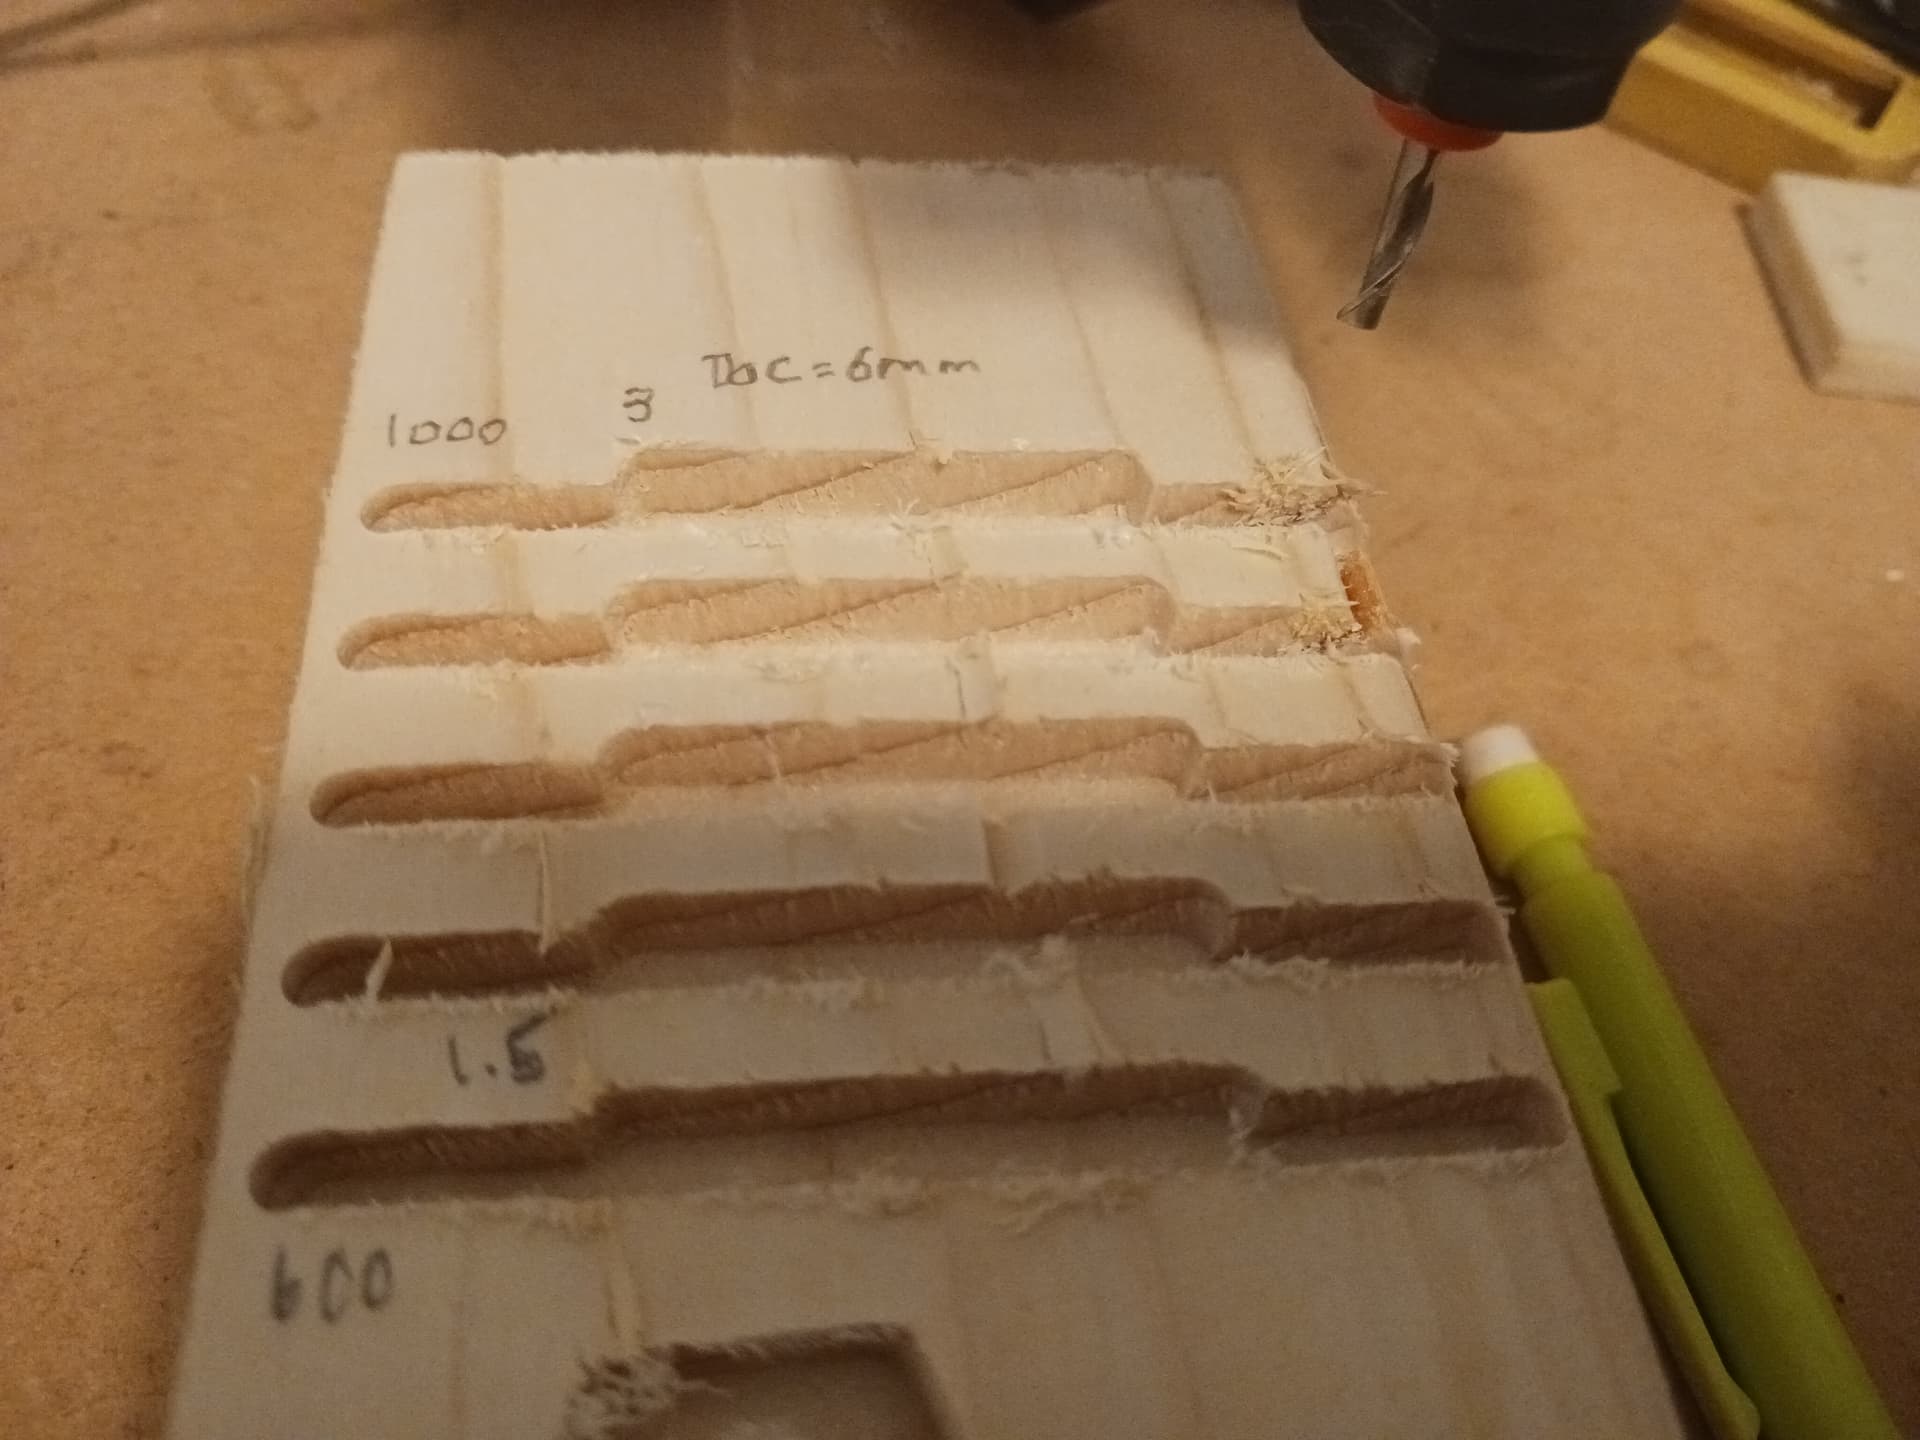
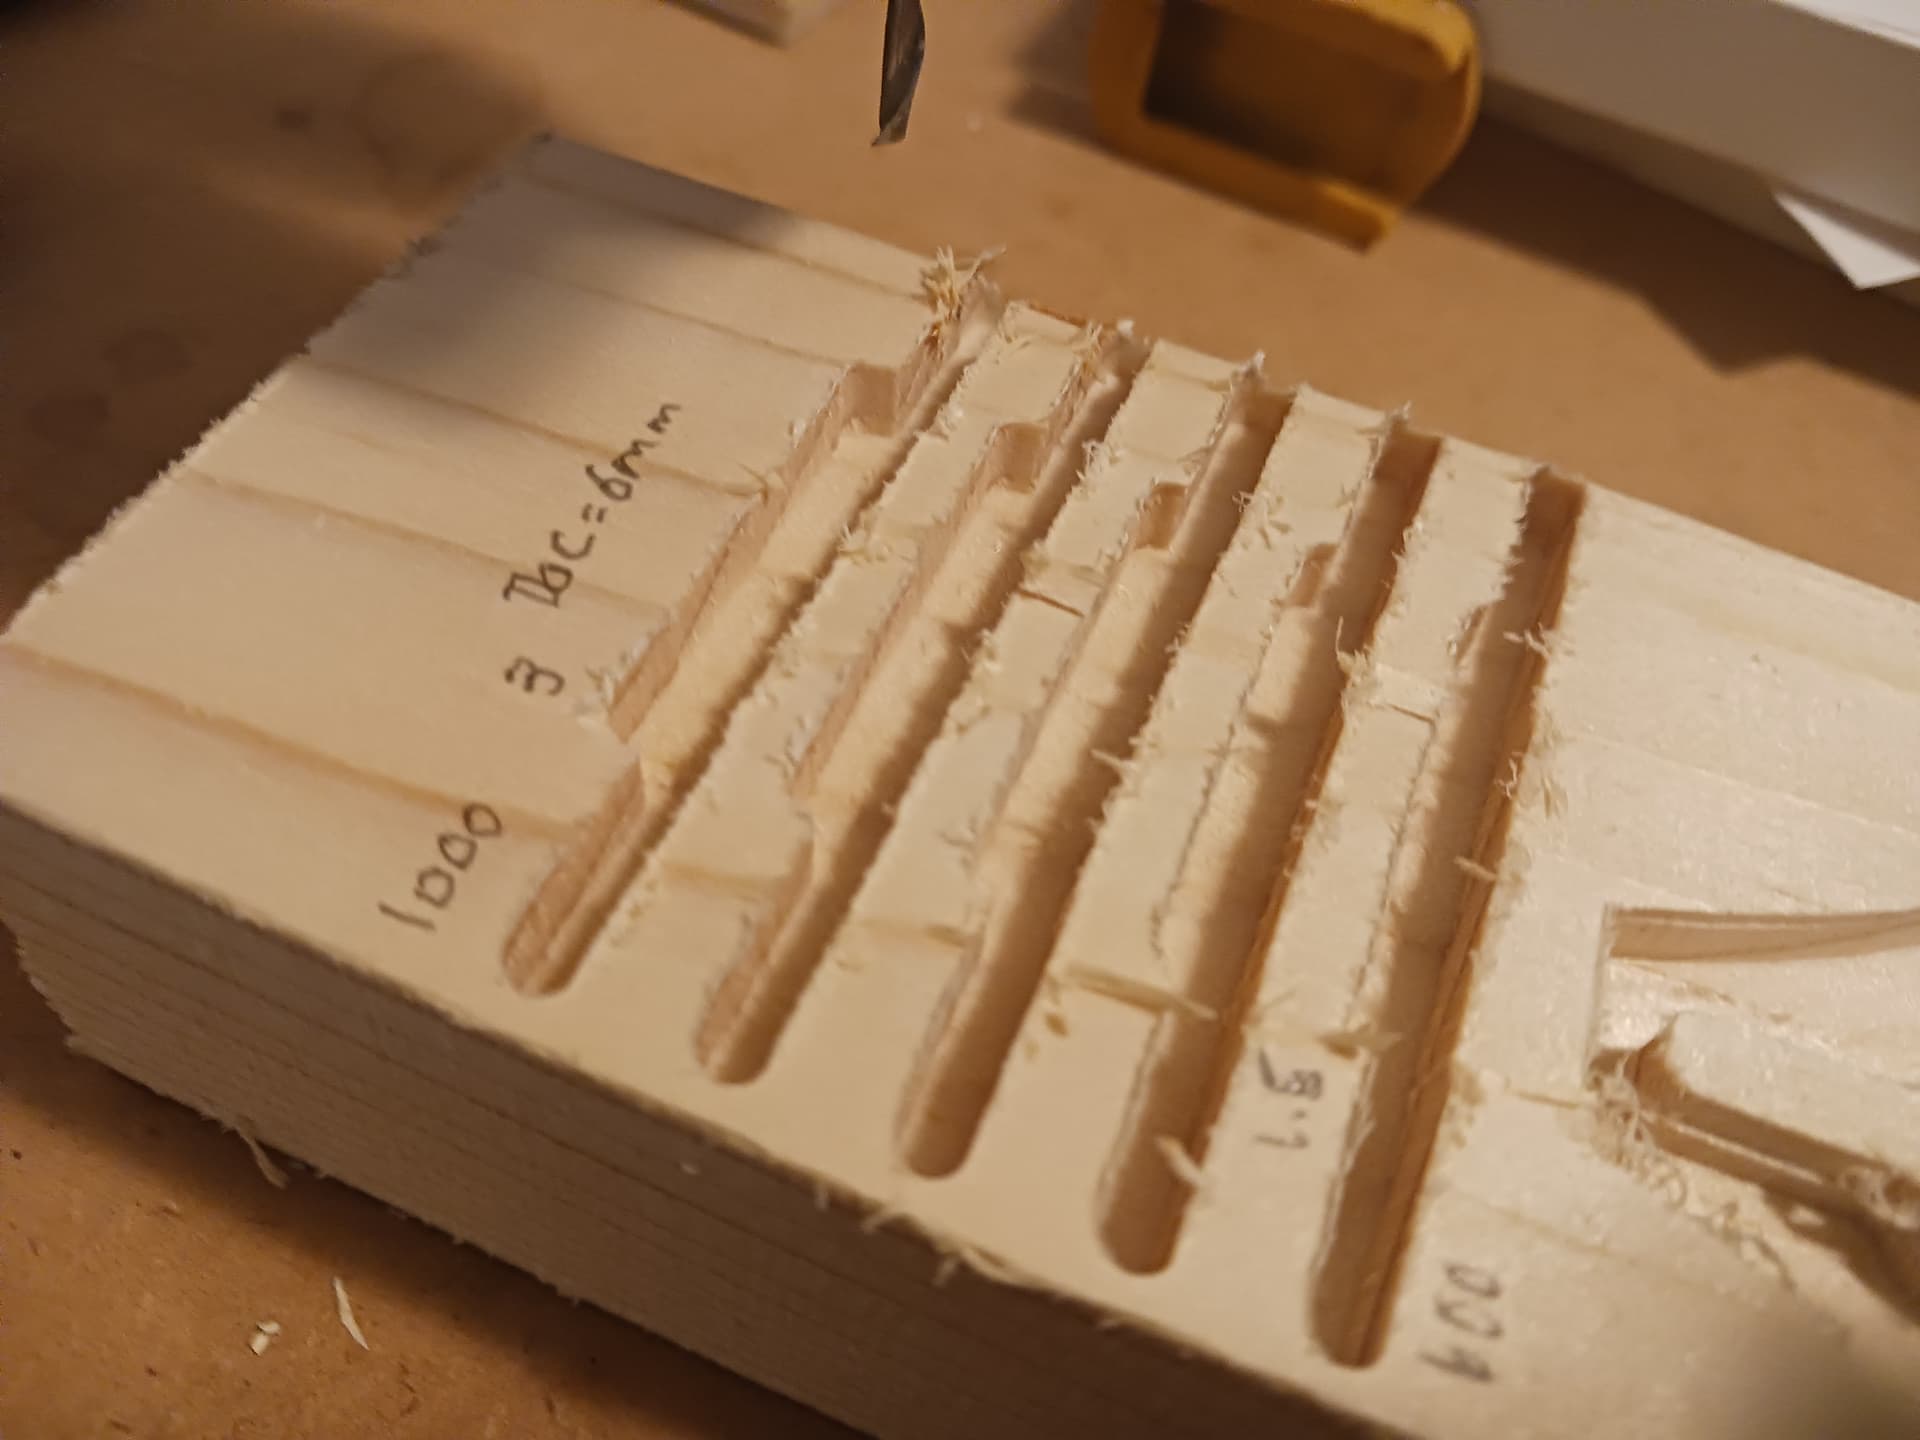
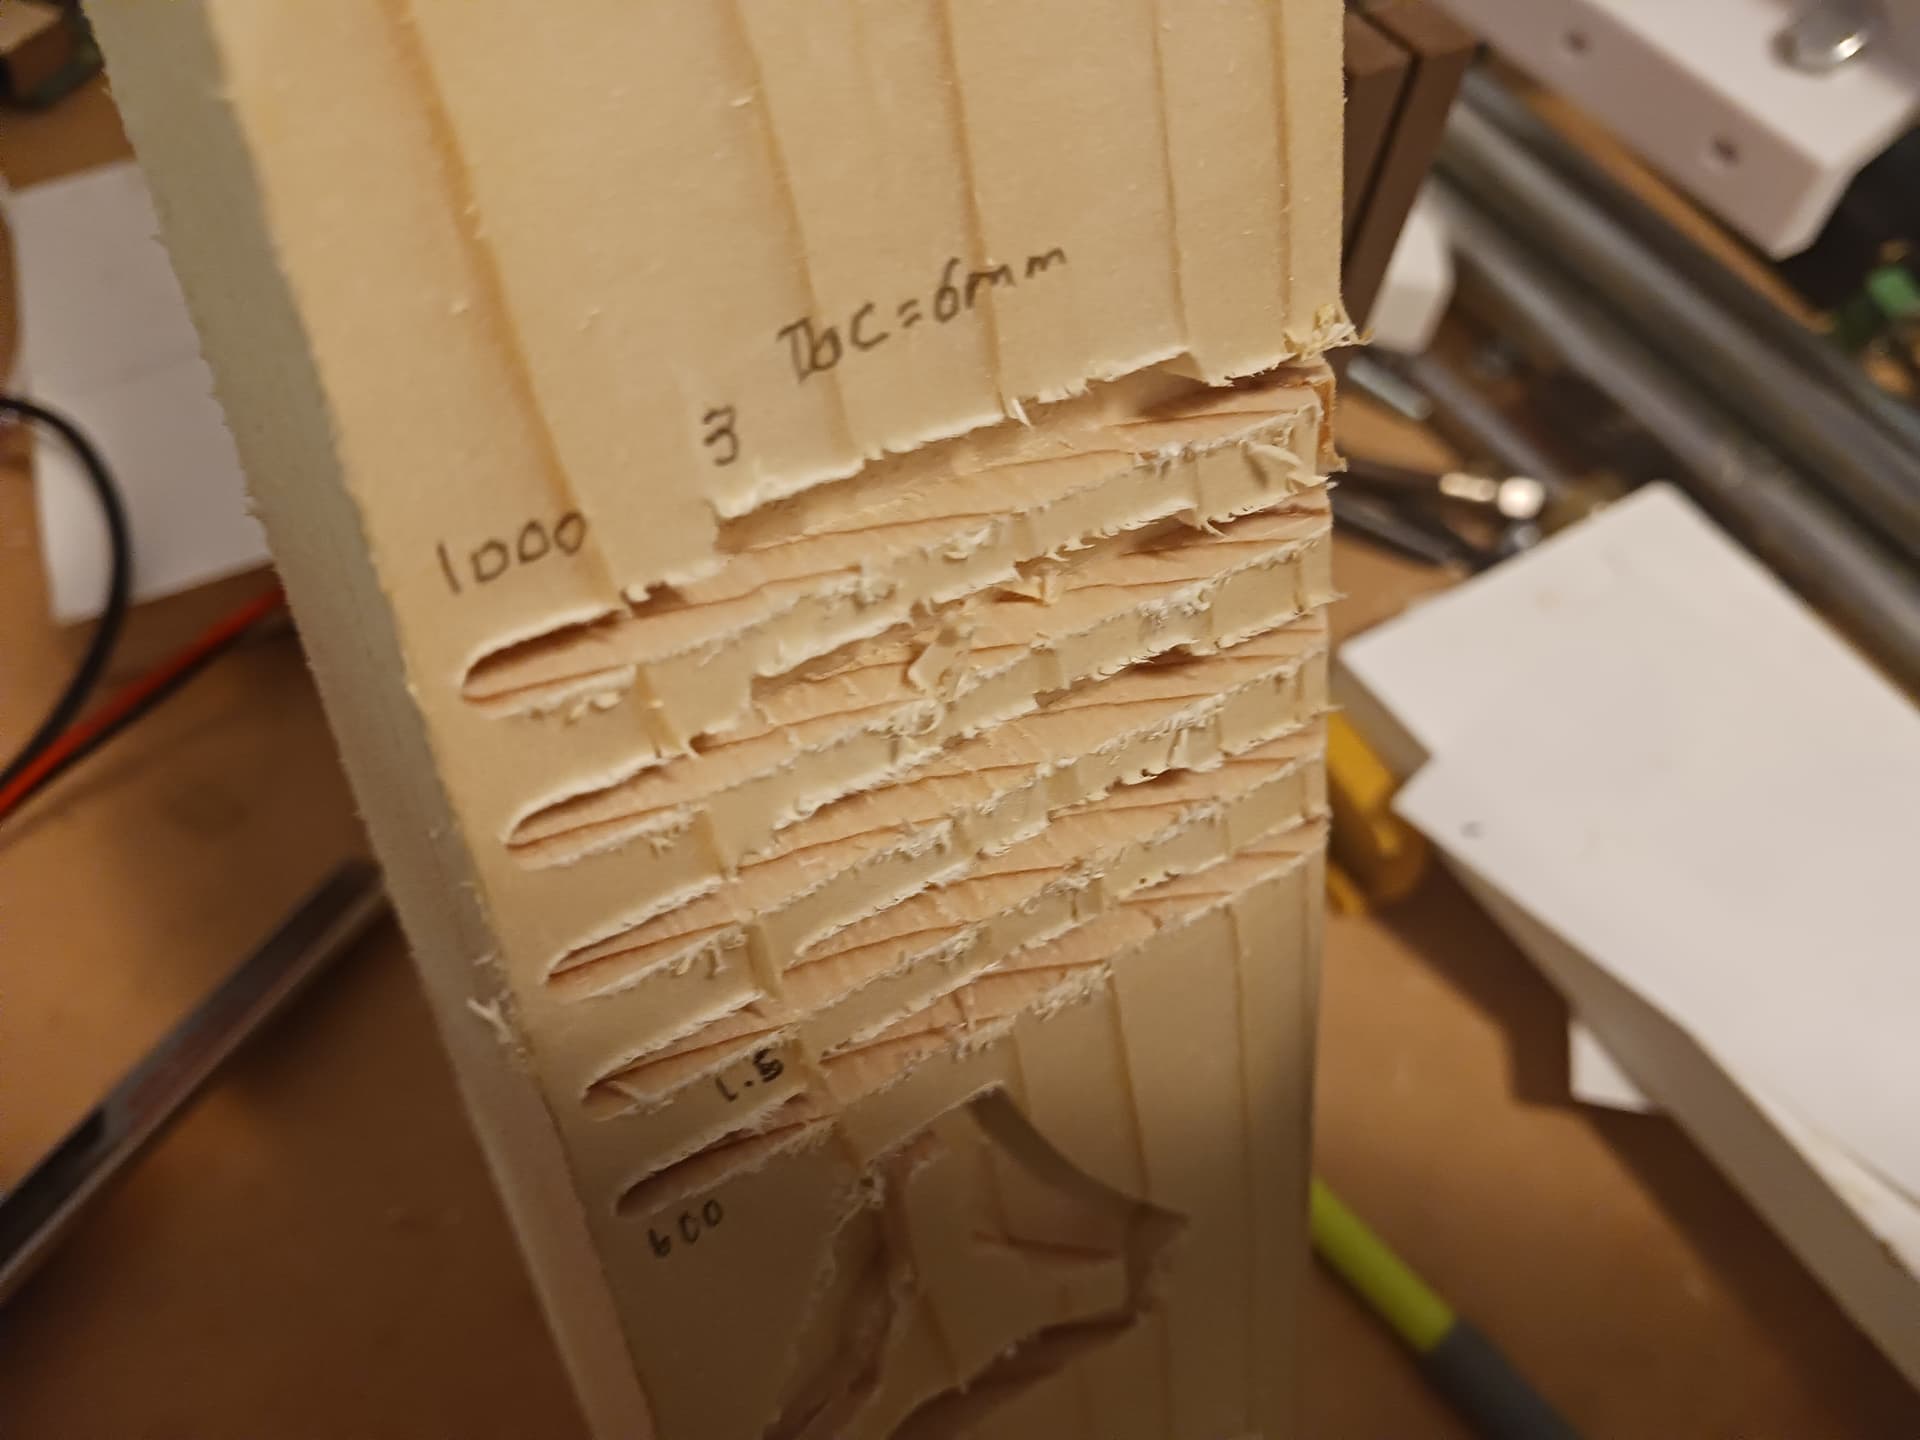
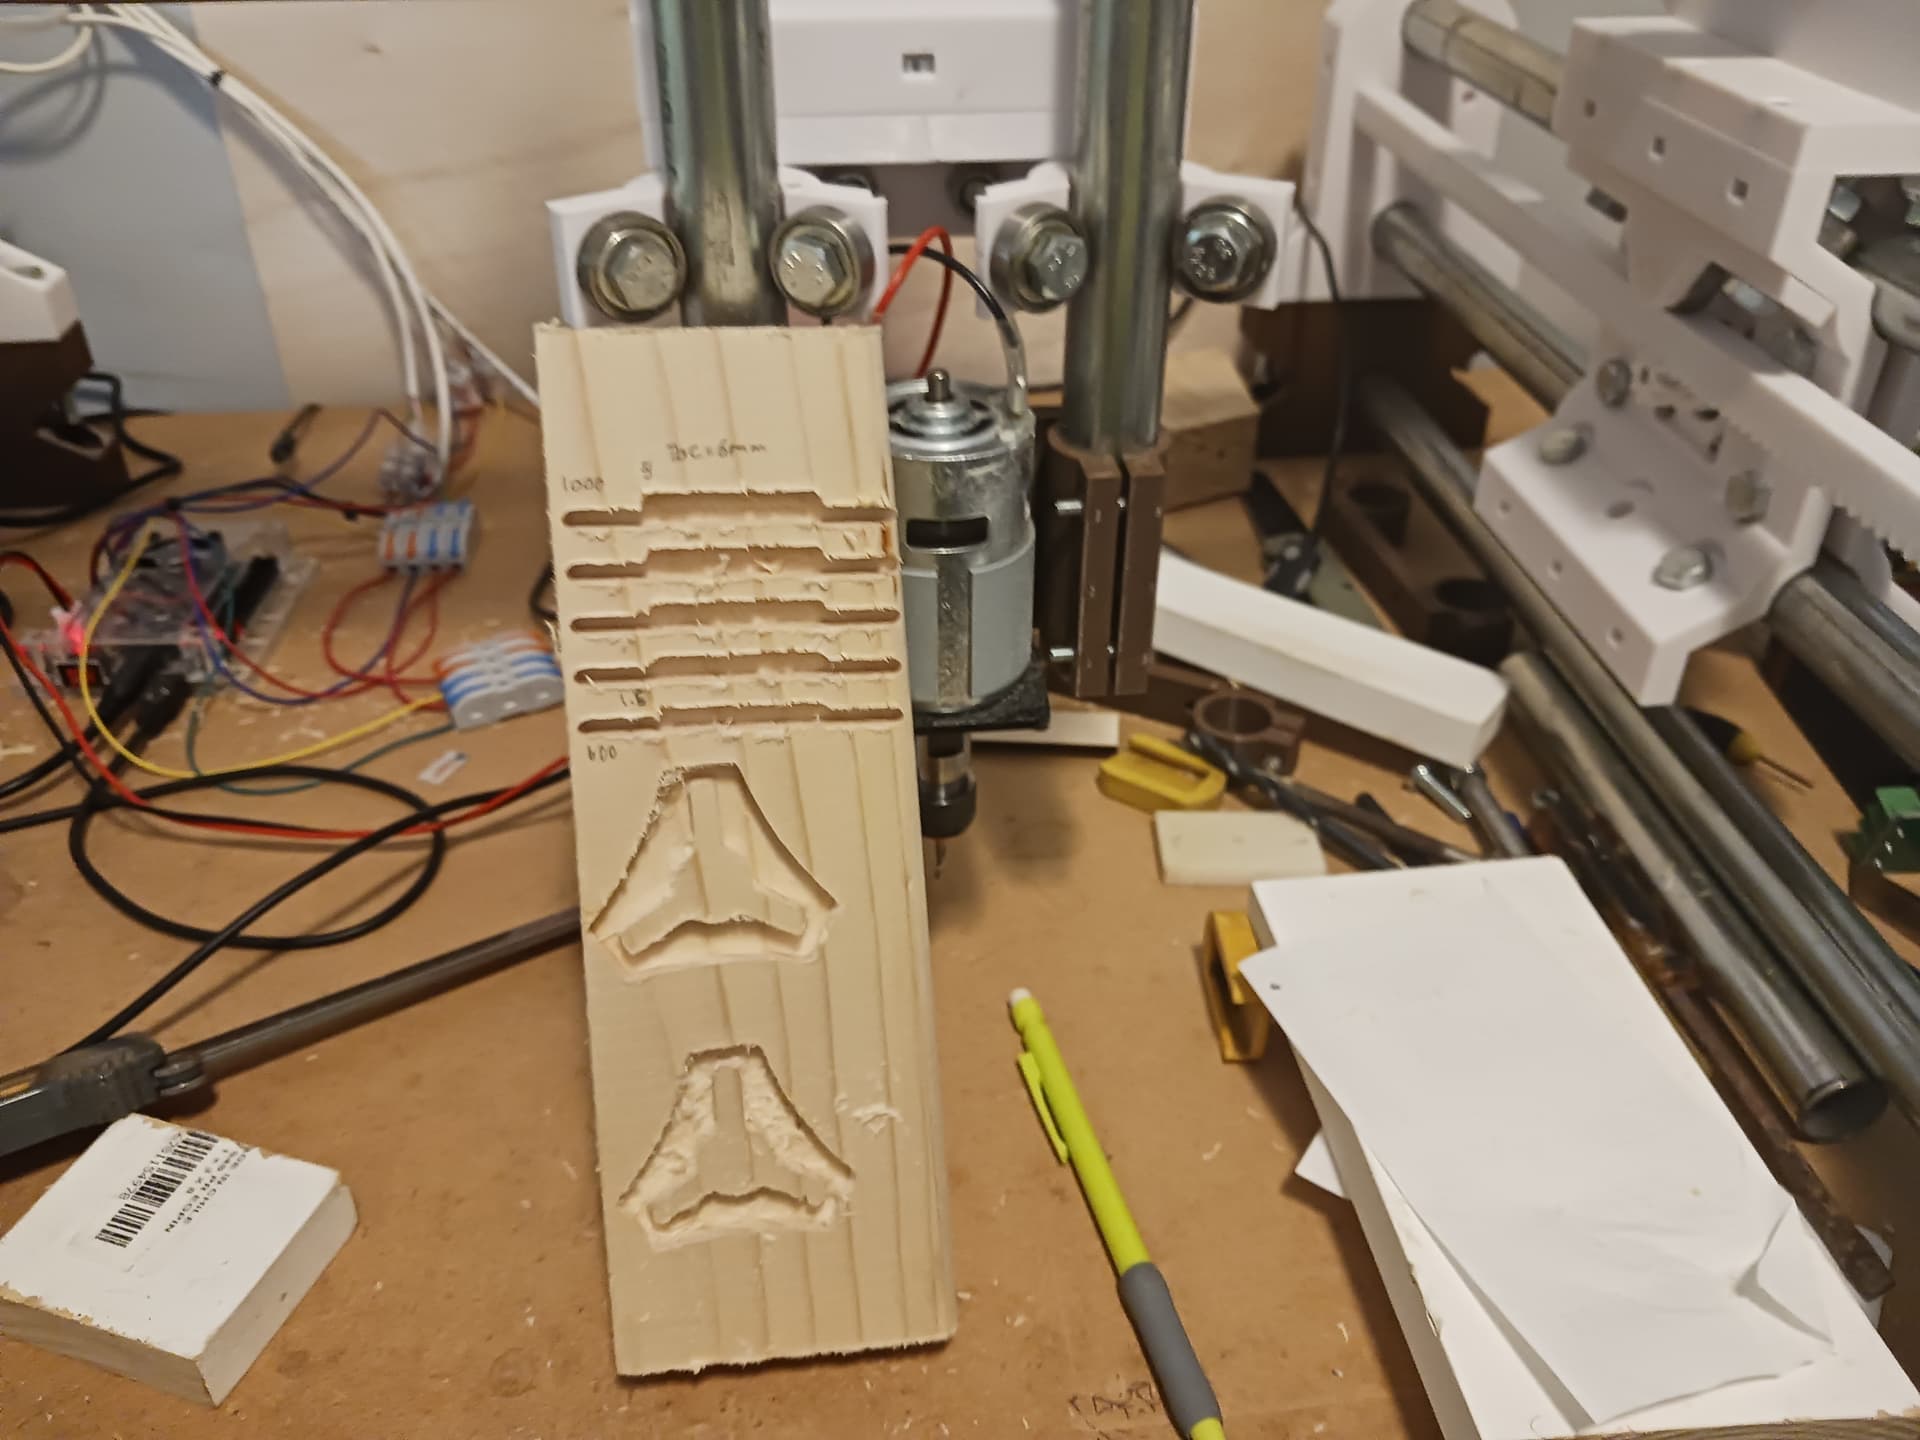
Well, I’m not gonna challenge any of those times but do want to report that I’ve actually patterned some of my MPR&P testing after what I saw there. Starting with Jamie’s hog-out pattern, I’ve subjected MPR&P and the small 775 “spindle” mounted to it to far more strenuous tests than I ever thought possible… and possibly even more than the 6mm DOC and 1000 mm/min in pine that I’ll report here. Initially thinking the 775 “spindle” little more than a toy, I’ve about changed my tune… and now think it’s actually a worthwhile accessory for the MPR&P (given you don’t have a LR4).
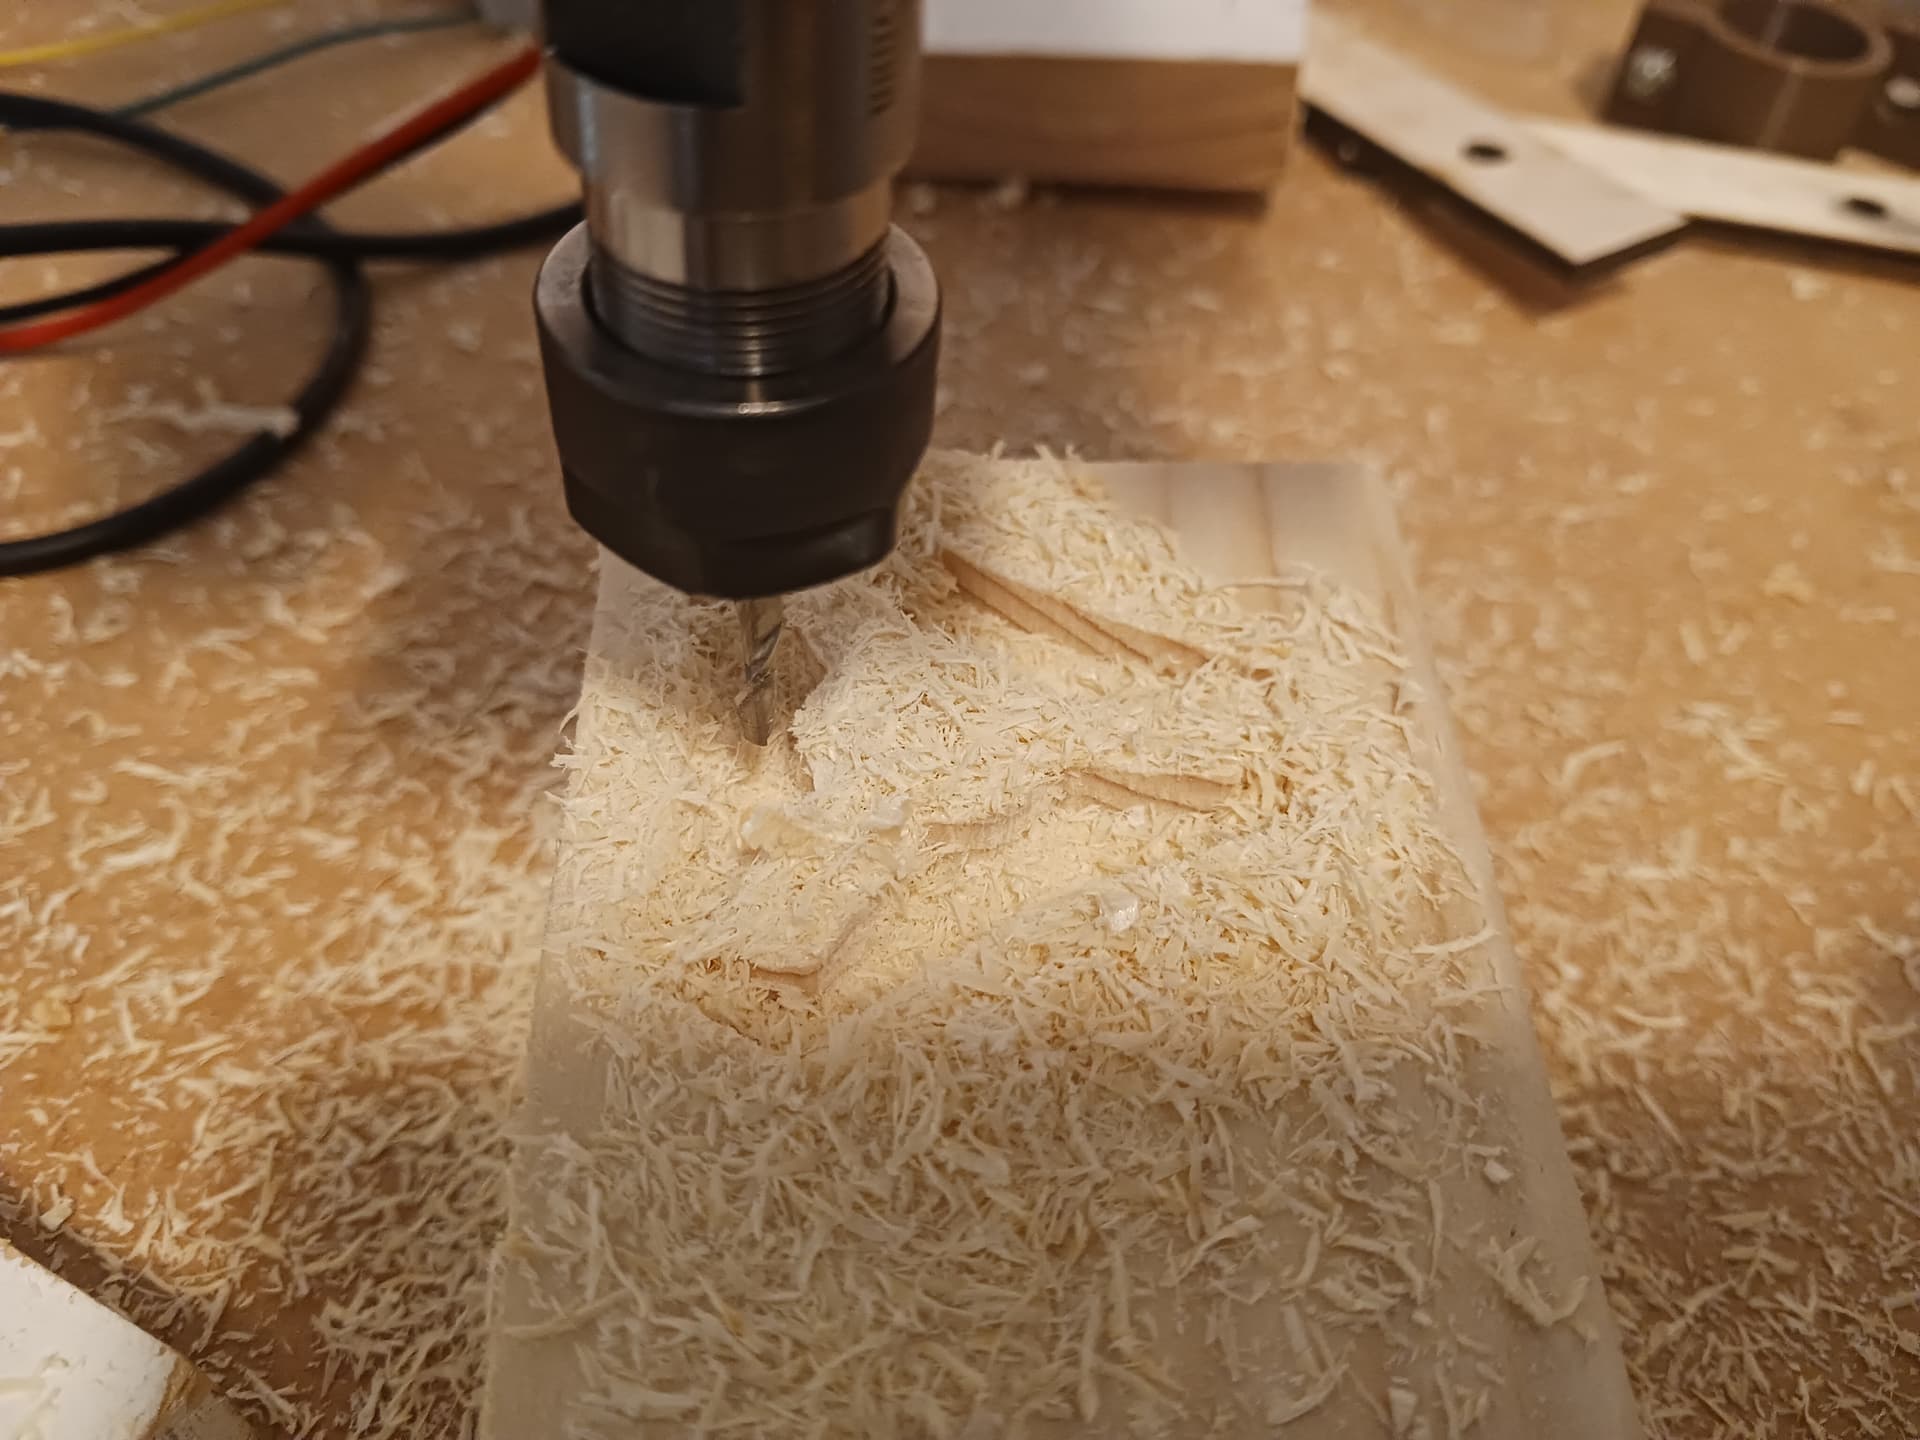
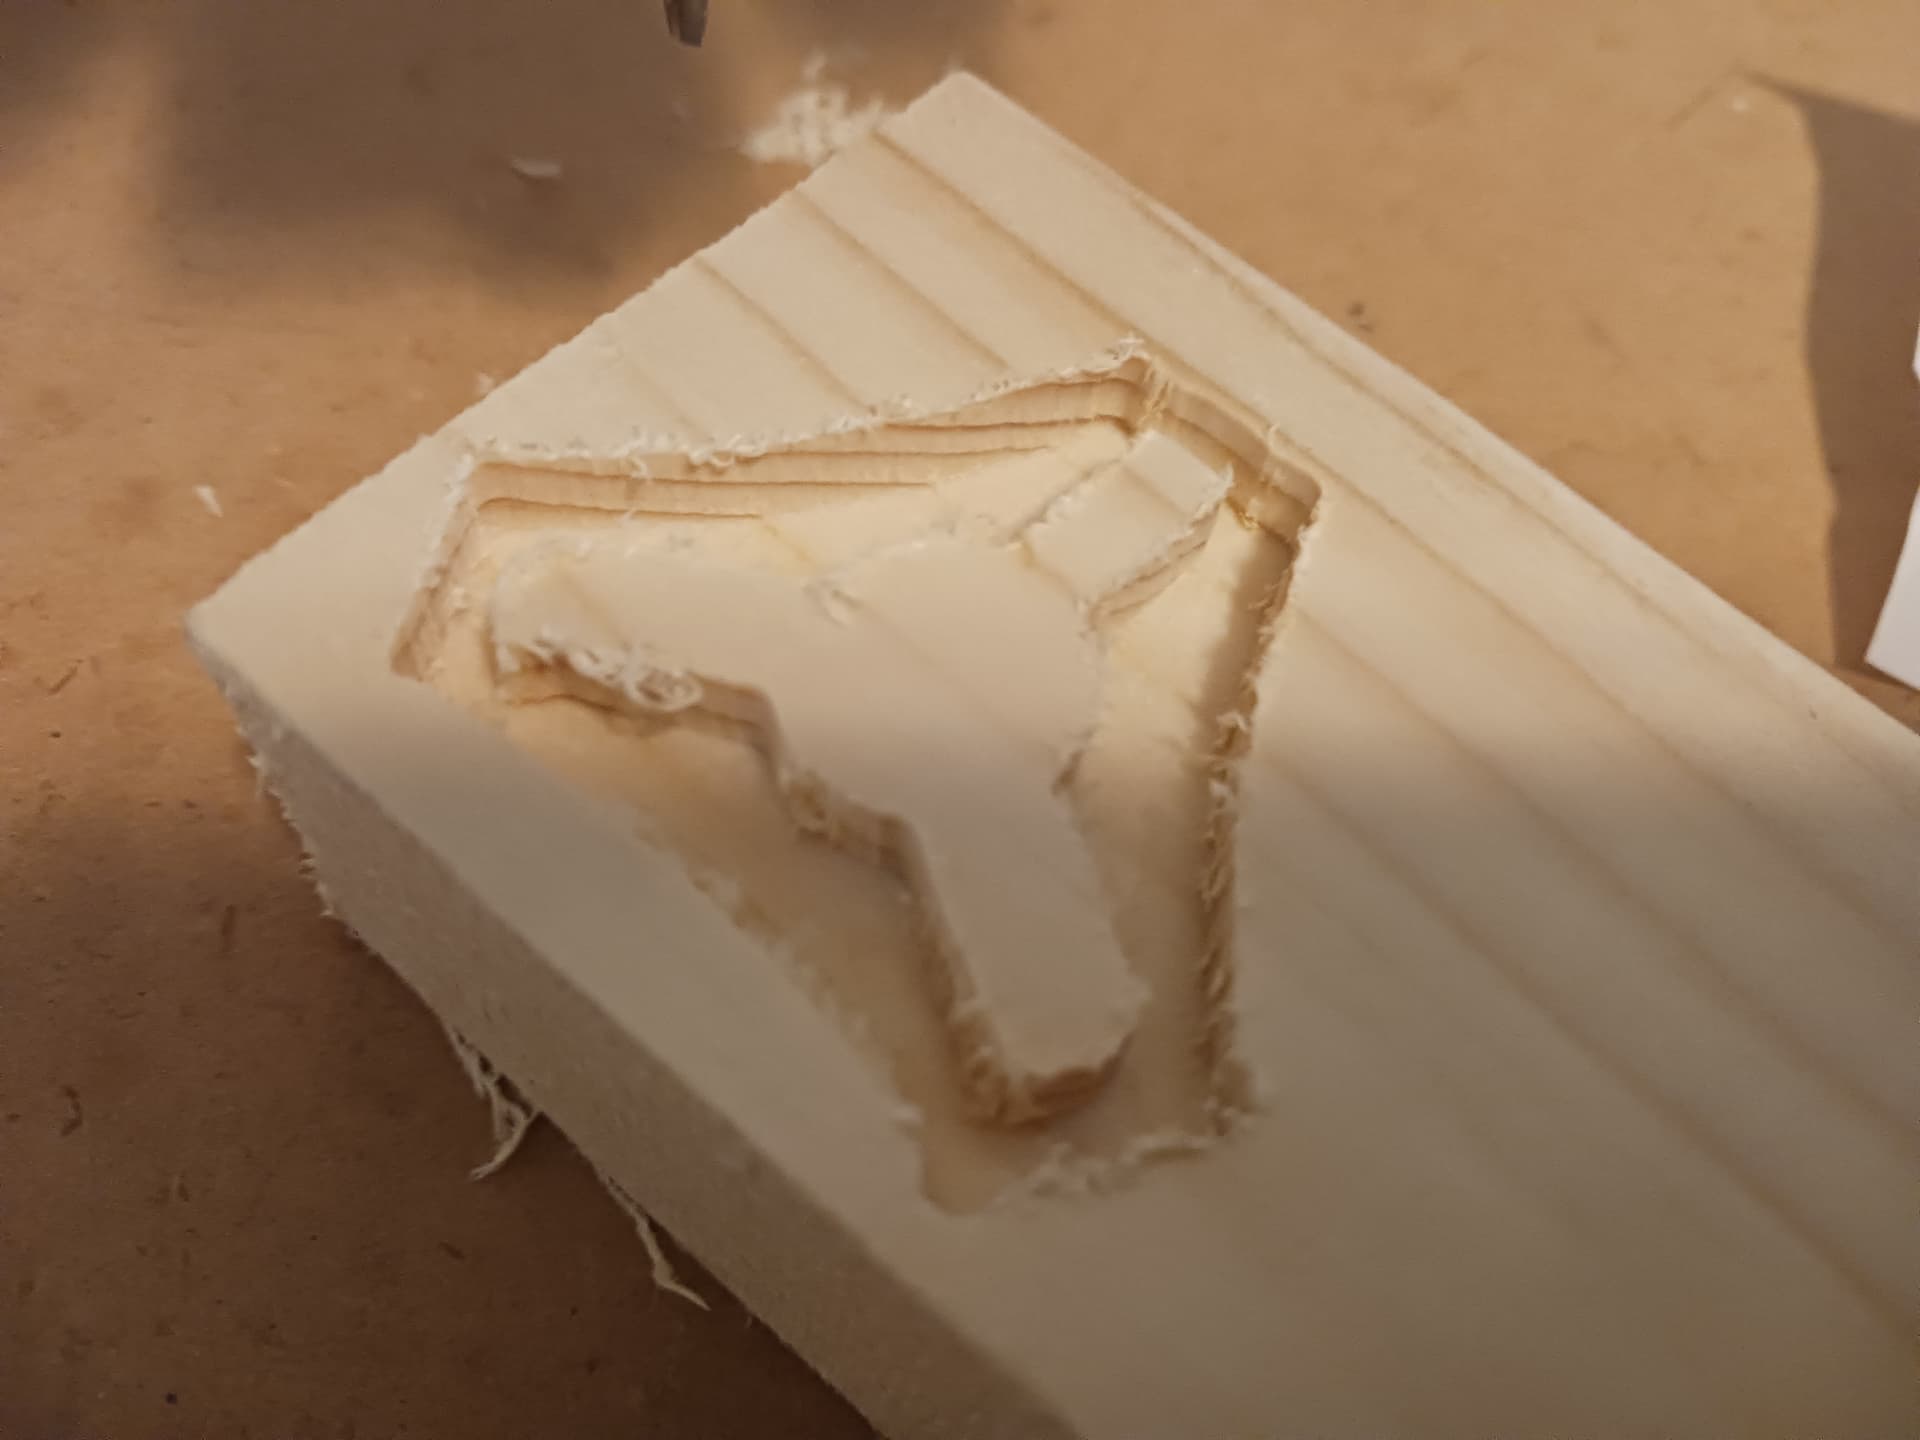
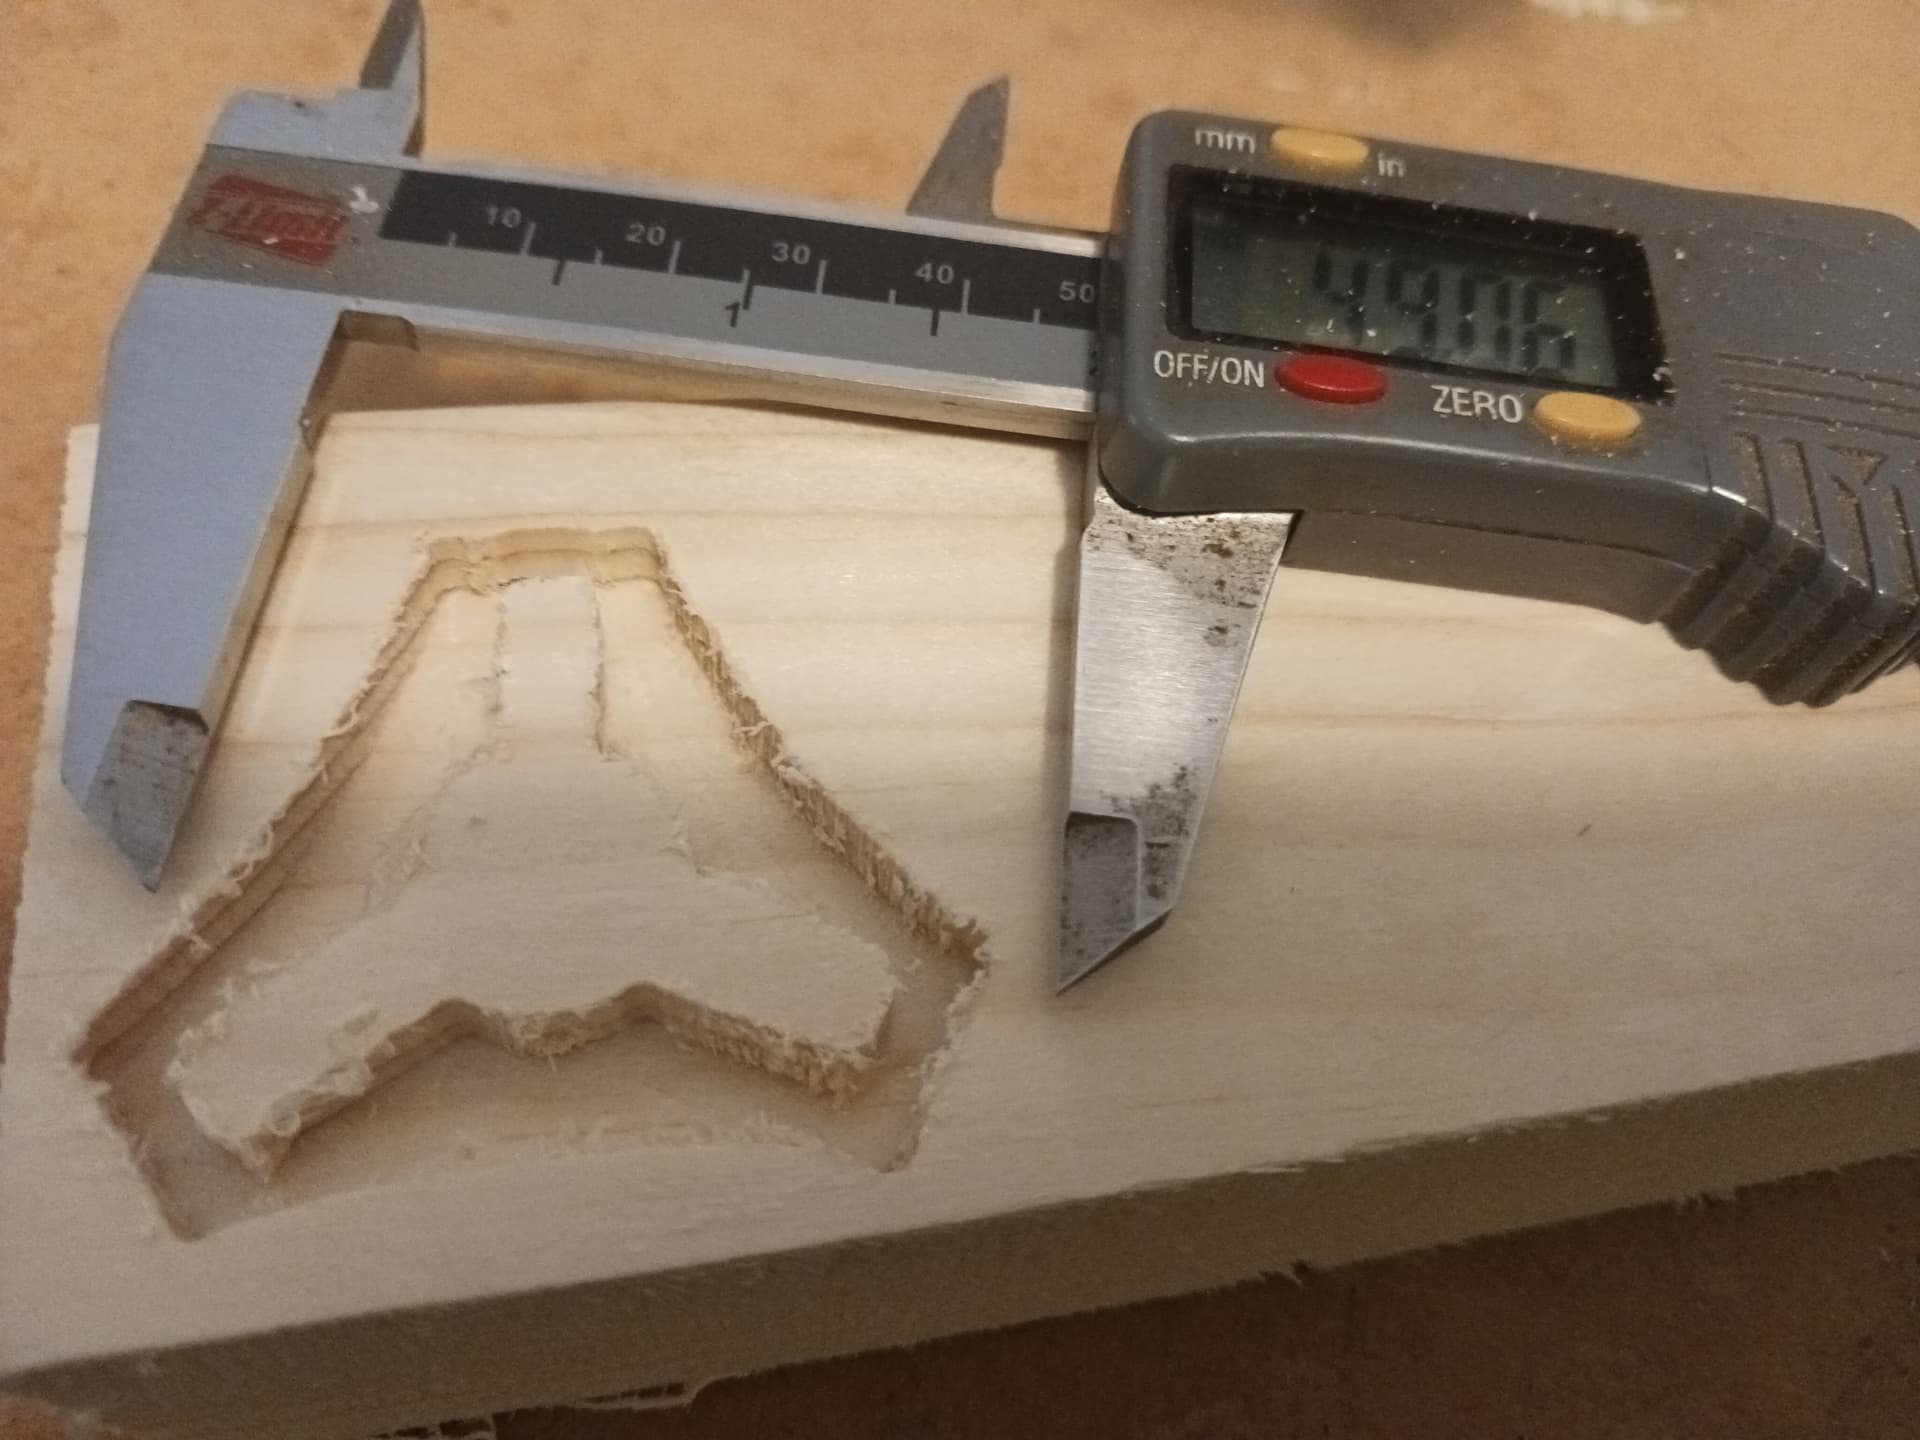
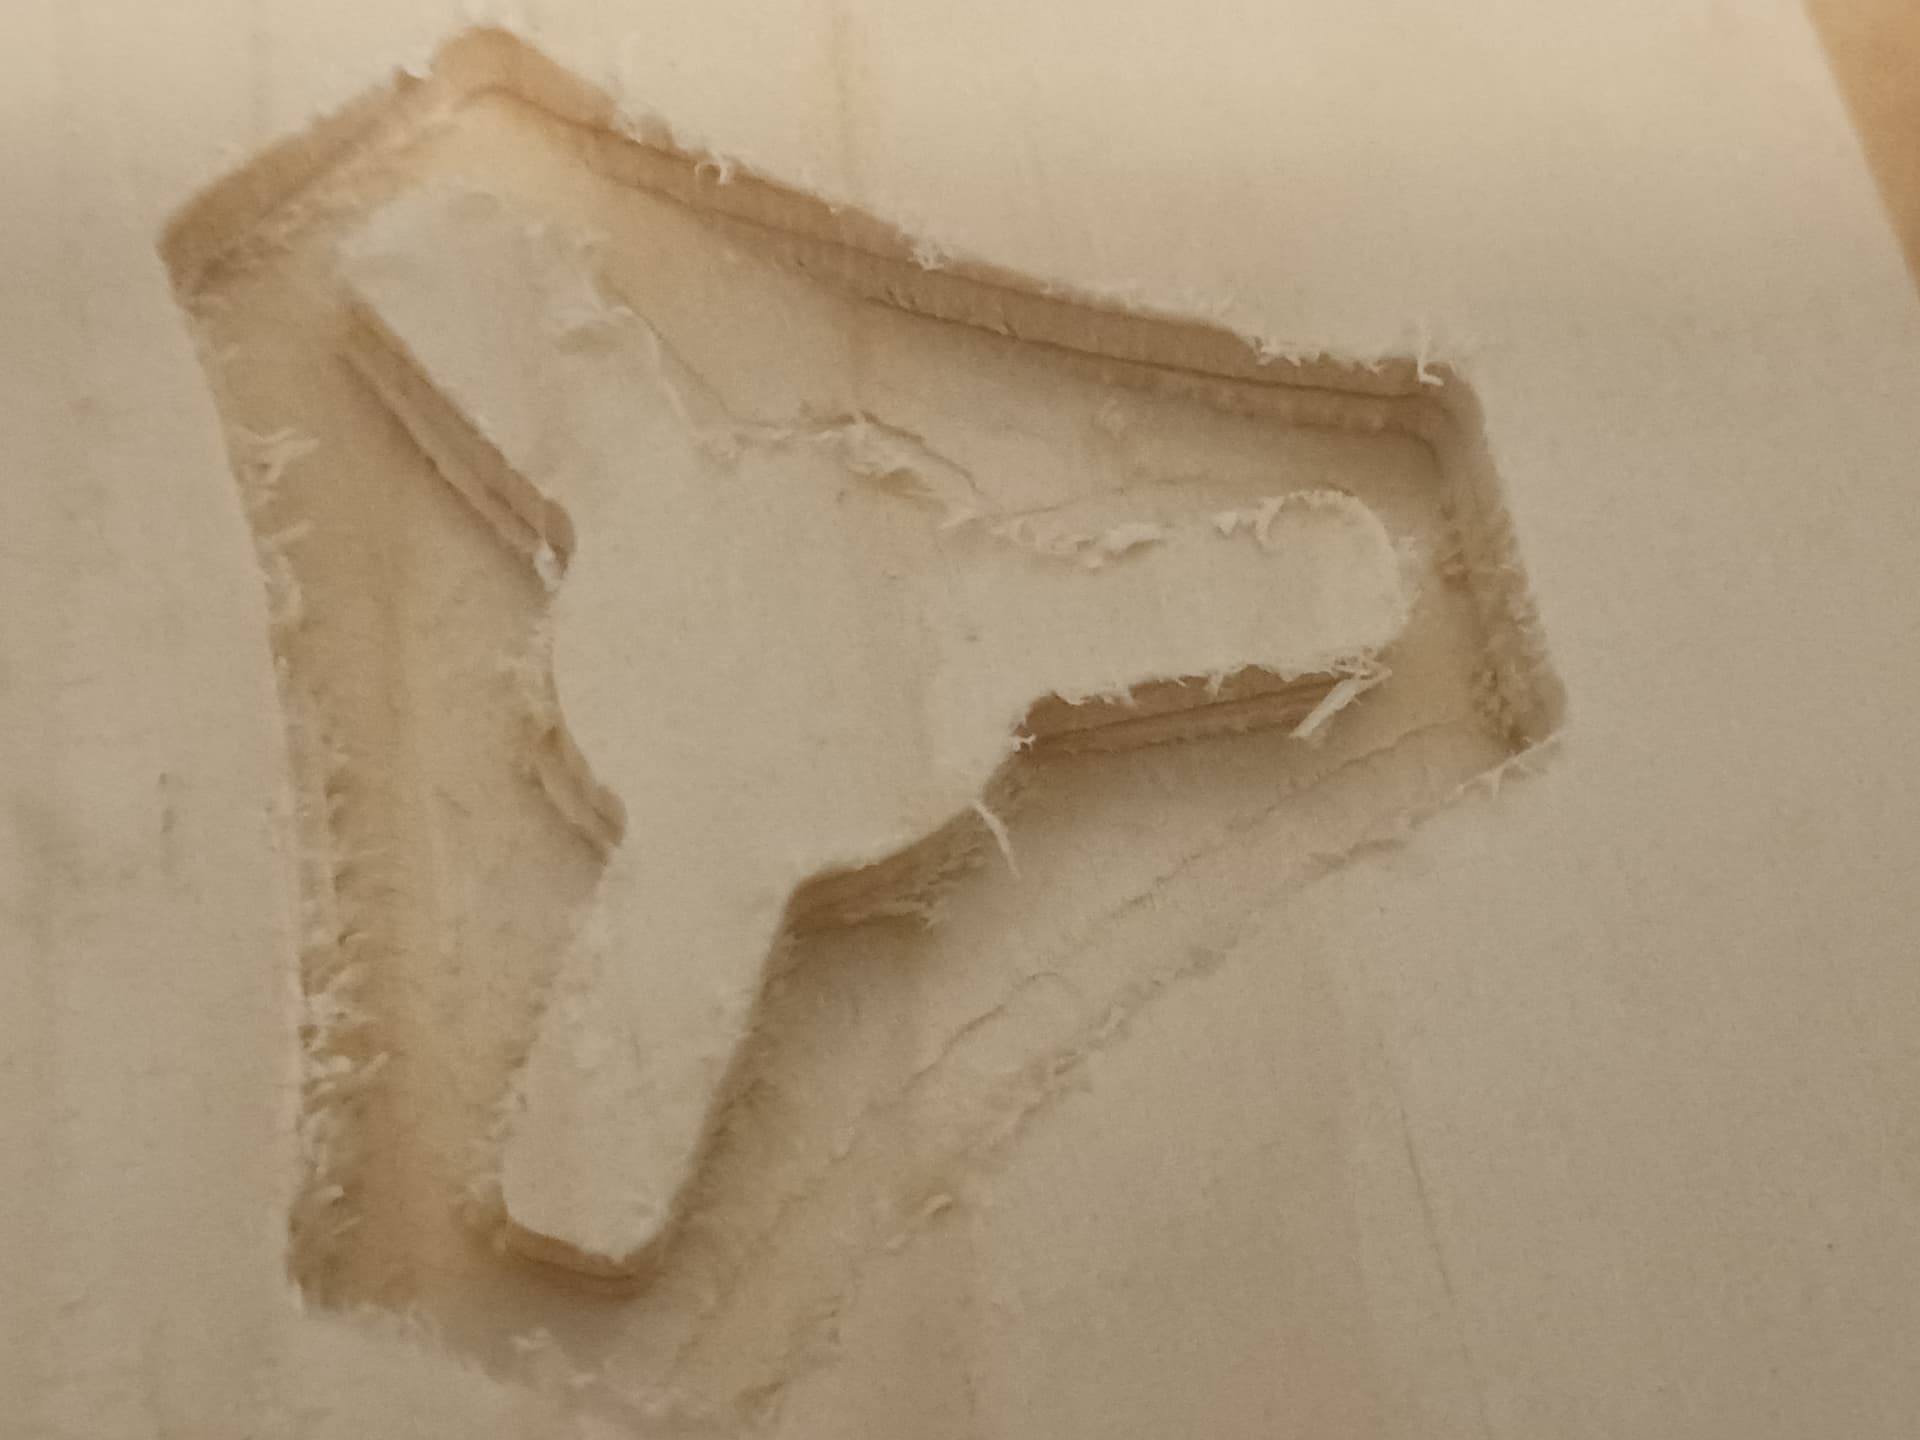
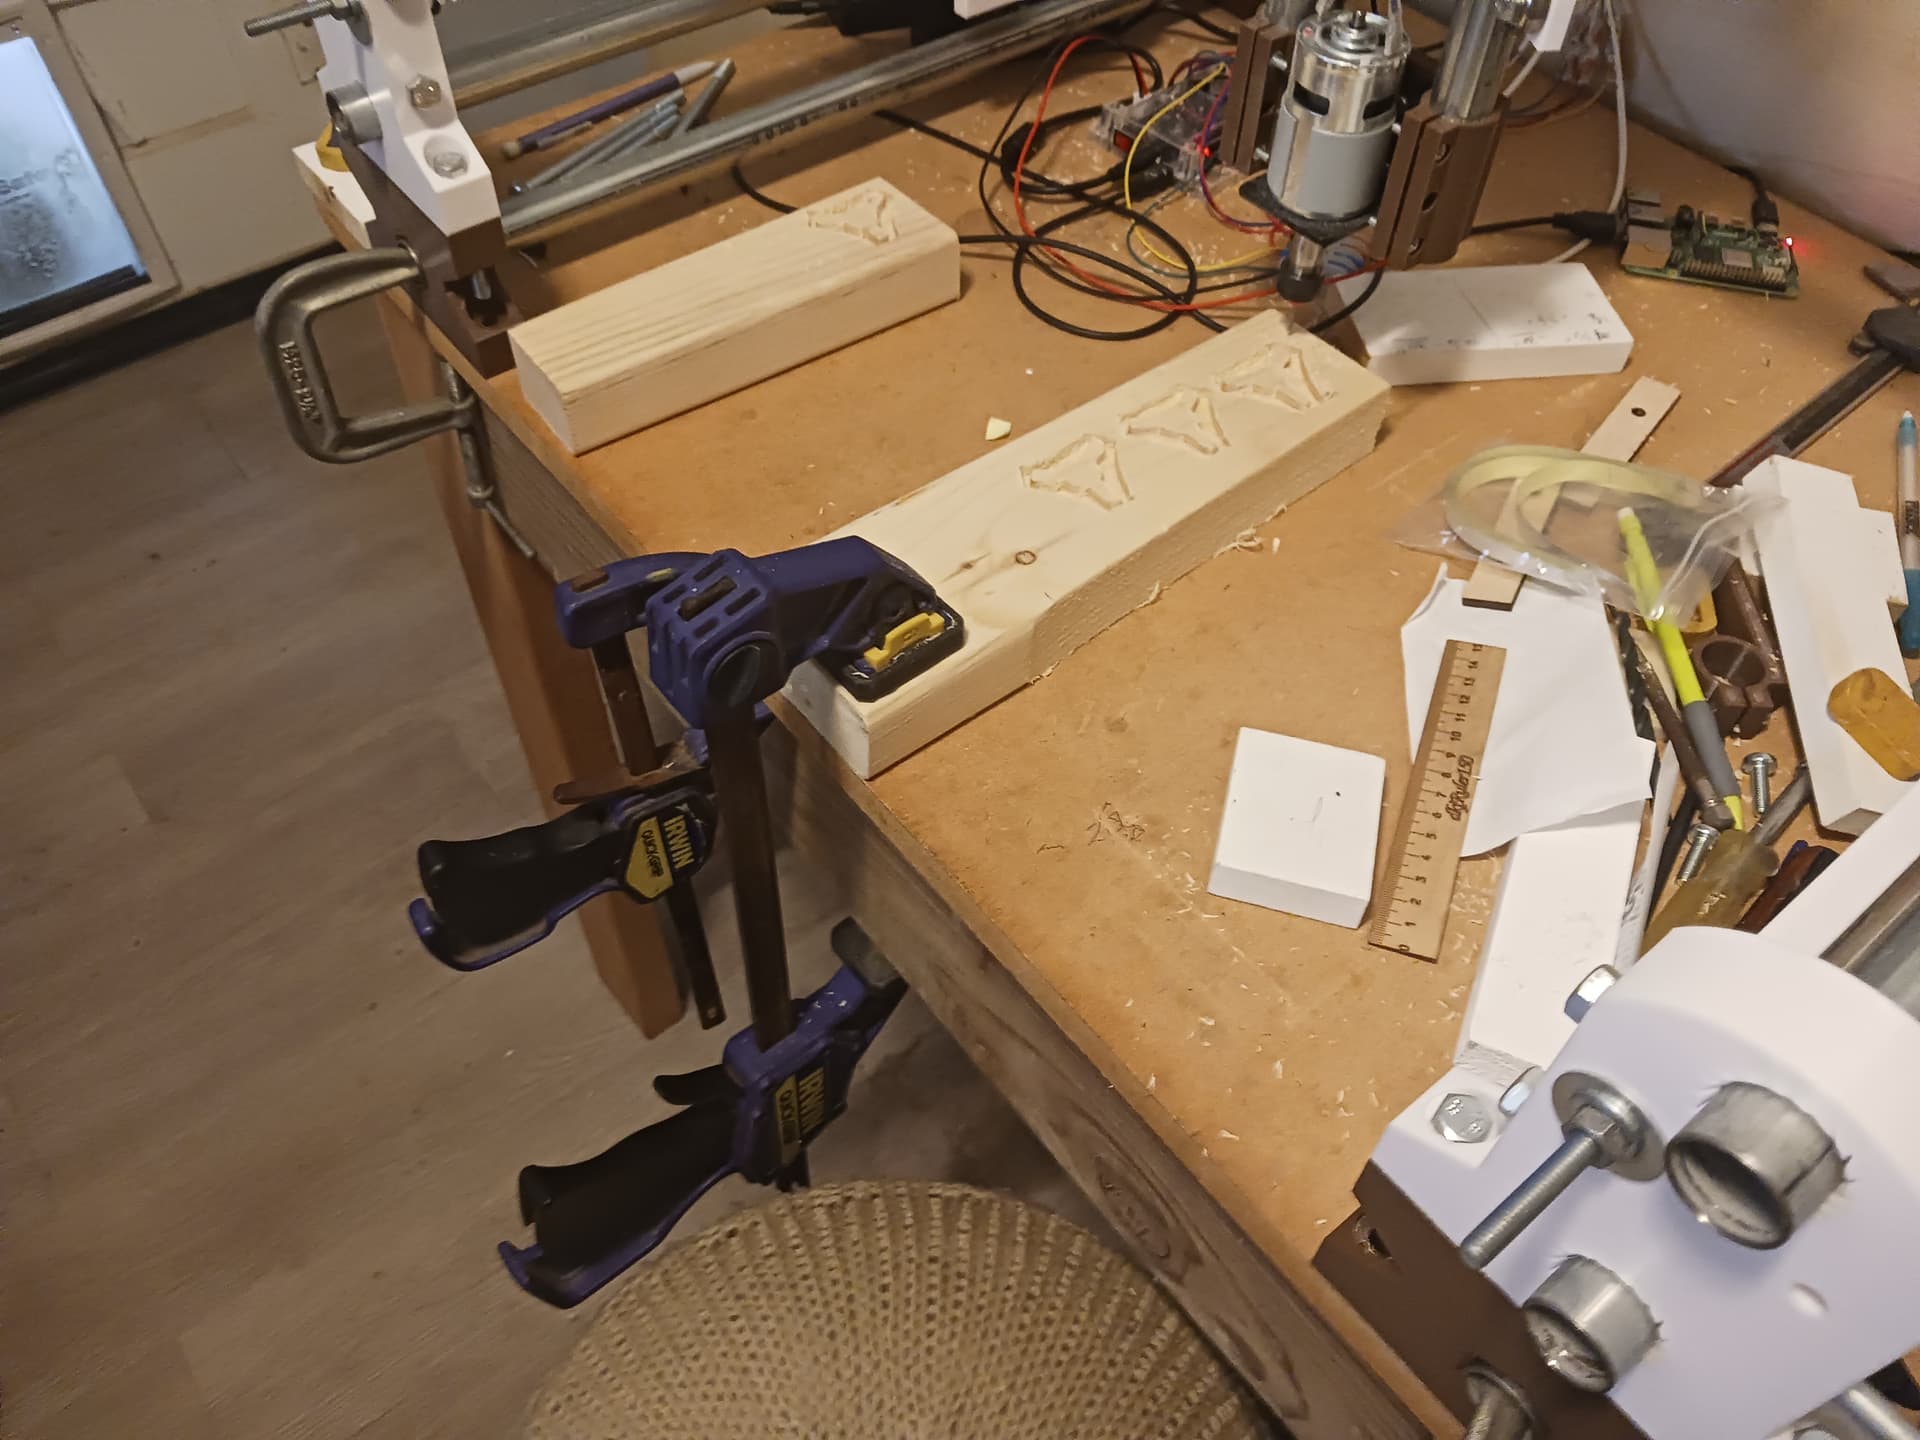
Finally, about those V1 logo’s in that last photo… these are quarter-sized copies (XYZ dimensions scaled by 0.5) of Ryan’s drag race logo in white(?) pine. My latest modest attempt is a simple roughing cut at 6mm full-depth in 1:28 minutes. It’s not nearly so clean as the cut would be in MDF but I’m using scraps of wood that I have on hand.
The depth and diagonals are just about right for the 50% scale I’ve used…
While certainly not pretty or perfect, I’m thoroughly pleased with these results. As I said, I really thought the 775 “spindle” was more a toy, as it is most usually seen on the tiny 1610 and 3018 desktop CNC’s that are so widely available. I’ve got a couple of those but had never done anything more than scratch/engrave a cartoon image on a piece of scrap wood before quickly converting them into a pen-plotter or laser-engraver.
I have several of the 775 motors and the first (unmarked) one I mounted on MPR&P was a lower-RPM motor… probably 8000-10000 rpm or so. It was responsible for the lower logo in the “hog-out” photo above. But a different one was substantially higher-RPM (they can be had up to 20000 RPM) and, for these hog-out tests, it only makes sense that a higher-RPM spindle will allow for a faster feed. It is responsible for the far cleaner upper-most logo in the hog-out photo. Both of those logos were only 2mm deep, however… and the same gcode used for both.
Obviously, I’m a beginner here and my results with a tiny spindle are modest at best… certainly not to be compared with the powerful spindles and routers used in Ryan’s drag races. But this is for MPR&P testing and I am finding it fun (as did the drag racers!) pushing things a bit. Thankfully, I don’t think MPR&P is the limiting factor here – yet – so am looking forward to seeing what more it’ll do. As Jamie says in his “hog-out” blurb,
I hope this all makes sense…
– David
Oh heck yes. I need to do a few more of those runs. They are the fun kinda stress!
Holy crap that’s awesome!
I’ve played with the 775 spindles on other machines and I was pretty sure a MPR&P could get better results than most folk would predict.
The past three weeks, three different family members have been into hospitals at least once (and one went in twice!)
My experimentation has ground to a halt.
I have a business trip in a few days and then at the end of the month hope to be back at playing with the MPR&P.
Heck yes, indeed. The LR4 is a beast, to be sure; the MPR&P is a very capable little relative.
Both machines perform way better than expected given build cost and mostly printed.
Bring on the next round of printed CNC hot rod exhibitions.
Thanks, Jim, for the kind words. I’m sorry to hear about the family difficulties… and I know that you are busy. I really don’t expect you to be “experimentiing” too much these days but am happy to hear that you are still looking forward to playing with MPR&P some more when you get the time.
Funny, I thought I was only “out” $20 or so on the 1/4" threaded rod for this build… but while looking for other parts a couple of days ago I found several 36" lengths of 1/4" threaded rod in my junk box. So, in truth, I’m only out several new rolls of Sunlu filament… as I did print and reprint, several times, several of the parts during MPR&P development. And since, I’ve also gotten my Longer LK5 Pro 3d printer back from my buddy. So, now I’m “rich” in printers again… but with not much more to print.
I’ll continue to play with the 775 “spindles”. They are far more capable than I initially thought and much quieter than the full-blown routers I’ve used in the past. And since the parts/tests I’m likely to run for the foreseeable future are pretty short/small… even the debris generated is manageable. I must admit my initial apprehension/“foot-dragging” was largely unwarranted… and this has actually been fun.
– David
It has been great to follow along with you David as you have created and modified the R&P. Thanks for sharing your process with us.
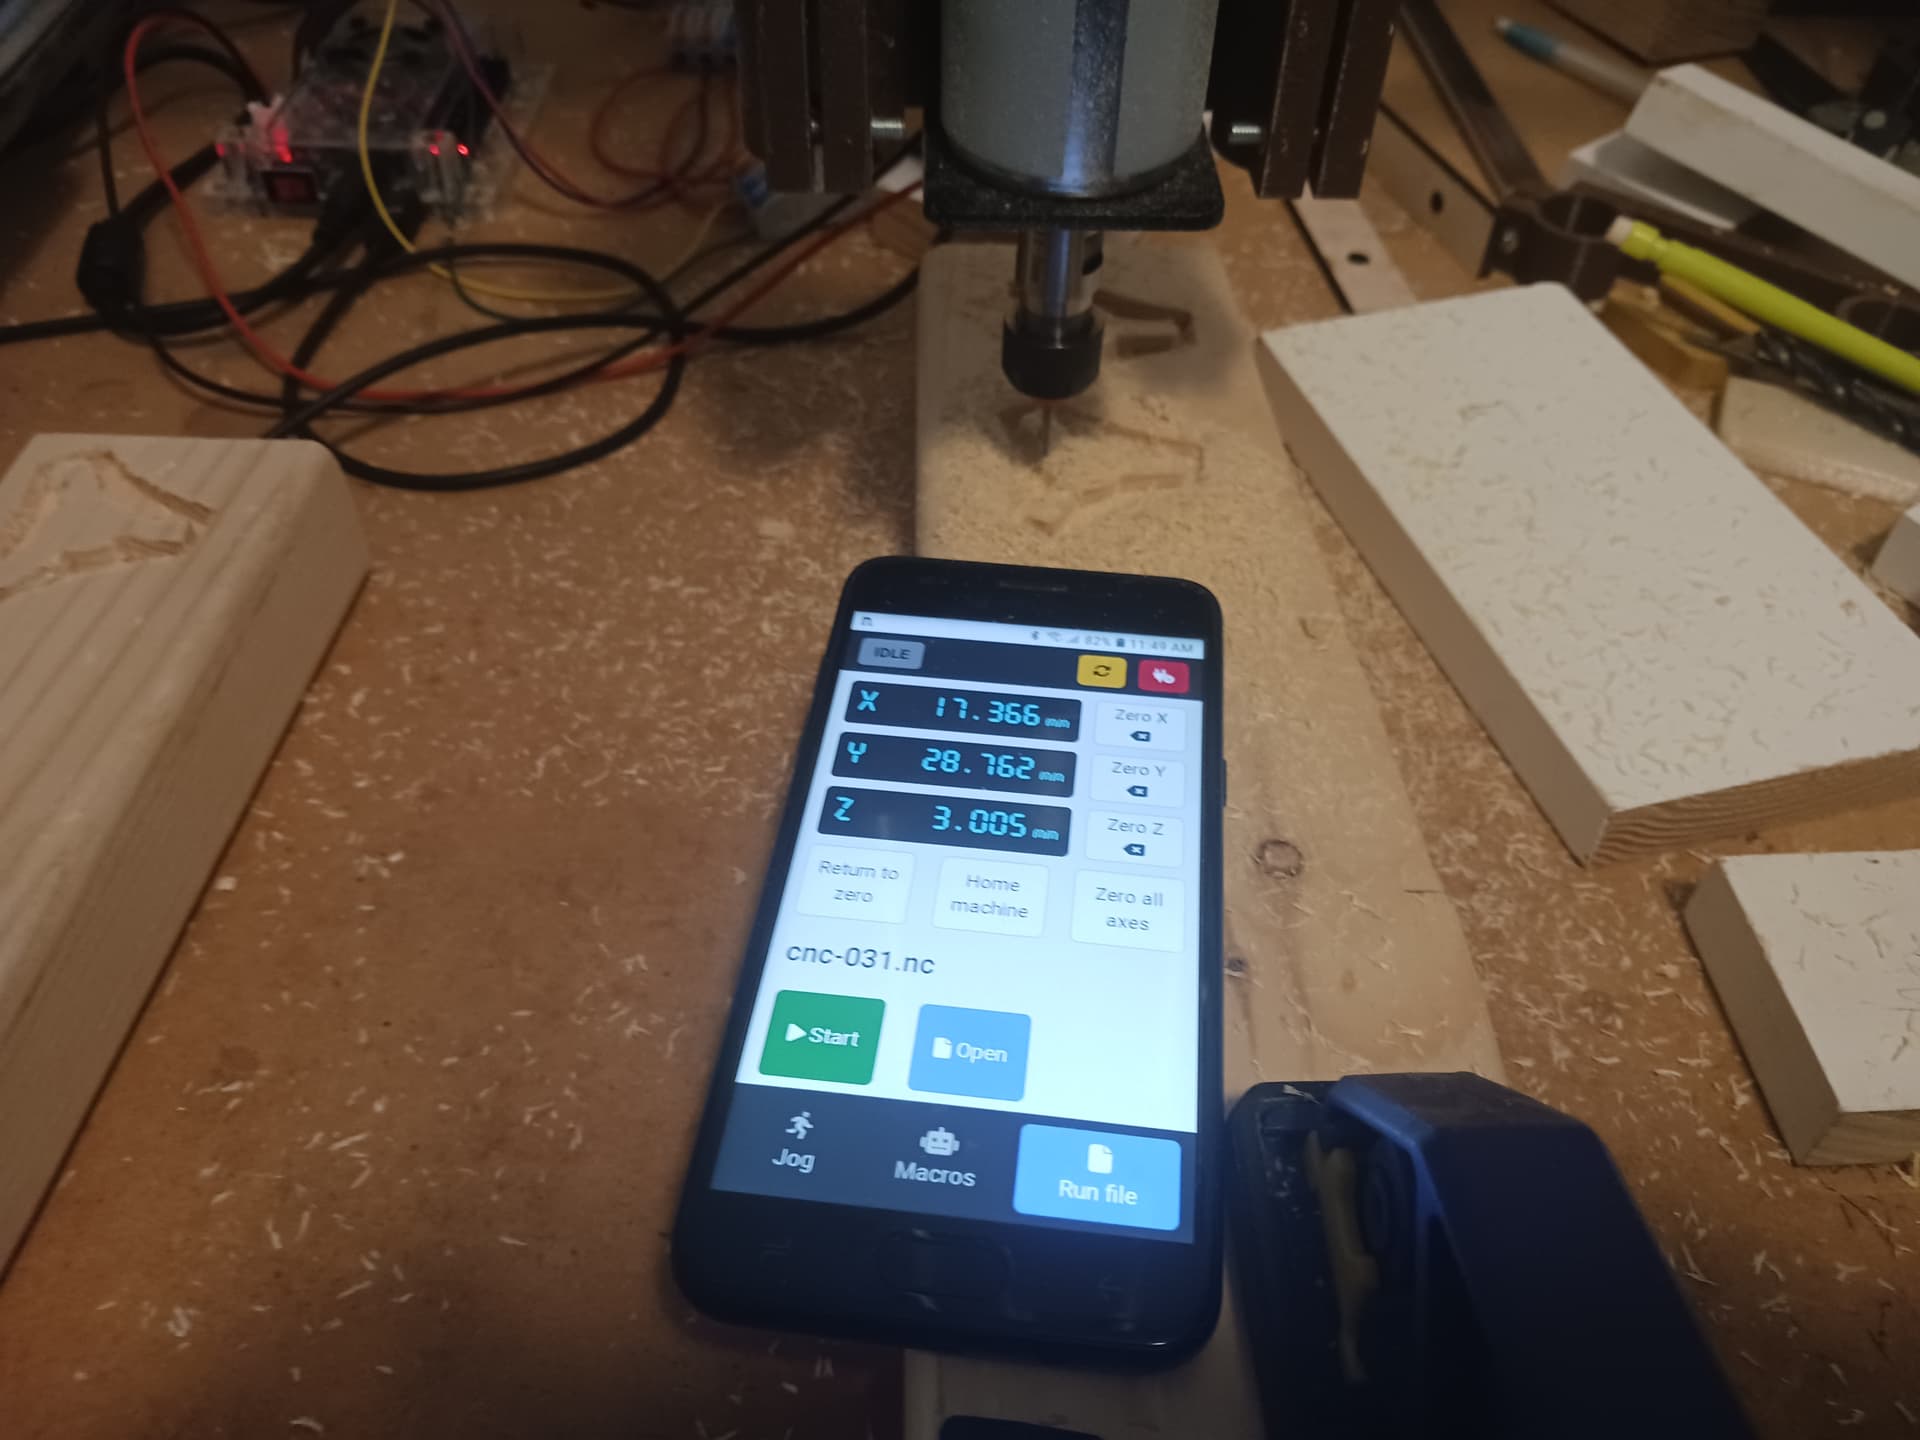
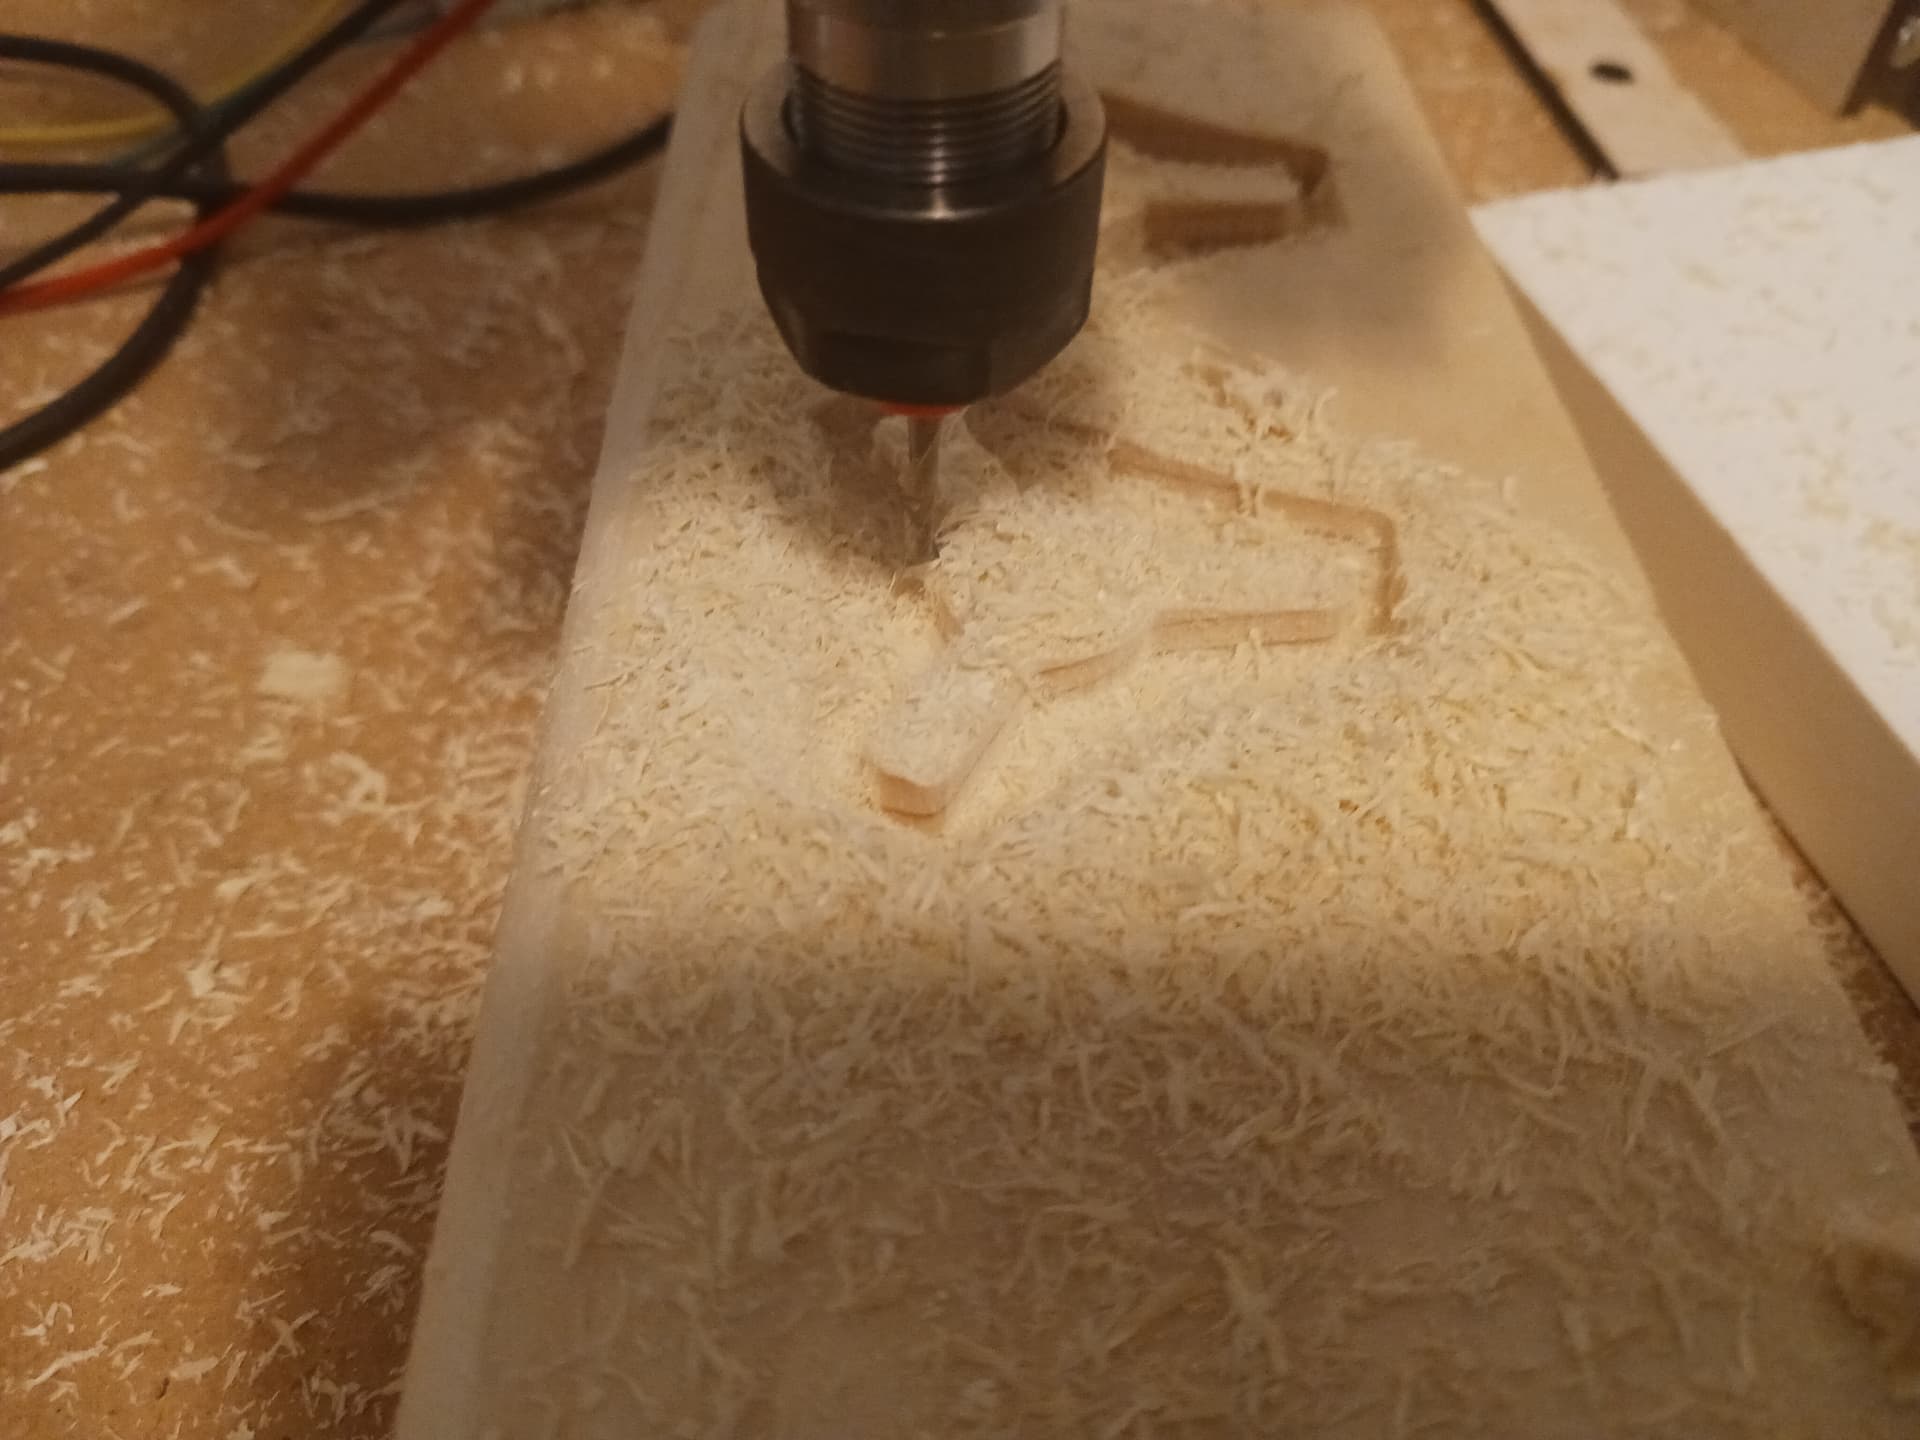
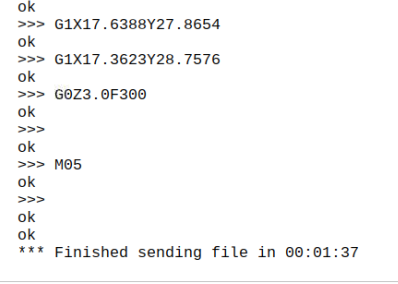
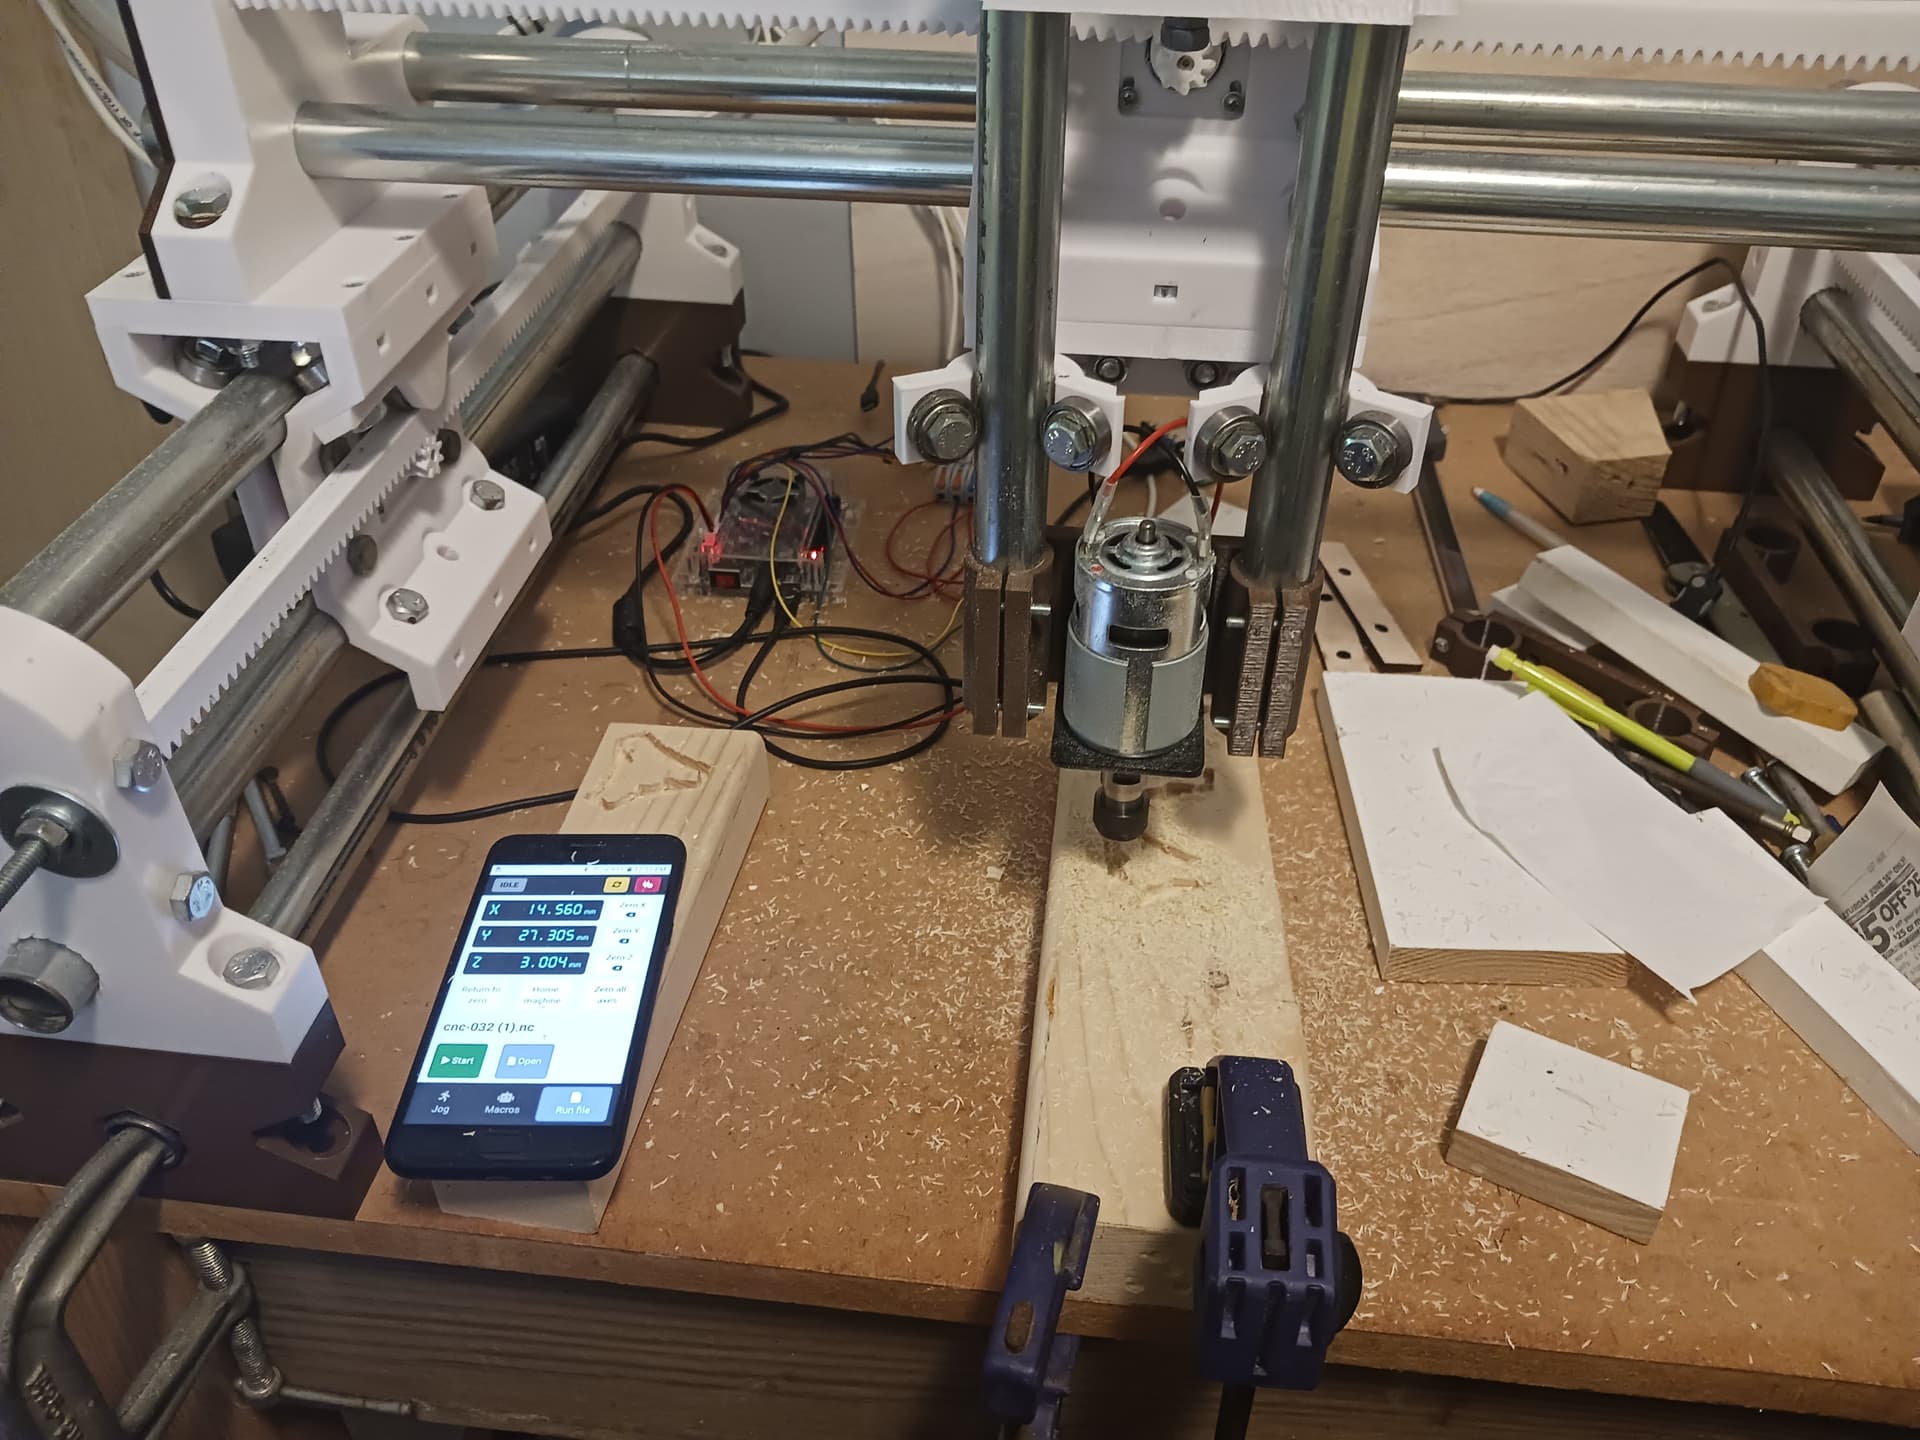
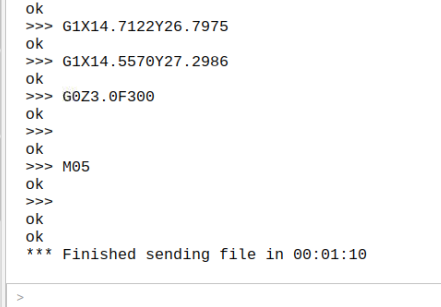
Here’s a video from another “drag race” logo run similar to last post. MPR&P with 775 spindle and 1/8" single-flute end mill… full 6mm DOC at 1000 mm/min in white pine construction lumber. Also using RPi-3B+/UGS Platform over VNC for job setup and old Android cellphone as pendant. Could improve time with just a roughing pass and no finish pass… quirky Kiri:Moto finish pass on this run seems not quite deep enough…

– David
Time to see if you can beat my time from the LR4 Beta. You are much better at manual edits to Gcode than I am so that should be super easy
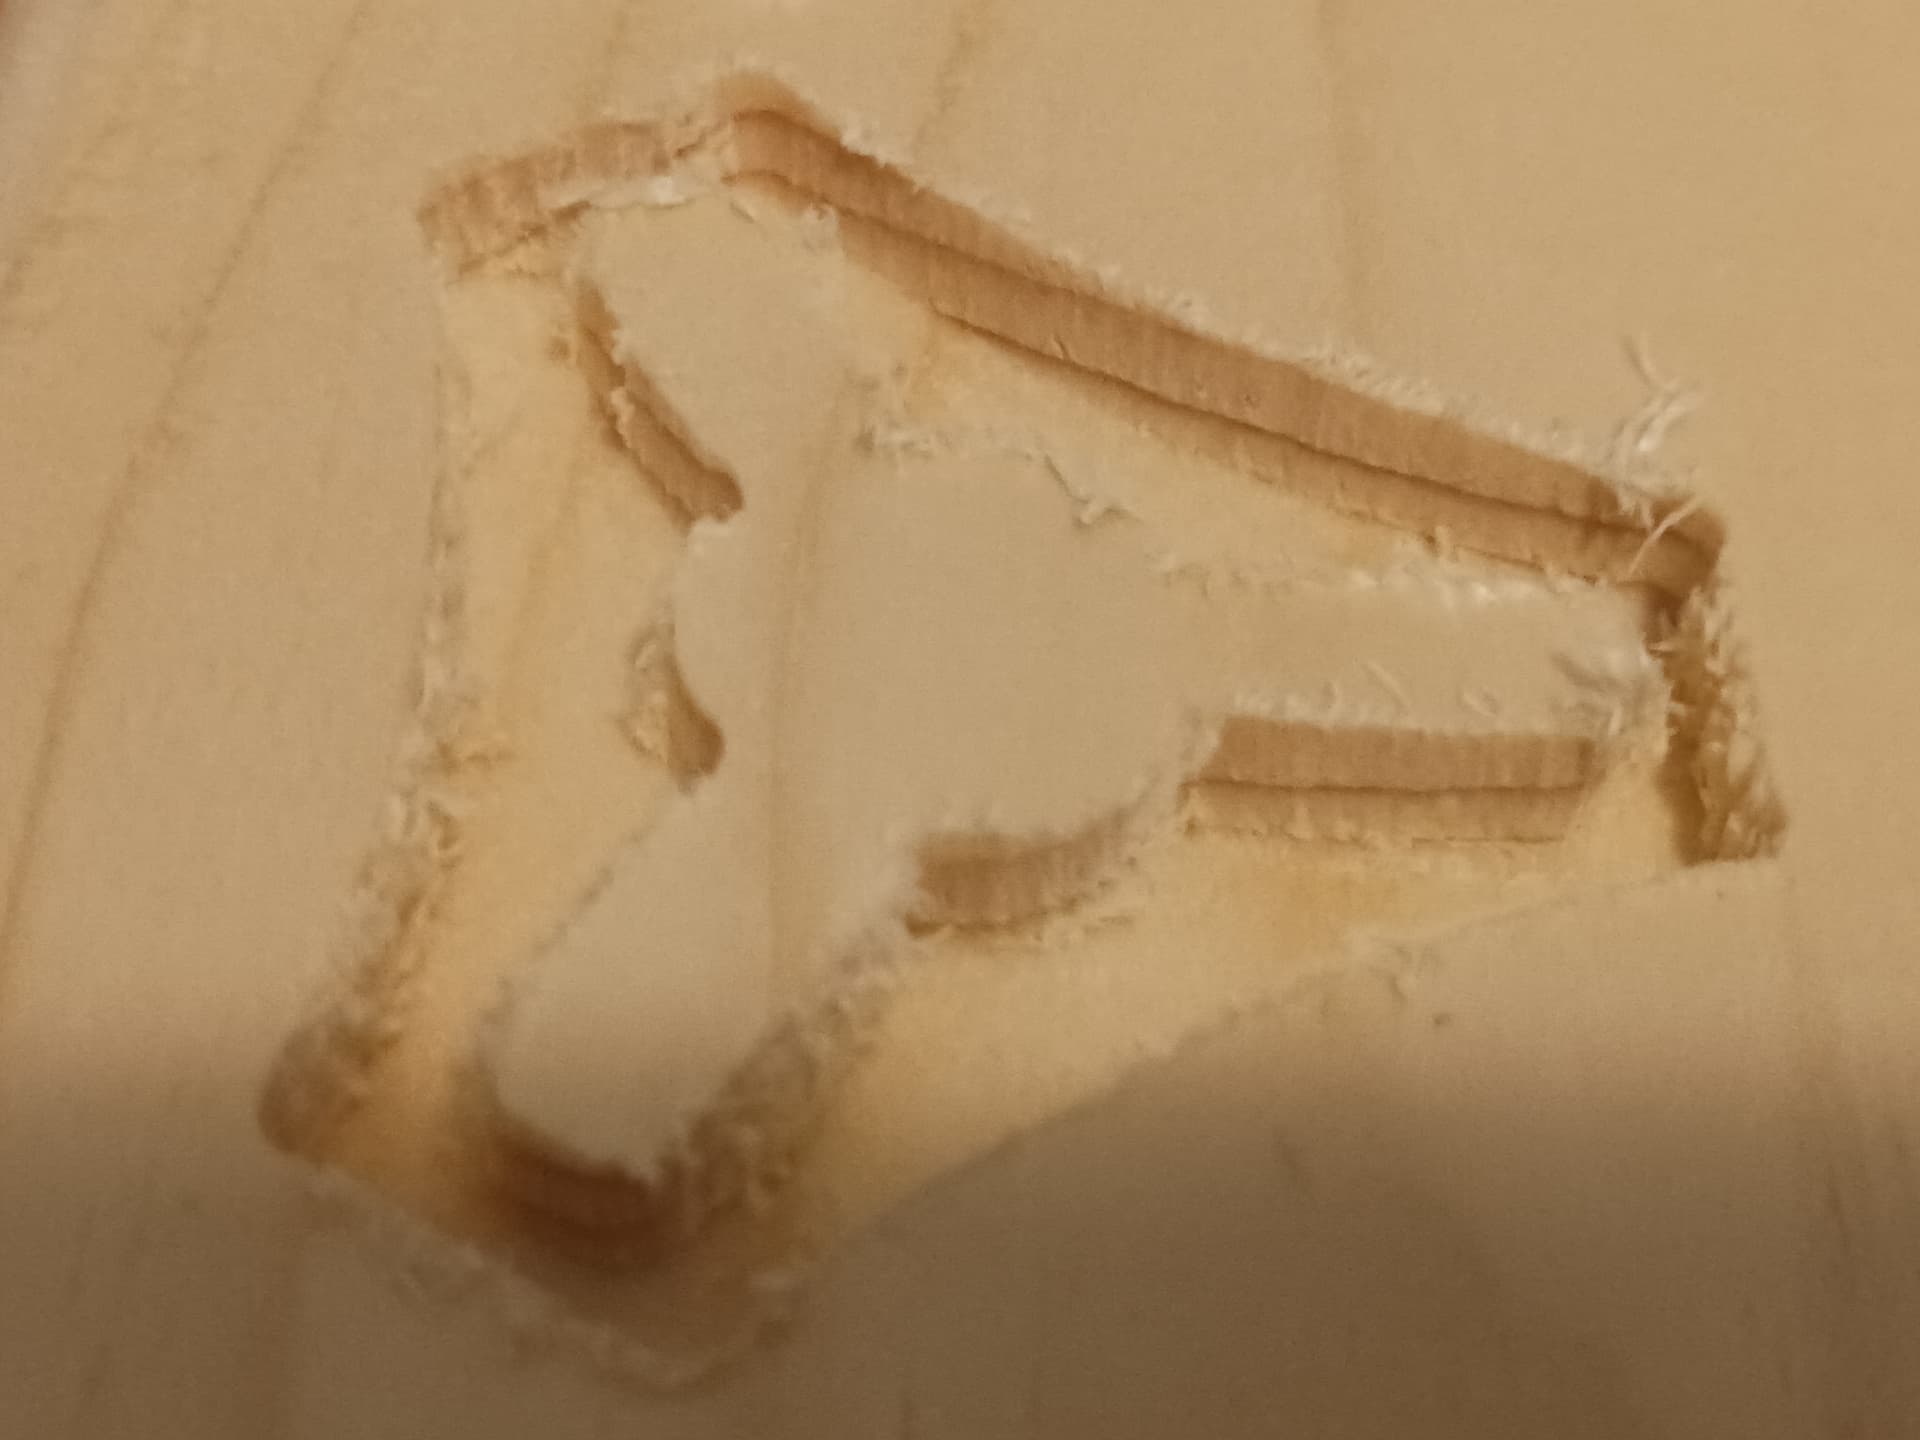
I’ve just completed a “roughing only” pass in ~1:10 minutes. It’s really rough (and rough-sounding) but seems to remove stock pretty well and without undue harm to the machine or bit…

Beating your time… “should be super easy”. Pshaw…! When have you seen me be “much better at manual edits to Gcode”? Pshaaw… again! ![]()
![]()
![]() I’m just a relative beginner at this milling stuff…
I’m just a relative beginner at this milling stuff…
Actually, I’m only removing (if my math is correct…) about 1/8th the material you did with the LR4 Beta. Since I’ve scaled the “drag race” logo in XYZ by 50% (1/4 the area and half the depth) to fit my material and the initial testing phase I’m currently in… I was just trying to be conservative and somewhat realistic, given I’m using a new and unproven machine and such a small spindle motor. I’m just trying to “beat” the little CNC3018’s that are so ubiquitous out there… and am pretty pleased with where I am at the moment. I do feel that I can still do better yet… but I’ll never compete (or even try to) with youse guys’ LR4’s. MPR&P is just a “laboratory curiosity” using R&P drive and “scratching an itch” I had… and I never had any real expectations as to how powerful and capable it might be. I just wanted to see what it could do… and am pleasantly surprised and a bit shocked with it so far. ![]()
As I said, I was truly impressed by the “CNC drag race” thread Ryan started several years ago… and all the spectacular results you guys were getting. I missed out seeing that thread then (I was probably off lasering something…) but I found it a week or so ago… and decided to pattern my MPR&P testing after what I saw in that thread. And I’m finding this kind of testing actually “fun”… just as you guys seemingly all did.
![]()
![]()
![]()
![]()
My comments were pointed at Ryan there. What you are getting from your R&P machine is extremely impressive!!!
Gotcha! And thanks for the kind words.
I didn’t mean to come across as “defensive”. I’m just following my nose and headed down another rabbit hole… ![]()
You are good. I have been enjoying following along with this thread!
Pity all my old lecturers are mostly interested in corporate handouts rather than fun shenanigans, I bet a sintered metal version of this machine could have some crazy performance…
Not that it would make sense at that point (vs bought parts) but it would be cool damn it ![]()
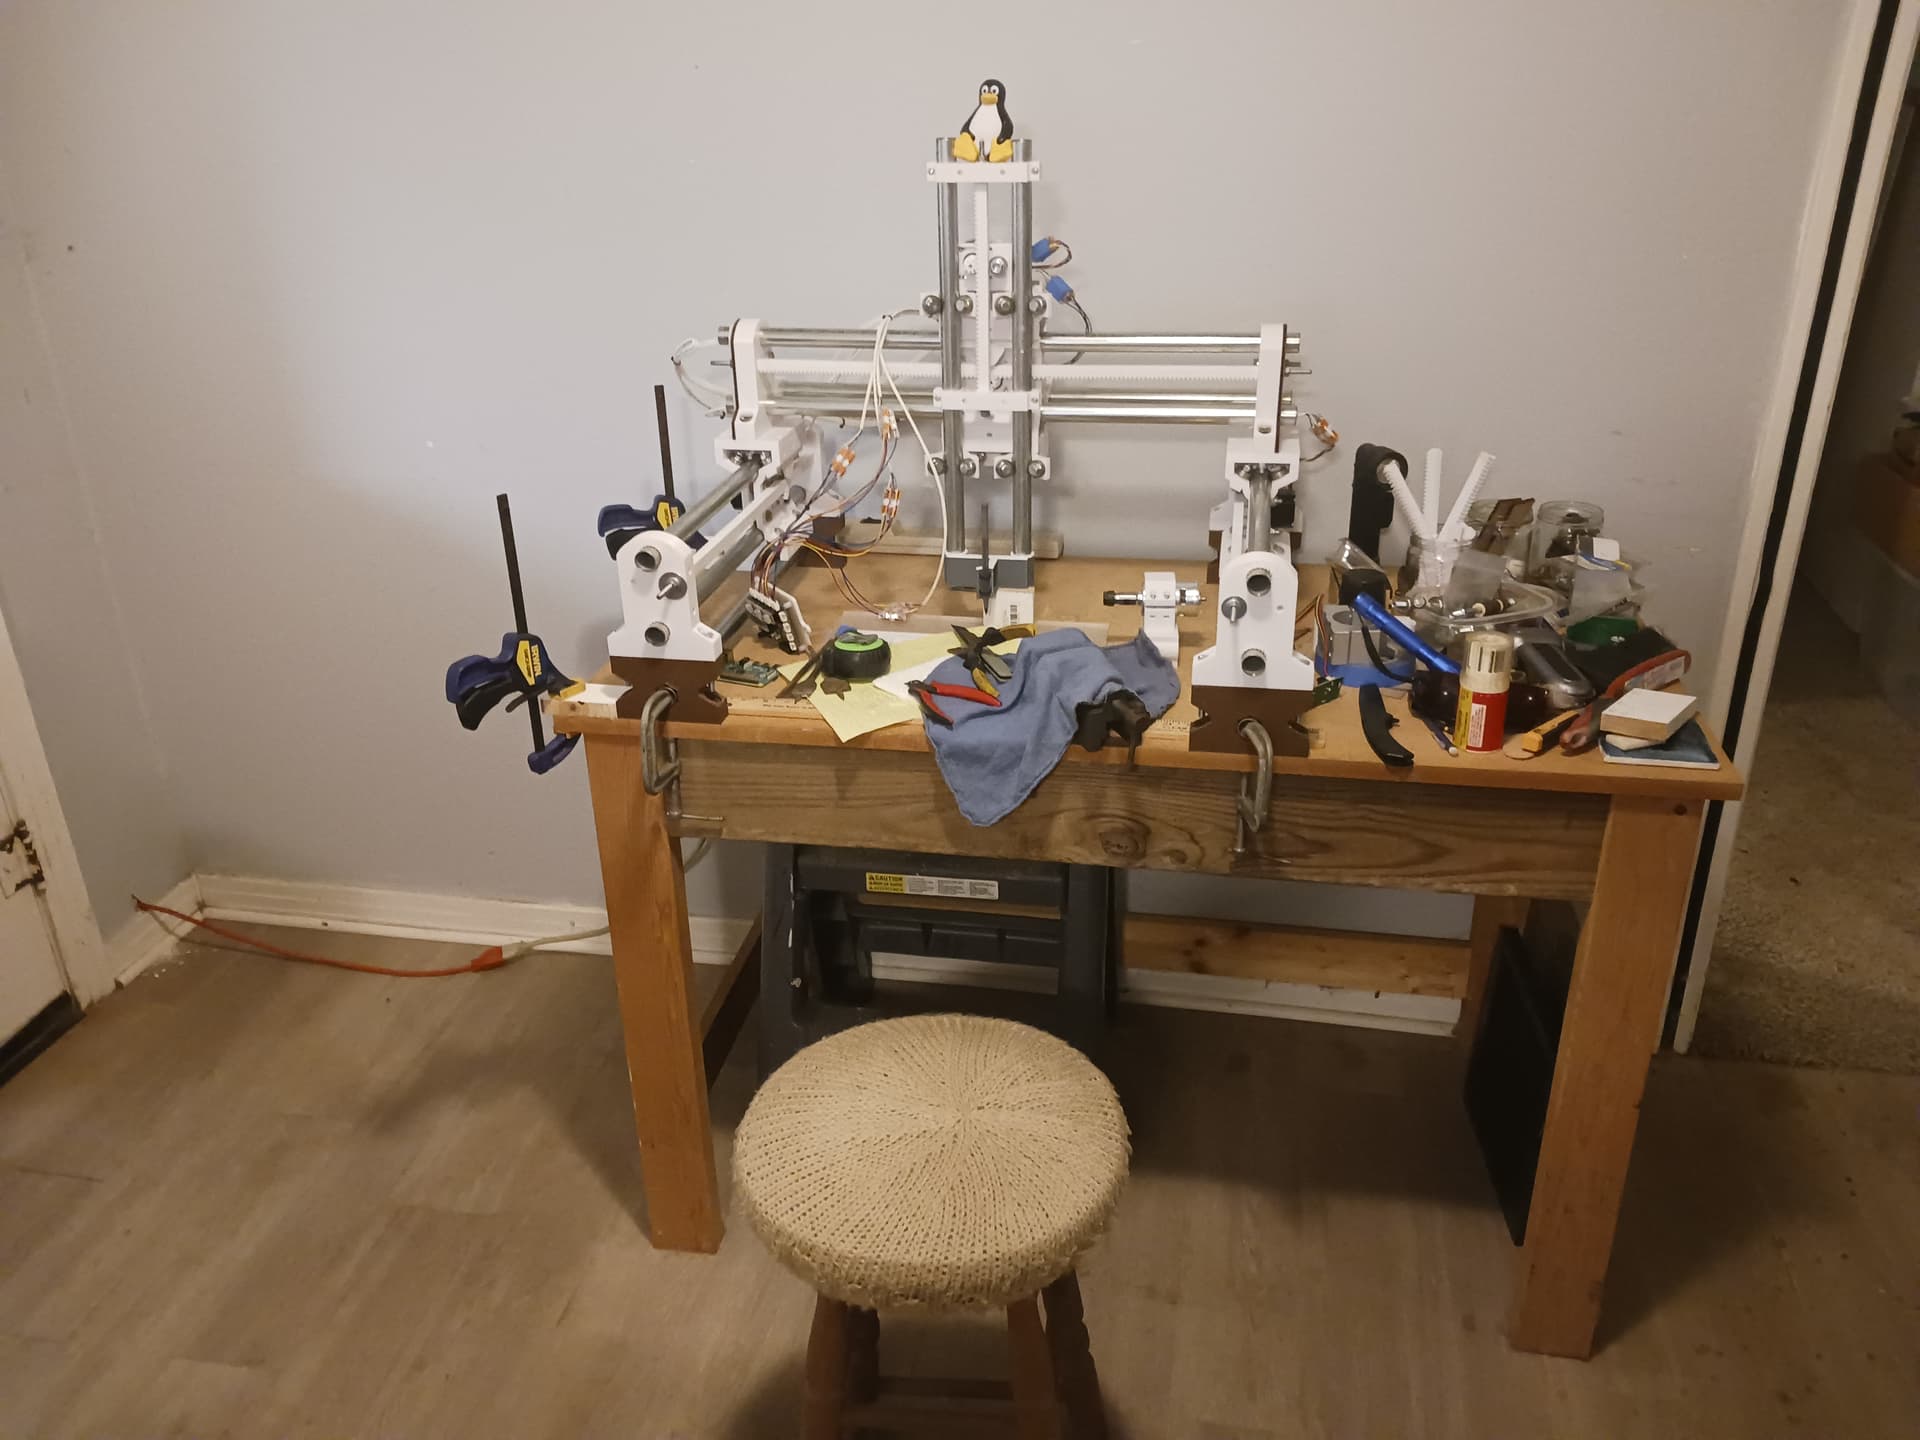
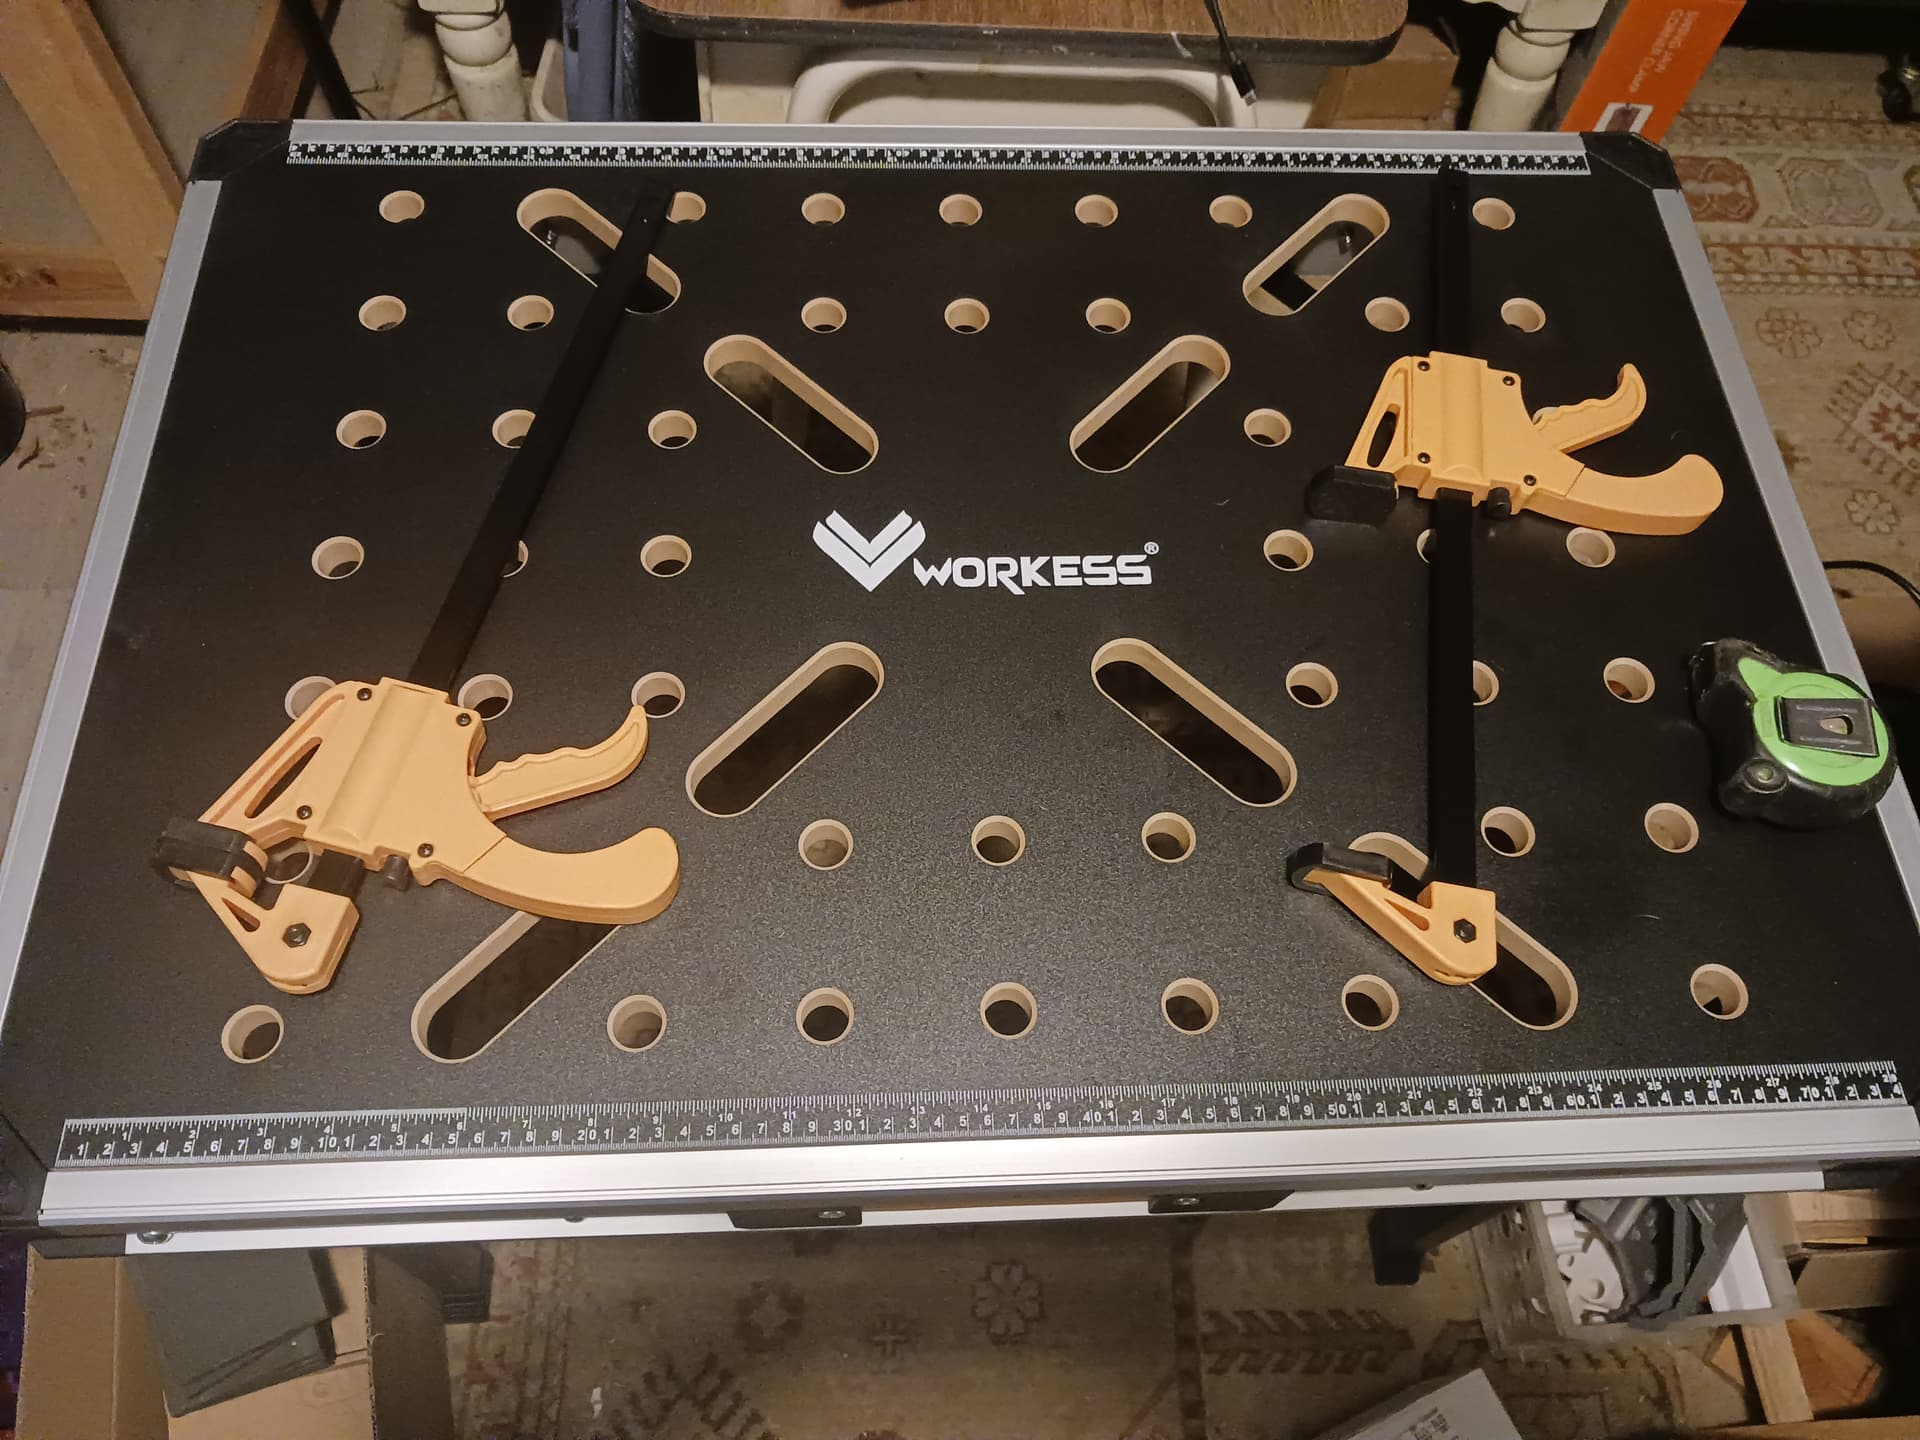
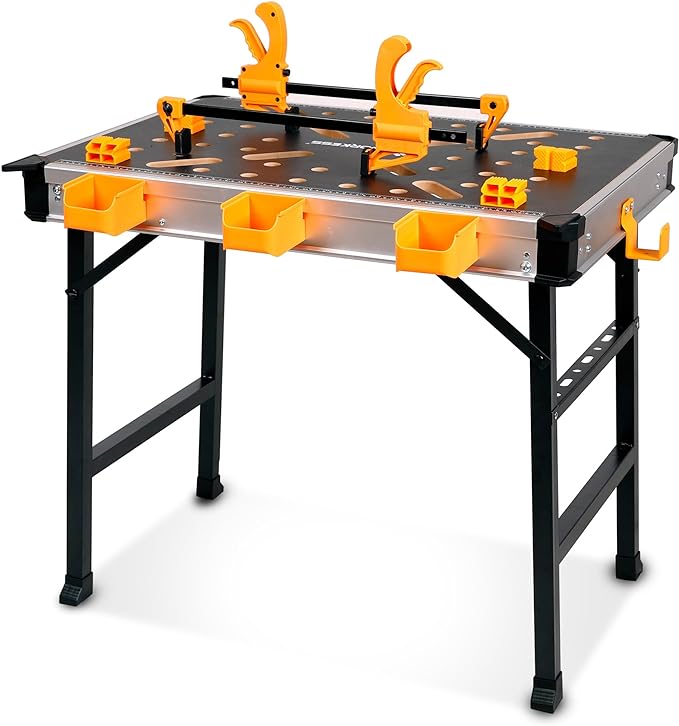
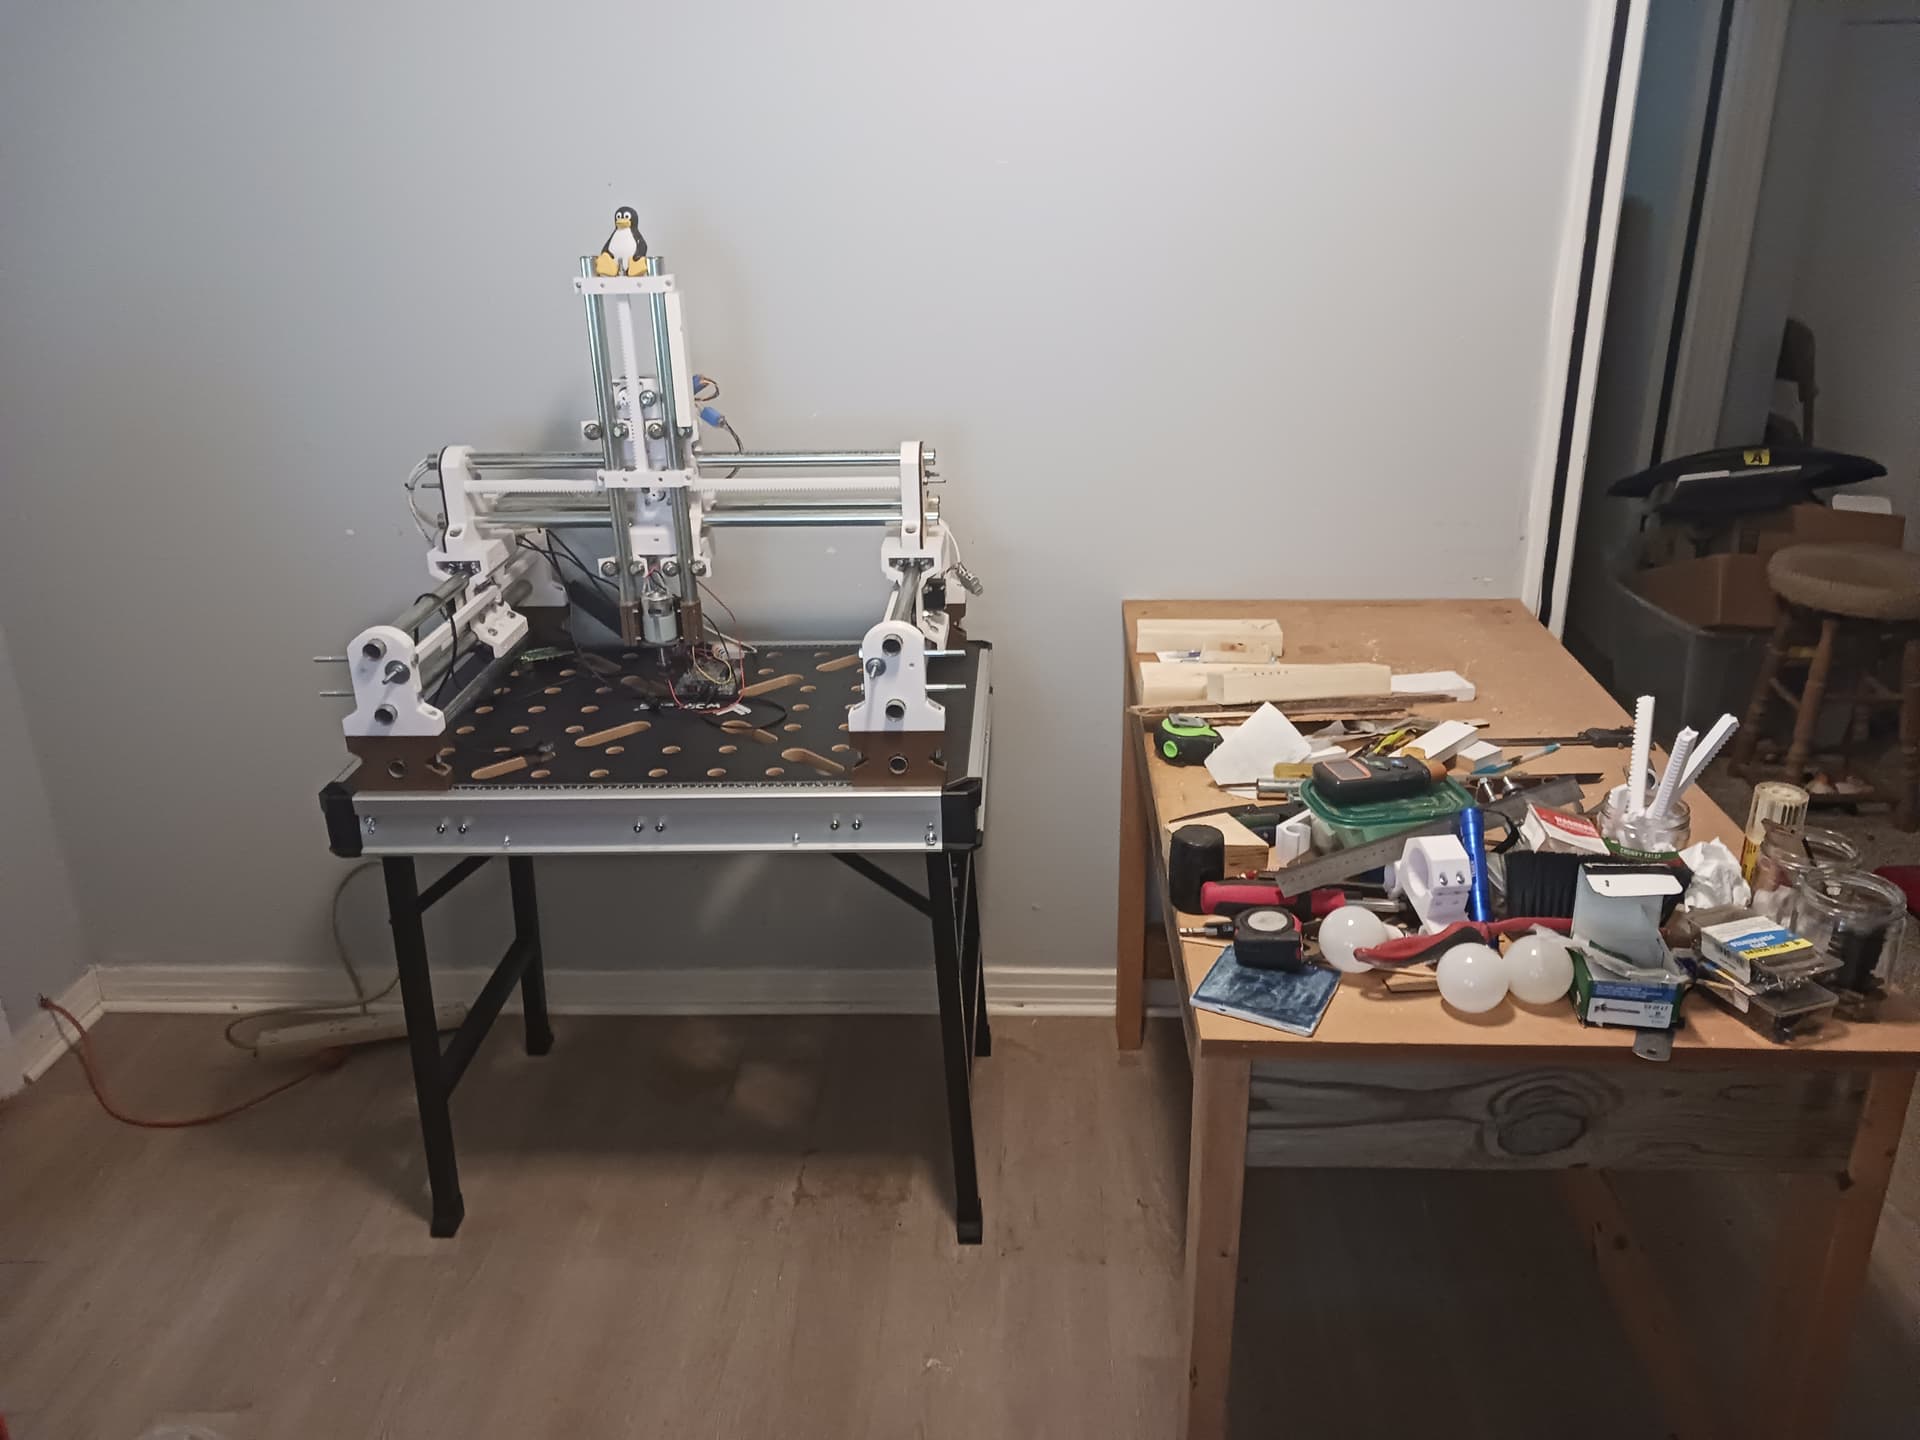
I guess I’ve just “splurged” on MPR&P… without really intending to. Took delivery of a portable workbench that I bought just for the heck of it… it seemed a good deal at $79.99 during Father’s Day weekend. Actually it’s $99.99 right now… but could still be a pretty good deal if you’re just needing a handy and dedicated workstand for your ultra-cheap MPR&P, built almost entirely from your MPCNC junkbox. ![]()
Once I opened the box, I realized that I had done myself (and MPR&P) a great favor. This thing is the perfect stand for MPR&P and provides ample workholding possibilities… something I’ve struggled with quite a bit during testing on its current work table.
Just larger than the footprint of MPR&P (22" x 30") this handy work bench comes with 4 plastic dogs and 2 Irwin-style clamps. The worksurface is MDF and it appears plenty sturdy for anything I’m likely to clamp to it…
ASIDE: Seemingly, 79 is “my number” now. First, there was the ever-popular $79 Cenoz laser engraver, now this handy $79 MPR&P workstand… and quite irreversibly, now hurtling head-long toward my 79th birthday in just a few months. Oh, well… ![]()
Back on topic… I found a piece of reflective tape and have confirmed that the 775 spindle I’m using tops out at ~20000 rpm.
Later.
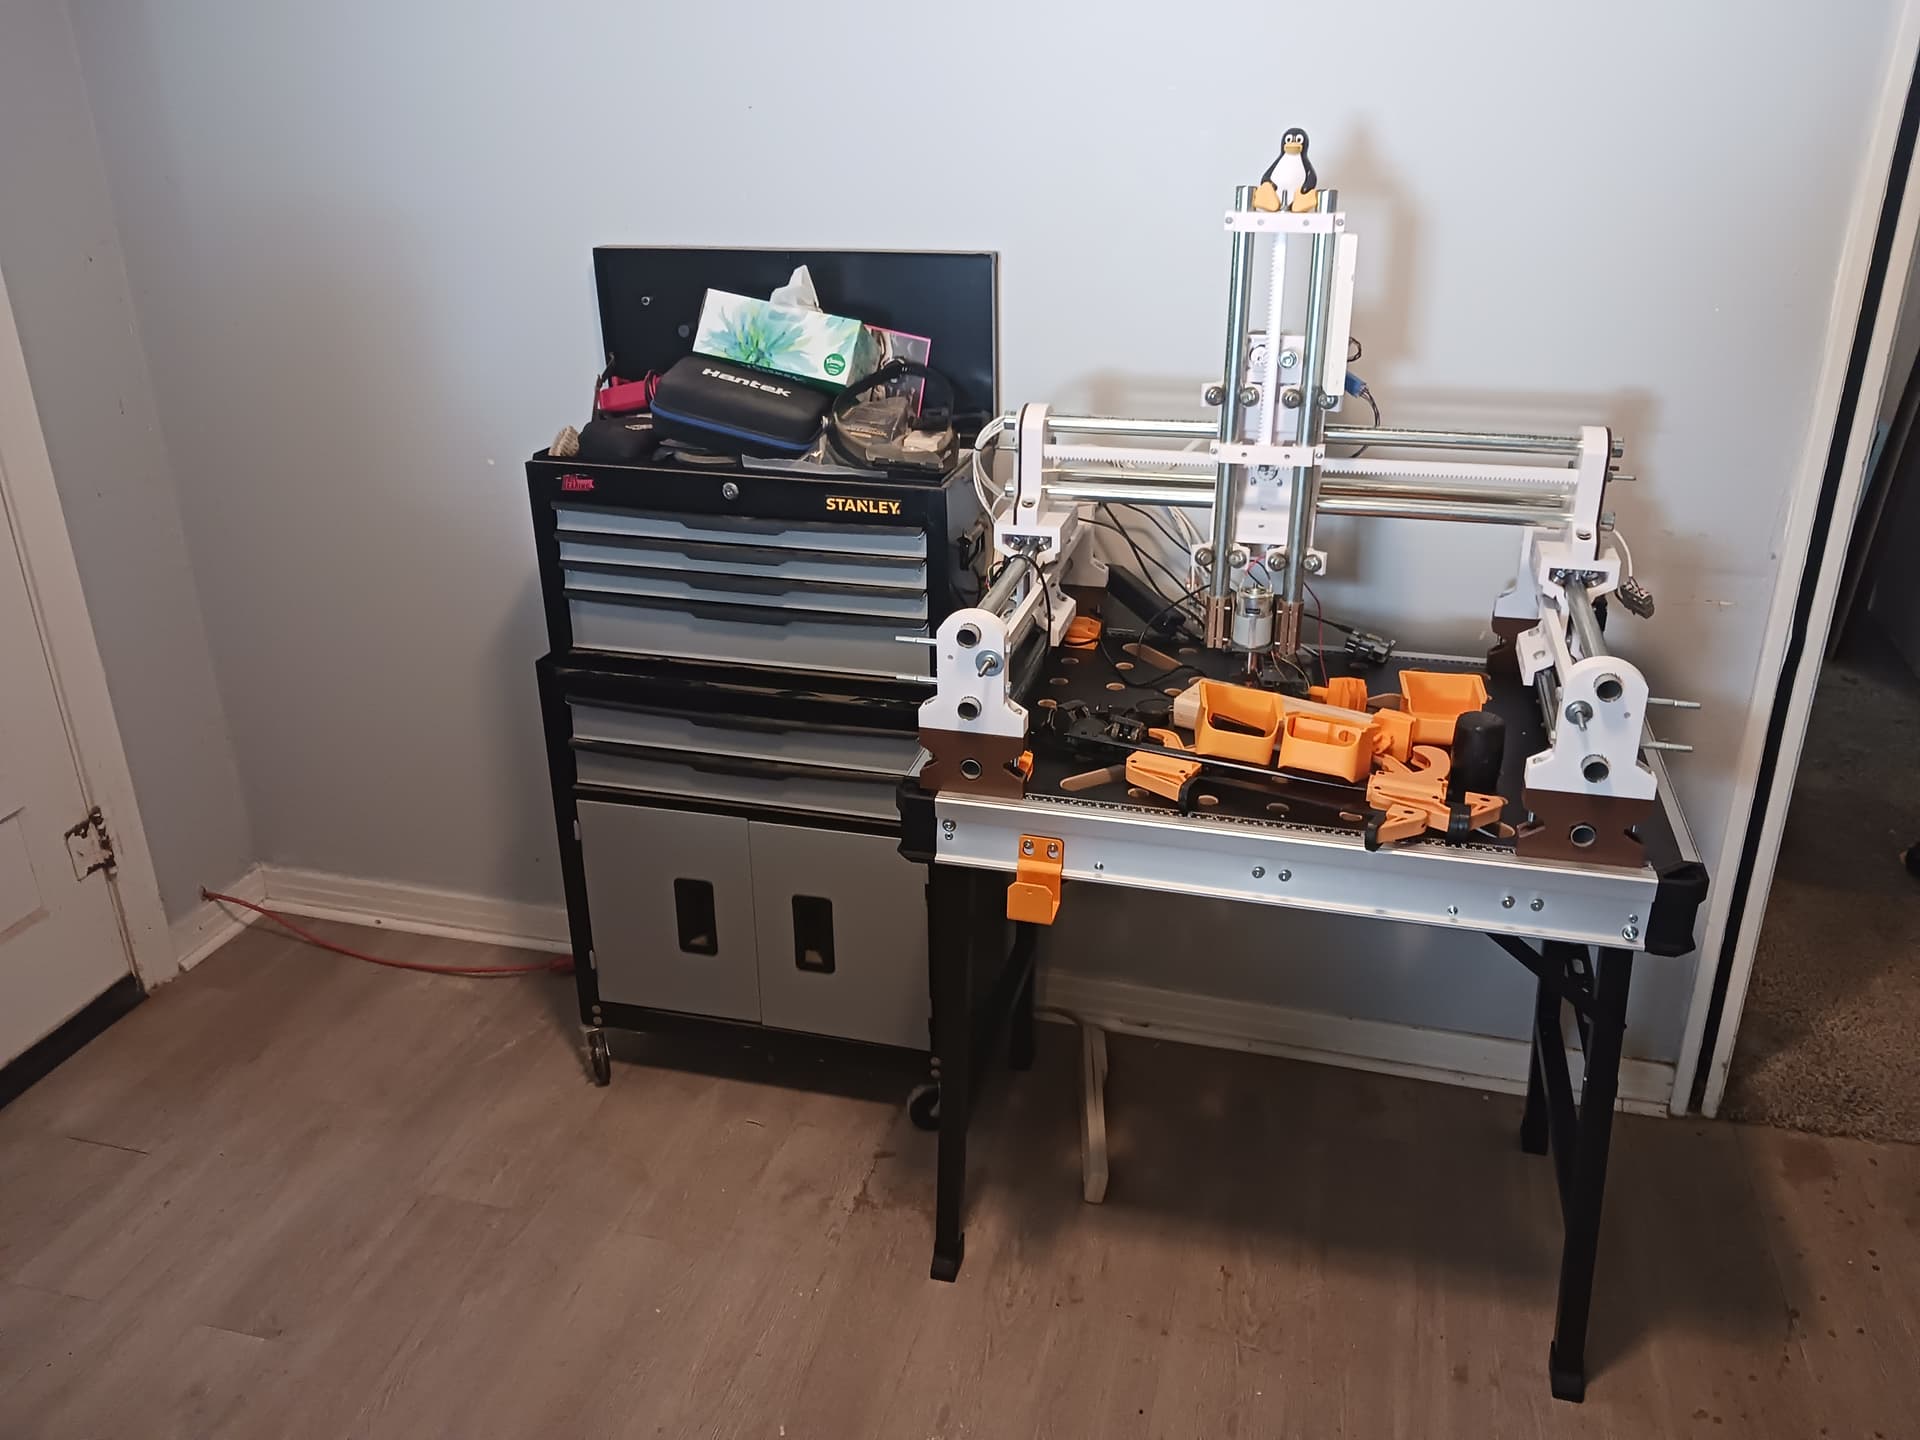
Just starting to move things around…
It’ll be fun getting MPR&P settled into its new home and learning how best to use it… but the ripple effect of moving everything else around is the part I hate. I still need to figure out what to do with the Kreg-jointed worktable… it’s too useful dismantle and destroy. Maybe I could stack a couple of them… they are horizontal surfaces and wind up being “storage” spots anyway. ![]()
EDIT: Not wanting to block the back door and/or waste wall space… managed to uncover my tool chest that I hadn’t seen in several years.
Later.
Rabbit holes,thats where the fun starts