New LR4 build - considering table options - portable?

I’m all over the place regarding my plans for a table and I need some advice.

The plan is to build a half-sheet (4’x4’) working area machine with the potential to expand to a full sheet (4’x8’) down the road.

I’ve seen the various tables - simple, torsion, parametric, bootstrap, Unistrut… They all have their intriguing qualities, but I’ve been reluctant to commit to any because I just can’t make up my mind. Mainly I don’t like the idea of having a big monolithic machine in my garage that will forever occupy a 5x5 footprint. So, I guess I’m looking for something that I can break down (to some degree) or for future transport

I was leaning towards the full Unistrut table like what Peter B has cooking over here: LR4 - If I can build it, anyone can build it - unless it turns out I can’t build it. LOL - #293 by HyeBuilder because it actually seems relatively simple to build and should be a bomb-proof table, but while it could be taken apart and re-assembled later, it’s probably not something I would ever do until I decommissioned the table or moved my shop.

Tonight, while browsing the forum I came across this design from a while back: Portable Lowrider in Annapolis and it definitely caught my attention for how quickly it can be torn down and set back up. But I wonder how accurate the table will end up, and it looks like a lot of fiddling to get everything to fit well during initial construction. I really like the portable sawhorse approach, though.

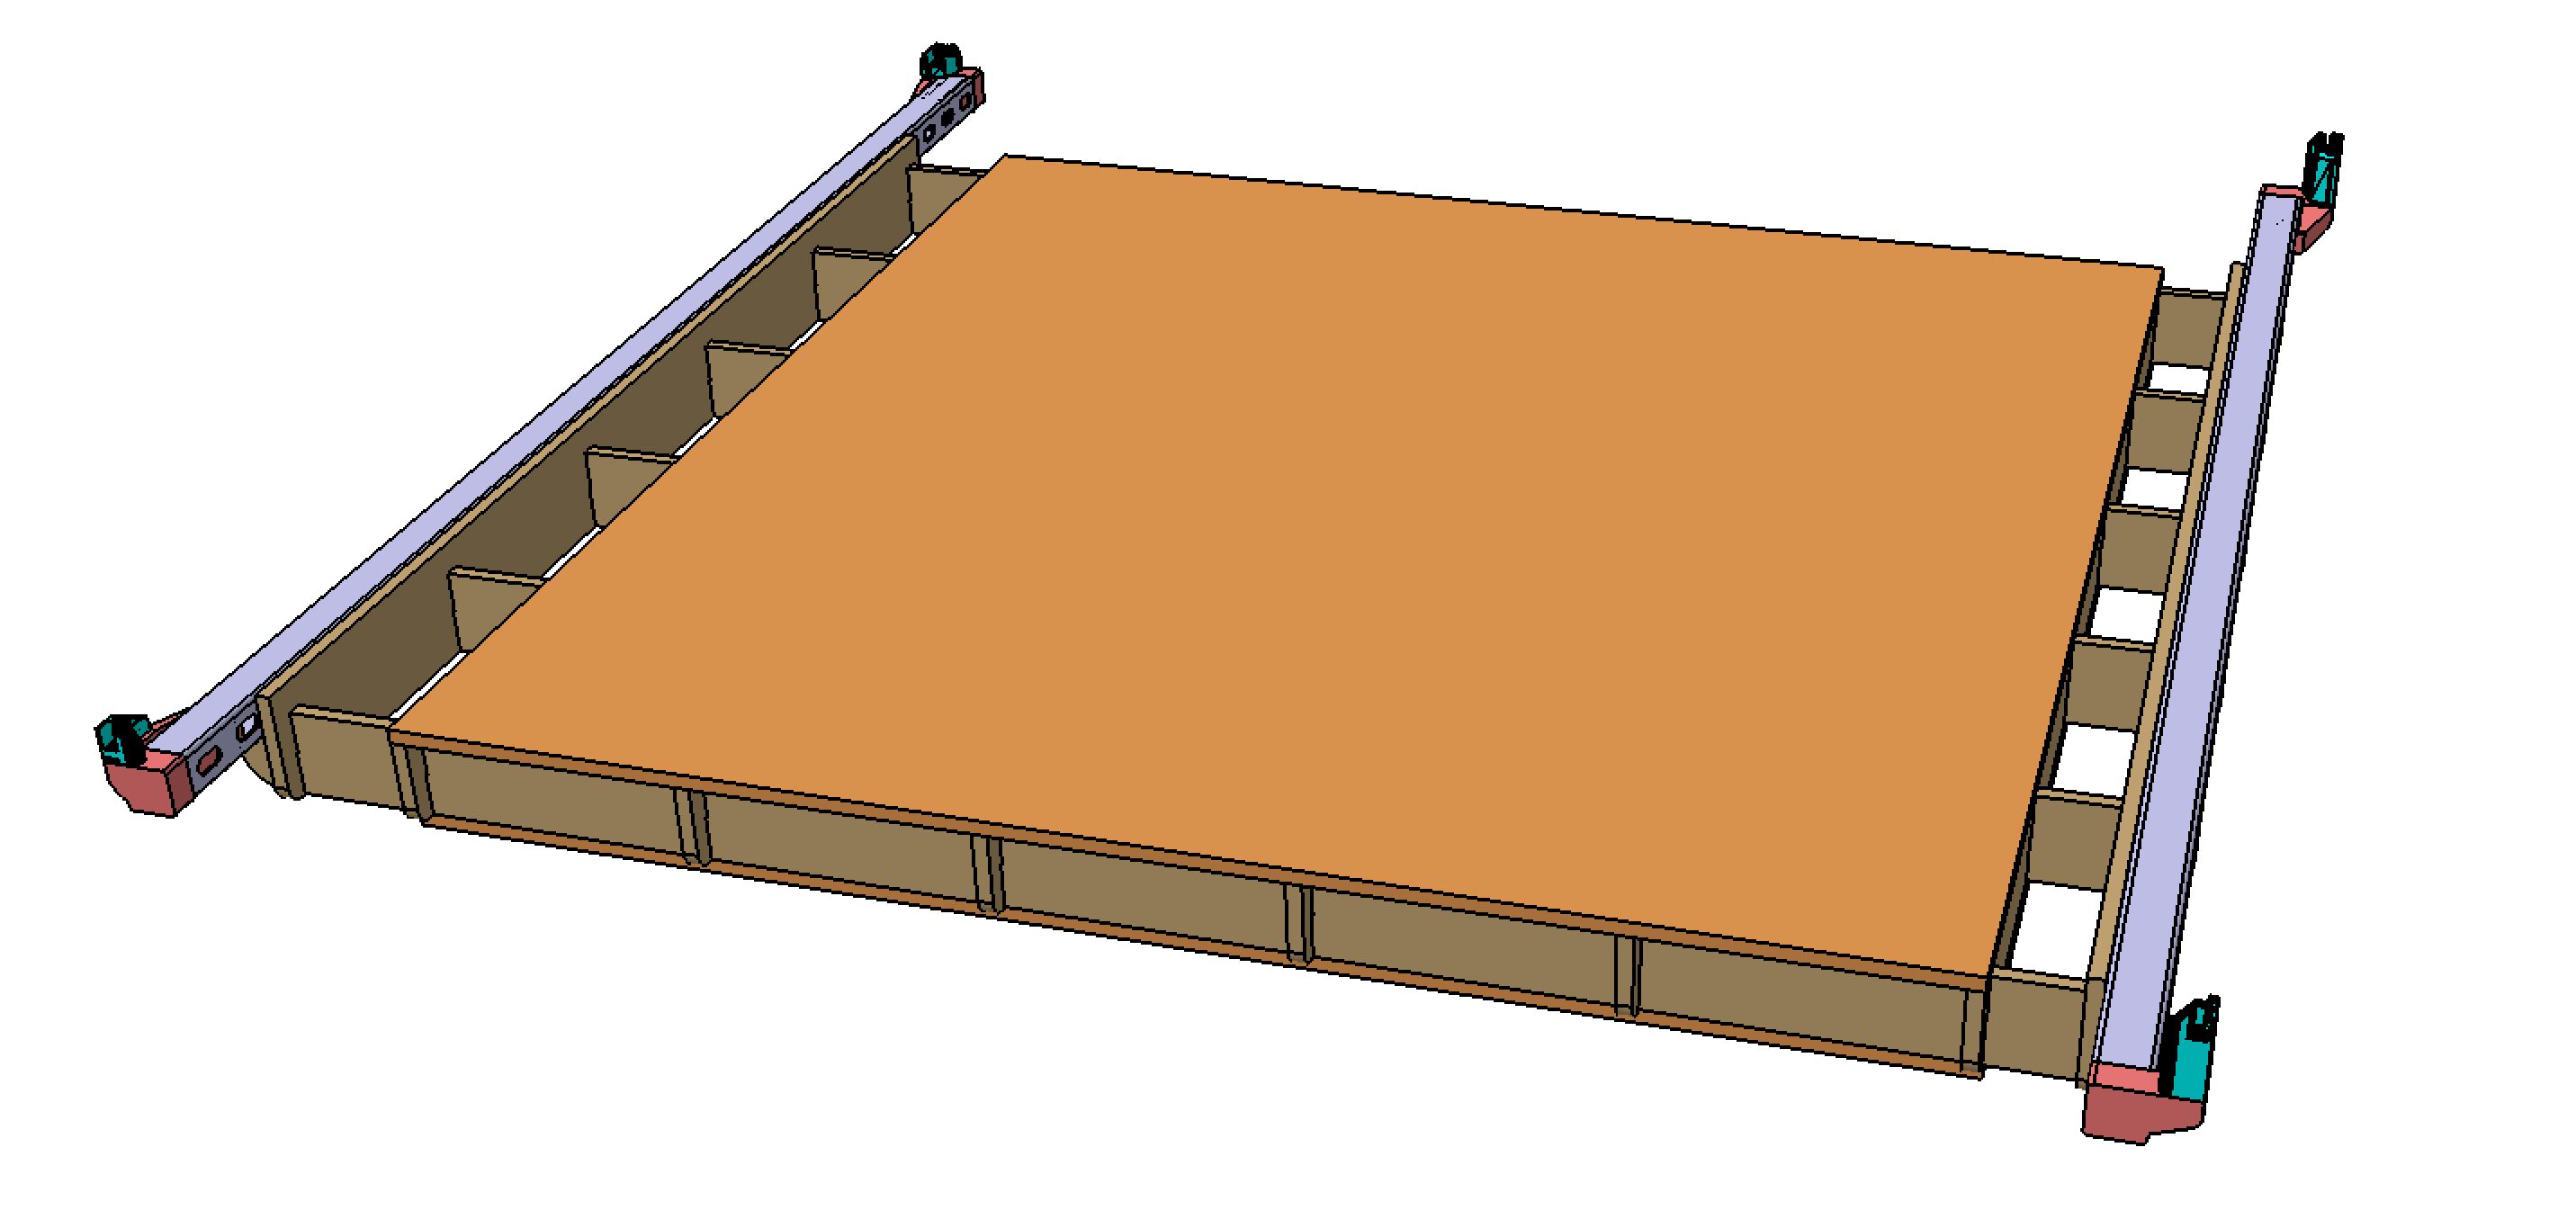
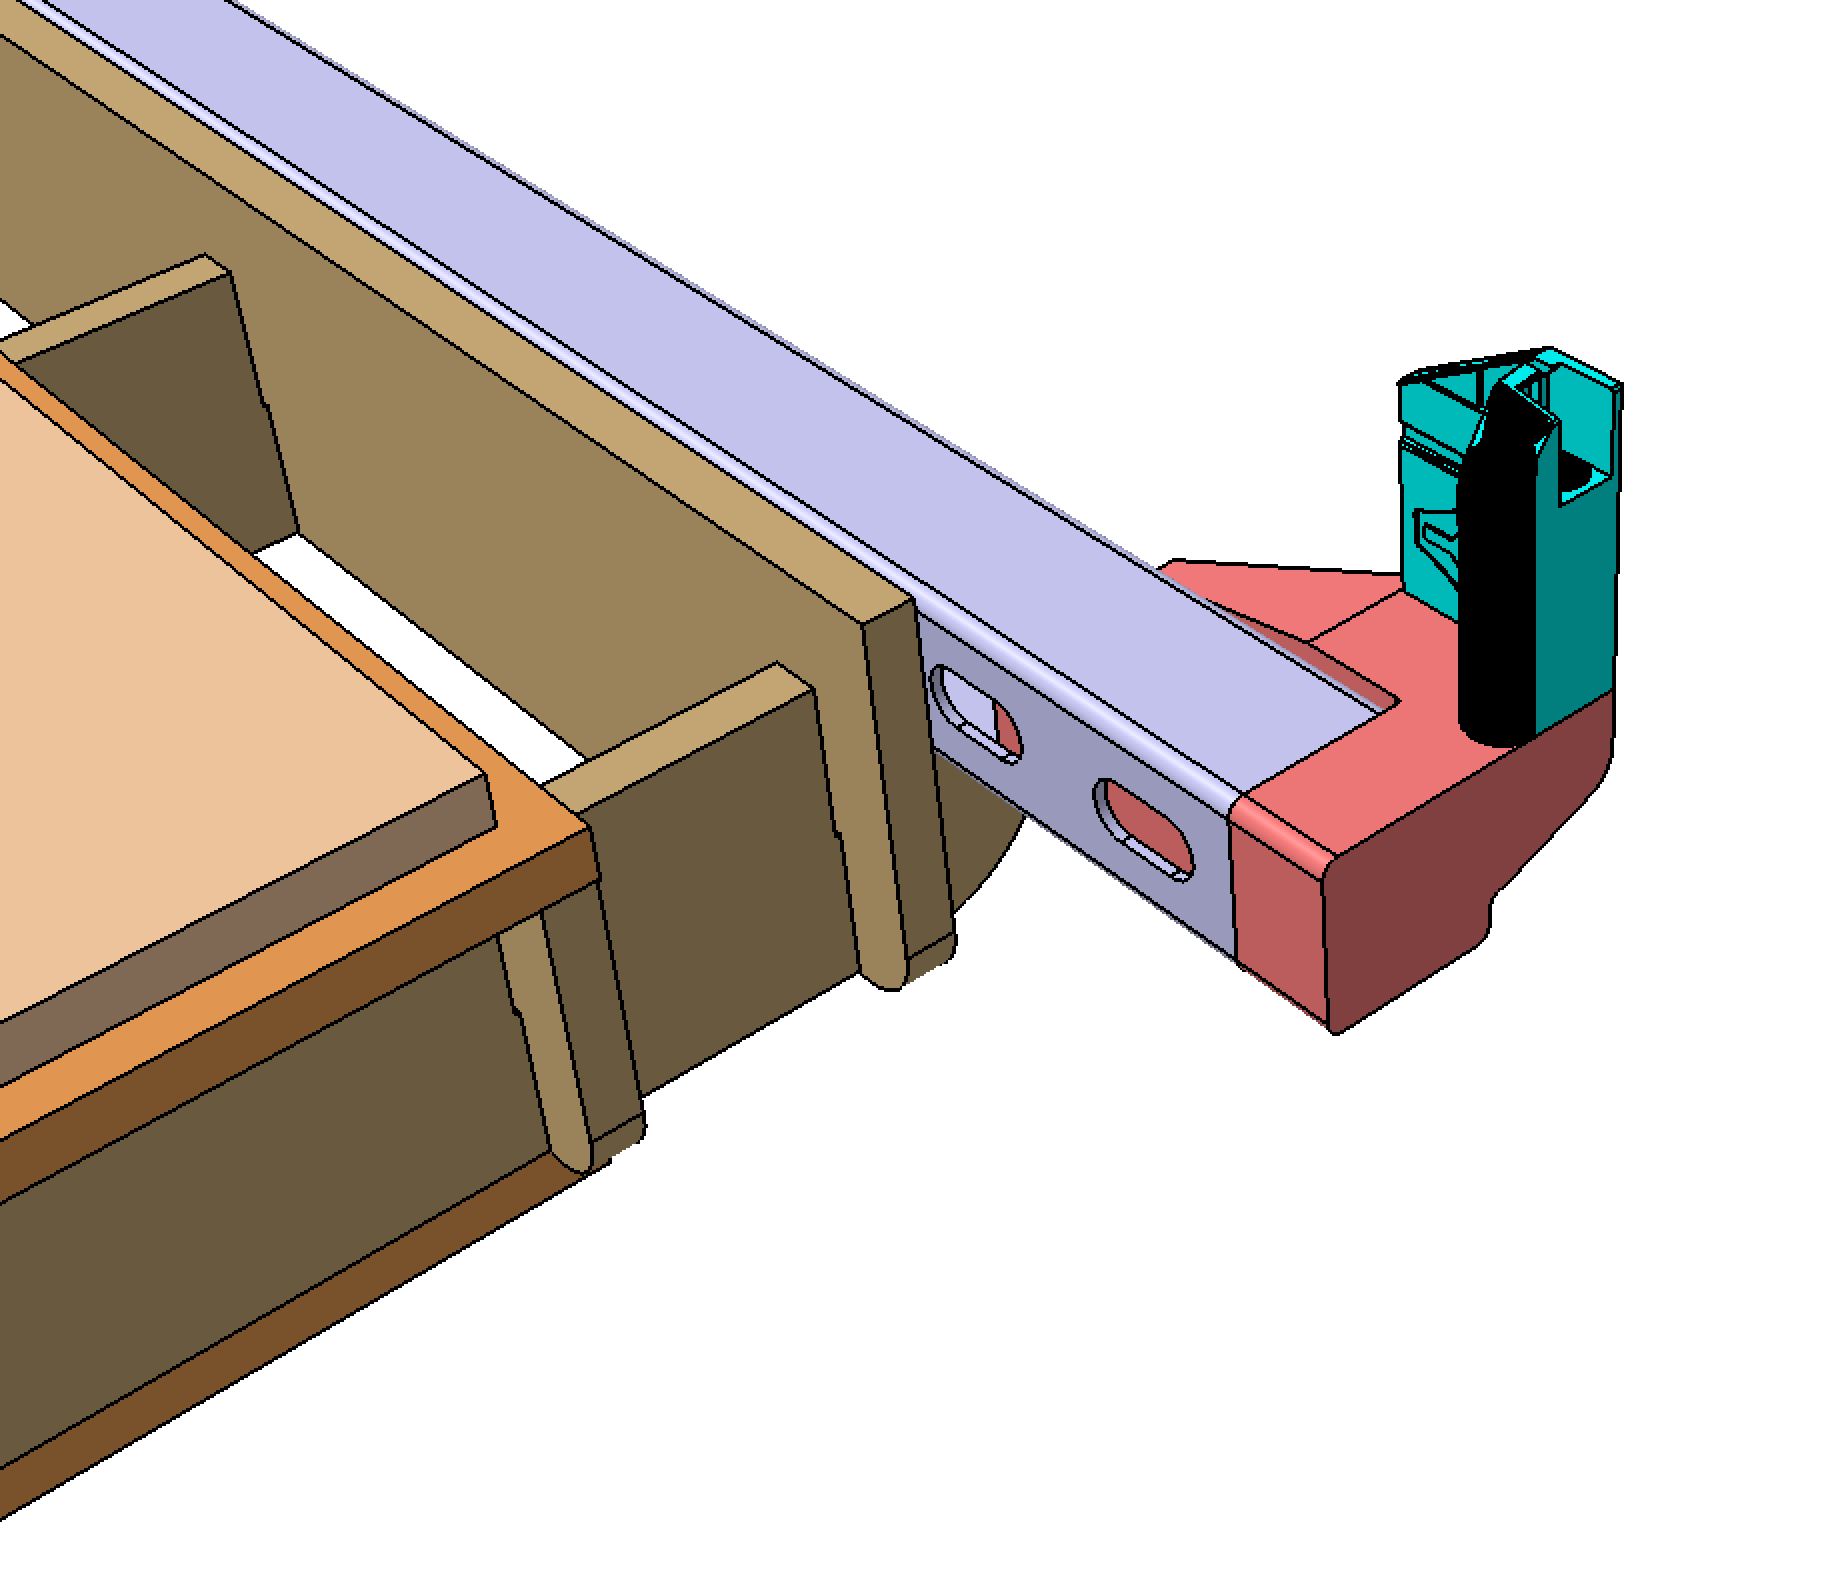
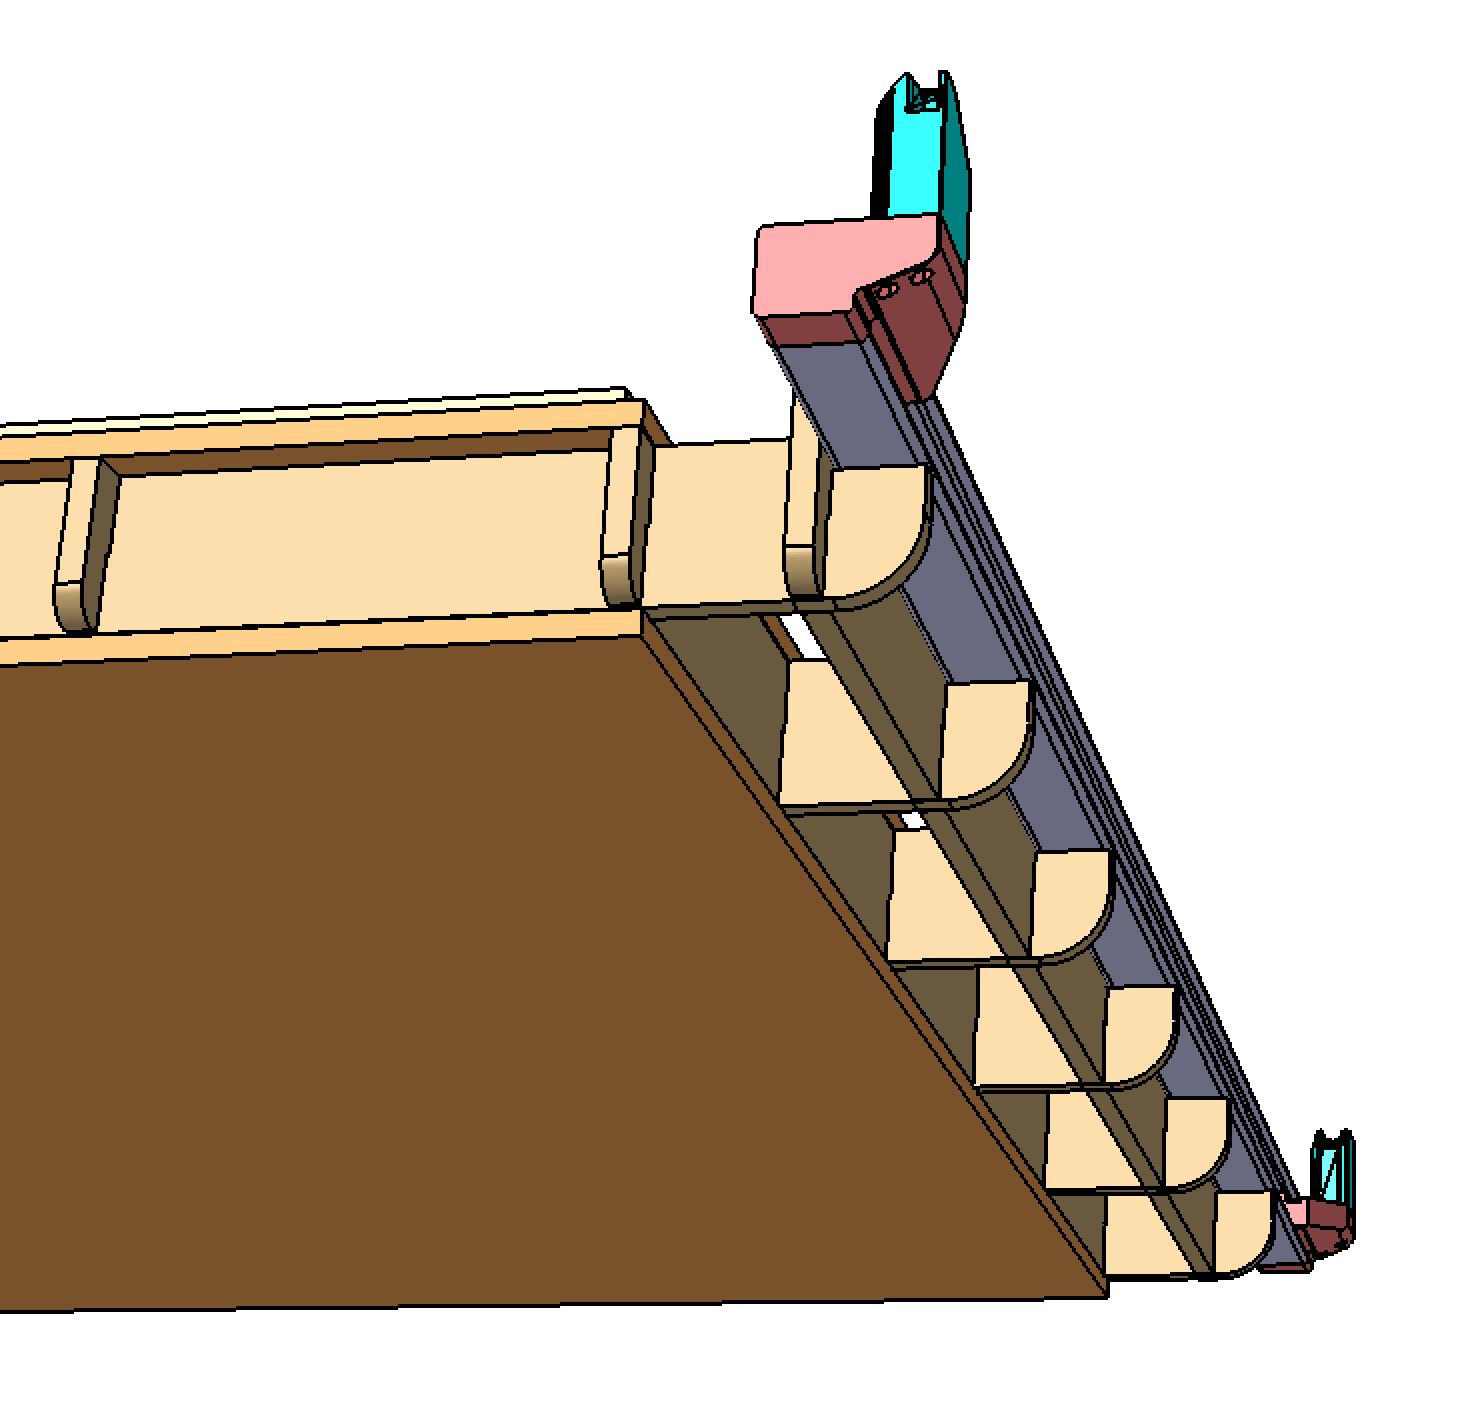
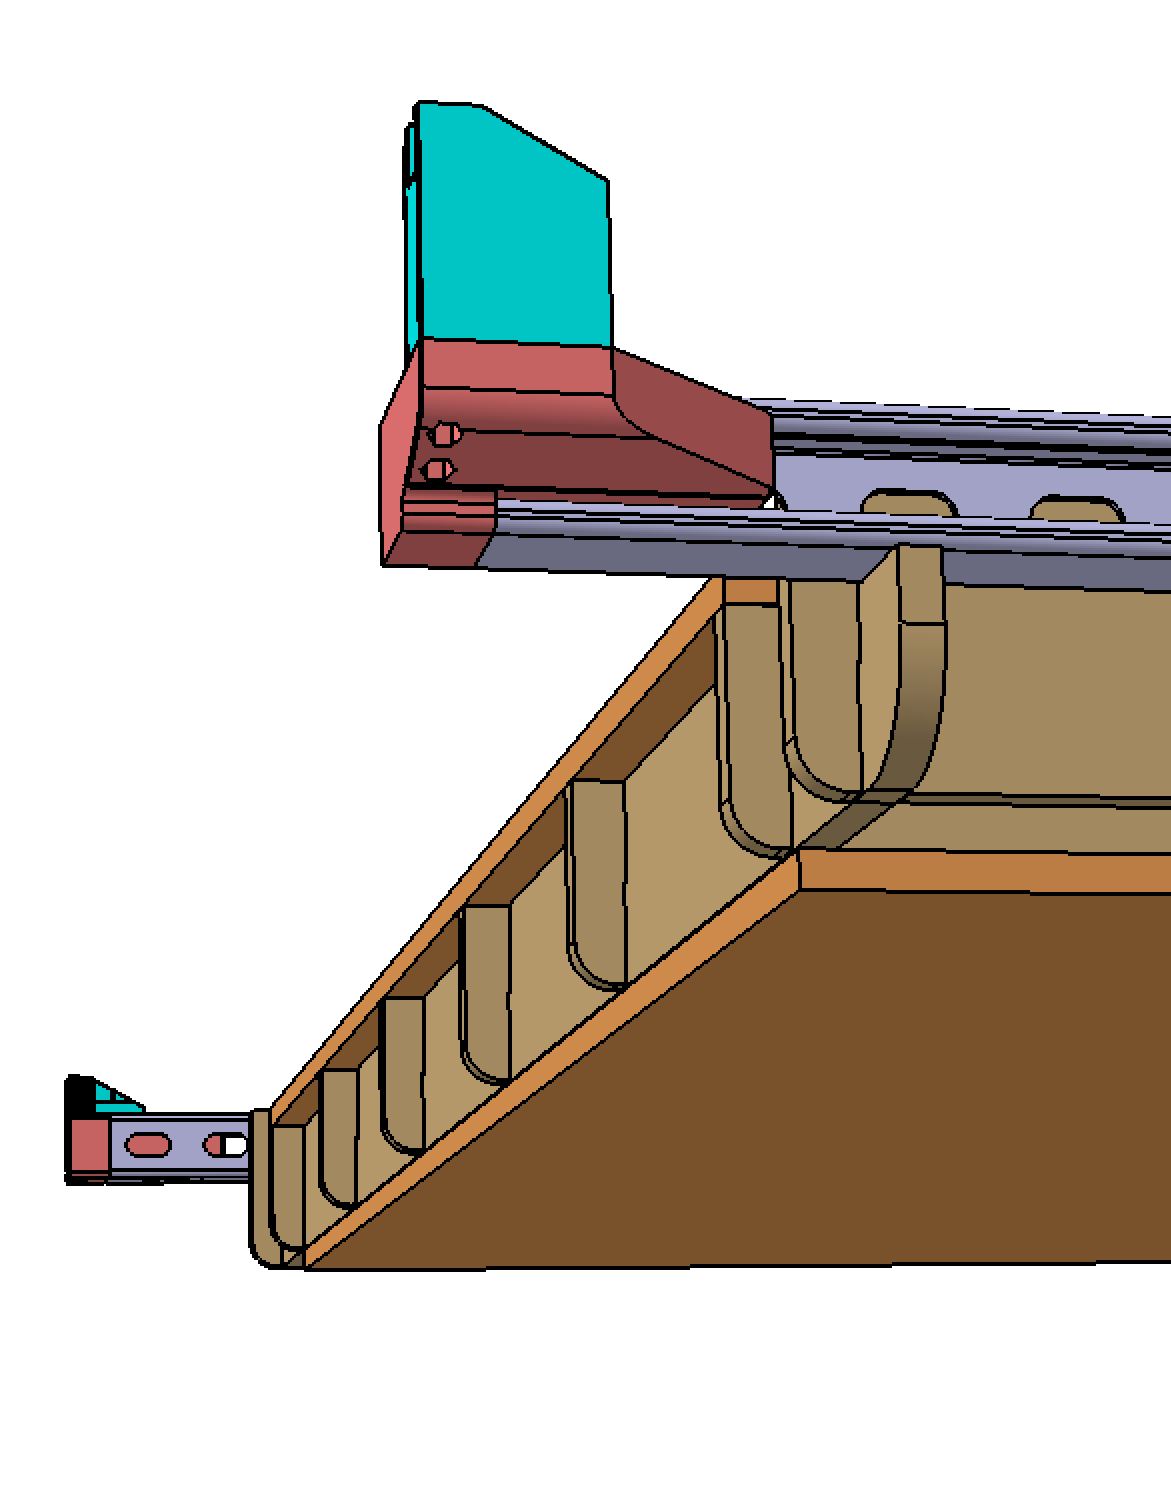
One thing I’m pretty sure about (maybe) is that I want to use unistrut for the Y-axis rails. I have a couple of 10’ sticks laying around and like the idea of having it serve as the backbone for my rails.

Maybe I should just build some version of torsion box with unistrut rails and put it on portable sawhorses? That way I could at least break it down to a certain extent. Or maybe I build a simple 5’x5’ torsion box from baltic birch or mdf and skip the unistrut?

If I go the torsion box route, is baltic birch stable enough or should I use mdf? BB would be nice because it’s the exact size of the tabletop I’d need, but I’ve seen the designs with the extended “wings” for the y-axis rails, and I see how that could be beneficial for clamping/etc which would negate the need for a solid 5x5 top.

Finally, is there an example of how to bootstrap a table from 4x8 sheet goods if my gantry is wider than 4 feet? I’m struggling to picture the steps. I’m handy with a table saw - so I could always skip the bootstrapping.

Sorry for rambling - any advice or experience with any of these questions would be appreciated!

1 Like

Yep, this was common struggle for many here. Consider getting something simple running to start with. Get cutting asap.

Already considered making a sled to bootstrap your cnc to bootstrap your table? Shared sped up sled assembly video here, let me know if slower version you can skip around and zoom through will help.

I don’t recall seeing it mentioned or suggested before, but… Given how effective wood glue can be… Was recently been wondering whether Makers can use the very very temporary 3D printed strut parts to bootstrap a good enough less temporary short term strut made of 2 pieces of 1/8" hardboard based struts overlapped and glued together, where overlapping is the middle ~3/4.

Note, this isn’t a yellow brick road recommended path, so, push back welcome. Am mentioning incase it helps people in your situation looking to do multi-step bootstrap to their “final” setup.

Good luck with whatever table design you end up with.

1 Like

Thanks - this was helpful to watch. Looks like a bunch of work :smiley:. I’m starting to lean towards just cranking out a torsion box on the table saw and putting it on sawhorses.

Ironically, as a woodworker, the table should be the easy part compared to figuring out the electrical and control software.

2 Likes

The torsion box tables with outriggers look neat and save bit of material/weight. Lots of options to choose from, good luck!

The portable lowrider in Annapolis is mine.

Your concerns about the tradeoffs are valid. X/Y are easy to square and I’m accurate to about .25 mm even on my older LR 2. Can’t tune it much beyond that because of flex in the machine itself.

Getting Z accurate is a pain unless you mark the floor where your sawhorse legs go and even them I get. 2-3mm accuracy without a resurface of the bed. I’m doing mostly through cuts so I normally don’t bother.

It serves its purpose as a sheet cutter but there are definitely trade offs.

I also have a MoCNC Primo that I use when I need accuracy.

Hope this helps.

1 Like

As someone who struggled with the table issue from the first day… build the machine per the yellow brick road.

I had my LR4 for nearly a year on that 4x8 torsion box table I built…that table rested on a low portable table I built years ago. I strapped it to that table knowing that someday I would likely build something I needed but to know exactly what that is, it is best to just get the machine up and running correctly. So you have to sacrifice some space for a time… it is not permanent. Better off using the machine and then dialing in your needs with no ‘under the gun’ time pressure. I never would have designed my 100% unistrut channel table if not having spent the time using the machine.

Now you might think about a portable workspace in this regard.. using strut for the two Y rails and then the half-height struts for cross members all bolted together to create a sturdy platform to fasten 3/4 plywood to. This might work as a base you can move around [much like the frame I made for the Primo… using 1.5” extruded aluminum vs 1” pipe for legs and then 1.5” ext frame all around allowed me to move it to where I needed.] this might work but you will need to re-square and resurface each time you move it . You might also think about having one build from steel or aluminum, where it is all welded and designed in a way where there is no flex or movement so to be truly adjustment free and portable but that would cost a lot to have made.

I settled on the in-between. My uni-strut table designed after my childhood experience with erector sets basically. Nothing is perfect, the table that the working part of the LR4 sits on is about 1/2” out of square but that didn’t matter because the Y rails were square and parallel as are the half height strut supports. Once I bolted all that together it could sit on that table or any table for that matter since the Z is always relative to the spoil board on the half-height rails. Depending on the flatness of the table, that would likely cause warpage so there is always give and take.

My advice… build the machine according to the direction, build your full size table (can be like mine allowing you to move it or stand it on long edge if needed to be out of the way) and get used to using the machine to determine what you really need. That is what I did.

BTW, in the entire year of using the LR4, I never once needed the full size table… until about 1 month before I converted to the smaller work area…. Our city Christmas tree auction committee asked me to cut the props.. from 4 X 8 sheets of foam board. Timing was everything and i was happy to do that because it gave me more time to decide what I wanted to build while having a use for the full sized table…

I now have a 4 x 5 working area and could not be happier. Especially since it rolls around my garage and being built from strut channel, it appears less obtrusive probably because I can see through it :slight_smile:

Hope this long-winded muse of mine is somewhat helpful.

Pete B

4 Likes

Alrighty. Here’s where I’ve landed with my plans for the table. Plan is to just put it on sawhorses at first and then maybe build a cabinet base (with my fancy CNC router) later. Looking for a thumbs up or some constructive feedback before I start cutting…

See pics below…

Design criteria:

  1. Work area of 49”x49”
  2. Utilize Unistrut for y-axis rails
  3. Easily sourced sheet materials
  4. Optimize materials used for construction
  5. Make it buildable using a circular saw and table saw

Results:

  1. Router travel in X/Y of ~49.5” in both directions - Unistrut is biased/offset (runs long) by ~2” toward Ymax and table is offset 0.75” toward Xmax to center the router on the spoilboard
  2. Design optimized for (1) 10’ section of Unistrut by remixing/redesigning Doug Joseph’s awesome Unistrut table extender design [unofficial] LowRider v4 DIY CNC - for use with Unistrut / Superstrut / metal strut - table extenders, rail clips, and rail placement jig v1.0 to add 25mm of bonus length at each end so my Y-axis didn’t come up short
  3. Tabletop and bottom made from 49”x97” sheet of 0.5” MDF available at Home Depot (or similar), the torsion ribs are from a 5’x5’ sheet of 12mm Baltic birch available at my local hardwood/plywood supplier, Unistrut is 10’ P1000 available at Home Depot
  4. The tabletop is 49”x49” and the table bottom is 49”x47” - this allows for construction from a single sheet of 49”x97” MDF. The torsion table x-ribs are 60” long which allows for construction from a single sheet of 5’x5’ Baltic birch. The y-ribs are 49” long which is a bit inefficient if you wanted to use 48” wide sheet material but works out fine in the 5’ BB
  5. Circular saw to break down the sheets, then table saw for rips, crosscuts, and dados…

Questions:

  1. Is it okay to mix materials? Baltic birch for the ribs and MDF for the top/bottom? I could do it all in MDF, but those “outriggers” for the Unistrut look a little vulnerable and I’d prefer to use plywood for strength.
  2. Is 0.5” thick enough for the MDF top/bottom and is 12mm thick enough for the BB ribs?
  3. Ribs are currently 3” tall - is this adequate?
  4. Preferred torsion box assembly method? Glue only? Glue and nail-gun (brads)? Glue/screw?
  5. How are people attaching the spoilboard? I was thinking of putting threaded inserts into the top of the table and then bolting the spoilboard to that.
  6. Any other suggestions?

2 Likes

Exciting! My table is plywood and my spoil board is MDF - and it works BUT a lot of times for material hold down I use screws right straight into my spoil board, and MDF doesn’t hold screws real well. I wish I had put a layer of OSB (oriented strand board) on the top of my torsion box and then put my spoil board on top of that.

1 Like

My plan was to build the torsion box with plywood ribs and an mdf top (mostly just to have a 49”x49” top surface based on the availability of 49”x97” mdf sheets).

In addition to what I show in the images, I’d plan to attach a separate mdf spoil board to the top of the torsion box. I was thinking threaded inserts (designed for mdf) in the table top and then bolt down the spoilboard to that.

It’s entirely possible (highly likely) that I’m overthinking things, but I like the idea of cutting past the full width of a 48”x96” plywood sheet and the 49” work area would let me do that. If this seems totally unnecessary, I suppose I could build the whole thing out of 4’x8’ OSB, particle board, or cheaper plywood.

I struggled with this as well. Looks like you have a plan. The one thing you might add to your considerations is whether you’d ever want a drop table component. Basically a section you could remove to give yourself depth for a rotary axis, or a thicker project. With the unistrut design, I think it would be hard to raise the whole rail.

I have a section of my spoilboard that can be removed to reveal a deeper section. I primarily use it for laser projects, but I’m glad it’s there. It does complicate the design a bit. I also left the struts a little long so the gantry could ride out over open space (for the ultimate drop table.) I guess it depends on whether you’d want to do any work on the ends of workpieces.

Just another consideration.

1 Like