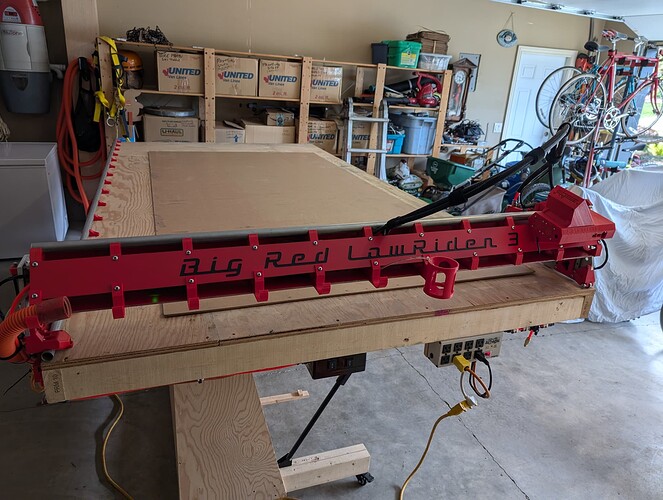
Introducing - Big Red Lowrider 3

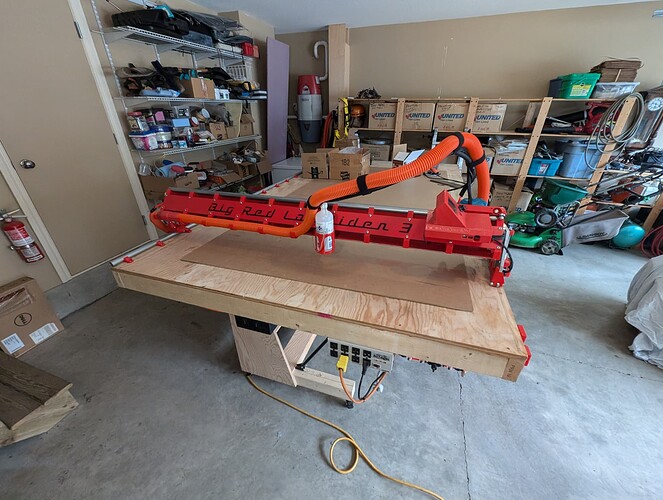
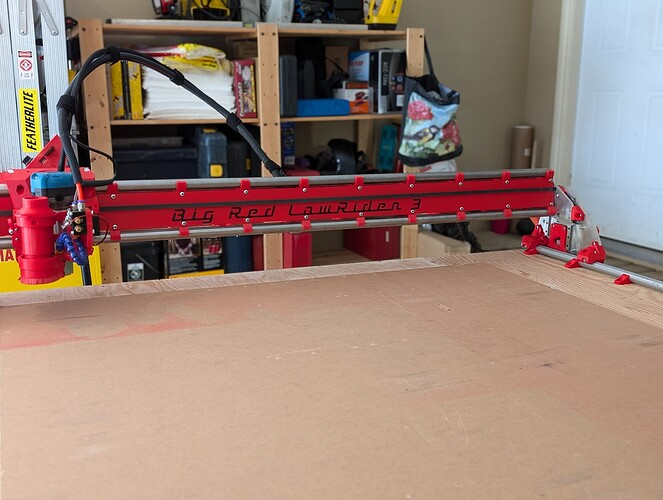
Big Red Lowrider 3 has arrived!

While all the cool kids were playing with their Kobalt Routers, Jackpot Boards and LR4 Beta builds, I’ve been slowly (very slowly) upgrading and expanding my earlier “Little Red” build into its much larger (and much redder) replacement.

@vicious1 has claimed the title for “World’s Sexiest Lowrider 3” (although the post seems to have disappeared), but I think that this one may be in the running for honorable mention…


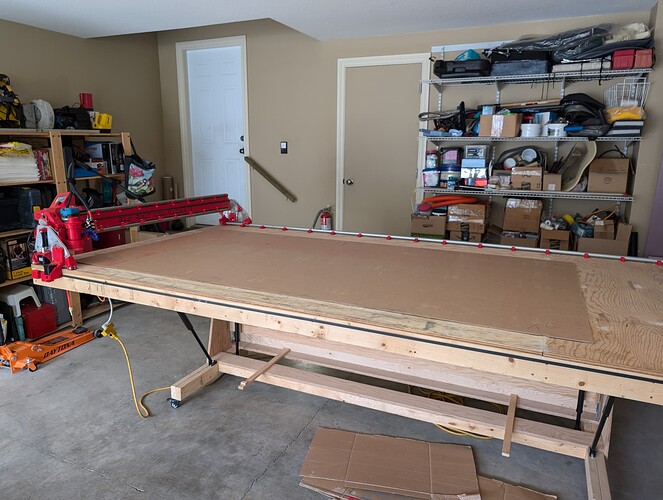
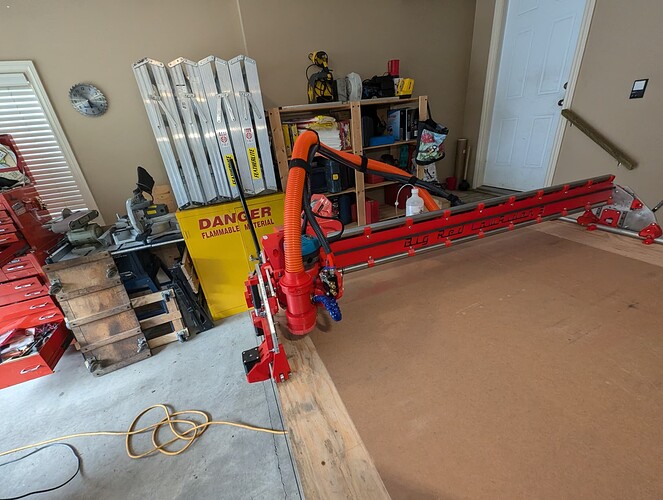
This build is YUUUGE! Usable cutting area is 1367mm x 2710mm.

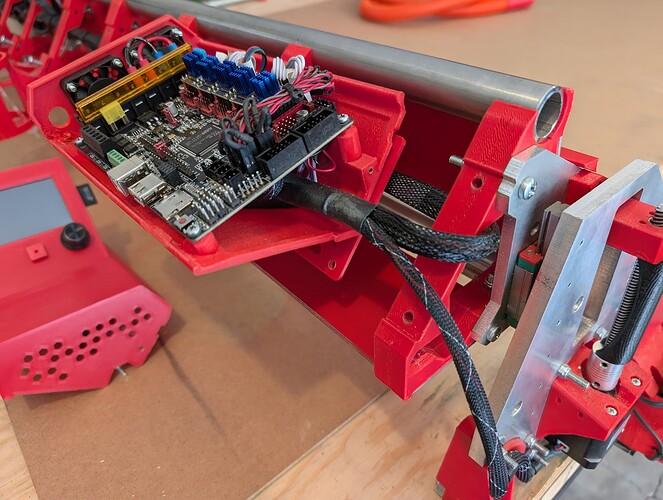
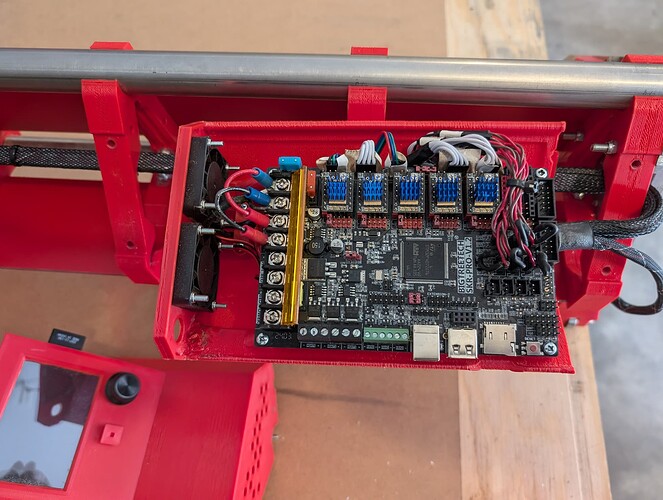
It uses the same SKR Pro V1.2, Vevor Router and 1" (0.120 wall thickness) stainless steel tubing as the original build, but there are a TON of modifications on this build.

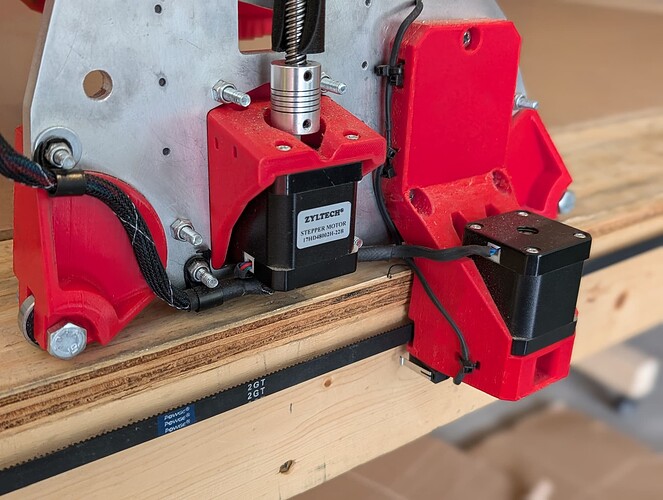
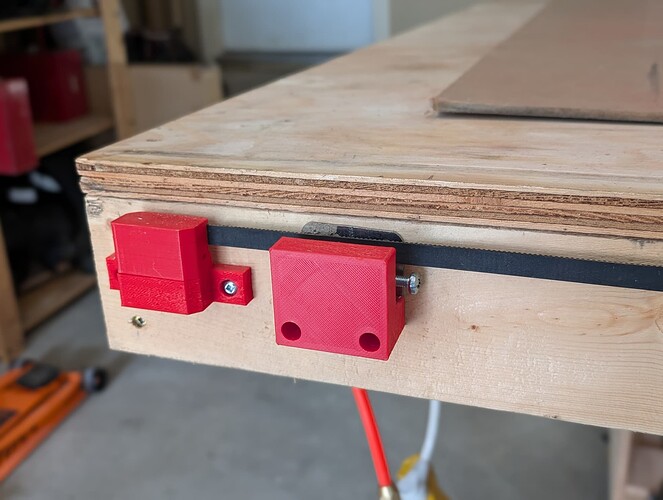
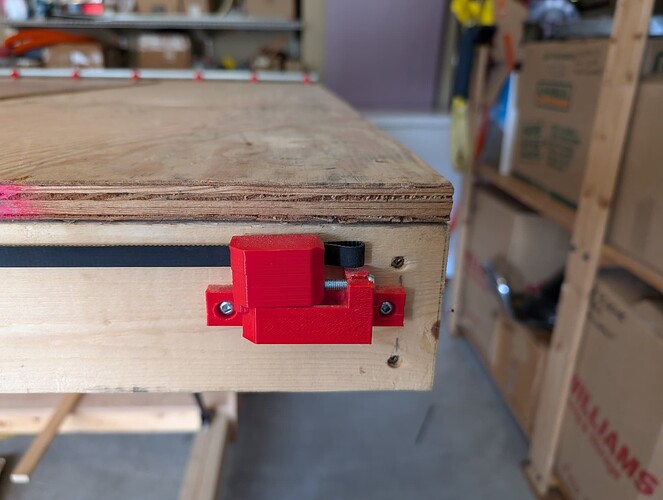
The biggest modification was to use side mounted belts on both sides. I used @Fabien’s design as a starting point, and with help from @Rob_W, I modified it to work on both the rail and non-rail side. I did this so that I can use the table for other purposes without having to remove the belts and belt holders. I find that it works really well.


I also swapped the X/Y orientation around so that X is the long axis. (The gantry is still the short axis, but instead of the gantry being X, now it is Y). I did this mostly as an OCD thing (my design screen is landscape, why shouldn’t my CNC be the same?), plus the layout of my shop means that it is much easier to load material from the long edge rather than the short edge.

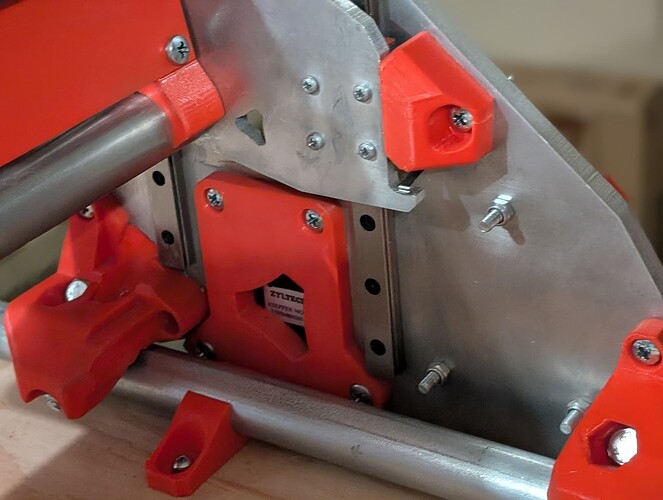
I needed to remix/design new belt holders and endstop switch holders to sit on the sides and also accommodate the portrait/landscape change.


I used M3 adjustment screws in the endstop blocks, and was able to get the square test to within 0.5mm over a 2.7m x 1.35m rectangle!

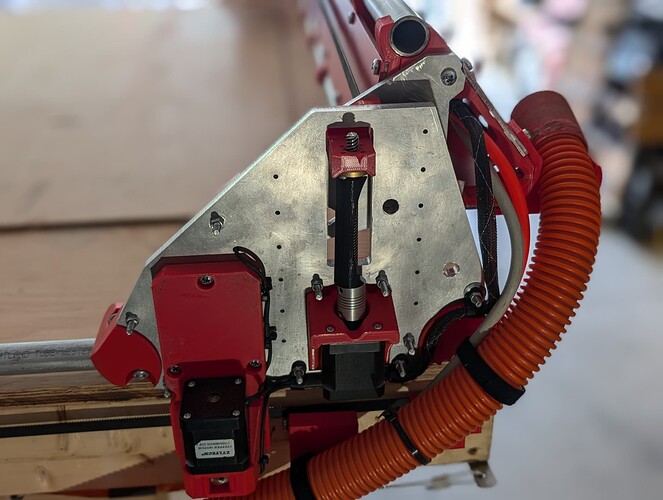
In order to increase rigidity for such a large gantry, I beefed up the strut braces by making them all 21mm wide (6mm wider than stock) , and increased the strut count to 11.

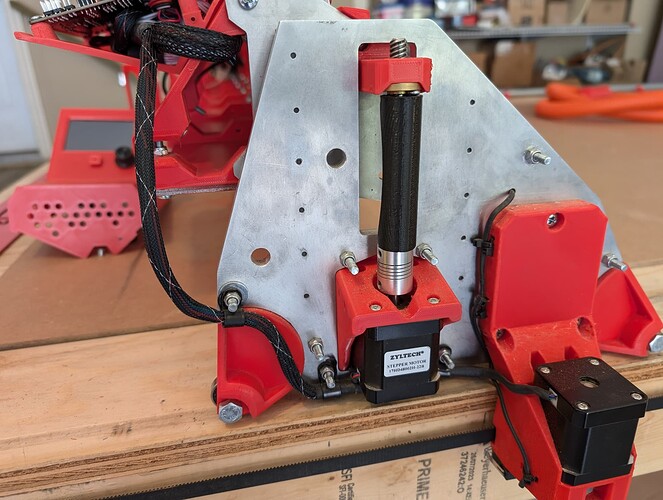
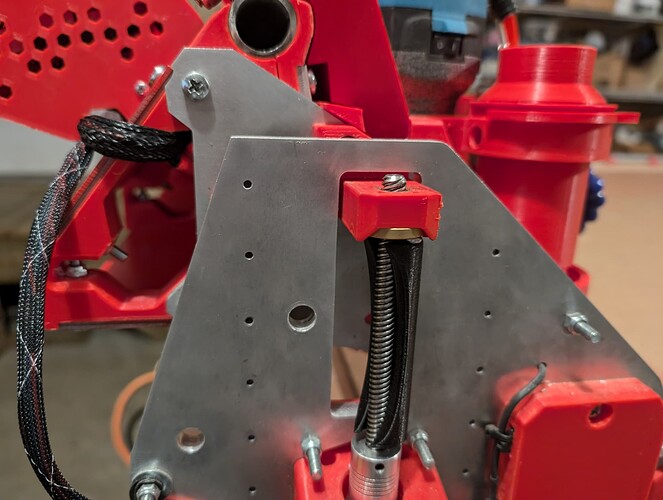
I used 6mm (1/4") aluminum for the XZ plate, and 9mm (3/8") aluminum for the YZ plate. The struts are 2 plys of 2.5mm aluminum. Everything was milled with the LR3…

With the beefed up gantry and the aluminum plates, this build is VERY rigid! The difference between this and the earlier build is like night and day.

More details and pictures coming shortly.
16 Likes

Wow!!

1 Like

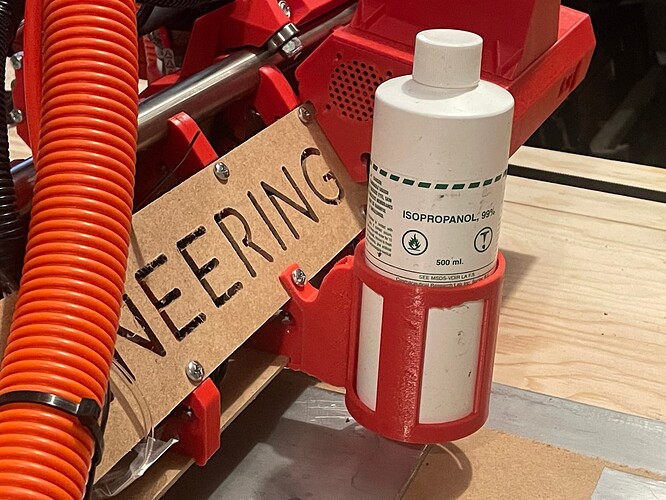
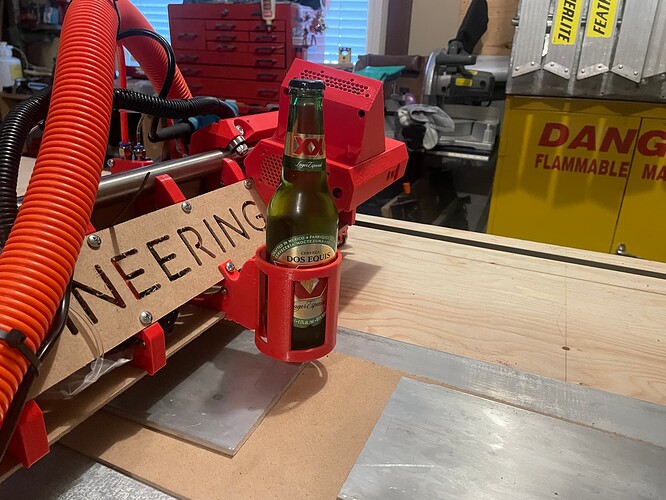
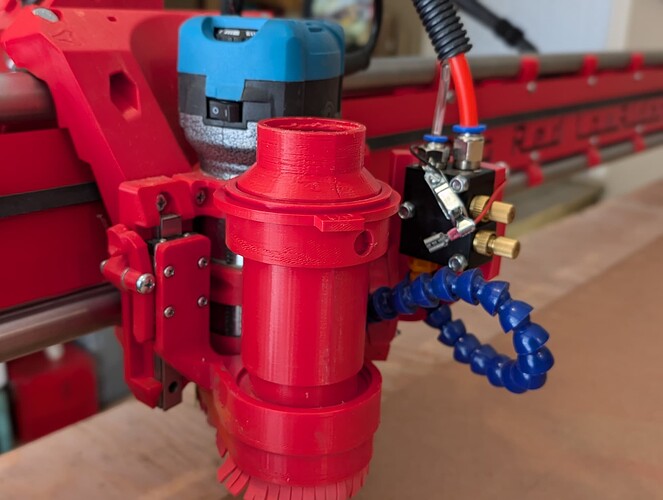
I feel like I’m probably wrong, but secretly hoping I’m correct. Is that a 3d printed cup holder attach the the machine in the second photo :eyes:

2 Likes

Wow!
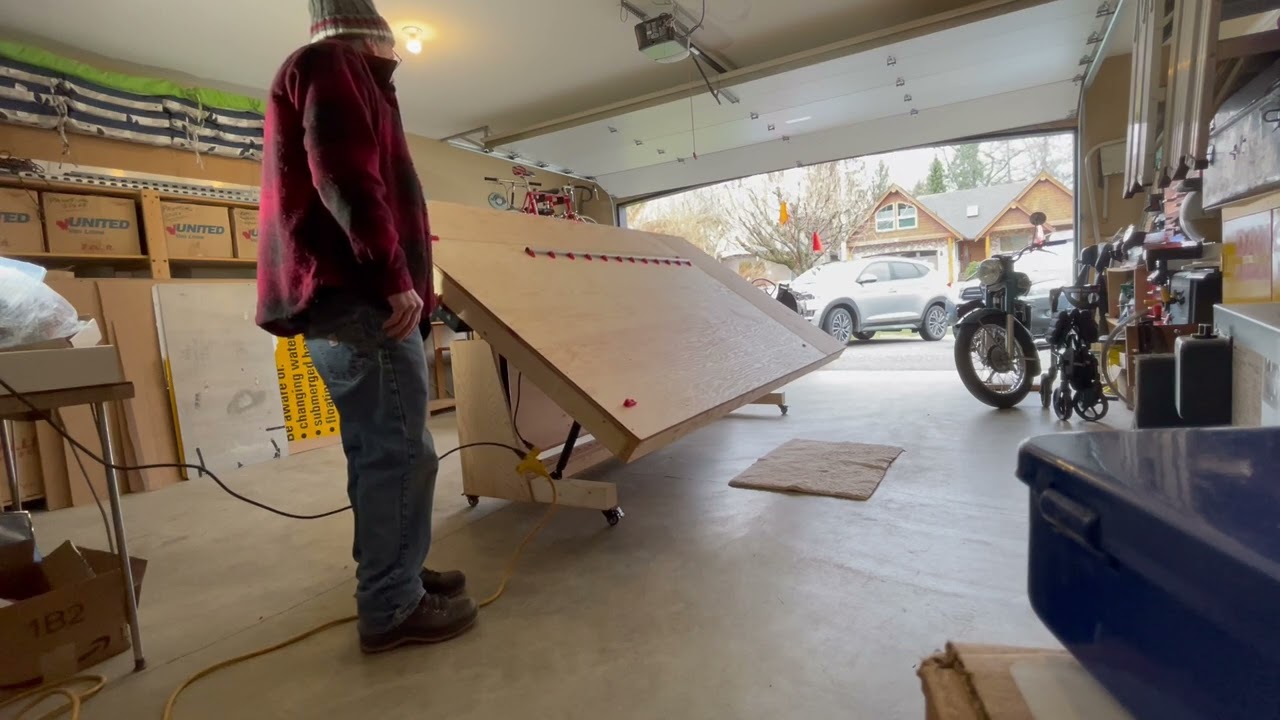
Great machine build, and I’d love to know more about that flip table.

1 Like

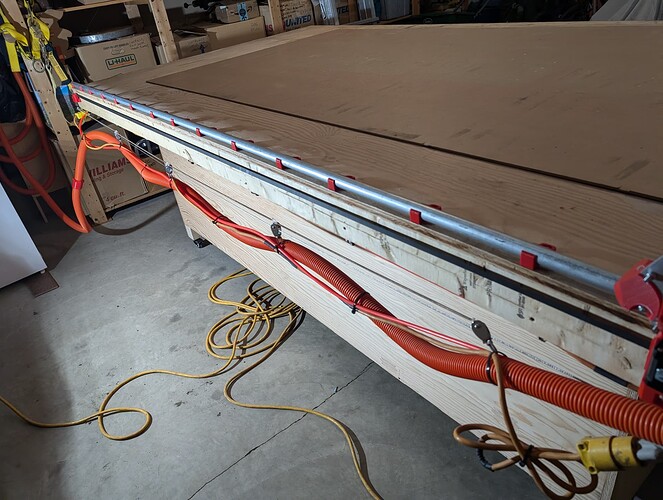
Pretty close! It is a 3D printed bottle holder to hold the isopropyl alcohol (IPA) for the air/mist sprayer

c6cfcfaeaff12061063723cfb9c23e8f677821b7_2_666x500

It also doubles as a beer bottle holder…

c22f4f04f02ae53cd1f18d616a115c508cab13c5_2_666x500

4 Likes

I have this thread from a few months ago…

and a video…

I’m planning to re-do the video in a week or three showing the process from fully stored to installing the LR3 in place.

5 Likes

Automated!!! I love it!

1 Like

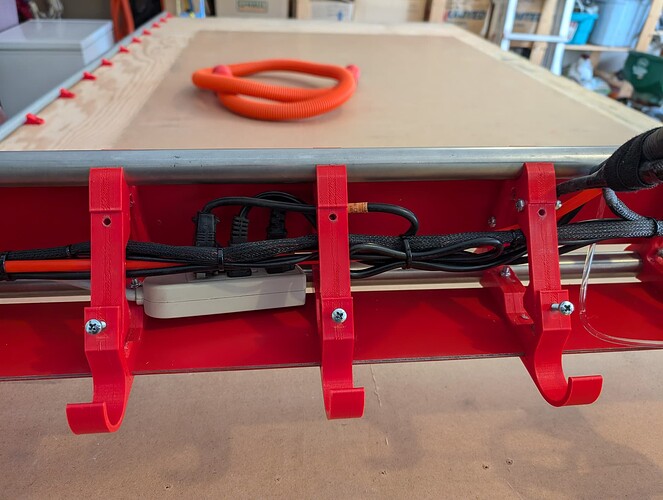
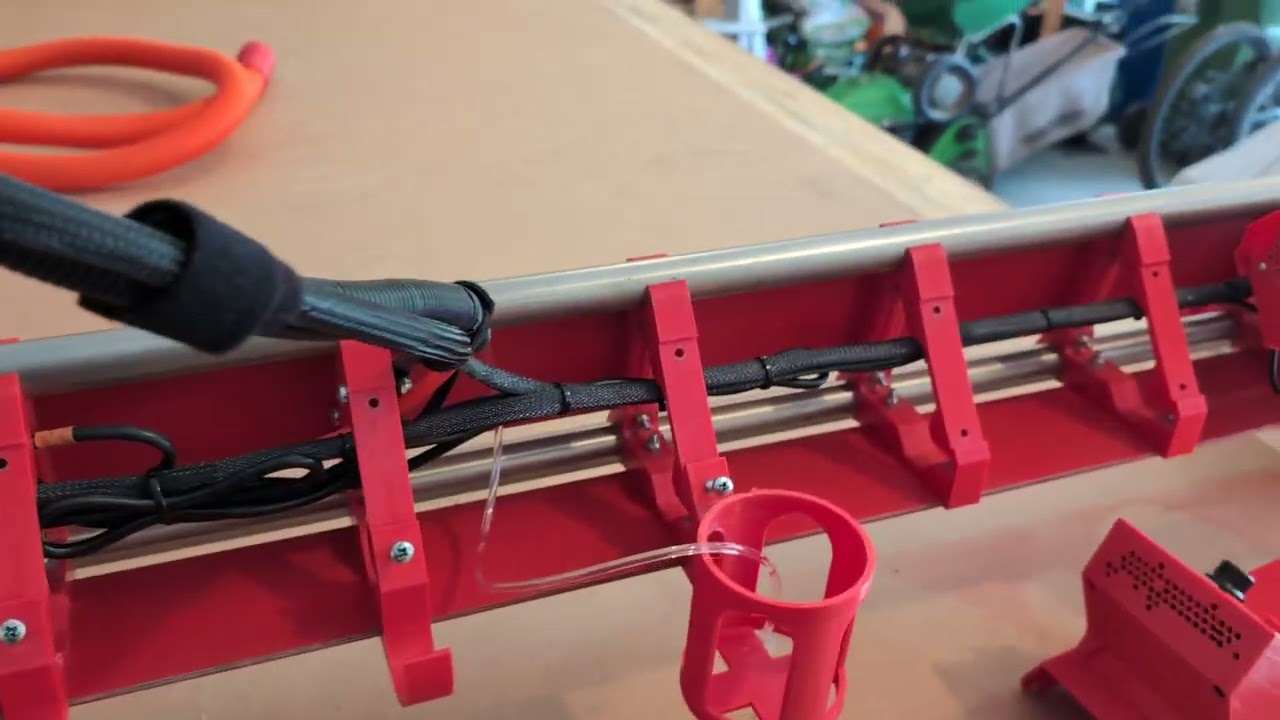
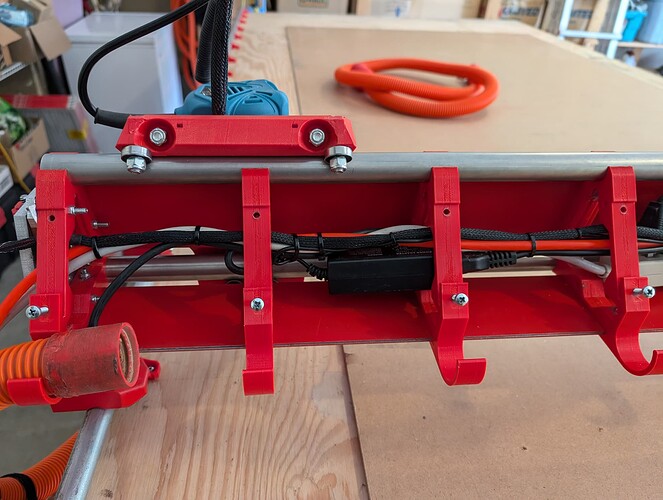
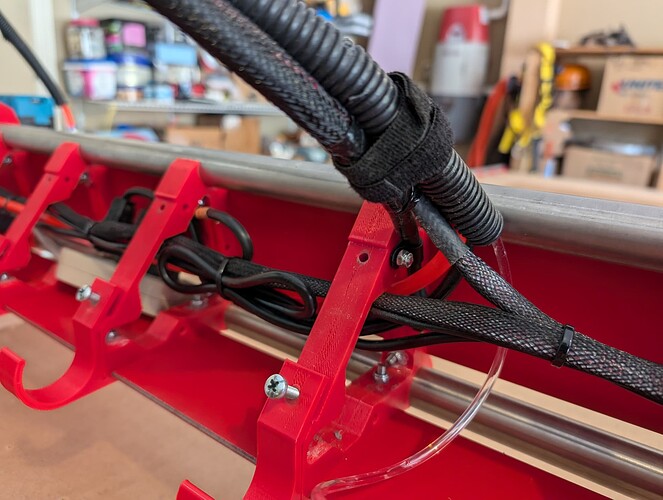
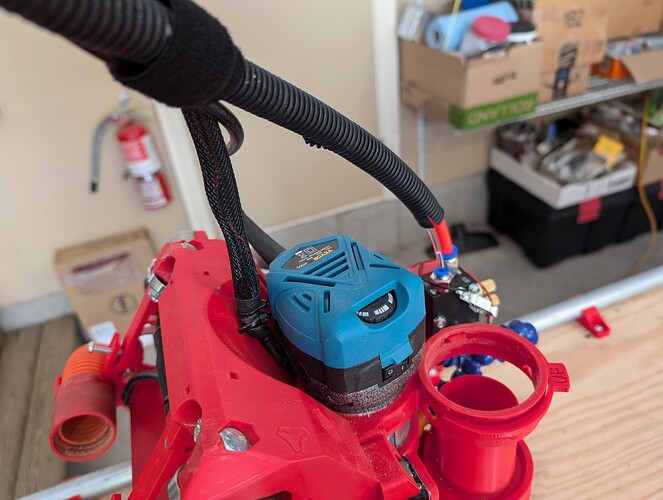
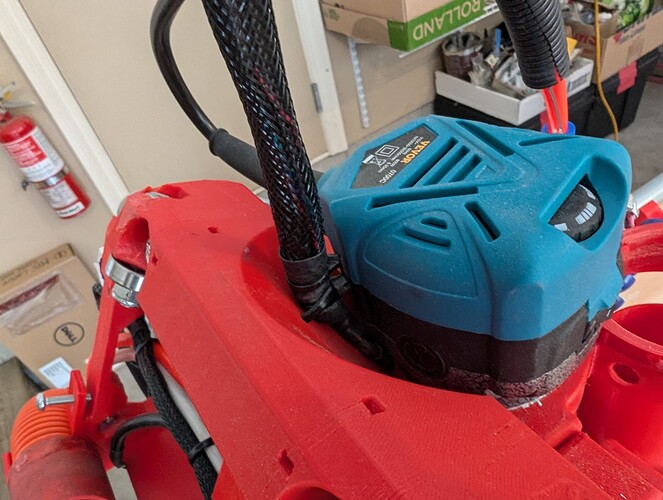
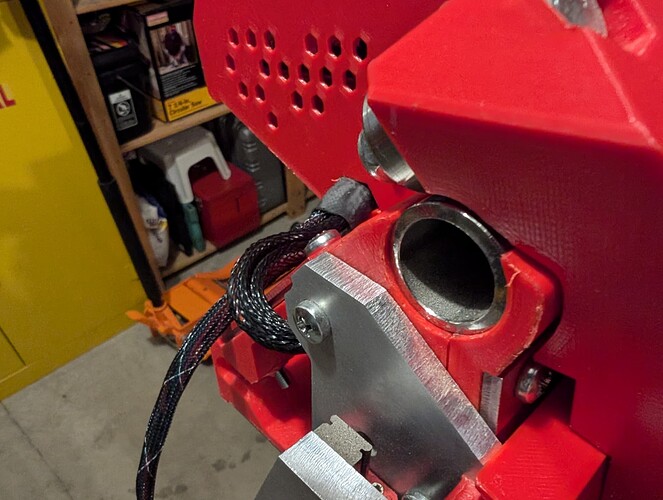
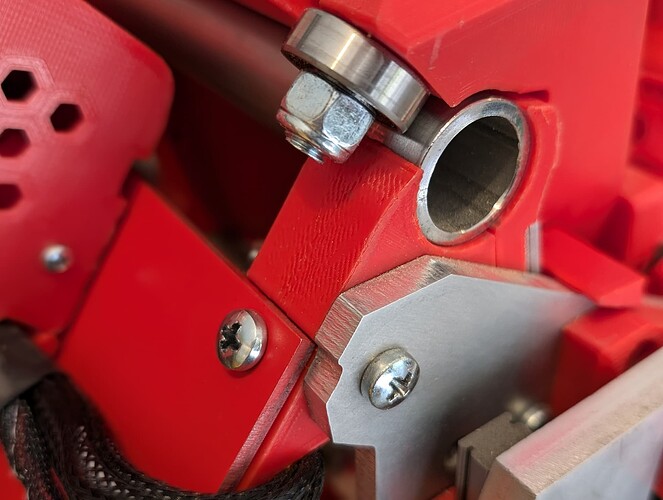
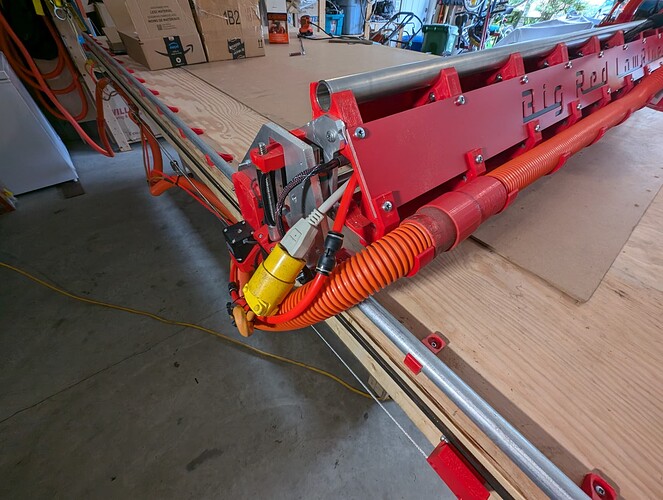
One of the things that I spent a lot of time thinking about was cable/wire management. I used mesh loom, heat shrink, cable clamps and tie wraps to create what I hope is a professional looking build…


One of the trickiest parts was working out what to do for the gantry wiring/tubing (X endstop wires, probe wires, router power cable, air hose, IPA hose, etc.). Putting it all into a neat bundle and making sure it didn’t flop into the path of the core wheels was a bit of a challenge (at least to my feeble mind)…

I ended up using a section of 10mm OD PVC air hose with a piece of fencing wire inside to act as a stiffening rod, attached to the middle strut with a cable clamp , and to the core with a tie wrap. The core wires went into a mesh loom with the stiffening hose, and the air hose, IPA hose and router power cable went into a section of nylon split loom and attached to the stiffening rod with velcro straps. The vacuum hose also attaches with the same velcro straps. It seems to work pretty well.


6 Likes

Impressive machine!!!

4 Likes

A couple more mods…

My printed YZ plate from the earlier build seemed quite flimsy (I could move the front wheels about 35mm side to side). When I was thinking about how to increase rigidity, I noticed that the stock YZ plate doesn’t have a whole lot of material at the top of the cutout for the Z stub. On my aluminum plates I increased the material at the top of the plate by 2mm. I also removed the cutout for the Y motor, as the side mount belts don’t need a hole in the plate


Because the strut braces are much wider, I was able to reduce the length of my X Rails by a couple of mm to ensure that the rails weren’t hitting the XZ plates, while still having lots of contact/grip in the end braces.


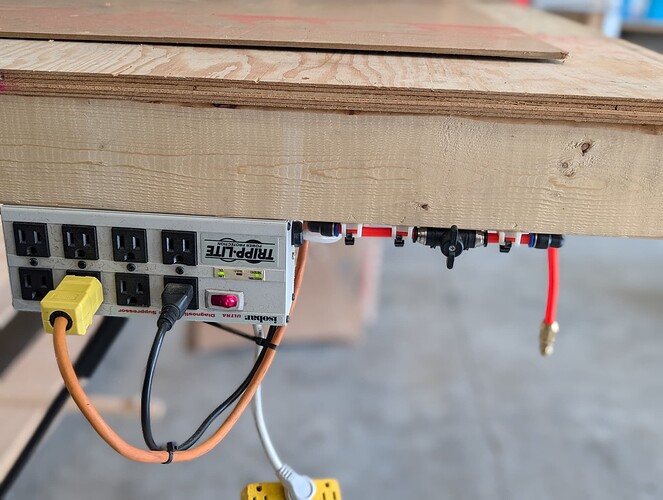
I used a power bar/surge arrestor as my emergency stop switch, and placed the inline air shutoff right beside it. Both are located close to the Xmin Ymin home position. Makes it really convenient to shut off the air when pausing to install hold down screws in the middle of a cut.

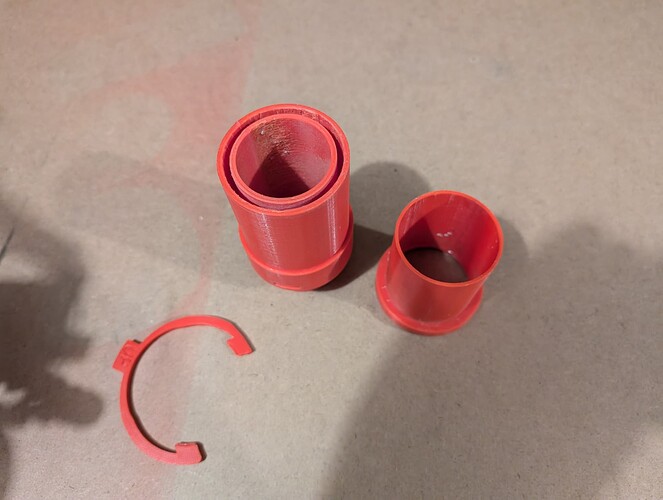
I tried out @DougJoseph’s floating dust shoe, but I didn’t want to buy 10 feet of 2.5" hose just to use 4" for the expanding part, and his system needed some modifications to fit my small built in vacuum hose, so I designed a hose adapter that uses two cylinders that slide inside each other instead.


4 Likes

Class, what a beast and a great build

2 Likes

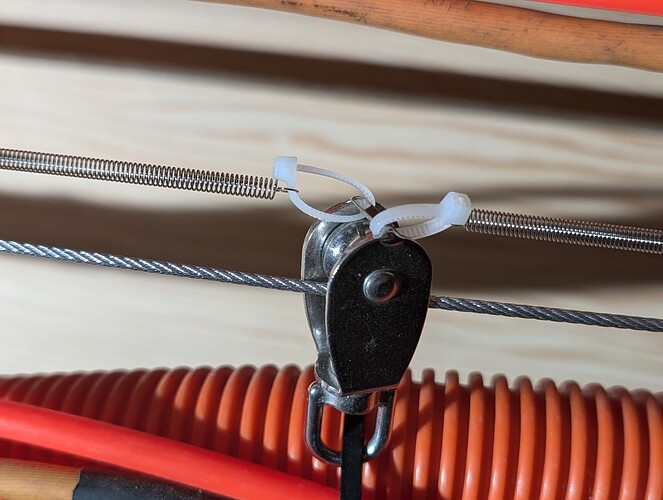
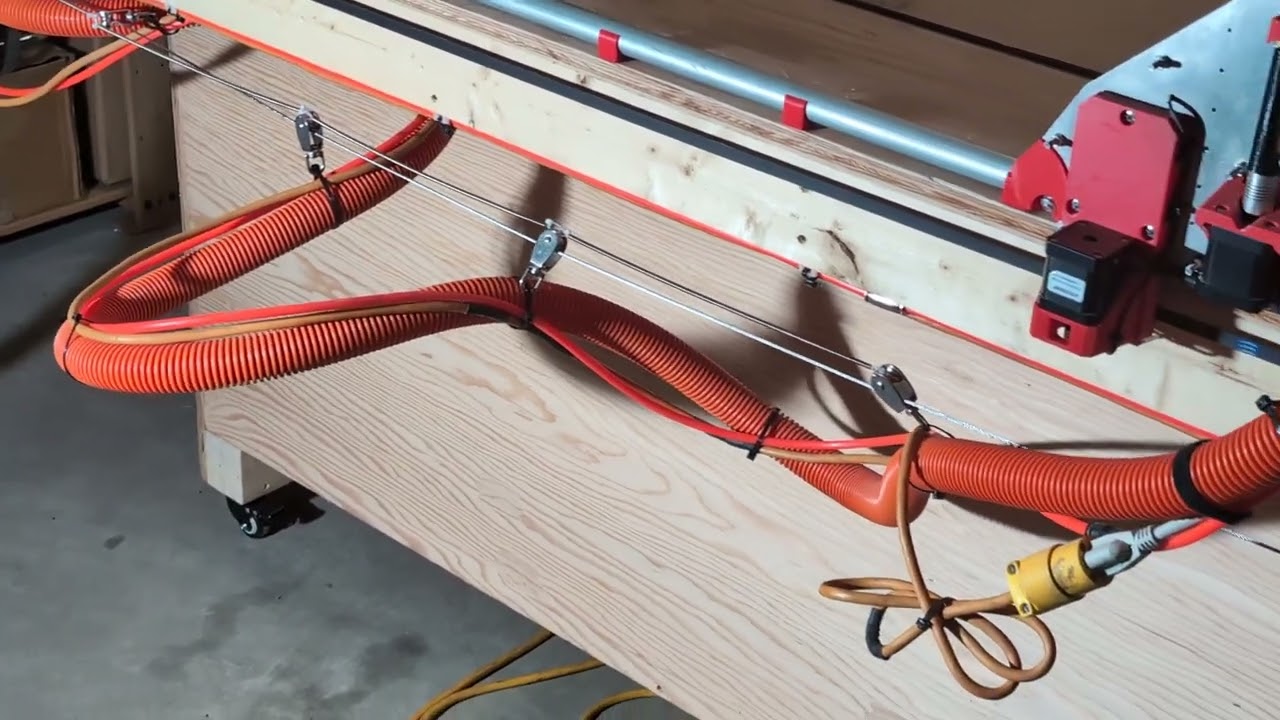
Instead of building a drag chain system to hold the air hose, power cable and vacuum hose at the side of the table, I used a length of aircraft cable, some roller clips, and some springs.


It’s still a bit of a work in progress. The metal rollers don’t move very smoothly on the metal aircraft cable, so it jerks and jumps a bit. I’ll come up with a better solution…

EDIT - I’ve modified the drag chain alternative a bit to reduce the jumps/jerks. A new video has been added in post #30.

10 Likes

I LOVE that!

2 Likes

Dude, you are rockin!!!

2 Likes

Very nice! Just reminded me that I have an unused shower rod/hooks/emt that’s good enough for my much smaller 2’ x 4’ usable setup. Thank you!

2 Likes

Looks awesome

1 Like

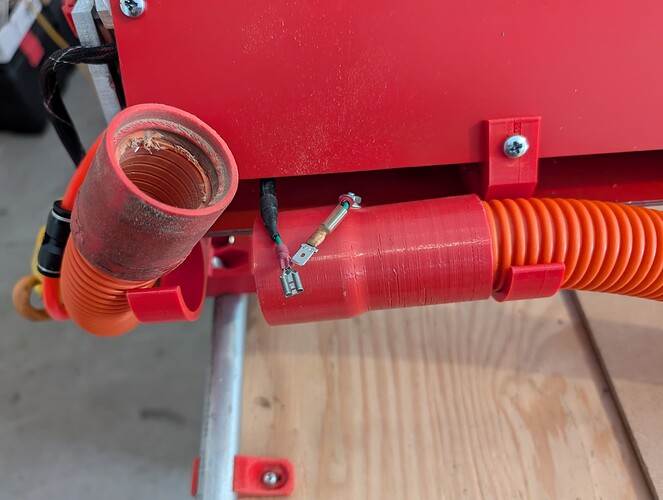
One more set of pictures with the vacuum hose attached…


Close up of the vacuum hose ground wire connection

I made a connection point for the vacuum hose, air hose and power cord where they drop down to the side of the table, so that I can quickly remove the gantry from the table.

4 Likes

Build looks awesome!!!

I am curious though, why bring the wires and vac hose way up in the air like that?

1 Like

Probably because I didn’t know any better! :upside_down_face:

In the absence of a drag chain system, I found that the cables could get in the way of the core upper bearing bolts. I actually had one cut on the earlier Little Red build fail when the router power cord got in the way of the core, causing the X (my Y) axis to skip steps. I wanted to have everything well out of the way for this build, and I remember seeing a “pogo pole” method that seemed interesting.

2 Likes

I get that. As long as it doesn’t hang on anything I don’t see it being a problem. But just watch out that it doesn’t pull on the core from way up there in any spots. That can end up throwing your cut off.

1 Like