You can change the fluidnc wake behavior to not block you.
I am tickled to know you are impressed. Always trying to make improvements without breaking the bank.
You can change the fluidnc wake behavior to not block you.
I am tickled to know you are impressed. Always trying to make improvements without breaking the bank.
Oh…I’ll have to investigate that. I assumed it was a resource thing (i.e. reloading the UI takes too many resources and can cause issues with the running operation.)
And now that I’m reading the config file and FluidNC docs more ideas are coming…
I was already thinking I’d like to have a physical button on the machine for “cycle start” and “feed hold” which looks easy to implement. Except I also want to add my old “$100 laser” and my needle cutter at some point and it looks like there may not be enough I/O pins for all of those. Looks like the laser will use gpio.27 and I should be able to configure PWM on gpio.26 for the needle cutter.
gpio.39 looks open for a button…but then not sure where a 2nd button could go…I see there are 4 gpio pins exposed on the expansion header - but I know the pendant will use 2 of them for serial. So…maybe one of the other two could be used. I know the pendant has it’s own feed hold / start buttons…but I like the idea of directly wired buttons with no communications protocol like the pendant deals with.
Hmm…ideas…haven’t found the wake behavior settings yet but I’ll keep digging through the docs.
My FluidDial is on hold a day or two - thought I had the right JST connectors but turns out mine are 2.4 pitch not 2.0 so they don’t fit. Correct size on the way though.
So a few years ago my uncle gave my dad a few yard decorations he cut out - IIRC they were little ducks - one each to represent me and my sister. Those first two were nicely sanded and painted and ready to go.
Then he followed up with something else but this time it was just cut and sanded but painted.
Then the next time he gave my dad some that were rough cut but needed to be trimmed to the line, sanded and painted.
And last time he just gave my dad a rough drawing and challenged him to make his own.
My dad of course was up to the task and they’ve been having fun making little wooden yard decorations and sharing them with each other.
He posted a photo last week of a few and it got me thinking:
I asked if he had the drawings - but he hadn’t saved them. Instead he sent me a photo and some rough dimensions.
Ok…now I can join in ![]()
Fired up fusion and drew a construction line box to give me a rough size - then pasted in the photo as a guide. Drew out half and mirrored it…then a few 3D operations and:
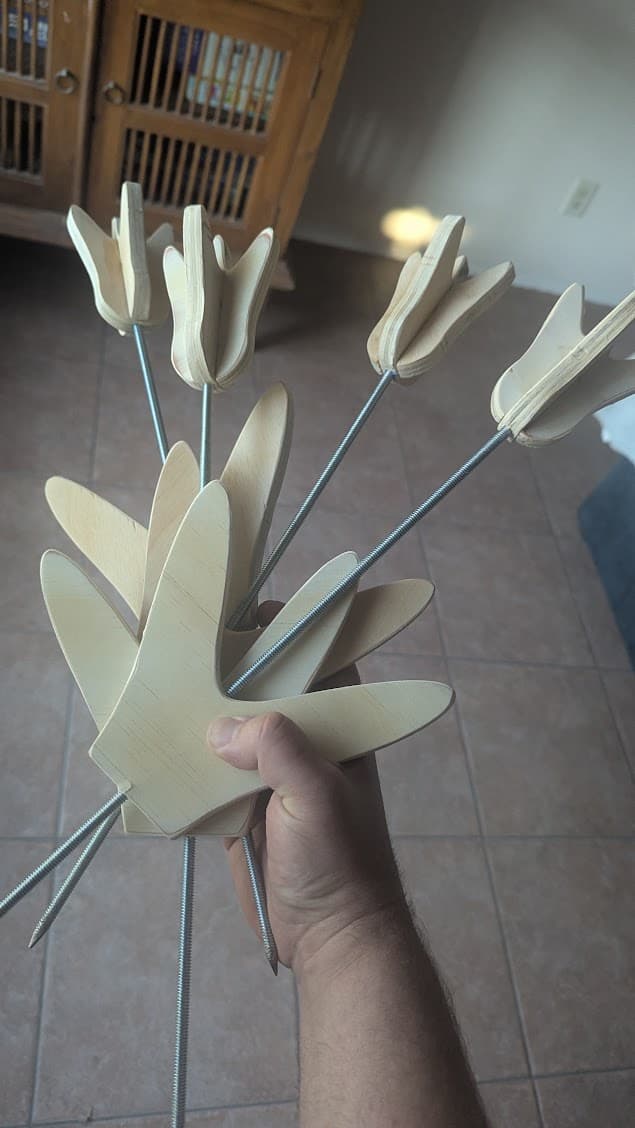
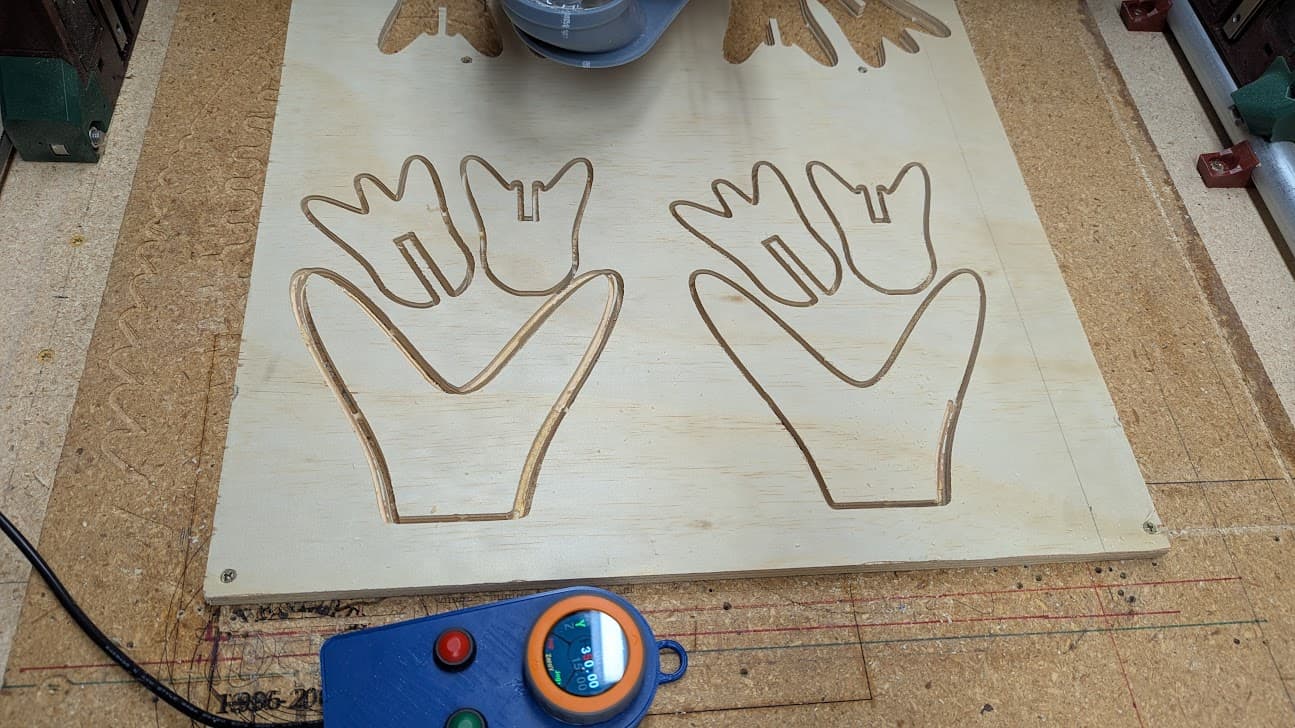
One tulip plan! Exported some DXF’s of the two top pieces and the leaves…then out to the garage:
Love it! About an hour total from when I had the idea until I had the parts for two sitting on my desk (Yeah, I should have been more careful drilling the hole in leaf parts but I didn’t feel like pulling out the drill press.)
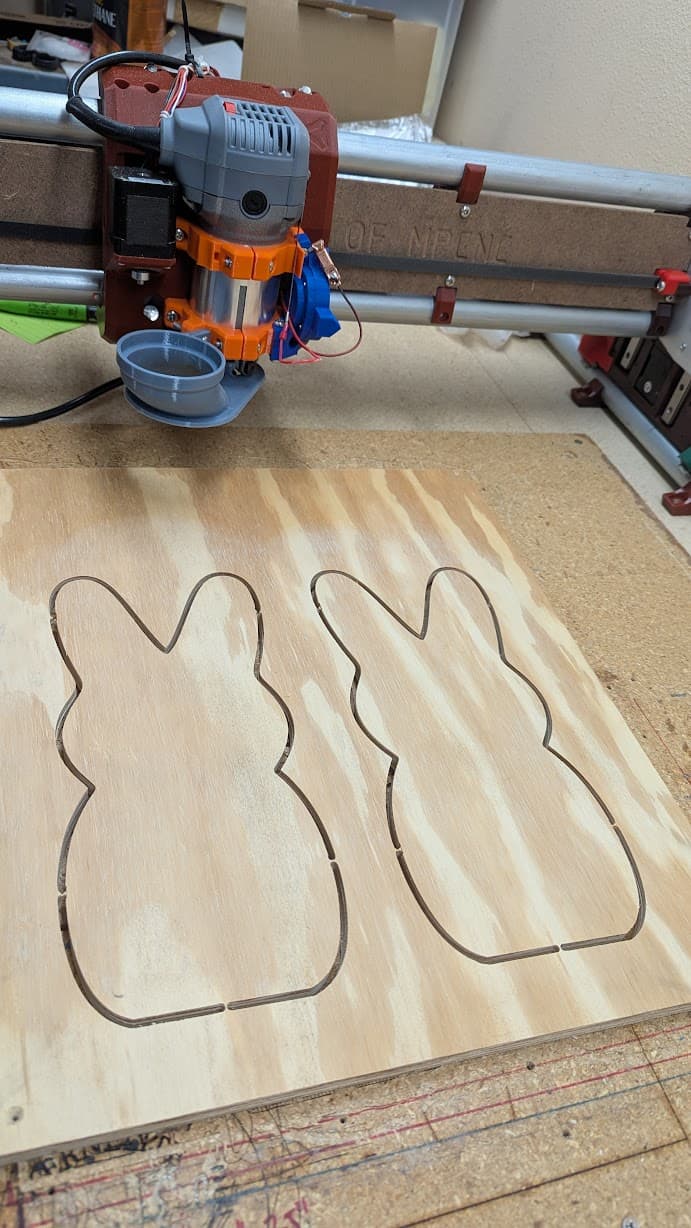
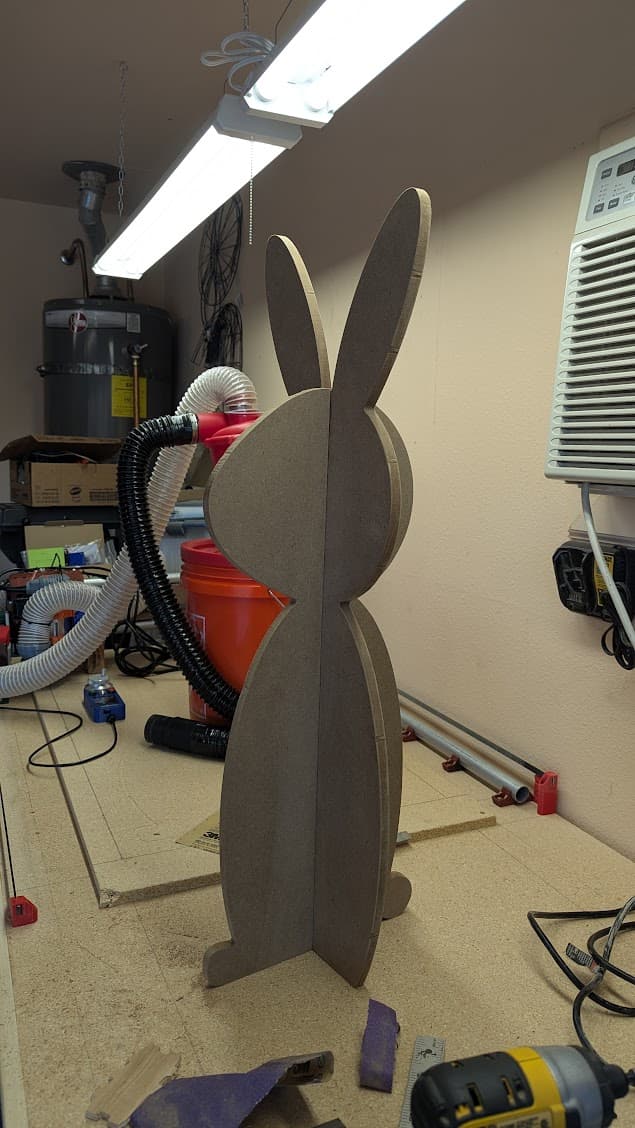
The bunny went even quicker since it wasn’t two dimensional:
I’m loving having a working probing setup, and being able to reposition the machine and repeat a cut. So much nicer to work with than my old machine! And I’m not nervously waiting for it to crash the whole time like my old machine. I’m running 3x faster with 3x deeper cuts and it’s working flawlessly. On nice ply my z is dialed in to where I can just barely kiss the spoil board…but I’m mostly using some old scraps that have been through a lot and are a little warped and janky. But this spoil board is rough enough I don’t mind giving it a bit more abuse.
I need to get a vacuum hose figured out next. I got the recommended hose off Amazon and it fits in the shoe just fine…but I’m not sure how to actually hold it in there. Any advice on what people are doing? It doesn’t seem big enough to stretch over the shoe and clamp on but I’m not sure how to secure it inside the shoe opening…other than glue?
My girlfriend and daughter are excited about having a bunch of flowers and bunnies to paint and put in the yard. And I’m getting rid of a bunch of little scraps of wood. Can’t wait to get some more bits and try some more advanced tricks with the machine.
I am using the recommended dust hose for the LR4. It friction fits in the shoe and uses a zip tie from the hole in the upper router mount to secure. Mine doesn’t seem to be moving at all so I don’t see any need for adapters.
That’s what that zip mount is for ![]() I kept thinking it was some kind of leftover pen mount
I kept thinking it was some kind of leftover pen mount ![]()
Once I held the hose in place I couldn’t see it anymore and forgot it was there…That makes perfect sense though!
Do a flip! ![]()
My old machine I really wanted to do some two sided work…but there was NO WAY I was going to try. It was way too easy to bump it out of alignment. This one…pretty sure I’ll be trying it sooner or later!
Still fighting to find holding tab settings that work for me in estlcam…full height works…but I hate them. I tried 3mm cutting 11.9mm thick ply with a 12.5mm cutting depth…and…went right through them on the final pass ![]() So…still haven’t found something that works for me there. But I’ll keep experimenting.
So…still haven’t found something that works for me there. But I’ll keep experimenting.
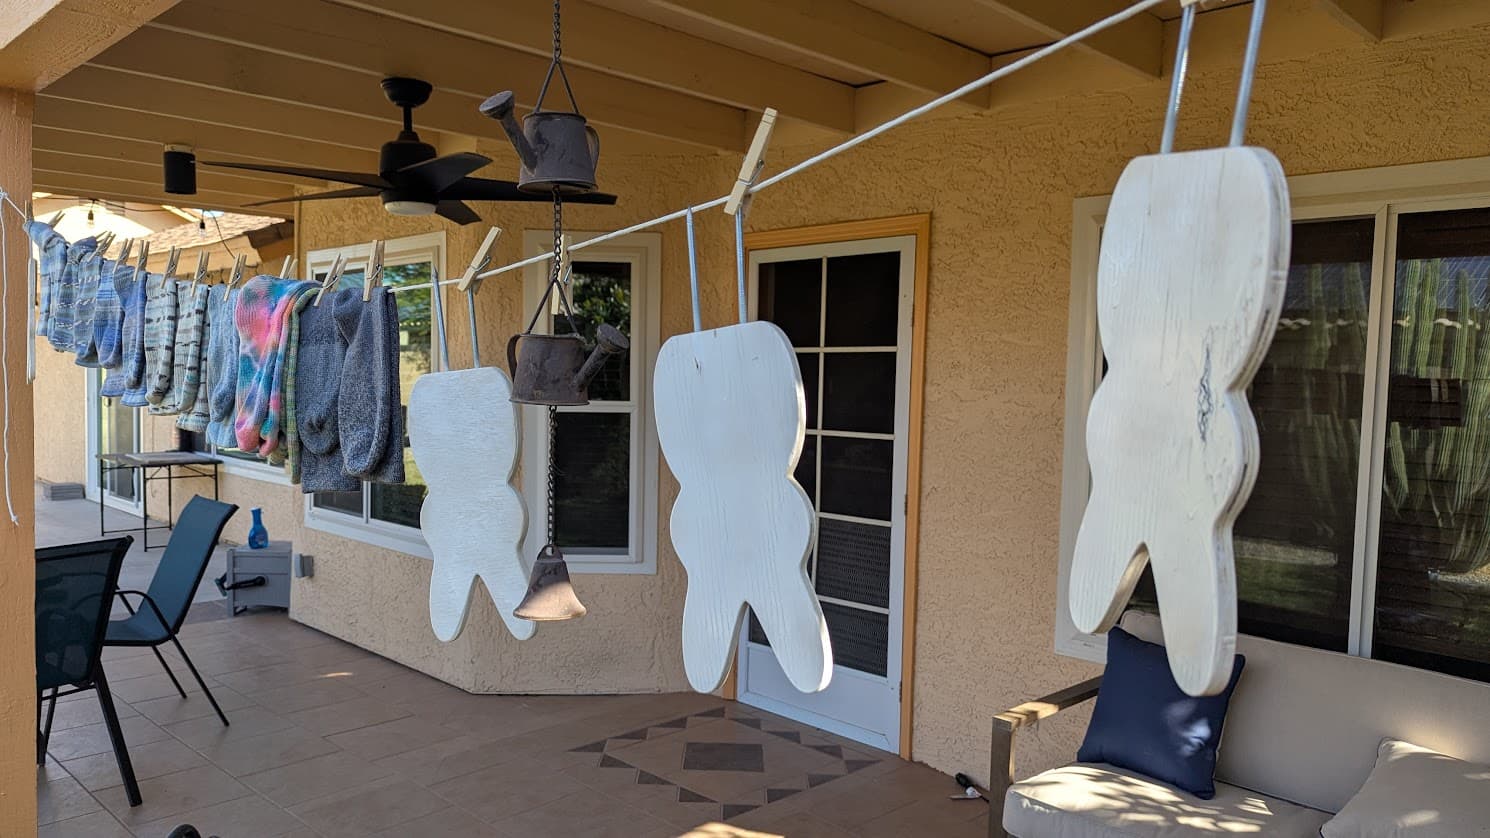
I made 2 more tulips - and this time actually measured the wood first so the slots fit perfectly:
And a few more bunnies:
Our ground here is basically compacted sand so I figured putting a bit of a point on the all thread would make theme easier to jab into the ground. Turns out they also make decent jarts!
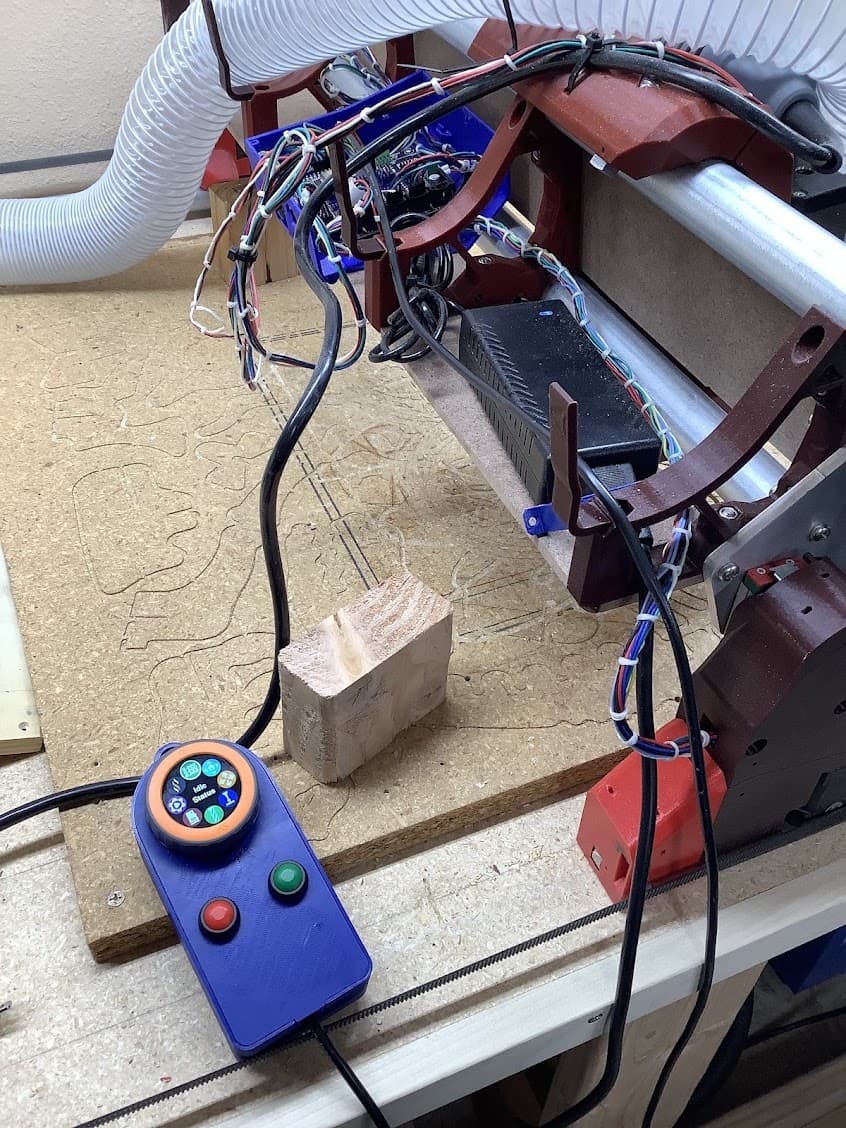
My JST-PH 2.0 connectors came in as well…only to find out that the M5Dial is not actually JST-PH2.0. Grove doesn’t use JST-PH…it uses HY2.0 which is very similar but has slightly different keys on the plugs ![]() And apparently HY pins and housings are remarkably hard to find…so I gave in and ordered some pigtails. Which showed up today so I was able to get my Fluid Dial attached finally:
And apparently HY pins and housings are remarkably hard to find…so I gave in and ordered some pigtails. Which showed up today so I was able to get my Fluid Dial attached finally:
Worked first try thanks to the tips in @DougJoseph’s thread
Not sure I really like the m5 dial though ![]() My CYS came in last week so just waiting on the dial to build a CYD Dial and see if I like it better. I do have a bunch of encoders on hand so I could start building it up with one of those to test…
My CYS came in last week so just waiting on the dial to build a CYD Dial and see if I like it better. I do have a bunch of encoders on hand so I could start building it up with one of those to test…
Only bummer is when I ordered the 4 conductor cable off Amazon I did NOT get 30’ as the listing stated…I got just under 6’. Which feels like the right length for a pendant…I don’t want to add connectors on both ends…but I might just because I have a big bag of 4 pin aircraft connectors (somewhere…they may still be at the old house as I can’t find them) and I don’t want 3’ cords and don’t have other wire that’s suitable.
But - I may also just build up the CYD and try it…and which ever I like better just leave hardwired.
I did get more 1/8" endmills in today too finally so I’ve got a nice new 1/4" from Ryan and 4 more of the same 1/8" I’ve been using. It’s a single flute I got from drillman1 on ebay years ago…I see he’s now “oliver tool company” but they’re still about $5 and seem decent. I originally got it for cutting acrylic but like it for wood too. Picked up 4 of them since it seems like I’ll be getting more use out of the machine than I did out of my old machine!
Still need to extend the endstop and probe wires so I can close up my box…but getting really close to having the LR4 totally in a state I’m happy with.
Hopefully this weekend I can get a new spoil board and maybe start on an updated needle cutter design.
Need to figure out what bits to try to do some carving too…just starting to research that…
Congrats on all the cool progress!
Bit of a mixed bag tonight.
Last night I went to start building a CYD pendant even though my knob won’t be here for a few days…only to find that the CYD I bought wasn’t the right one. I hadn’t double checked that my search on Amazon actually gave me what I was asking for and not just something similar. So I wound up with what looks like a CYD…but the connections are totally different and the part number is something wildly different. Oh well…will have to do some googling and see if I can come up with anything interesting to do with it…new screen was supposed to be here today - but USPS decided I should wait until Friday instead.
So - decided to try running a job with the M5 Dial version and see how I liked it. Also tweaked my holding tab settings a little - made them a little taller and a little wider (2mm long and 5mm tall) and got something I’m happy with on that at least.
But…also got my first missed steps on the new machine today:
What’s odd is that the speeds and feeds were the same I ran the last set of these on and they came out fine - other than cutting through their holding tabs and bouncing around a bit on the finishing pass.
Note - both of these were run as separate jobs - so this was one set of gcode run twice not one gcode with two flowers.
The only thing that changed is I had a fresh new endmill (same make/model as my old one just new) that visually looked better (no visible runout on this one.) Yet both of these lost steps on X on the leaf portion.
My best guess is that my vacuum hose hung up on something. Because it also knocked two hose retainers loose. (The hose isn’t actually in use yet since I haven’t brought my big shop vac over from the old house yet…it’s just along for the ride right now.)
Not critical parts at least and I can live with the flaws…but still odd that the same code that worked twice before (though with slightly different holding tabs) didn’t work right this time with a fresh bit.
Oh yeah…it was also 90 in the garage so things were a bit warm…I did turn on the AC which cooled it down from 100 but I didn’t want to wait for it to cool down any further. But I’m probably going to stick with blaming the half routed vacuum hose.
Well, last few days I haven’t had much time for the CNC.
I’ve been experimenting a little with trying to make some small boxes out of the scraps from cutting my strut plates using designs from makercase.com…but it hasn’t gone well. I had more apparent lost steps on X even after slowing down my cuts. Which has had me really confused since other than adding a newer sharper bit nothing else has changed…and even my old machine was able to cut the 1/4" MDF fairly effortlessly.
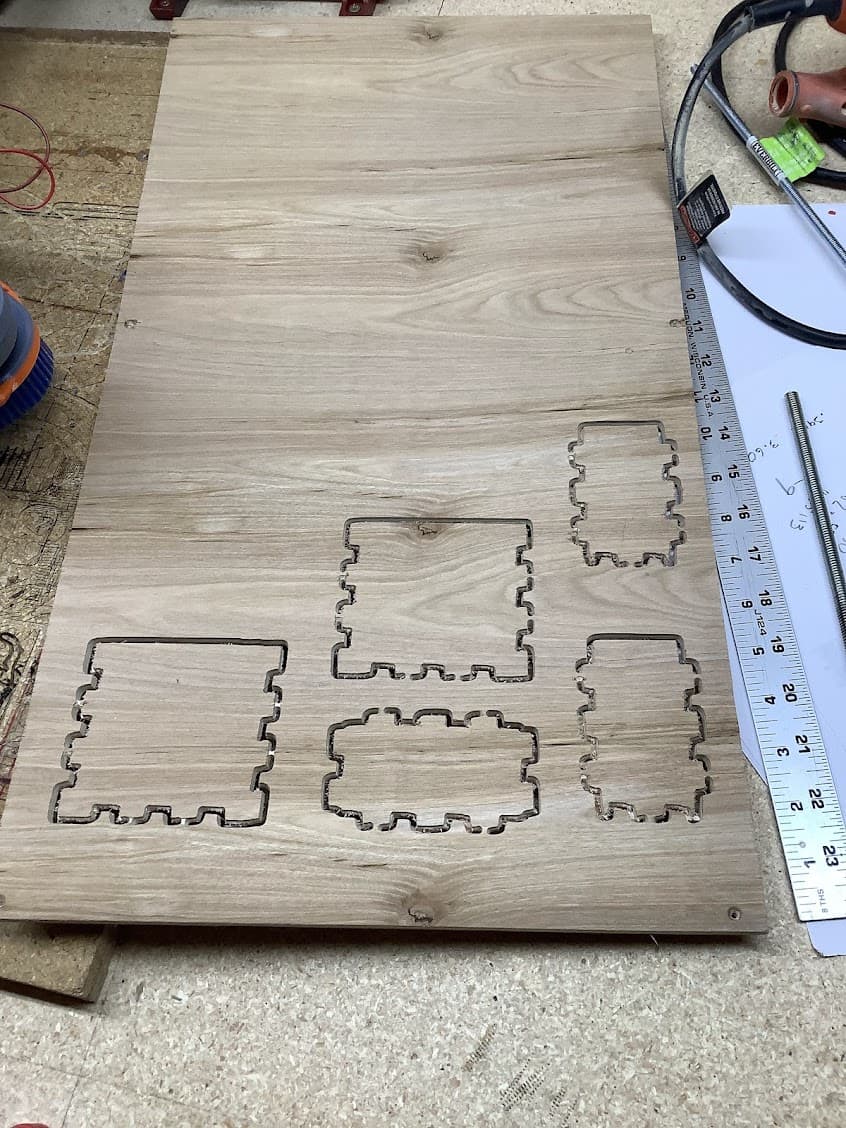
So today after killing my CYD pendant I decided to try again in some scrap 6mm ply I have. It was one of the first things I cut on this machine so I know I can cut it easily and reliably…maybe this new bit is just bad?
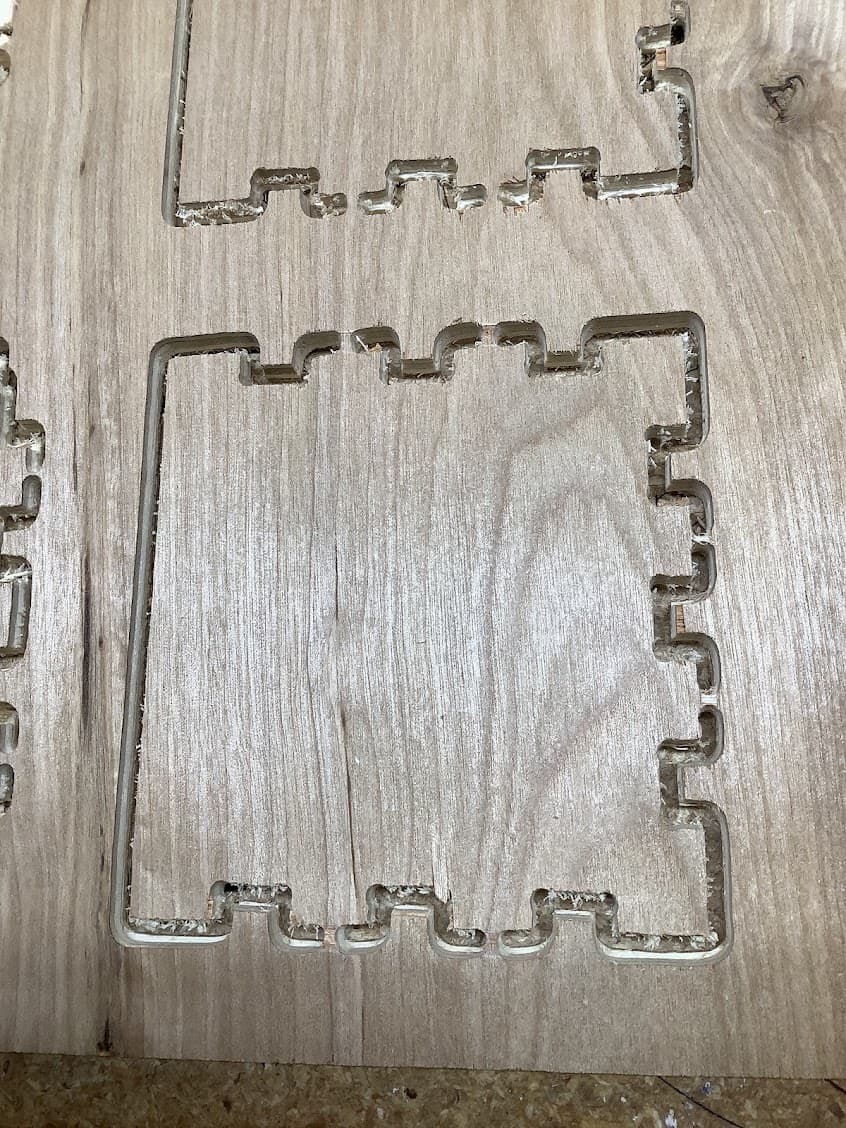
Well…the results were not great:
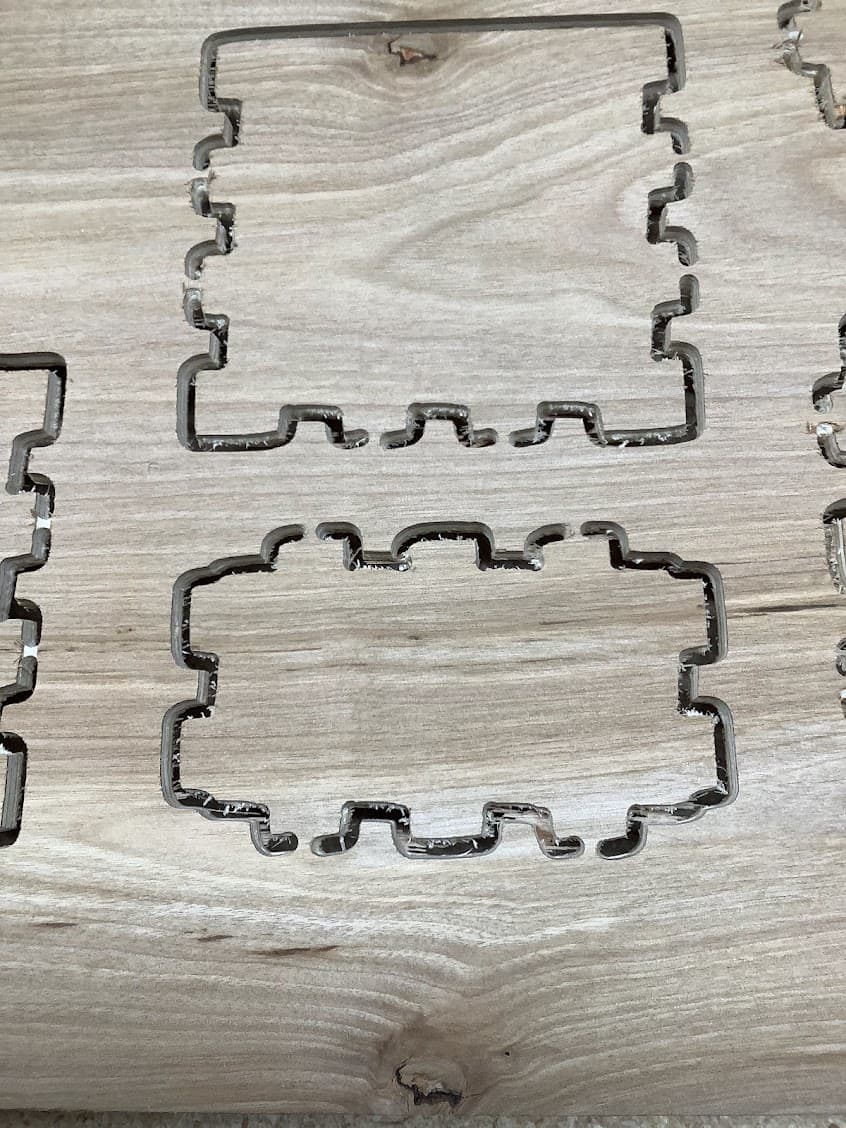
Looking closer the cuts are just all over the place and sloppy:
I knew one thing immediately that could be the issue. When I installed Doug’s kinetic mount it calls for 45mm bolts. I could only find 40mm or 50mm here locally. So I got 50mm figuring I could always grind them down if I had to. The top bolt cleared…but the bottom one hits the supports…I just left it a little lose though and was going to go back and shorten it but keep forgetting…and the machine was working so well I had even less incentive to go back and fix it. So…that’s an easy fix.
But - watching it cut this box I saw the major issue that’s going on. My core is moving all over the place on the X rails. I knew I had left it loose to let things break in…but didn’t realize it was THAT loose:
Bolt bolts are there…but neither has a nut actually tightened even a little bit yet.
So - that should be an easy fix as well…though it’s a little hot out there to deal with tonight. We’re already hitting the 100’s and the garage is hitting 110. I probably won’t be able to leave the LR4 out there when not in use much longer. And I’m a little worried that with those loose something may have started to shift with how loose it is. So…I’ll have to take a closer look later this week.
FWIW - even as sloppy as those cuts were the box still fit together halfway decently. But I’ll try again after snugging up the core and fixing that bolt on the mount.
I bet correcting this will make a major improvement to how your machine behaves.
Fingers crossed. Over lunch I dug out a socket and snugged up the Core bearings. Core now rides nice and smooth again with no wobble and no restriction.
Then pulled out the slightly too long bolt on the router mount and ground a few mm off of it. Put it back in and seems like there’s no slop in anything now.
Didn’t have time to fire it up and confirm - but I’m feeling pretty confident that this will have it cutting great again. And in the future I’ll check that X-carriage a bit more often. I’m still nervous about heat in the garage since it’s just starting to heat up here - and in the evening the combination of uninsulated garage with a BIG west facing wall that gets a lot of sun and two cars with hot engines parked in there it gets quite a bit hotter than ambient…and I’m still hesitant to run the A/C because I’m trying to figure out how much our electric bill will actually be in this house just keeping the living area cool ![]()
Side note about our heat…First week of March we installed a new kitchen faucet. The old one was really annoying and was very easy to leave leaking slightly if you didn’t position the handle just right when you turned it off. And about a week after we installed it I noticed that I was getting hot water in both the hot and cold positions…but could get warm water in the middle.
But it didn’t happen all the time. Would be normal for a day or two…then boom hot on both positions again.
Well, it was Moen and one of my childhood friends is QA manager at one of their plants so I have good faith in their support. Filed a ticket and they had a new cartridge out to me the next day. I installed it last week and it seemed good. But the next day - I had hot water on the cold line again. Ugh.
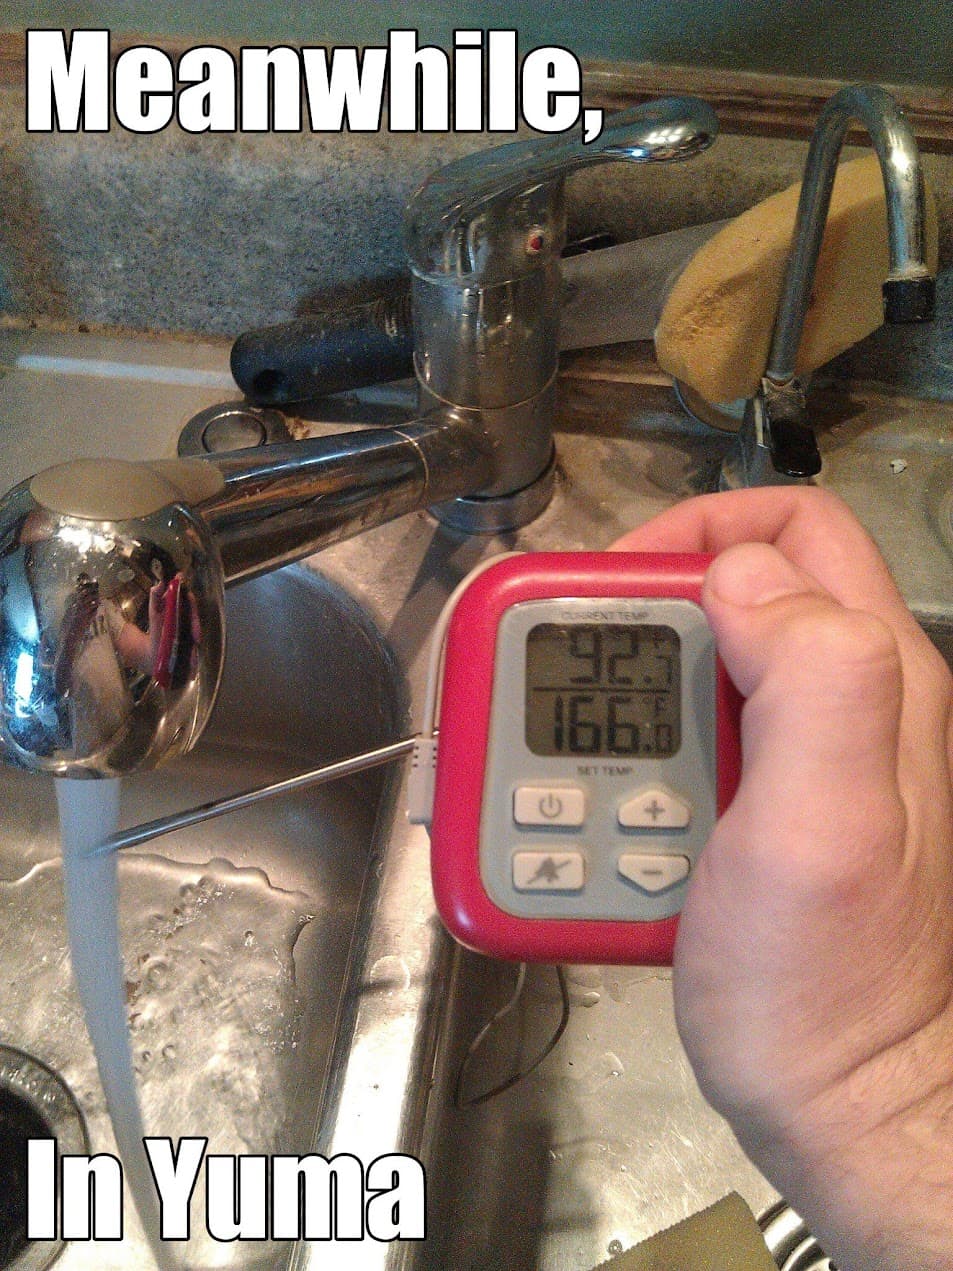
Now - I live in Yuma AZ…so we don’t expect cold cold water for about 4 months out of the year. Back in 20212 when “Meanwhile…” memes were big I made this one:
No camera tricks - that was my actual cold water after letting it run for 5 minutes in the middle of July. Our cold water really is just that hot.
But what my sink was giving here at the new house wasn’t just bath temp like that - no…it was steamy HOT water…almost seemed hoter than the hot water.
Finally Saturday morning it hit me what was going on. Most houses I’ve lived in here all the plumbing was run in the slabs. I hated it since if anything went wrong it meant jackhammers and major repairs. The new house though I noticed that the line comes up that west facing garage wall (which isn’t insulated) and through the garage attic to the main house where it finally gets covered in insulation.
Just a bare copper pipe running in an uninsulated attic:
So once our temps got into the 90’s and the attic got well over 100…that pipe has been getting hot. And the last week or two with us dipping into the 100’s…that attic must be getting REALLY hot and likewise so is that pipe in the wall and attic.
The new faucet is lower flow than the one we replaced…so it takes almost 5 minutes of leaving it on for all of the hot water in the pipe to flush out and enough cold water to flow through to cool the pipe to where we start getting cool water again.
Looks like I need to pickup some pool noodles to go over that pipe and see if it helps at all ![]()
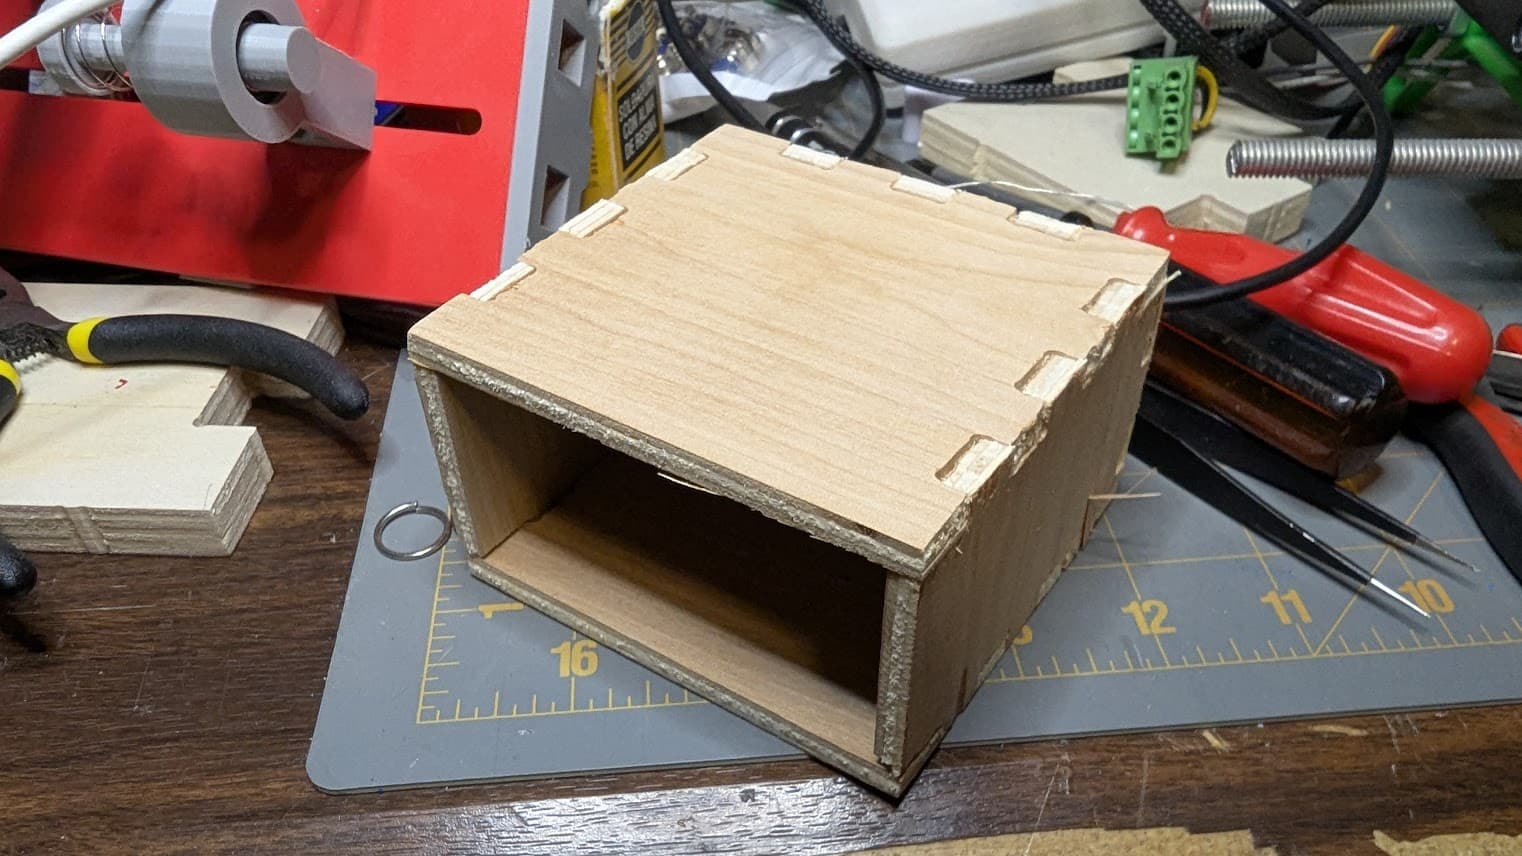
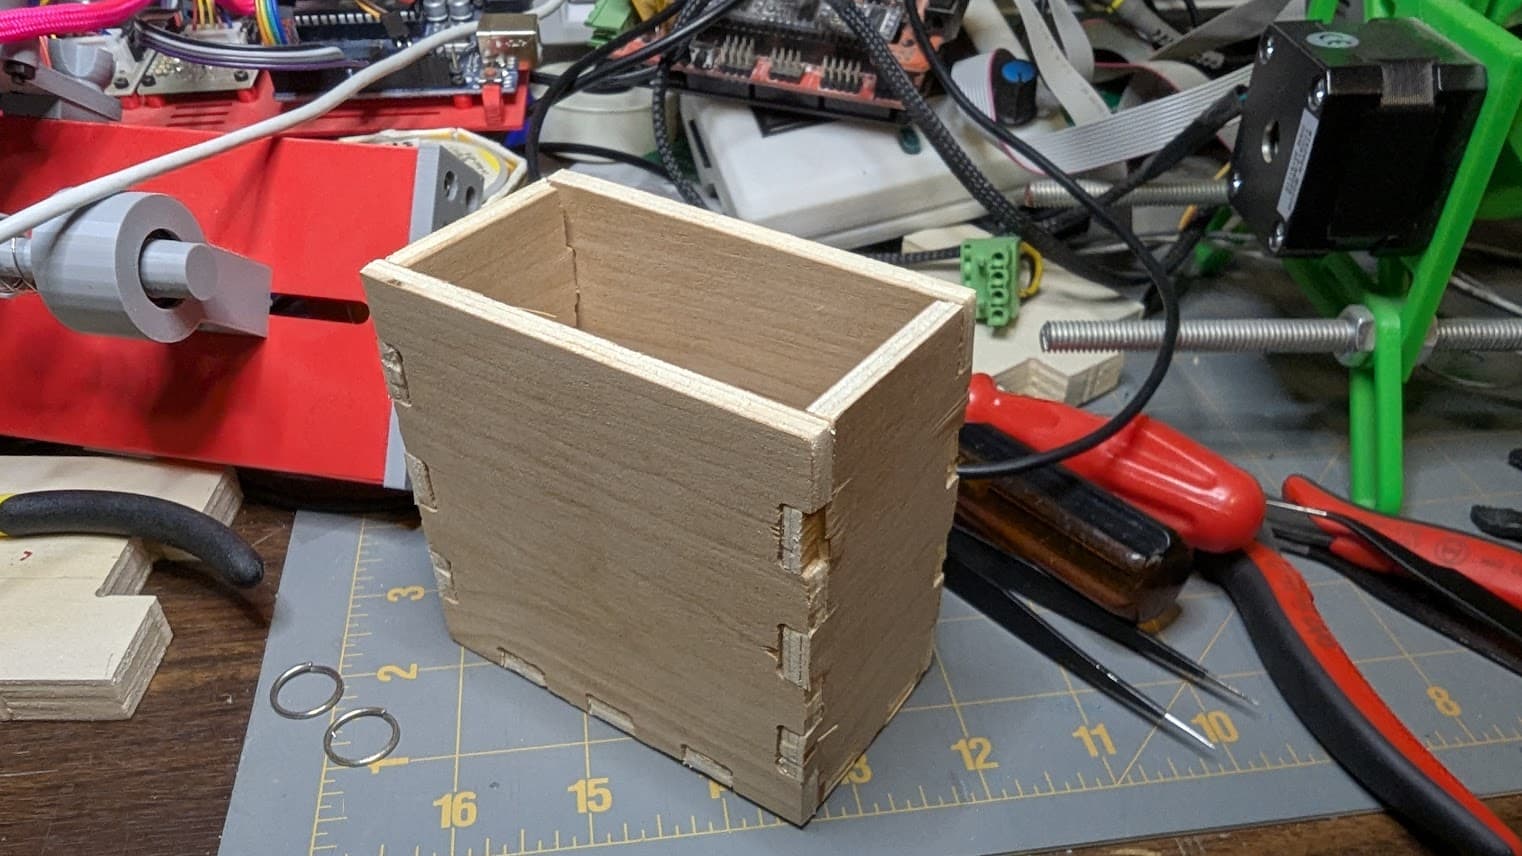
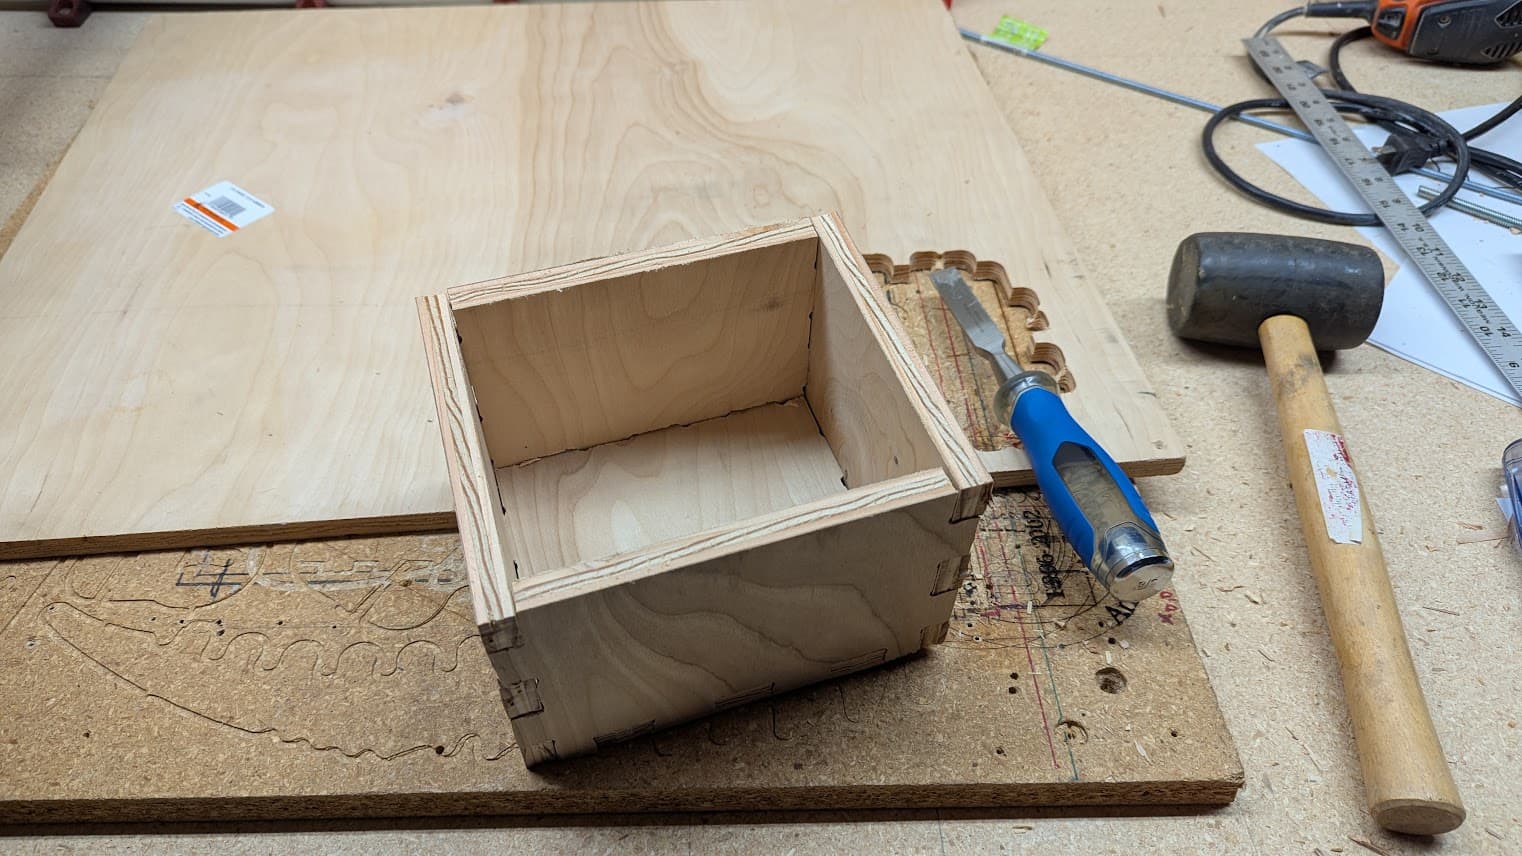
Ok, with the small fixes from lunch things went much better.
Much cleaner cuts and it no longer looks like the machine was drunk.
Biggest issues with this box are because the wood was a REALLY bad piece that had gotten wet and warped at some point.
But…it wasn’t all peaches and cream:
It took me four tries to cut the 2nd side piece because I started getting skips on X again.
I think the problem may be my X belt is a bit too loose. Pushing the gantry around by hand it feels pretty good - but every now and then if I press a bit too fast I can feel the belt skip. And the belt is pretty loose - but my tensioner is pretty much maxed out (I didn’t actually measure my belts…just eyeballed them) so I may have to take a little bit off that belt and snug it up. I’m going to do some more testing with jogging and such first though to confirm so I don’t wind up going too short and having to replace the whole belt.
But - I almost trust things enough to start using better wood again ![]()
It’s not like there is a water problem on the Colorado river or anything. /s.
The pool noodles will be in the same attic for an extended amount of time and they won’t keep the water colder. They will reduce how fast it warms up. So between you washing your hands at 9am and washing them at 10am, the second time won’t be as hot. What you really need is a big reservoir under ground. That would keep it colder. Dig a deep hole and then run 30’ of pipe in a loop. Probably don’t do that.
That’s essentially what my old house had…just because it had a long yard so the incoming line ran 30’ underground then up through the slab ![]()
Ah - but what they will do is keep my girlfriend happy because she got to go to the dollar tree and I did what she suggested ![]() Sometimes the fix isn’t for the obvious issue
Sometimes the fix isn’t for the obvious issue ![]()
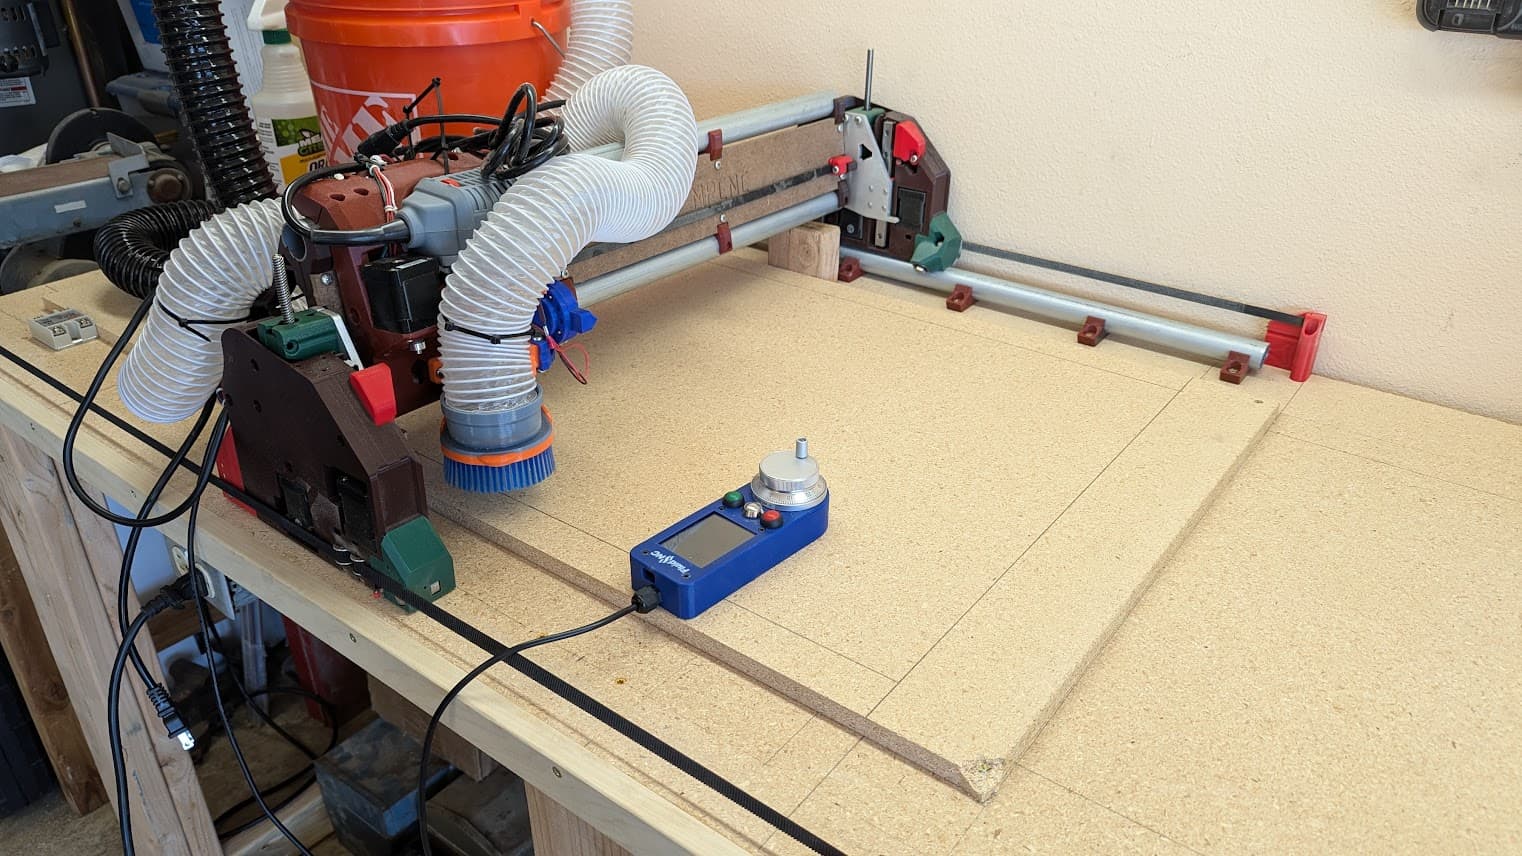
So - had a bit of time this weekend to play with the LR4 some more…
Swapped to the 1/4" bit I got from Ryan with my LR4 plate order. I’ve only used 1/8" or 3mm bits in the past since that was the only size collet I had for my old DW660 on my MPCNC. Stepping up to the Carbide ER11 router for this build I’ve been excited to have a wider selection of bits to choose from.
Pulled out a nicer piece of 1/2" Birch ply scrap and did a hog out test. I was surprised at first that with my 3mm of stepover it was chattering more than I expected even at slower speeds…but…as the test got into faster speeds it actually sounded better. I was tempted to try faster speeds still…but only had so much time and wanted to get to some actual projects. So I went with 30mm/s which seemed to do well in the hogout test.
Whipped up a slightly larger box in makercase and generated some gcode. Overall it cut really well! Though my holding tabs still seem a bit off - I tend to get a bit of notching next to them and they never seem to the height I specify. I’m suspected that the “notching” is an indicator that my router is a bit out of tram.
The box wasn’t quite as tight of a fit as my little 1/8" test was…but still self assembled into a nice square box with minimal effort. Though I did notice some of the edges were a little angled so again…pretty sure I need to do some work on tramming the router:ff
Made it to the store and picked up a new chunk of 1/2" particle board to use as a new spoil board. I love the memories in my old one…but it’s too small for the project my partner has been patiently waiting for and the clock for it’s relevance is ticking.
Though - I did have to take a brief diversion into the kitchen to make my annual lamb cake:
(Actually baked it last night, then my daughter helped me decorate it this morning.)
Installed the new spoil board…and…sure enough I managed to make a mess of one corner screwing it down…whooops:
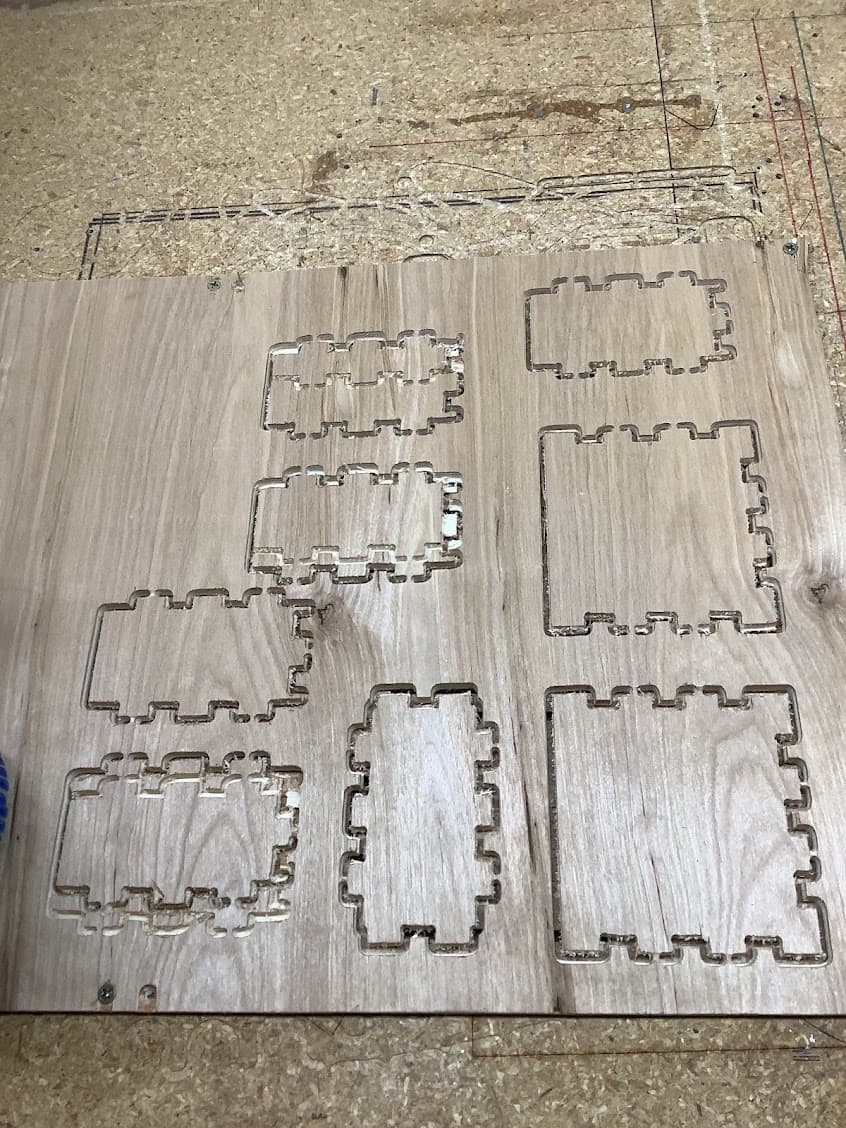
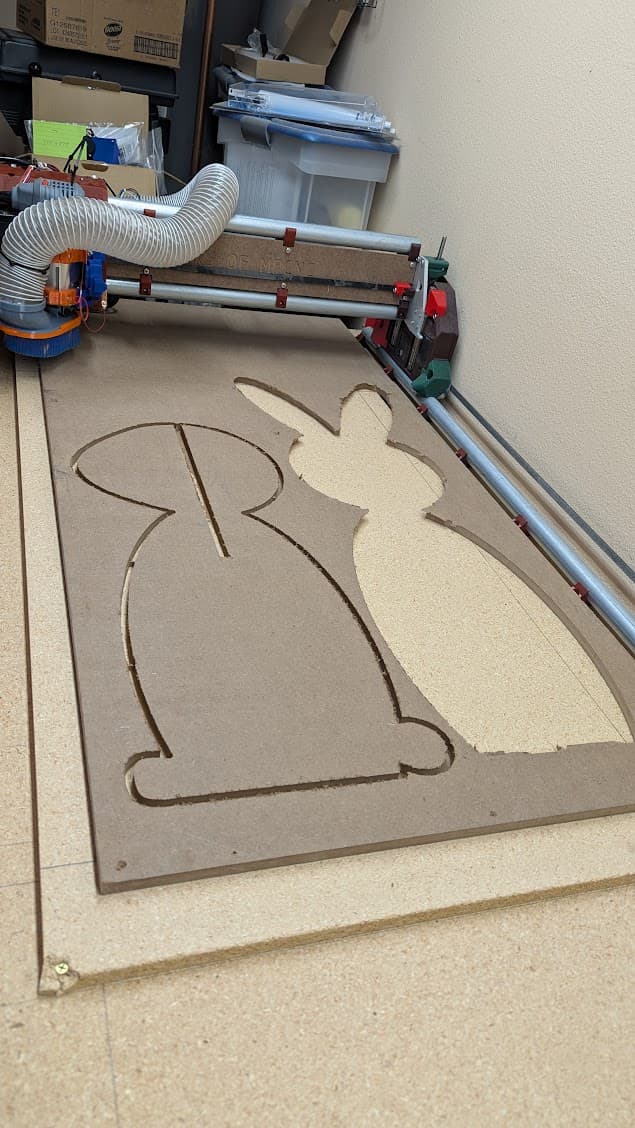
Finally with a larger spoil board I could cut the project that helped me justify this build:
A few months ago we saw these rabbits for sale at a craft store - I scoffed at the price and said when I have my CNC rebuilt at the new house I can just make those. (though - admittedly the 2’x4’ piece of MDF cost a few dollars more than these were selling for. Partly because sheet goods seem unusually high here…and partly because cheap material and labor for the mass produced version.)
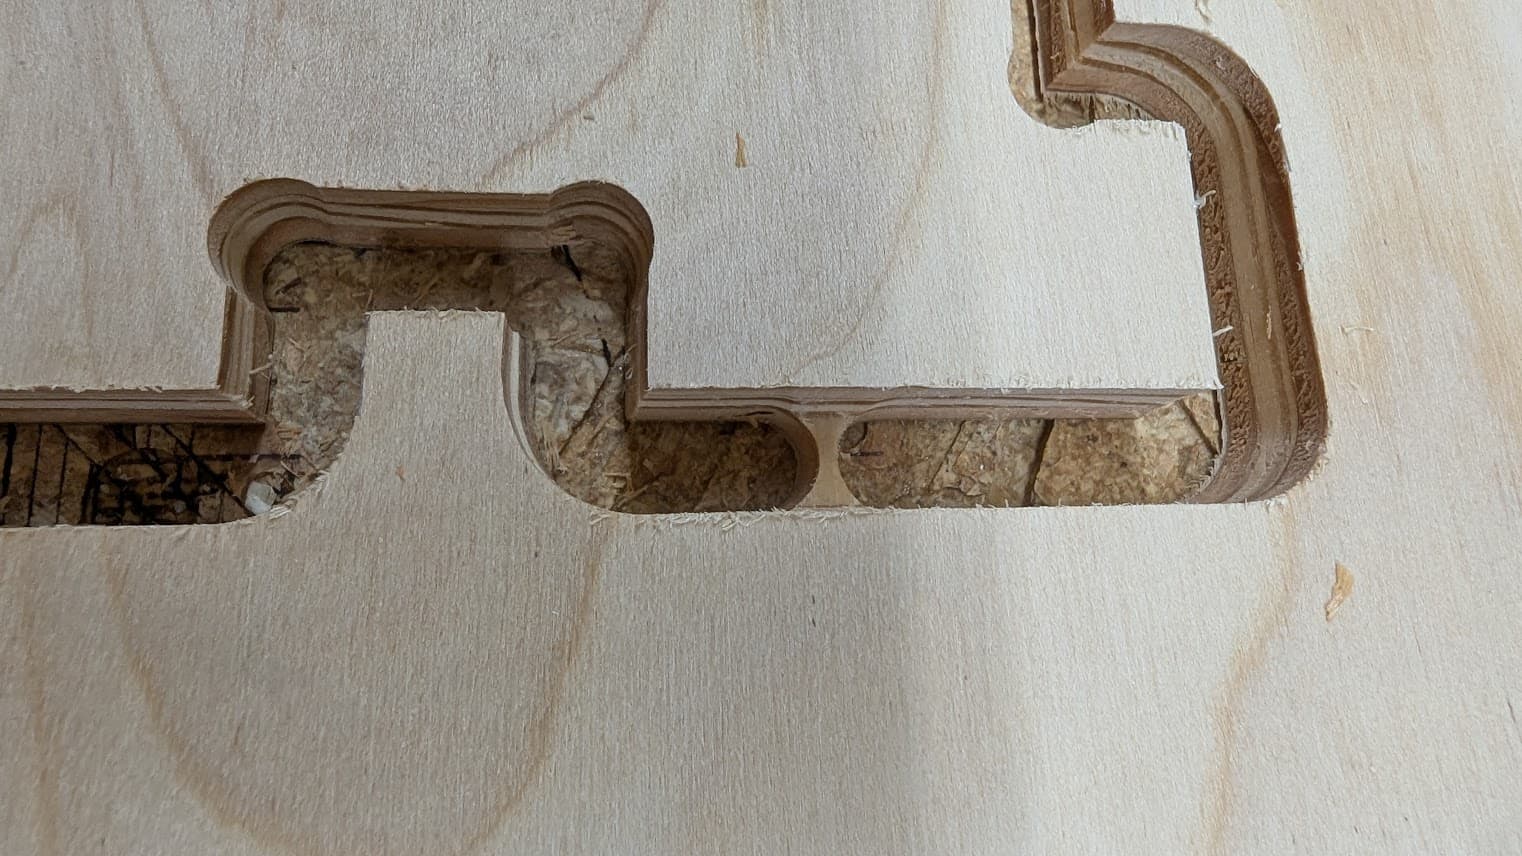
The cut wasn’t perfect…I had a few issues. The "notches’ on the hold down tabs persist but not shocking since I haven’t taken time to check/adjust tram on the router.
But also - shockingly one of the slots was a tight fit and neither cut through all the way.
The incomplete cut depth I’m not overly shocked by. I didn’t re-adjust my z level for the new spoil board and the spoil board isn’t surfaced…and worse yesterday I had a small issue with my pendant and raised Z past the max knocking one endstop out of position. So I’ve got some tuning to do and know it. But…this MDF did measure 12.5mm thick and I had a cutting depth of 13.5mm specified so I was surprised that I was still left with a thin skin at the bottom of some cuts.
And - with 13.5 mm deep cuts I left the holding tabs at 5mm…but it just cut right though them. Second piece I changed that to 6mm and it did leave my tabs that time.
Even odder…one one piece the slot in the middle came out perfect…but on the one where the tabs didn’t fail was was barely 12mm wide instead of the 12.5mm I had designed.
The X axis did sound a little rough. I experimented with tightening the belt a bit and it seemed to make things worse the other day - so I instead loosened it more than it was…now it’s not obviously missing steps…but I do start to get some bumpiness in the motion on X when cutting while Y is still silky smooth at the same speed. So - not sure what may be going on there. Will have to do more test/investigations I guess.
But at least the GF is happy with her bunny so I earn more time out in the garage playing with the machine for a few more weeks ![]()
That’s absolutely normal, even with expensive, stiff machines, that’s why Christian gave us the option for round holding tabs. ![]()
I observed this, too as well as some others, that X kind of “bounces” (I am missing a better word) but does not skip steps though. I hope that will be gone with the closed loop stepper. I really need to fire up a project where it did that… ![]()
Good to know…and I’m guessing the round tabs are another reason for me to upgrade from 11 to 12 ![]()
Also reminds me of a big part of why I had switched to mostly using painters tape and super glue instead of holding tabs…
Ok, finally pulled the trigger and updated to estlcam 12. Took me quite a bit to find where to enable round tabs but hope to give them a try shortly.
Mostly dug in and figuring out why my z was so inconsistent. I knew part of it was from accidently driving the machine way too high and having one of my z endstops shift. So…figured it would be good to spend a bit of time redoing my Z level.
Sure enough - first set of measurements showed I was almost 4mm off from Xmin to Xmax now! Ouch.
That’s more that I want to adjust with pulloff so I adjusted the Z endstops…and realized I had never fully tightened them. That explains a LOT!
So shifted one a few mm and snugged them both up - redid my measurements and now I was barely 1mm off. Much better.
Tweaked my pulloff and measured again…now I’m within 0.05 and I’m ok with that ![]()
So now I’ll have to find something to cut to test with…
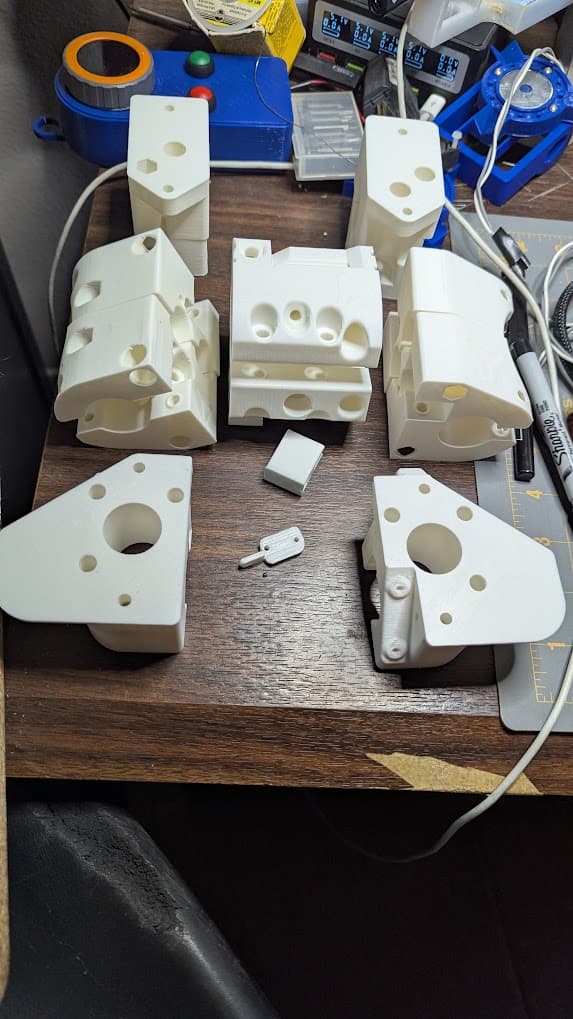
In the mean time…I got everything printed for a ZenXY:
I have half the rollers, and both pulleys on hand as extras from the LR4 build, and probably have all of the M3 and M2.5 hardware (I’m just short 20 of the M5 bolts)…debating if I want to wait for Ryan to get the full hardware kits back in stock…or just order the wheels, another 4 idlers, magnet,ball and endstops today. Probably going to pull the trigger after this post to be honest ![]()
Though - measuring our table again I’m questioning if it’s actually suitable for a ZenXY. It’s not very well made and it’s kind of narrow. I may just toss the current top completely and replace it … or may toss the whole table and just build a full table…GF is good with any of those palns so we’ll see. I’m thinking I may build a small tabletop version first just to get a feel for things…then expand it out to fill a real table.
Now…what to try cutting to test this recalibrated Z and rounded tabs before she wakes up from her nap…
I threw in all the hardware in your order!