Wow, nice! I laughed this morning when I saw you restocked the parts kits. Reminded me of how I kept putting off updating my MPCNC since every time I started to you seemed release a new update and my update was out of date before I finished printing it
I’ll have to start a separate thread for the ZenXY build later this week…I just realized last night that the steppers on my eggbot that I planned to re-use are only 28oz/in … not sure if they’ll work or not…I assume there’s not much need for a lot of torque on the ZenXY so maybe they will Also helps explain why they got to warm so quick with the 2 driver fluidnc board on 0.5amps, they probably don’t need that much current.
But I figure it doesn’t hurt to try them…worst case I have to order some new motors and delay the build a few days.
Still struggling with what is increasingly looking like a tram issue. Core isn’t loose anymore, but I’m still getting some cuts that are noticeably not square. Slowing down and taking shallower cuts with less stepover doesn’t seem to help and neither do finishing passes so I’m thinking it’s not bit deflection…but…it only seems to happen on cuts moving in the Y axis towards Y min so it feels like it probably IS bit deflection rather than a machine issue.
Dug out my dial indicator but haven’t jigged up any way to mount it and do some measurements yet…
And since USPS decided my zen parts should enjoy a day in LA instead of going out for delivery as planned I decided to fire up Fusion and do a little CAD so I can get my laser mounted up on the new machine.
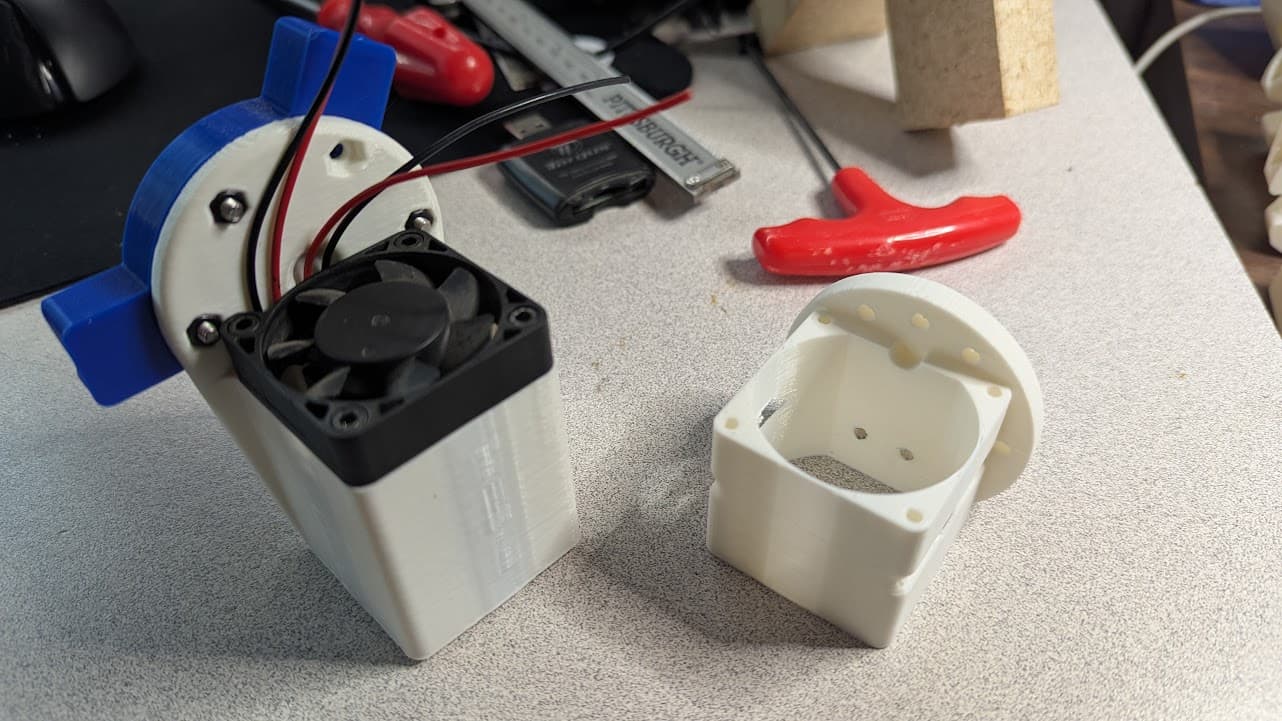
First try - (on the right) was semi-viable…laser mounted…but I had the holes for the fan off so it wouldn’t mount, and for some reason I thought the magnetic mount piece had nut traps and the screws went in from the laser side. But it also mounted the laser higher than I wanted and was a bit crude. So v2…
Which seems usable. Not perfect…the walls are a bit thinner than I’d like in the middle and I need to add some mounting provision for the control board still. But…there’s no reason I couldn’t wire this up and run it on the machine as is first to see what needs to change.
But…I haven’t run this laser in probably 6 years and it looks like the old @leo69 $100 laser guide isn’t around anywhere anymore to refresh my memory…(all the links I found for it 404 and the thread is pretty long without having the details the PDF used to have.) I see I have a resistor hacked onto the TTL pins on my laser board but can’t remember why…and not sure if that’s needed with the Jackpot. Guess I have to do some research tonight before I can wire this up again.
Plus I have to rig up some kind of 12v supply for it…not sure if I have any buck converters that will handle the draw or if the power supply has enough overhead to handle the laser as well…I could dig out the 12v supply I used for the old MPCNC but I’m running out of outlets…though I don’t need the vac or router plugged in while running the laser now that I think about it.
I know my old module is pretty outdated and rough compared to what’s available now…but…I’ve got it and it’s paid for so that’s a pretty big incentive to mess with it instead of buying a newer nicer module right now
I have a Jackpot running a JL1 laser. As you need help, post in this thread and I’ll try to jump in .
I have a thread I’ll link below which is a bit dated.
I’m playing around with the JL1 this week as I may want to bring it and a pendant or two (or three) to RMRRF to show off jackpot with some options (though with a pen mount instead of the laser fitted)
Just a note for myself as I research my old laser.
Found the order receipt from 12/16/16:
NDB7875 445nm 9mm Diode In 12mm Copper Module W/Leads
, Lens Options: G-2 Glass Lens add $25 , Back Half: Full Length
So I at least know what laser module I have…but man there’s not much data out there anymore on these good laser A-11 driver boards other than old posts in this forum