Inderdaad, praktisch om de hoek! Leuk om te zien dat er zoveel Nederlandse lowriders bijkomen ![]()
3 Likes
Het wordt tijd voor een meeting! Nijmegen is van mij uit ongeveer 50 km!
1 Like
Maybe a good idea to start a separate thread on that one ![]()
It’s been silent for a while here, but not in my workshop.
The correct drivers have arrived and are installed. That fixed the problem. Thanks @Jeffeb3!
I had to rotate nearly every connector to get the steppers in the correct direction. That took some time to fiddle every cable out of the connector and put them back in reverse.
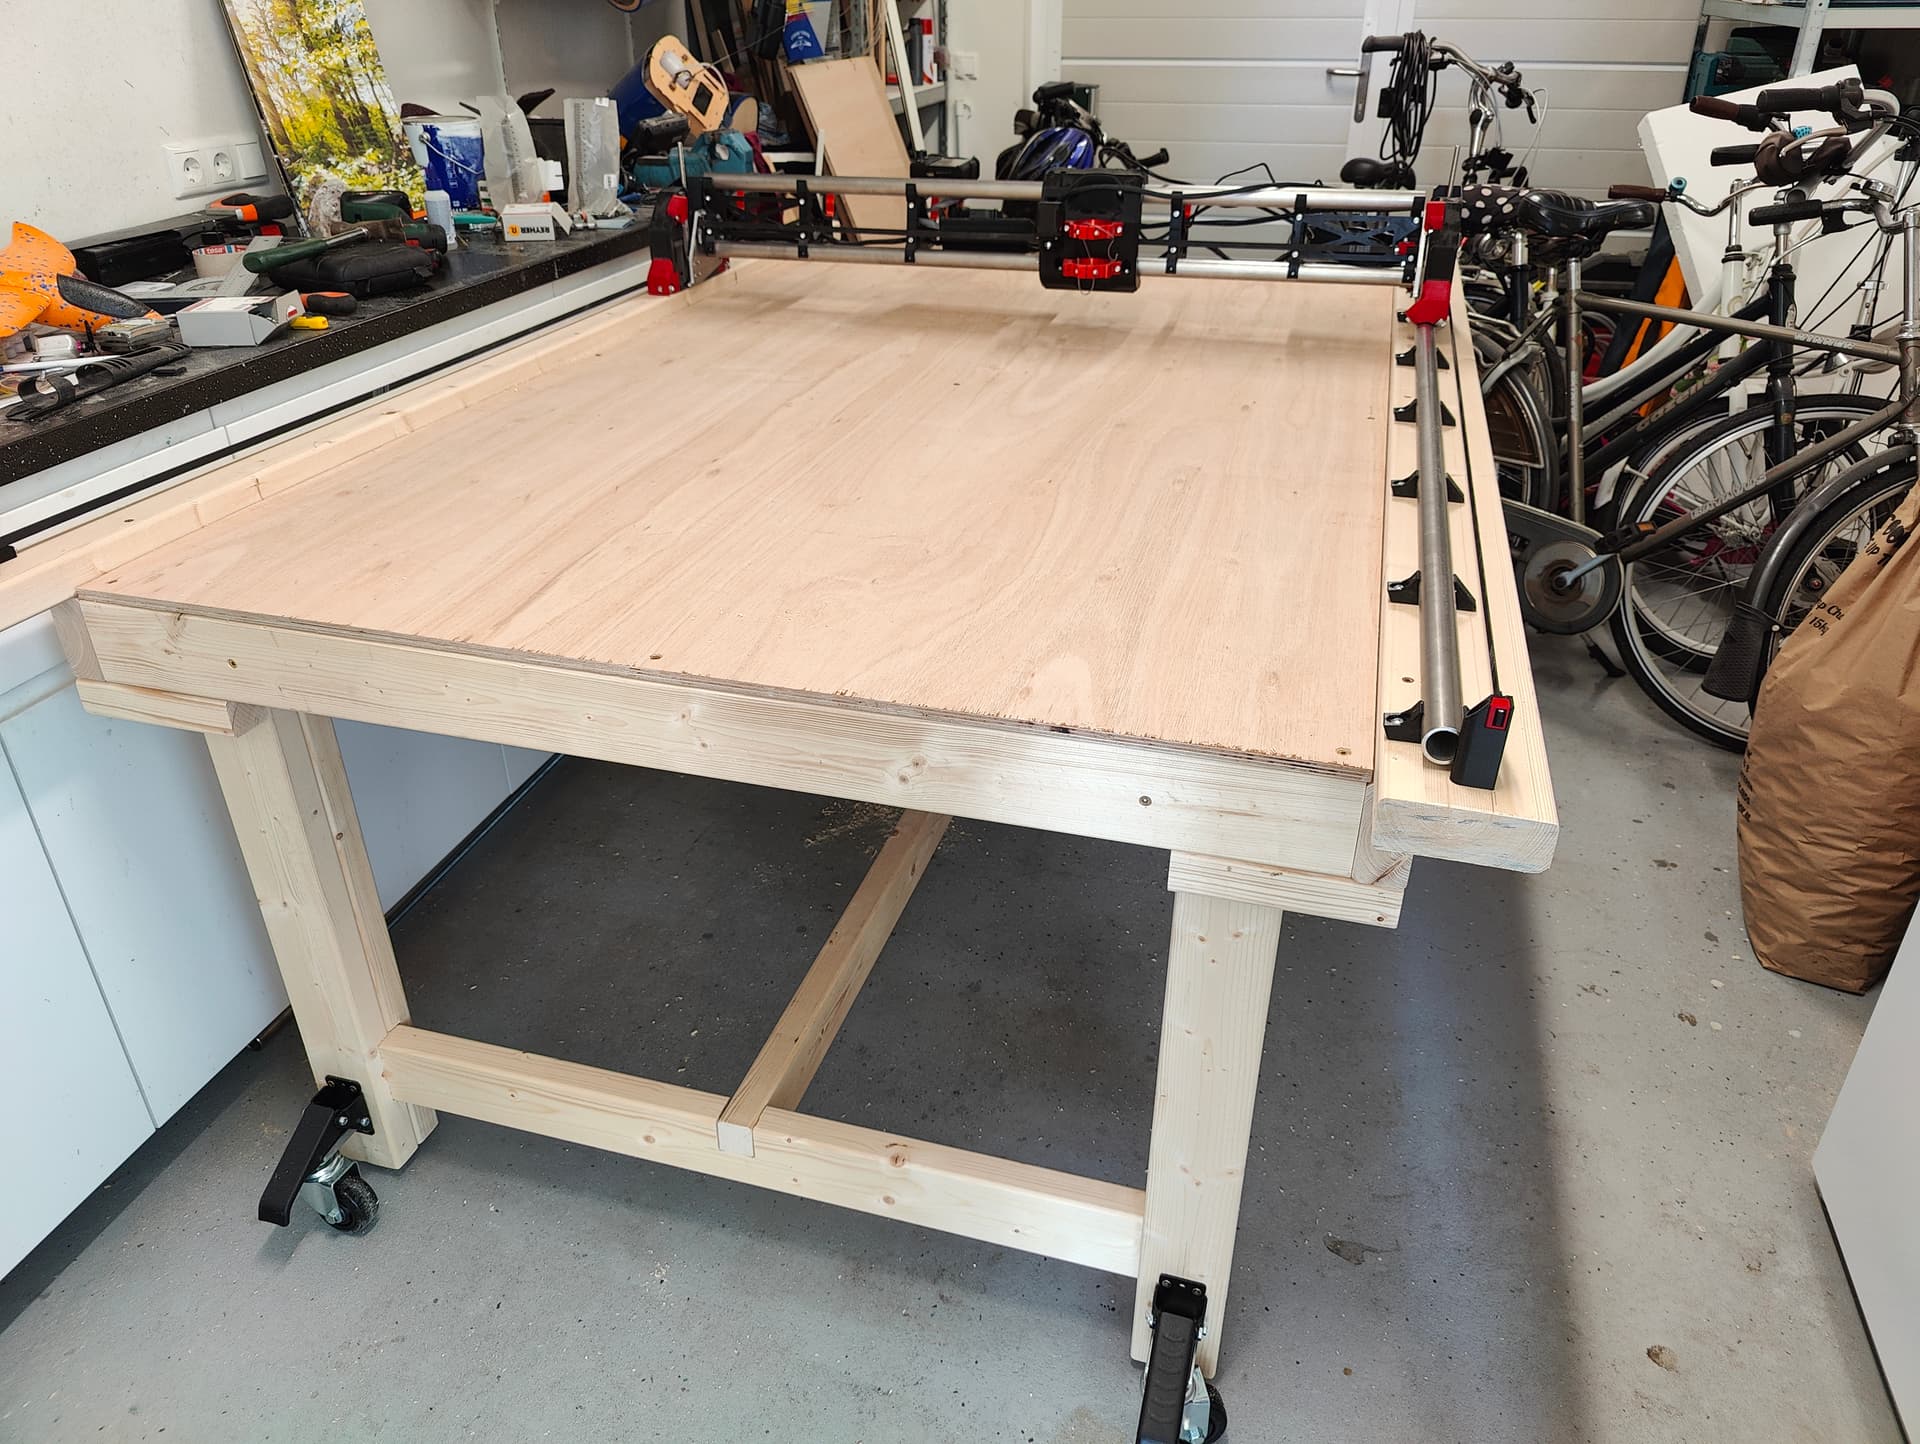
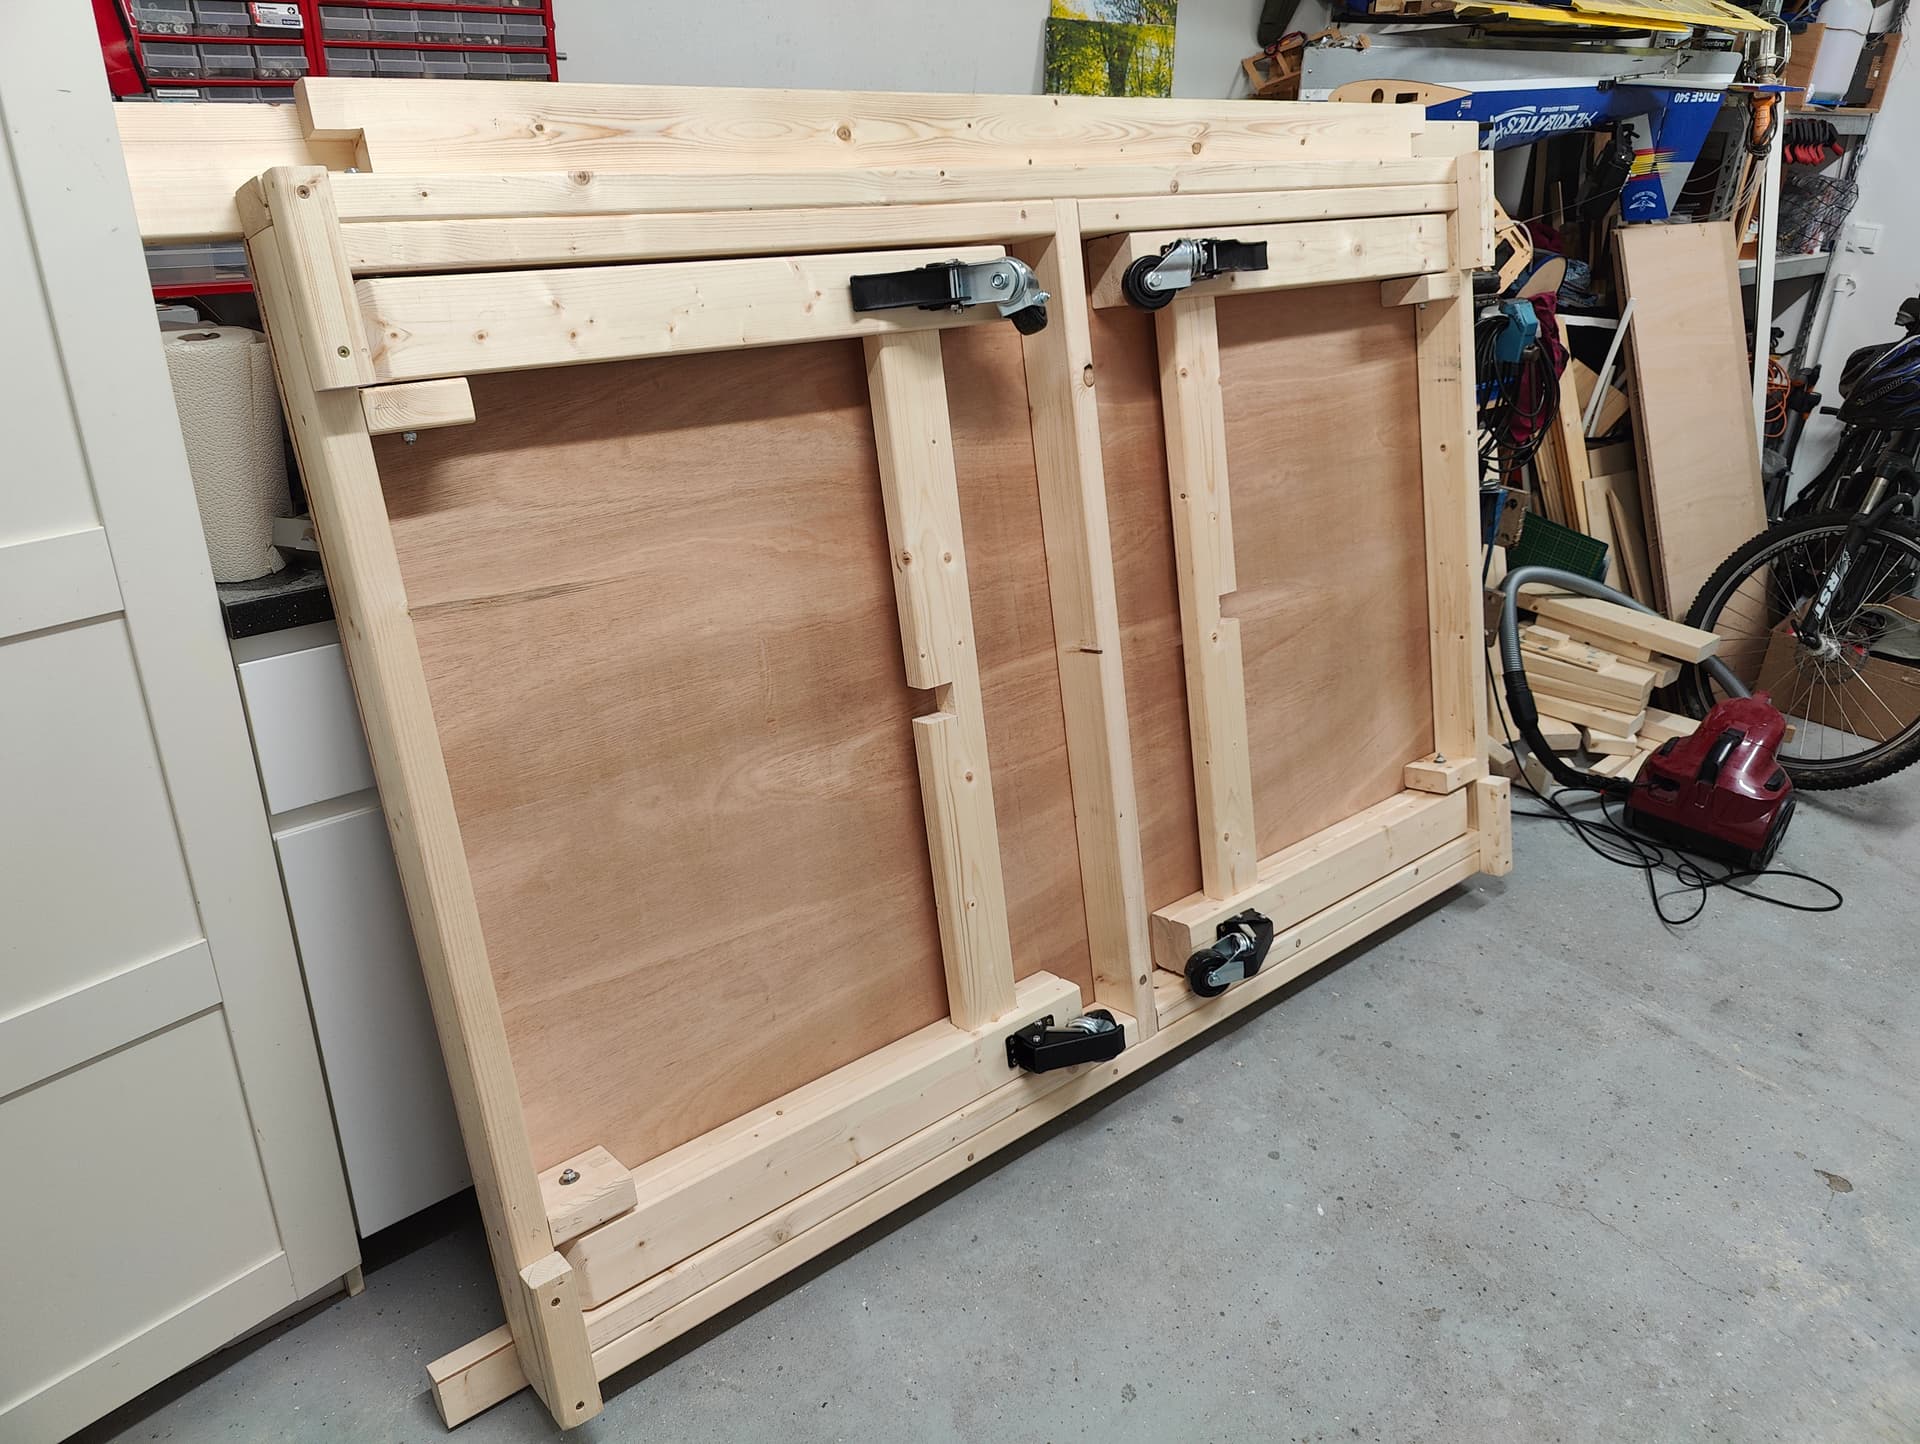
Also, the table is as good as finished. Really glad that is is foldable and has wheels. I did not realize how big this machine was going to be. ![]()
I (and my girlfriend ![]() ) cannot wait until it is also wall-mountable.
) cannot wait until it is also wall-mountable.
I’m now decrypting the instructions on checking for squareness. That should be no problem.
One question to others;
Is there a best practice to get the cable from the core to lay down neatly into the gantry cable/hose channel? In my case, the cable keeps snagging behind other components. It does not stick up, but lays a bit flat. I’m willing to test some, but I’m sure that I’m not the first and that others have a more creative mind than I have.
At the moment I’m not going to install a dust suction hose, so I cannot connect the cable to that hose. This is a concious choise; I will be holding the hose manually to make sure that I stay with the machine and don’t wander off during operation. I saw some sub-optimal results on this forum when the machine gets stuck. Would really like to prevent that.
Thanks!
5 Likes
That is one nice looking table!
Attach it t the vac hose, that makes it simple. If you are not using a hose try the tape measure trick.
Well, that settles that just try the tape measure trick.
3 Likes
Hi Guys,
I have seen some pictures here where a fire was started because of some issues with CNC machines. This is something I really want to avoid.
I would like to get the opinion of all you experienced users;
My thought; if there is an issue with the CNC machine and the router gets stuck, it will take up (much) more power (Watt) then during normal operation.
I have some Shelly power monitors laying in my drawer (Type 1PM mini gen3). I now put one within my E-stop button (between power supply and E-stop). There I’m thinking of disconnecting power when the watt’s go above a preset value. I can set this up in the Shelly app (or within my home assistant, it connects automatically).

Is this idea making sense or stupid?
Thanks for the advice in advance!
I don’t think that’s necessarily true. Just a bit spinning in wood with a router that’s barely moving if at all could start a fire.
You could also trigger false positives if you hit a knot or something.
This also doesn’t eliminate the need to watch it.
1 Like
That makes sense.
It was not to make me able to walk away, just an extra safety. Think I still keep it in there to have some logging in Home assistant (not sure yet for what purpose).
Other question;
I tried the tape measure trick to guide my cables, but the cable sleeve has no room to put a tape measure in there together with the cables. Tried to tape the cable on top of the tape measure, but that does not work well.
Therefore , I would like to use a cable chain.
I have seen a few posts mentioning that with the MPCNC and the Lowrider V3. Does anyone have a design for the Lowrider V4?
1 Like
Use your vac hose as the cable chain. They both travel the same direction and it works really well
I printed a cable chain, but only for the y axis, for x I use the vacuum hose!
https://makerworld.com/models/197887
It is a bit oversized but it works. Also made a mount for it, if you need it I can share it.
There are some laser machines that have flame detection, you can look into that.
https://youtube.com/shorts/hM0iChUdmZQ?si=uGNlzeW_dMnmijha
Interesting idea for water cooled spindles!
That would be great! Was thinking to design it myself, but if there is a tested design it there, that speeds up the process.
Haha, that looks funny ![]() . But I’m afraid that is another project. They seem to keep piling up. First i want to finish this one.
. But I’m afraid that is another project. They seem to keep piling up. First i want to finish this one.
Hi,
This table looks awesome. Is the table stable and does not wobble in any direction (especially the long axis) ?
I like the gen 3 stuff. Makes me wish I had waited to install shelly in all my light switches.
The stepper motors actually don’t use extra current when they stick. The router might, but it would also use more when working hard. If you have a router without a speed control, I’m not sure if it would use more or just send the same amount of power all the time.
Interesting idea. I am very wary of safety features that are not bulletproof. I would want to make sure I don’t trust something that isn’t as reliable as me. Otherwise, it makes it less safe.
Just tested it: on the short axis it is very sturdy. On the long axis it wobbles a bit. I don’t yet know if this is an issue during carving (speed and weight of the Lowrider will be relevant for that). The design that i used as inspiration uses a diagonal beam. If the wobbling is a real issue, i also will put a diagonal beam between the legs.
It’s addictive; everything that can become smart…
I hear you; it’s better to know that there is only manual safety, then thinking that there is an automatic safety that in practice does not work.
1 Like
The first crown is a fact ![]()
![]()
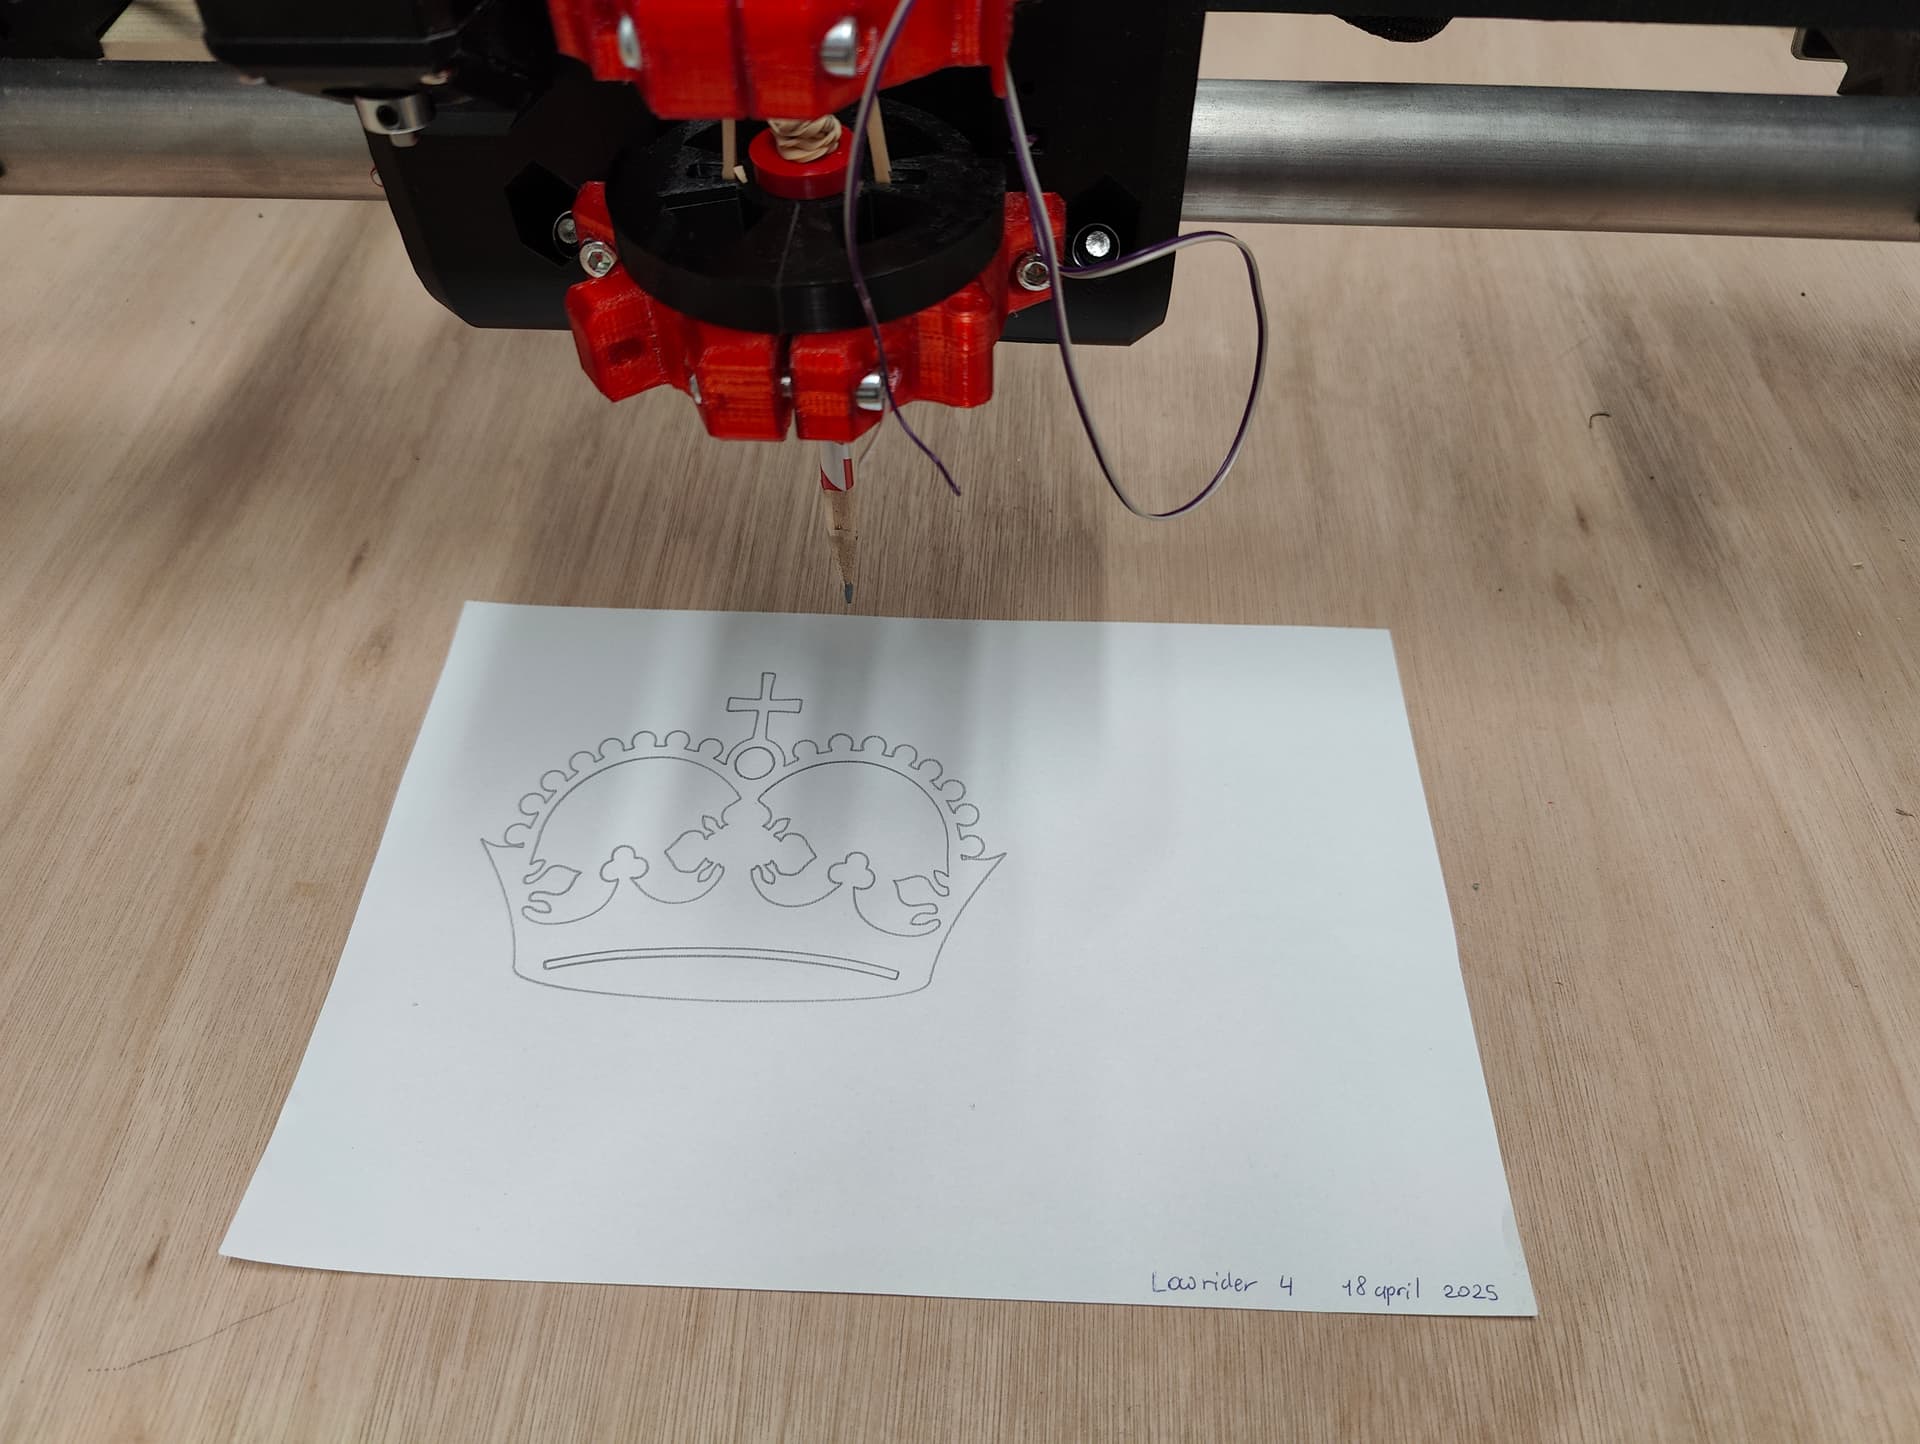
This one is going to have a place of honor in my workshop.

The sound is a bit of nails on a blackboard, but once the router is spinning, that will be unnoticed. The Z-screws also will get some more lubricant.
Also, I feed like I’m now far enough to place a pin on the V1 map;
V1 user map
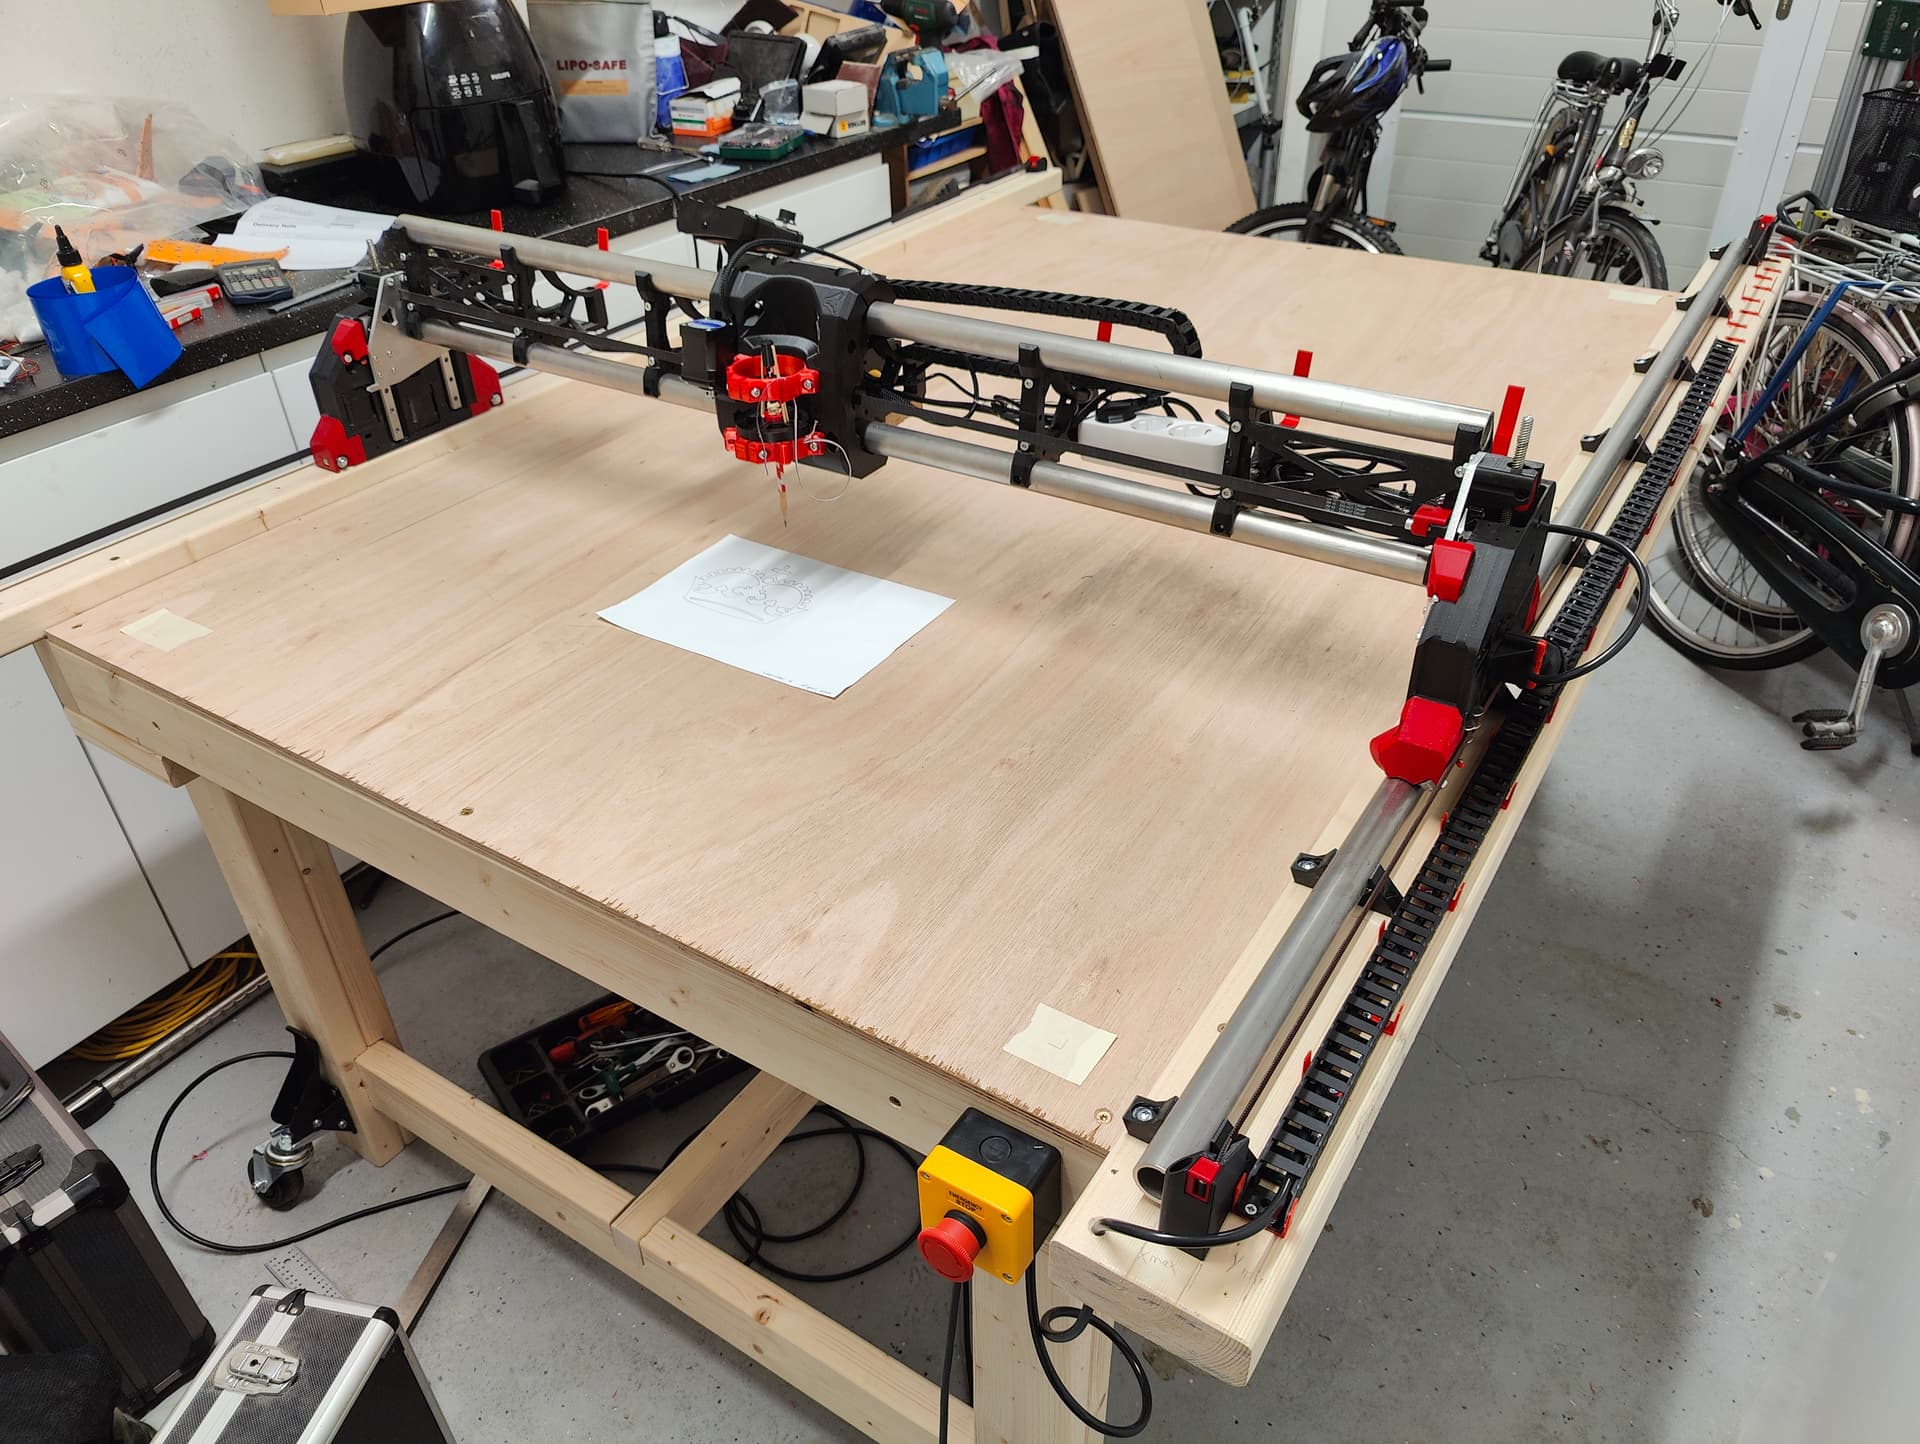
Really happy with the result! Thanks Ryan and all other people that helped!
7 Likes
Got a question regarding the leveling of both Z-stops so that both side stop at the same hight; Is there a best practice? The instruction is not really clear on this for me.
If there is no best practice, I intend to cut a part of wood to a length so it fits below the gantry on its highest point and then try to get the Z-switches to activate on the same hight on both sides. But I imagine that someone here already has developed a best practice on this. ![]()
I just drive to X min, drive an endmill down to the spoilboard and then drive to X max. Then I check the difference (like how far I need to go down) and adjust accordingly. Ideally the side that was lower up if still possible.
1 Like
The docs are a little confusing/sparse on leveling Z. I ran into the same problem (may actually want to start one post earlier in that thread where I shared my initial confusion.)
This process was key to me figuring out what I was missing:

Was the part that I kept getting confused by. I assumed it was just reading the Z position off in the fluidNC interface (Though - I know that’s not what @Tokoloshe is doing since he’s all in on Estlcam as a controller.) The video was key to me realizing that the probe command returns the Z position in it’s output so you can just read it from the log - then work out the new pulloff for whichever side needs adjusting.
2 Likes
Thank you both for helping. I’m not using the jackpot, but the SKR board. Still, the video does give some ideas. I think i’m going to use the method of Philipp and read the Z-values off the touch screen. Then try to correct the Z-stop a bit to come close to 0. Next step is to figure out how to finetune in the Marlin software.
1 Like