Table Top ZenXY

The Road To RMRRF 2023

Since there is a rep rap festival in Colorado this year, I wanted to bring something. I decided to build a table top sand table that can sit on a table at an event like this (or a coffee table, or a counter) and attract some attention to V1 and sandify.

Design

The criteria I set for myself was:

  • The table needs to be easy to build. I don’t have a ton of time to prepare.
  • The table needs to be (relatively) cheap. You can make it out of walnut, or OSB, but making it out of sheet goods means it will be accessible to me and to future builders.
  • The table needs to be carried by one adult.
  • The glass size needs to be commonly available. I used a weird piece of glass before. And local glass shops will cut any size you want, but they don’t sell custom sized tempered glass.
  • It needs to have LEDs.
  • It needs to fit on a table.

The glass I chose was from ikea. This glass advertises as “18in x 14.5in”. But it is actually about 16.5"x13.5". I think the hole the shelf is meant to sit into is 18x14.5. I bought two two packs. I will use one for the bottom. So I have two spares.

I started with the easiest thing I could think of. A TV-like box:

I was thinking of adding beefy hairpin legs. The whole thing looked too bulky. Plus, I won’t be cutting this on a table saw. So I don’t need to stay on straight lines.

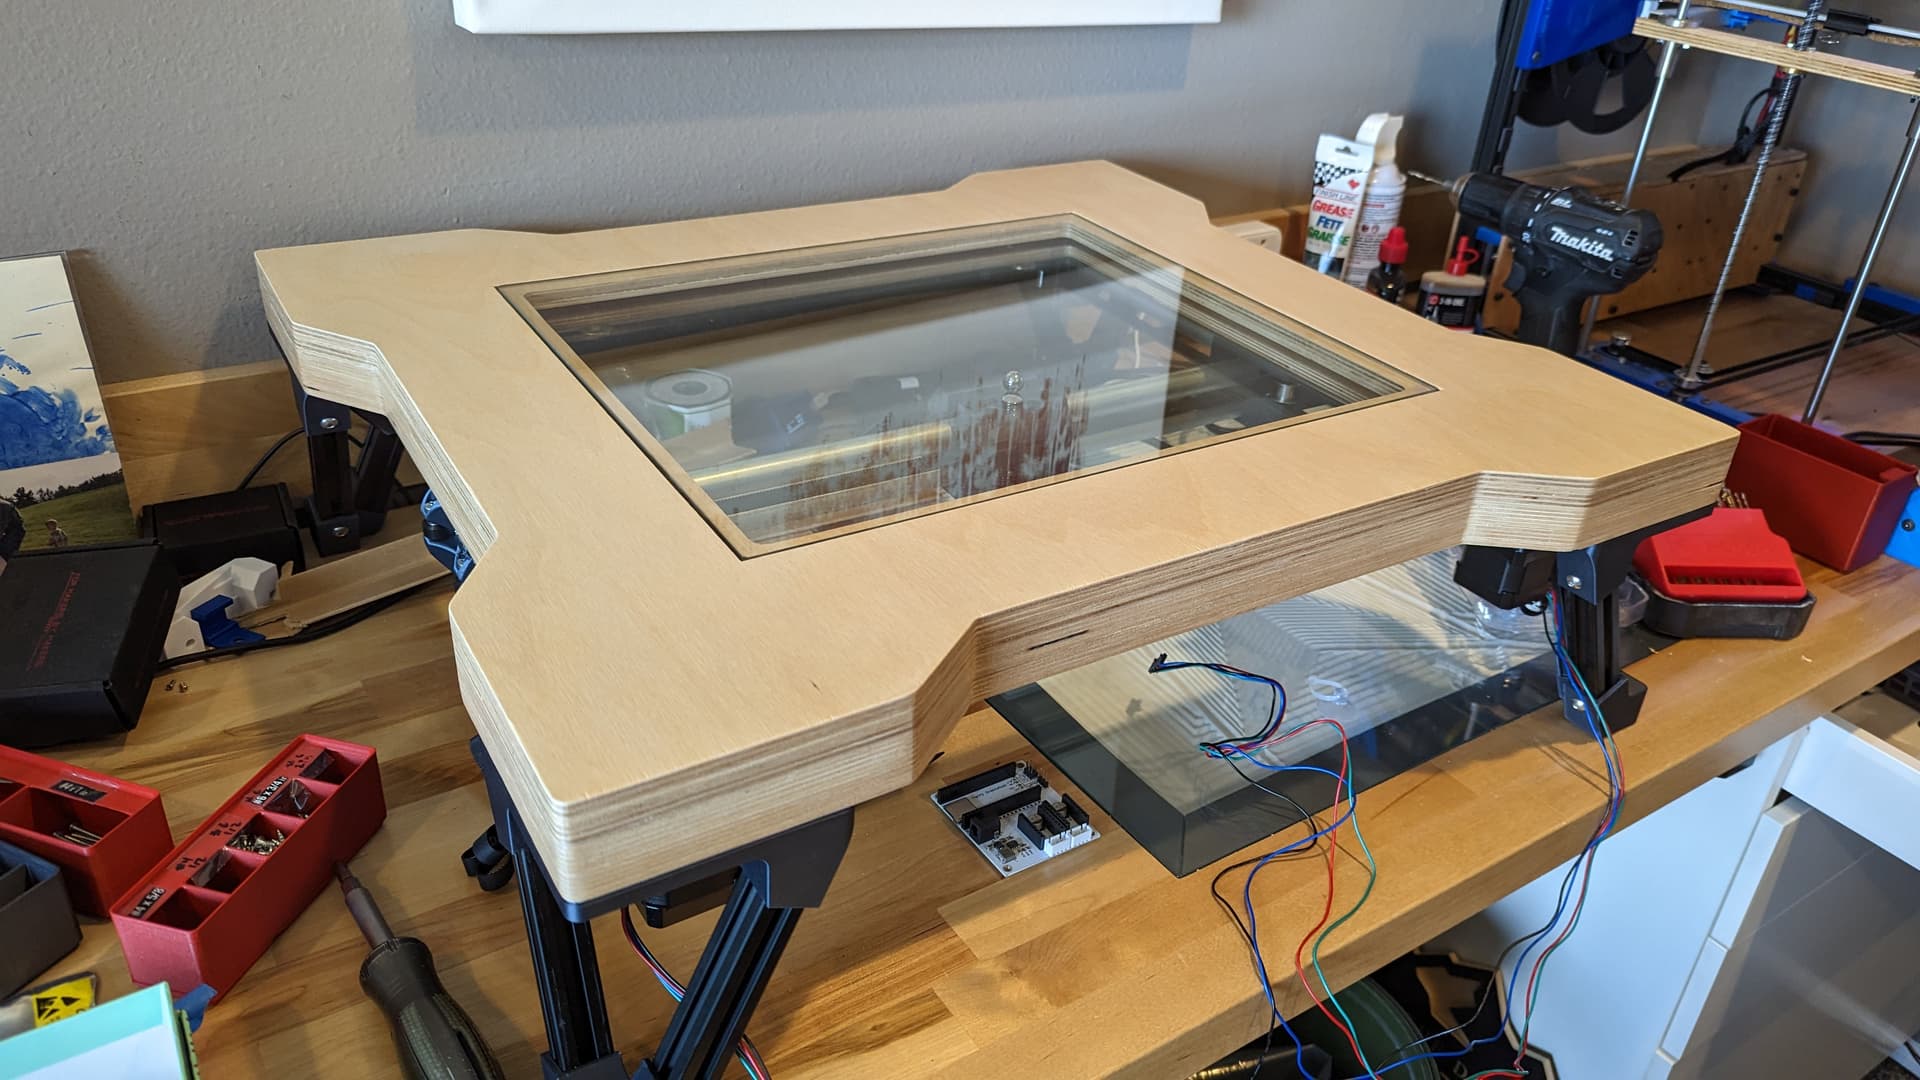
With the help of some friends, we came up with printing some legs (more on that later) and cutting some of the extra width off, which will also give you a better look at the machine.

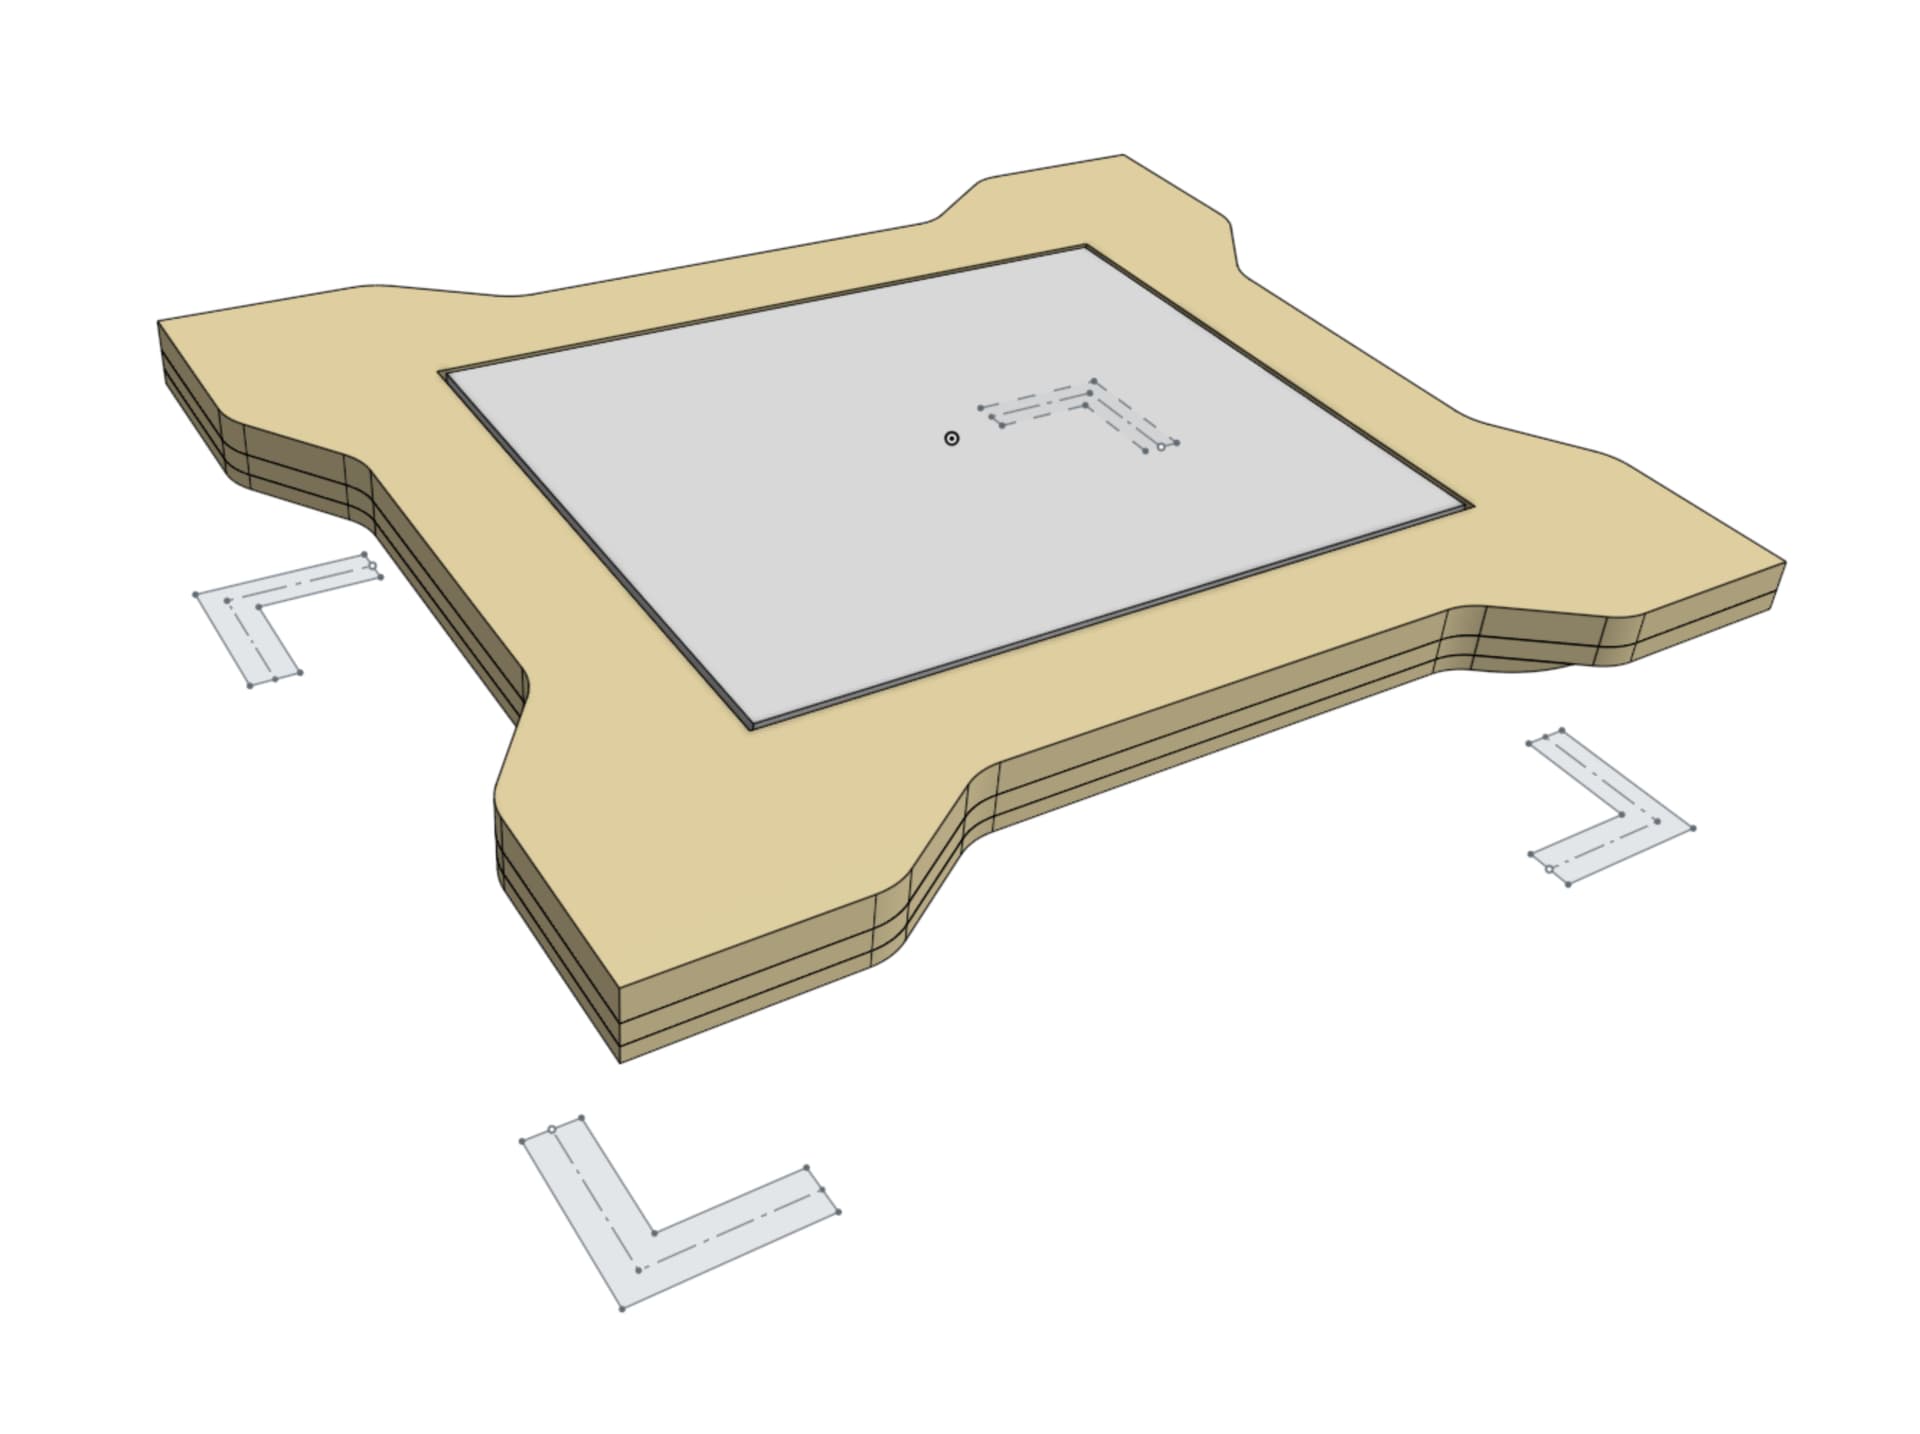
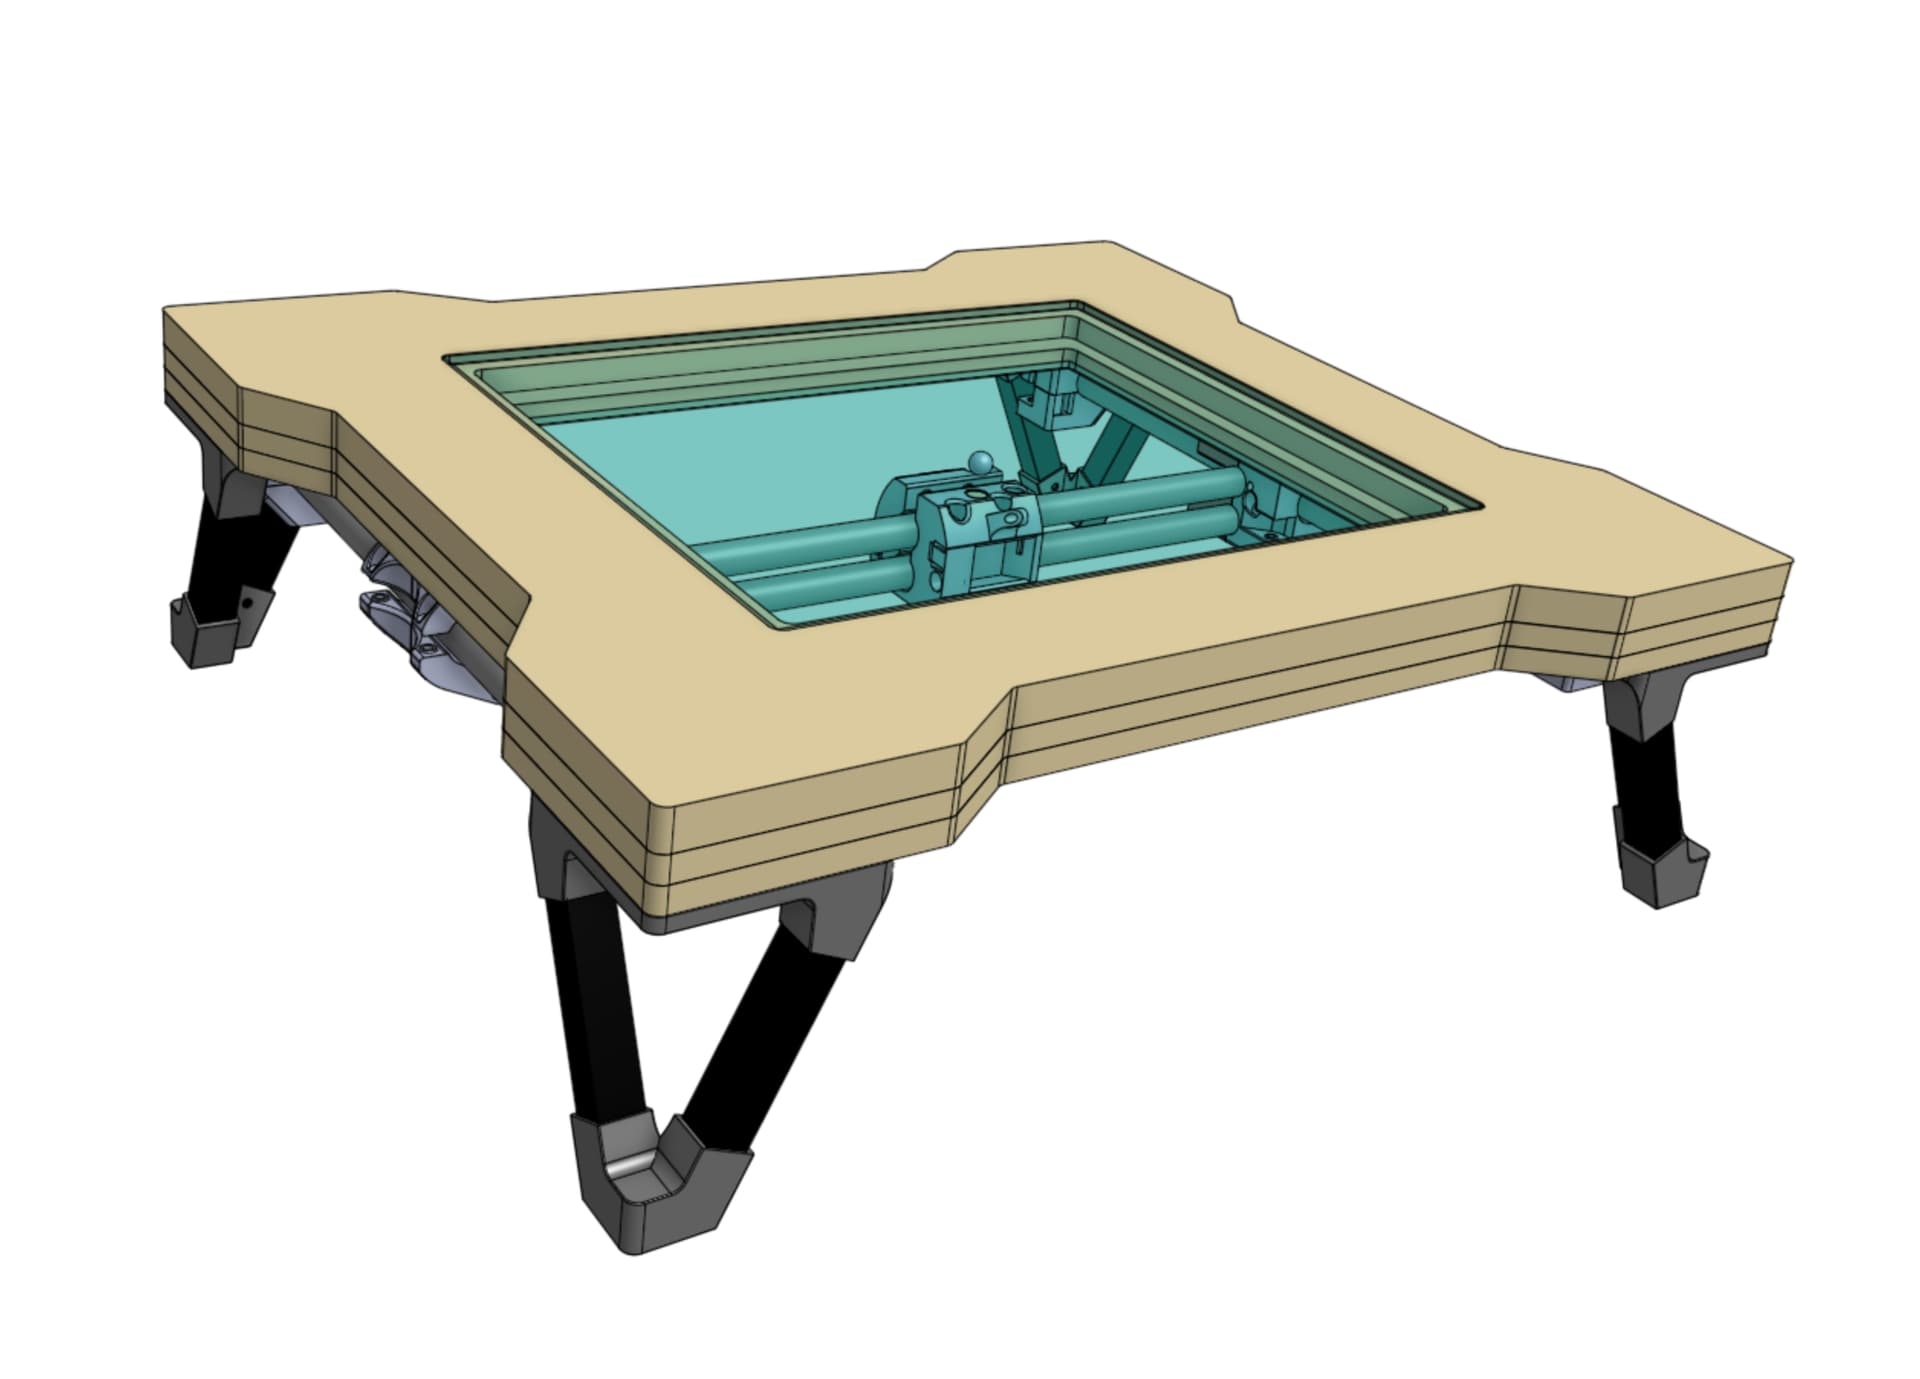
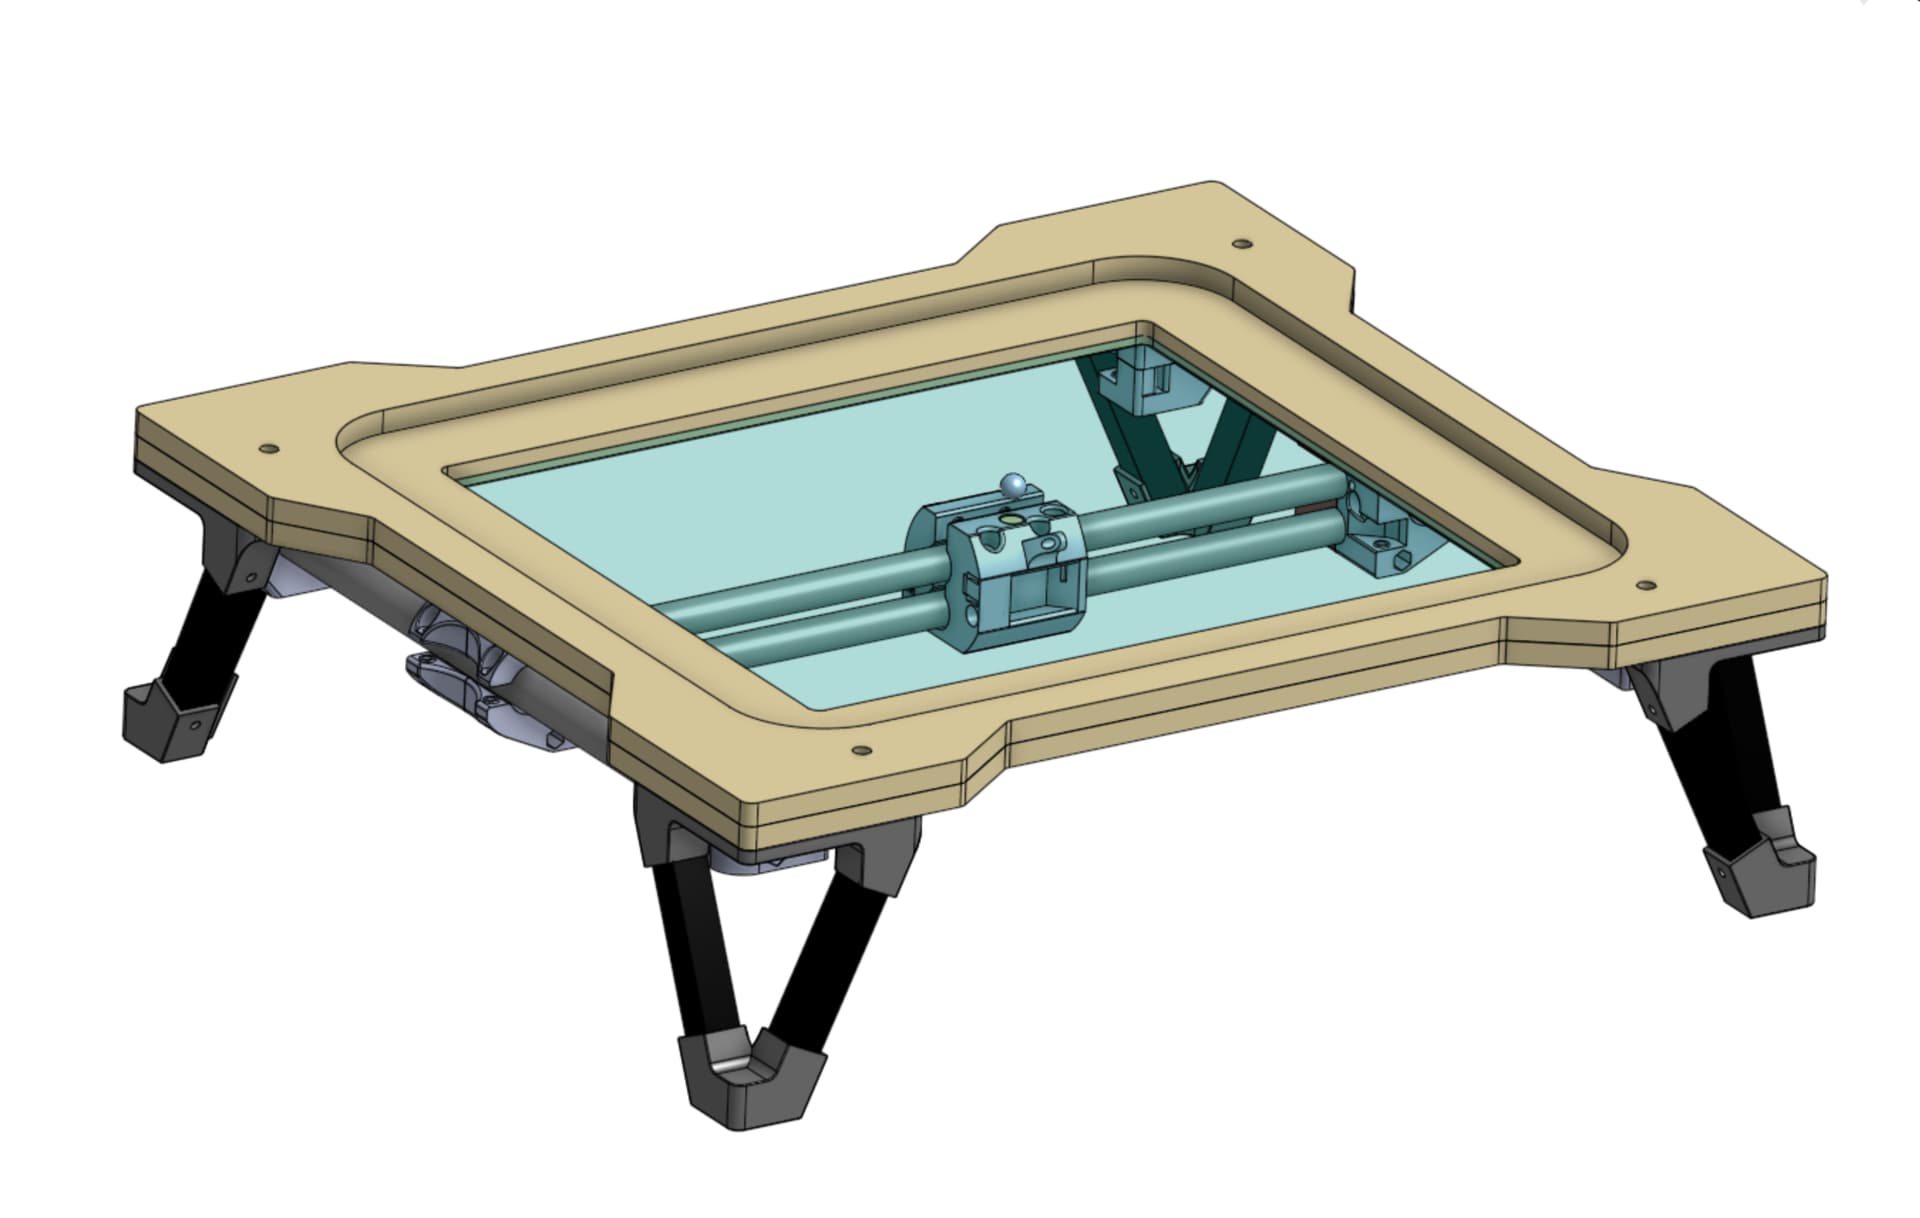
After some more CAD, this is the design I am building:
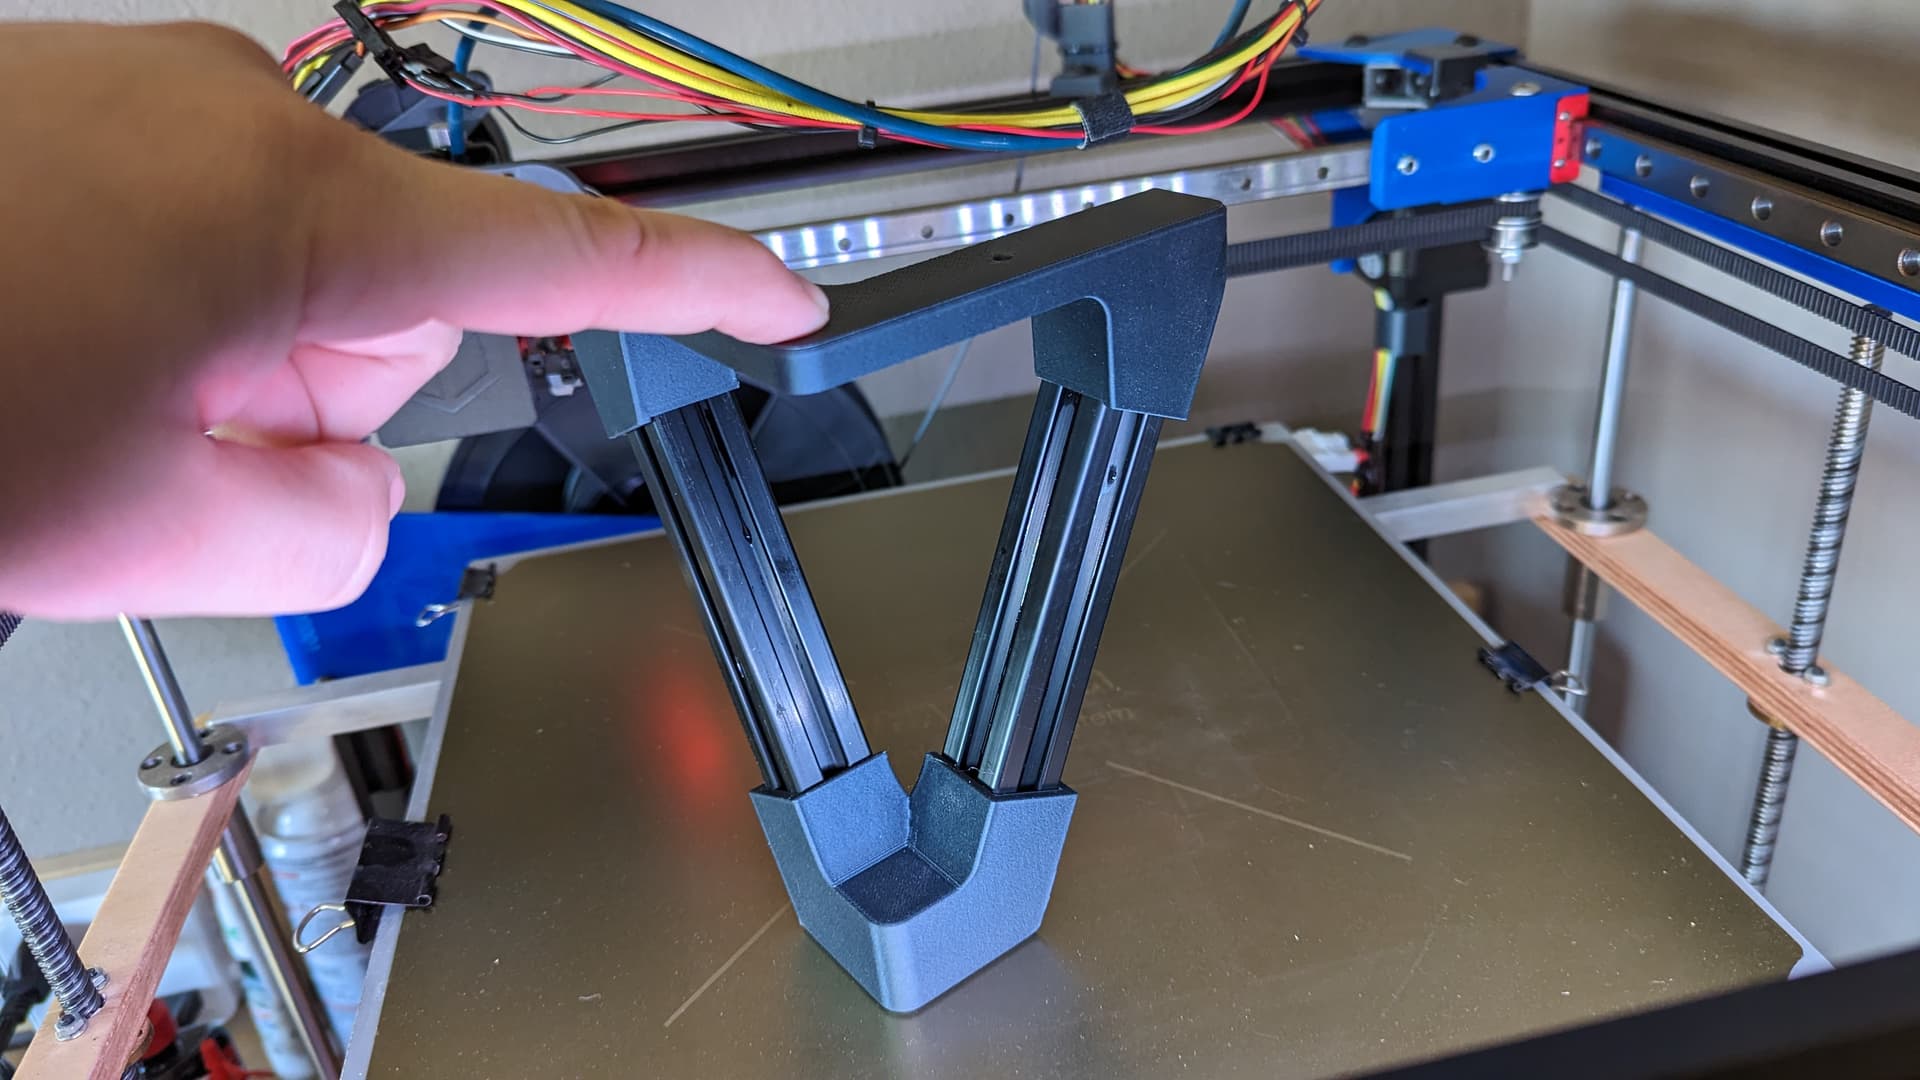
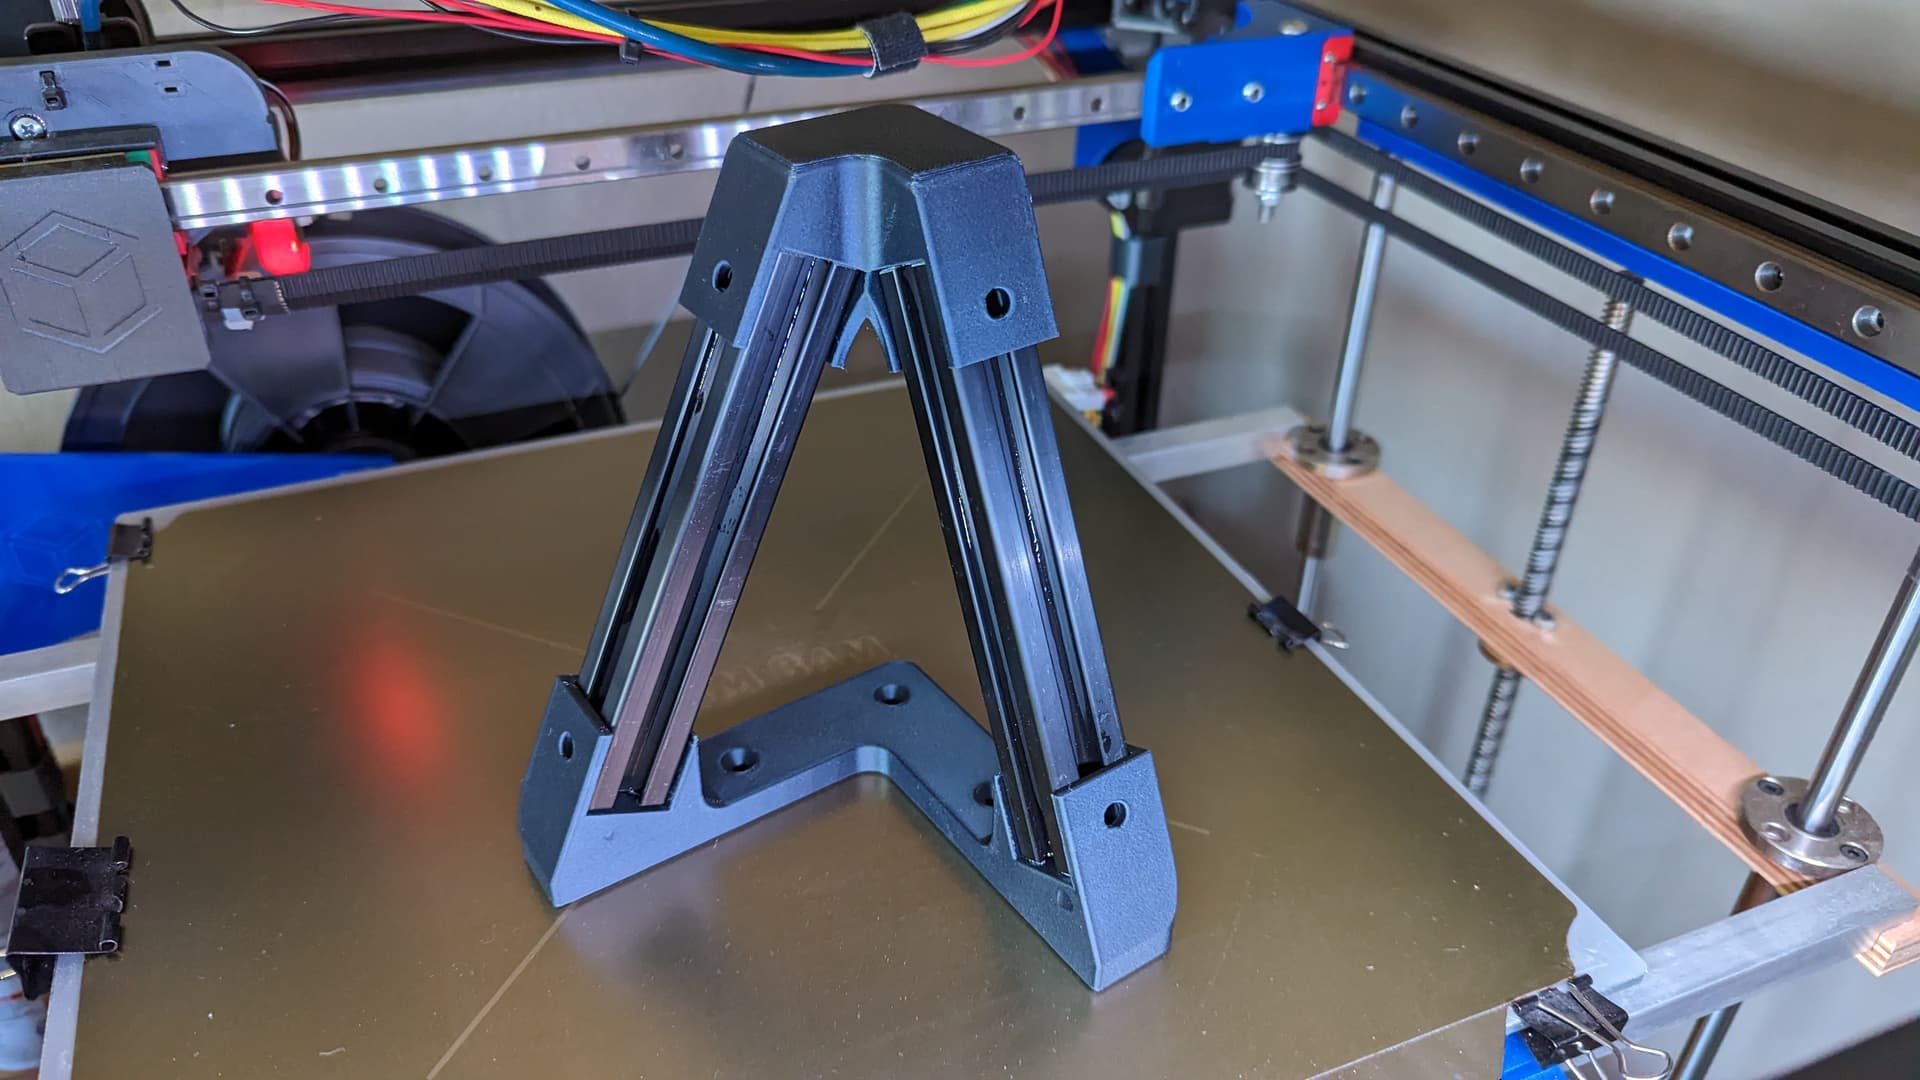
Legs

For the legs: I thought it would be fun to use some 2020 black aluminum extrusion. The top and bottom pieces are printed. I really like that the 2020 is not at a right angle. I don’t see that much.

This should also let me print and mount the electronics in the space inside the legs. I won’t know until I am done if I have given myself enough room there.

LED Layer

In the middle of the 3 ply sandwich, I have a smaller layer. This will let me install the LEDS a bit away from the sand, so you will only see their glow, not the LEDs directly.

Mounting the top

The top needs to be removable, so I can maintain the LEDs. I want the sides to be as smooth as possible, so I also designed in some holes for dowels. These should align the three layers after I cut them out. And let me remove the top and replace it with the same alignment.

To the Low Rider!

I decided I would use baltic birch. 3/4" thick for the top. 1/2" thick for the middle and bottom layers.

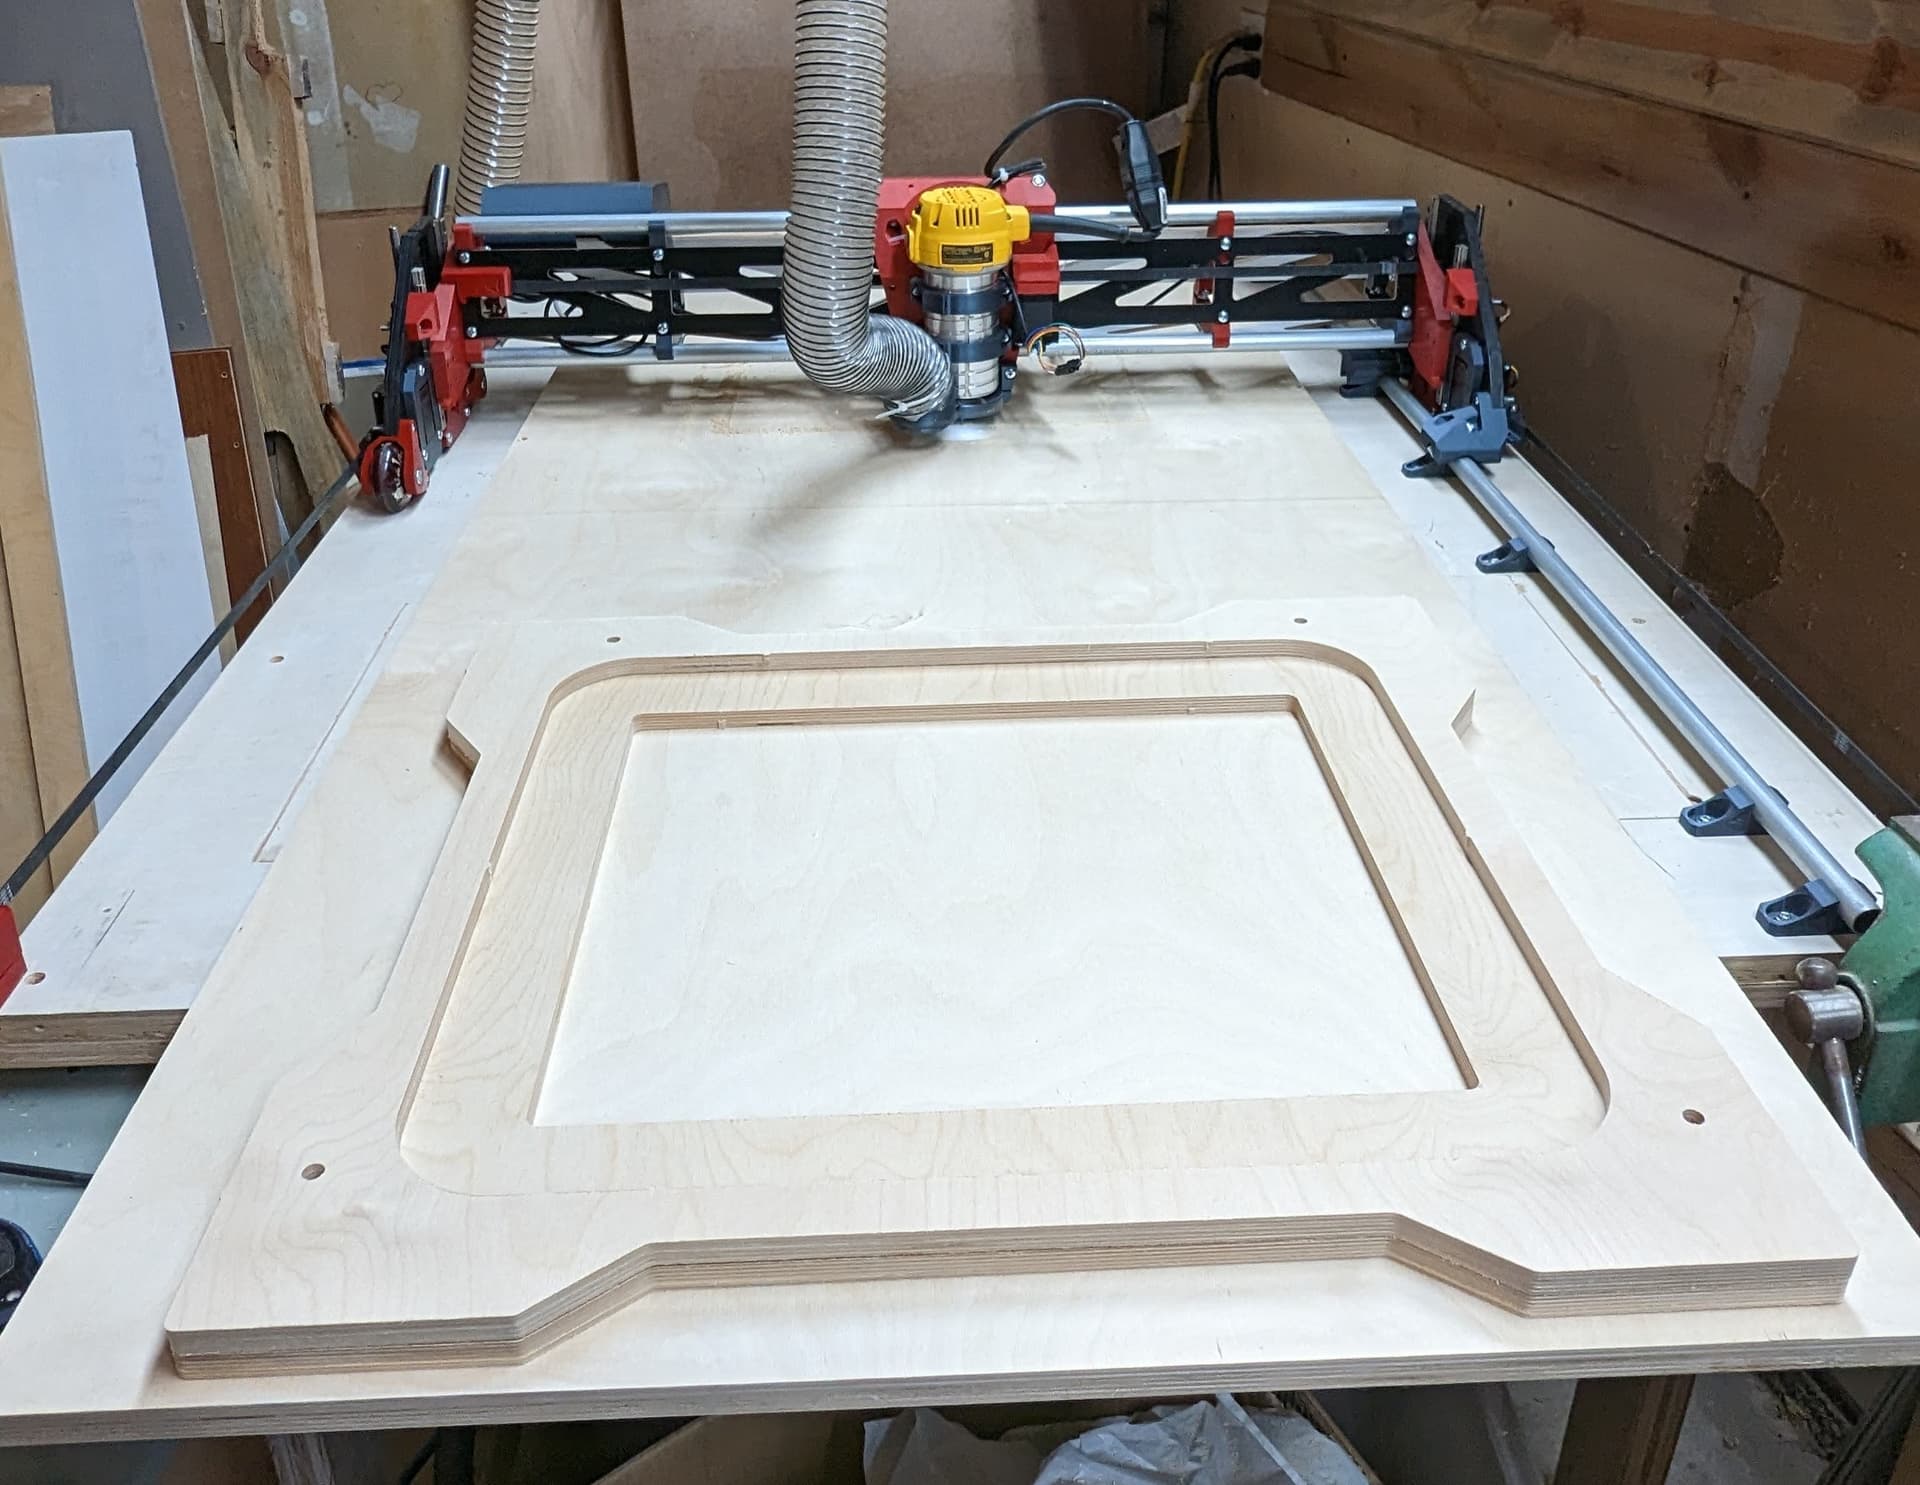
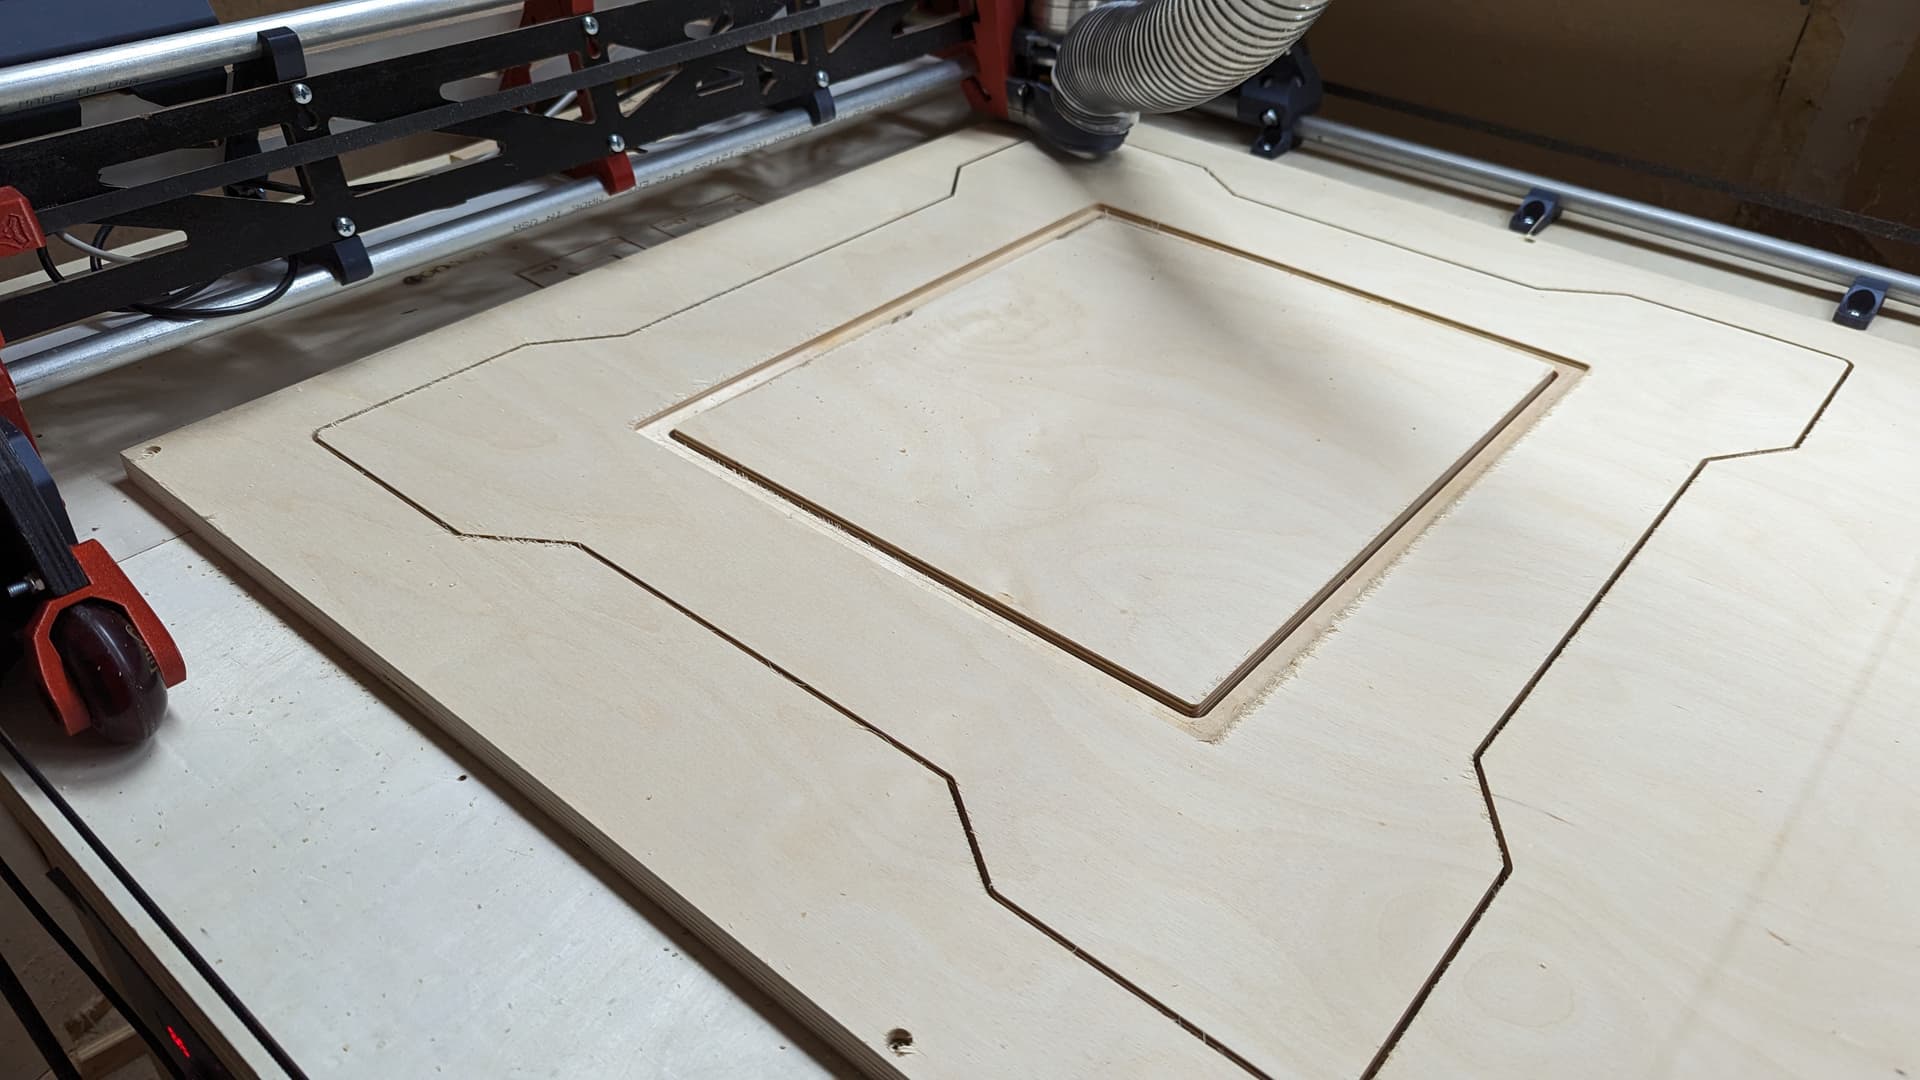
I cut everything out with a 1/8" single flute bit. I went way too slow, but it got the job done. This pic shows the middle two layers after I freed them from their waste, while the LR3 is chewing away on the top

Here is a pic of the top being carved out. There is a rabet for the glass to sit in:

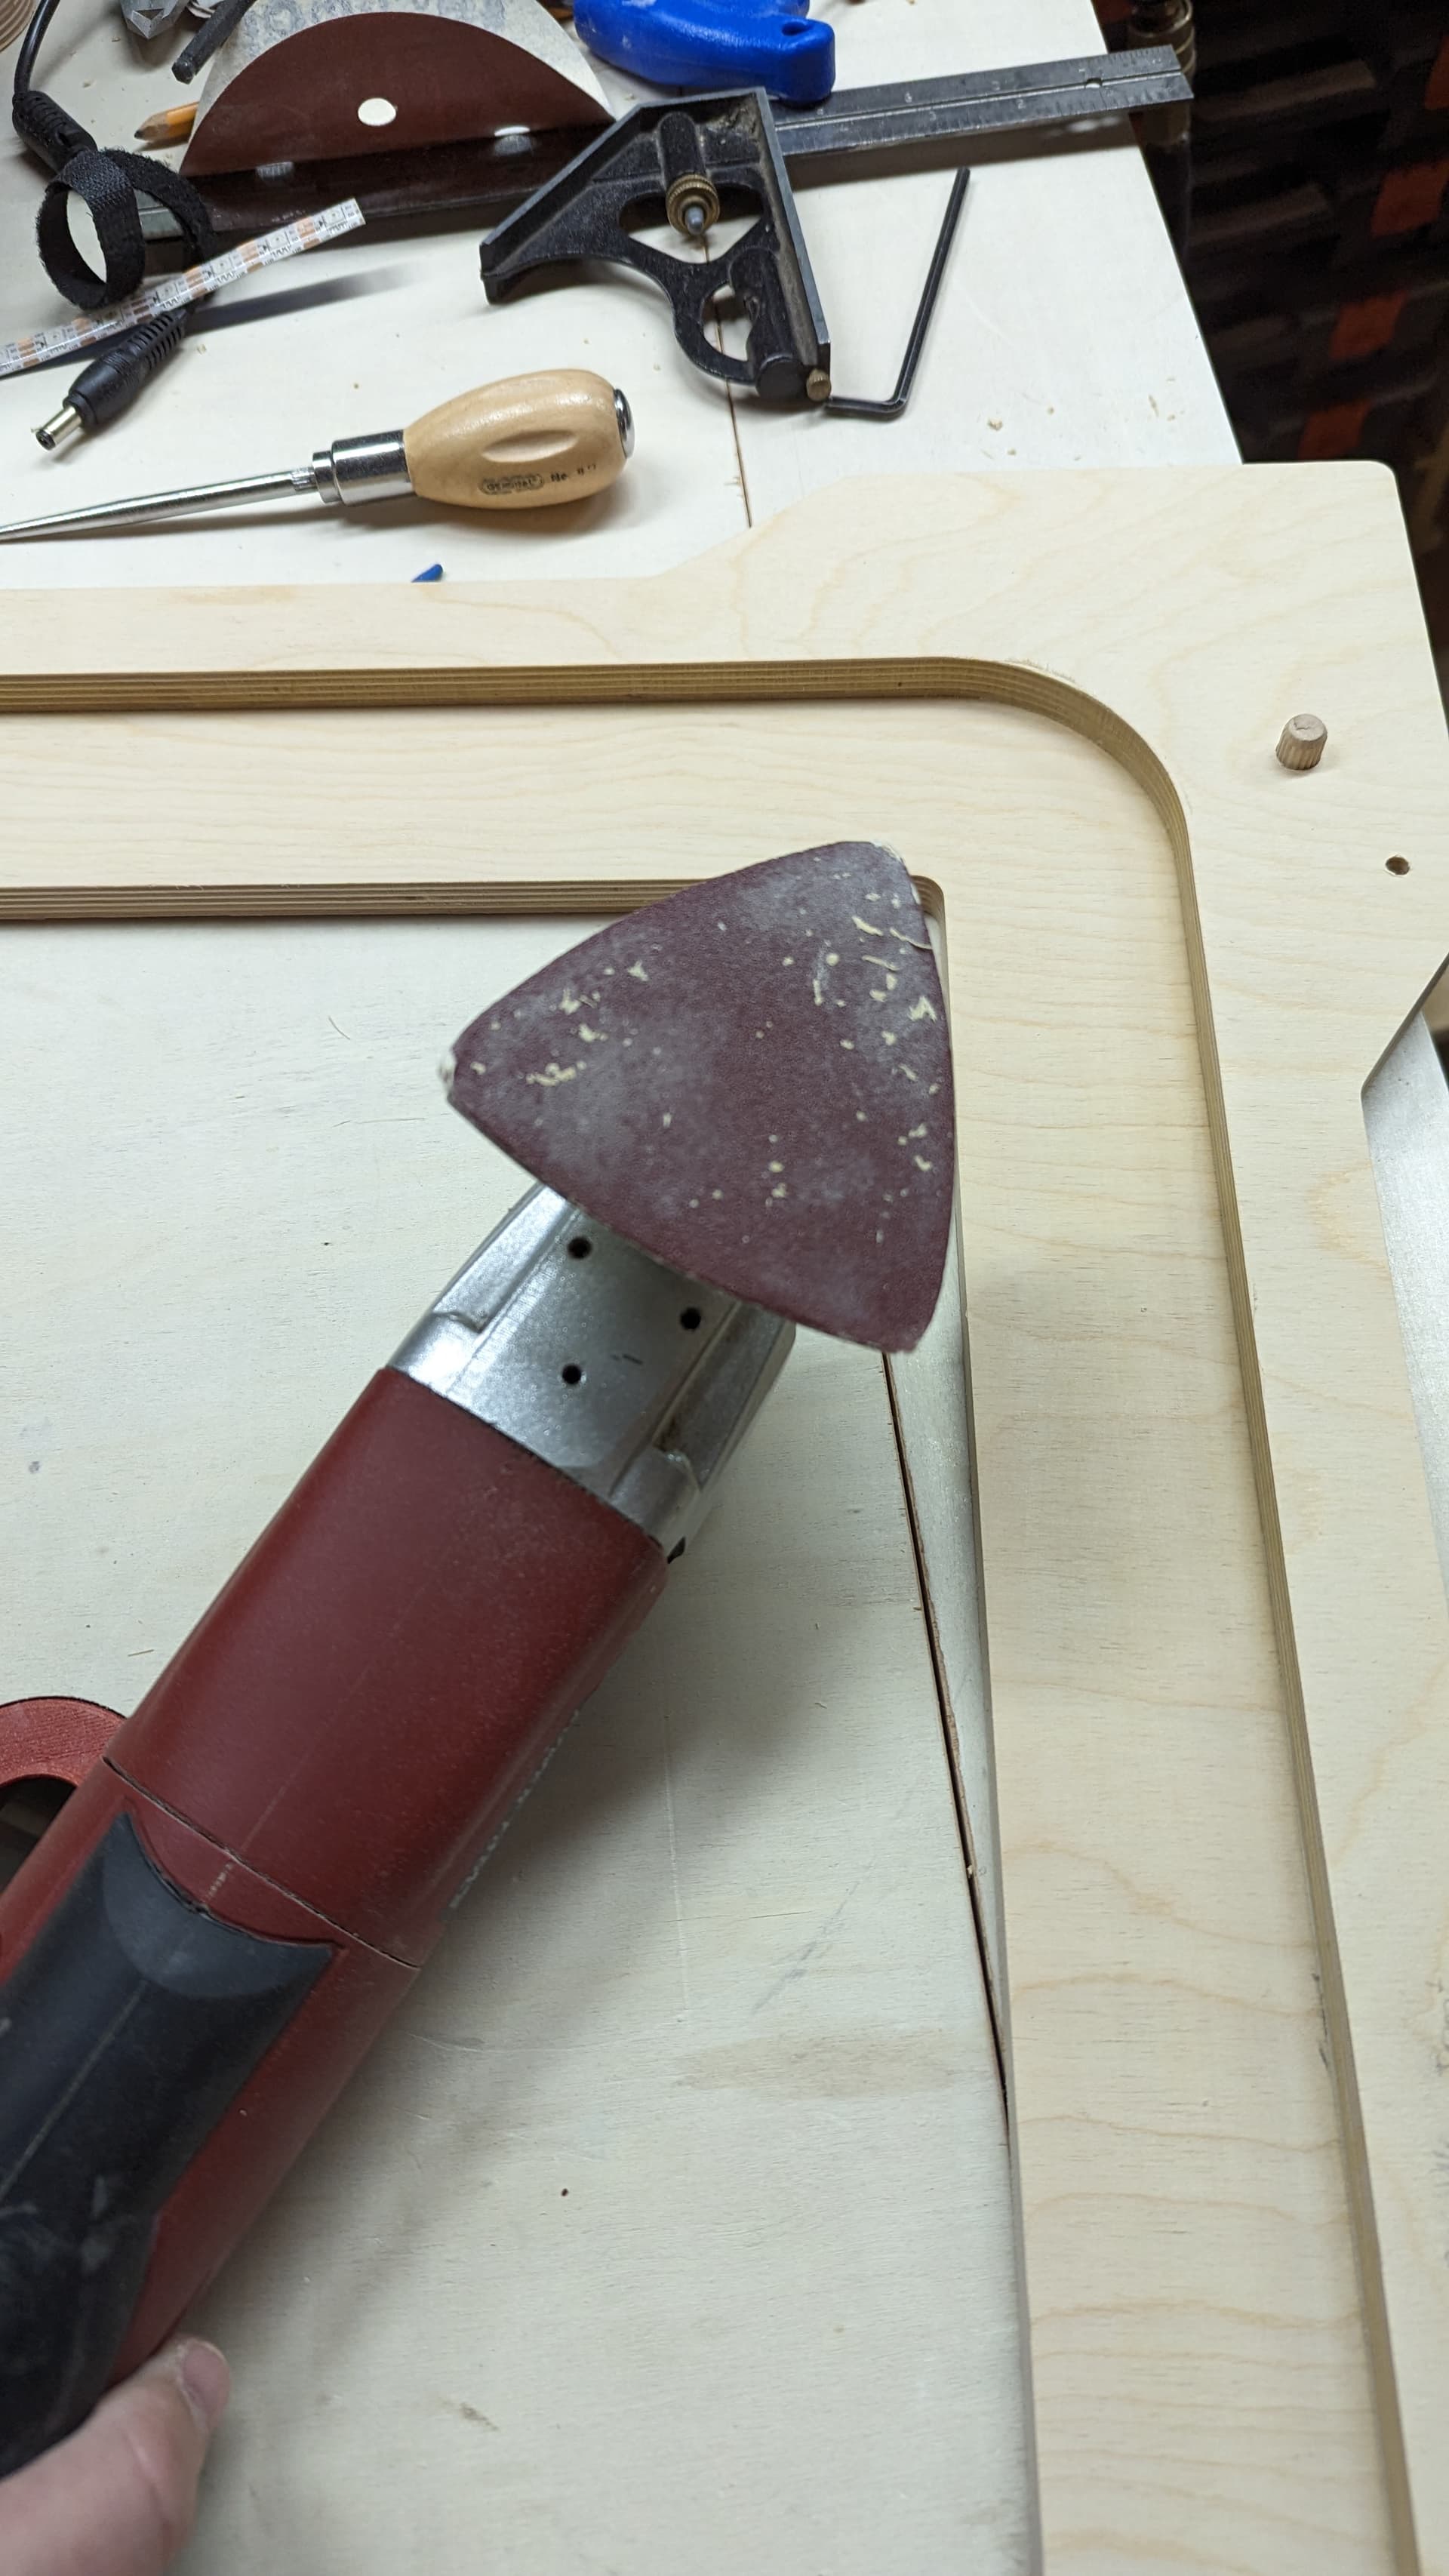
The depth of that rabet wasn’t perfect. It landed right on the edge between two layers, and I hadn’t used the touch plate to get Z perfect. I cleaned it up with a dado plane.

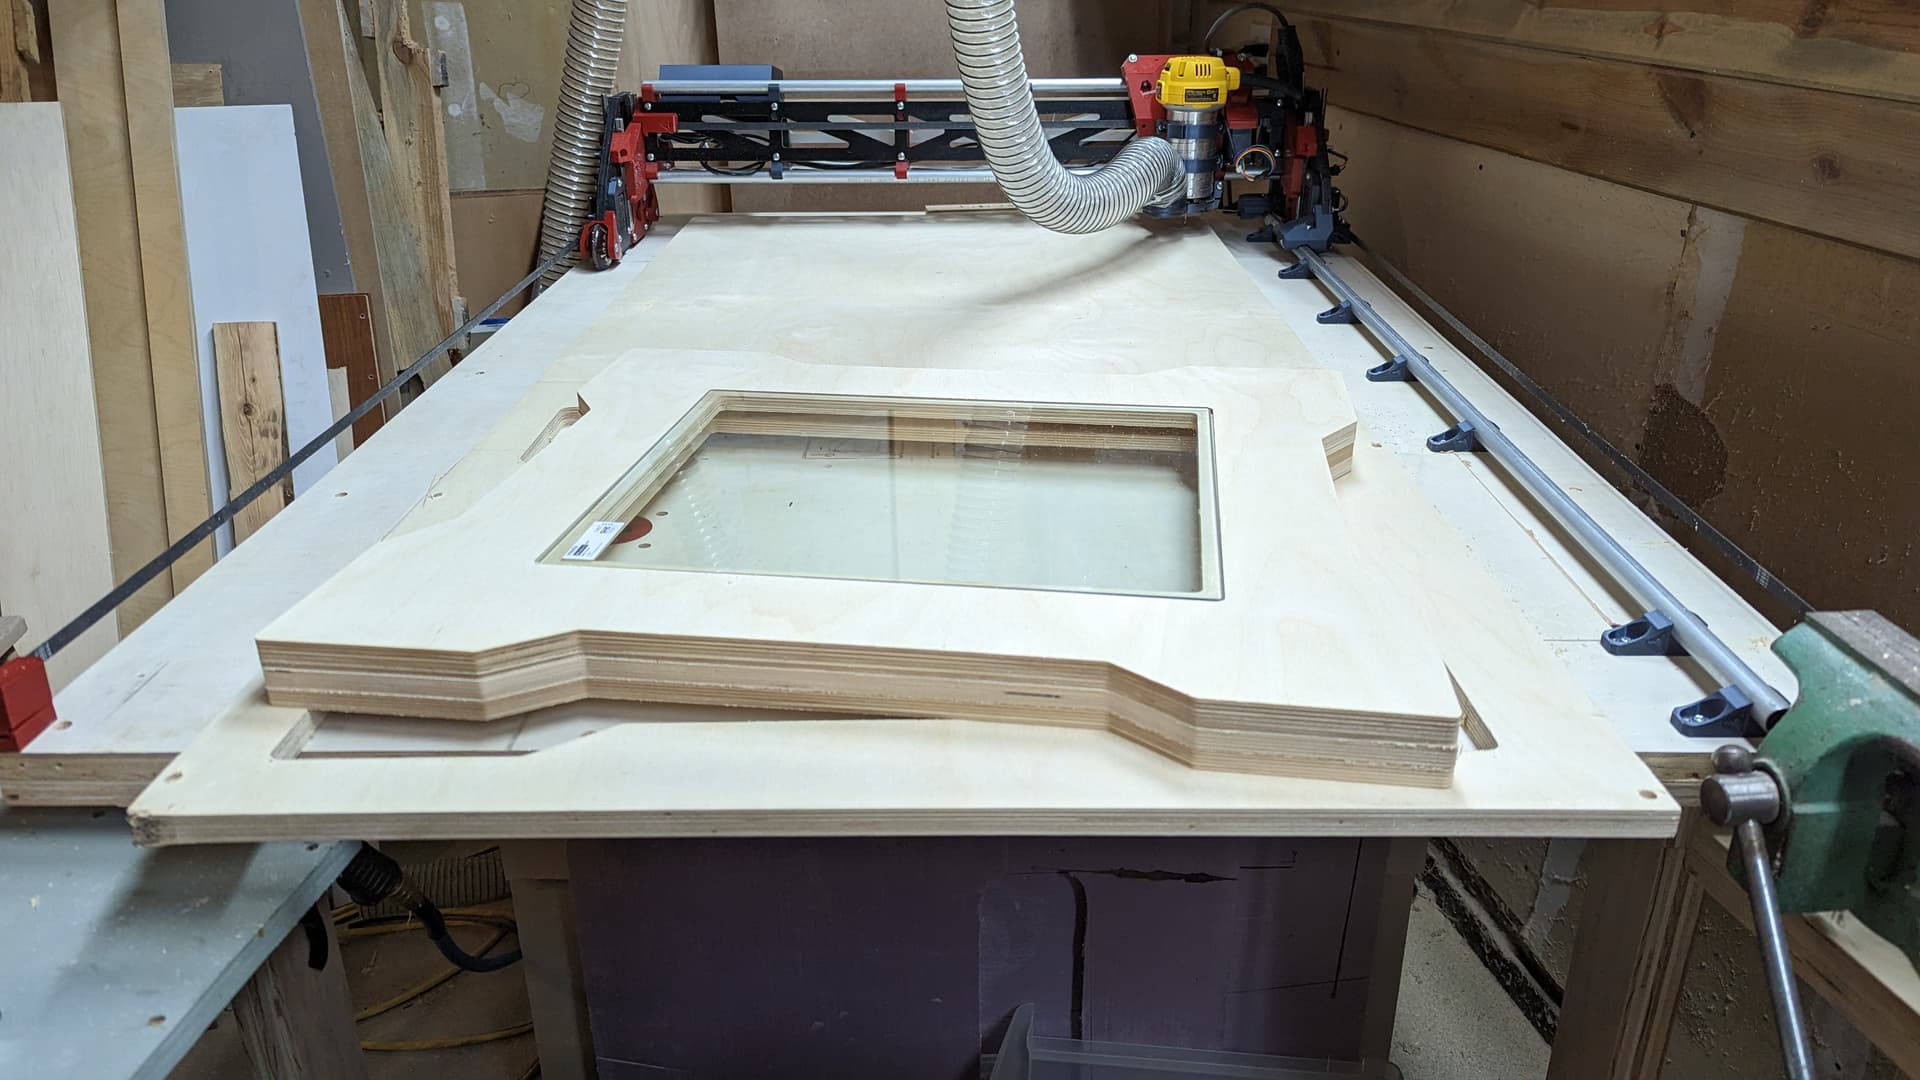
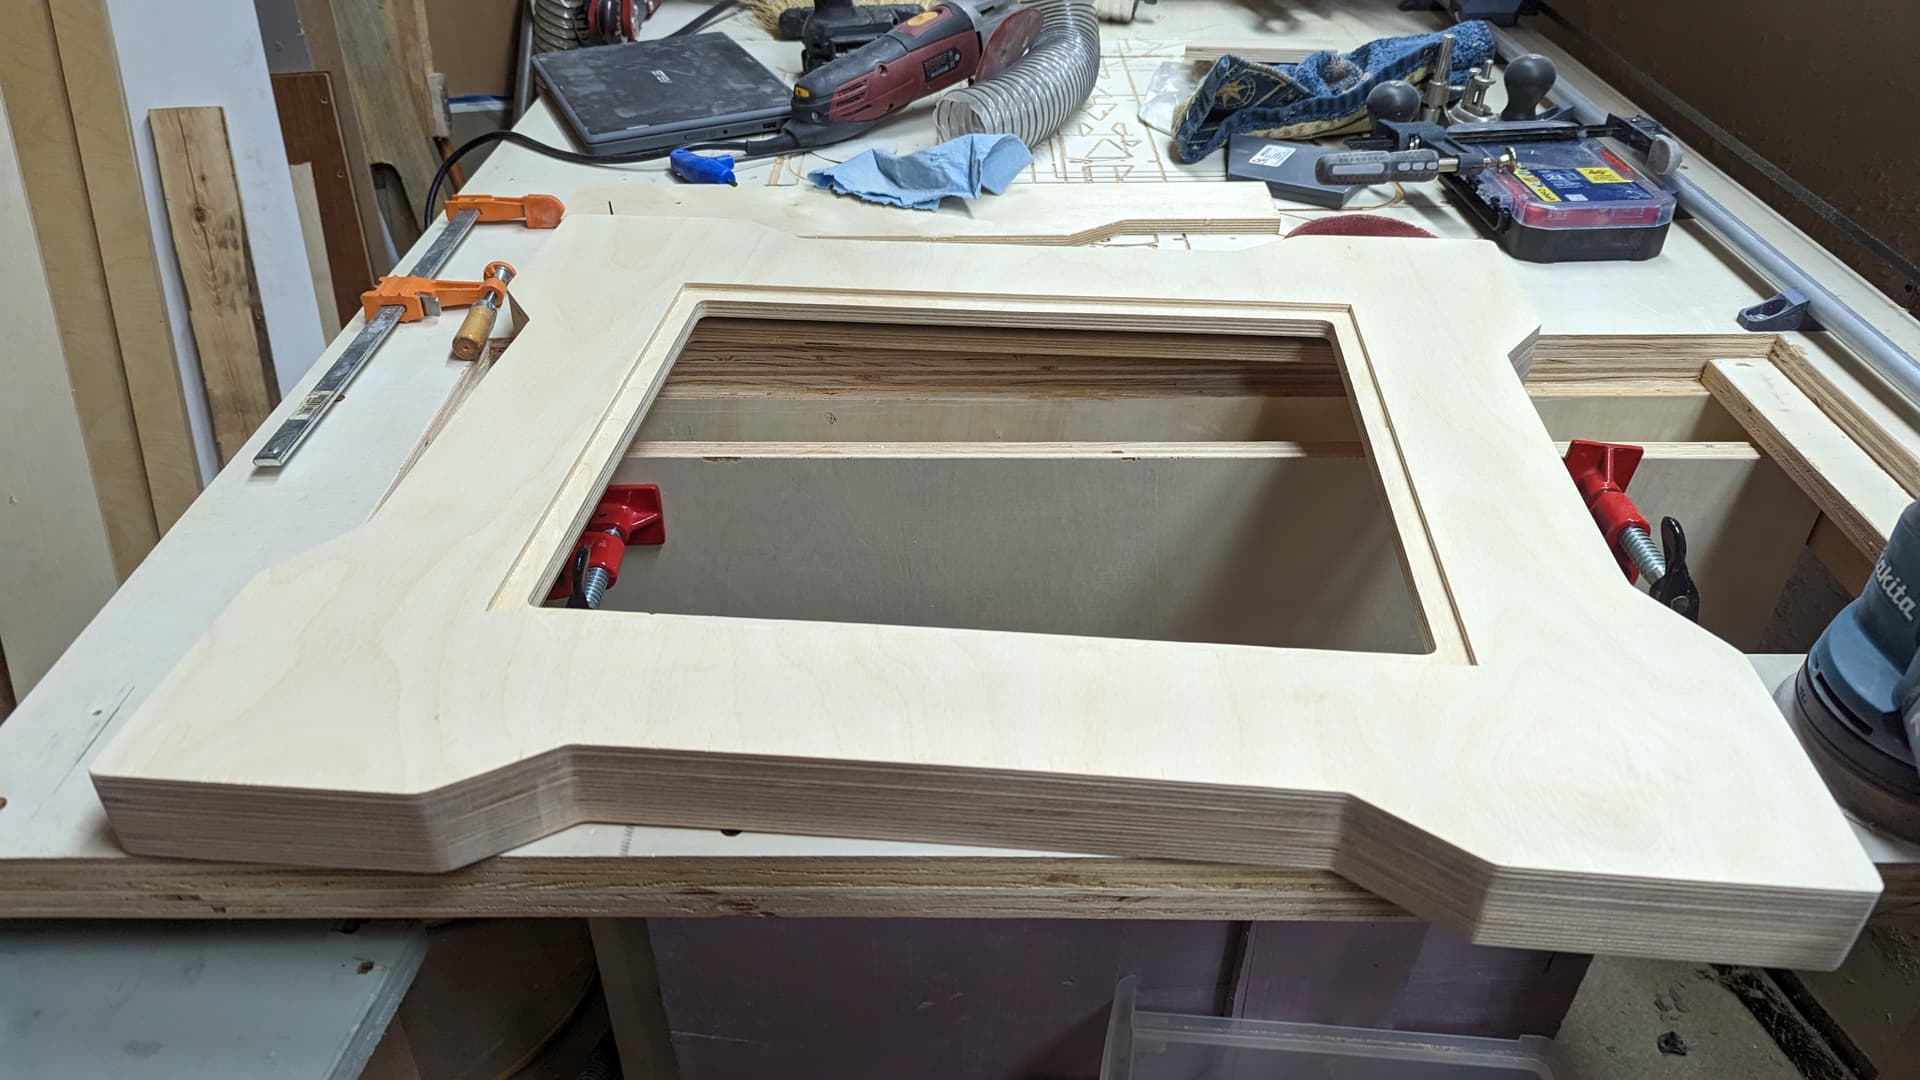
Here are the three layers just off of the CNC. Not much clean up to do, honestly. I am always a bit surprised when the object looks like it did in CAD. :slight_smile:

Aligning the layers

I didn’t cut the dowel hole in the top layer. I cut the top layer from the top, so there was no way to cut a hidden dowel hole in the top. I clamped the three layers together as best I could, and I drilled down through the dowel holes into the top with a drill press. The depth was set to cut about half way through the top.
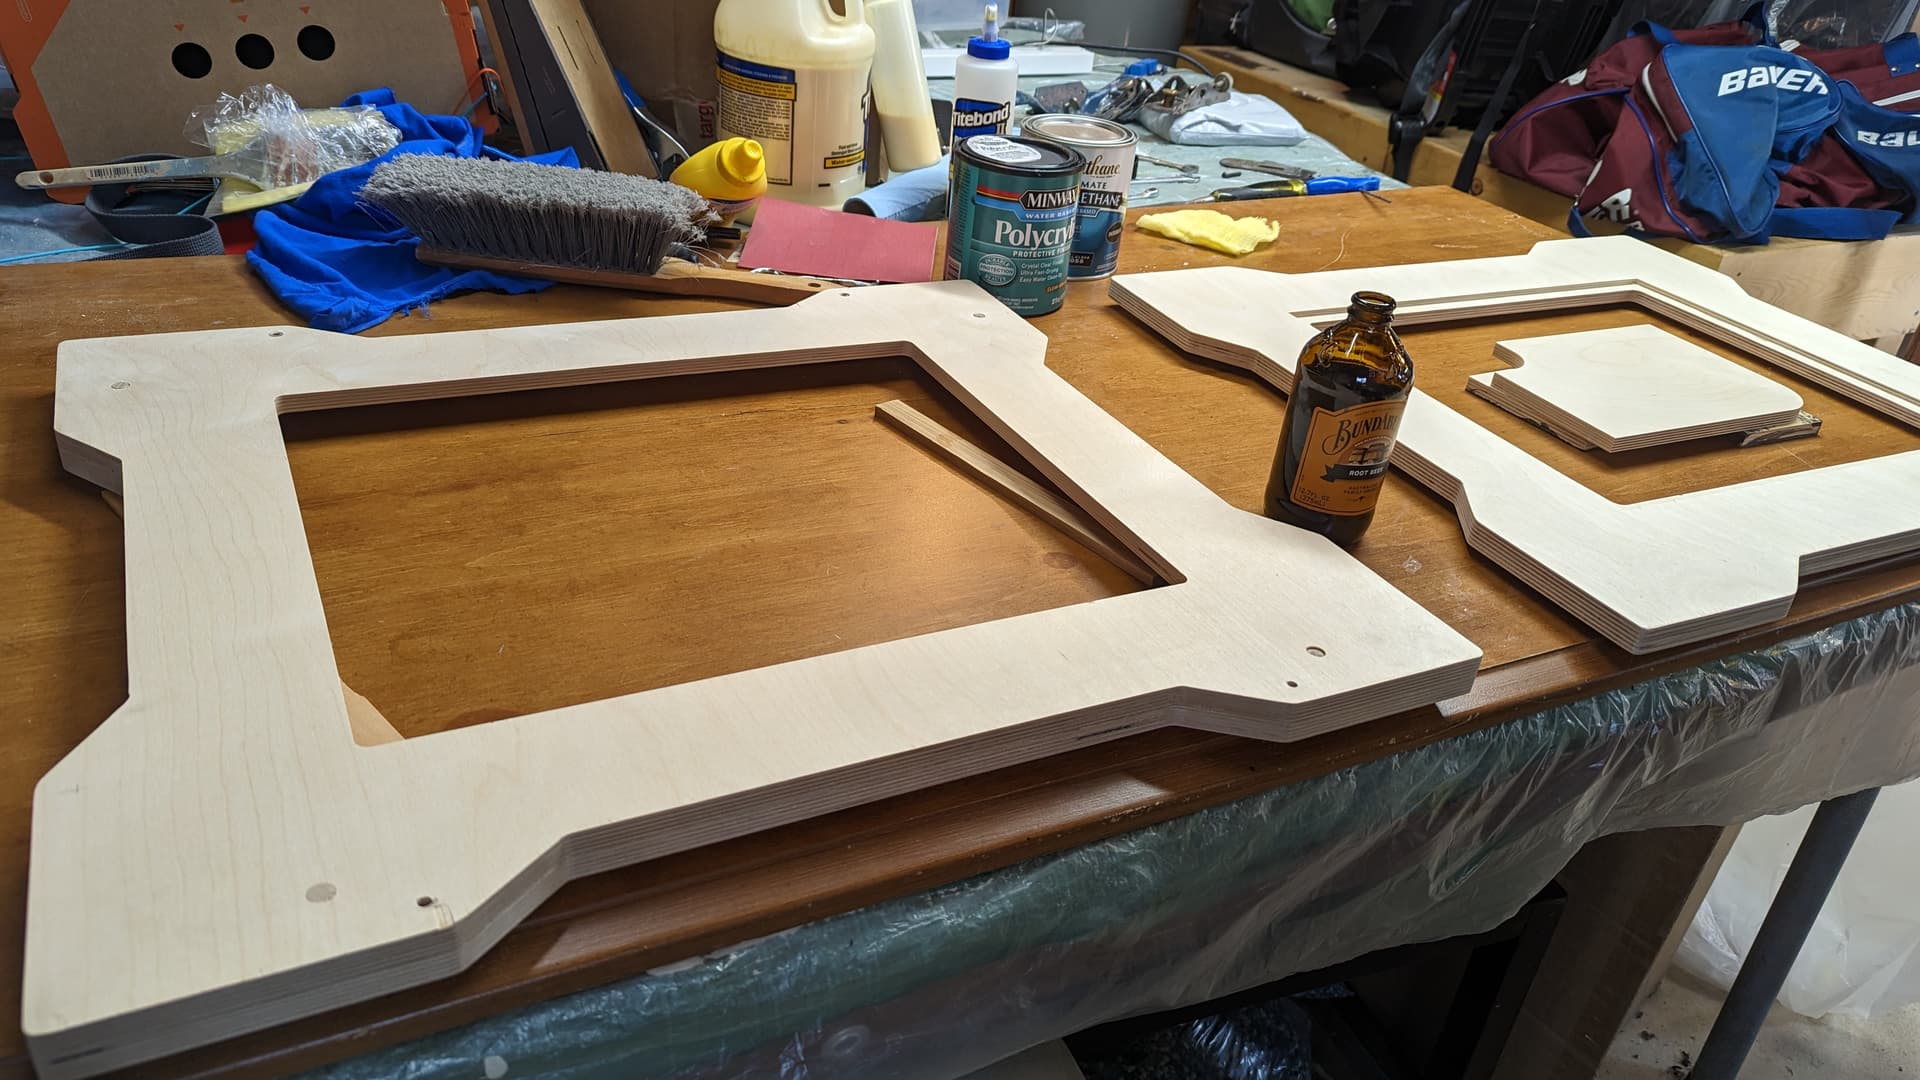
Glue up

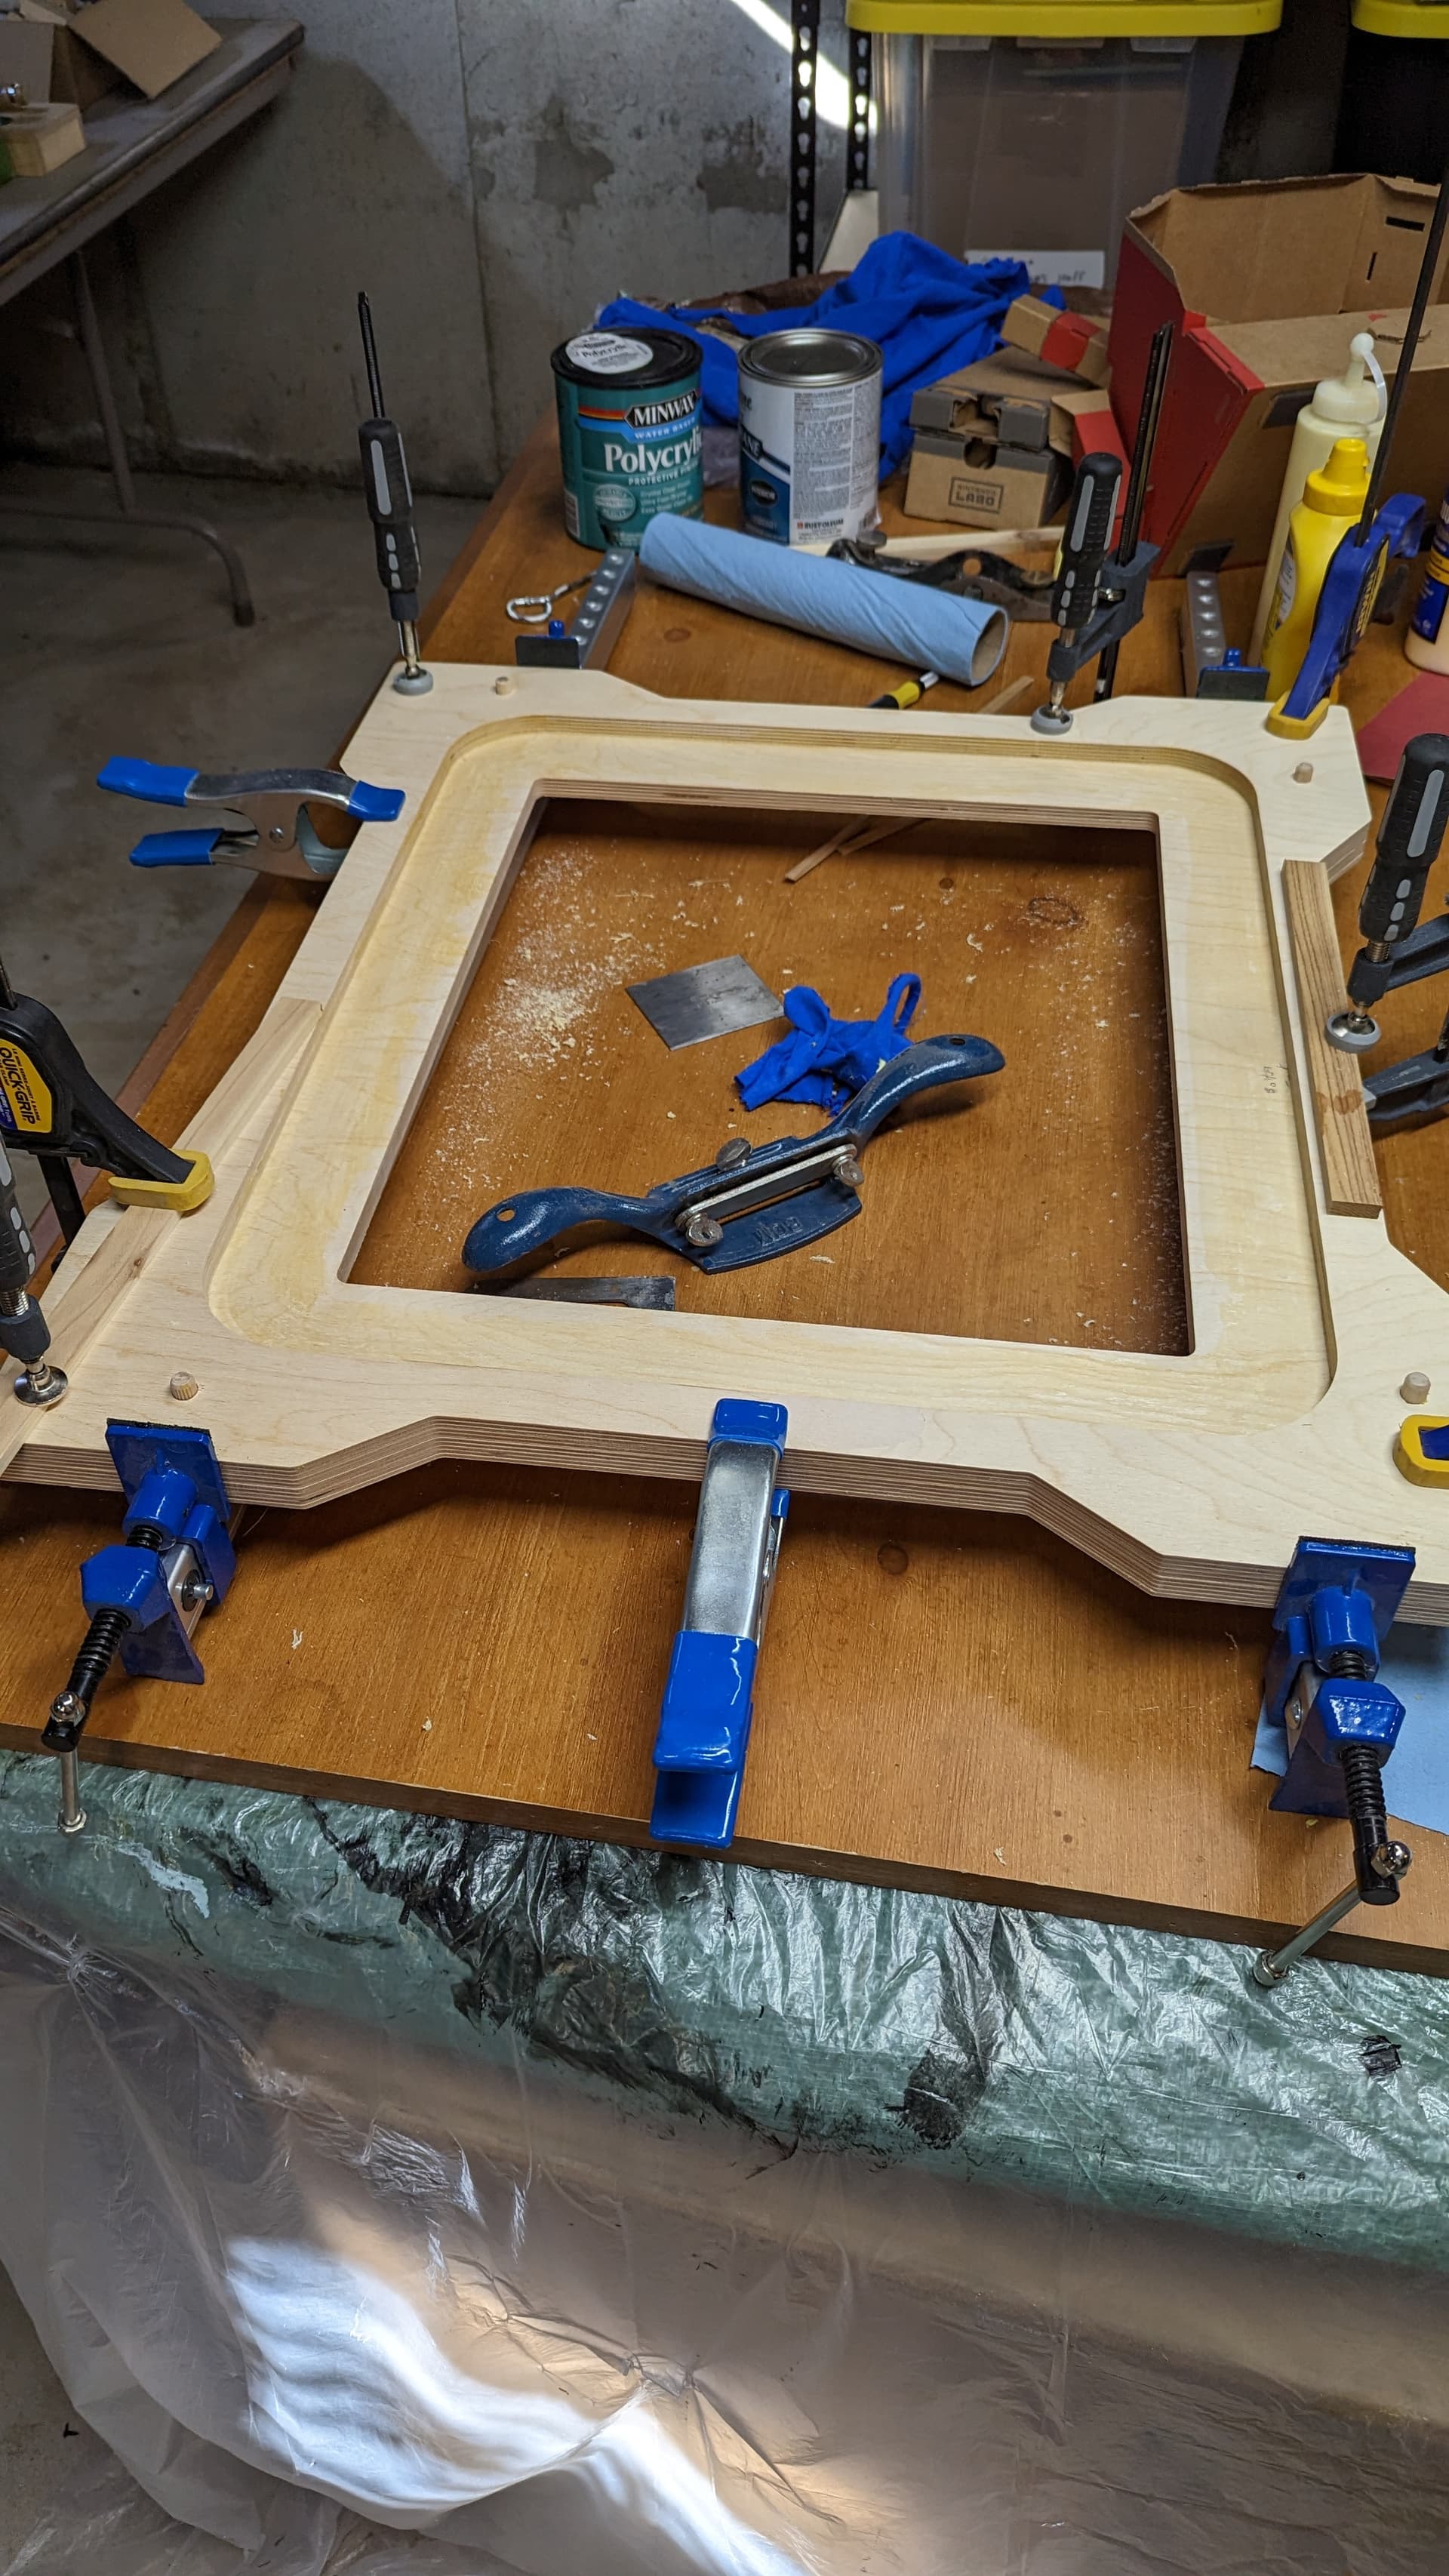
Today (you’re finally caught up with real time), I glued the bottom and the middle layers together.

I made a goof here. I slathered on a bunch of glue before remembering that the bottom is significantly smaller than the middle. So there was a lot of extra glue (a lot) in this LED area. I don’t think it will matter much in the end. I cleaned it as best I could with some scrapers. If it bothers me, I will paint that inner cavity white. Learn from my mistakes. Don’t do what I do.

15 Likes

Rocky Mountain Rep Rap Festival is on the weekend of April 22nd.

If anyone out there wants to be there in spirit, I would like some help.

Please help me make sand patterns to draw at the event

The machine is rectangular. The dimensions should be 20-400 and 20-330. If it is close, I will manage to adjust it myself.

Try making patterns at sandify.org. Paste a .zip with the .gcode (and preferably a screenshot) here. I will try to get a picture of your pattern back to you. I hope to get at least 5-10 patterns that are interesting for the RMRRF people and play them in a loop.

sandify can make text, import thr files, and has a lot of neat layer abilities to combine shapes. They don’t have to be perfect.

Thank you, in advance

5 Likes

Excited! The project is turning out great. I hope to try my hands at a pattern for you, I have a Rmrrf logo pack, maybe I can do something with that and learn something at the same time.

2 Likes

Wow just wow that’s awesome and I love the sandwich idea.
What a cool design I would love to try and help maybe it will get me that little push I need to get figuring the sandify out.
I hope you are open to ideas I have a couple very minor things that I have seen before and really made things nice.

2 Likes

Neat build, and neat software, thanks for sharing your React app at GitHub - jeffeb3/sandify: web based user interface to create patterns that could be useful for robots that draw in sand with ball bearings., checking that out too :slightly_smiling_face:

2 Likes

This looks very nice, I think I know what I’ll do with my lemon yellow Zen parts now.

I don’t have black 2020 extrusion, but what I do have is a bunch of 20mm square CF tube that did not get used for a repeat build. I’m sure that I can adjust the leg parts to make that work!

I have the Ikea Utrusta glass shelves, but the ones I have are longer, though they are the same width. Well, they’re also cheap enough…

2 Likes

I like it!

Looking forward to seeing the final project.

2 Likes

I don’t like it, I love it! :stuck_out_tongue:

And I am also looking forward to seing the build advance to completion. I have the 3D printed parts for the table here all ready to use.

1 Like

For sure. I may not use them, but I will be happy to hear them.

You can use some CAM to create gcode and import it as a layer. You can’t transform and loop it (yet). But you can do a background and then the gcode and then add something else on top.

I’m not up on the latest, but there are some tools for sisyphus (sisyphus for the rest of us comes to mind) to do some great drawing from images. Then you can import the thr.

Very cool. I will be releasing the cad and useful files (dxf, stl) when I am confident they will work. If they don’t, I will release them before RMRRF anyway.

That should work. You can’t fit both pieces in the ends, so I had to let the pieces slide in from the back, and I plan on using M5 screws and nuts to hold them in place. So you may need to edit the parts or add screw holes to your CF tube.

Thank you all or the positive comments. :beers:

3 Likes

Oh totally no offence taken on any crazy idea I give lol.
I just thought maybe it would be cool to do like the lowrider chrome guys do at car shows. (They put mirrors under their control arms etc so you can see all the detail underneath)
And have a mirror under your table to show the mechanism to ppl so they can see it easy while they view your amazing setup.
The other was maybe do the V1 evolution of the machines for sand table diagrams.
Like the low rider 1 then 2 then the recent one.
And same with the mpcnc.
Again just random ideas. Also I have figured out my code issues.

1 Like

The mirror is a really cool idea. I bet a lot of the leds are going to bleed down too.

My old LR1 is in pieces. I might have some of them. But Barry’s original parts are older. My old stuff is MIA. I will leave it up to Ryan. But my guess is we have too much stuff already.

1 Like

Just silly ideas I have, I was meaning like use the sand table to draw the old machine evolution.
Like to a sandify pattern of the lr1 in isometric format.
Then the next pattern is the lr2 kinda thing.
Can a guy do that like take a render and change it into gcode ? Or maybe a pic then to light burn. Anyways thanks for sharing your creation it’s great and has that futuristic look to it.

1 Like

Oh! That is cool. IDK if I have the talent to do that. But that is a good idea.

2 Likes

I have today off and there is no lunch league hockey today. I made some good progress, starting with my flat white latte.

I fixed my goof with this tool. It isn’t great (the movement is small) but it does fit into the corners. Very little of this surface will be visible anyway.

The top had a small gap to the middle/bottom. Just because one of them is not flat. So I predrilled a 4.5mm hole through all of them and a 5mm hole through the bottom and middle. An M5 screw threads in perfectly to hol the down down firmly.

Once they were all one solid piece, I sanded until my arms fell off.

That is the end of the “woodworking”. Onto the finishing!

The polycrylic goes on the boards. The root beer goes in me. First coat: :white_check_mark:

Next up: more finishing! 330 grit sanding, more finishing! Then in a really long time, I can start attaching the parts and release the files.

Is it really only 3 weeks away? :grimacing:

10 Likes

Dude

2 Likes

@Jeffeb3 Very Sexy design! What sand and ball are you using? It’s been awhile since I read up on the ZenXY… what the consensus(?) was on the best of those to use. Happy you are representing V1 Engineering at the Rocky Mountain Rep-Rap Festival. I usually got to MRRF when I can.

1 Like

It will be a 1/2" steel ball (chromed, I think) and baking soda.

1 Like

The legs are cut to length too. This looks like it will work great.

13 Likes

Oh man that’s classy nice

1 Like

Never done this before, but here is an attempt. It is a clearing path and then a few random V1E logos on the bed. You mentioned 330x400, so that was the bed size I went with. Not knowing the size of the moving tip, the spacing is at about 10 for the start and each logo was adjusted by the number of loops. V1E_random_logos.gcode (371.3 KB)


I think I need to build one of these now…

4 Likes