Pulling off of the v5 design thread to show my build… it is named Ron after the one in harry potter… as a silly reference to it being a red-headed stepchild. but it won’t likely win any beauty awards or be the poster child for this design. I share it as a way of tracking knowledge gained on the platform and hopefully contribute back something at some point.
the plan: I have a basically functional nonfunctional anycubic kossel that is terrible and a few motors. I bought a 200x200 bed and I got an skr off ebay recently (thanks ryan). The anycubic runs klipper and has a camera, so that will all transfer excetp its mini e3v3 is up for sale/trade if anyone is interested, DM me. It has probably a couple weeks of on time not really doing anything and has the latest klipper on it: 4 channel 2209’s and an ender screen.
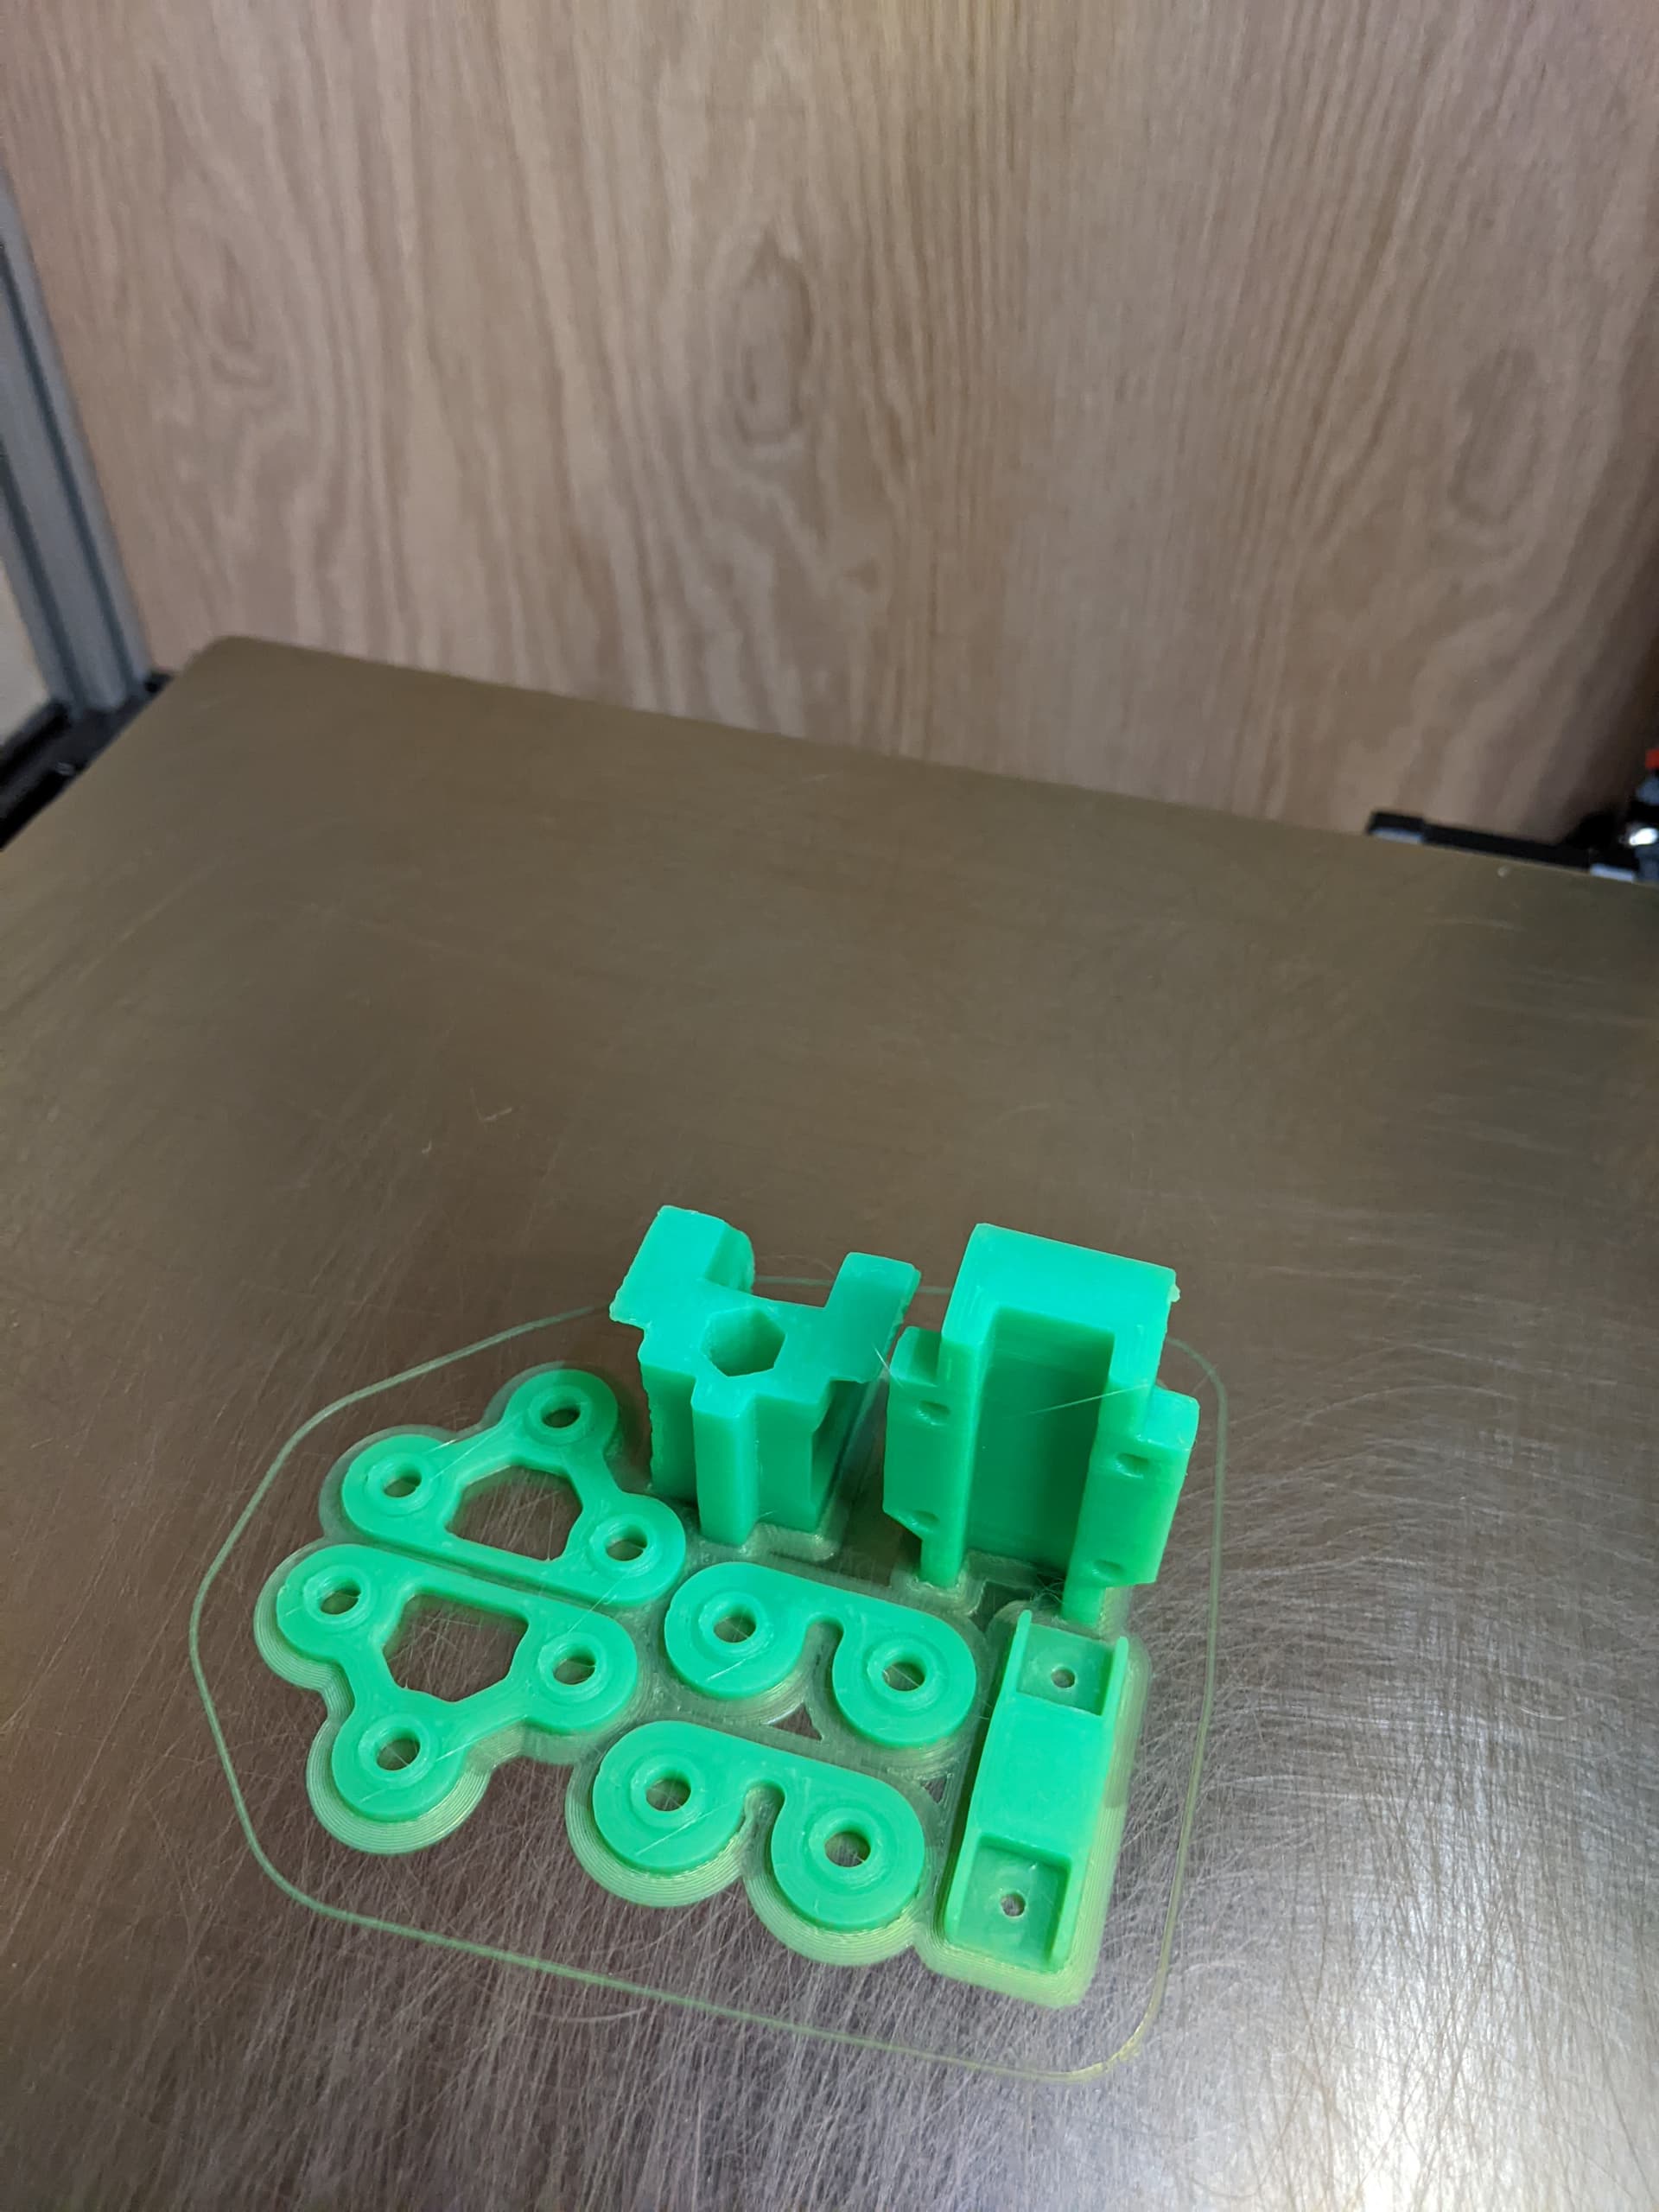
the v5 will use the wheel carriage to see how that goes for both Z and Y with the intent to put in linear on the Y, but not yet… (somewhat expecting some internet hate for that choice) because it is a budget build for now an it is going to be 200x200 and enclosed, so the granny apple green will likely only be the first round of parts until I tune for the black PETG or blue ASA as the print capabilities level up around here.
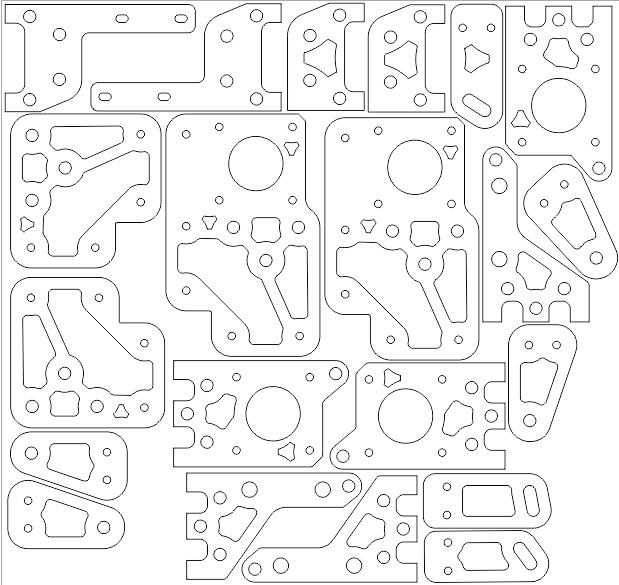
I posted the question of part orientation and showed the CNC mill part layout.
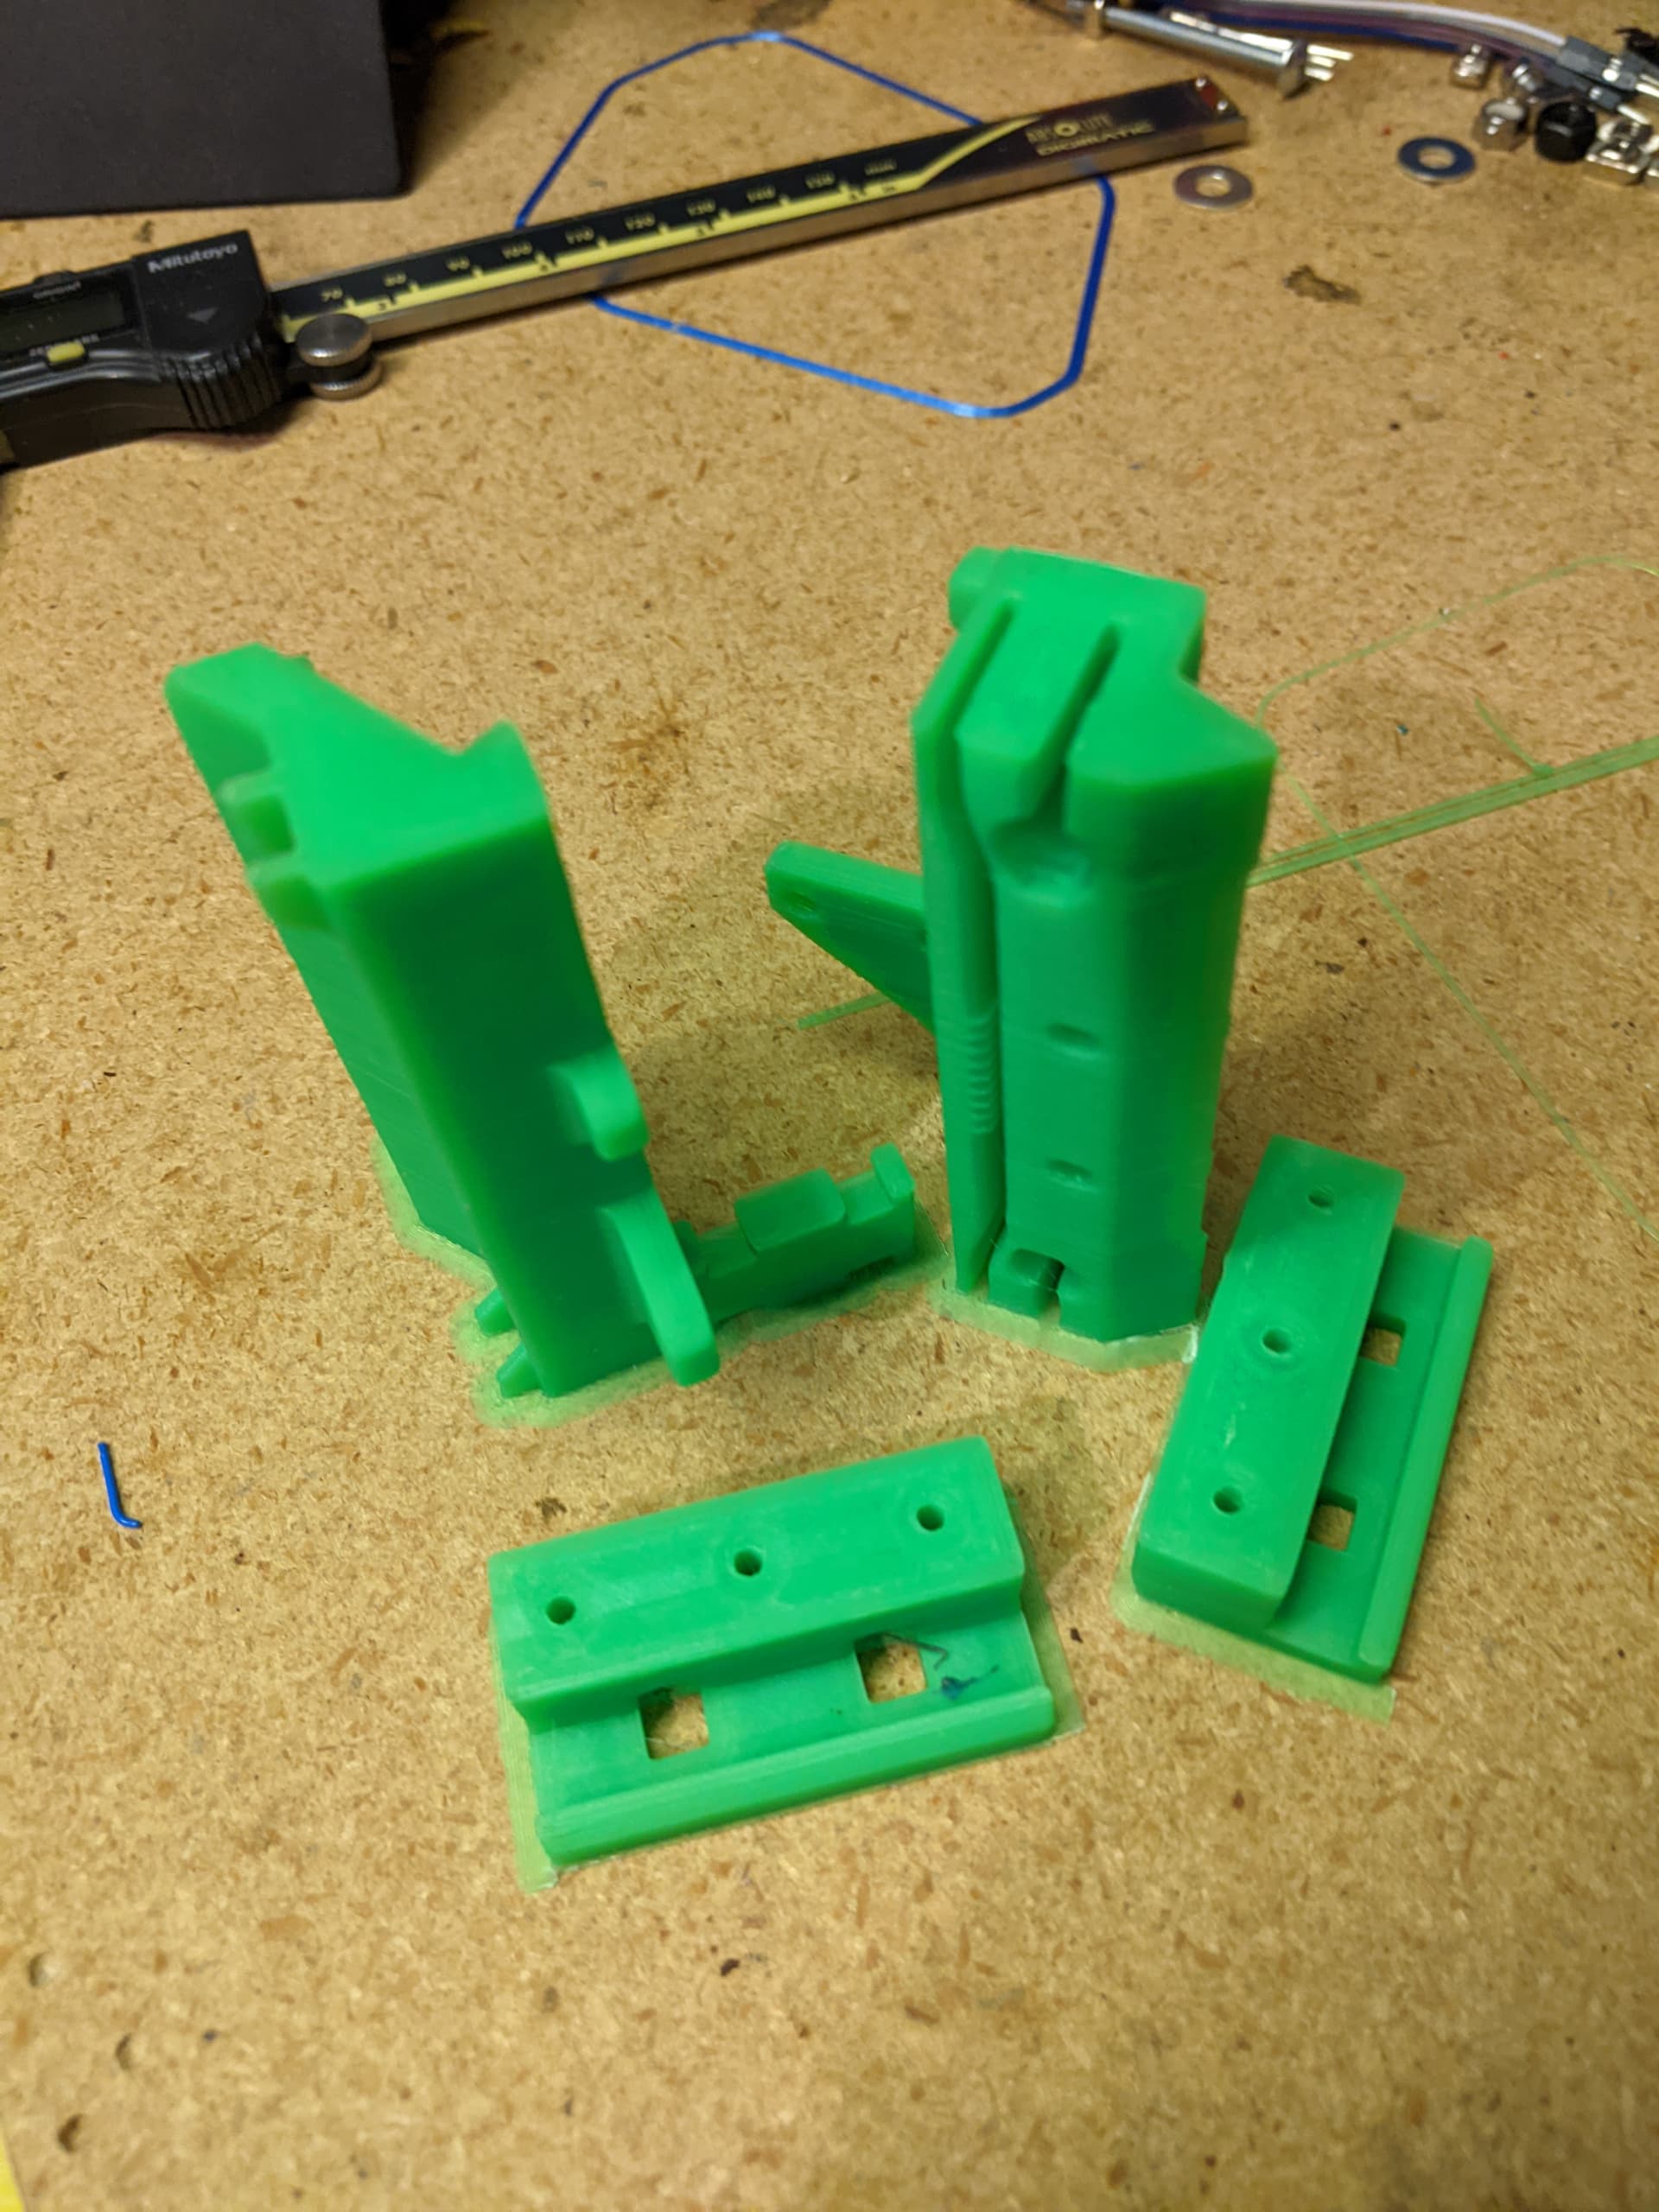
One of the Y parts was " upside down." I got that after the print was started, so it actually printed anyway:
I plan to laser cut this out of leftover acrylic and if possible see if I can get the cracked mpcnc to make them out of scrap 1/8" aluminum. So far I’m into this build about $60-$70 including the skr board, the filament, wheels, and new heated bed. I had some short extrusion pieces from the v4 build and there will likely be some hardware needs such as belts, bolts, and a couple pulleys, but I think most of this is spare parts laying around. the anycubic has a terrible bowden on it and that might need to get swapped with an H2V2s, so that would double my investment, but we shall see… Thanks for reading this far. Hopefully ron doesn’t turn out to be the fatherless child it seems it is destined to become… stay tuned.
No hate here at all. I am very curious to see how it goes. Its not the plan for my build but that’s the great thing here, we can all be different!!!
Same board I have on both of my Ender 5s. And I am now running dual Z on the E5+ after going to CANBUS freed up the extruder driver on the board. Great little boards! Just not enough drivers for the MP3DP with triple Z
Thank you for posting that! I have started my core print but going to have to do some work on Z offset. Have to leave in a few so going to mess with that when I get back.
Your parts look great! I am assuming that’s PLA? The green I have is a few shades different and its ASA. Figured I would go ahead and start with that since I plan to have this one “Enclosure ready”
I can post that as an svg if it helps…
It is PLA because I think I finally have PLA figured out on the v4 at least at low speed. i’d really like to triple the speed, but that gets complicated.
I think I’m good now. Most of it I can figure out just because I know how Ryan models things lol. But having something to look at that he double checked is always good!
PLA was the easiest to print on my V4. And I’ve gotten the speed well past what I can cool lol. Nothing has changed except it hasn’t been used in a month and now my first layers are all screwed up. Just got back home and about to try and get it better. They aren’t far off but anything is too much for ASA lol
So i was reading a klipper post about the manta board and voltages… the skr pro 1.2 states it can take 12-24V. The heated bed I have is 24V. Would it run on 19.5V? Would the power supply be stressed or would it just take forever to heat? I’m lazily asking because I dont’ feel like sorting through google if someone already knows (@MakerJim?)
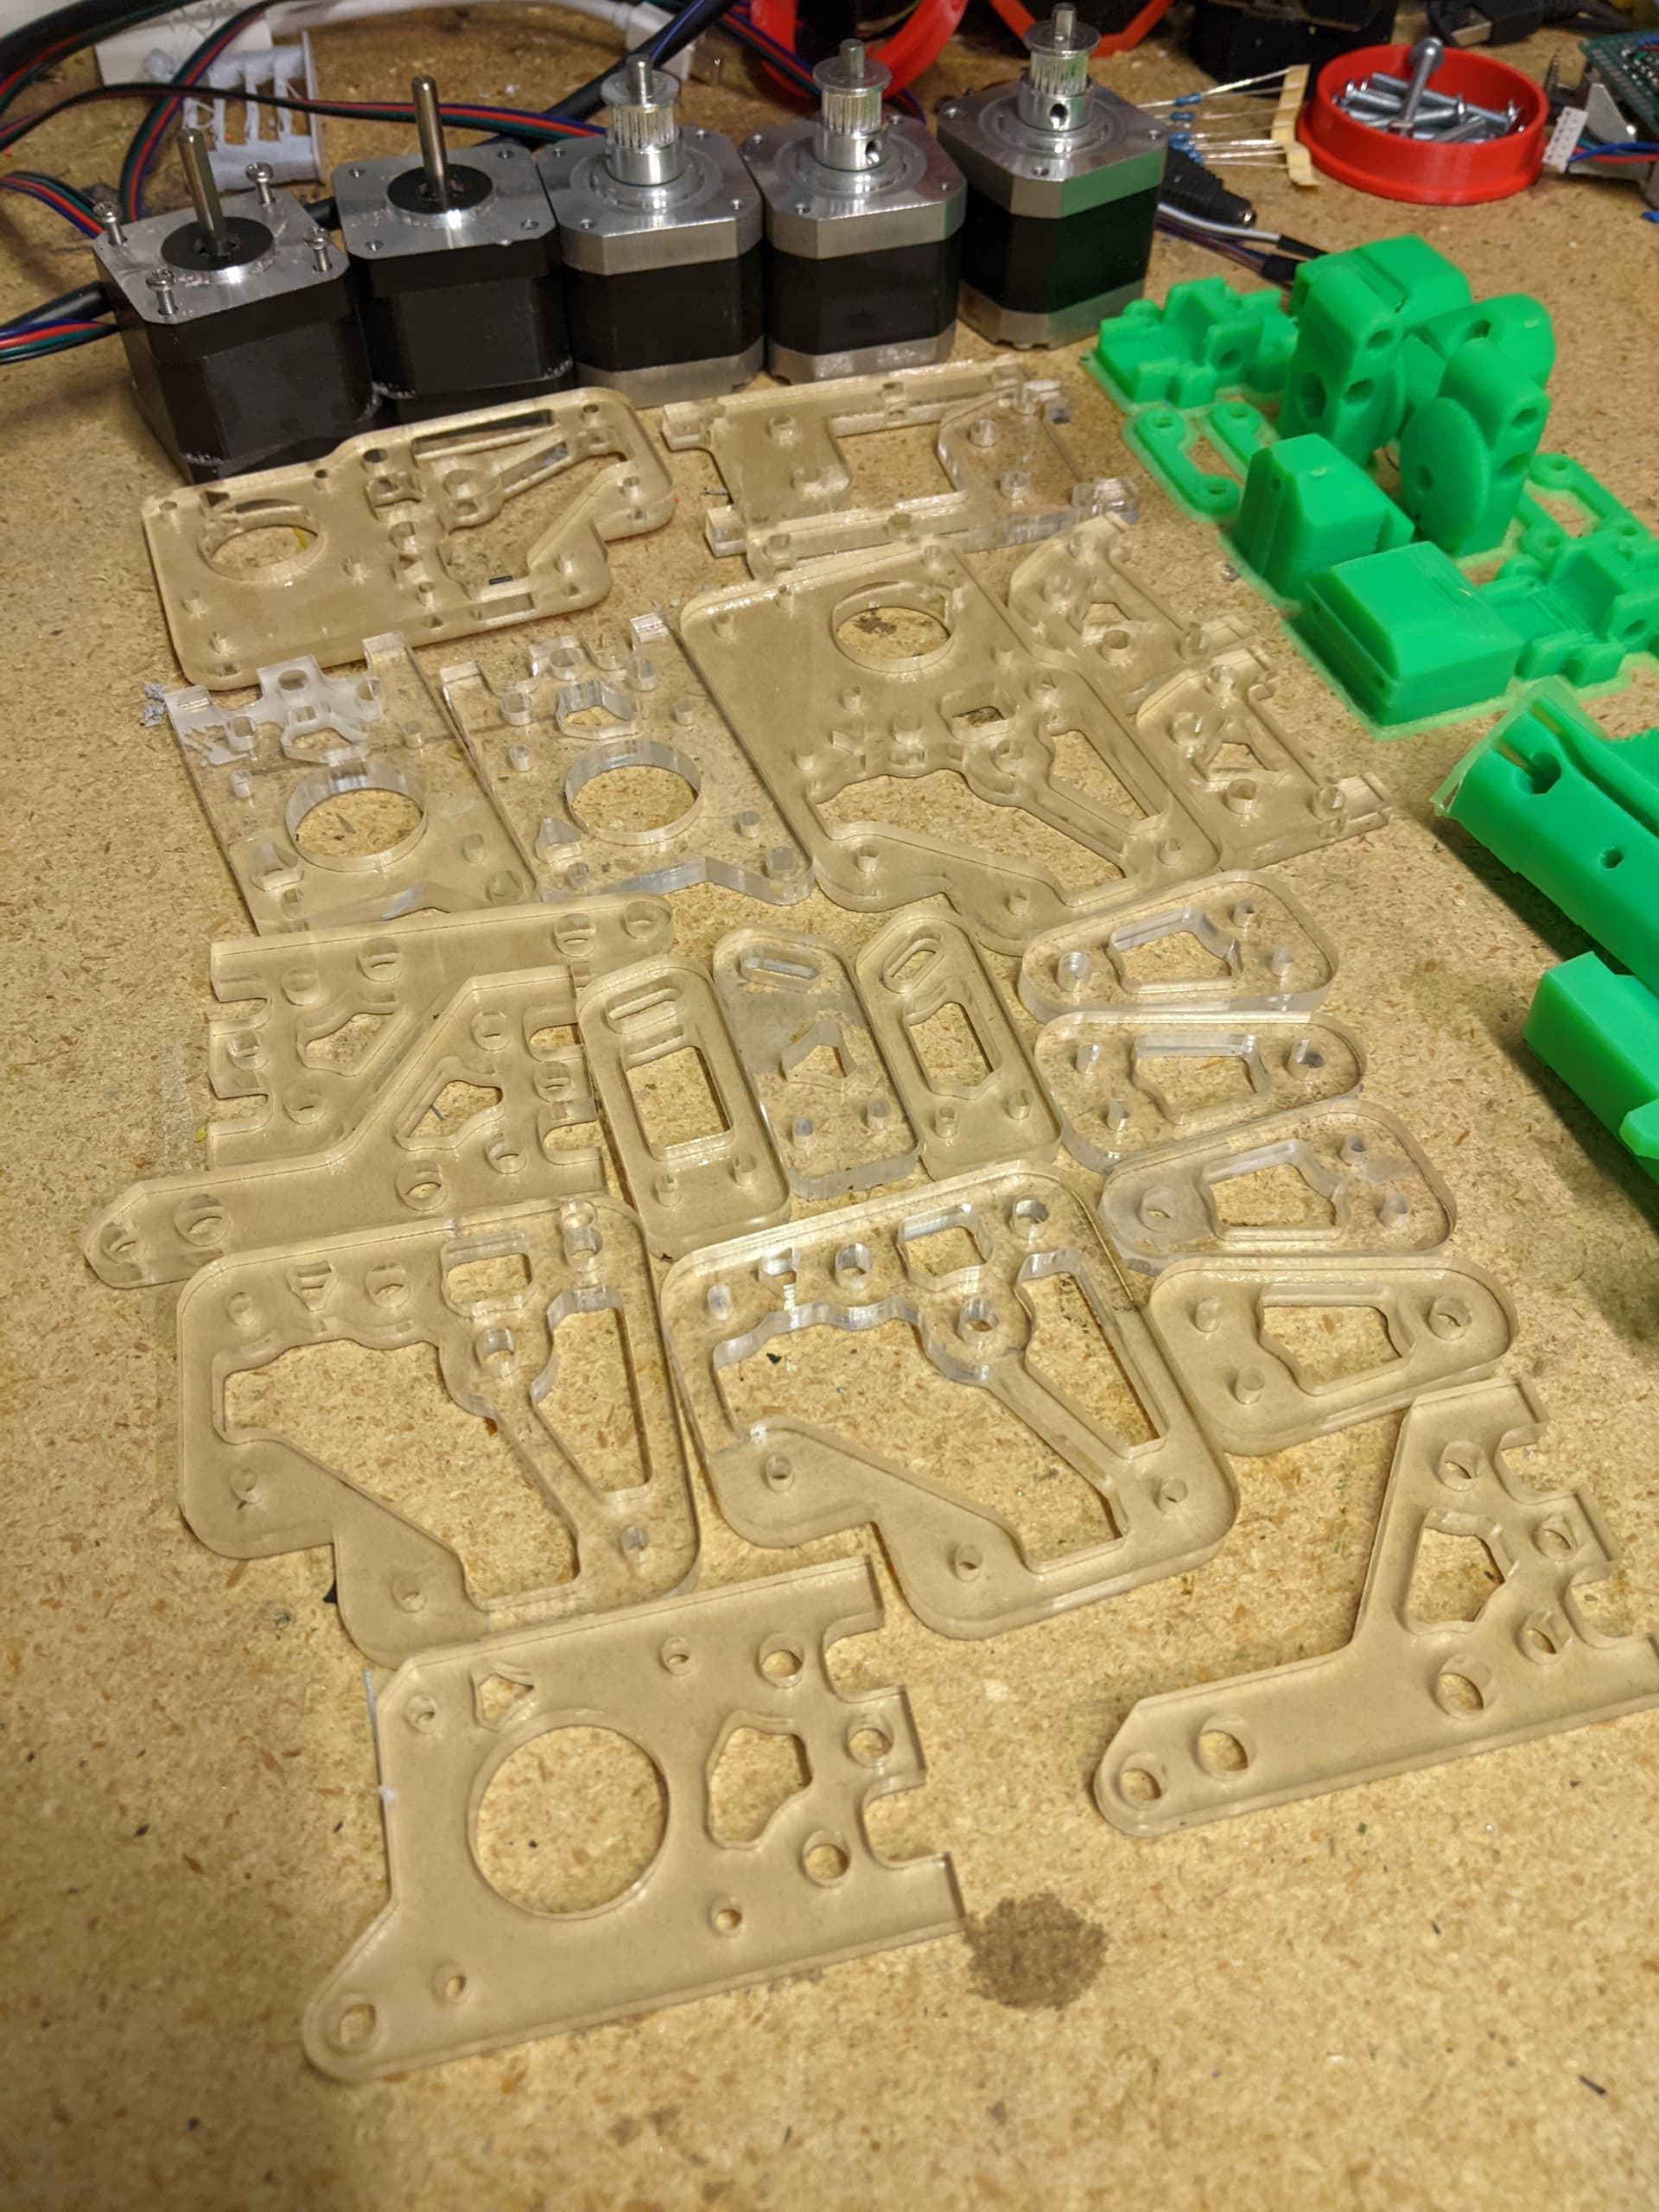
It is an 60W CO2. We don’t cut polycarbonate with it, only acrylic and only because I had a scrap piece the right size. I think I feel about cutting aluminum kind of like @DougJoseph has mentioned about his voron build: nervous; for good cause.
So probably not a good idea to use a 150W laptop power supply brick?
EDIT: 19.5V on a 220W bed, it will need ~11.5 amps and the 150 only rates at 7.5, so it will get too hot. at 24V supply could put out that much power at just over 9 amps.
I am going to be cutting my Aluminum parts when I get back from school end of next week/first of week after. Going to do my best to document everything and post plenty of pics/videos to try and help everyone feel a little more comfortable to give it a shot.
bolts (I just picked up a box of 10-24 bolts for the sandwich composite parts)
x and y linear rails
belts
extruder / hot end
extrusion (short by a couple sticks)
I’m rethinking the “budget” aspect of this. If it is worth investing the time, it is worth doing right, not just twice, so parts will be acquired as the side gig provides means to get them.
After having redone my V4 2-3 times it can go either way. I learned a ton and changed things I wouldn’t have changed before the first build. But then again this isn’t your first build so that might not matter here. I do hope that I can put this one together and use it without having to redo a bunch so I get exactly where you are coming from. And I think this design is proving worth a nice build.
I went back and forth on keeping the v4 or dismantling it and building a V5. Ultimately decided to keep the V4 as it is and just build another from scratch. Every time I look at the V4 and know what all it took for me to get it working like it is. How many mistakes I made that I had to go back and learn and fix on it. It’s become pretty sentimental to me lol. And now that it’s all dialed in good I just can’t bring my self to take it down lol. I’ll retire one of my other machines before I do that lol