I agree with this 100%
Sounds like a good idea, thanks. I’ll have to try to figure out how to do that in Mach3.
I don’t see any option to input gcode commands directly. There’s nothing like a live console that I see. Like I said before, I need to do a little more research…
[quote=“MakerJim, post:100, topic:50176”]
I’d do a motion test
I agree this will help find your problems.You do not need to remove the belts, if you do the distance test.
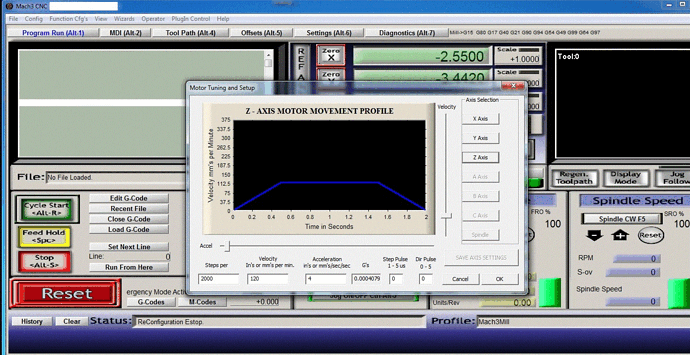
I don’t know what version of Mach3 you have. But I’m sure that in your main screen you have a Setting tab and also a Config tab. Under the Config tab you will find one labeled Motor tuneing. Click on it and choose which axis you want to set. You should see a steps per unit and also Units. You should be able to set the steps.
You will see you also can set your ramp speeds and max speeds here.
Now I do not know what changes have been made over the years.
I don’t know for sure the interactions between the settings and configurations.
Britts gcode file using MillMage includes the comand ‘G21’ which
should tell Mach3 to run in mm even if you are set up in Metric. I have no experience in using it, quick Google says it works.
I
Can someone tell me how to edit and do strikeouts ? I have tried tildes and strike. Strike sort of worked but it deleted what I wanted to strike out and strike out the remaining text.
double tildes with no spaces
So, this:
~~strikethrough test~~
becomes this:
strikethrough test
Thanks Iwill try again, I must have done something wrong.
Ah , I had a space after the first set of tildes ![]()
Thanks Larry! My Mach3 looks like that top image, but nothing like the bottom image.
I tried going into motor tuning, but it threw an error 9991 and crashed the program.
I need to figure out what that’s all about.
I’ll be away from now until Sunday evening for a convention out of town, but I’ll investigate more when I get home. Please bear with me, I’ll look into it asap.
Really, at this point you have the steppers running. You can save yourself a lot of headache by switching to newer controller that others have suggested. The newer controllers have the drivers onboard and are replaceable. mach3 was and is a good program, but you will spend too much time trying to get it right.
I havent played with the Jackpot yet, but you will find a lot of help here with it. I sure you would like to spend more of your time making chips. To change over to the newer boards at this time all you need to do is add the four pin connector to the end of your stepper wire and plug into your new controller.
One other thing, the TB6600’s will make a lot more noise. Your SK board would also work and I believe others here can get you going
I am happy to help you with the Mach3 but I am no expert with it.
I got it working on a CNC I built. Running good enought to drill and mill thousands of PC boards. My Burly is my goto now, still running a old Arduino Mega and RAMPS shield.
Hmm, and I am here doing it with sdasd <s> and </s>… ![]()
Yea, Discourse seems to support a collection of formatting options.
Formatting posts using markdown, BBCode, and HTML - Documentation / Using Discourse - Discourse Meta
Thanks everyone for all the help and tips thus far!
I just ordered a Jackpot controller (and SD card) from Ryan.
I’m looking forward to a much smoother experience from here on out. ![]()
However, I’m certain I’ll need help with the setup. I’ll report back as soon as the new goodies are here! In the meantime, is there documentation I can be reading, to prepare for the install?
Someone mentioned that I’ll need to swap out a connector…
Start with the Jackpot docs:
https://docs.v1e.com/electronics/jackpot/
The Jackpot uses a different style of inlet power compared to SKR Pro (a terminal block on the Jackpot vs two pairs of ring terminals on an SKR).
Be careful not to twist/over torque the power inlet connector on the Jackpot and risk breaking a solder joint when wiring up VMOT. I use crimp ferrules for that wiring and recommend it over just stripped stranded wire.
Your ensdstops and stepper motors will go to the new locations on the Jackpot but the connectors are similar so should pose no issue.
The enclosure/mount is different, so you can figure out what you want to do there and can start printing that and deciding where you want to mount the jackpot on your machine.
Beyond that, it should be pretty straightforward.
Different how? I can’t just mount the Jackpot in the place where the Mach3 board was in the enclosure I have now?
Also, I have dual 12v PSUs. I notice the docs mention using a 24v PSU. Will this be an issue, do you think? I don’t know the total power of either of my current PSUs, I’ll need to check.
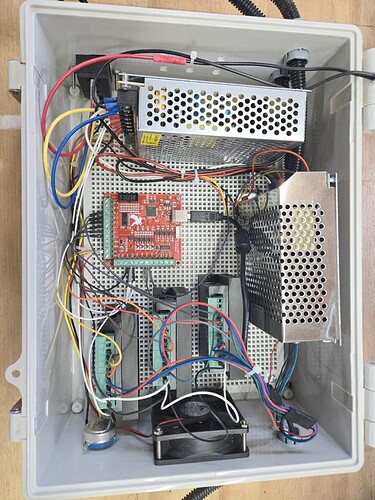
You can install the Jackpot in your existing box (enclosure), but the hole pattern isn’t the same as the Mach 3 board.
You have a really nice enclosure which I’ve taken the liberty of re-posting here below. I’m not sure if someone made a shim/mount or just drilled holes in the grid to mount the Mach3 board, but you’ll need something to mount the Jackpot.
In re-reviewing this, you have external drivers, so you’ll need to pull the stepper wiring out and put connectors on those to plug into the Jackpot.
Sorry, I thought you had an SKR pro, not remembering it is that Mach 3 board.
Remind me why your current setup needs dual PS? Does one run a spindle and one run the controller? I think that’s what your first post picture shows. If one runs the spindle, it looks like that spindle has multiple wires, implying perhaps the Mach3 board has a spindle controller.
This will be something we’ll need to work on, so lets start lining up the details and documentation for what spindle you have, and how that spindle is currently wired to the Mach3 board.
Jackpot works fine with 12V or 24V power supplies, so the voltage is fine. We just need to sort out why your original setup had two PS.
Yeah, I plan to pull the drivers, which will give more space in the box anyway. ![]()
Any idea what the connectors are called that I’ll need for the Jackpot? I’d like to go ahead and order some, and whatever tool is required for crimping them on.
EDIT: Wait…don’t the steppers connect directly into the jackpot? They already have connectors on them.
Correct. One drives the spindle through a manual rheostat. I have no idea why, as it means I can’t control spindle speed in software. I assume that will no longer be a thing when I switch to the jackpot, right? I’m guessing it handles spindle control?
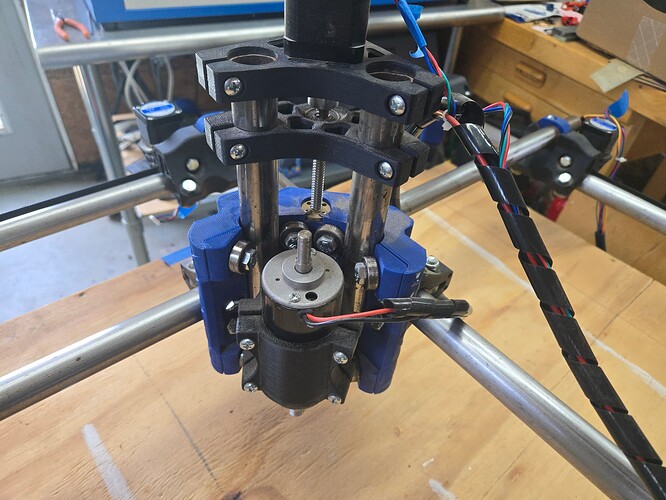
The spindle is super simple, just 2 wire direct drive, as far as I can tell…
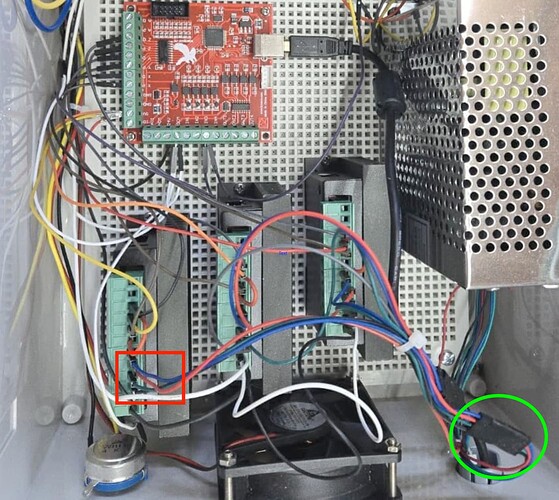
OK, taking another look, It appears your external drivers are wired with an extension pigtail. On the left and in the red box is where one of your stepper motor wiring is terminated in the driver. Over in the bottom right is where that set of wire pigtail comes to mate with the existing stepper motor wiring. If you separate that harness, then the stepper motor wiring should be able to plug directly into the jackpot.
OK that’s cheesy- but it works.
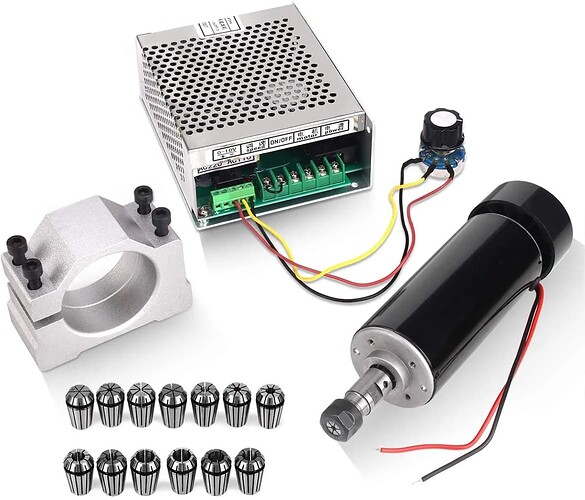
That means your spindle appears to be just a simple DC motor. We need to compare the ratings of the power supplies. I suspec that the reason you have the PS dedicated to the spindle is that it is electrically noisy as all hell.
You will be able to keep this setup with the jackpot, and I’d leave the spindle power supply and speed adjuster alone to start with. It does mean that you will have to manually controll the speed just as before.
Eventually you may want to upgrade to a different/better spindle. If you do, then you could swap to a trim router and still manually control that from it’s own speed control. You could also upgrade to a spindle that the jackpot can electrically control the speed from.
That’s a much more advanced setup so I’d do this in steps/phases.
Edit: Next thing to think about: Is your enclosure metal? If so, then you won’t be able to use the jackpot WiFi unless you get an ESP-32 with an external antenna pigtail. If it is plastic, then depending on what kind of plastic it is, it may or may not be sufficiently RF transparent to allow WiFi connectivity.
If it’s anything like the garbage one I had, those spindles are ~100Vdc or something so that power supply is the power supply and ‘speed control’ (for whatever that’s worth) combined.
@Elmojo Do you have a photo of the spindle? There’s a good chance that it may be a worthwhile thing to consider upgrading…
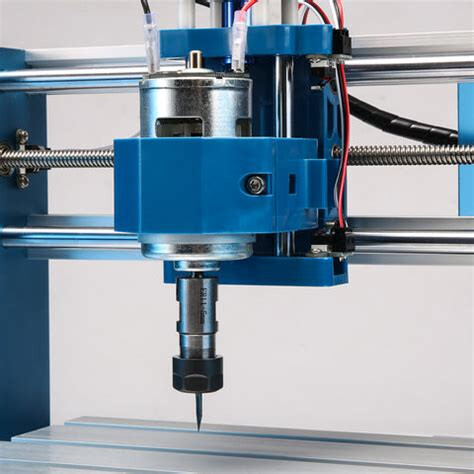
That looks to me very much like one of the “775” spindles you see on a 3018 CNC. If so, it’s either 12V or 24V DC.
More details are surely worth gathering.
These are surprisingly capable in a machine like the MPCNC or even like the MPR&P- as @dkj4linux has shown. Though he’s also moved up to a trim router as he contines to explore the considerable performance envelope that the MPR&P turns out to have.
Looks more like the typical 500W spindle, to me, just with the fan removed from the top.
It may well be that you can get good enough performance from them for a MPCNC. I certainly don’t think the performance of mine was holding my machine back in its previous long-rod configuration. I’ve also seen enough people complaining about runout issues with them and with mine the bogging under any load with the speed set to anything slower than maximum really made it difficult to get the machine to work well. For me, at least, moving to a trim router removed an entire set of problems and made my machine actually usable.
It wouldn’t surprise me at all if there’s a trim router upgrade in this thread’s future.
I’m really curious now to see what the specifics of this machine’s hardware is.
These are big complaints with the lower end spindles. I have a ‘775’ spindle in my junk box that came from a kid at the local makerspace. I gave him one of the '775’s from my no-longer-used Twotrees CNC 3018 Pro. The one I had was respectable. The one he had with his machine was garbage.
Back to watching with interest as we discover more about this topic’s MPCNC and get a chance to make recommendations or do some benchmarking of what’s there.
