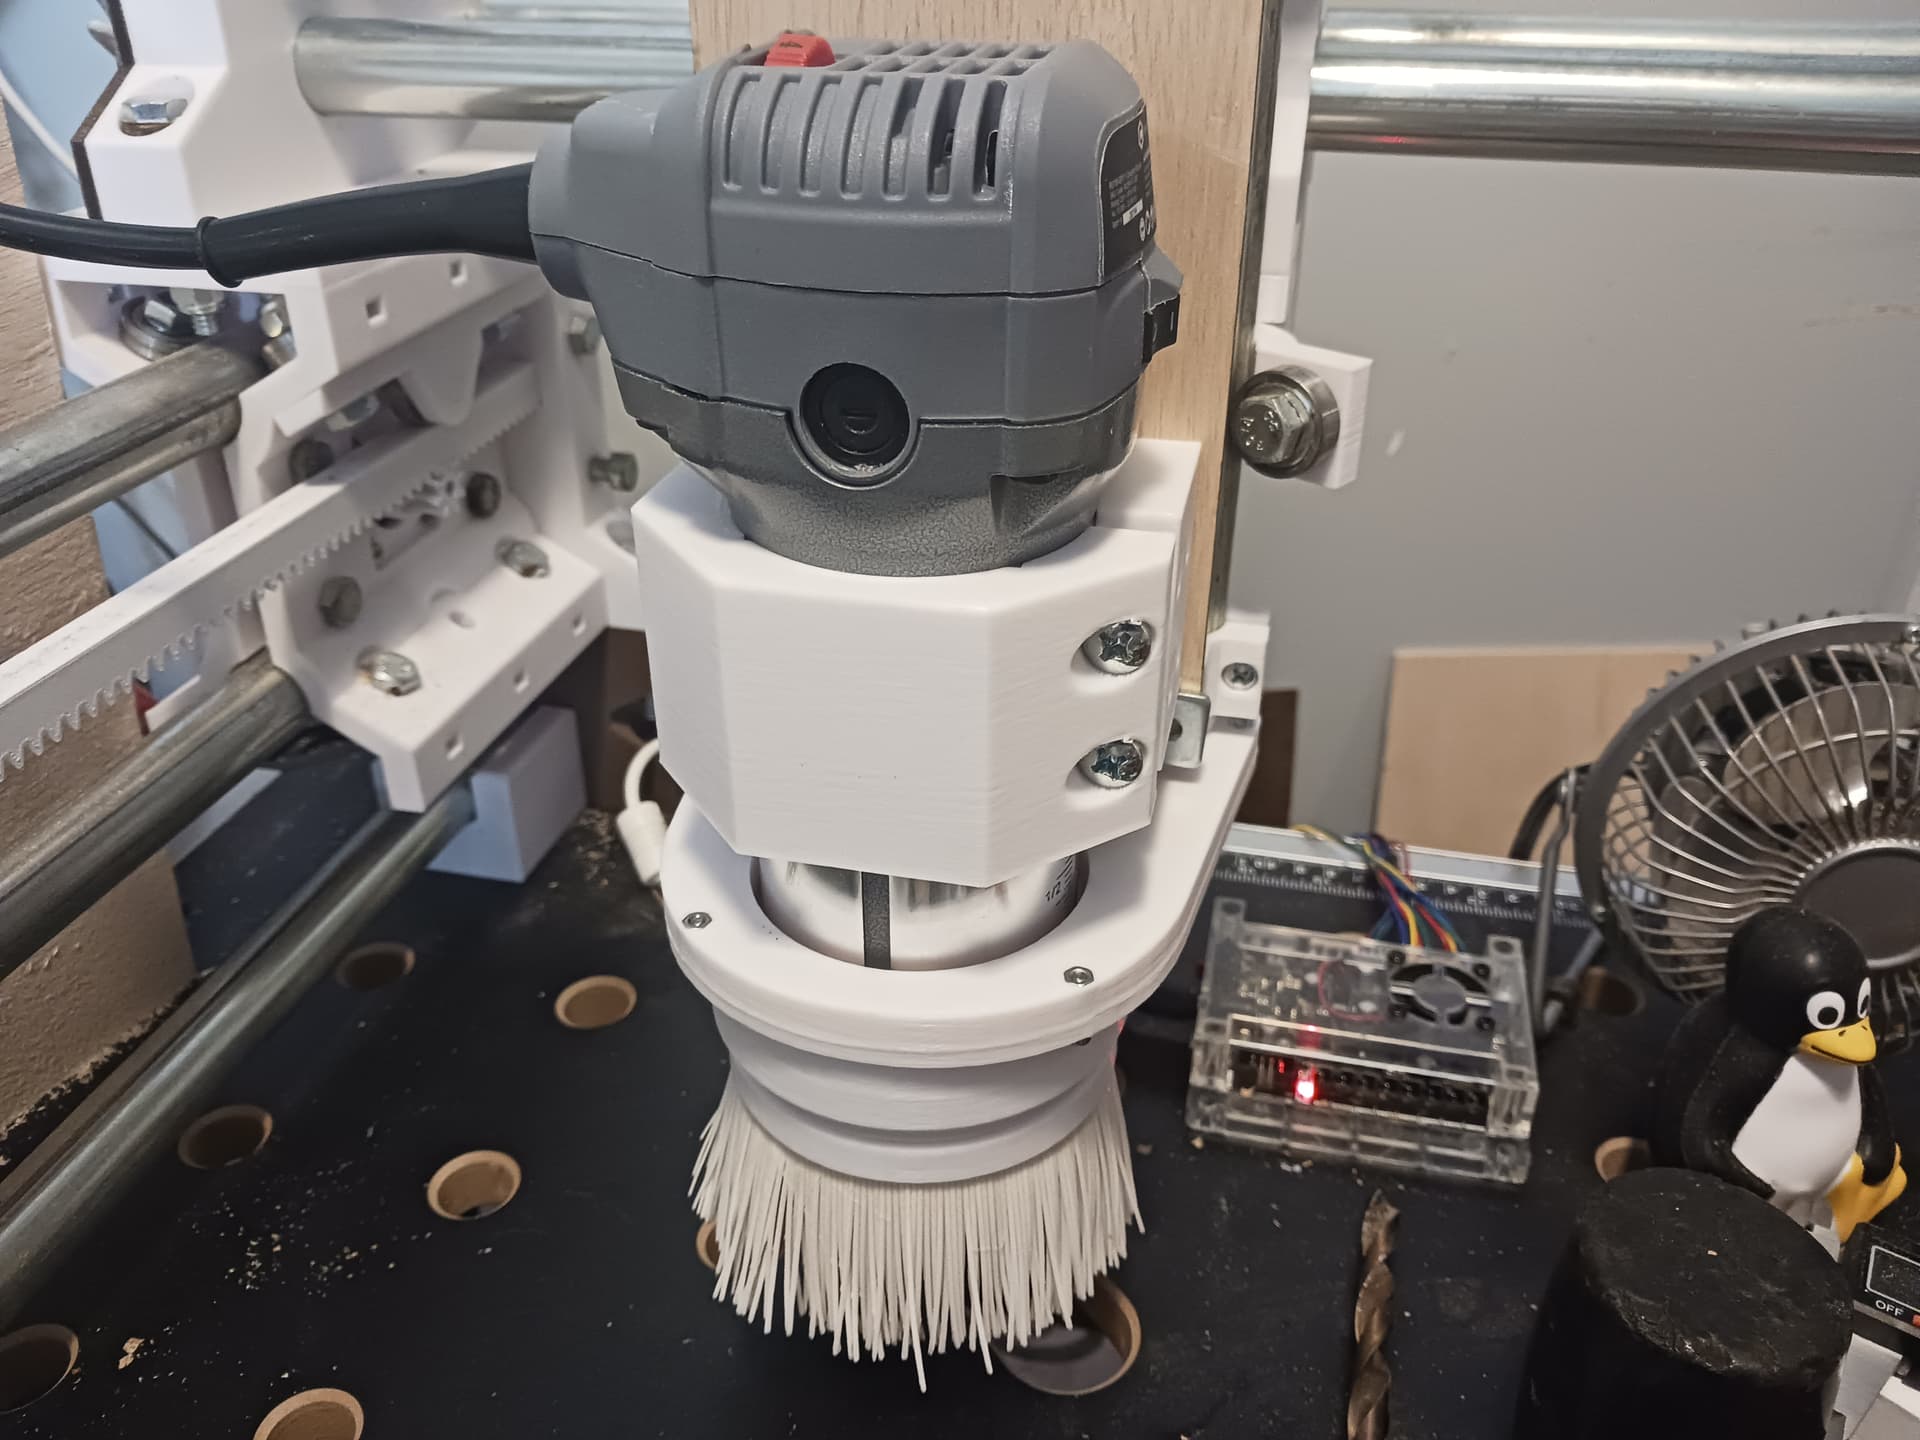
I was wondering about that. The fan from mine is in the box of junk that came with my MPCNC. lol
Looking at it, it’s hardly a ‘fan’ at all. There’s almost zero pitch on the blades. I can’t imagine what they expected it to do, other than make noise and cause drag and vibration.
I might try that printed one, thanks!
That’s good to know, but no thanks. The UI of gSender is so superior to the built-in one for the jackpot, I can’t really see any reason to go back, except maybe for upgrading the firmware or something.
The questions/issues I’m having now don’t really seem to have anything to do with the sender anyway. If something pops up that does appear to be gcode-related, I can always drop back into the webGUI for troubleshooting.
Is there any way to know if I’m running the spindle too fast or too slow? I read a guide early on that talked about using the cut quality as a guide, but since the cut looks pretty much perfect, does that mean that just running the spindle mostly wide open is correct? That doesn’t really feel right, but I have nothing much else to go on.
Searching online shows that this motor has a top speed of 12K rpm.
That sounds a little slow for this type of milling, but I’d appreciate your comments.
Since your spindle is running so hot and you still have the “fan” that was originally on the spindle… regardless of the [lack of] pitch, I’d recommend at least putting it on the spindle and see if it helps cool it. Then you could print one and compare.
I also seem to remember someone printing their spindle fan and then going through a proper balancing procedure of some kind… don’t remember exactly but might have involved using a ''prop balancer" from the RC world. I’ll look around a bit to see if I can find the post/article/whatever…
I’m printing the one you posted now, thanks!
If you find that article about balancing, I’d be interested to see it.
Do I take it that your spindle or router doesn’t run hot?
It doesn’t look like PETG. I use that fairly often, and it has a particular…sheen?
I highly doubt it’s ASA, due to the cost, but it’s possible. I can test to see if it’s ABS the next time I go out to the shop.
The mount is not ABS. It’s ‘crunchy’ under an Exacto knife, so I’m fairly sure it’s PLA.
I installed the printed fan. It moves a decent amount of air, and isn’t too loud. I’ll try a cut with it soon, and see if that helps prevent a Chernobyl situation. lol
That looks like a solid router, but if I replace my spindle motor (I most likely will), it will absolutely have software speed control. Not being able to control the bit speed from gcode strikes me as dangerous. As mine is, I have to bend down, putting my face near the bit, to turn it on and off. I really dislike that arrangement. Also, being able to vary tool speed for different parts of a job just seems like a no-brainer.
It’s every one of the router types is louder than I like I’m in my basement and hear from the wife and dogs about what is and is not acceptable for long periods of time. Part of it may be pitch more than loudness (volume) was the word i wanted also.
(I never leave.my speed at what is set in the program so don’t worry to much with that. I adjust on the fly accordingly with wood at hand.
Feed rate is easier and more versatile to adjust cutting length of time)
That seems to be accomplishing the same thing from the other side, but ok, I see your point.
Either way, how do I determine what’s a “good” or “bad” speed, whether that be the spindle rpm or feed rate? I know there are all sorts of feeds and speeds calculators for various tools and materials, but every time I read one of those, they seem to end with something along the lines of “but these aren’t much good for cnc routers, so pretty much ignore this”.
Is there a good resource (or rule of thumb) for how to determine the proper spindle rpm and/or feed rate for a given tool and material? Keep in mind, I’m not looking to learn a new language, just to set up for a cut …
For The Impatient
If you just want to get the machine dirty here is the generic recipe. This should work in every material softer than metal; you can optimize later.
8mm/s Feed Rate (The speed at which you move through the material).
3mm/s Plunge Rate (The speed at which you move vertically into the material).
1mm Depth of Cut (The thickness of material your bit will be removing per pass).
45% Step Over (The percentage of bit diameter that should be in contact with the material)
Use the Peel pocketing strategy.
Always use a finishing pass of ≈10% of your tools diameter. The denser the material the smaller the finishing pass.
At this point you should be in HD foam, if that works out you can try some soft wood like pine.
If that works at this point the only variable you should be changing is the depth of cut. You can vary this and it will increase the load on your machine in trade for more material removed per pass or decrease the load by taking shallower bites.
Thanks for those guides, guys!
That MellowPine article is a nice explanation of chip load, but it illustrates my frustration with most of these ‘guides’.
It says “Calculating the chip load is a fairly easy process that involves a simple mathematical equation.”
Followed by a chart and a little math, then…
“use the formula to calculate the optimal feed rate”
Then comes….
”A beginner-level CNC machine cannot handle such high feed rates, and therefore these parameters need to be updated to match your machine’s capabilities.”
Ummm..okay. So all that explanation and calculating was useless, because we still have to ‘guess’ at what our individual machines are capable of. So frustrating.
I live and work in a word of CAD and engineering, where design parameters are known quantities. I’m struggling a bit with all this “close one eye and throw a dart at it until something sticks” approach to setting up a machine.
I did use Ryan’s guide as my starting point, but found that it was much too conservative for my cutter and material. I was getting burning on the material edges, which I see is bad. I increased the feed rate to 14mm/s, plunge rate to 4mm/s, and eliminated the finishing pass, and things look pretty good so far.
Granted, That’s in one material (bamboo) with one cutter (1/8” O-flute spiral up cut), so I have no doubt that his numbers are entirely appropriate for other materials.
I agree. And it’s way faster too, at least for simple geometric shapes.
The estimated cutting time for using Peel on that job I posted above was like 4.5hrs using Peel, and only a bit over 2hrs with Parallel.