I wired up a couple endstops tonight, and connected them to the jackpot. I got green lights (yay!), which go out when I trigger the switches manually. So far, so good!
Here’s where I get lost…
Am I understanding correctly that there should be a switch at each end of each axis?
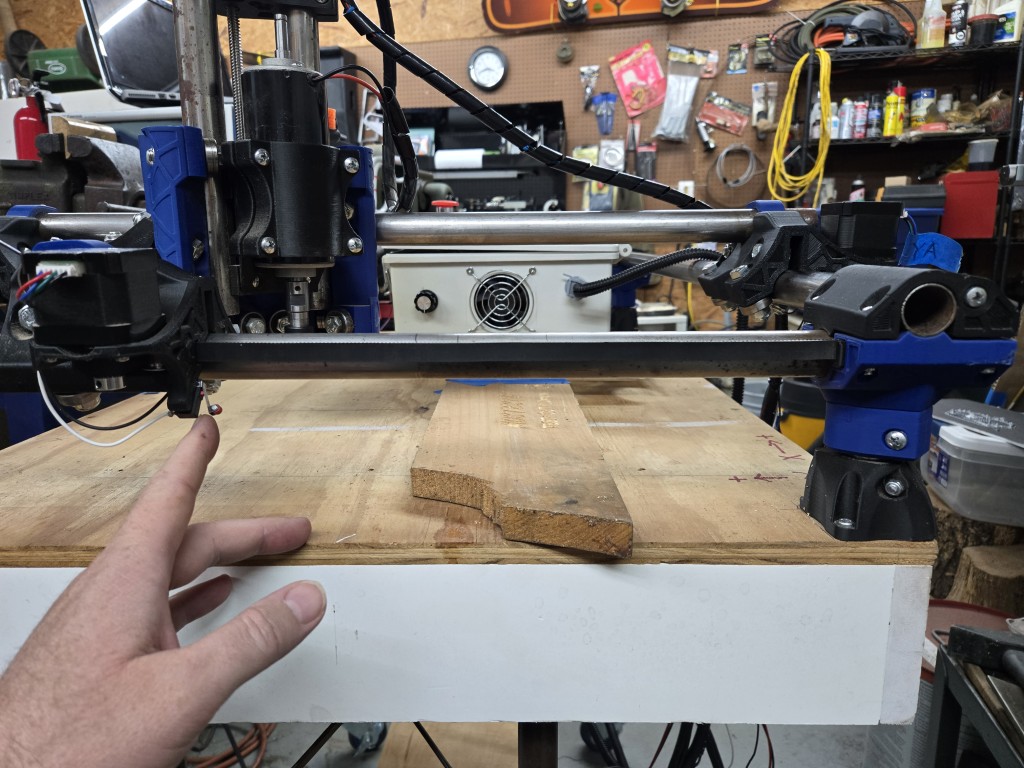
If so, then the origin side (machine zero) looks good, but how do the endstops mount on the other truck for each axis? Take a look at these images for what I mean.
In the first image, my finger is on the switch for Y0, and machine zero is to the right. Everything looks good.
In the 2nd image, I’m holding a switch in place at Y1, machine zero is to the left, and the endstop would trigger on the right, to limit travel in the Y-max dimension (in this example). How would that work? The switch would reach the stop block (not installed), because the truck is in the way. What am I missing?
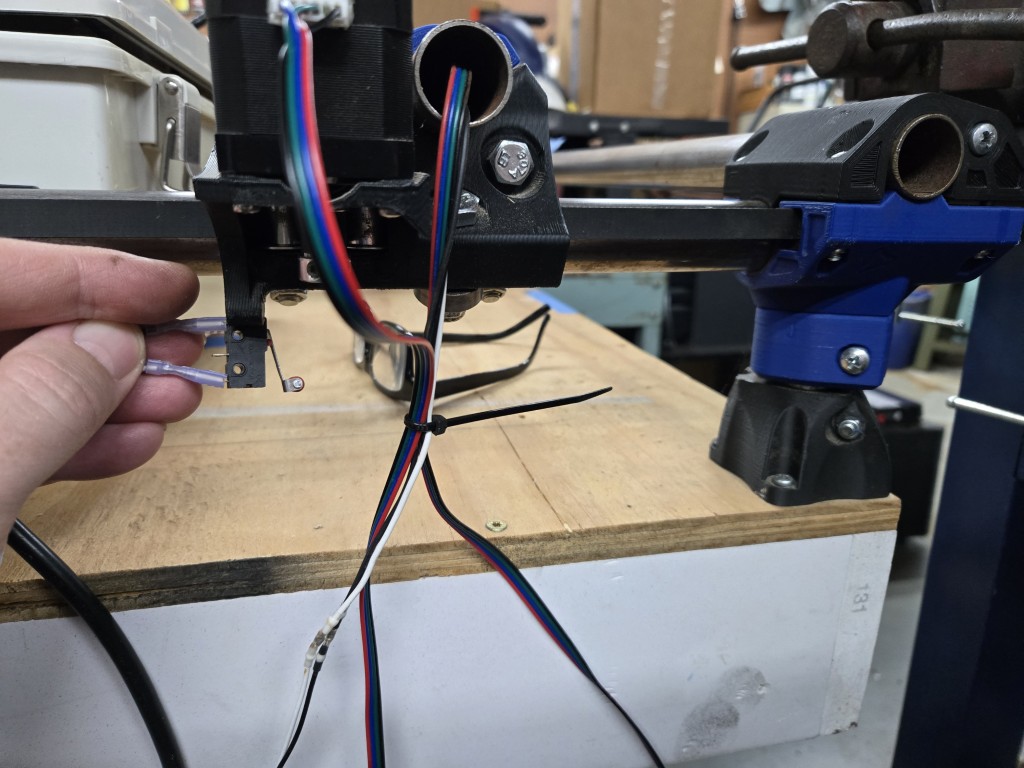
On your second pic, flip the endstop around 180°
ummm…okay…
Then I would have 2 switches activating in the same direction.
I thought we needed one on each end of the travel, to set min and max for that axis. Is that not how these work?
Yes that is how it should be. These are used to square the machine up. Not for travel limits. They are only used for homing and ignored with any other travel movements. Its up to you to make sure you dont program your CAM to go beyond the limits of your machine.
Oh!! I thought they did both squaring and normal limit switch stuff. Thanks for clarifying.
I got the endstops all connected, tested (lights respond as expected when switches are triggered), and the stop blocks are tuned to trigger the switches at the limit of each axis travel.
So…how do I actually get the firmware to use the endstops?
I put the original config.yaml back on the board (since I had commented out the endstops before), but when I send a home command (ie. $HY), it crashes into the negative limit of the Y-axis and slips the stepper gear until I power off.
What step have I missed, to make the machine honor the input from the endstop switches?
Reupload the default config.yaml for a mpcnc if you’ve made any edits to the one you have.
Then test motion and jogging. Moving in positive numbers in X and Y should move right and away from the front left corner respectively. If not you need to flip direction. Homing should move towards front left.
There is no Z homing on a mpcnc so the ‘home all’ button isn’t used.
Yes, I did that. That’s what I meant when I said “I put the original config.yaml back on the board (since I had commented out the endstops before)”. Sorry if that wasn’t clear.
Just to be extra sure, where would I get a new ‘default’ config file?
Motion all works as expected, except that homing commands cause crashes. Of course I didn’t try the Z-home, because there’s no endstop on the Z-axis.
Here you go:
Can you post a picture of your build and where you have the endstops? Homing should move the gantry towards them not away.
If you’re using the v2 UI - which is what the screenshots I posted earlier are then the config you need is
Will do, standby…
Correct, it does. It moves right towards the switches, and keeps going until it jams against them and grinds the stepper gear until I can e-stop. ![]()
Yes, I’m on v2. Ryan suggested I stay with v2 for now, until he finishes working out the bugs on v3.
I’ll upload that default config.yaml to the controller again, and see if it makes any difference.
OK, the new default config file fixed the homing issue!
I have no idea what I did to the other ‘default’ file to make it ignore the endstops. I thought it was untouched, but clearly not.
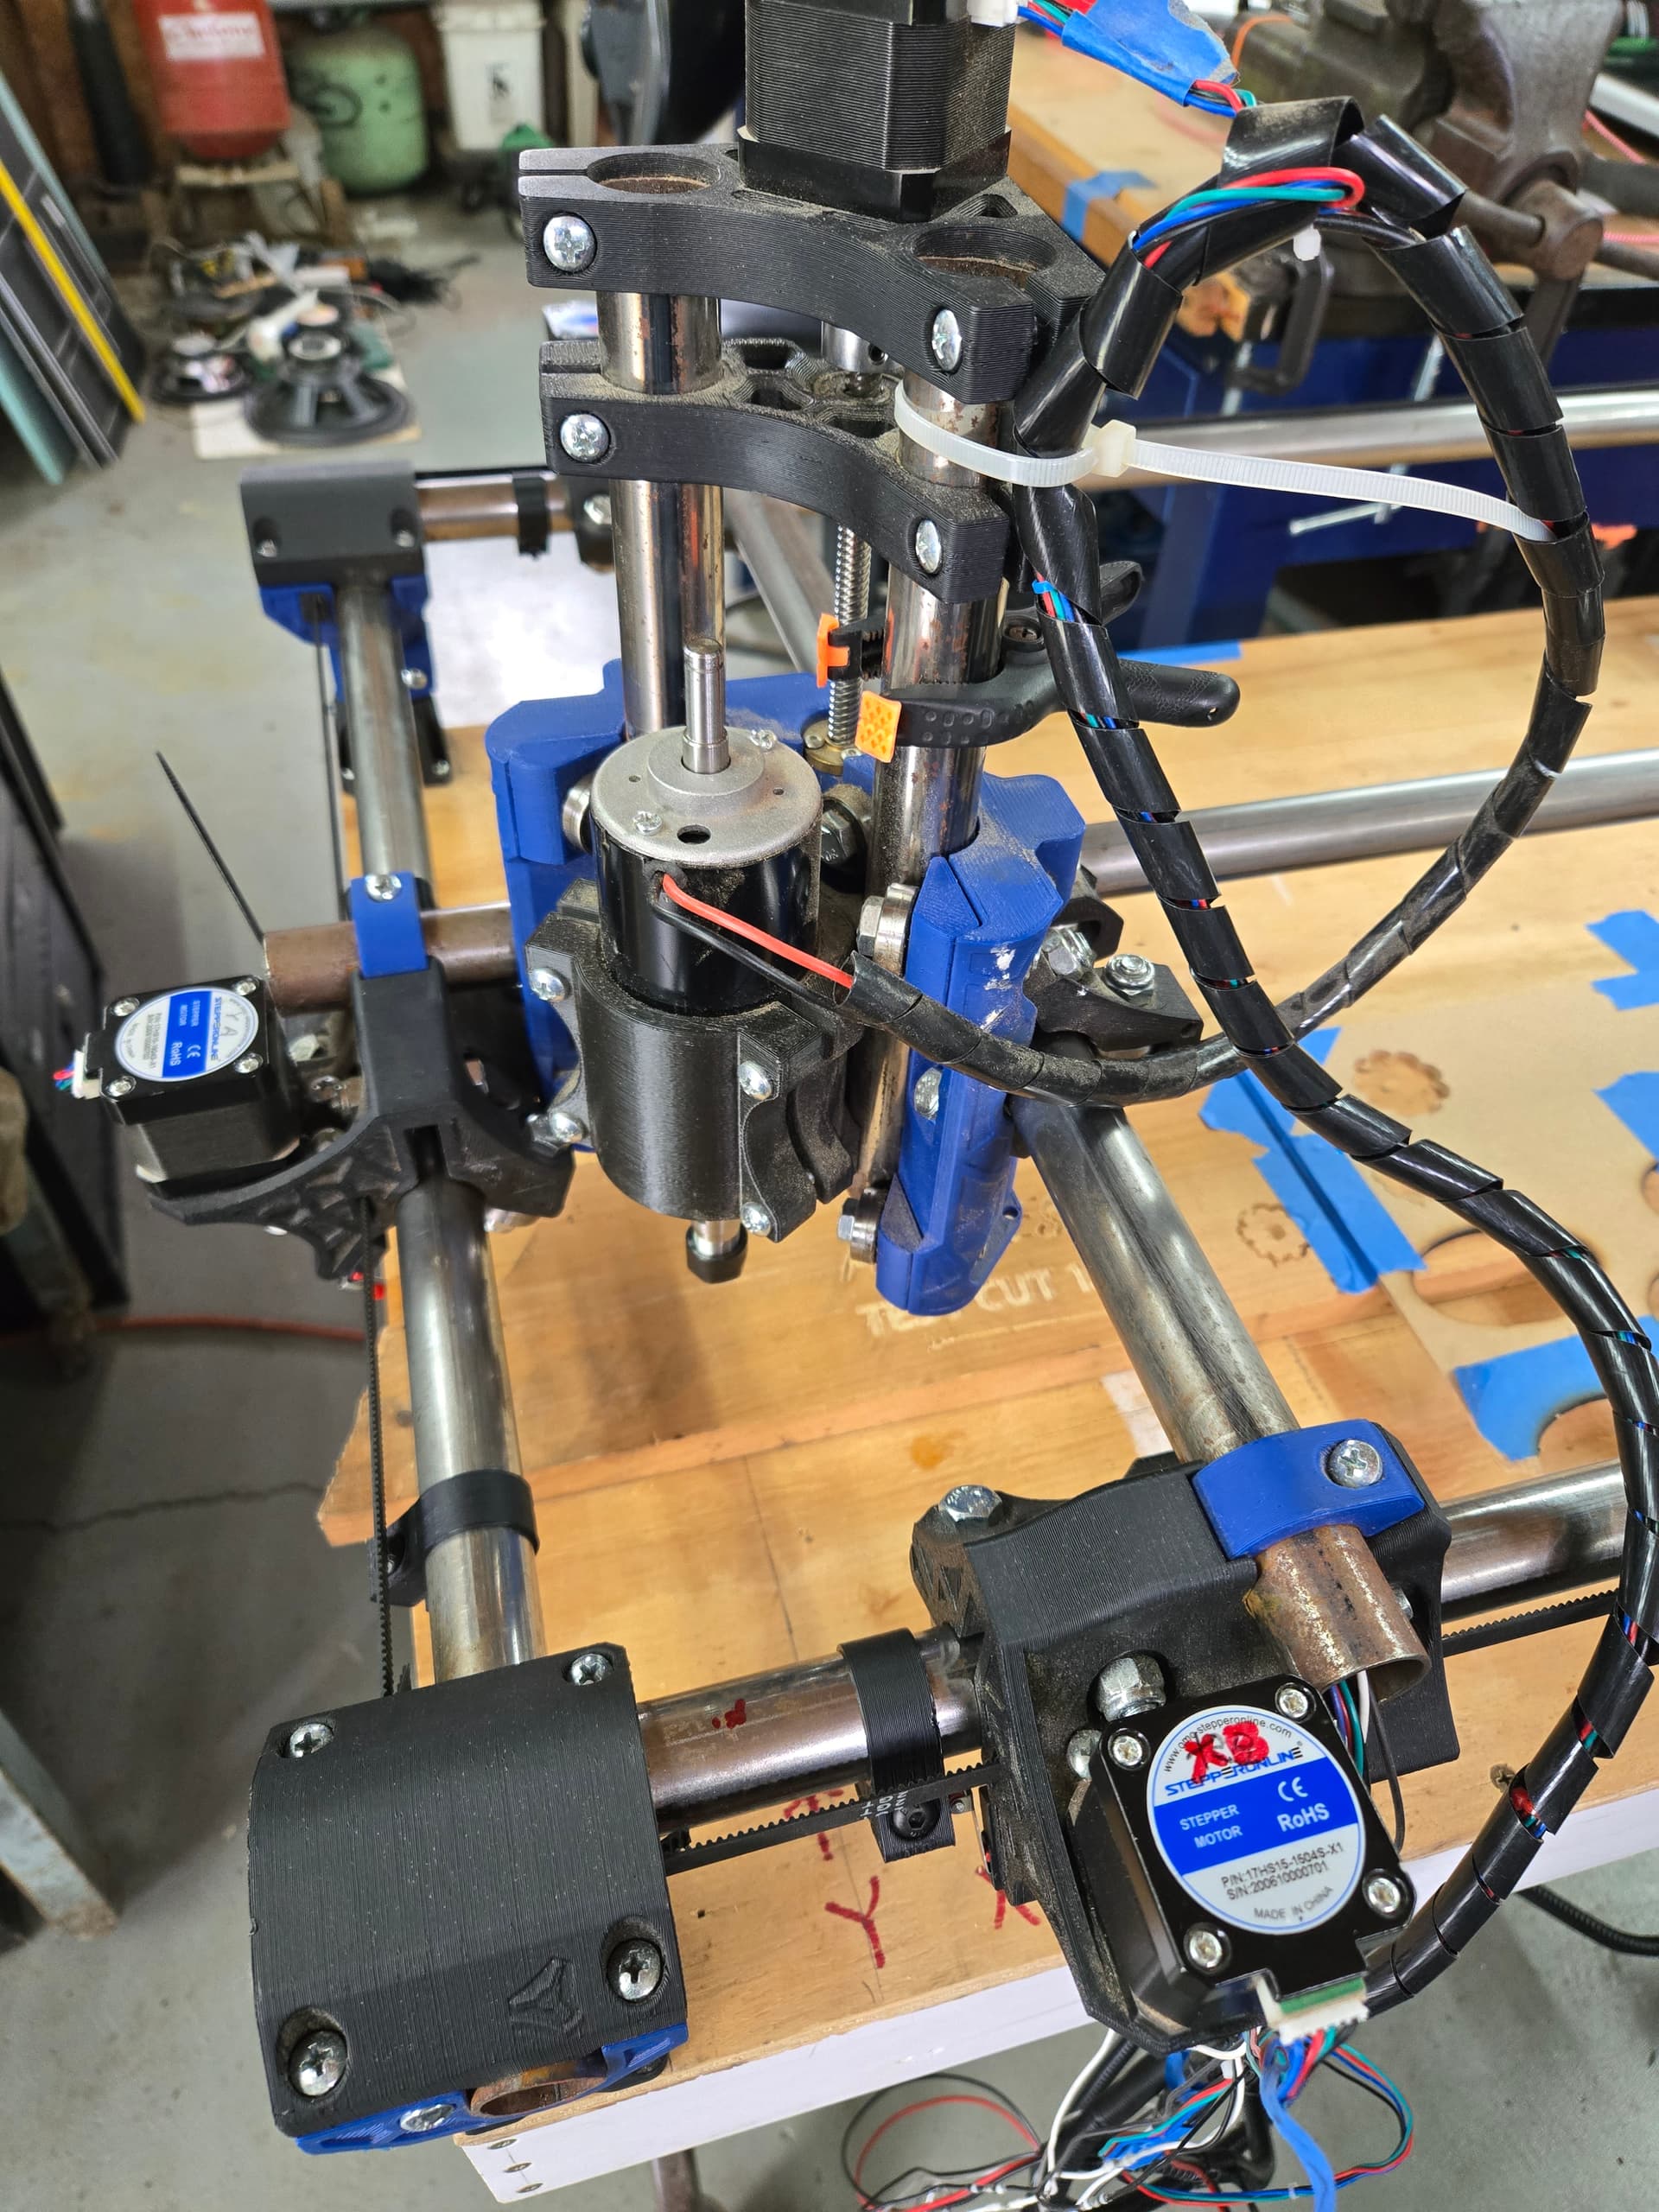
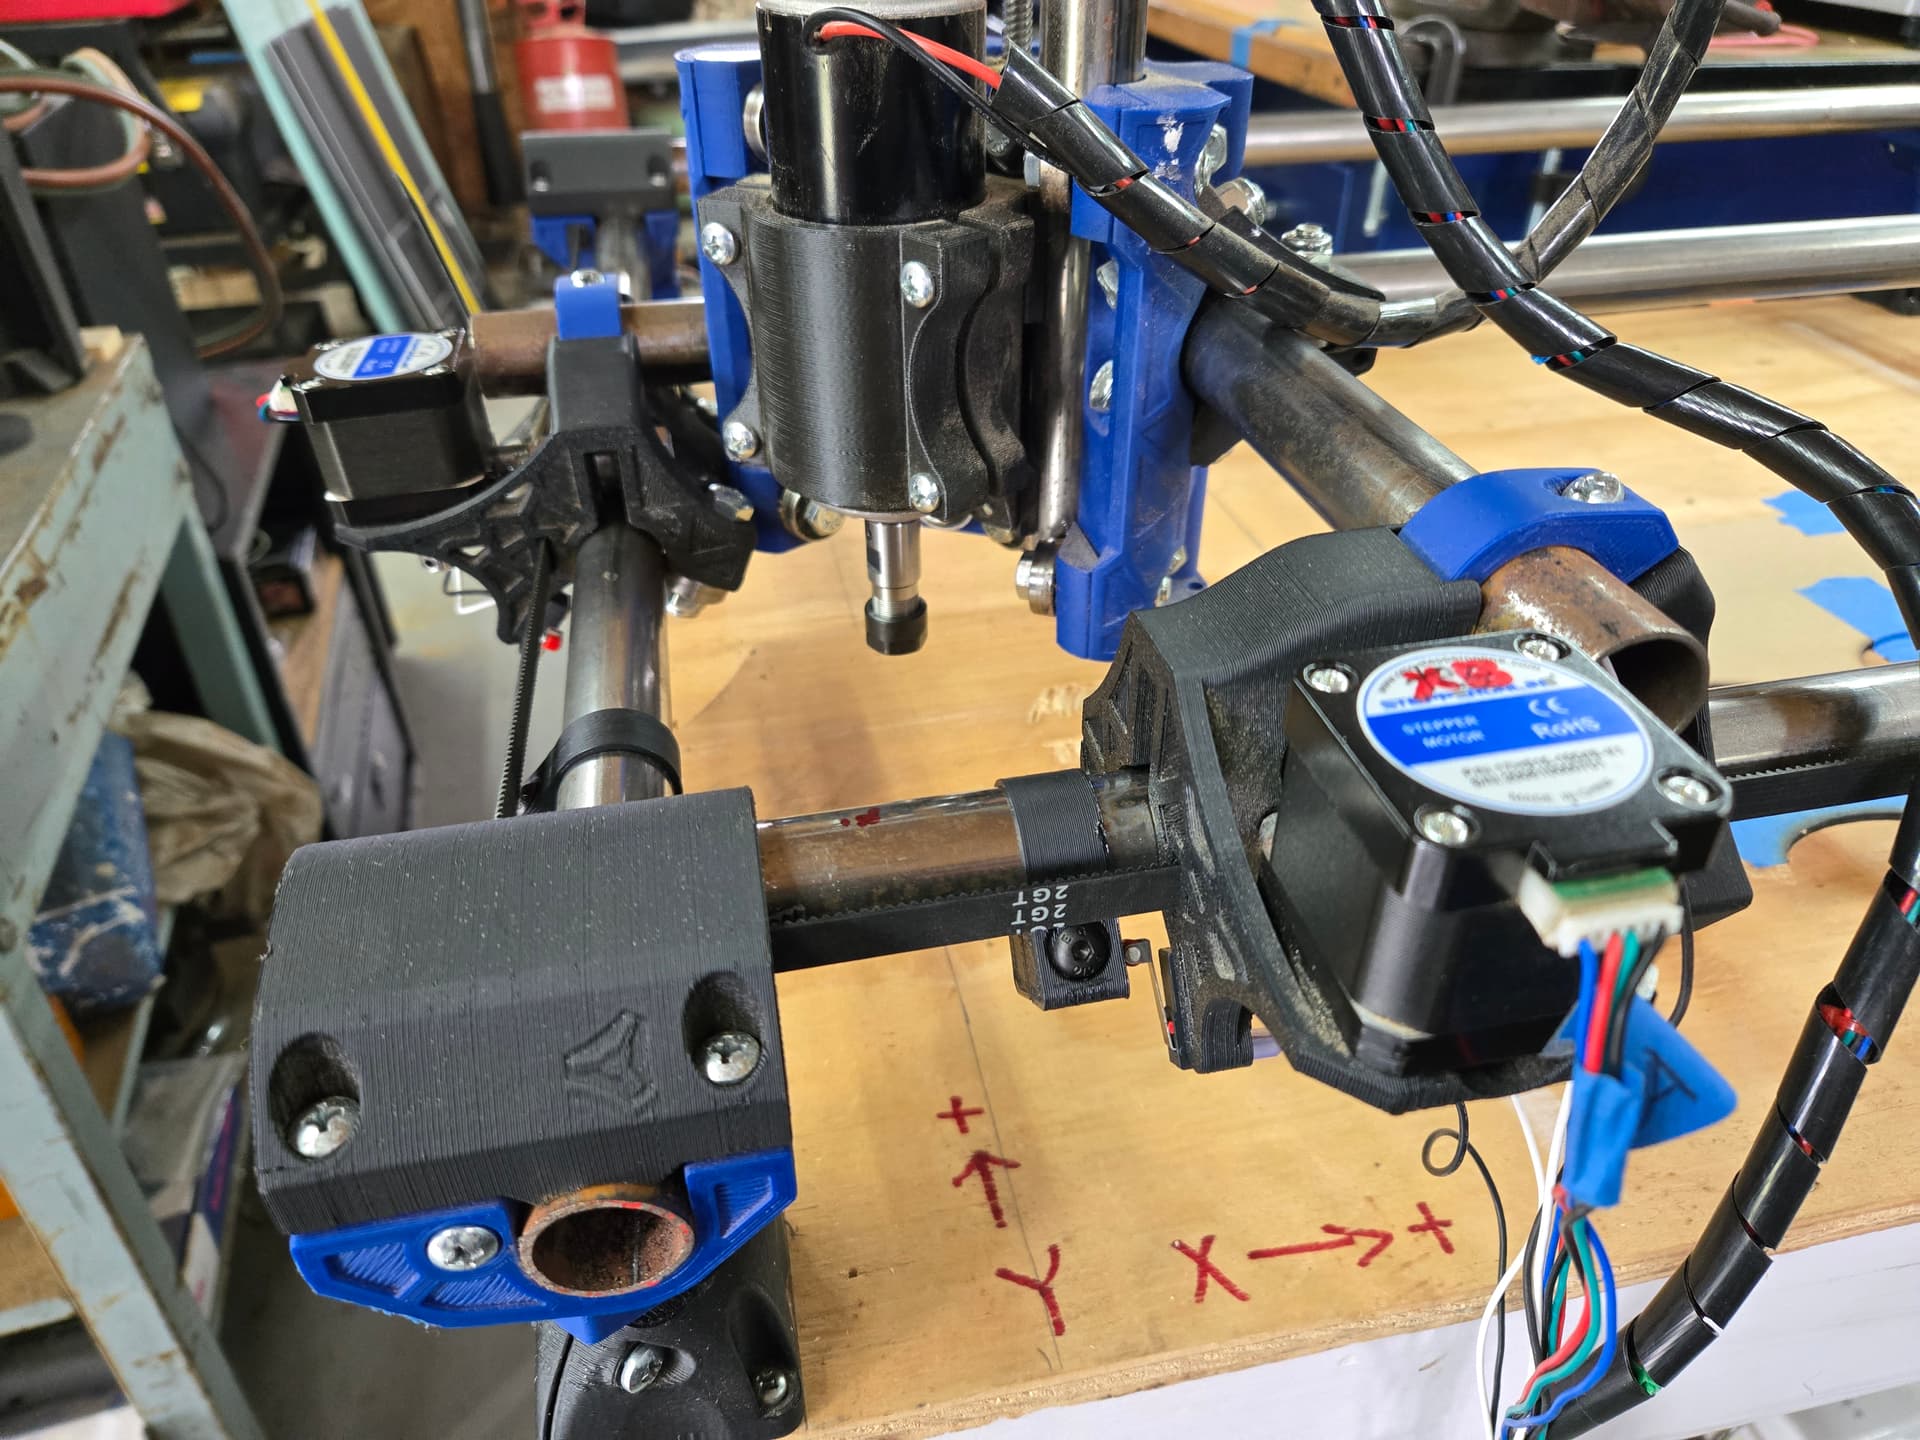
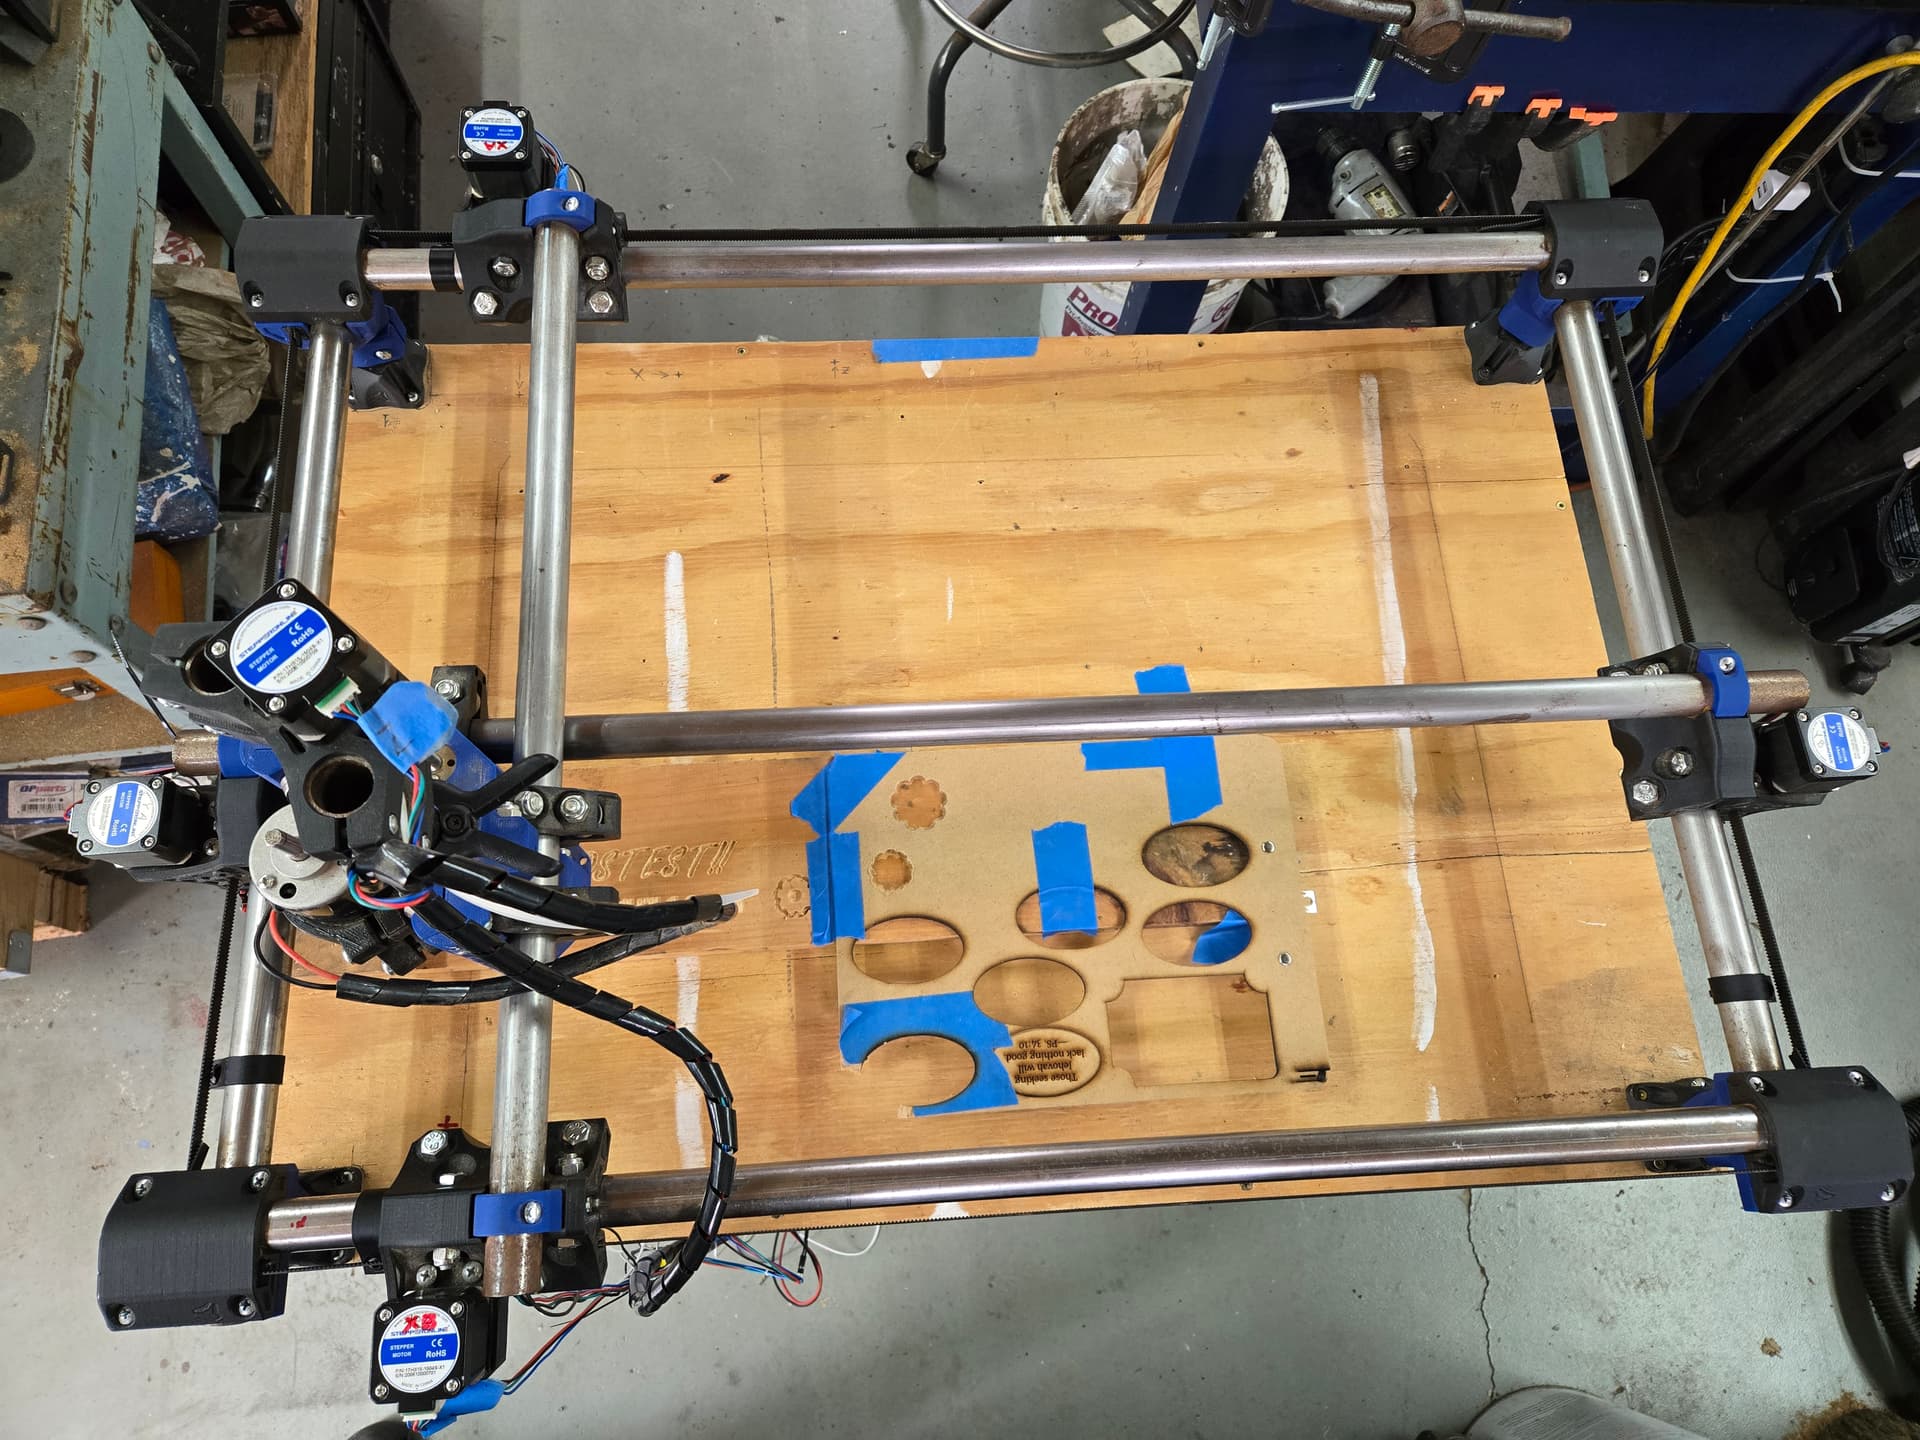
Here’s the setup as it sits now. Does this all look correct?
In the first 2 images, it’s in the Y-home position. The switches are just tripped.
The 3rd pic is an overall of the current setup.
So now I’m wondering…how does the auto-squaring work? I read the docs, and remain unclear.
It says “Auto Square on this board is as easy as editing each endstop individually…” and “you have a “pulloff_mm” setting for each endstop…”
Okay… but how do I know if an endstop needs to be adjusted? Right now, they are on the default of 4mm pulloff, and that seems…fine? Is there a guide somewhere on how to do the actual adjustment? It seems highly unlikely that I have this machine that dialed in. ![]()
Most people do not square a machine to this sort of precision until they when using it they find the need for a more perfect fit. MPCNCs are typically built pretty small so just the simple measurements included in the instructions get you really close.
If you want more precision before messing around with it more the instructions on the LR are more hashed out….and about to be updated again. LowRider CNC V4 - V1 Engineering Documentation
I do urge you not to chase ultimate precision unless your jobs need it. We call that chasing zeros. If you are making carved signs all day you need no extra calibrations as no one will notice if your carves are 0.5degrees off. Calibrations are a rabbit hole, the better your measuring equipment, the longer it takes to get to a precision you are happy with.
That’s the X home position - as far to the left as it will go.
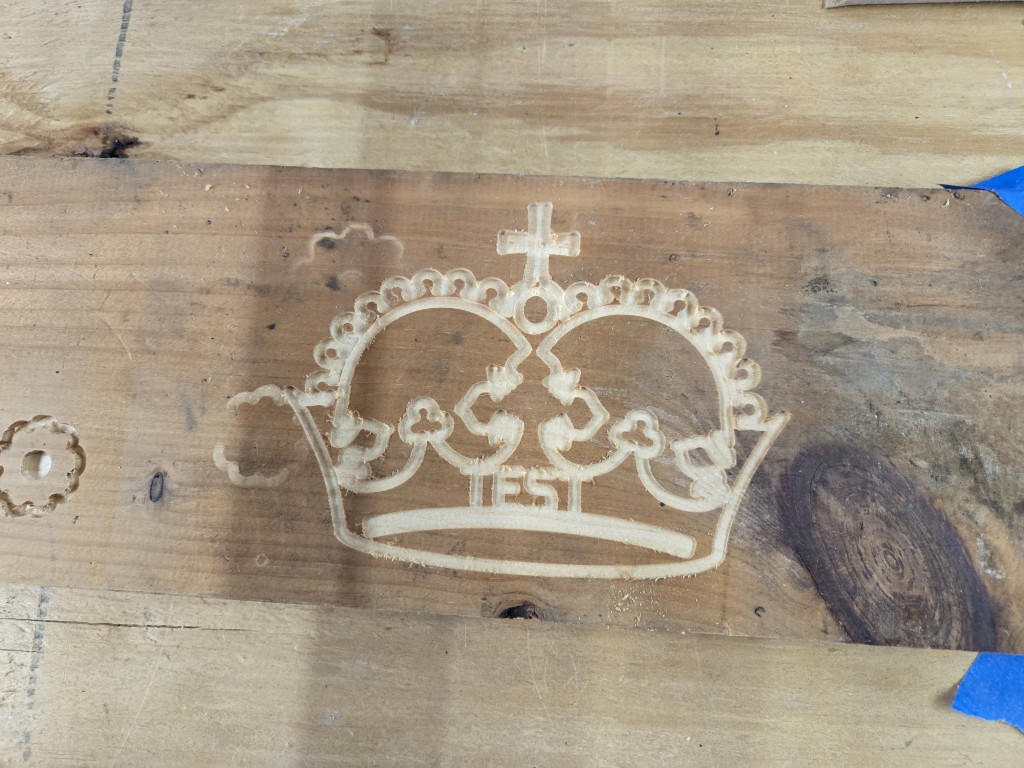
Looking fine, time to draw a crown and get ‘er movin
Oops, sorry! You’re right, I was looking at the Y in the photo when I typed that. ![]()
Oh, okay! The instructions made it look like this was sort of mandatory to get the machine working right.
By the way, I want to take a moment to THANK YOU all for your help, and patience with me.
This has been a fairly long (and rather odd) journey in getting this machine up and running, and at this point, we’re pretty much there! I’m able to send it gcode, and it cuts without trying to kill itself!
That’s a minor miracle, considering the shape this thing was in when I brought it into the shop. ![]()
Without all your help and guidance, it would still be a box of parts.
That being said what’s my next move here?
I’m able to cut basic shapes, but there are just so many things that don’t seem…right, for lack of a better term, I guess?
I just keep running into these “where’s the __ button?” or “why is there no __ option?” situations.
I feel like there are probably answers to all of this, but I just don’t know where to look, and I hate to keep coming back with what I feel like are RTFM questions. I’m just really struggling to find clear answers on my own.
My next “must have” will be a cleaner and more reliable way to do manual jogs. The web GUI works, but is way too easy to hit 100 instead of 10, and cause a problem. What’s the easiest way to get joystick control for this thing? Is there a way to interface a BT or wifi game controller? I have one lying around that would be a nice simple solution, maybe… ![]()
I’ve seen the CYD and M5 pendants, but I’m not ready to jump into building one of those yet.
Just do some test cuts. There is a lot to learn. Don’t make any changes yet.
Cut out some shapes, cup coasters.
Do some carves with your initials or something.
Try foam and wood.
After about 5 little projects things should be much much more clear and simple.
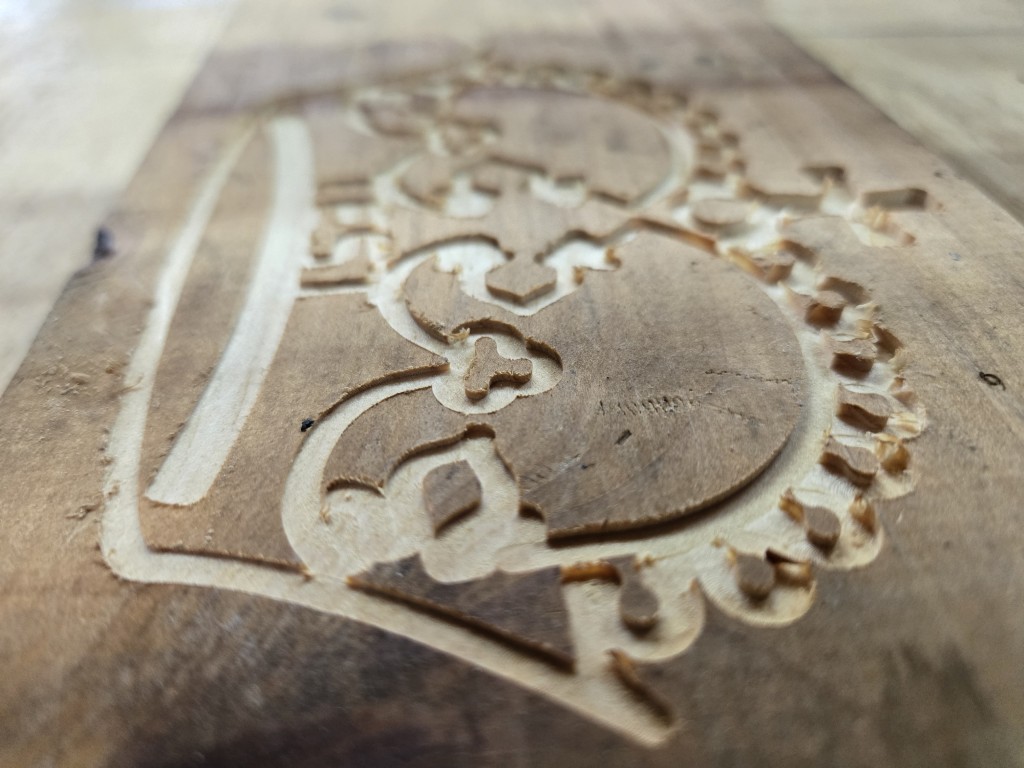
I ran the crown, and it came out fine, except that I was using a too-large bit. ![]()
The finish was quite good, considering that I didn’t have the workpiece fastened down properly, and it moved around a little as it was cutting, plus one side is deeper than the other because it wasn’t flat.
I was going to buy some 1/2” MDF to practice on, but a quarter sheet is $25! ![]()
What’s a good site to browse for ideas of things to make? That’s really where I fall flat, on the creative side. I’m an engineer at heart, I don’t really have a creative bone in my body.
If I see it, I can probably make it happen…
I’d like to try some sort of 2.5D engraving to see how it handles detail, but I don’t think I have the proper bit for that yet.
This is a good thread.
Also, the galleries on this forum:
https://forum.v1e.com/tag/gallery-mpcnc
https://forum.v1e.com/tag/gallery-lowrider-cnc
Man, that’s seriously depressing. Those are some talented folks! I have no chance of ever creating anything like about 90% of those projects. Maybe CNC isn’t for me after all… ![]()
![]()
![]()
I didn’t know ANYTHING about CNC work before I joined this forum and built my first machine. Just stick around, ask TONS of questions, make plenty of mistakes, learn from the mistakes and before you know it youll have some seriously awesome projects posted on the forum as well!