Can you share the Estlcam file? What version of Estlcam ate you using?
Sure thing - I’m on Estlcam V13.004
2x40x40.zip (2.6 KB)
something else I just thought of - if anyone here has g code of a similar test cut (doesn’t have to be the same exact dimensions) generated from a CAM software other than Estlcam I would be very interested in running it on my machine to try and isolate whether Estlcam is at fault or this is a machine level problem
What do you end up with if you double to 80mm x 80mm?
1 Like
Try this one, FreazyKam Free Browser based CAM
Yup, agreed, this will tell us some valuable info. With all the different settings changes your ID never seems to move. We need to see a different cut. Double size lets us see if the error doubles, or stays consistent.
Honestly neither dimension moves much or as we would expect it so let go bigger to add a real new data point.
Use a Vbit or a pen and do the squaring calibration and tell us the dimensions of your 4 corner dots, X, Y, and Diagonals.
I used a V bit to check an 1100mm square on my bed (by moving the X and Y axis 100mm x11)
All 4 sides of this square measure 1097.5mm give or take a fraction of a mm (hard to say with an eyeball measurement)
I measured the diagonals and they look like 1552 and 1551mm - fairly square for a square that size?
I cut some 80x80 test squares and the part measures 79.9x79.9 and the pocket measures 79.3x79.15
Curious what you make of this - seems like I could adjust the mm/step a little bit to tighten things up?
okay, so you need to adjust your steps per mm. super easy, LowRider CNC V4 - V1 Engineering Documentation. This should make it symmetric, that explains that. Your OD is going to get bigger, the ID will as well.
1mm is good, you can leave that.
1 Like
From there the endmill diameter should get you the rest of the way.
I liked this thread on the topic:
1 Like
I set my steps per mm to the calculated amount - ended up being 50.113895 - on the X and Y axis in the fluidnc settings panel, and it seems to have saved through a power cycle? However I just did a test to check the steps/mm again and it’s still short - am I forgetting something dumb? I pressed “set” for each value but the Jackpot instructions say to “use the save macro” - is that the same thing?
ahh I figured it out
What was it?
I forgot to hit the big save button
So I’ve double checked that my steps/mm is accurate - measures correctly now
I measured a slot I cut with this bit at 6.2mm, so I set that as the tool width
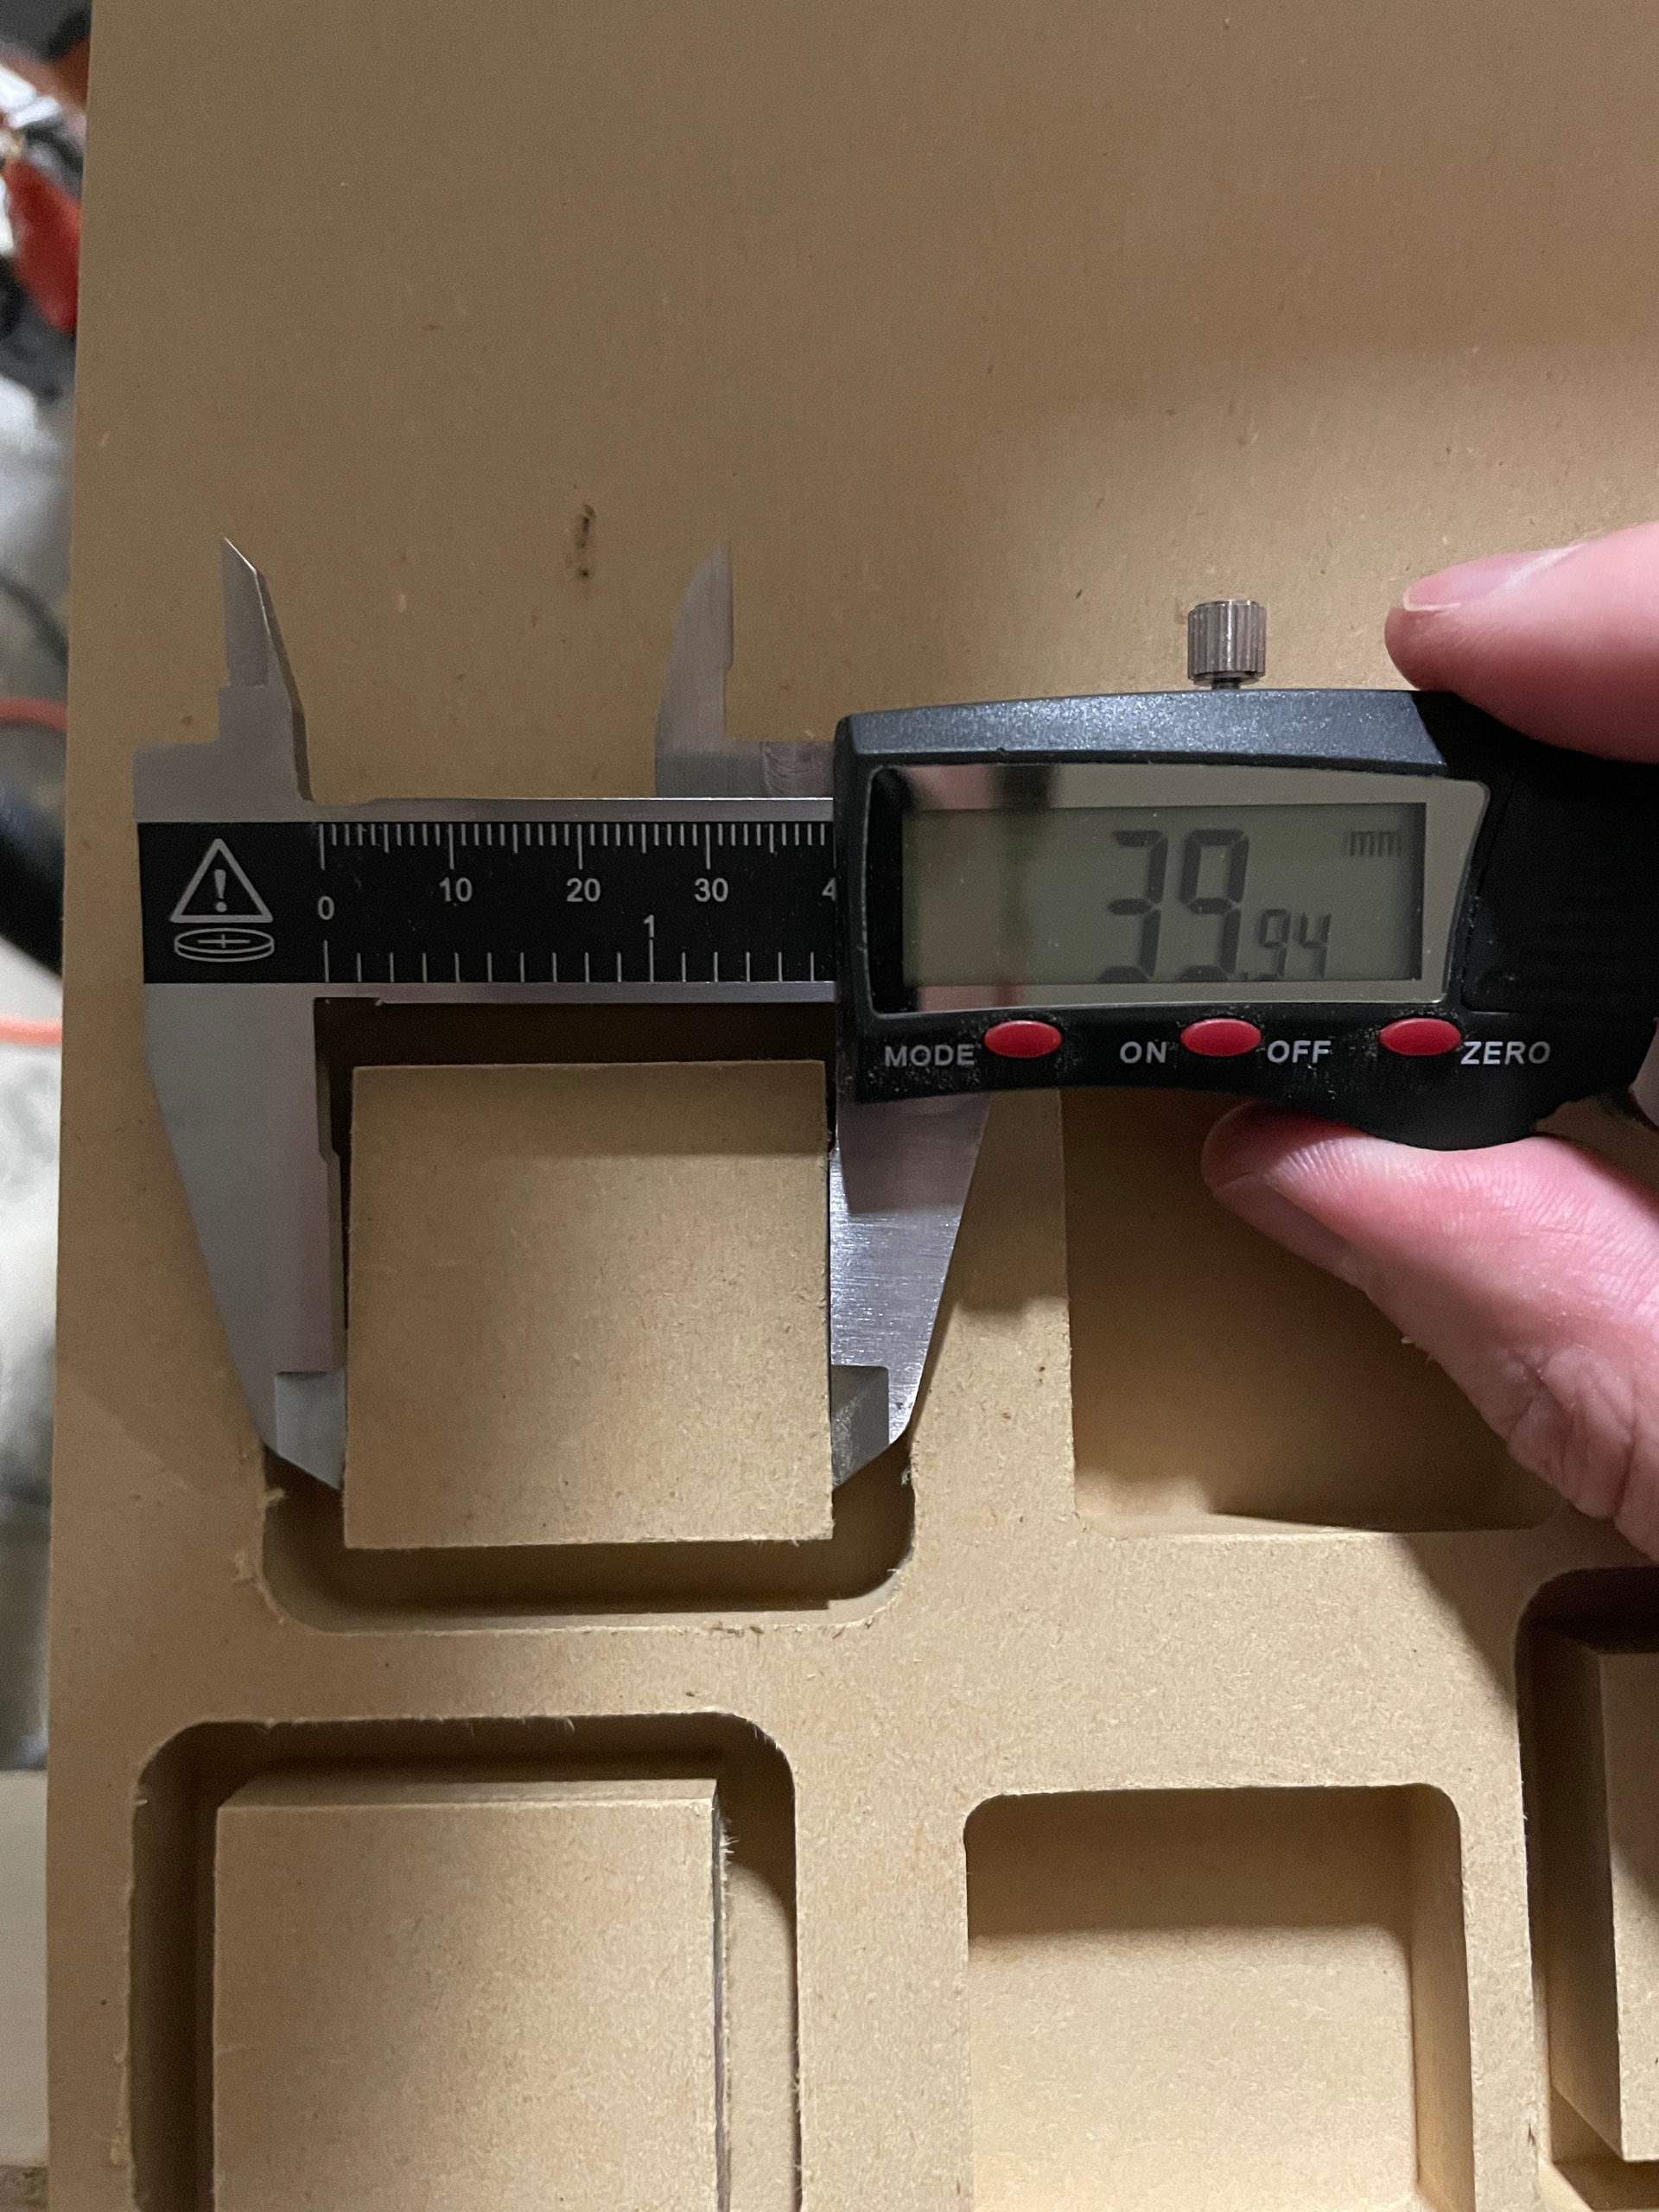
I’m still getting 39.3x39.3 pocket and just about dead on 40.05x39.98 part. I’m also just not seeing the proper surface finish I would expect after a finishing pass - it’s better on the pocket now (but I am still seeing that ramp in) and the part still shows the roughing pass layers
it’s just so weird that the cut size error isn’t symmetric
I know 0.7mm isn’t HUGE but it would be nice not to have to use some kind of funky workaround like a negative value finishing pass offset for pockets
if the endmill is 6.3 is the error symmetric?
slow down the finishing pass to half whatever it currently is.
i also recommend buying some hdpe or some hardwood to do some test cuts in. mdf is fuzzy.
slowing down the finishing pass was a good call - the cut is noticeably cleaner
WIth a 6.3mm tool width I’m getting a part cut measuring 40.15x40.10 ish and a pocket cut of 39.30x39.15ish
do you think this kind of error could be a speeds and feeds issue, where the machine is just struggling a bit and not quite hitting the dimensions perfectly?
1 Like
I am concerned that your ID is always 39.3. Through all the changes your ID never seems to move.
Do some full cutout outs so you can measure it better. or use some hand tools to cut your test cuts all the way out., there is no way the ID is always 39.3.
I highly suggest using something other than MDF for a while. as I previously mentioned. Try a hardwood, something that will hold a better dimension. Change your pocketing operation to peel and slow your finishing pass down again. Do you have a fresh sharp bit to use, this one might not be happy with all the testing?
the machine steps in 0.02mm steps, we can change it to up to 4x that resolution. If needed.
5 days ago before all these changes you ID was exactly the same. I can’t imagine how that is possible.
Change the size again, do a 60 or 80mm cut. you can do an 80 OD and a 60mm ID inside of it if you want to save material.
Finally got it:

Here’s the tool settings I’m using:

Makita router speed setting 1 - roughly 10k RPM according to the manual
Still doing a 0.6mm finishing pass, and using the peel setting for the pocket
This is getting me legitimate chips of MDF instead of awful dust - I think the dust may have had something to do with my issues before, interfering with the tool in the cut. I also hadn’t cleaned out the shop vac in a while and was not getting proper dust evacuation from the cut.
Also the oversized tool settings before were not getting me a full finish pass - now I know if the tool dimension in CAM is too large the finishing pass will not be in the right place and potentially leave some of the inconsistencies of the roughing pass
@vicious1 thank you so much for sticking with me on this - I really really appreciate your help. I can’t believe how accurate of a machine this thing can be for $1k
To be honest this process has been very educational, and I’ll be a lot more prepared in the future when I’m dealing with new tool + material combinations
11 Likes