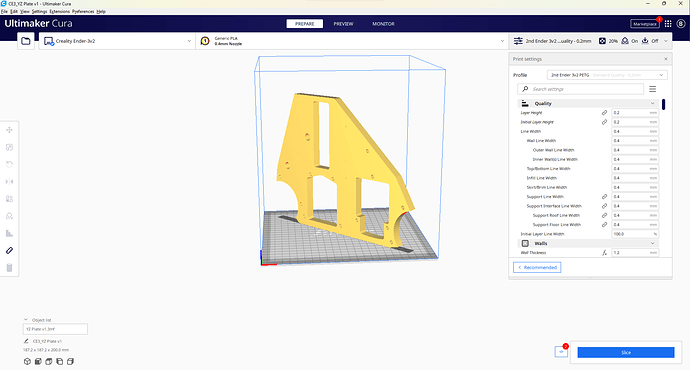
Ive been thinking about building the Lowrider CNC for a while now and finally decided to pull the trigger with the V3. I have 2 Ender 3 v2 printers with a build volume of 220x220x250. In the attached pic of the YZ Plate do you think there would be any issue with printing it upright like this? I know i will have to use supports for it but this is the only way i can print it since its bigger than the build plate laying flat. Ive been printing things for car air ride suspension controller mounts so all i have on hand is PETG which im using. Everything i see says to use PLA. I guess i will eventually redo everything in PLA if the PETG doesnt work out for me. Also what are my options for making the strut plate? I dont think i have any way to print out the DXF to manually cut it out. I do have a crossfire plasma table with some 3/16" metal i could possibly use id just have to reconfigure my computer. It crashed a while back and i lost all my settings in fusion.
Hello @KMRDesigns! Welcome!
Personally wouldn’t trust my printer or my skills to pull off that vertical print. Curious if others have pulled this off before? Plasma cut would be pretty cool. Seen YZ plates printed, MDF, Corian, Acrylic, plasma cut steel, all sorts of options…
Have seen a few people print out YZ plates on paper then trace/cut using bandsaw if they (or a friend…) have one. Or, use jigsaw or the router LR3 will use even. Maybe coping saw to do clean up. These plates are available from V1E shop too.
Good luck with your build!
I just saw a video of a V3 that does not have a strut plate installed…is it ok to build without a strut plate?
NVM reading through the build instructions i see the temporary strut plates until you cut the permanent one
If you printed it upright you’d lose a lot of strength because of the print’s layers. I am not sure it wouldn’t break from stress.
It should be printed in the orientation Ryan publishes the parts. If you have to cut that part in two so you can fit it. That sould still be better than vertical. I would cut plates from wood as soon as I had it working if I had joined two plastic parts. Even if you never used them, they would be there as a warning for the plastic to not break 
For my first Lowrider build I split the plates vertically with overlapping joints and holes for 3mm screws. I printed 2 sets on my Ender 3 and finished assembling my Lowrider. My first project on my Lowrider was the 2 plates needed to replace the printed parts.
Do you have a pic of this showing how you made them?
That would be a good remix to publish…
Did you get this figured out? Maybe a local friend can print them for you? Speaking of which- where are you located?
I agree with the advice to not try printing that standing up like that.
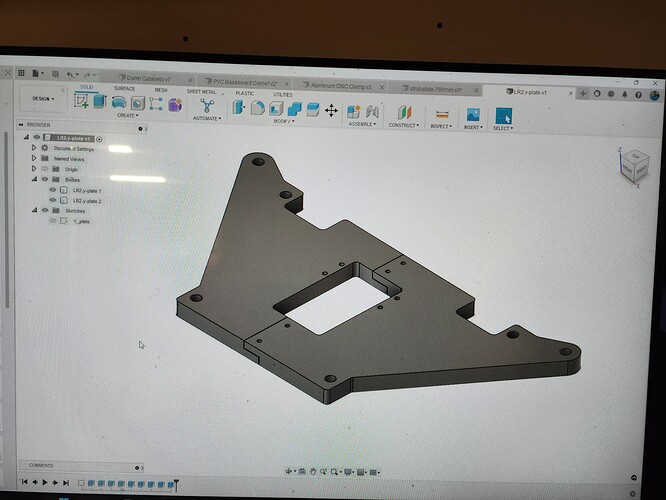
You’re probably aware that Tom Myers (@tgm022861) part shown there is LR2 as opposed to LR3.
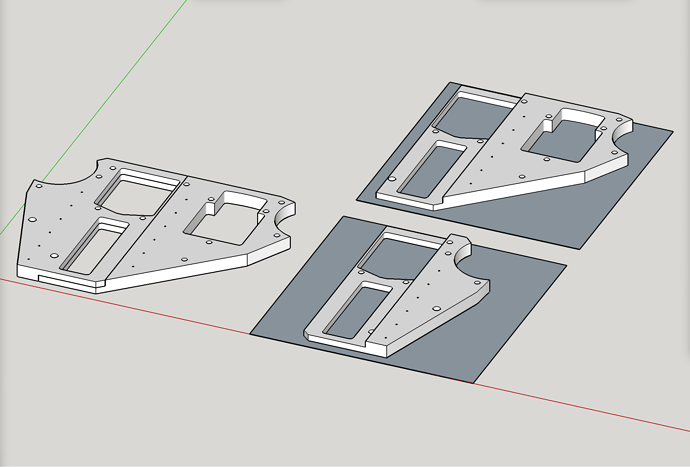
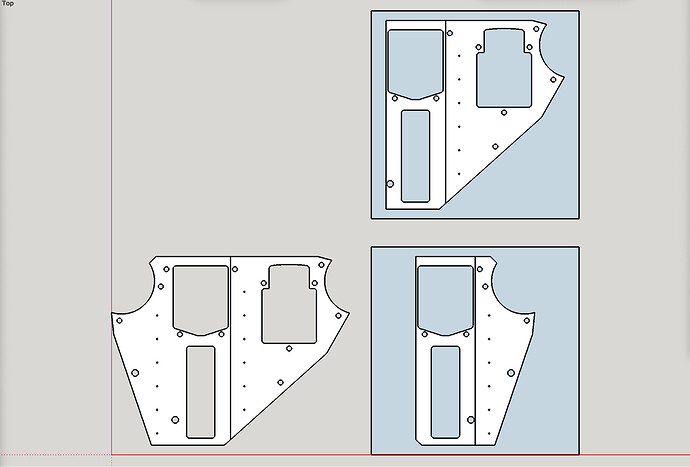
I’ve quickly worked up an approach to splitting the YZ plate for printing as two pieces. This is based on the approach shown by Tom, but it seeks to have all the cutouts completely contained as opposed to a slice running right through any of them.
YZ Plate - split for printing.zip (119.2 KB)
The illustrations show how they would fit on a 220x220 print bed.
Dude. You are a wizard with these printing mods. Super jelly
Nice work!
Im in louisiana. I just ended up buying the plates from the site.
I know the SketchUp modeling program so well it’s like second nature to me. I’m gaining proficiency with Fusion 360, and in doing so, I’ve realized that some jobs are easier and quicker there, while other jobs are still better suited to being done in SketchUp. This type of quick, easy job was much faster and easier for me in SketchUp.
Holy crap that is cool lol. Im decent with fusion but i still have alot to learn
So now i could print these instead of buying the plates from the site and use them to cut my own once i get it together?
If you print them, that’s all you need.
I’m running my Lr3 with printed plates. Super rigid, no issues
Awesome thank you
Yes, indeed.


