Done! Just tweeted with #V1E #MP3DP,…
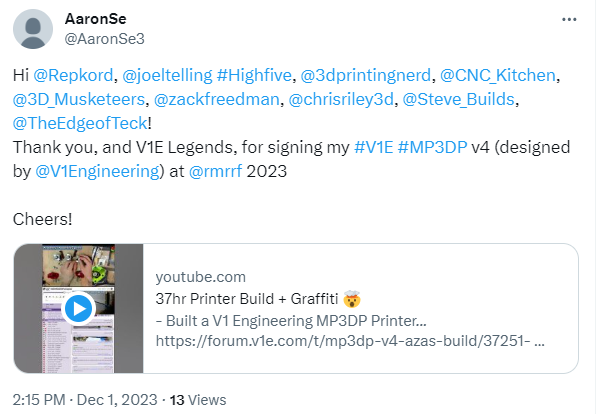
Ran out of character space, but special thanks to all the V1E Crew members that helped me through out the build. Was trickier than I expected. Cheers!
Done! Just tweeted with #V1E #MP3DP,…
Ran out of character space, but special thanks to all the V1E Crew members that helped me through out the build. Was trickier than I expected. Cheers!
One of these days I will catch up and try some of the stuff you did with that build!
We are about to see just how good your guide is for setting up CAN bus lol…
btw anyone have a good screen mount for the HDMI7 or 5? I have a 5 on my Ender 5 Plus and the files out there are all mostly garbage LOL
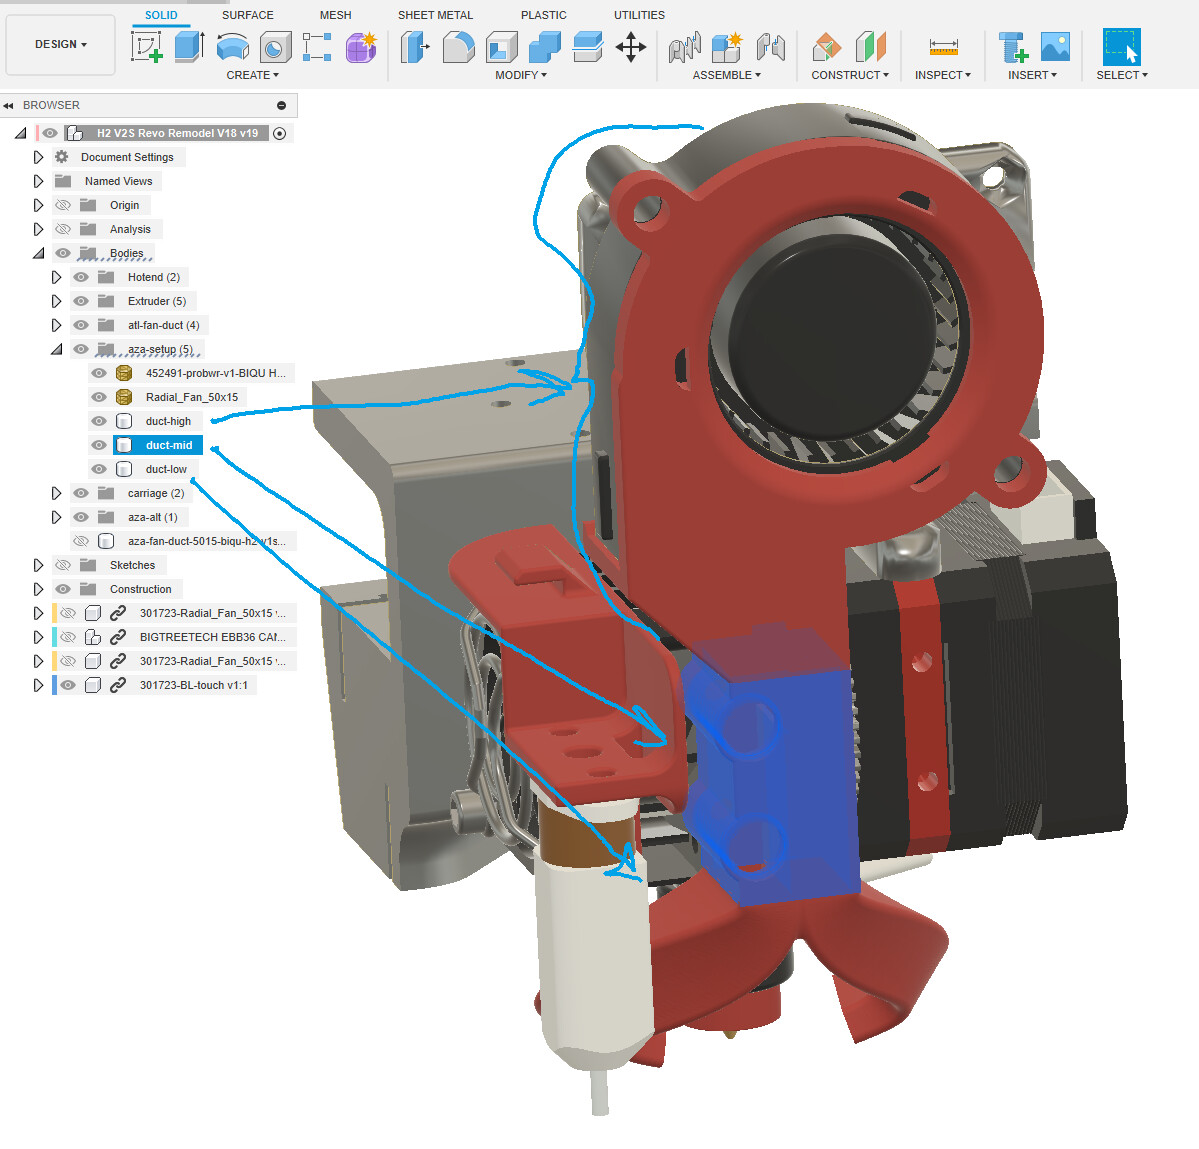
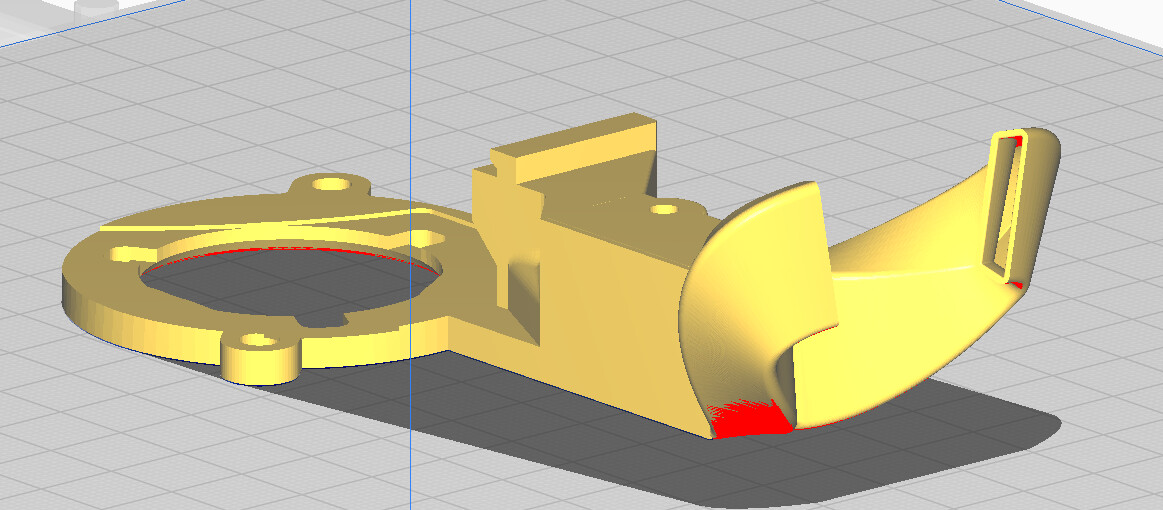
Fortunately, Fusion 360 was freezing/crapping out when I tried to merge these duct Bodies. So, I ended up leaving them as separate high, mid and low bodies that you/someone may want to use/mod. When exporting to .STL for printing, I just select multiple bodies, a single .stl file ends up being created with the selected bodies.
Exported and uploaded Fusion360 .f3z to OneDrive @ H2 V2S Revo Remodel v19.f3z. Feel free to use/mod.
The model includes your BLTouch mount, and probably other stuff too. You’ll need to dig around the mess of components/bodies, several are hidden by default…
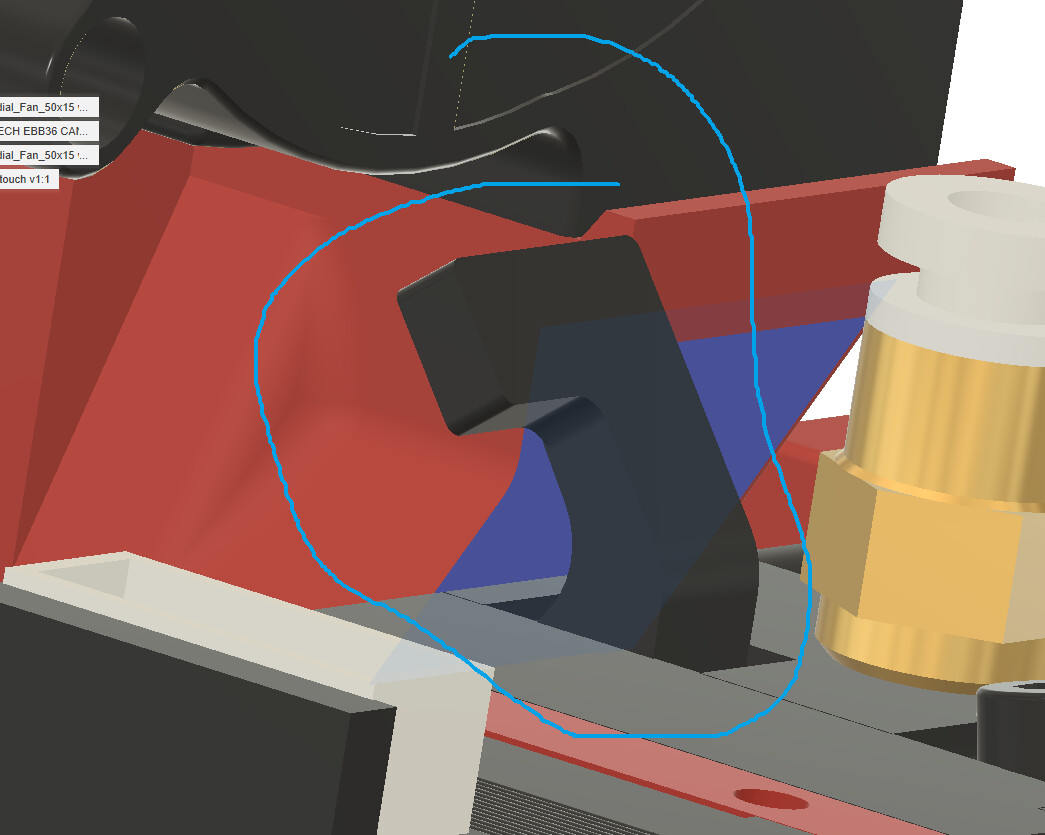
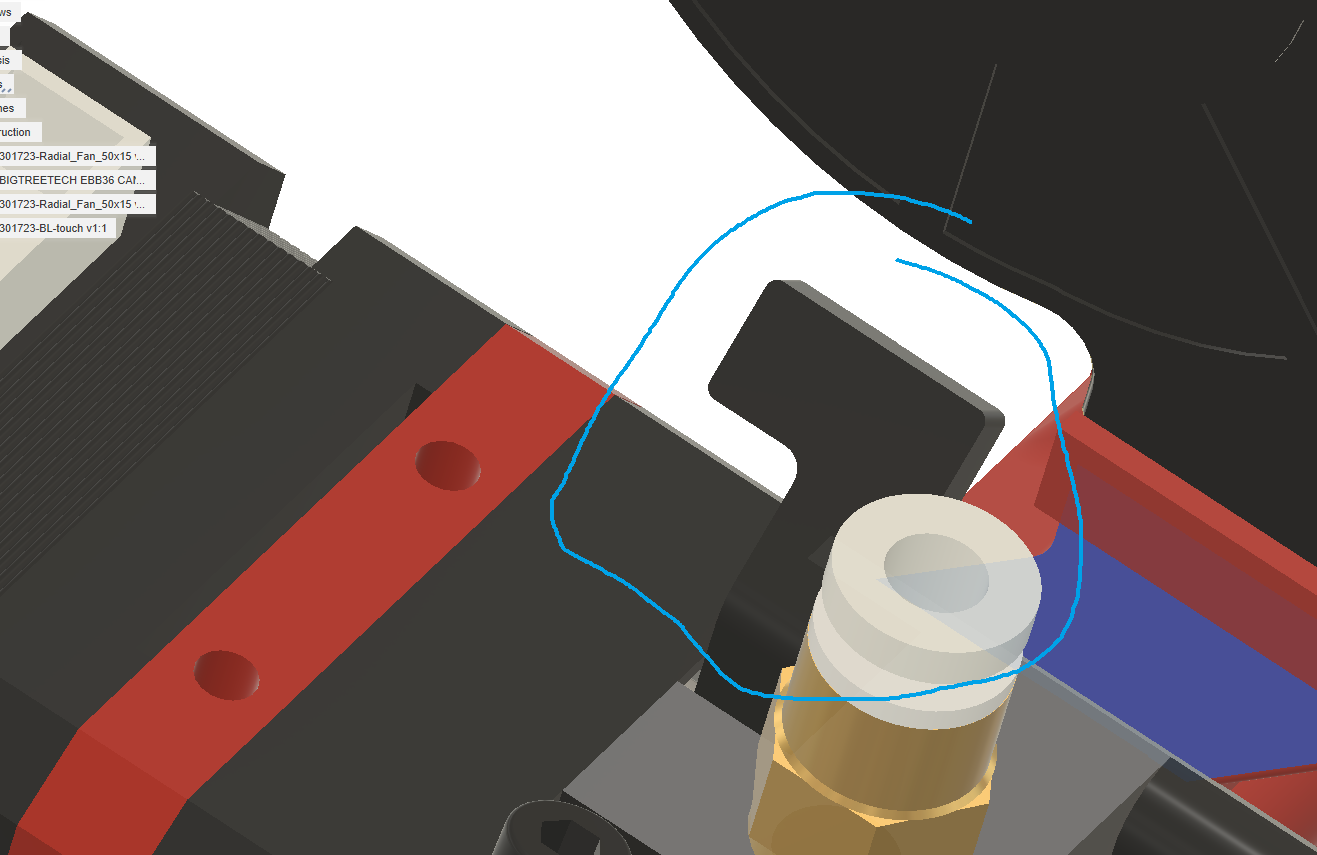
Agree, spent bunch of time making the duct route around various parts, including your BL Touch mount. Was nice being able to use your BL mount as-is with the fan shroud. I guess someone could make a shroud with the BL Touch mount integrated, but am happy with my setup an not looking to change that part.
I probably would’ve saved time on the vertical ducting, and could’ve increased airflow if I did a intersecting body cut with the BL mount (then do a pull/extrude/offset to add some tolerance gap, e.g. 0.5mm). So that the Duct almost “spoons” the BLTouch mount + probe…
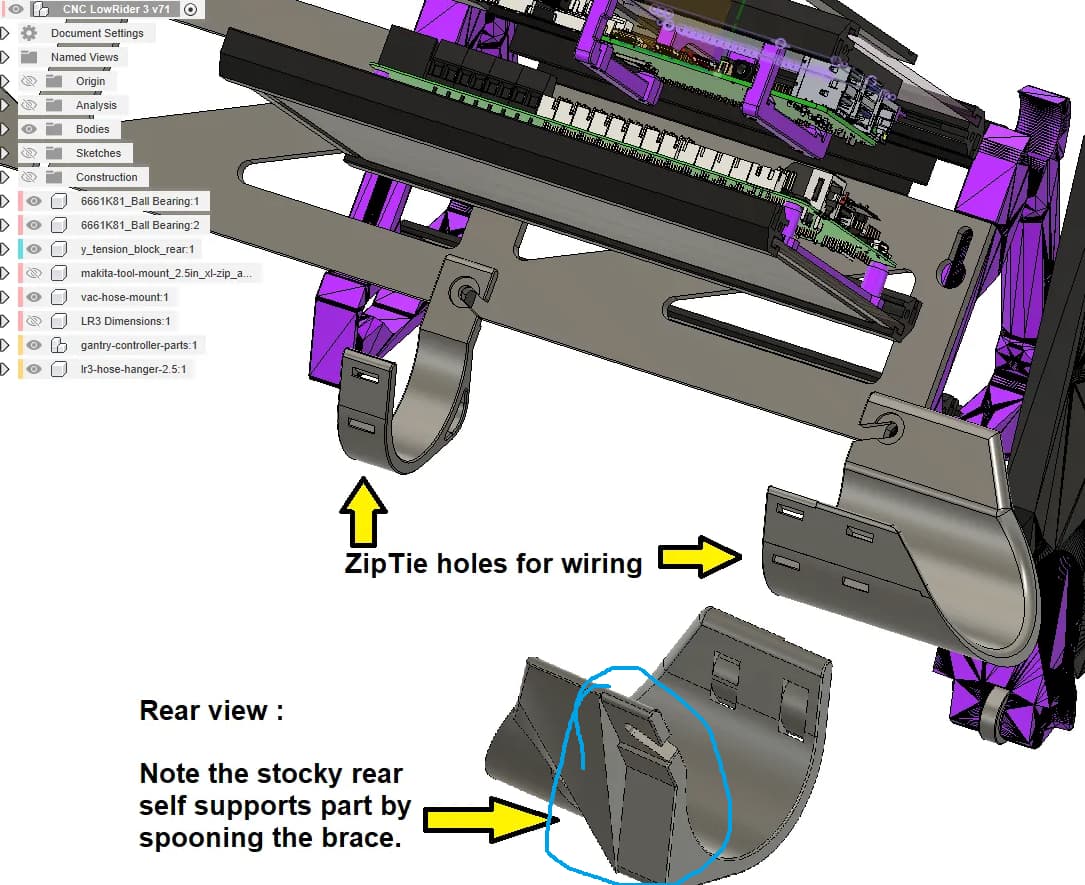
Did something similar for my Vac Hose Hanger part, which spoons the end gantry brace. Used the brace to help support and kick out the Vac hose past the Y belt…
Nice, thank you Mike! You’re giving me a good excuse to try reprinting ASA parts…
Posted other duct improvement ideas earlier in this topic
Just to bring up the ASA/enclosure discussion…
I have an enclosure and have tried to print ASA a few times. One thing to keep in mind is that you need the core to be printed from something other than PLA. The heated bed at 100C causes the core printed in PLA to soften and the belts come loose.
would that cause bltouch mounts to sag and fans to fall off?
I did have the fan shroud near the extruder soften and sag until it touched the heated bed. I didn’t have any other issues beyond that.
@niget2002 I’ll be careful about what I put in there then… a friend printed my carriage and all the mounts in ABS, so it should be good, but I’m only printing PLA atm so better watch that.
@azab2c regarding the fan situation… could the fan be rotated 90 degrees (CW around the Y axis) and set just in front of the stepper so there is an access slot for the gear, but still keep the front non interfering with the frame? Also: what orientation did you print your fan duct? Planning to print it after finishing the calibration fixtures.
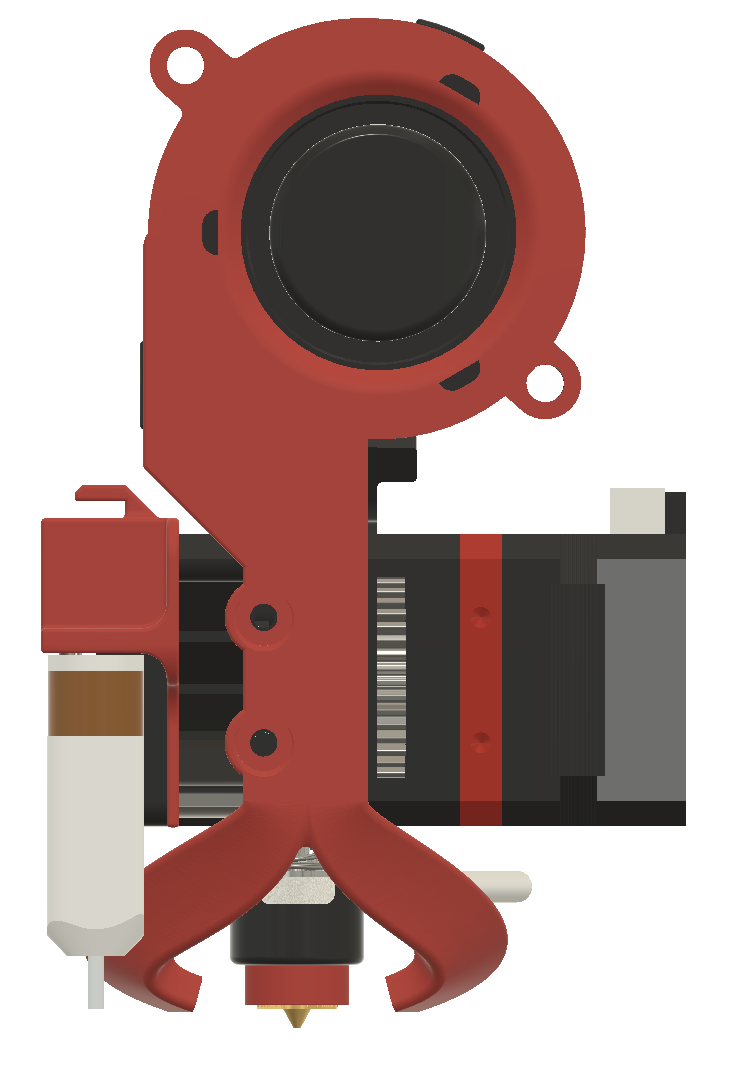
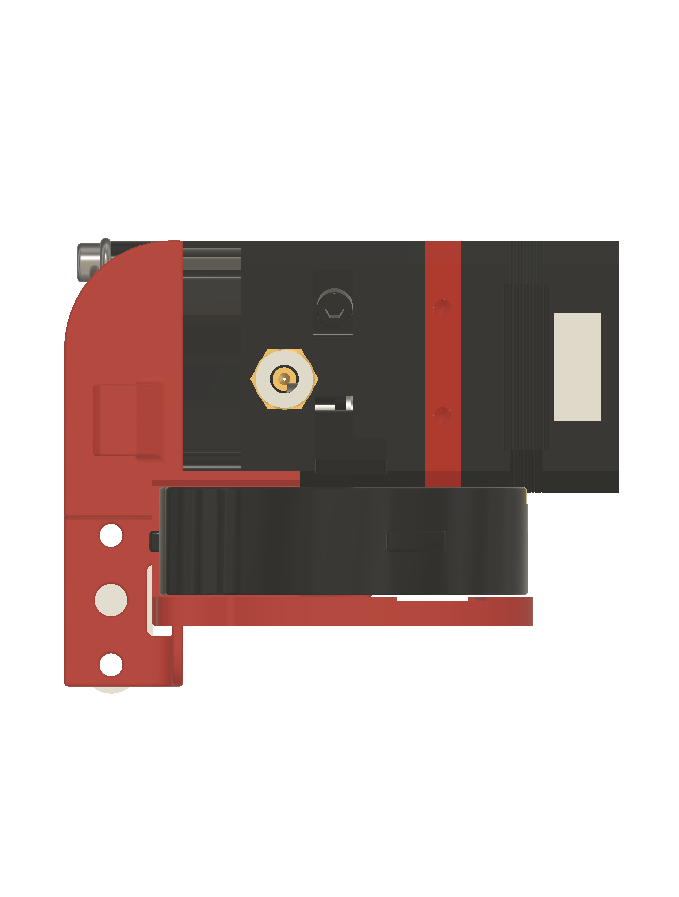
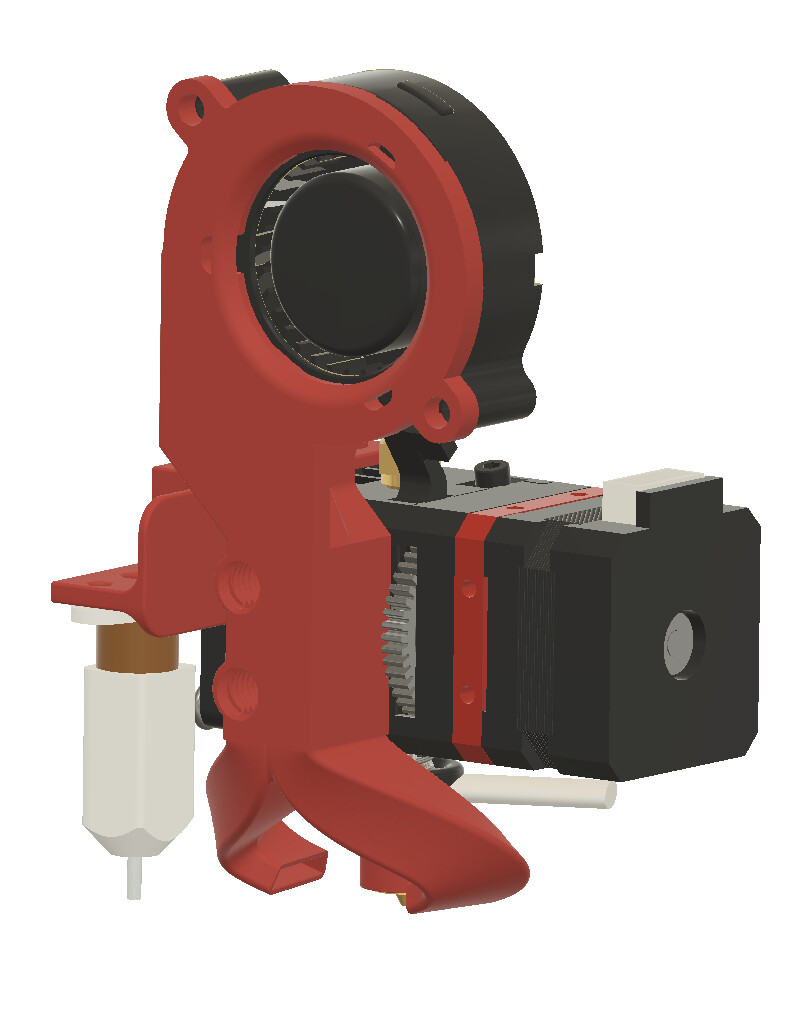
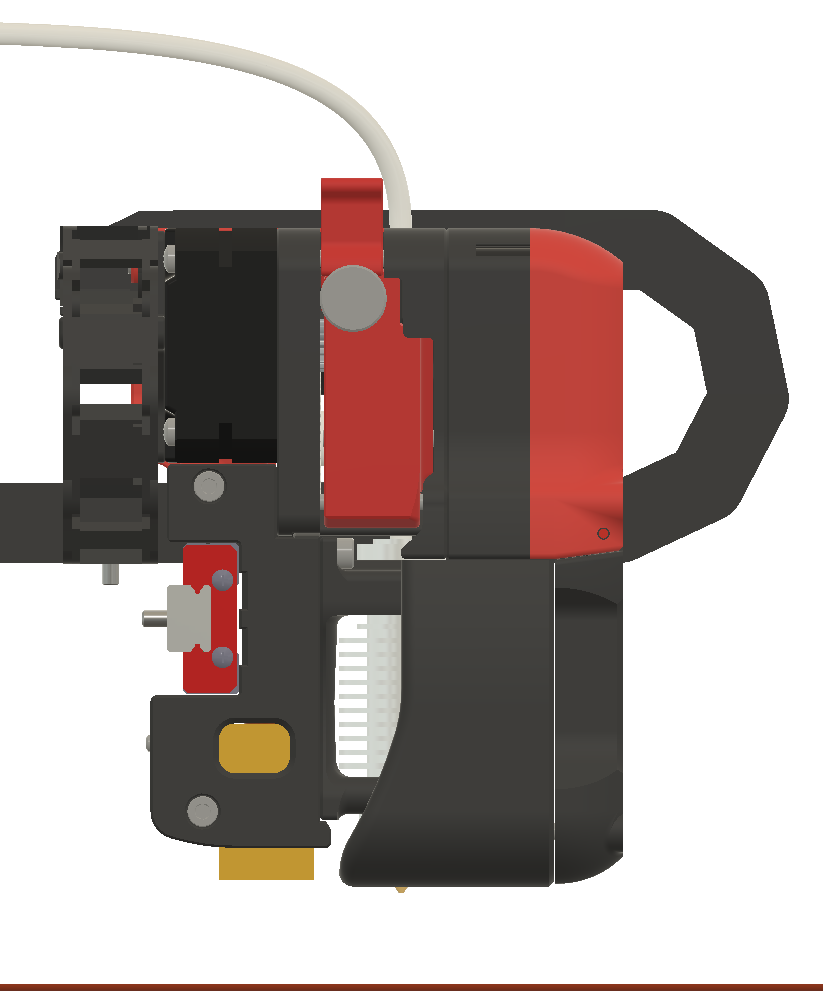
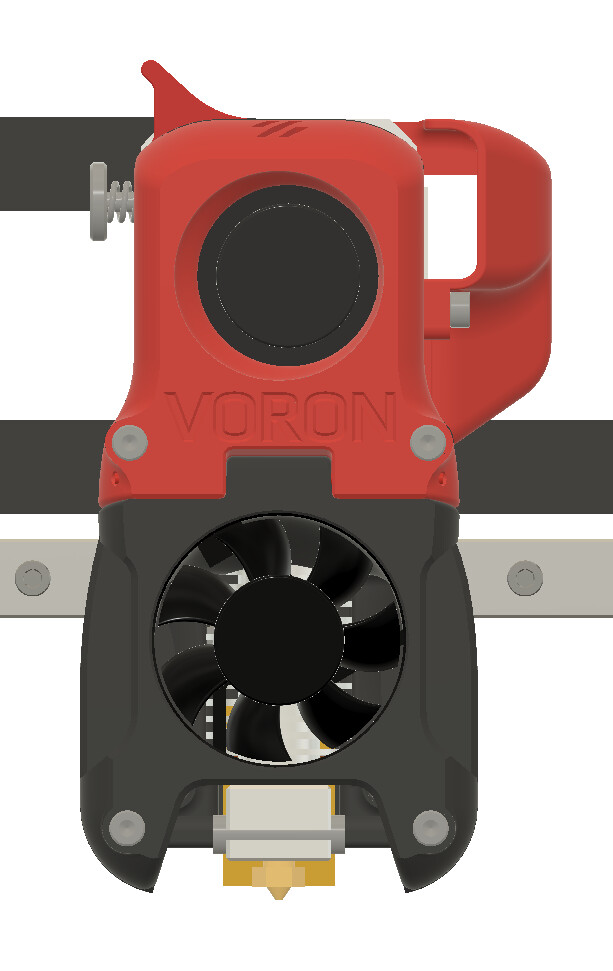
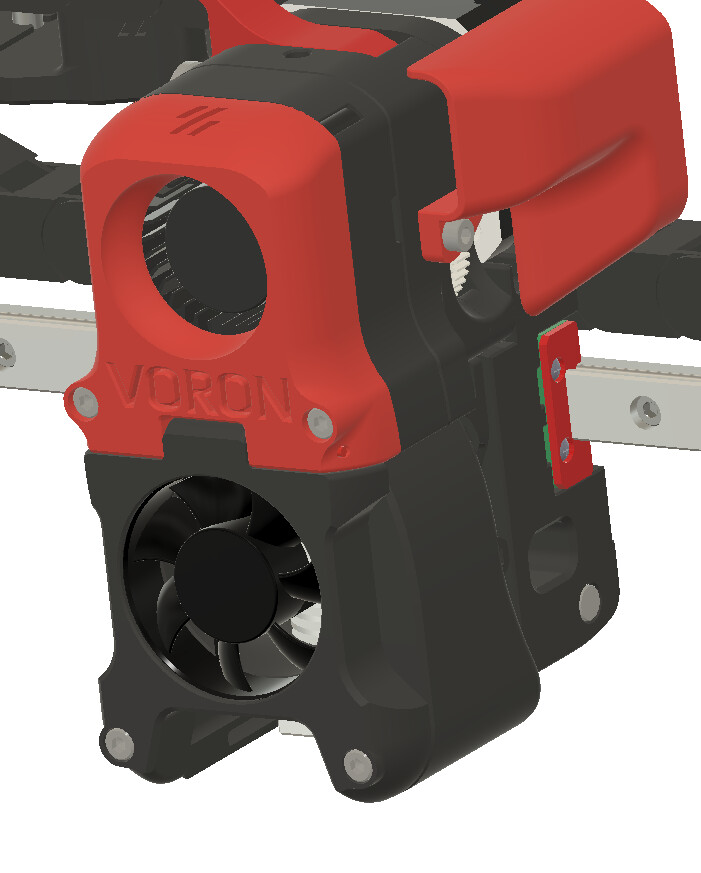
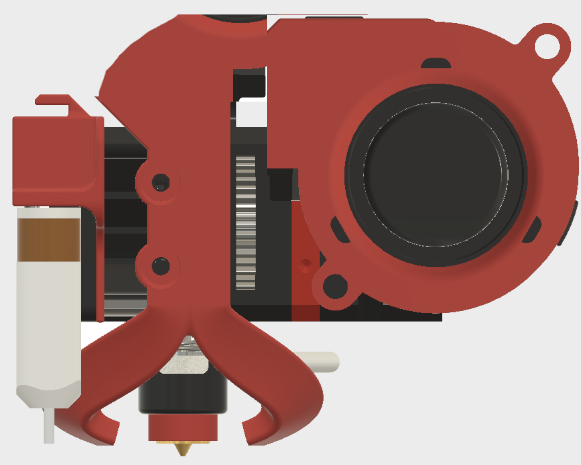
Sorry, not understanding, here’s current version… Able to scribble/markup what you’re thinking? I did think about making more symmetrical by rotating the fan slightly so center of fan would be colinear with center of nozzle (similar to Voron Trident, see below), but didn’t bother.
The extruder gear has room to spin…
And tension lever thing has enough clearance to be moved (I even smoothed edges so shroud is less stabby)…
Designed to print this orientation without support…
However, before printing you might want to create, or wait for someone to create, a version that has larger vent holes like the Voron Trident’s multipart fan shroud. See…
nice model. I was thinking like this:
You’ll have to excuse the crude cut and paste, but hopefully it shows the idea…
Cheers for the visual Rob, this helps clarify, I wrongly assumed a diff axis to your pic.
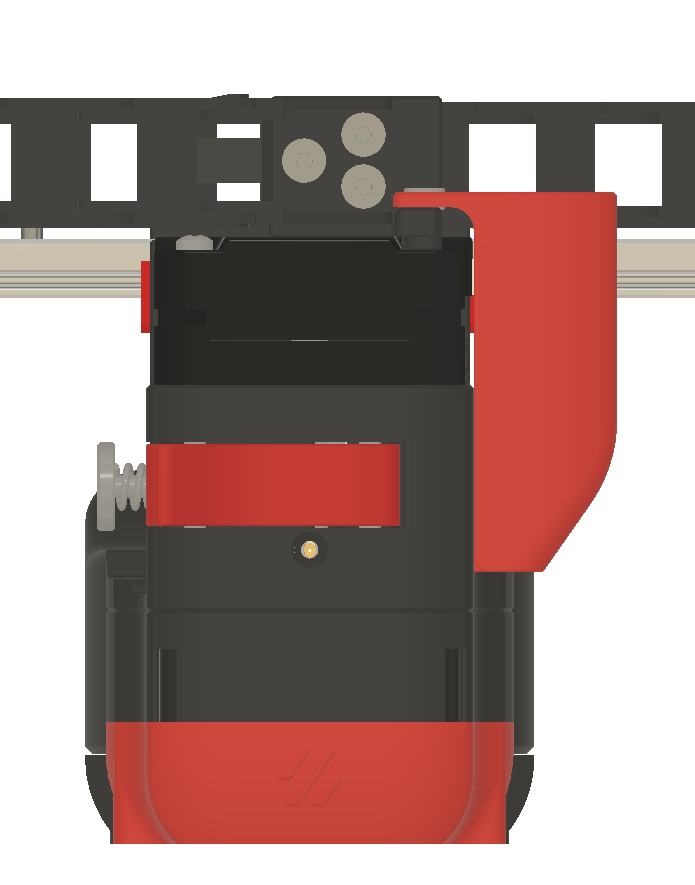
I do like the idea of the fan being lower, ideally with minimal ductwork. Shame the 5015 radial fan vent isn’t on the other side, could’ve snuck air vent under the extruder gear then. I couldn’t find reverse/mirror 5015, maybe smaller fatter 4020 would be easier to mount with shorter more direct duct?
Am trying to keep right side of the extruder clear on my setup so other stuff can be mounted. Wanted to be able to disassemble extruder for fixing clog/stuck filament without having to remove fan duct. Ideally BL touch mount wouldn’t be disturbed/removed when dealing with filament clogs.
Hoping info here helps someone modding, am not looking to edit much at the moment. Trying to wrap up existing unfinished stuff…
I may take a stab at it, but ave not run AutoCAD in tens of years…last time the printer blobbed and tore the heater wire, it all had to come off. In order to enclose this thing to enable abs, it cant be too high and can’t stick out the front as it does. If I had no plans to enclose, I’d leave it alone. This angled mount works great.
Hello @Tonic92_252063! Thanks for your question on printables about the Struts. Responding here with info that may interest/help others too.
Ultimately, I ended up settling on 30N/7 lb 6 inch Long Gas Shock, Soft Open, … (2 Pack) (affiliate link). Hope following info helps…
20N were too weak, 40N seemed to overstress the 3D printed 90 degree Voron inspired hinges as designed. I did try out many different Struts first…
Here’s a video clip of me talking through how and why I ended up with these Struts. That site has links to how I created/welded the transparent top cover too.
Good luck with your Squirrels Satsuma 180 Printer build!
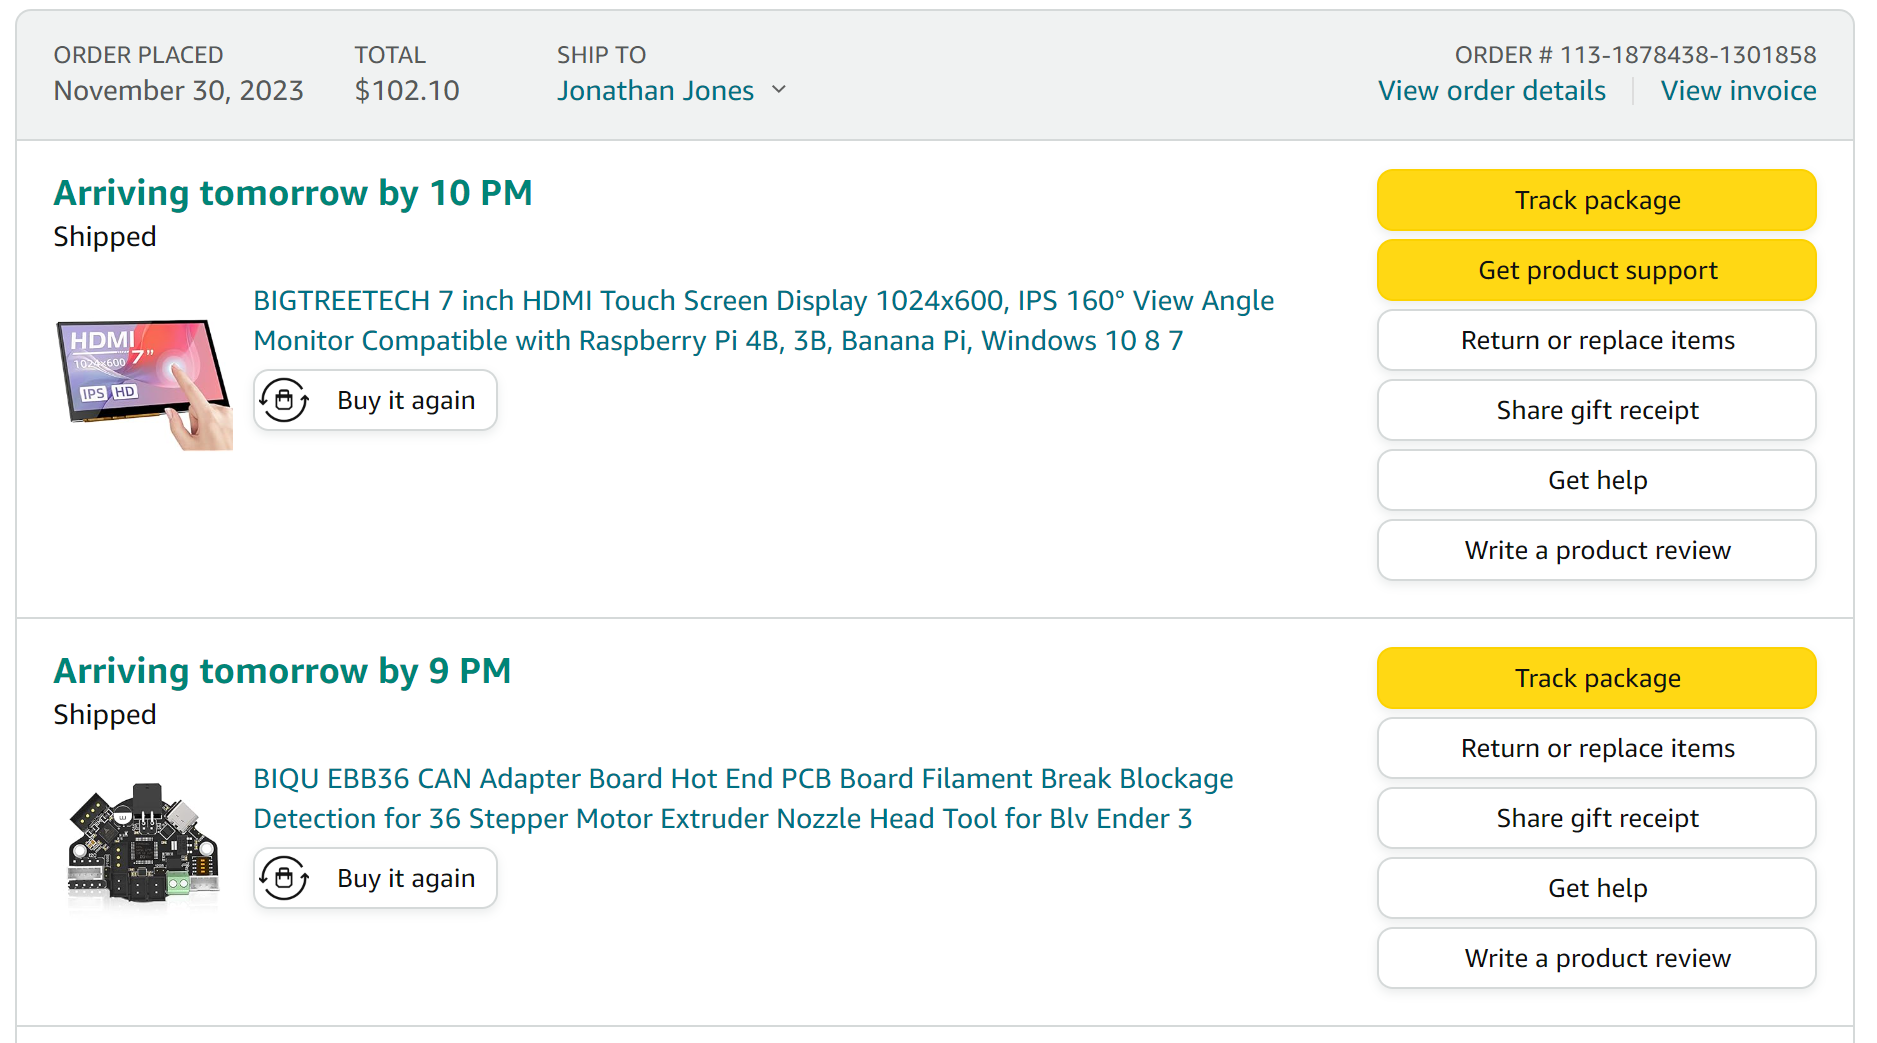
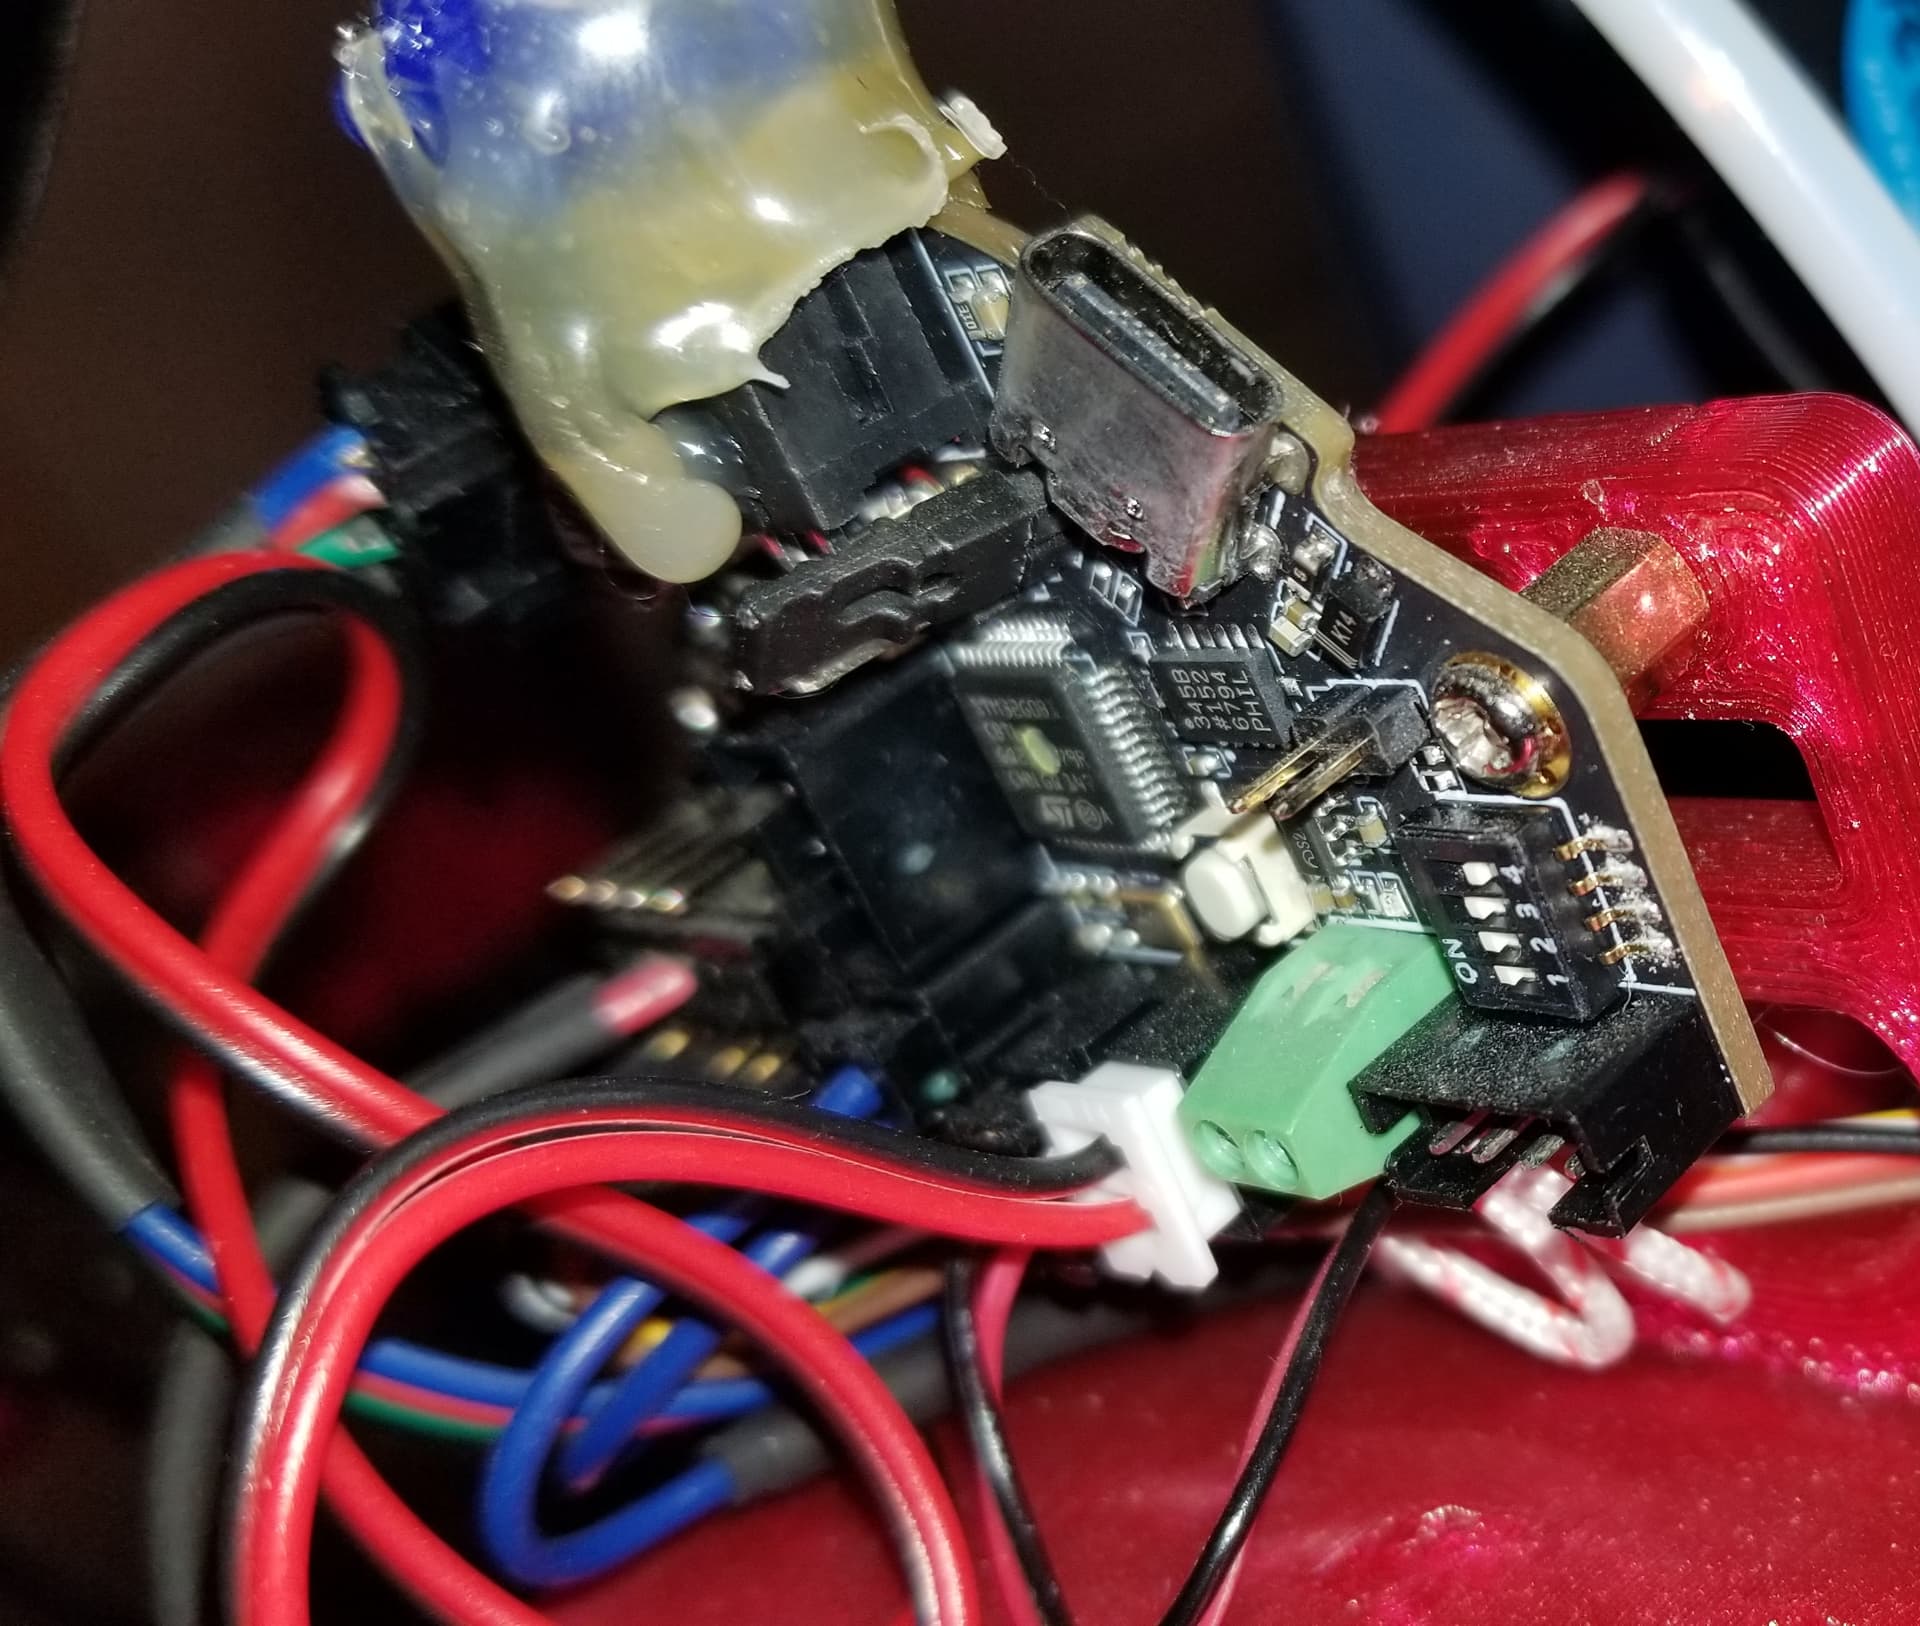
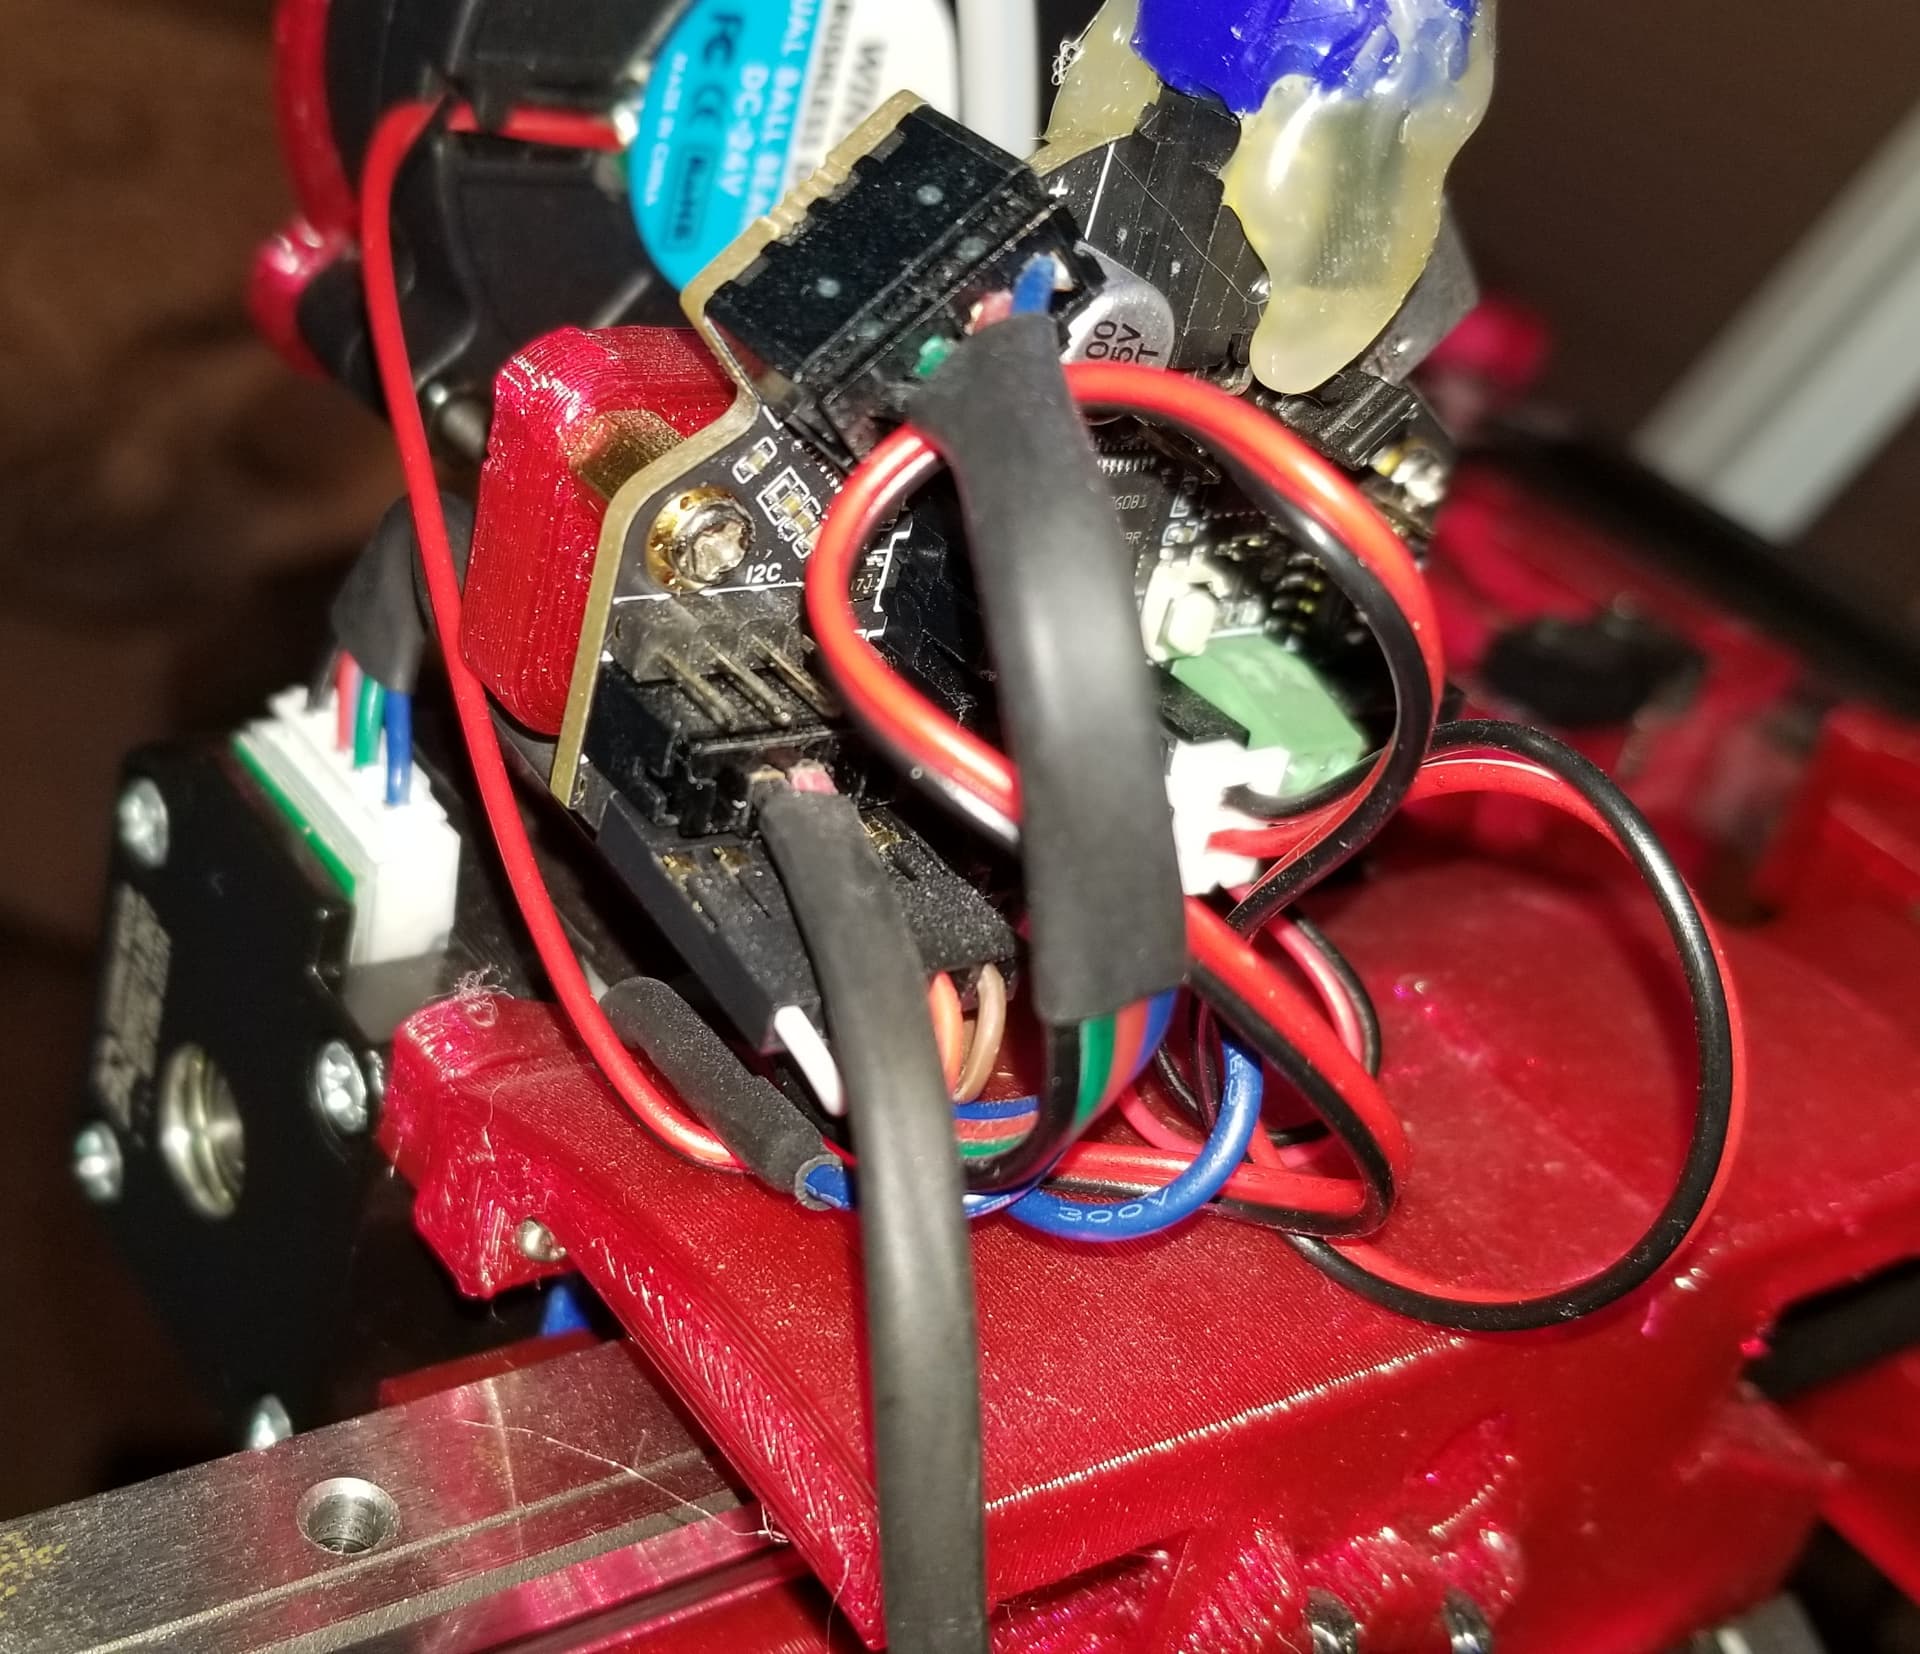
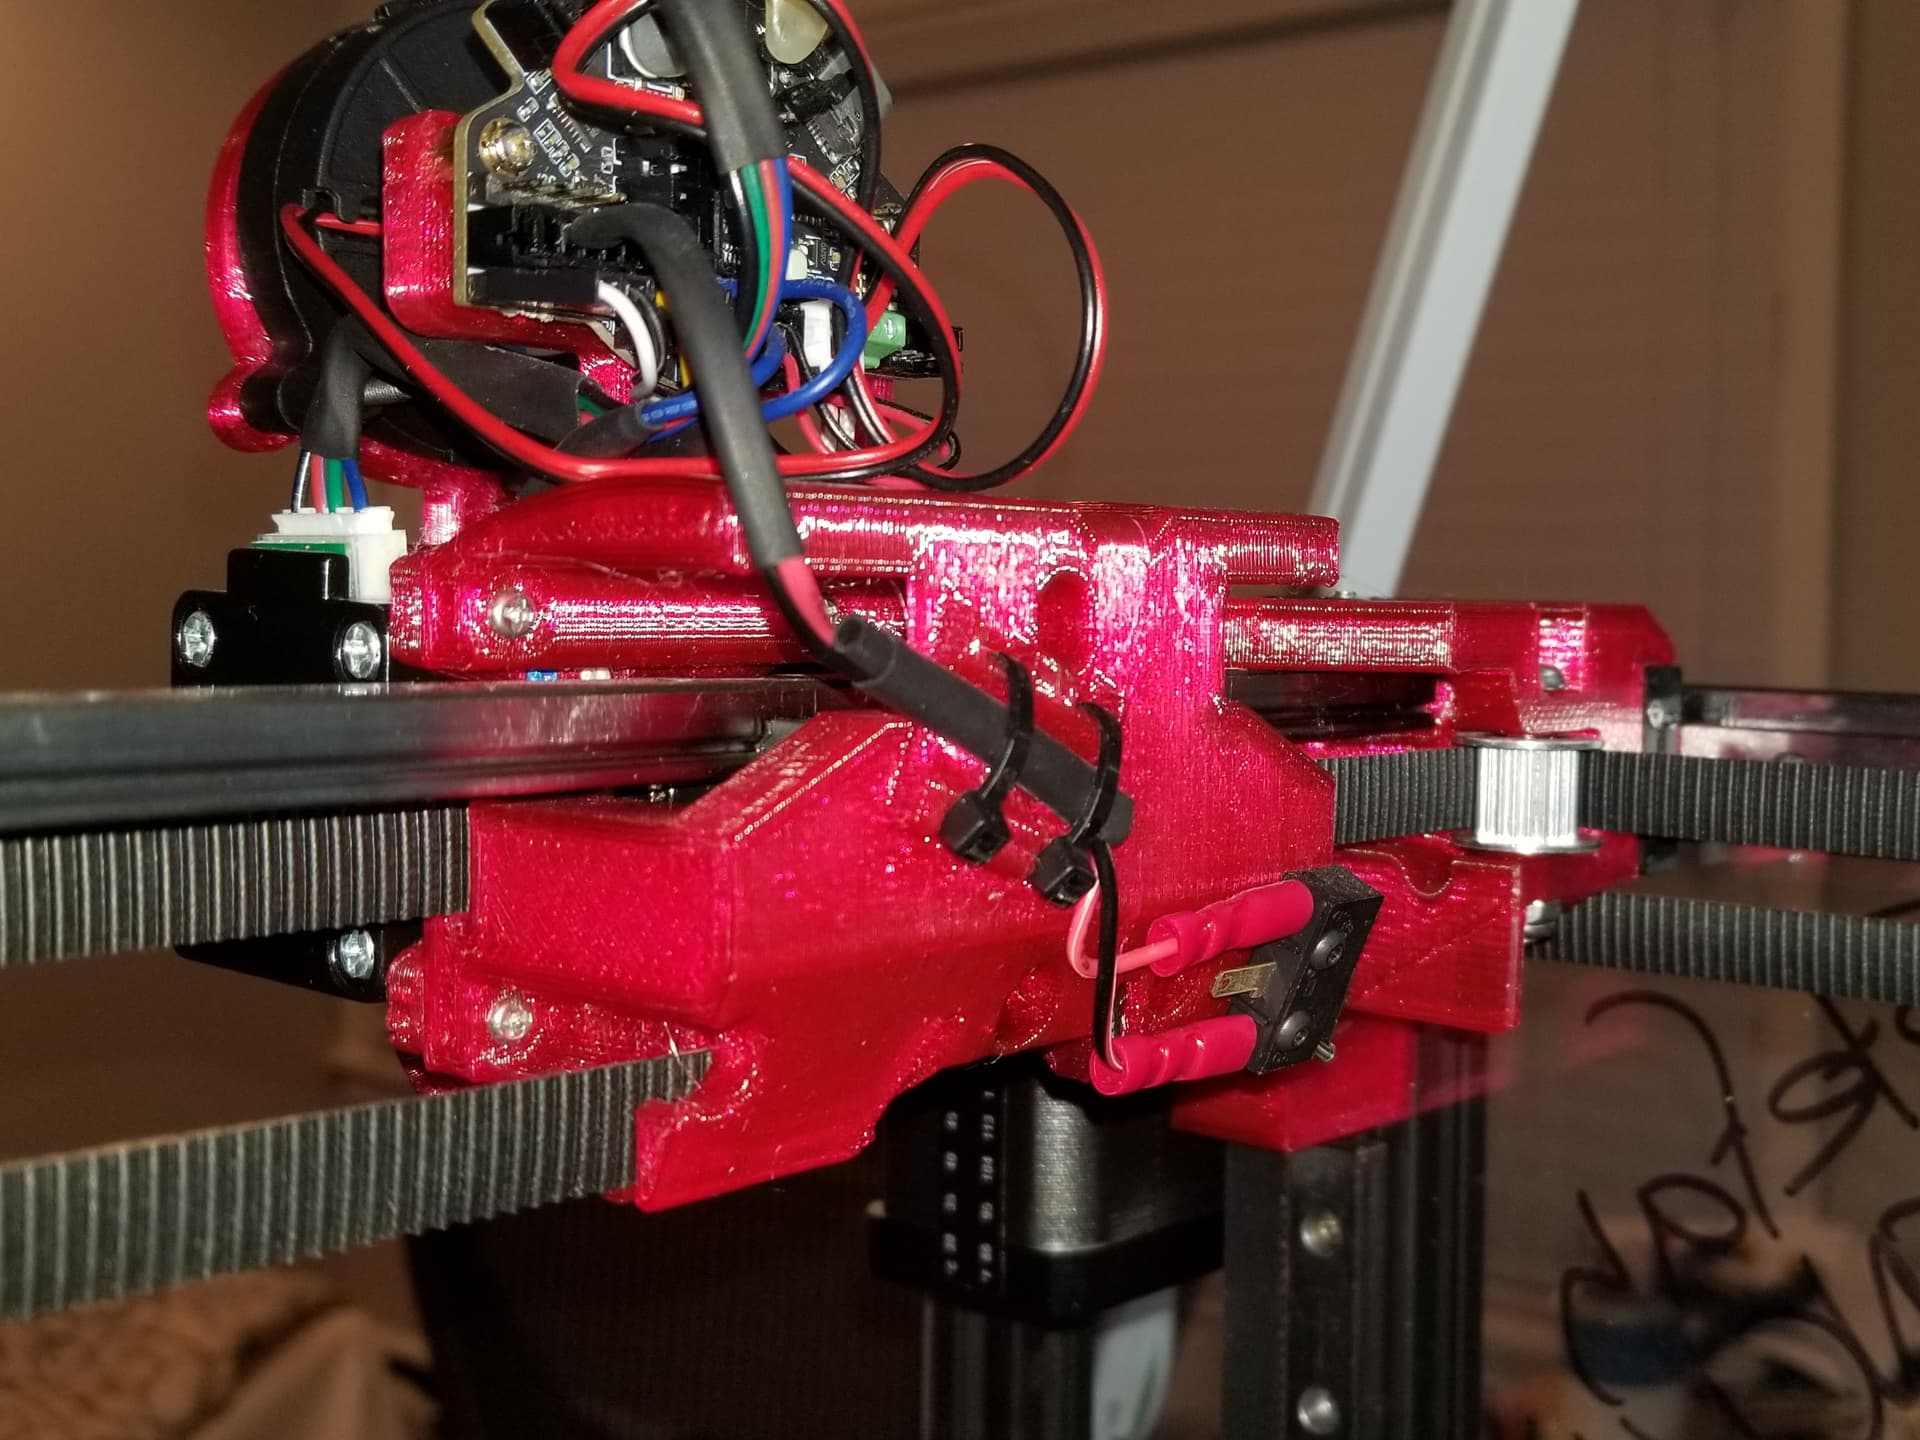
Some Photos for @Jonathjon showing X Endstop wiring connects to BigTreeTech EBB36 CANBus based expansion board…
EDIT: Scratch pad/notes, without updating topic’s timestamp…
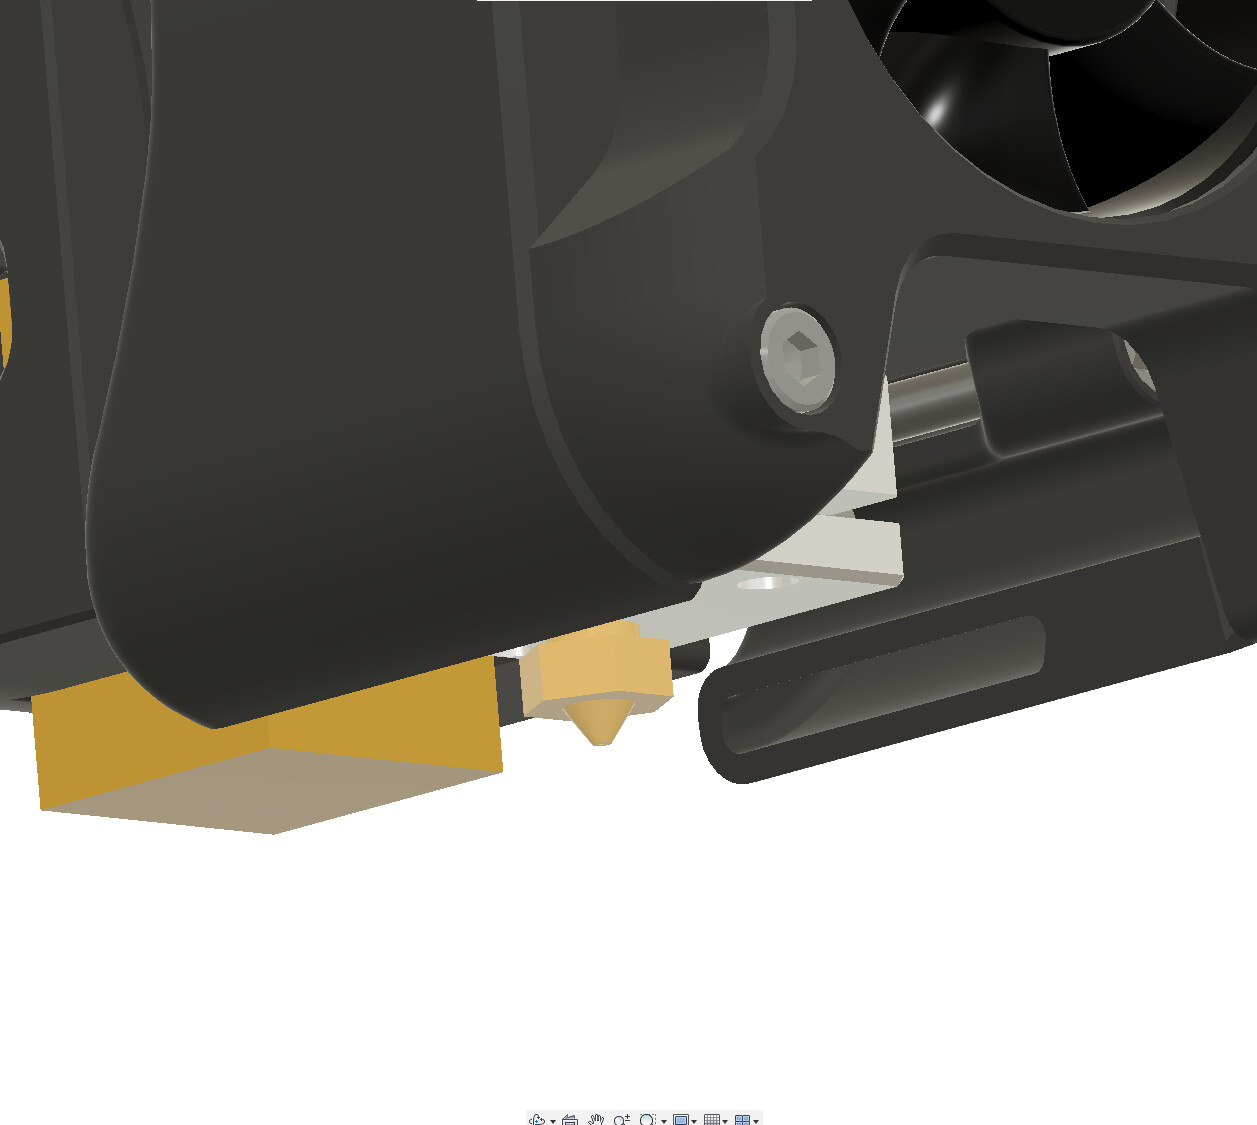
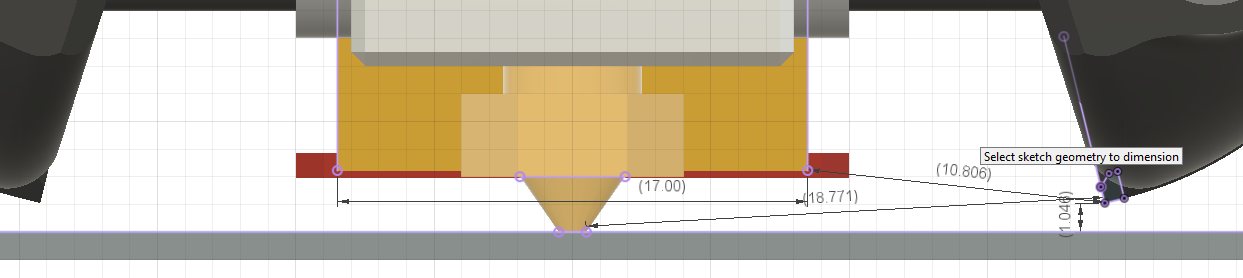
Voron Trident hotend and cooling dimensions/spacing :
Starting a new thread you might be interested in, Help develop the next MP3DP!?!
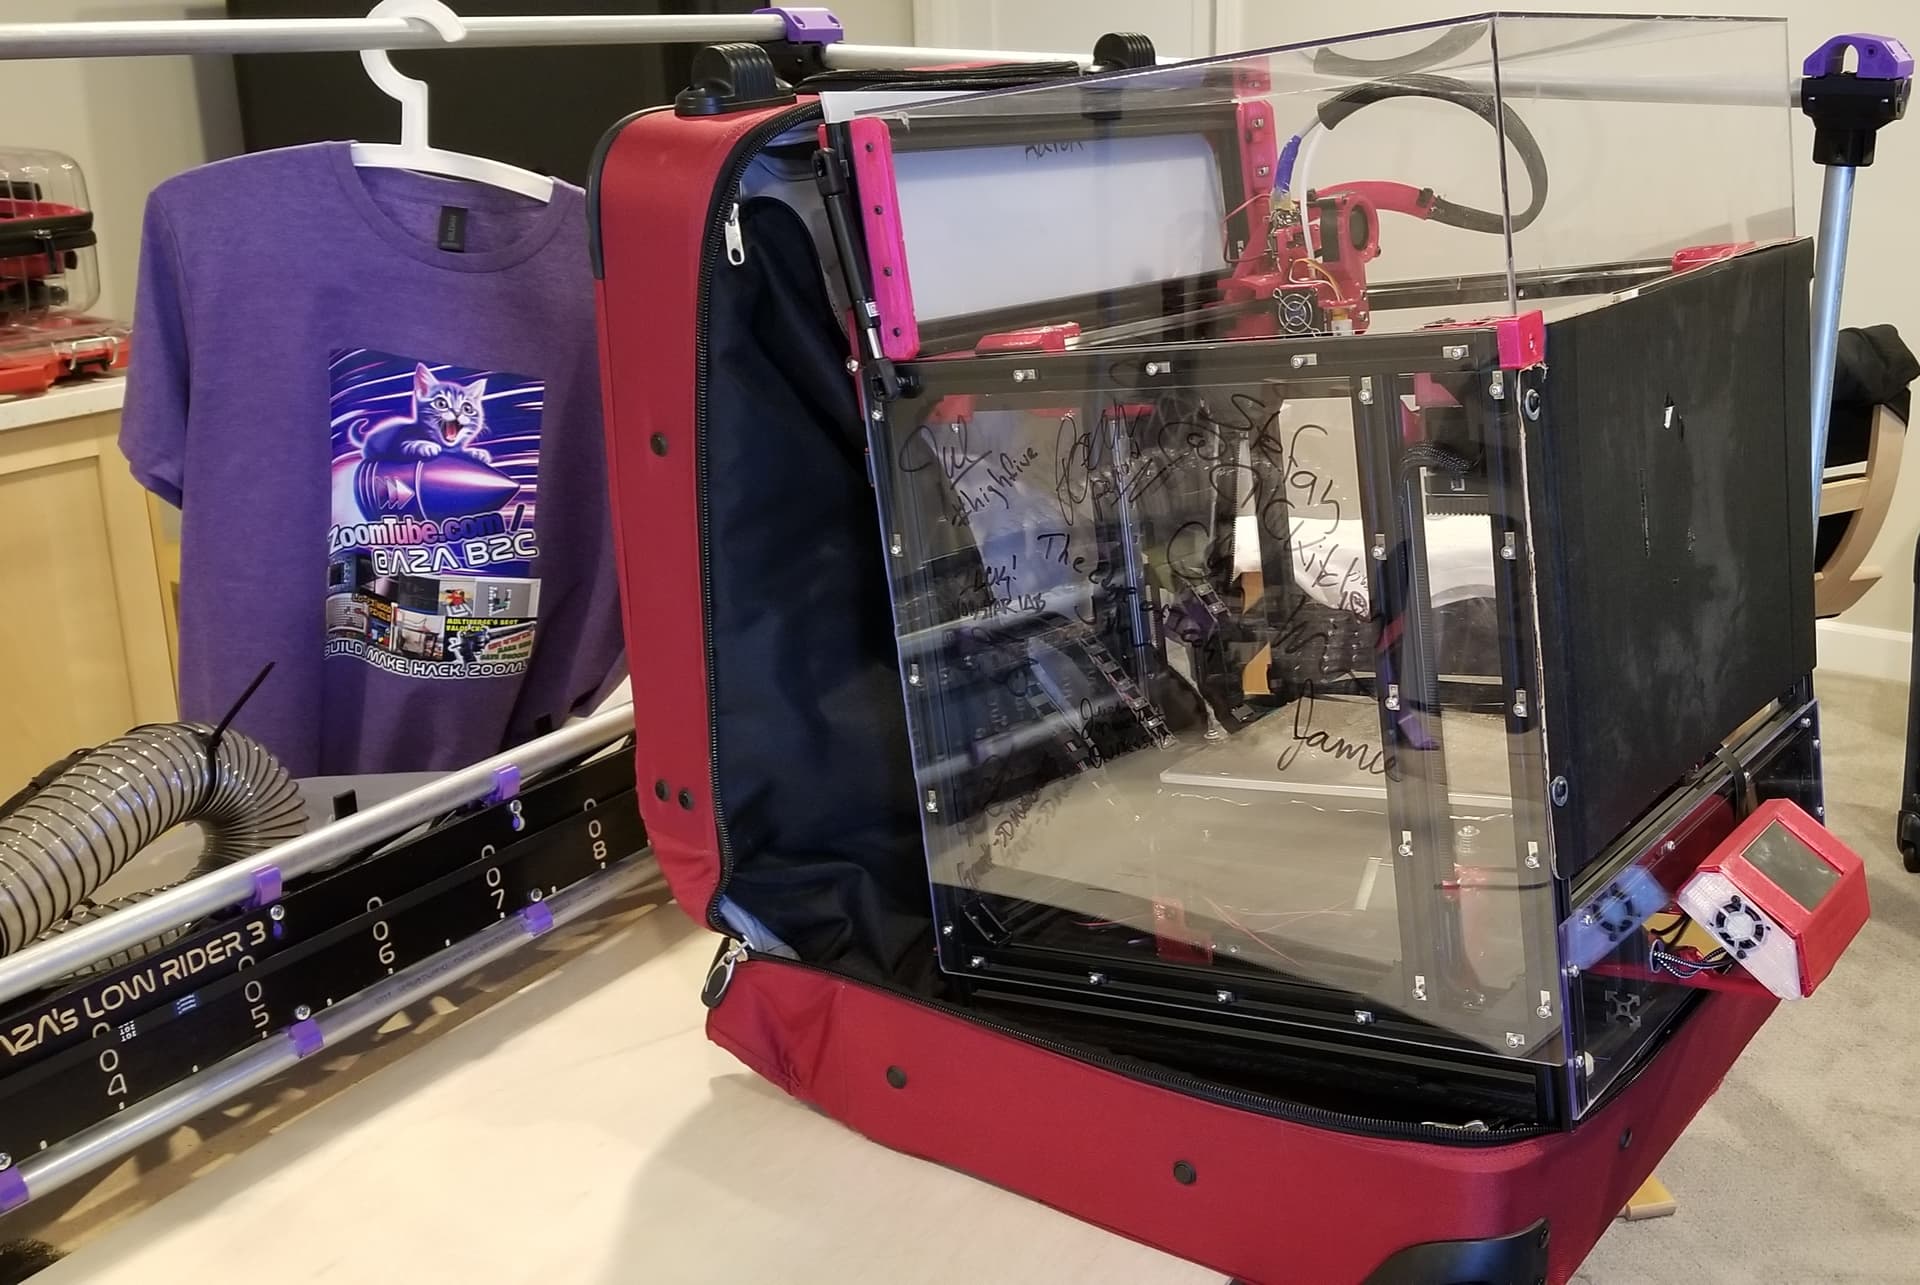
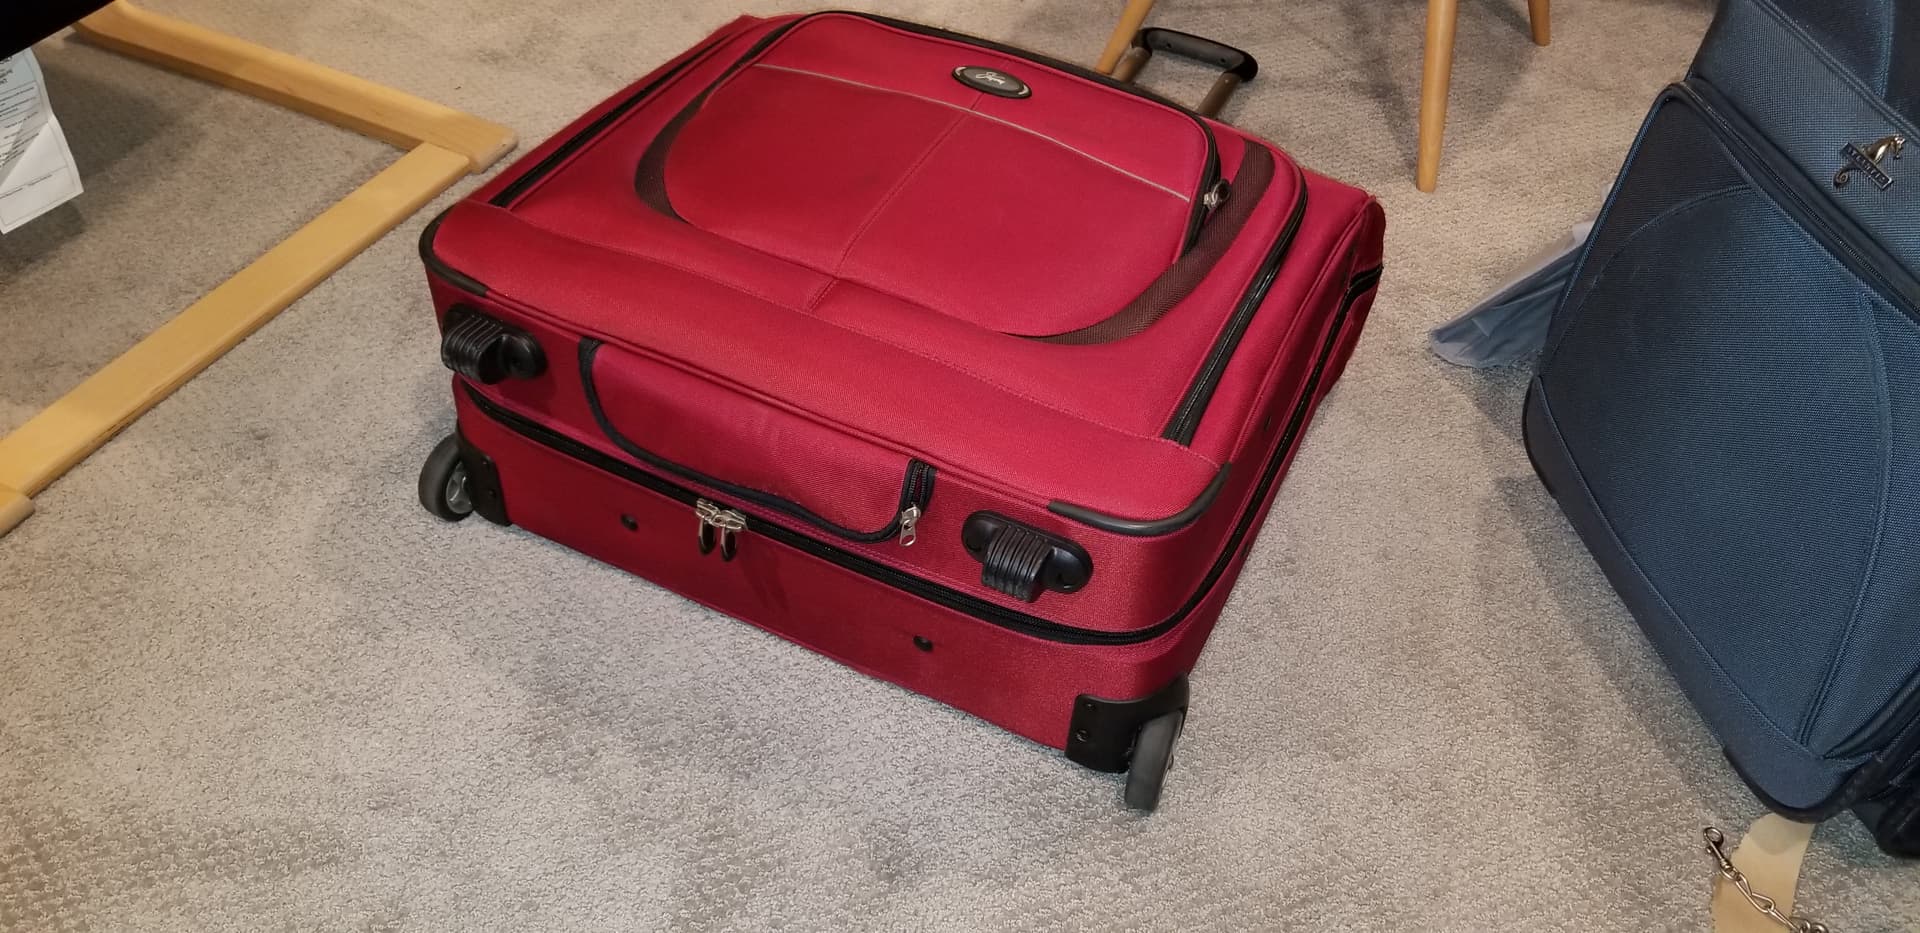
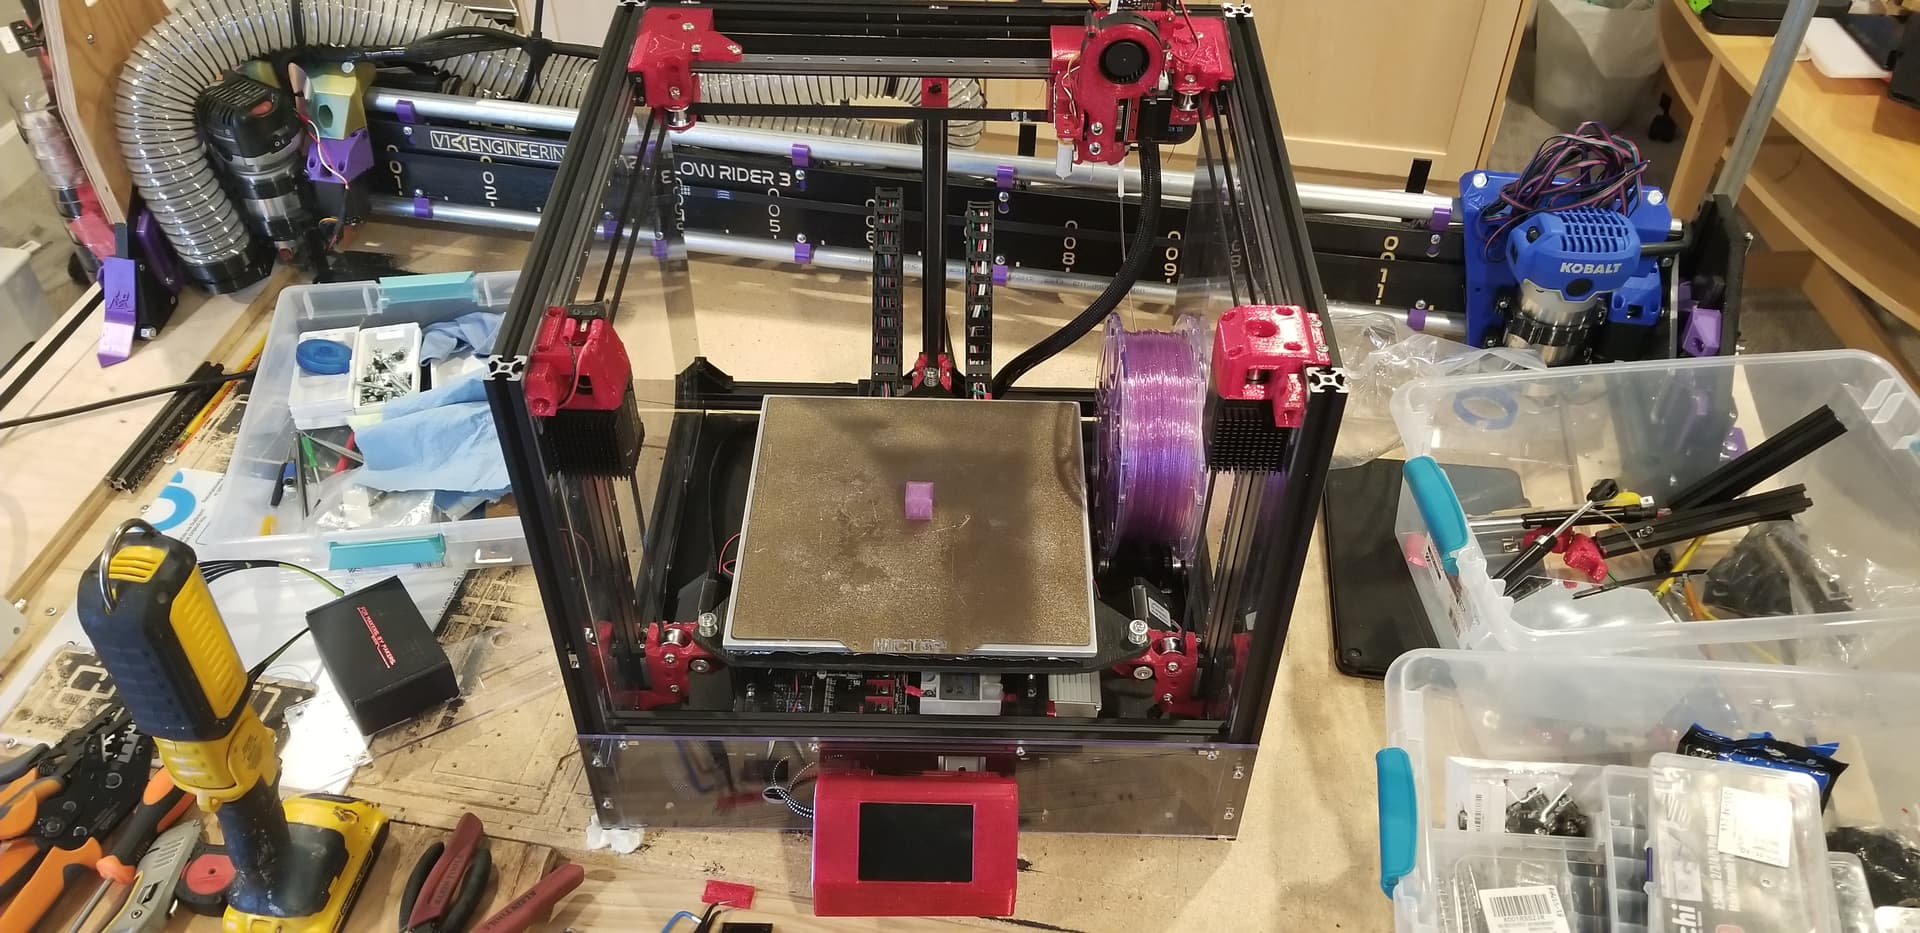
So, have disassembled and rebuilt my MP3DP v4 twice in the past week for travel, and use, at RMRRF 2024, and back home.
1st round of disassembly-reassembly was extreme, and not recommended… Single 68lb suitcase cost $100 to take as checked luggage.
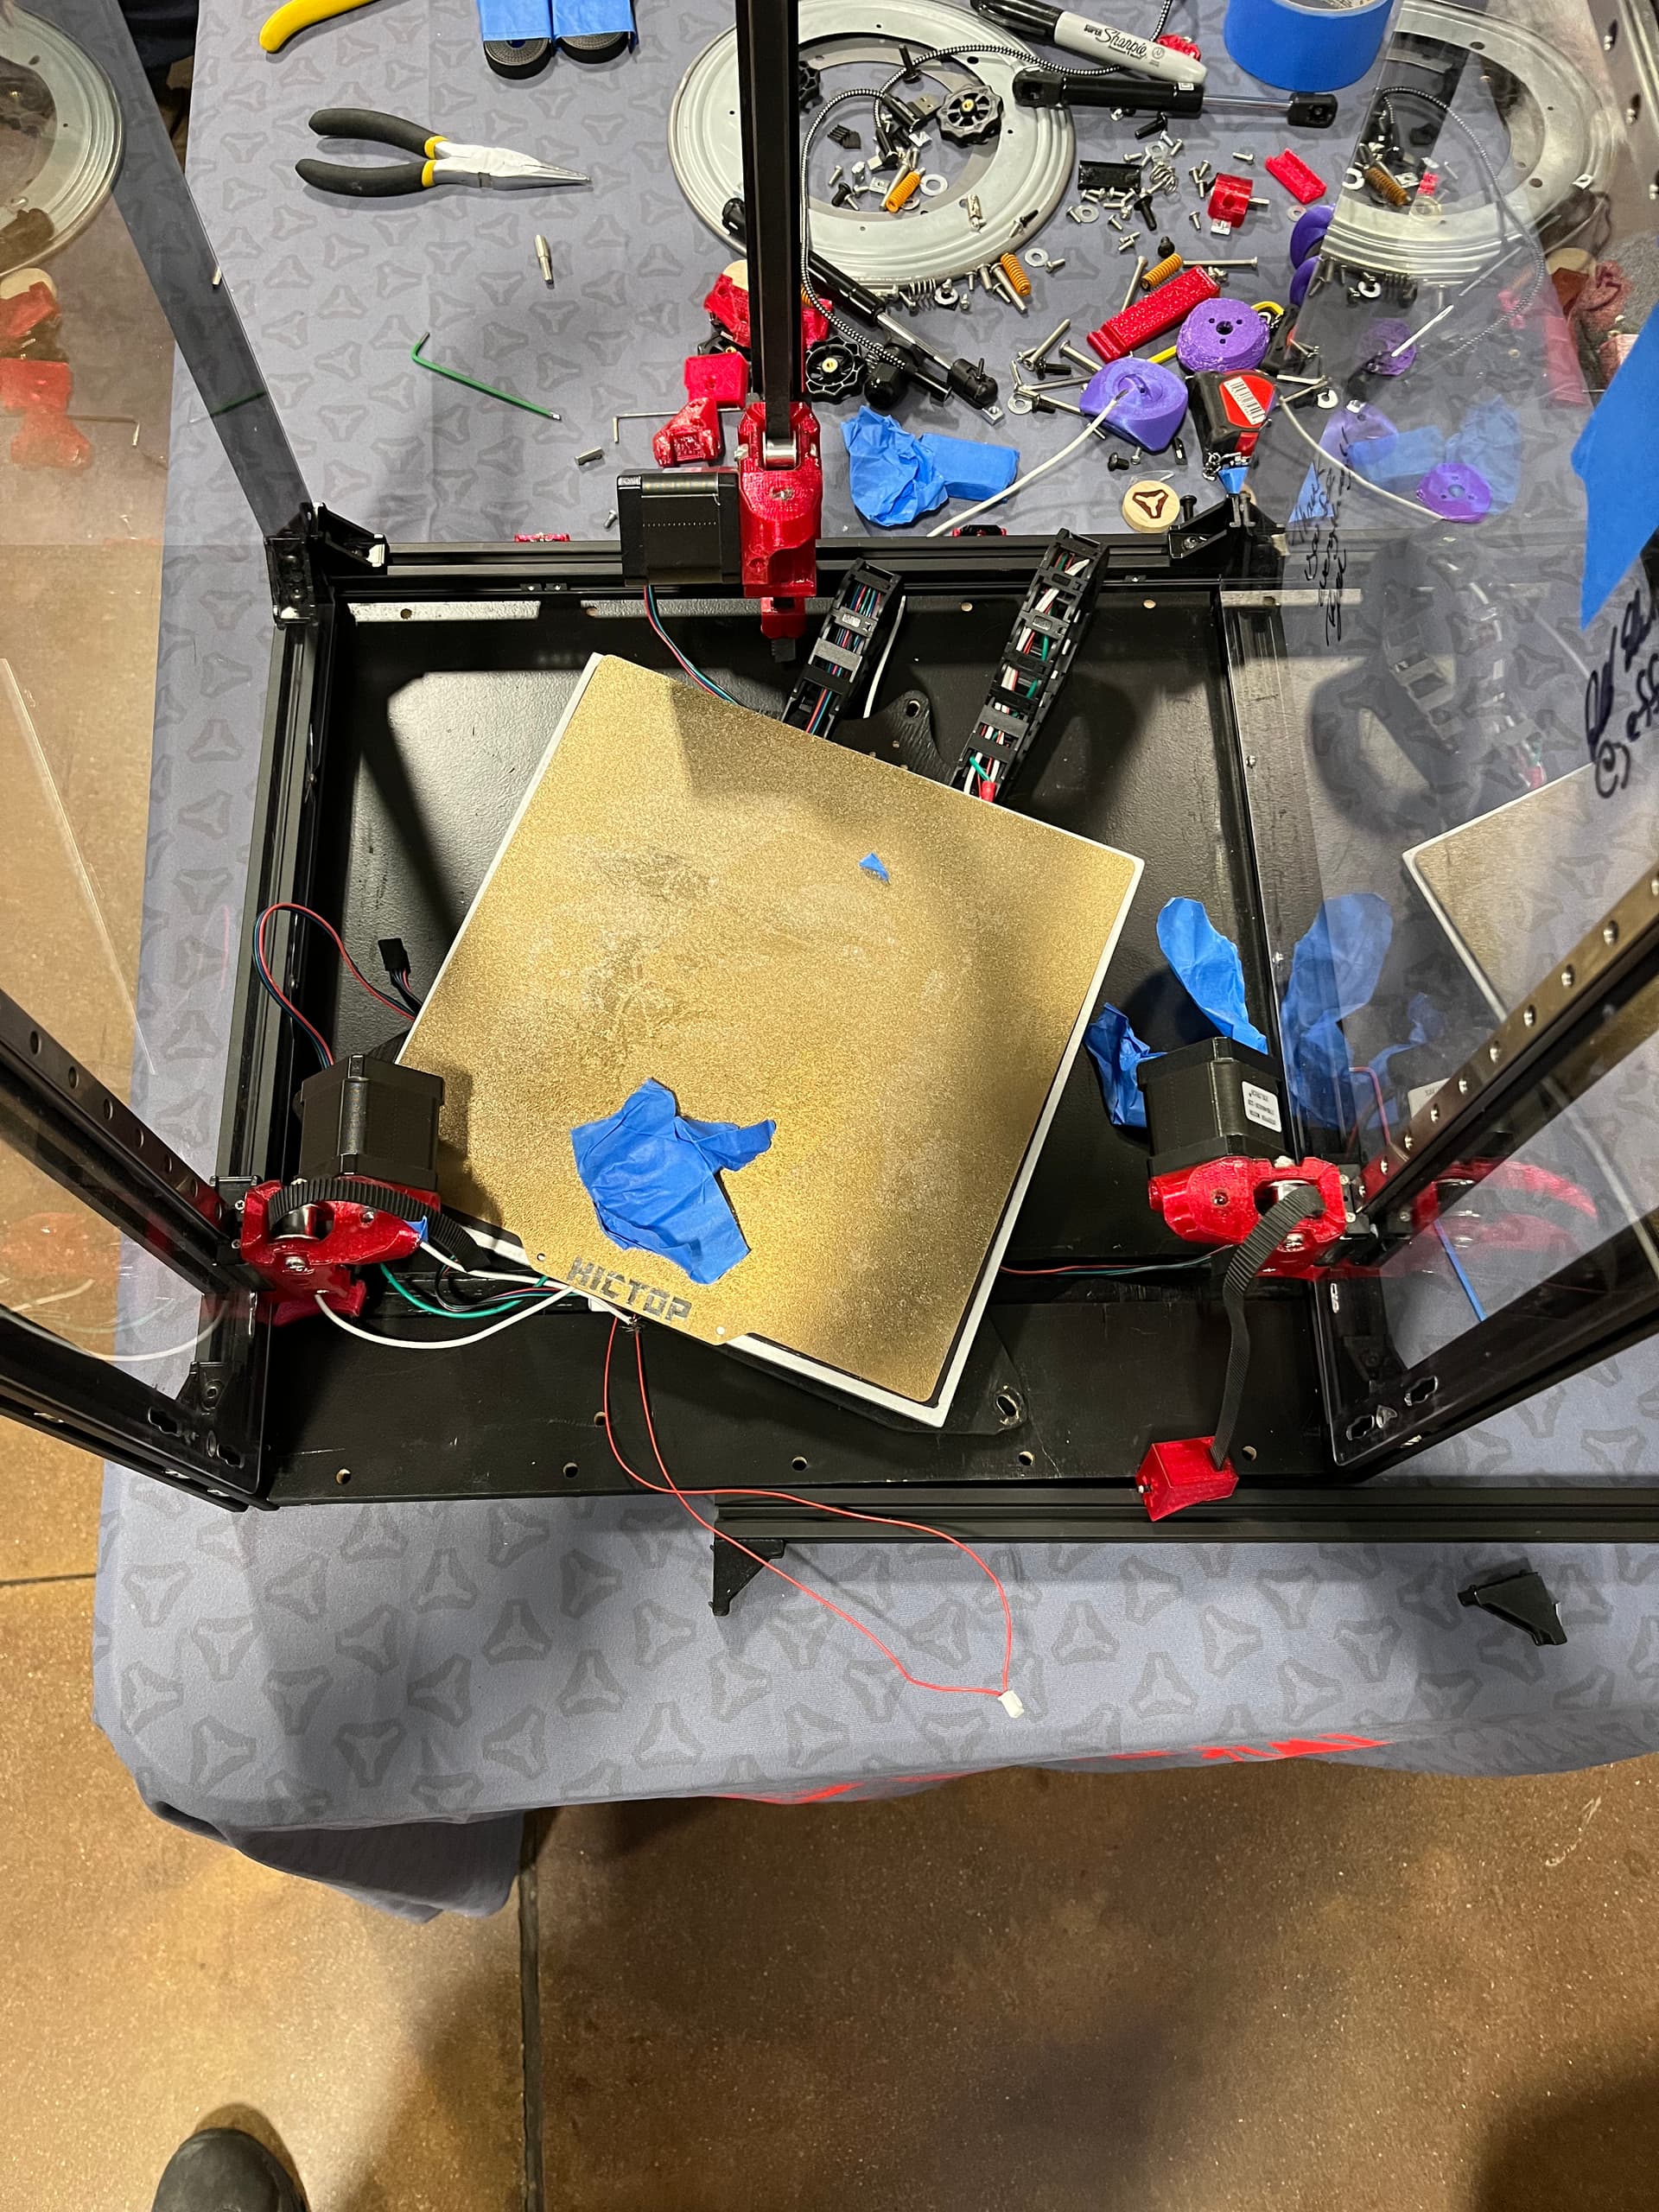
Thankfully, @MakerJim, @orob and others, including @jamiek’s partner were there to help get assembled, and printing again…
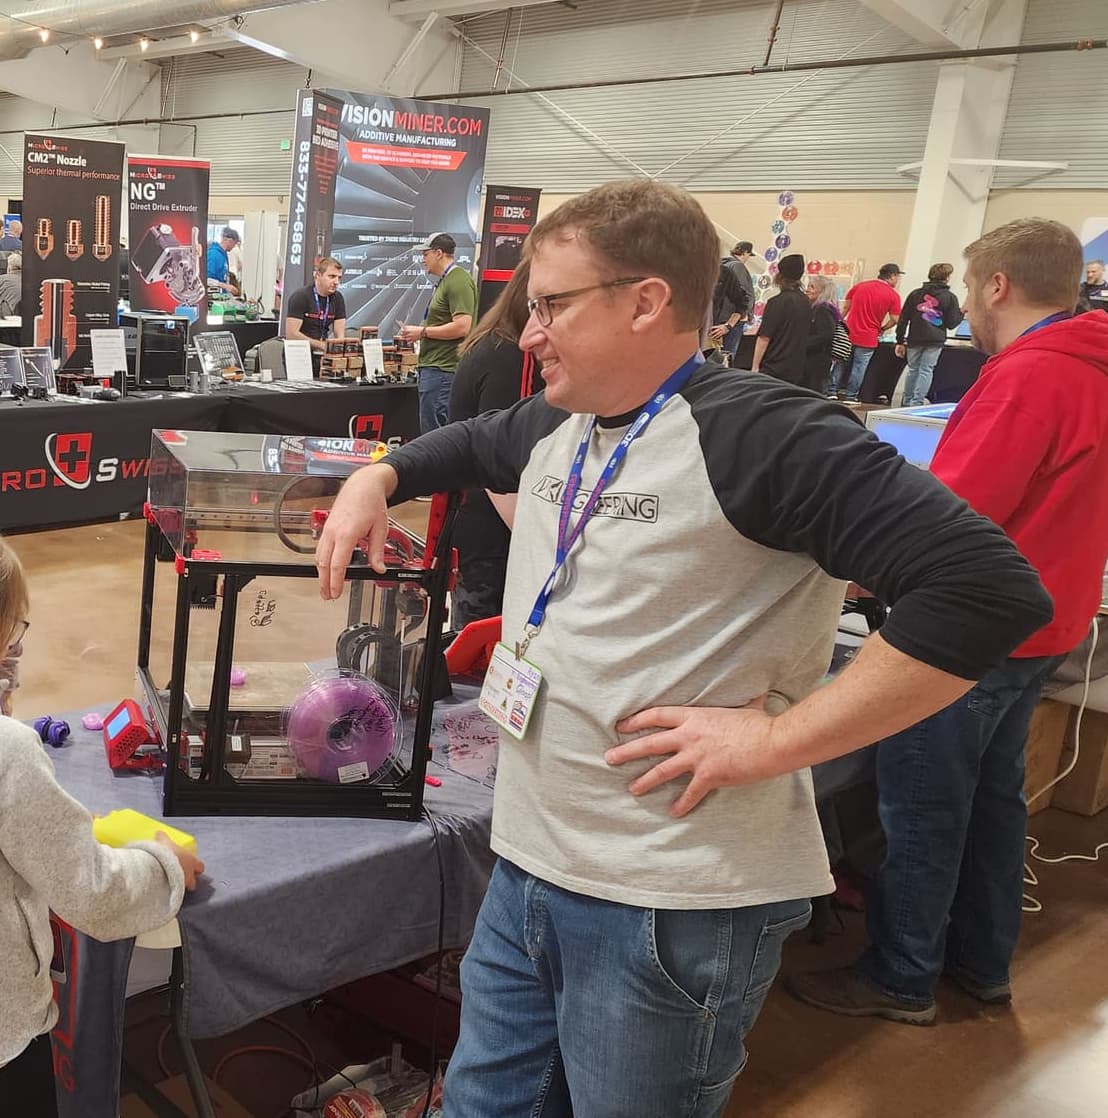
Ryan finally got to witness that the machine is more than just a supportive art exhibit, but can actually print…
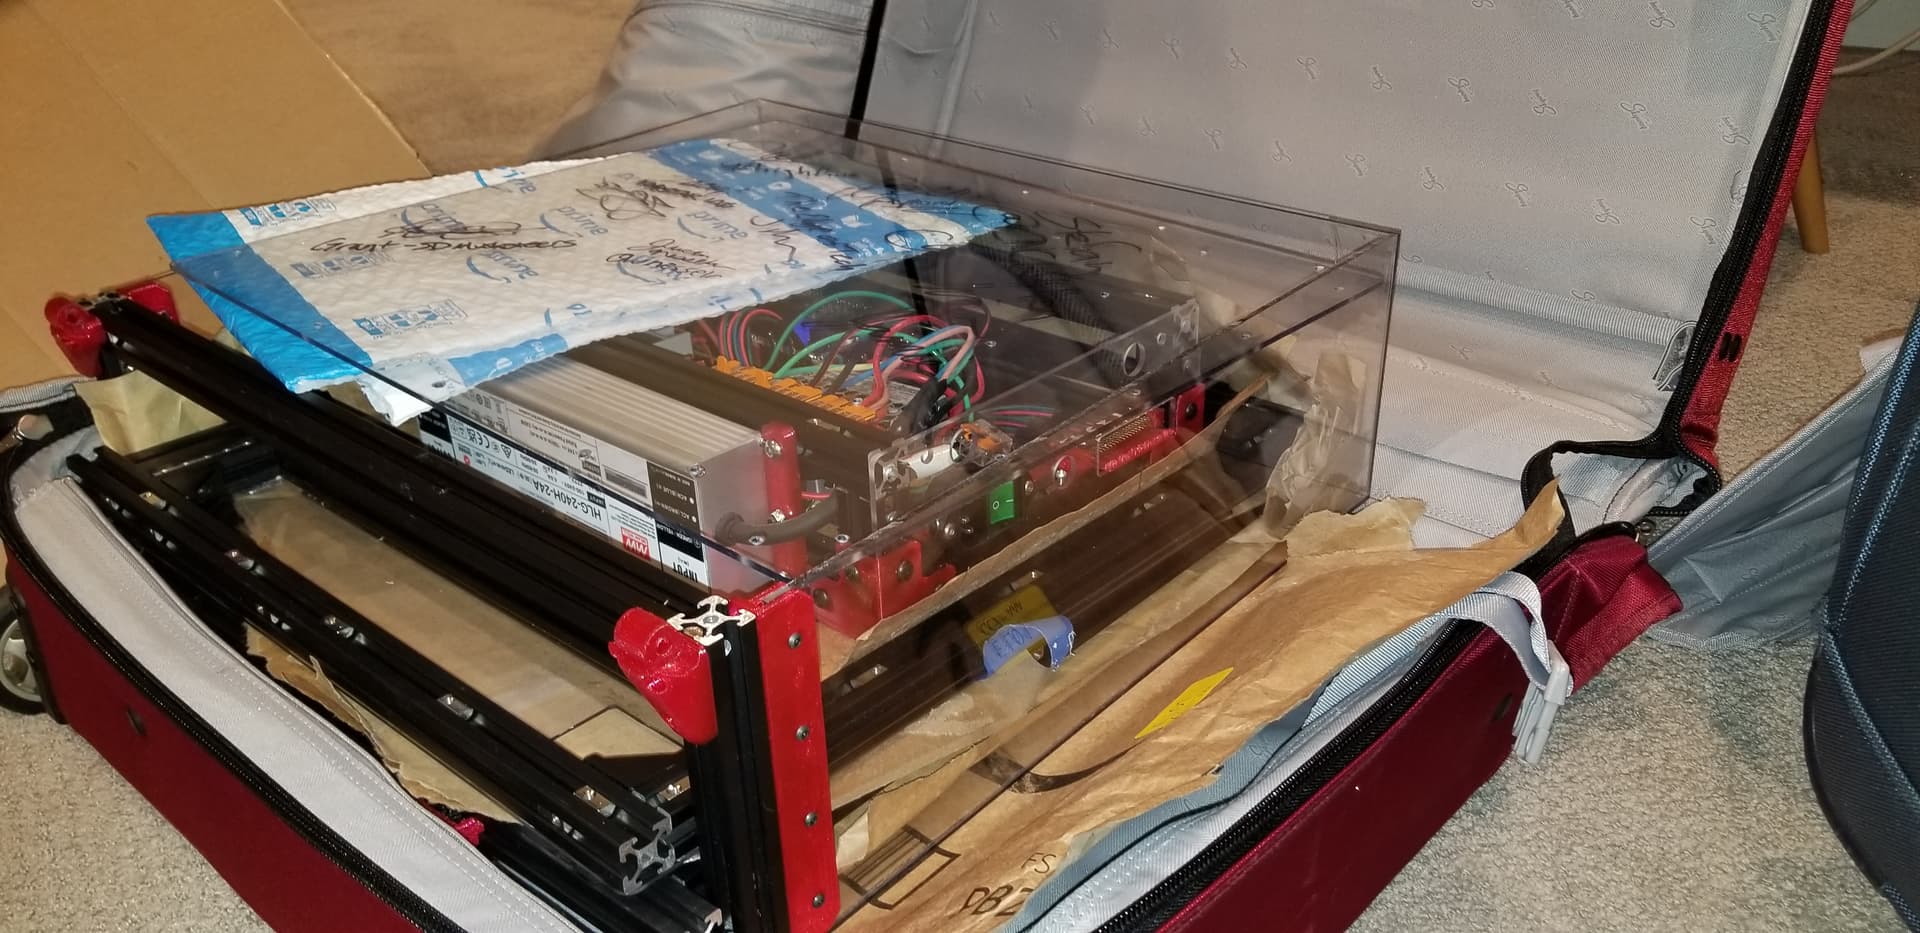
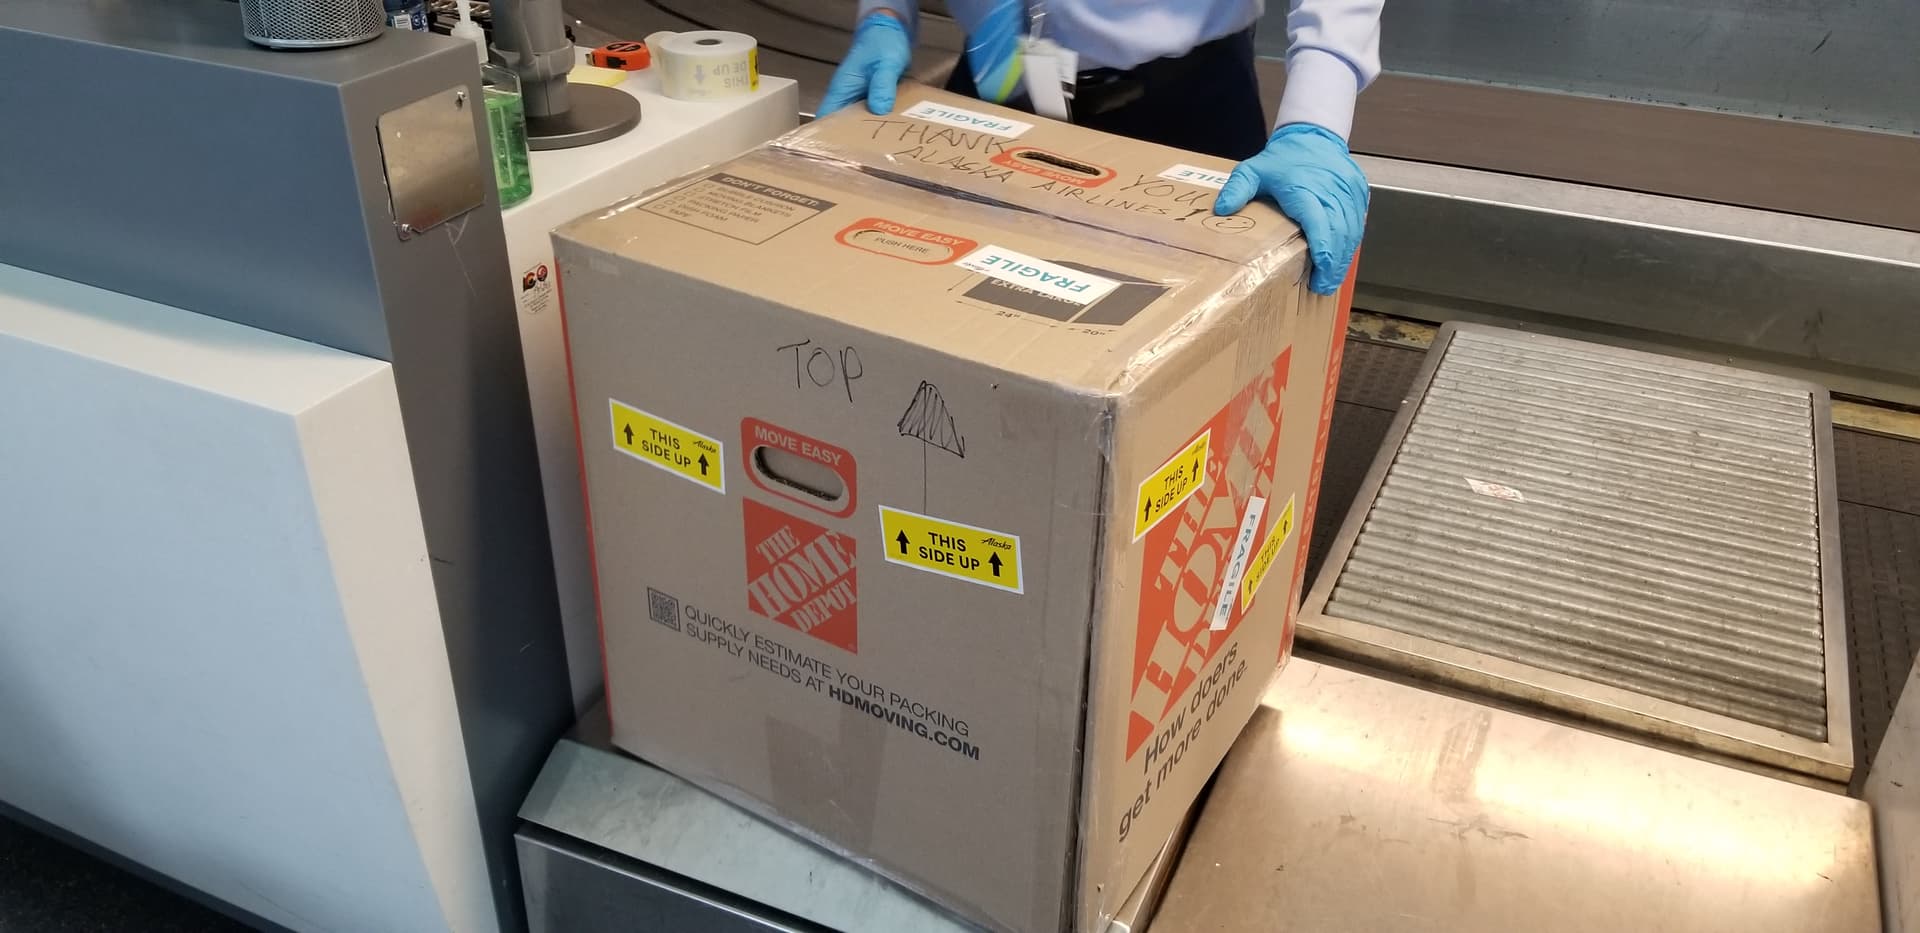
Lessons were learned, and 2nd round was way faster partial disassembly. Stashed lid, controller/PSU and tools into checked luggage, and packed printer frame into extra large box modded to have total L + W + H just under 62" limit, only cost $40 since first checked bag was free. Suitcase and boxed frame were ~40lbs each.
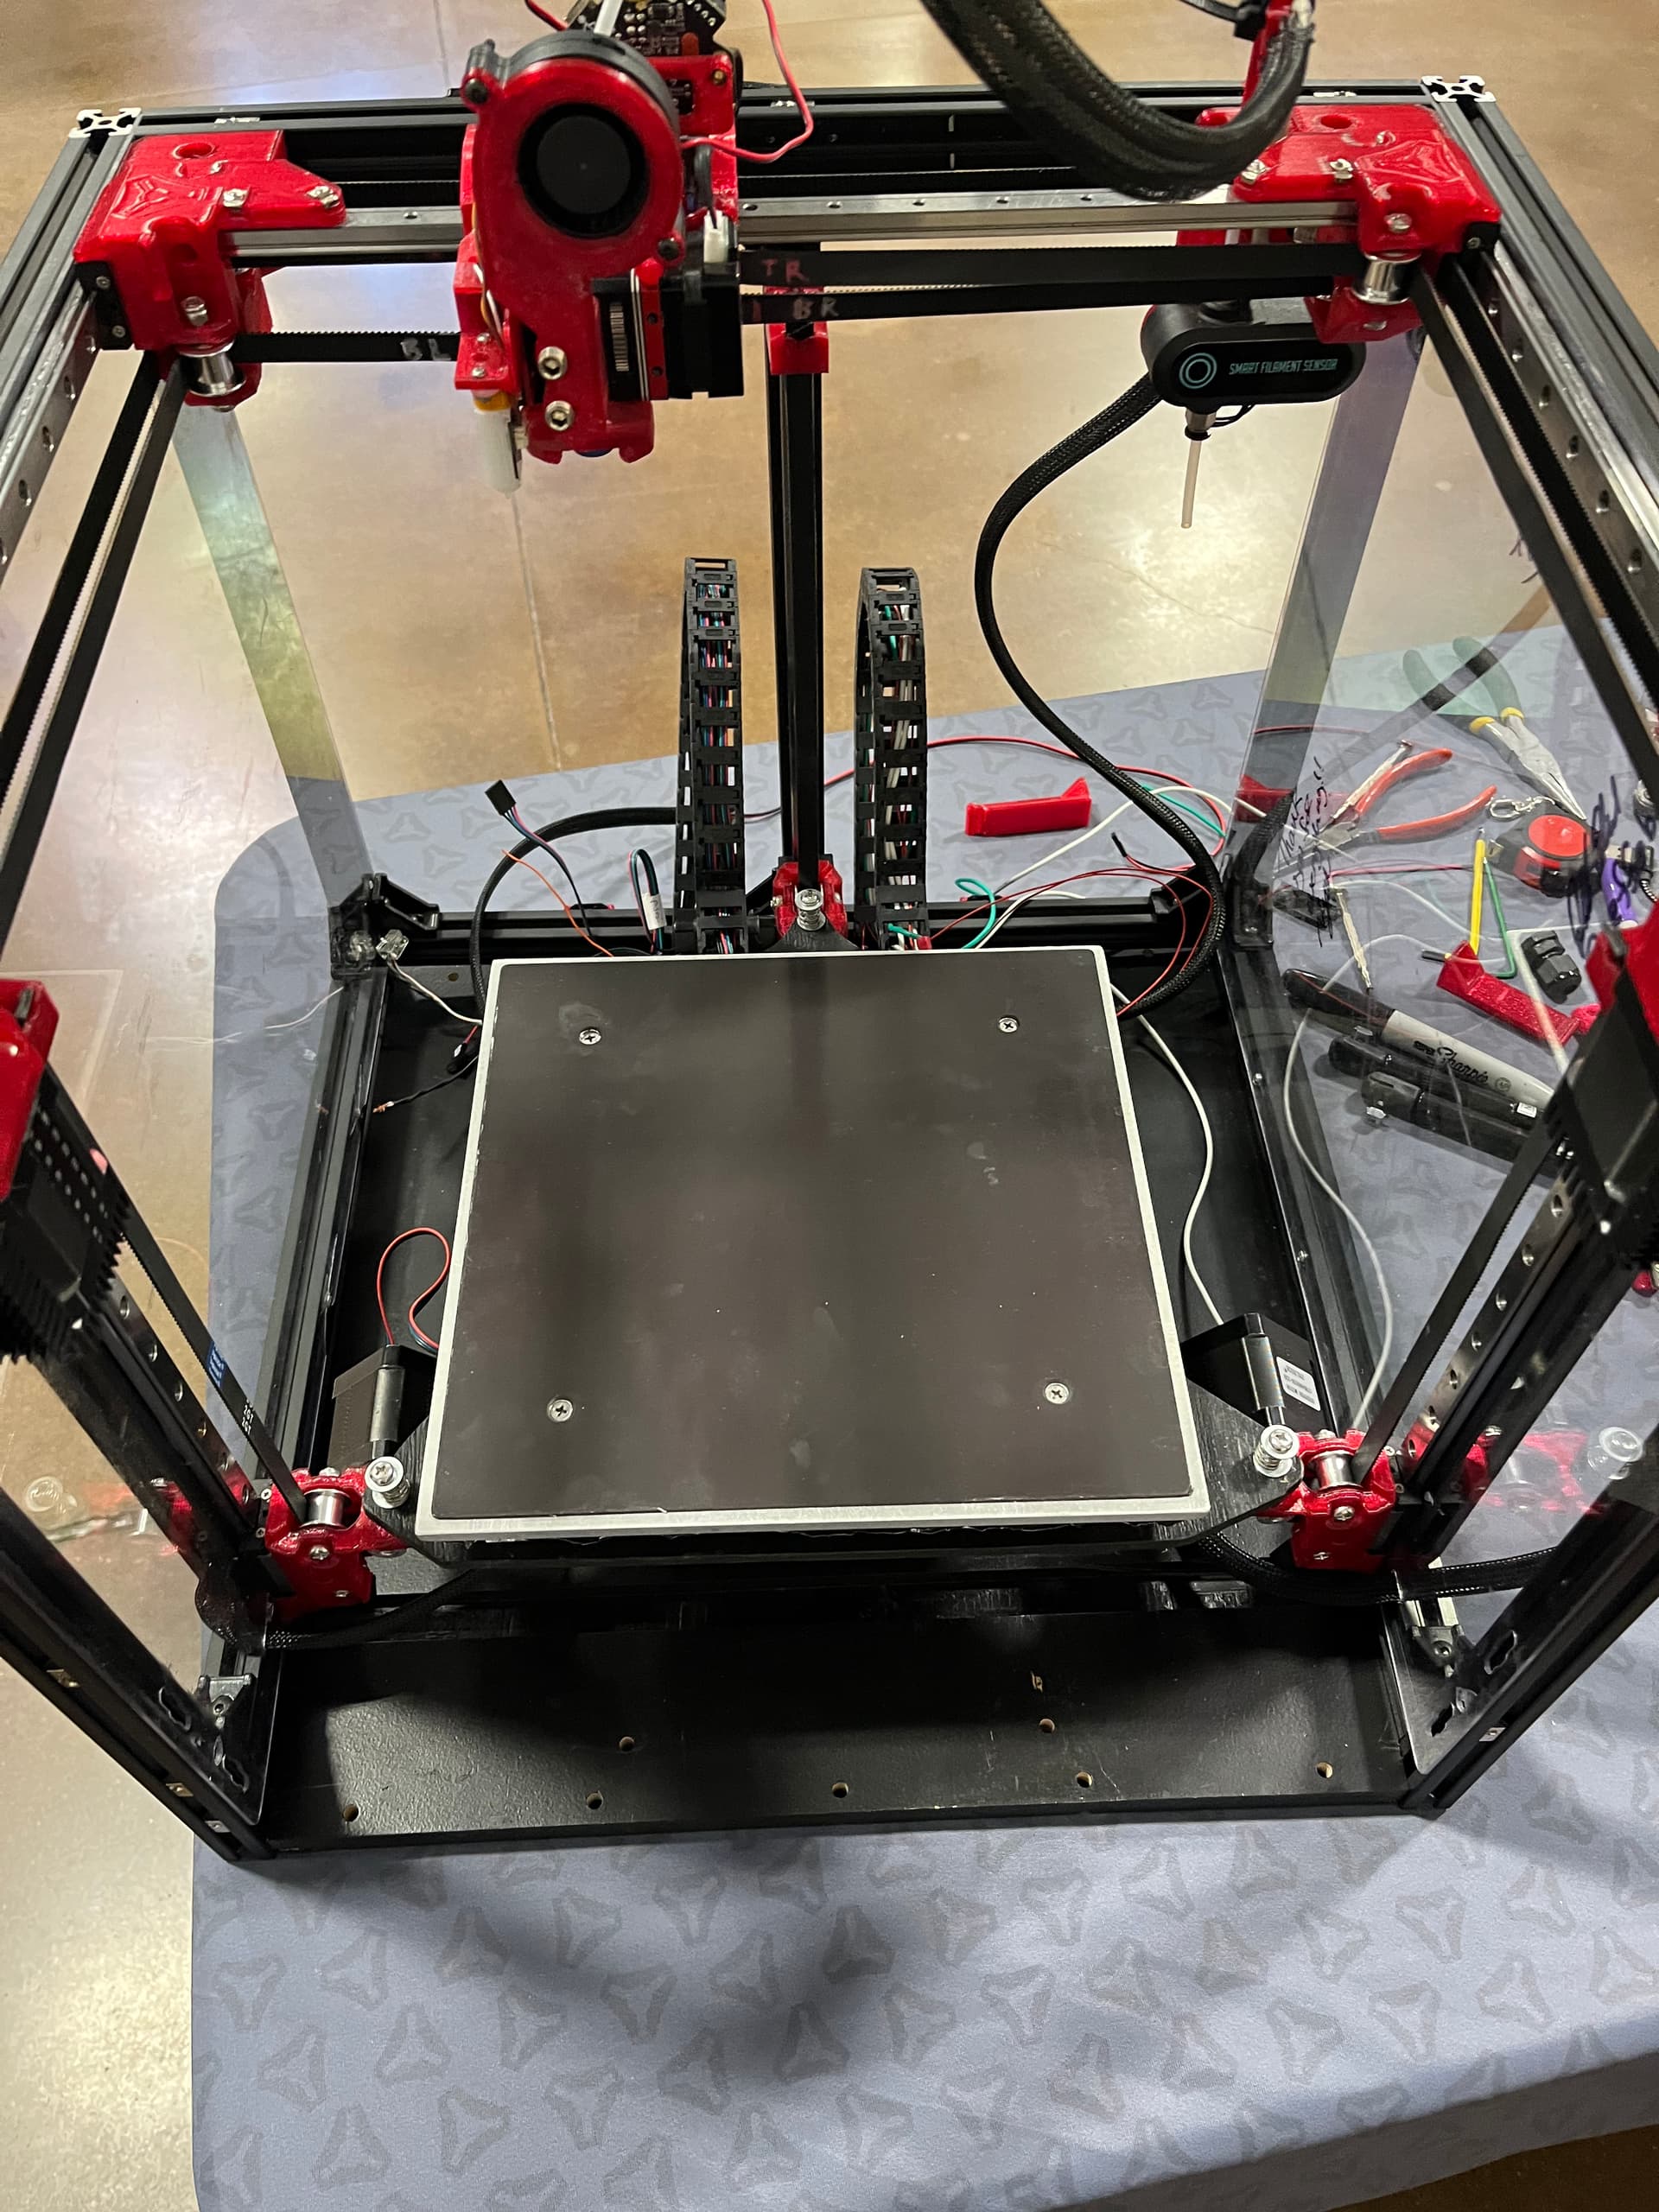
Back, working, and working on upgrades…
Things that broke :
Woo hoo!
I’m happy that it survived the return leg without major damage.
Can’t wait to see the upgrades and enhancements.
Recently noticed you, Rob and some other V1E community members haven’t signed my printer yet ![]() . Hoping you and other V1E crew that stop by RMRRF will next year, cheers!
. Hoping you and other V1E crew that stop by RMRRF will next year, cheers!
wow, that would have been super easy to do when I was messing with it on Saturday.
I thought about slapping a stealth signature on one of your panels, but thought it’d be a good motivation to plan for next years’ appearance.