I would do that, but I went the all-in-one Bigtreetech route on my other printer and the setup is so clean I want to duplicate it on this one.
1 Like
I used this heater on my build.
https://www.amazon.com/dp/B06XC5Y4XG?ref_=ppx_hzsearch_conn_dt_b_fed_asin_title_4
Okay new strategy. I’d like to still use the heater that I have (12" x 12" w/o holes). So I am going to cut a new bed plate that puts the holes outside of the heater and printing area. I am thinking I will do this…
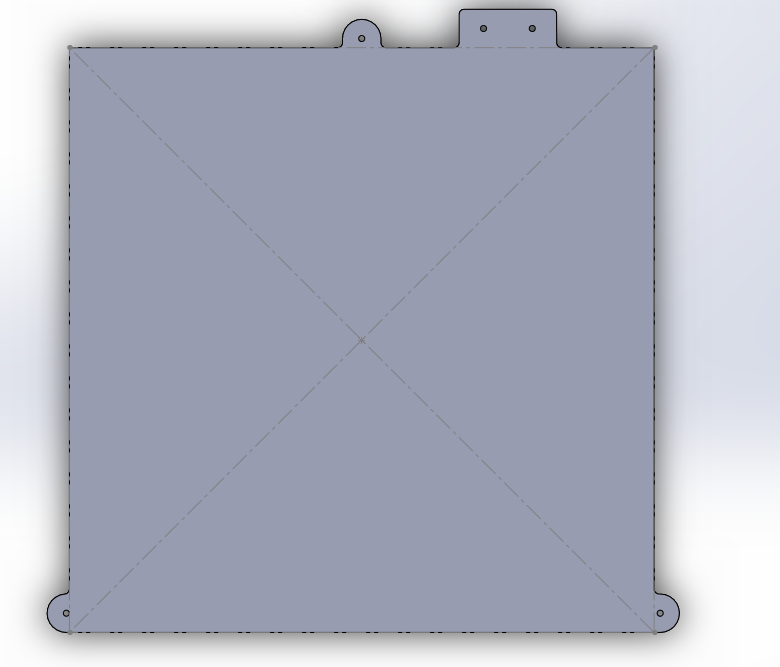
Any reason this wouldn’t work?
I bought a 300x300 heater, and had my screws right on the corners and back edge.
I didn’t have any problems, and don’t remember cutting anything on the heater.
I think the plate I bought ended up actually coming in 305mm x 305mm though
The only issue I would worry about is the new placements interfering with the brackets for the Z drives.
That was the only issue. But I made it work.
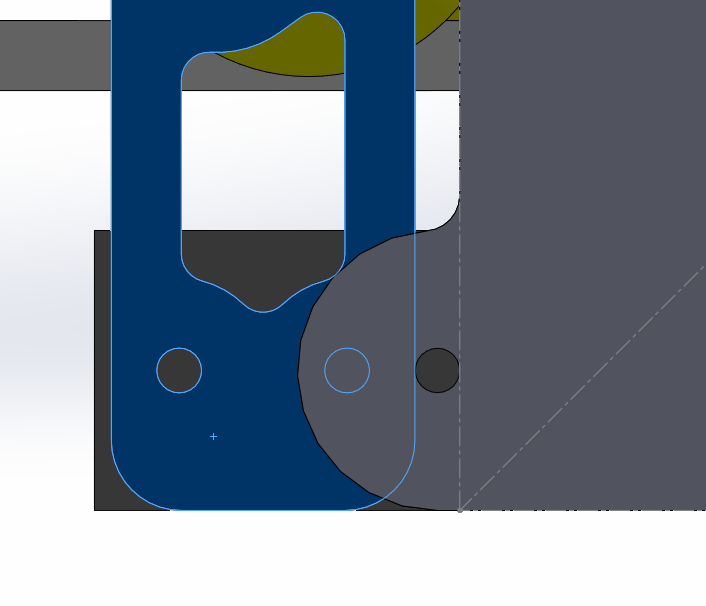
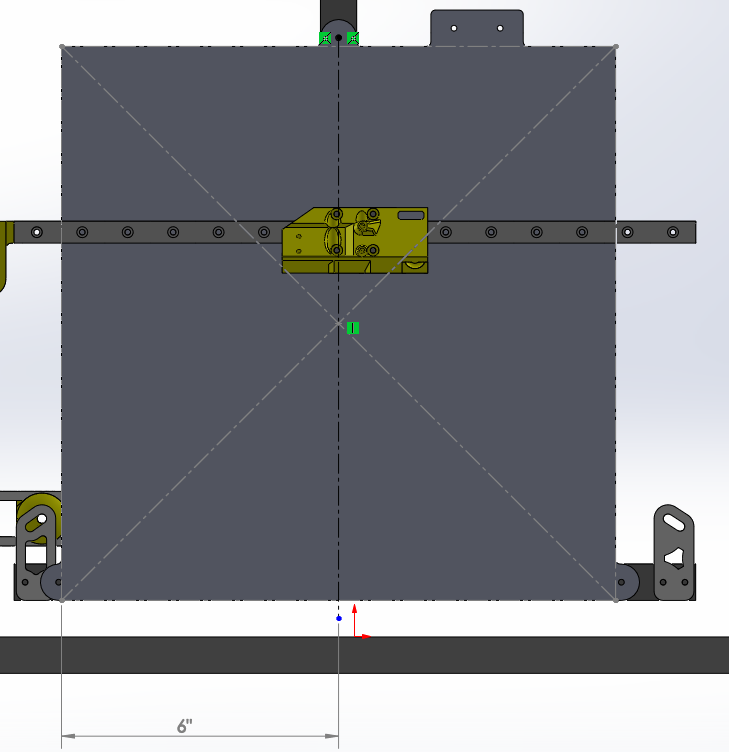
The top side and right side are no issue at all. The left side was as close as it possibly could be (thanks Ryan). There is perfectly enough room for an M3 bolt hole between the edge of the heater (grey dotted line) and the edge of the Z bracket (blue line). How convenient…
Mine are not that close, but I think I added spacing for add-ons…
Also, with the bed spacers, it should be raised up out of the way.
1 Like
How is the left edge of your bed so much farther from the bracket than mine? The top center mounting hole should be centered on the plate, correct?
If so, with a 12" bed, then the edge of the bed is 6" from the centerline of that hole. There’s not much I can do to change that. Look at the gap between the left edge of the bed in model to the bracket in the model compared to the left edge of your bed to your bracket. The model shows it should be a lot closer than you have. Is yours a 12" x 12" bed?
Yes, the bed itself will clear. But the bolt needs to clear the bracket. And I forgot to account for the bed spacer… that’s gonna hit the bracket in this scenario.
I wanted extra space around my bed so I think I added 25mm in Y, and 50mm in X to the frame or something like that??
Edit: yep…
1 Like
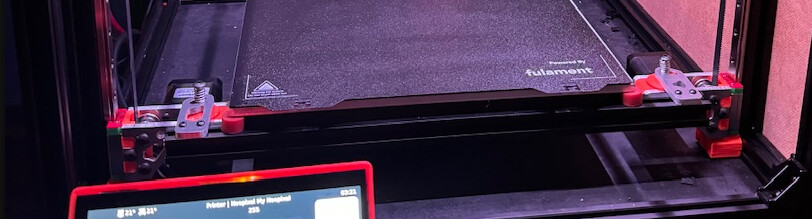
I did slightly notch my heater to clear the bed screws. BUT I did had a thermal camera and took a look at it heated up before I did to make sure I wasn’t going to cut into any wires inside.
well… it’s about time…
1 Like
Some of us have to work for a living, and not always at a computer ![]() I just got home at 4:45 am this morning.
I just got home at 4:45 am this morning.
AAHH. This could help. What do you think, a 1/4" all the way around the heater is safe to cut?? I will only cut around where the bolts go, not all the way around the heater. But just in general, it appears a 1/4" is safe, no?
1 Like
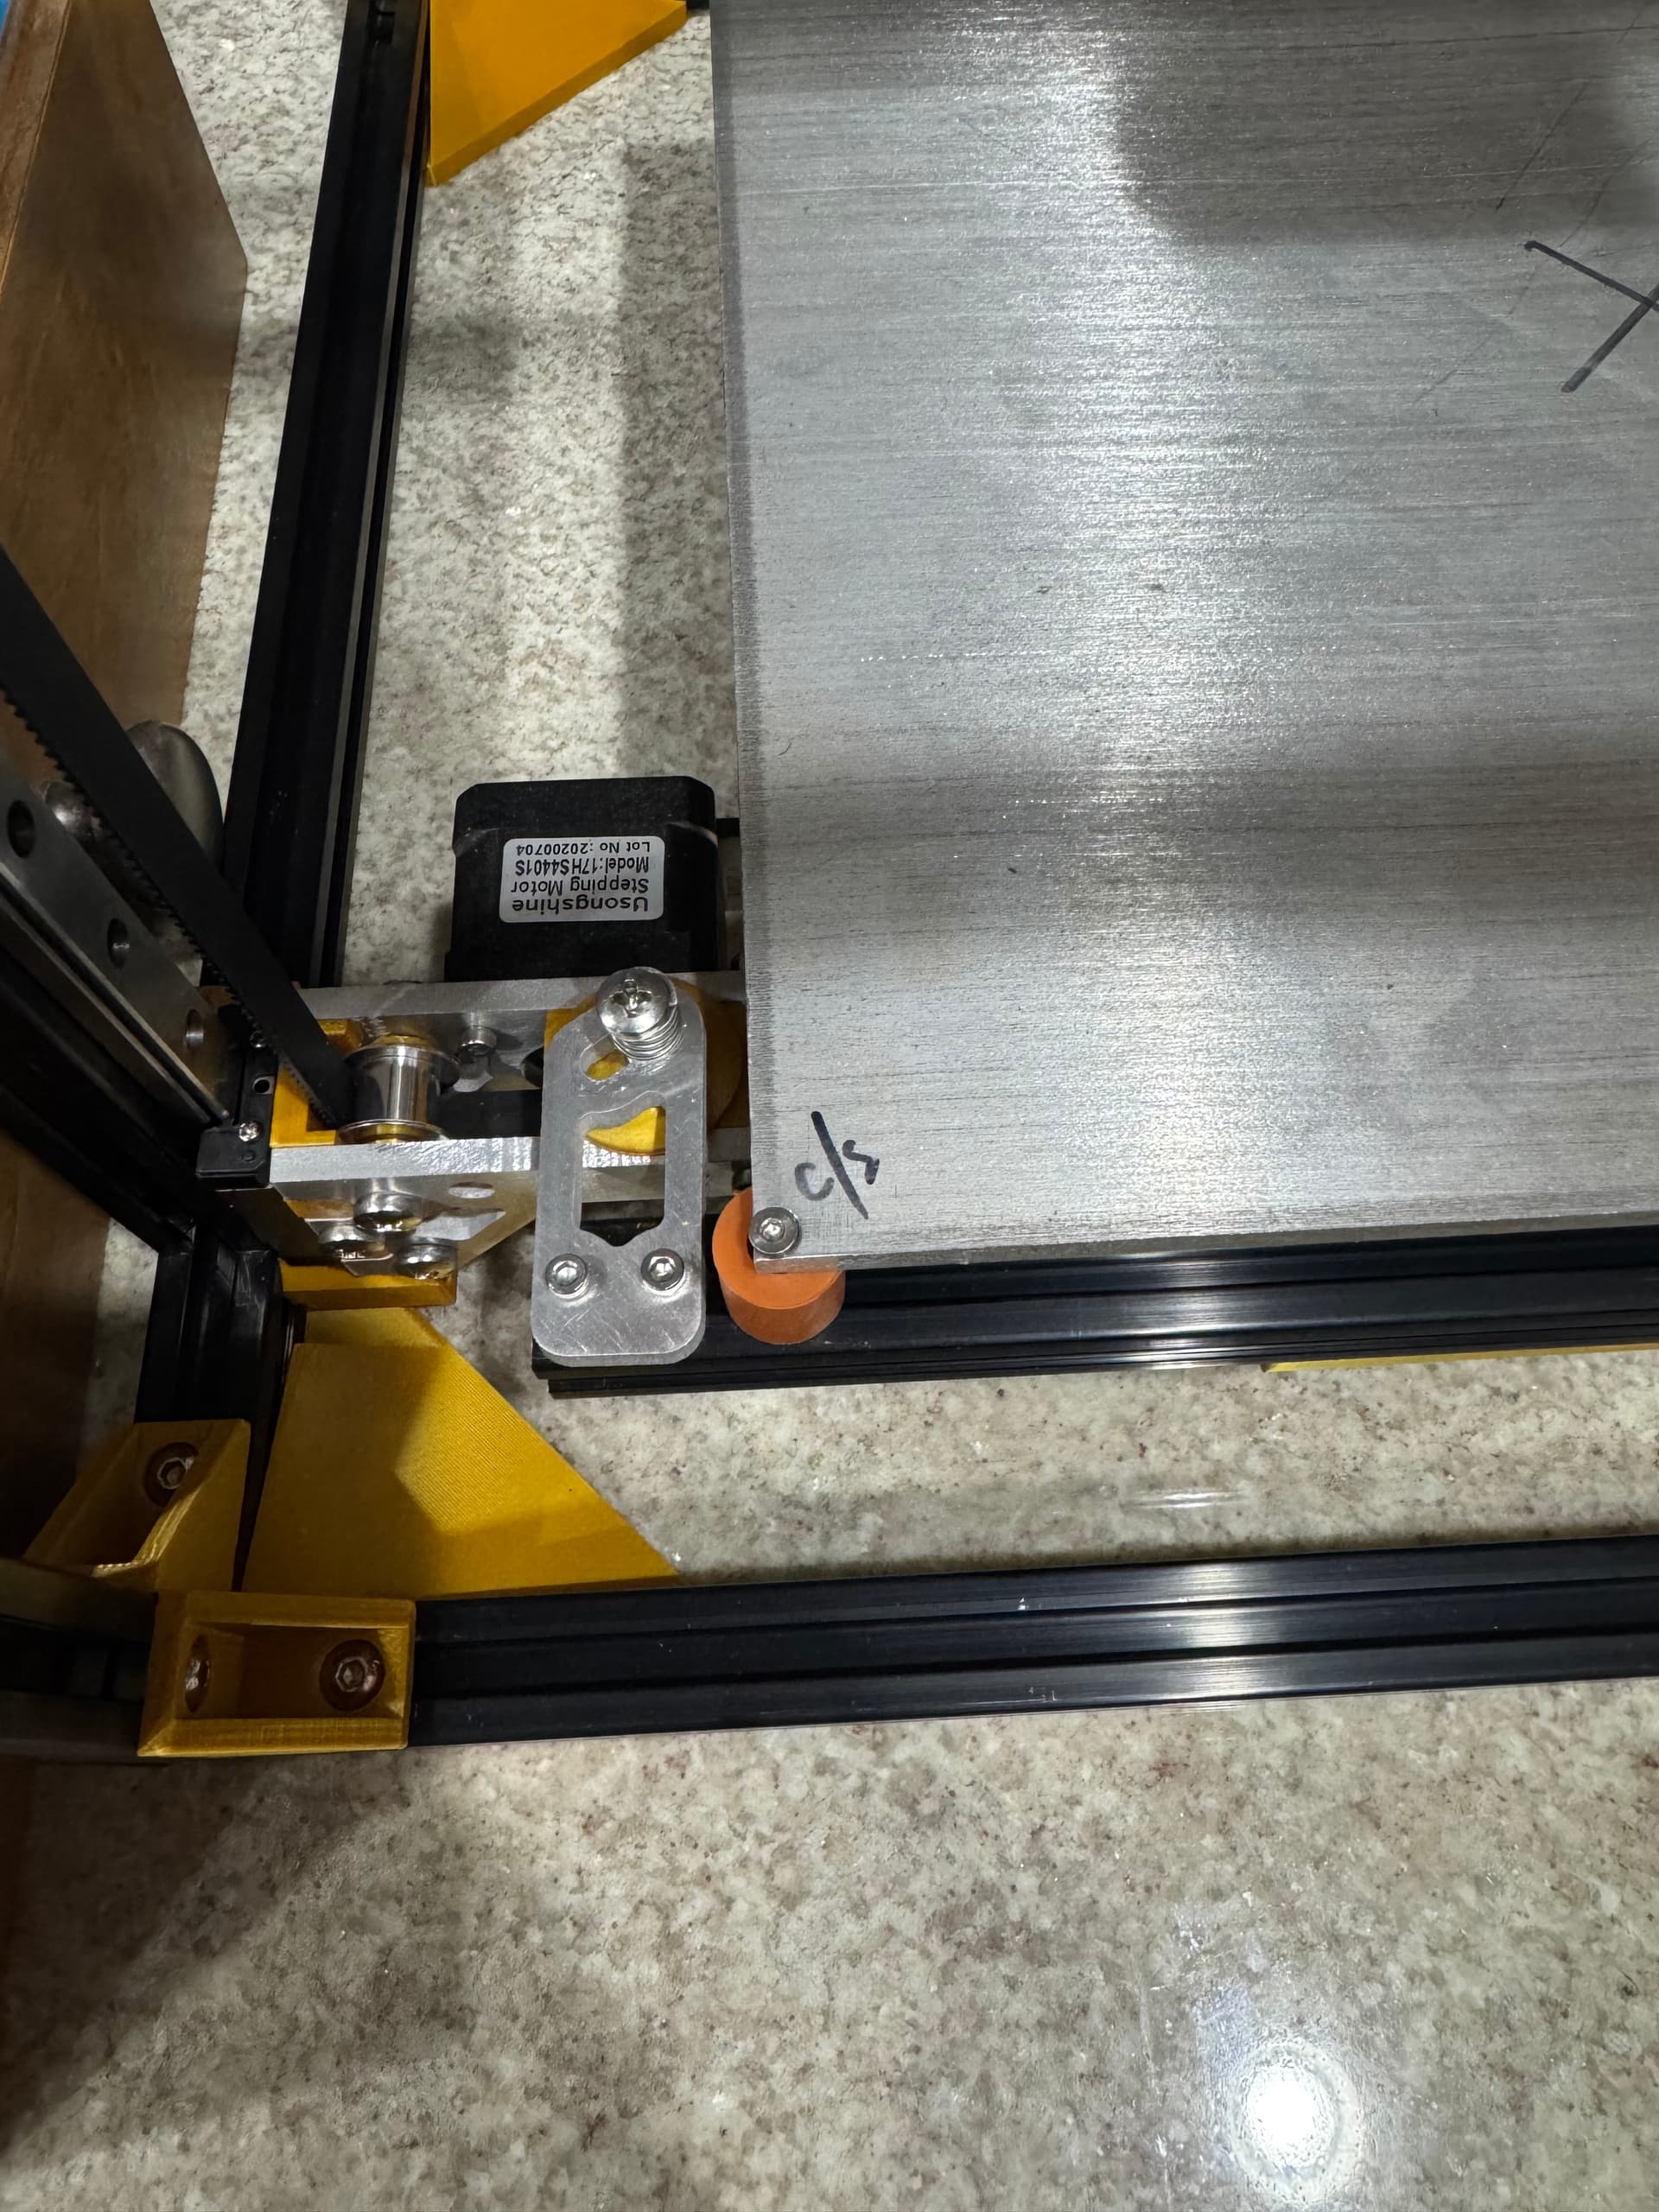
Yeah I think so. I put my screw holes as close to the edge as I could get them, and then I just barely notched around the hole so the screw could pass through.

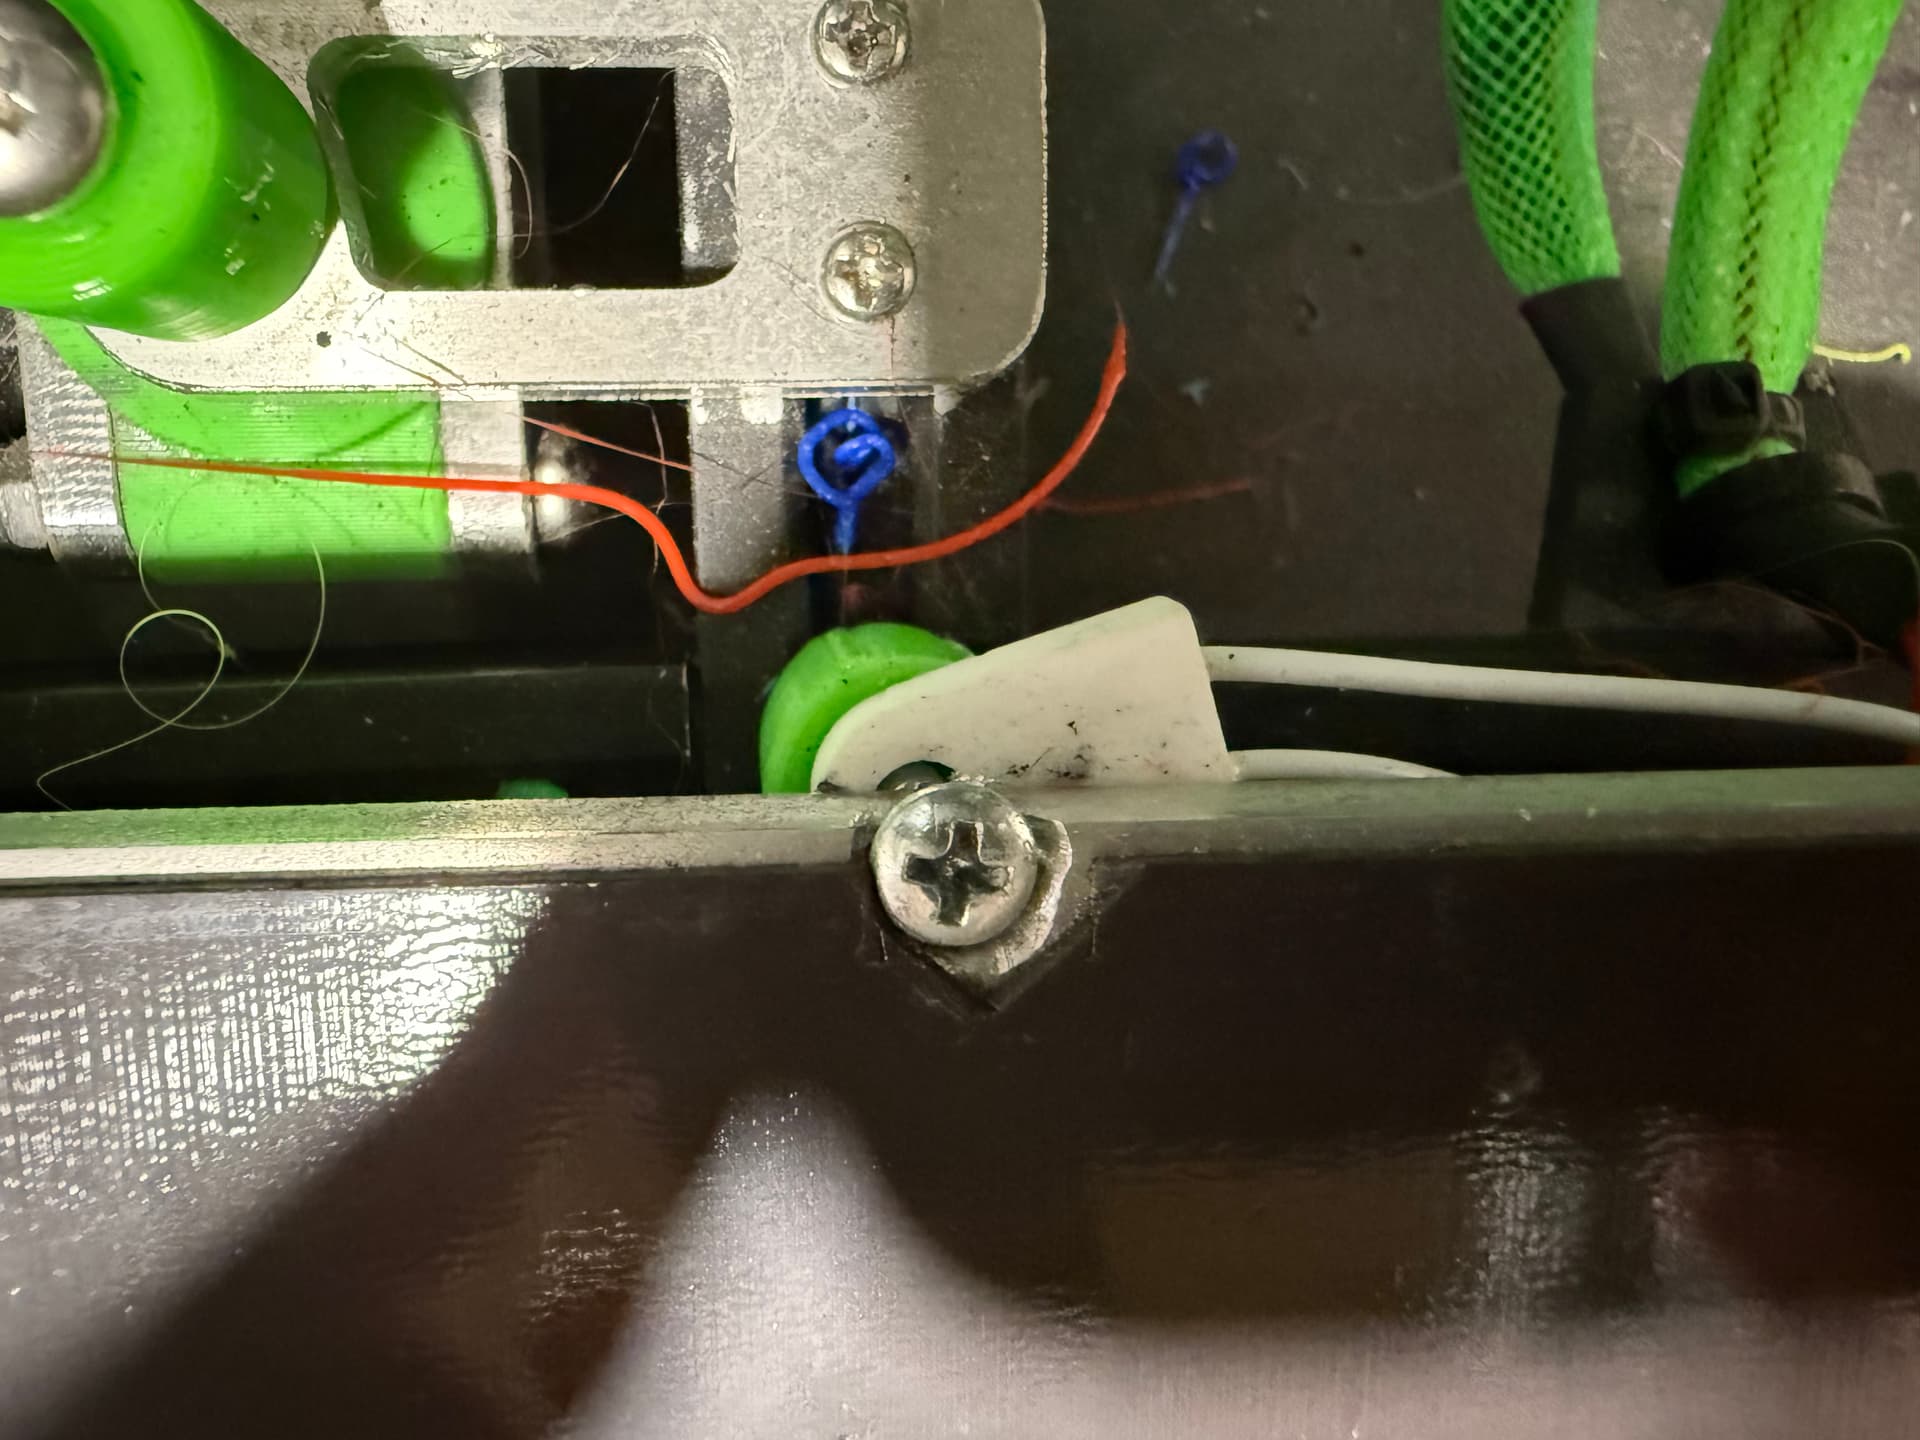
On the second pic you can see the thermal fuse under the bed as well. Which looking at it, looks like I need to move it more under the bed ![]()
Yeah I tried to get mine as close to edge as possible as well. But it still gets in the way of the heater a little bit. Going to try and trim some off the edge the heater and see what happens. If I ruin it I ruin it…
1 Like
Just worry about where the screw hole is. That silicone spacer wont hurt anything touching the heater pad. Mine are printed TPU and hold up just fine.
1 Like
Honestly, before I try to cut the heater, I am going to try out my plan of making a new bed plate where the holes are outside the 12" x 12" heater.
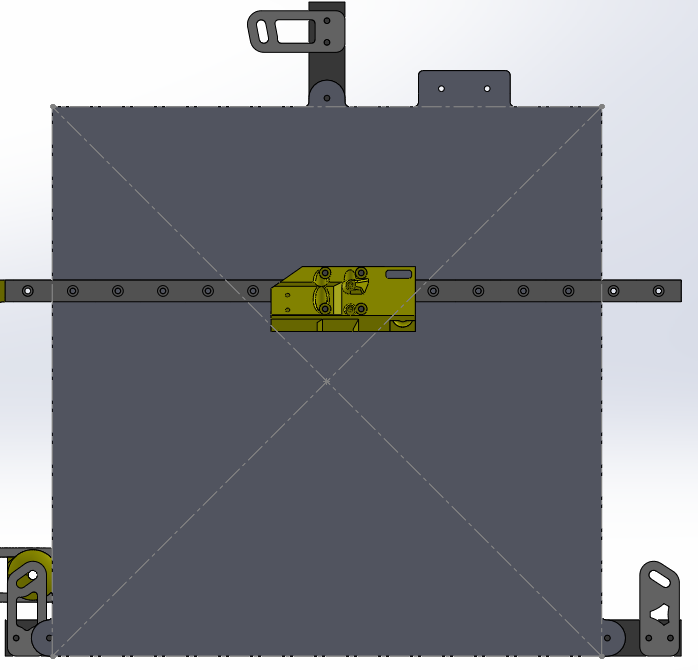
As mentioned before, the only trouble area is the front left bracket. I modified the bracket to allow for the bed spacer (grey circle) to fit inside of it. I had to get rid of one mounting bolt, but I think it will be plenty strong enough with just the one.
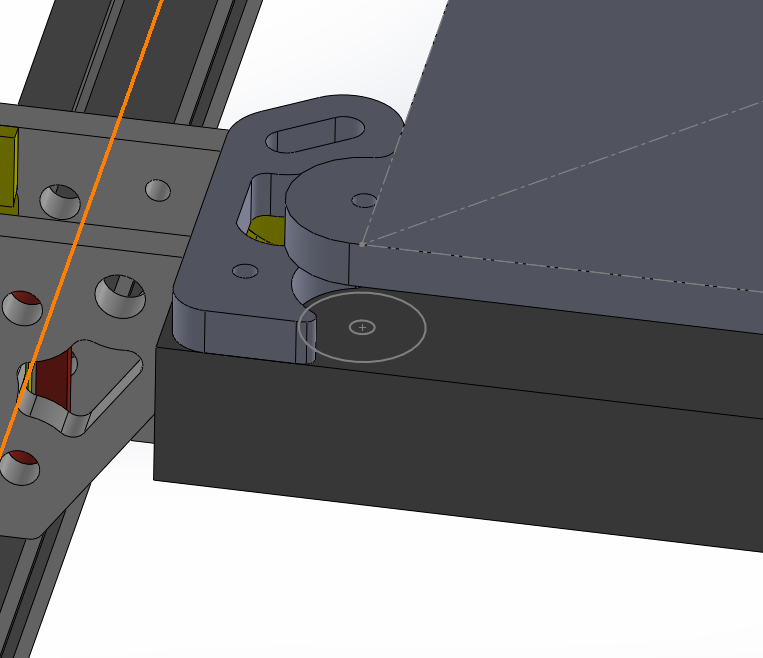
As long as it doesn’t start to pivot with only the one screw. 2 screws keeps the bracket straight all the time.
I am hoping it doesn’t pivot because it is two flat surfaces being bolted together. Even if by only one bolt, it should be strong enough to stay flat-to-flat which wouldn’t allow pivoting. At least that is my hope.
I would be a little leary about removing one of those screws…
I had a problem early on when those 2 screws weren’t tight enough…
1 Like