I think having a metal to metal seating for the bolt head doesn’t allow them to stay tight some times. They can vibrate and rattle loose. So if that becomes a problem, I am going to make some 3D printed pieces that will act as a spacer between the bolt head and aluminum. The bolt head usually can tighten into the plastic enough that its like a lock washer, keeping constant upward pressure on the bolt head. That is something I can add later.
If this part becomes a constant problem because of that missing bolt, then ill scrap it all on the fly and go back to trying to cut the heater a little
If you have not committed to a hotend you could use something like my Dragon Burner mount. It will shift the center of the bed to be exactly in the middle left to right as it allows for a 0 offset in X.
You can use any of the Chirpy toolheads or the Anthead.
I am almost done wiring up the V5. I need to flash the firmware now. Before I do, do I need to edit the firmware at all for the V5? The github only has the V4 I believe.
It should work if you have the z motors correctly wired. Changes from 4 to 5 were hardware pieces, belt routing, total size, z bed lifting connections, and the hot end mount.
I just built a new 5 with v4 bed mounts without issue. The v5 is really a nice upgrade and yet the electronics are the same.
Klipper with a 7" raspberry pi touch screen for the interface is very useful. There is some time required for the initial printer pin configuration, but it only requires the initial board flash and then iterative config file updates will allow the settings to be changed if not correct. Orca slicer prints directly to it and windows the control web page in a tab, so everything printer related can be done from orcaslicer eith klipper.
I guess my main thing is that the build plate went from 200mm^2 to 300mm^2. So operations like auto bed leveling and such need to know that. Is it not a firmware edit to make sure everything works correctly?
On my V4 I am running Octoprint with a touchscreen and Octodash. Very useful system as well. I plan to do the same on the V5.
I think you can use the marlin config and save codes from the terminal to do that without needing to reflash. As long as the pin assignments dont change. That is why i use klipper. It is all in a config file… Save and restart even with pin changes.
Its been forever and a day, but I believe you will have to edit the marlin firmware for the bed size and the locations for tilt and all. I did it for my V4, but when I built the V5 I just went with Klipper as its SO much easier for me. I also switched the V4 over to klipper as well and never looked back.
Sorry I never used marlin on a V5 build. I can’t be too much help I have not opened Marlin up in a while. It would be fun to try it out again, I would love to see how input shaping is working on their end these days. I just don’t have the time to mess around with a printer right now, but updating my V4’s would be nice.
There is a massive learning curve, but in the end it was easier for me to set up the advanced stuff in than Marlin. I took a lot of notes, read a lot of posts and watched a lot of videos.
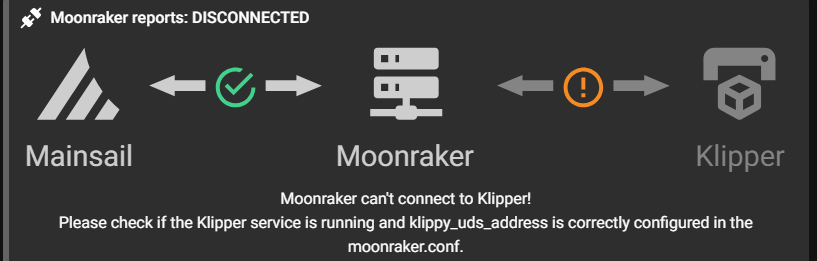
So once it reboots, I check my printer.config file again and the MCU ID was the same as it was before. It never saved. For some reason it is not liking me updating that MCU ID…
Try putting # in front of the old one and pasting the new one below it. I have no idea why this would work, but that is usually what I end up doing and have never had an issue with it not saving.
You could also try just saving, closing out of the printer.cfg and then opening it back up and see if it stays then. If it does try a restart.
If neither of those work you can get into the files thought winscp and try it that way.
Makes no sense why its not saving the normal way, but hopefully one of those helps.
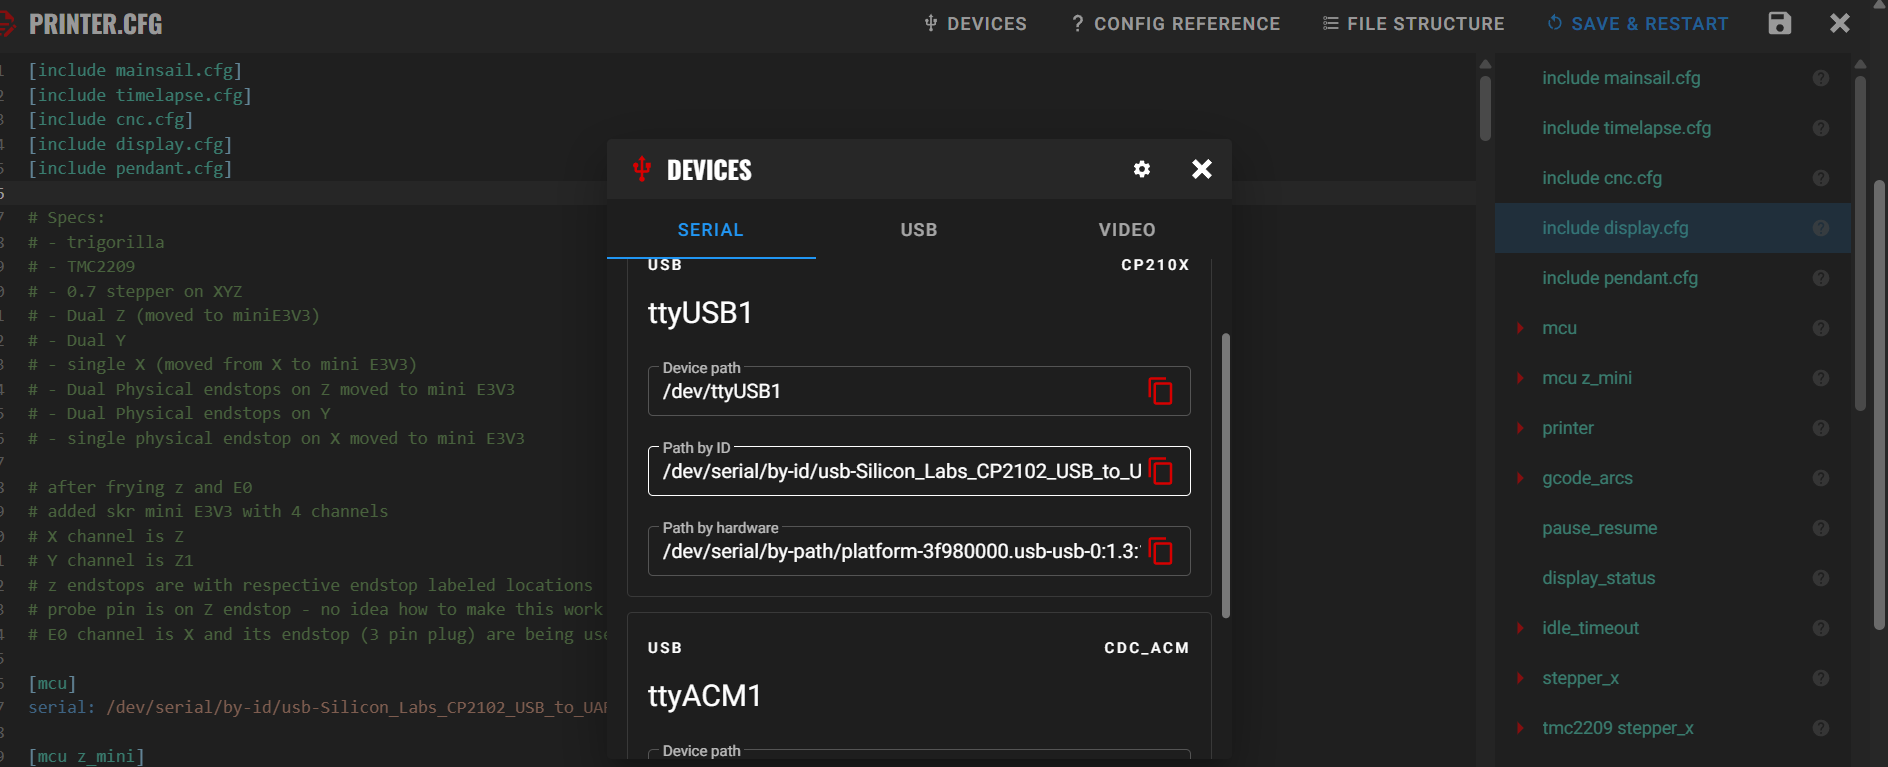
couple things: should be no need to use kiauh to get the device ID. In mainsail, when you edit the file, you should be able to click on the usb symbol device tab at the top near the center of the page to see the usb device id:
then click copy at the right of the by id and close that window and paste it right in.
second. you can save without restarting by hitting the disk icon next to the X instead of save and restart. Then reopen the file to verify it has saved. then add a space or make some other nonessential change and save and restart or just restart it manually to get the change.
I’m going through klipper configuration as well, and have had a couple of times the “save and restart” button seemed to skip the save and go right to the restart. Luckily, those restarts are way faster than flashing the Marlin firmware was. I’ve been using the save button alone and that seems a little more reliable.
I tried it this way and it seemed to have worked. I am now connected and operational. It oddly took a few minutes for my Pi to reconnect after the restart, but maybe that was my wifi being slow. It ended up connecting after all.