Neither of those towers look bad. Did you do all the calibration steps? The speed tests are pretty important as well. Print and retraction speeds.
The first picture is GCODE generated from the teaching tech calibration tool with the following settings.
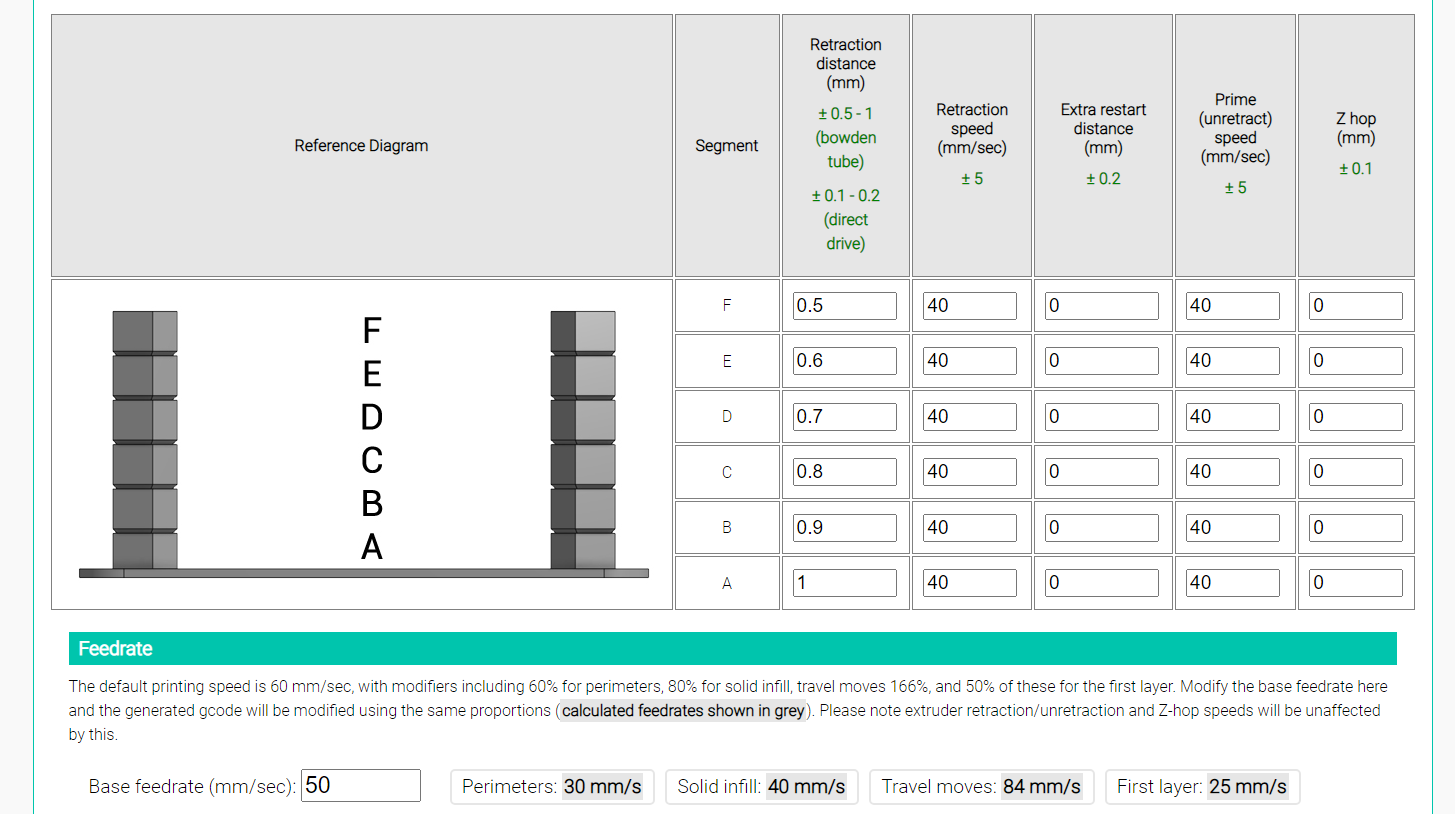
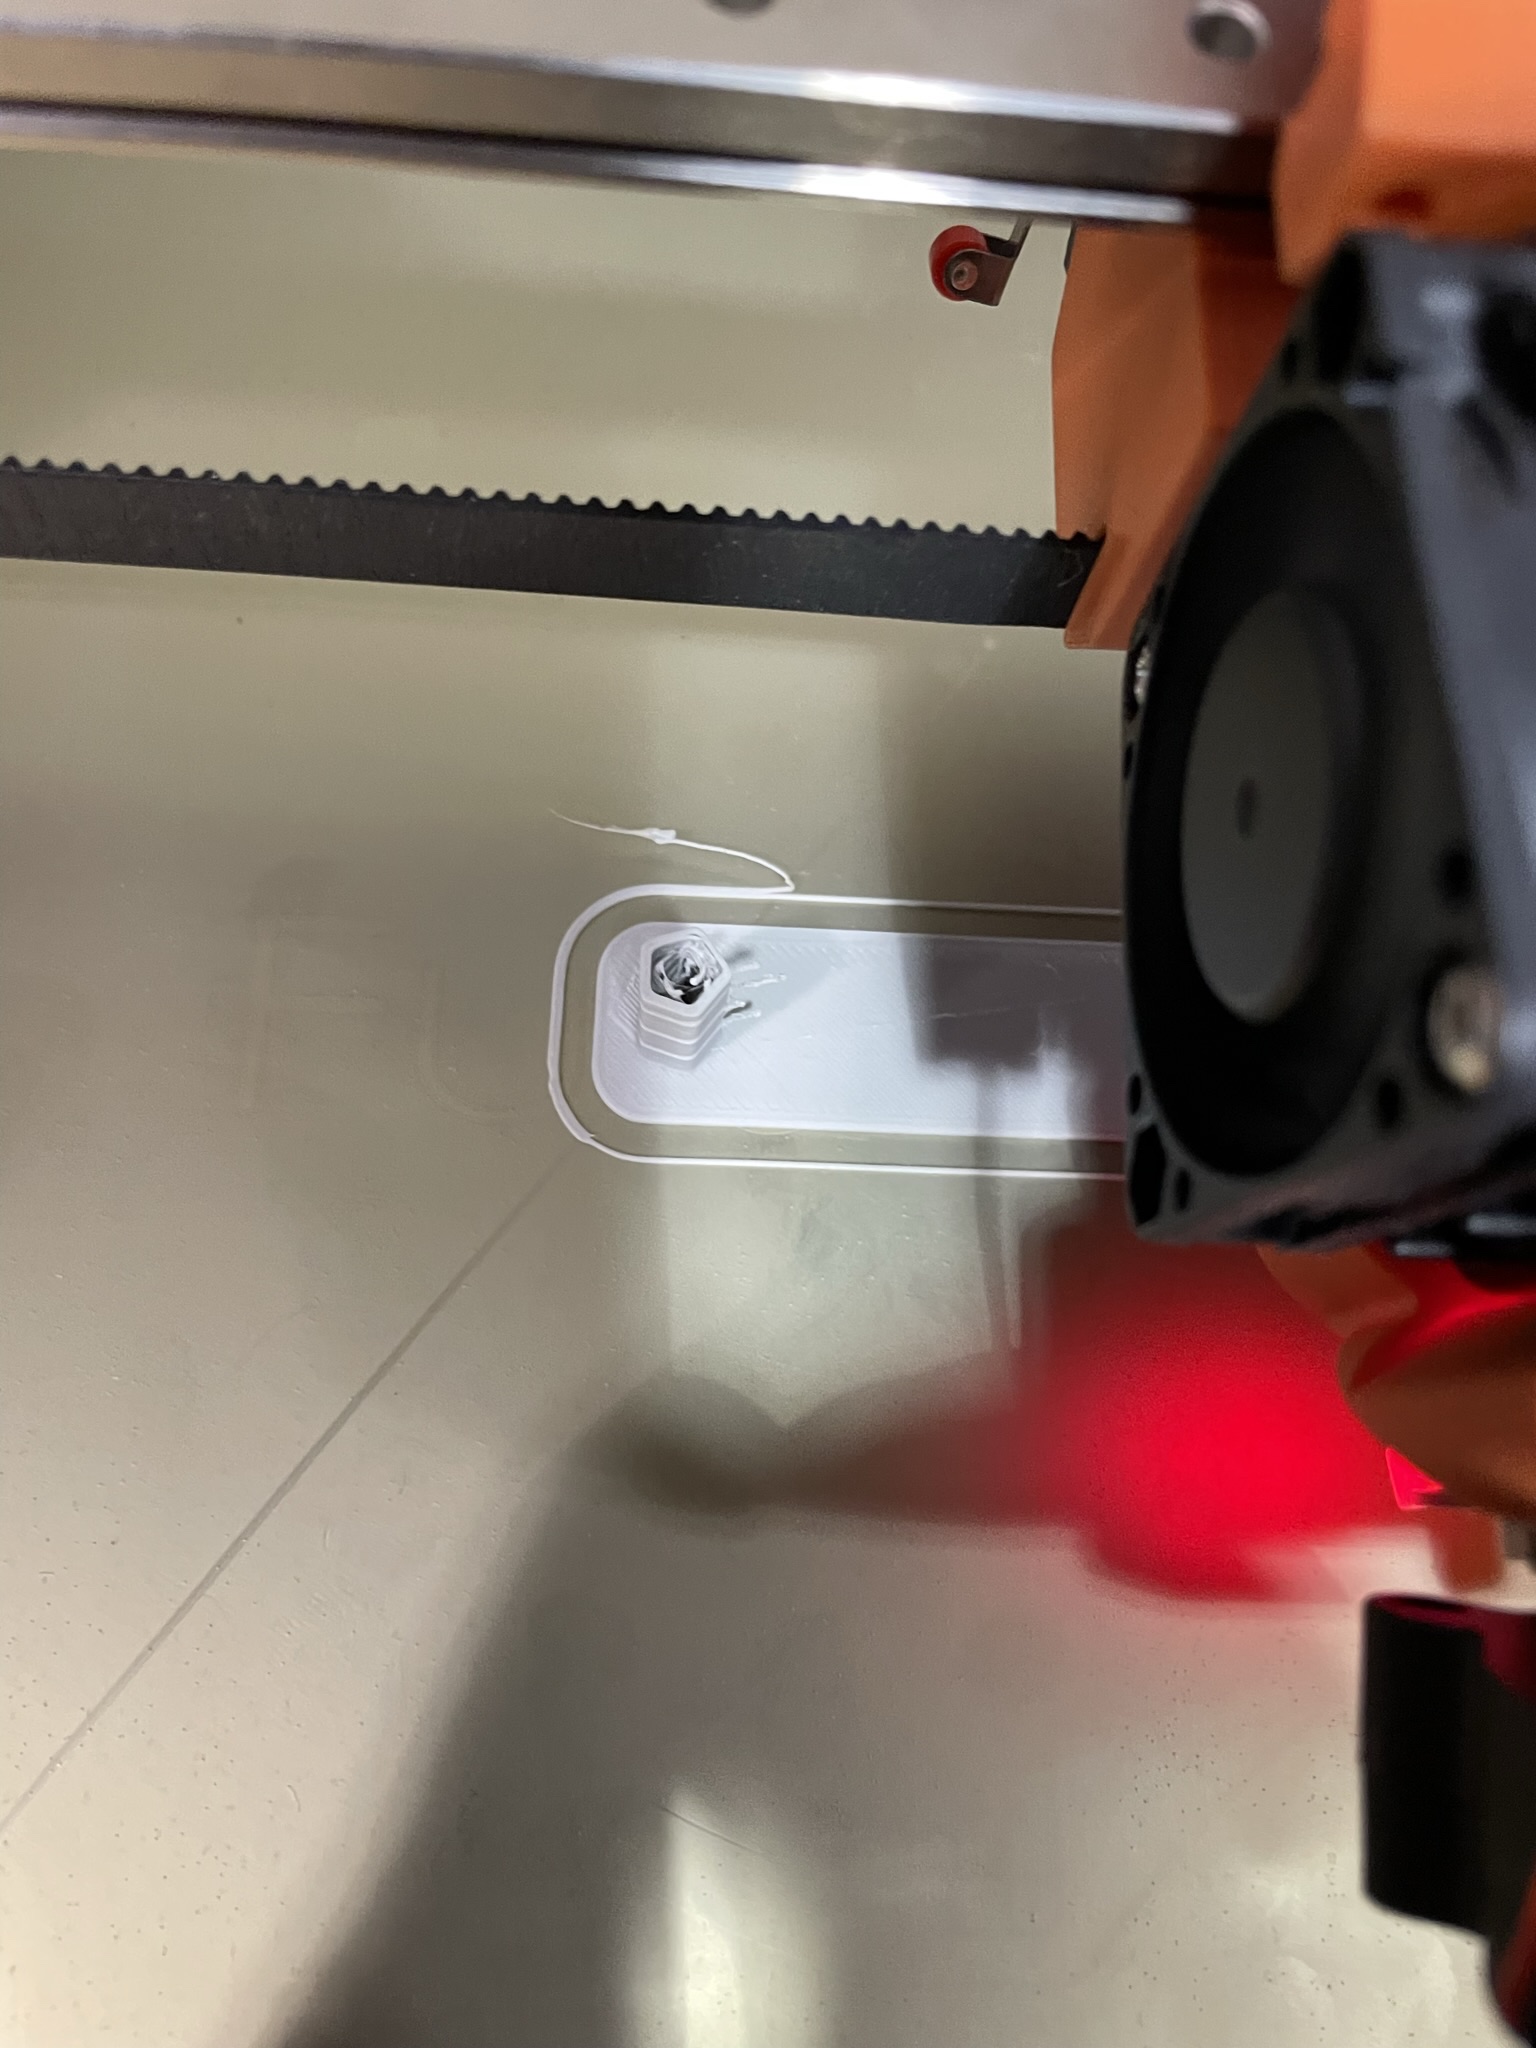
So that did vary as it went up. But the second picture with the clear stringing was sliced in Cura with only 0.5mm retraction all the way up, as I cannot vary that variable as it goes from step to step. I just wanted to compare the teaching tech tool to my Cura settings, and clearly they are different in some other way than just the retraction distance and speed.
See all the other settings shown, double check them all. Feedrate, travel moves, no zhop.
1 Like
I think I need to go through all of his calibration tests. I dont think retraction is really my issue here.
Look at this picture of the stringing test. You can see the inside/infill is almost nonexistent. And this corresponds well with the first picture I shared of me trying to do the pointy 4-corner stringing test and it was clearly not printing those little pyramids very well at all.
Not sure why. Maybe my infill print speed is too high. In Cura, the infill speed is the same as the baseline print speed. So I have print speed set to 50mm/s and it auto sets the infill to 50mm/s. Perhaps that should be lower. But this issue is still present when I use Teaching Tech generated gcode for the stringing test towers.
I am going to go through all of the calibration tabs on the teaching tech site and see how tuned up I can get it.
1 Like
Yeah I translated those settings over to Cura to keep it consistent.
Okay the dirty secret is those test will only get you close, they seem to be built for slower printers, not that 50 is super fast but I find them a bit too small to be super relevant. You will learn the tests and what to look for and you can make adjustments with real bigger parts once you get it close.
I’m not sure you will ever get infill in there.
Hmmm, well that’s slightly disappointing. I would like to be able to print parts with smaller details. Is there a way to make the machine print slower when making smaller moves? Surely there is a setting for that. I know there is minimum layer time which would slow it down. Just trying to find a happy medium between printing a larger part and a smaller part without having to change the settings back and forth.
I am reading that linear advance has to be enabled in the Marlin firmware. Is it enabled in the Repeat V2 firmware? I have it enabled in Cura, but that be useless if not configured in the firmware.
No no, it is not the printer it is the test slice. He made a super generic model, you will be able to print small things jsut fine. I do not think there is meant to be much infill. In that one.
You have to enable and tune that your self for your printer and your filament. It is not on by defualt.
It’s also a per filament thing. Different formulas cause the goo to flow differently, even between the same filament with different colors.
1 Like
Well I am not so sure. I don’t think it is the printer design or the test slice. I think it has something to do with my slicer settings in Cura perhaps.
I did it again this morning. I sliced it in Cura with 30% infill. You can see here what the infill should look like.
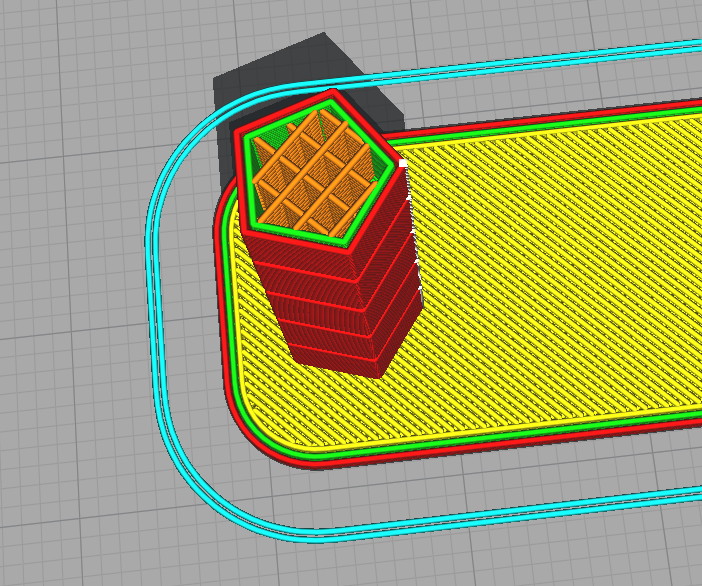
But here is the printing performance. The infill is terrible.
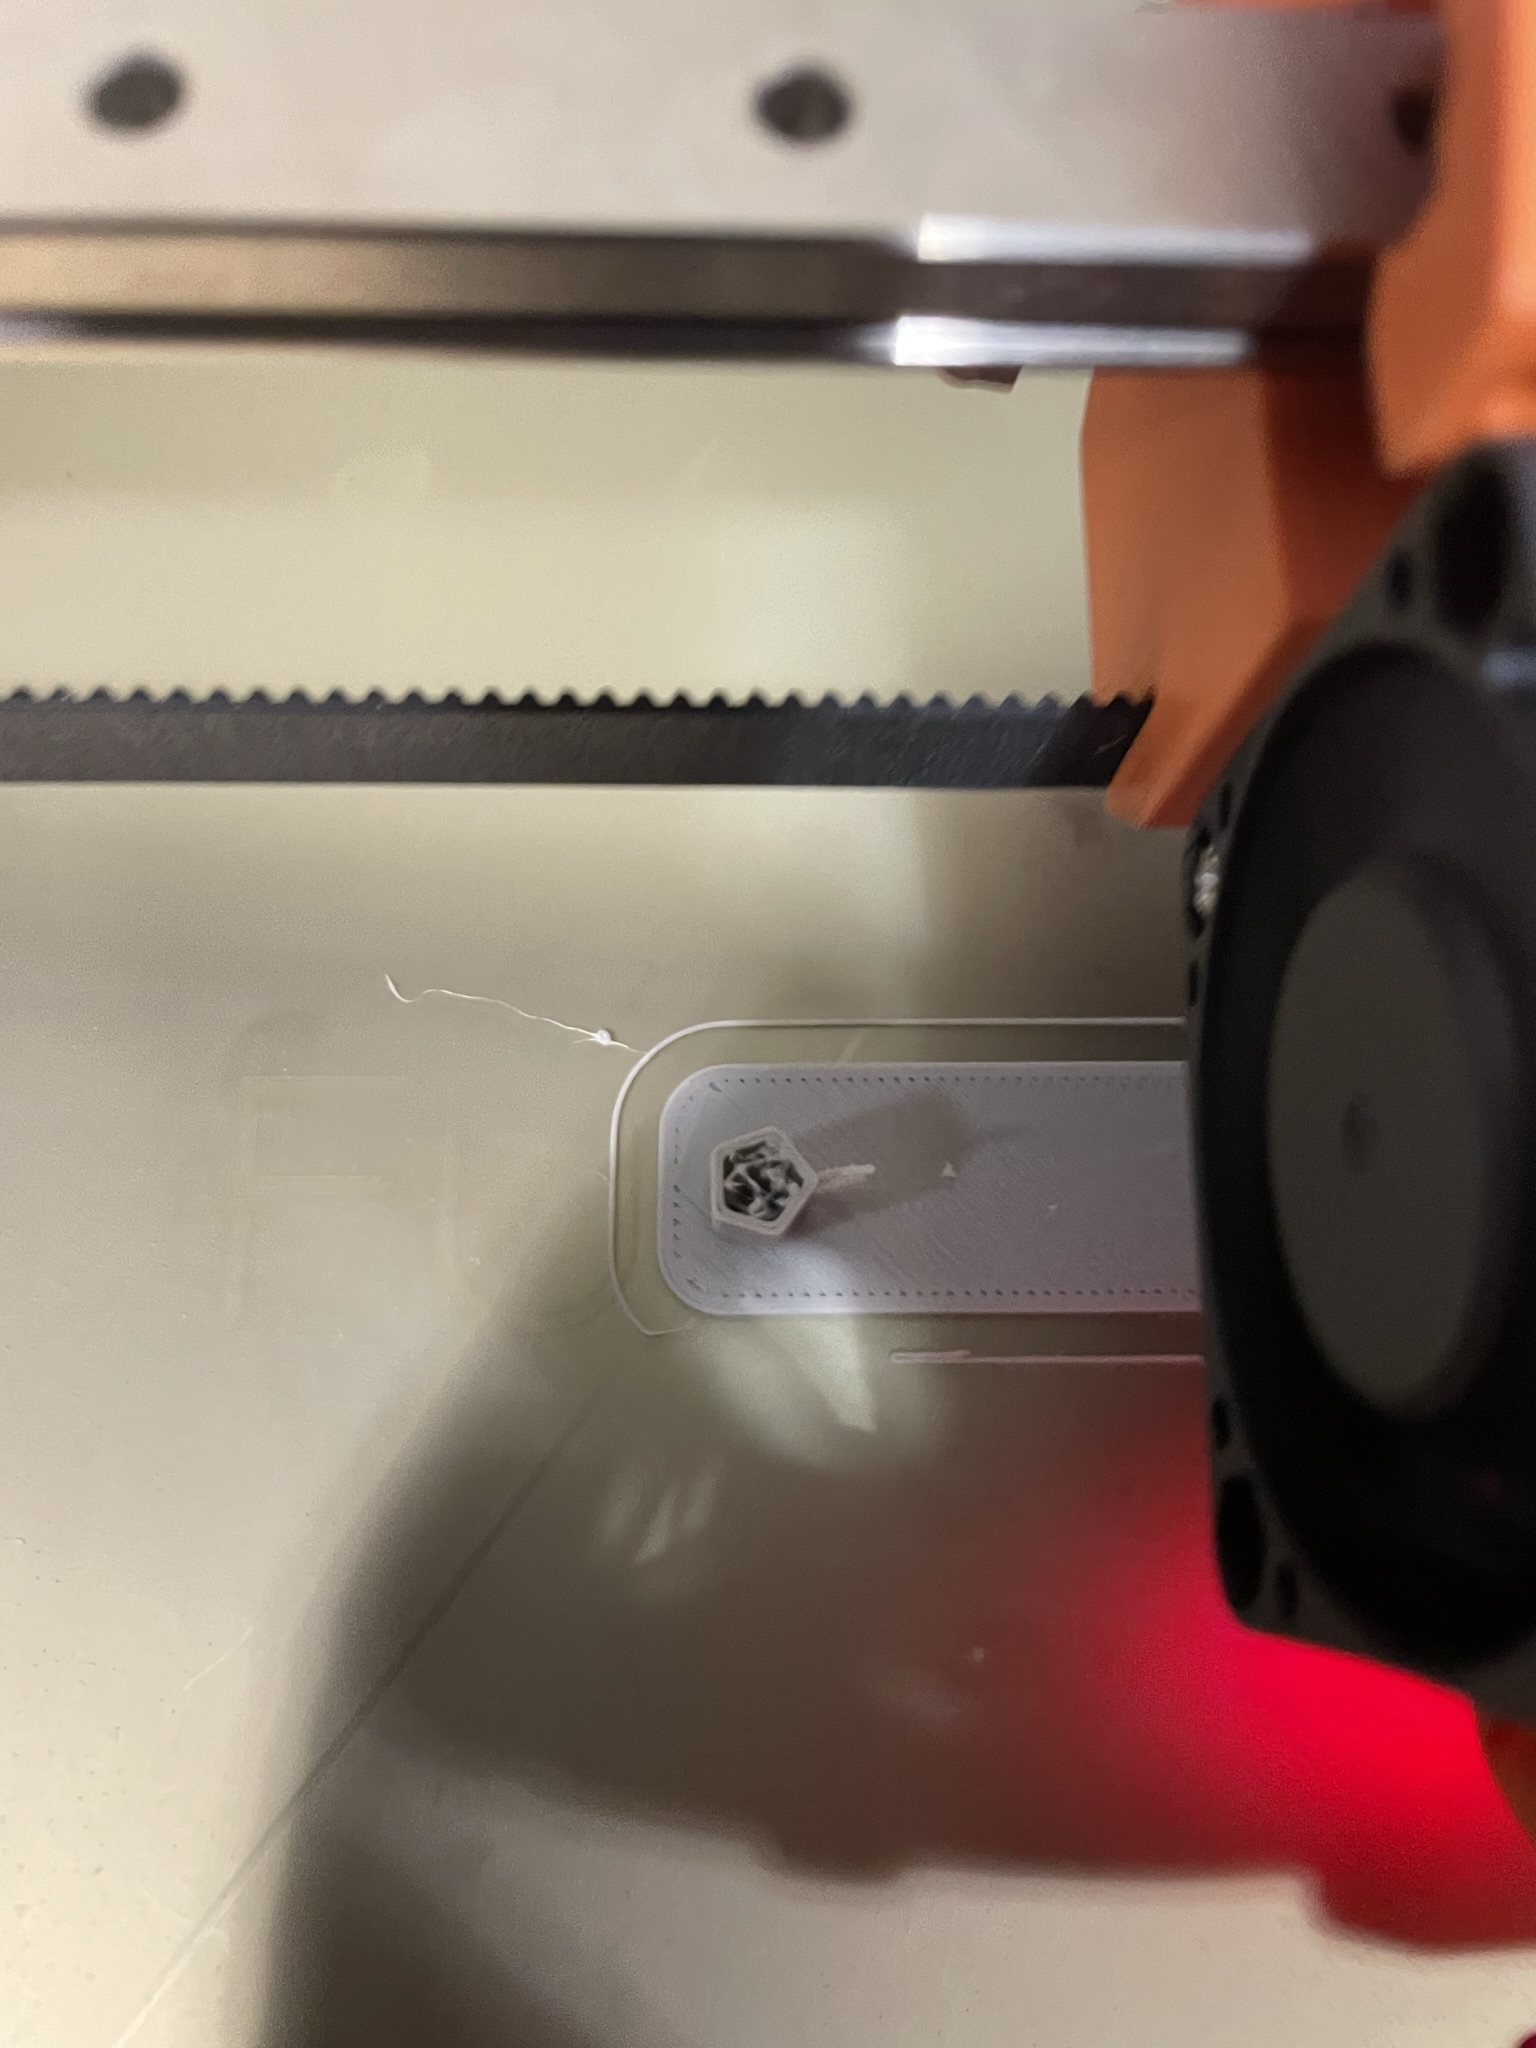
I am really struggling with short and rapid movements. It is struggling to push and pull filament quick enough to make these small lines.
Here are some of the important parameters I just printed this with:
-
Speed: 50mm/s
-
Infill Speed: Also 50mm/s
-
PLA - 218C and 70C
-
Retraction: 0.3mm at 40mm/s
-
Detraction/Prime: Same as retraction speed
-
I have linear advance enabled in Cura at 0.05 K Factor (not sure if this is working or if I need to do something in the firmware)
Here are some of the calibrations I have done so far:
-
Retraction: I get good results using the website generated gcode. No stringing
-
Flow: I am printing 0.4mm walls and I was measuring 0.5mm walls so I had to reduce flow to 80%
-
Speed: Varied from 40mm/s to 70mm/s and the test print looked great at each speed (see below)
-
PID Autotuning
-
XYZ Test Cube looks good
Don’t get me wrong, the printer is printing well overall and I can print most things perfectly fine. But I am definitely having issues with the rapid and small movements. The extruder is not keeping up with my movements and it is causing failed print lines in these areas.
What hotend did you use? There are some that are way better for fast moves. They have huge heatblocks so you can keep up. the one has the heatblock sideways.
The above is one such hotend.
so I see they ahve 12 and 24 v, is it 24v?
just pulling at straws, but if 12v, it may be having a hard time keeping it heated., oh, do a pid tune while running it fast. See what it is doing, if the temp is swaying alot, that could show you that there is a heating problem, if it stays steady then I would definitely say it should not be heat.
oops, been a while since I did pid tune, I do not think it can run while doing it, but you should be able to set a high temp and see what it is doing. Also Octoprint can show what is going on temp wise, while running.
Good thought, but there are no fluctuations in the hot end temperature during printing. I have been checking that in the Octoprint graph.
I think the fastest you can retract a hemera is 24mm/s, You might want to confirm that.
Skip this test, I don’t like it and 80% is not right. make sure your extrude steps are correct, the one that is 100mm marked on the raw filament, This wall thickness is not very valid to me.
Verify your max speed with the max speed slow test. I am maxed out at 55mm/s with a 0.5 nozzle so you should be somewhere around 70 I think. That test is very vaild.
try a scaled up version. 50x50 or one of the 100+ test shapes. Far more accurate. Like I said these tiny test parts are fast but can hide huge errors. 20mm cube can be 3% off before you would notice anything. Not true of a 100mm parts.
1 Like

This part does not look good at all. That has huge acceleration issues and the walls look really bad.
I don’t have any cura settings to share but maybe you should post yours here so we can look for issues. I have a prusa slicer setting file but that is for a different nozzle so probably not very relevant.
You should be getting flawless prints.
Hmmm… I thought this print was pretty decent ![]() I would be very happy to continue to improve the quality.
I would be very happy to continue to improve the quality.
This will be my next test. And then I will do the max speed test. Right now I am not pushing the machine too fast. Staying around 55mm/s.
Matts V4 Cura Profile.zip (812 Bytes)
Here is my current slicer profile for Cura. I have updated it to 24mm/s retraction and put it back to 100% flow. Let me know if this file works or if you need something else. I just used the export profile button in Cura so I assume that was the current way to do it.
Maybe it would be worth me trying Prusa Slicer so we can compare/relate settings easier.
His tests are great but you kinda have to go through them all once and circle back around and do most of them again. I suggest doing all these twice, and skipping the slicer flow rate one.
1- https://teachingtechyt.github.io/calibration.html#esteps
2- https://teachingtechyt.github.io/calibration.html#temp -pretty large range of acceptable (hotter =higher max flow rate).
3- https://teachingtechyt.github.io/calibration.html#retraction hemera is 0.2-0.4
4- https://teachingtechyt.github.io/calibration.html#speed - there used to be a initial test on this page it is gone now. This takes longer but is probably far more relevant.
5 - https://teachingtechyt.github.io/calibration.html#accel
As for axis calibration, do this with real parts, large parts and you are really only testing diagonals, your XY&Z should be fine as there is really no way to be off unless your belt tension is super far out of spec.
Just for reference here is an even more in depth tuning guide with caveat it’s aimed at klipper but is not hard to use for marlin. Tuning | Ellis’ Print Tuning Guide
2 Likes