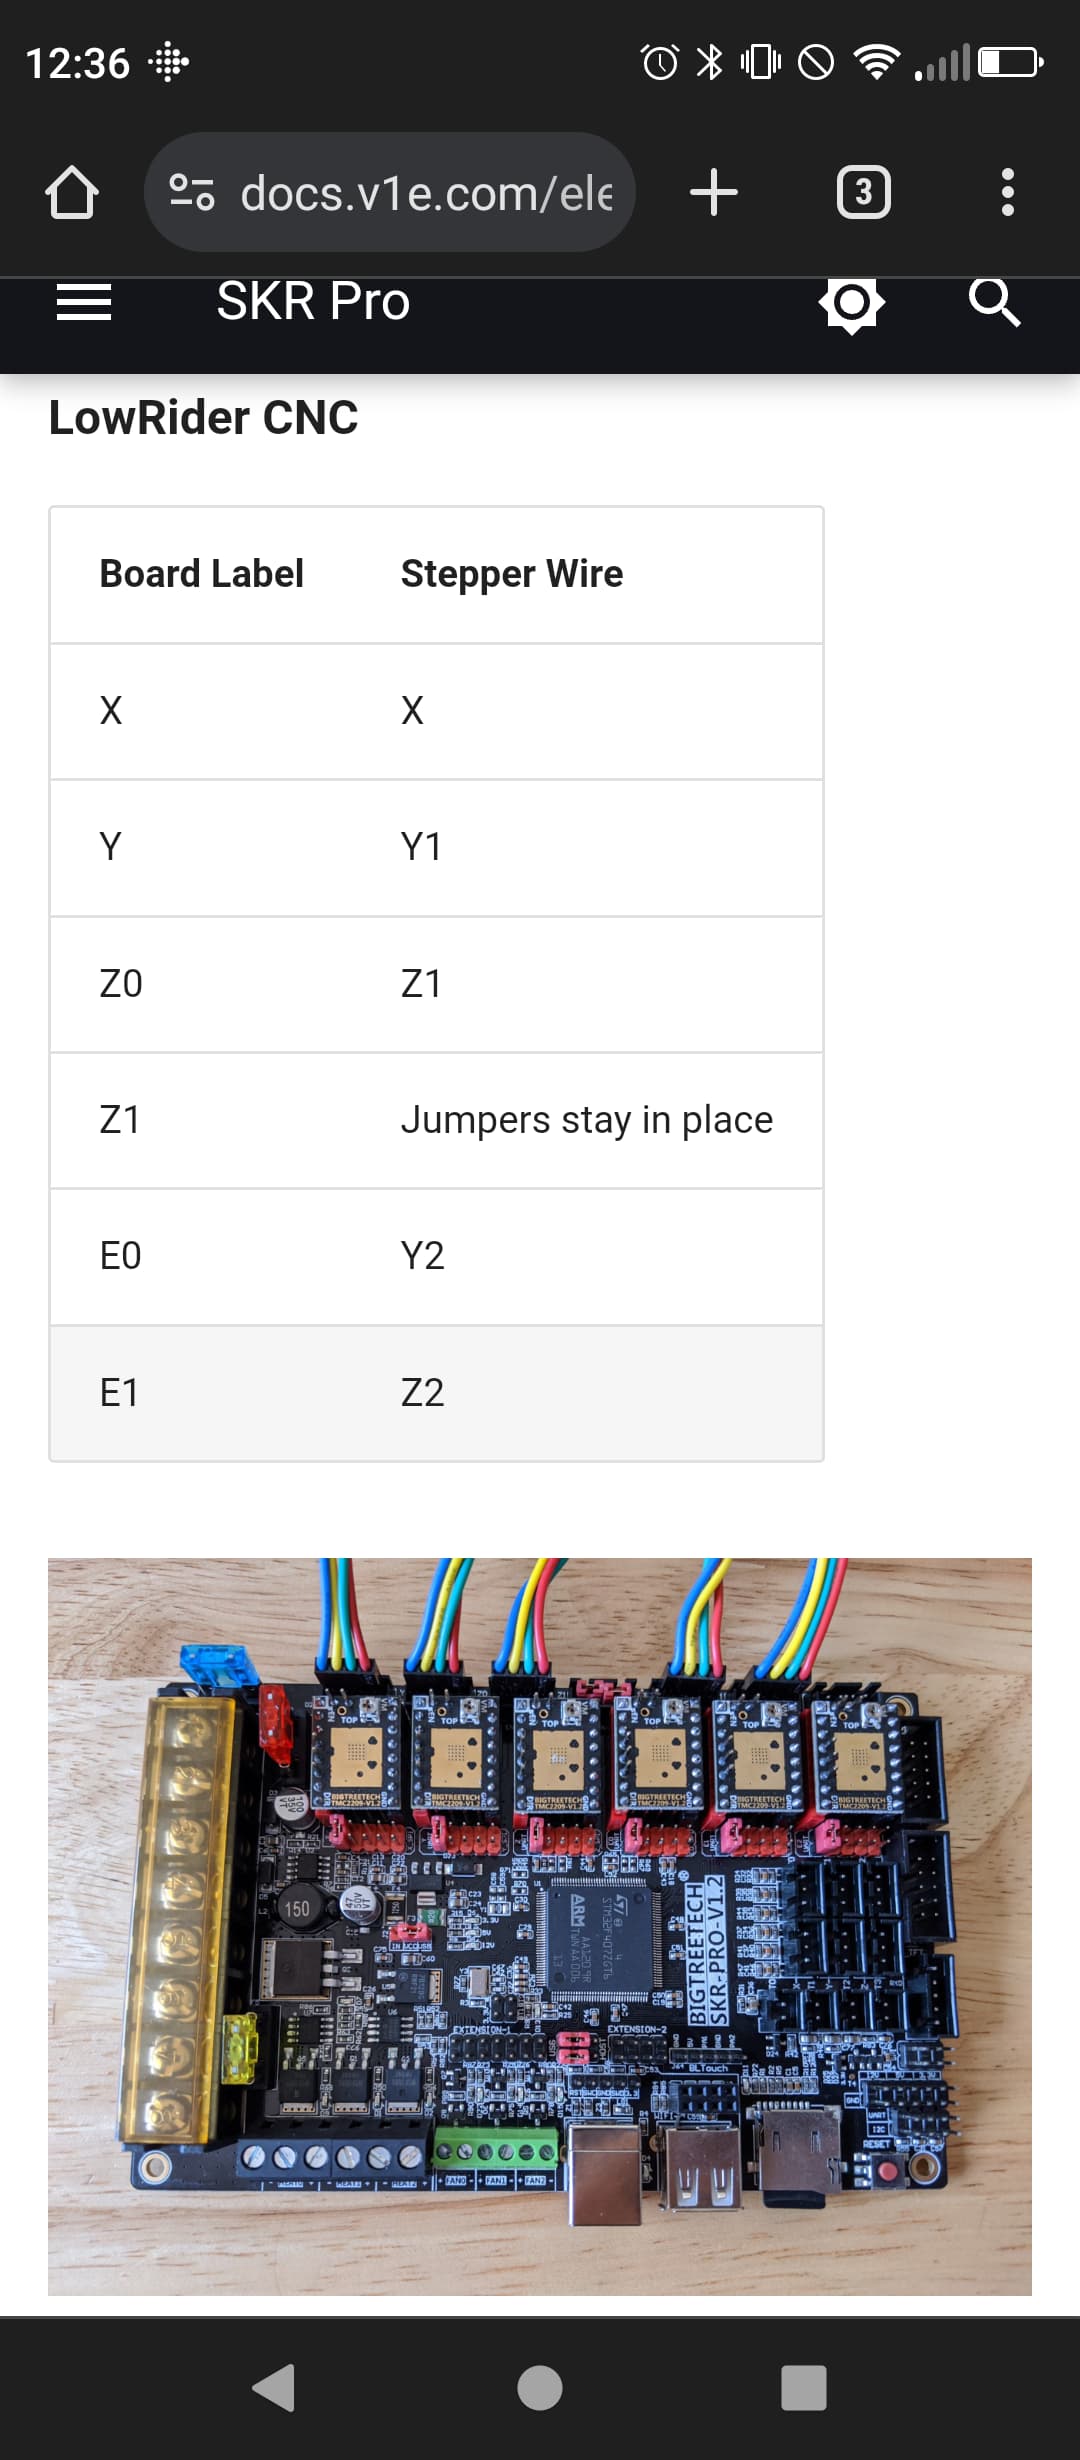
It’s clearly “I can’t take a trick day” today. X is sorted, but the old Kangaroo hopping Y came back - this time there was a faulty pin buried deep in the loom under the Z motor - despite being secured with zipties and shrink tube - one little pin had worked it’s way out of the plug!
I recall saying this before - but this is the time when sensible folk start doing the job from scratch, properly. But if I can get through the next little bit, all will be well with the world.
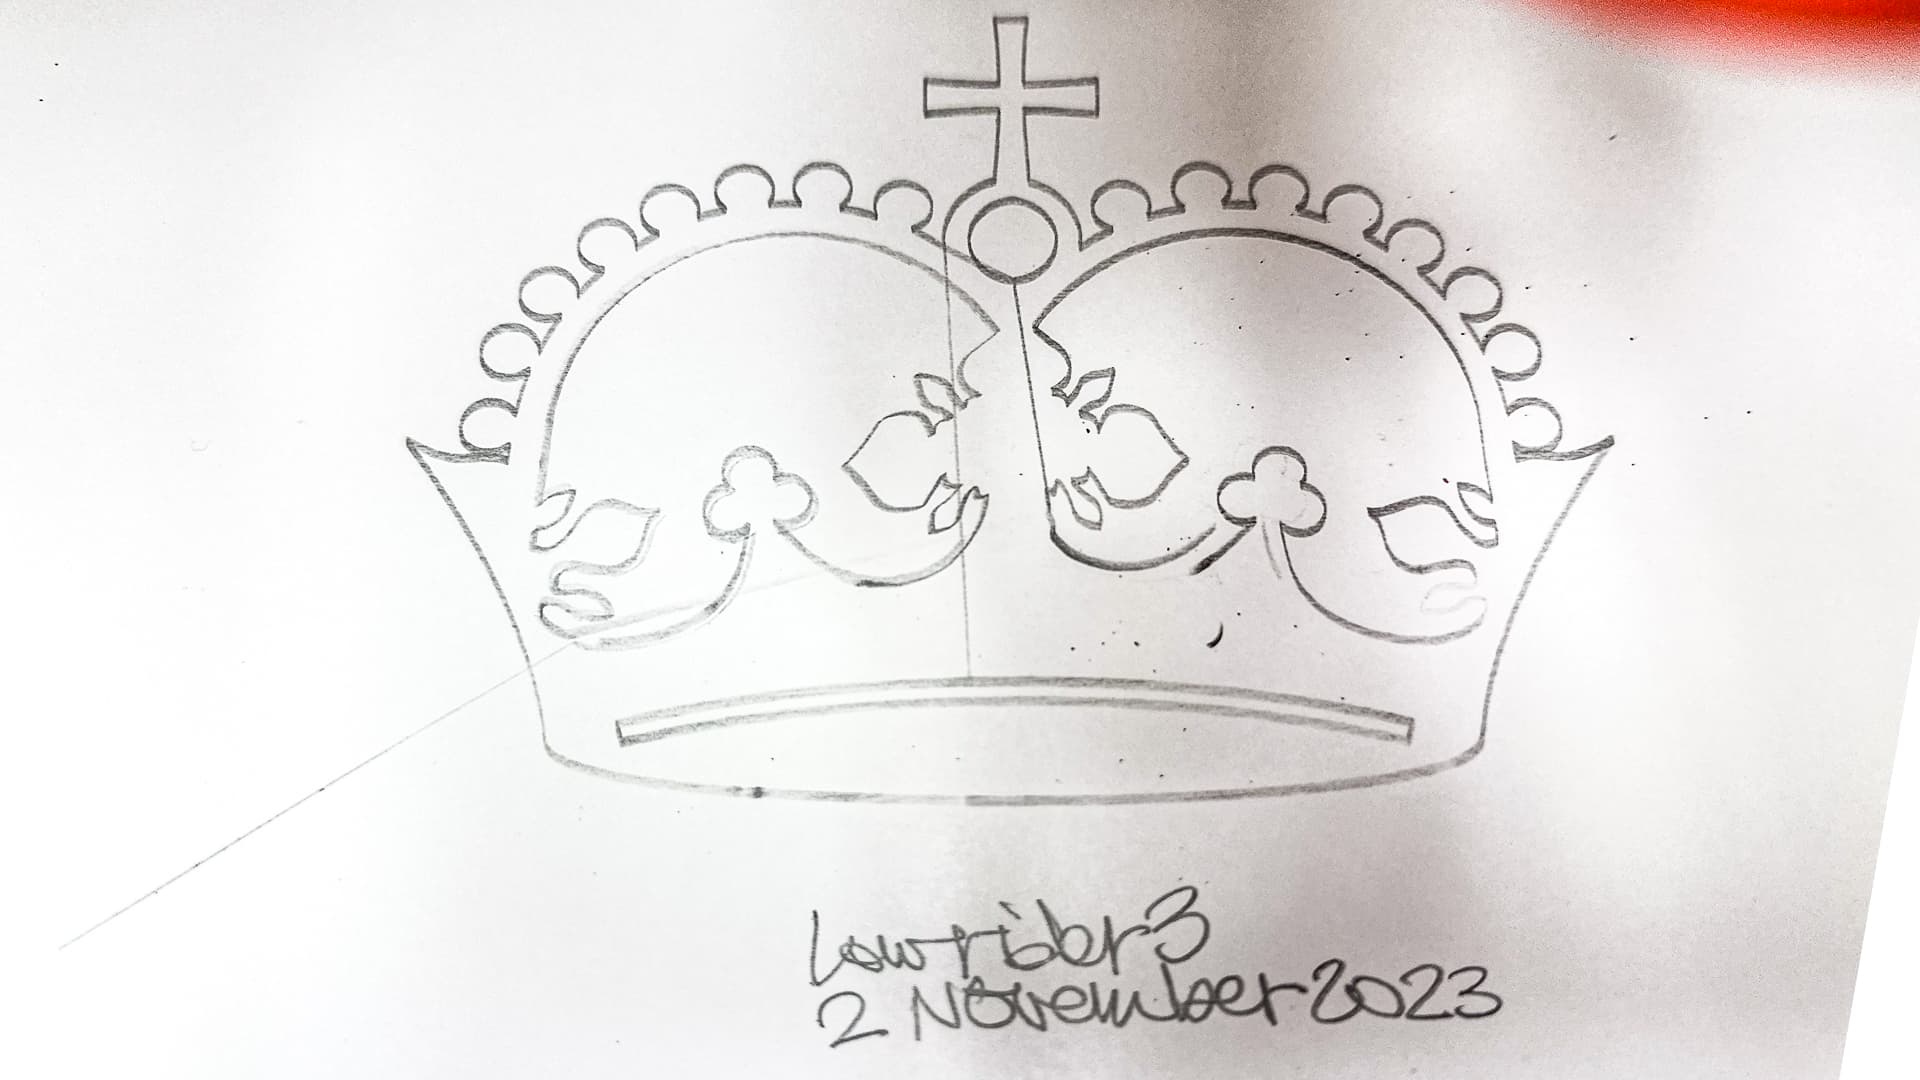
Then of course I thought I could just “reset” the lot, and draw the crown with the old gcode. Hmmm that didn’t go particularly well, and I need to work out why Z parks at +200. I presume that will all come out in the wash when I start following the instructions!
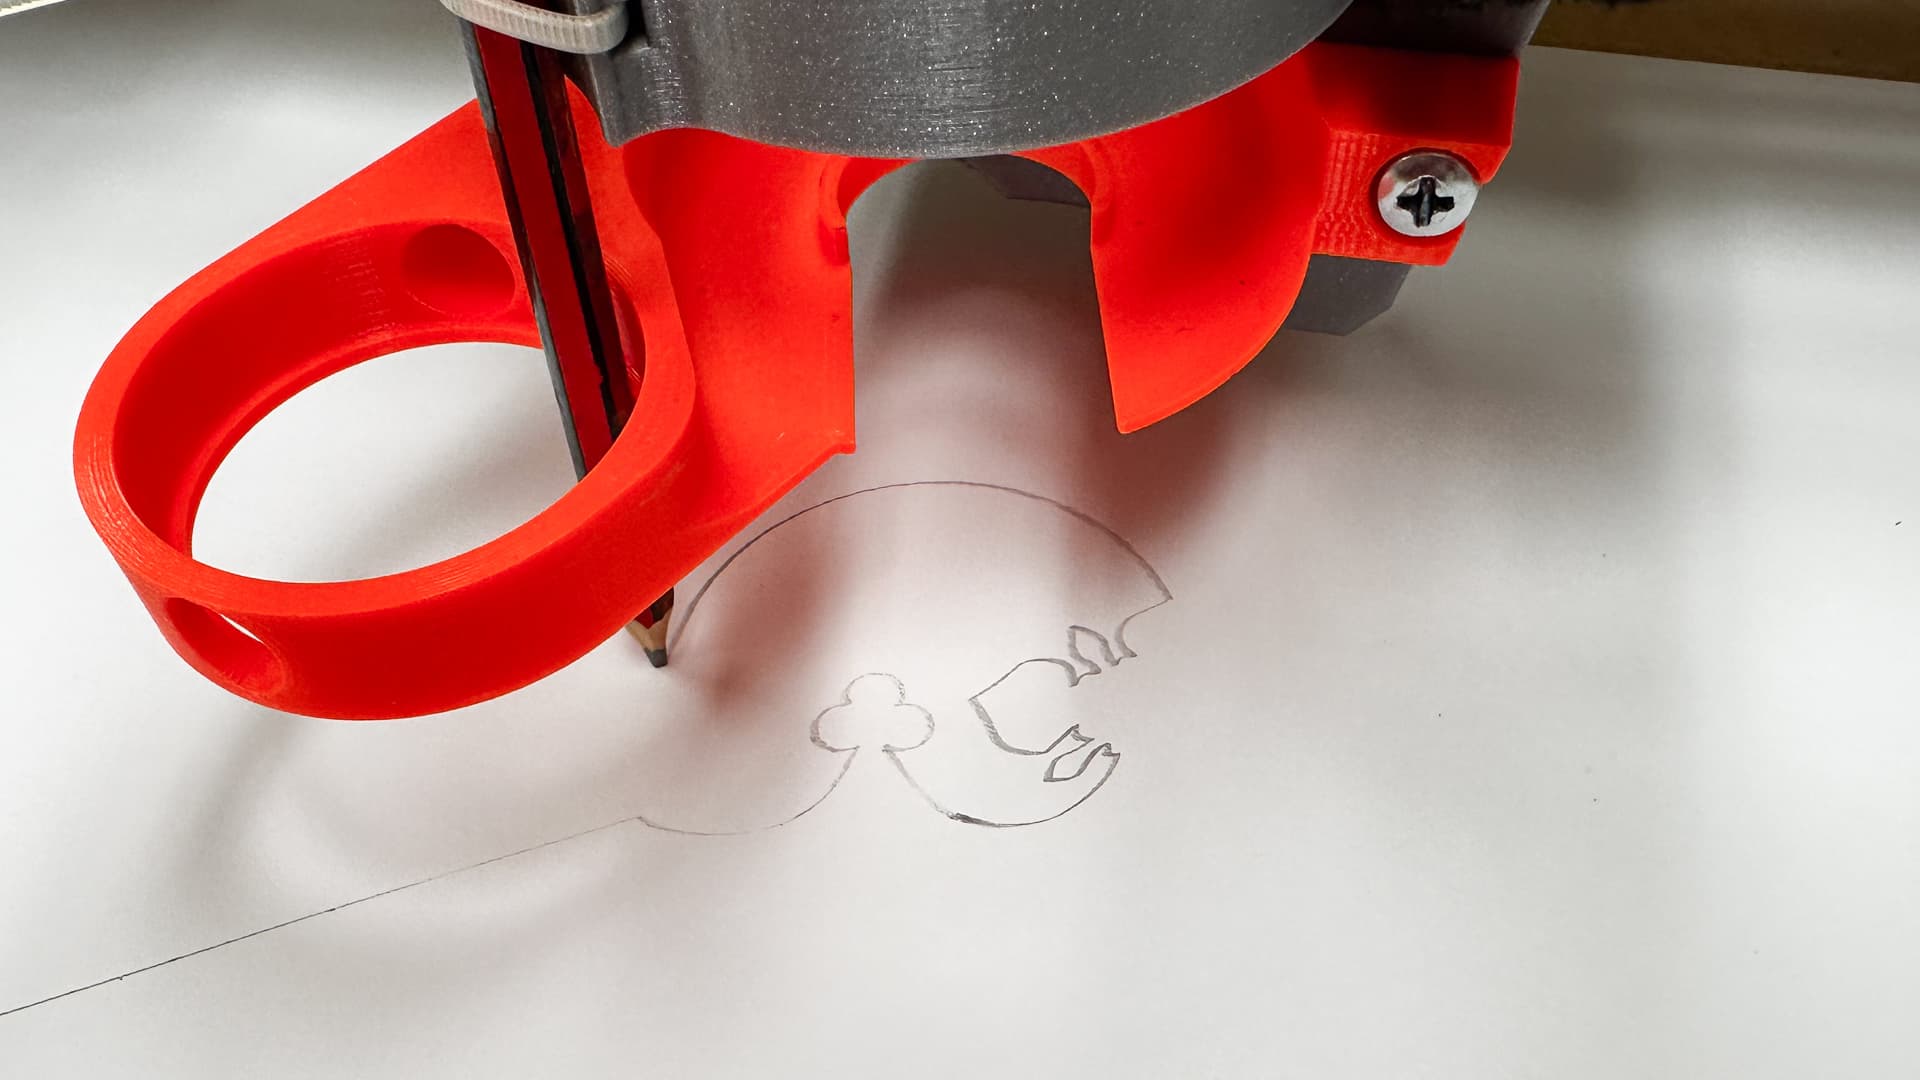
Like the newborn child of every new parent I’ve ever met, this drawing has no flaws.
OK it has a couple which were entirely my fault. I used a pencil to increase the degree of difficulty and what looks like double lines is actually double lines where I thought I’d check repeatability (perfect until I moved the pencil accidentally).
Its handwriting is surprisingly poor…
Now I can bolt it back together, and see if I can get it all finished before Christmas!
Ummm, I freaking love it. I spent years trying to write like that. Try it a little bigger with a chisel tip marker on a smooth surface. People might pay for it.
Well it was a bit of a frustrating day today. I had an entire day available to get this thing sorted and spent it instead on a chat with a nice customer service chap who proceeded to slowly fry my brain not fixing a problem which we both concluded would be best if we pretended it never existed and despite our best efforts simply vanished into thin air without explanation.
Therefore having missed my afternoon nap, with brain smouldering anyway I thought I’d leave the dear lopsided thing till tomorrow.
I can’t quite work out why WHEN POWERED OFF, the Z1 hangs up in the air while Z2 happily prostrates itself at every opportunity - it all seems to be aligned properly - perhaps after I lube the screws things will improve… at least the LR2 had the good grace to bow equally subserviently.
Anyway, that’s tomorrow’s problem, unless one of you knows something that I don’t ( and since all of you are in that category, I expect this thread to be flooded with suggestions before I next get out of bed!)
Ah yes - they have had a lot of bumping and mucking round since they were smooth as silk. Maybe I could just tap the other side a bit and they’d both hang up in the sky!
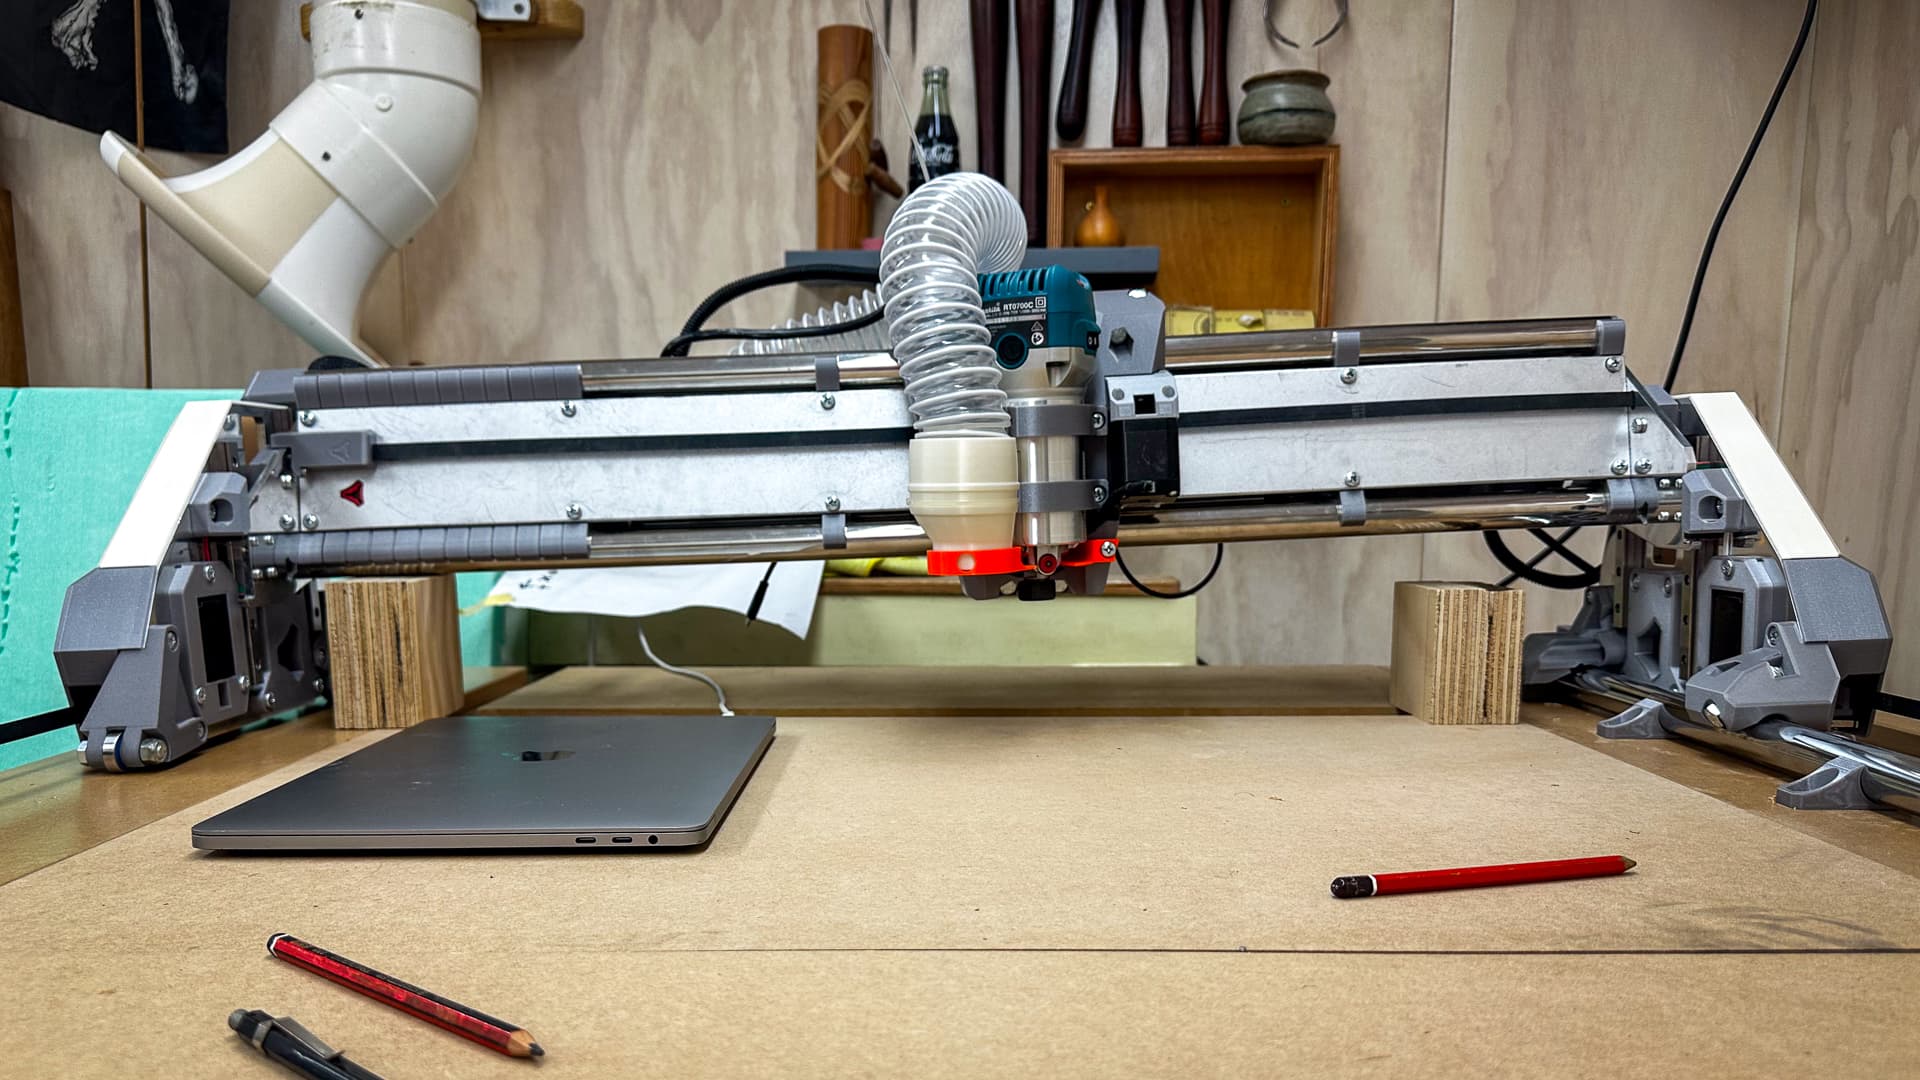
I checked the machine today and it all works as it should, but it hasn’t squared itself yet. Repetier works too, so that’s a bonus.
One week left to tidy up the years loose ends really before we go “dark” for a bit, and my 2d printer died so I’ve had to set up a new fangled wireless one that can print from an iPhone, but only has Windows software (really Brother, it’s 2023!!) Thanks to Mr Apple’s spite, it was plug and play from the desktop machine anyway, haven’t had the heart to try wifi from the laptop.
And you lot are relentless. Every time I log on there’s a day to catch up on. What will it be like after a couple of weeks?
Tempted though I am to make it all work as an add on - I don’t really want to be without a laser as well in the couple of years it will take to build the LR4.
Here’s what’s planned for the next stages of this build, and in a further post I’ll discuss why I’m not using it as a laser.
While this is going on, when we get back sometime in December, I have a small sheet of composite to so I can start mucking around with the struts and I have a super non-sensical series of spoil boards (in mdf) planned “because I can”.
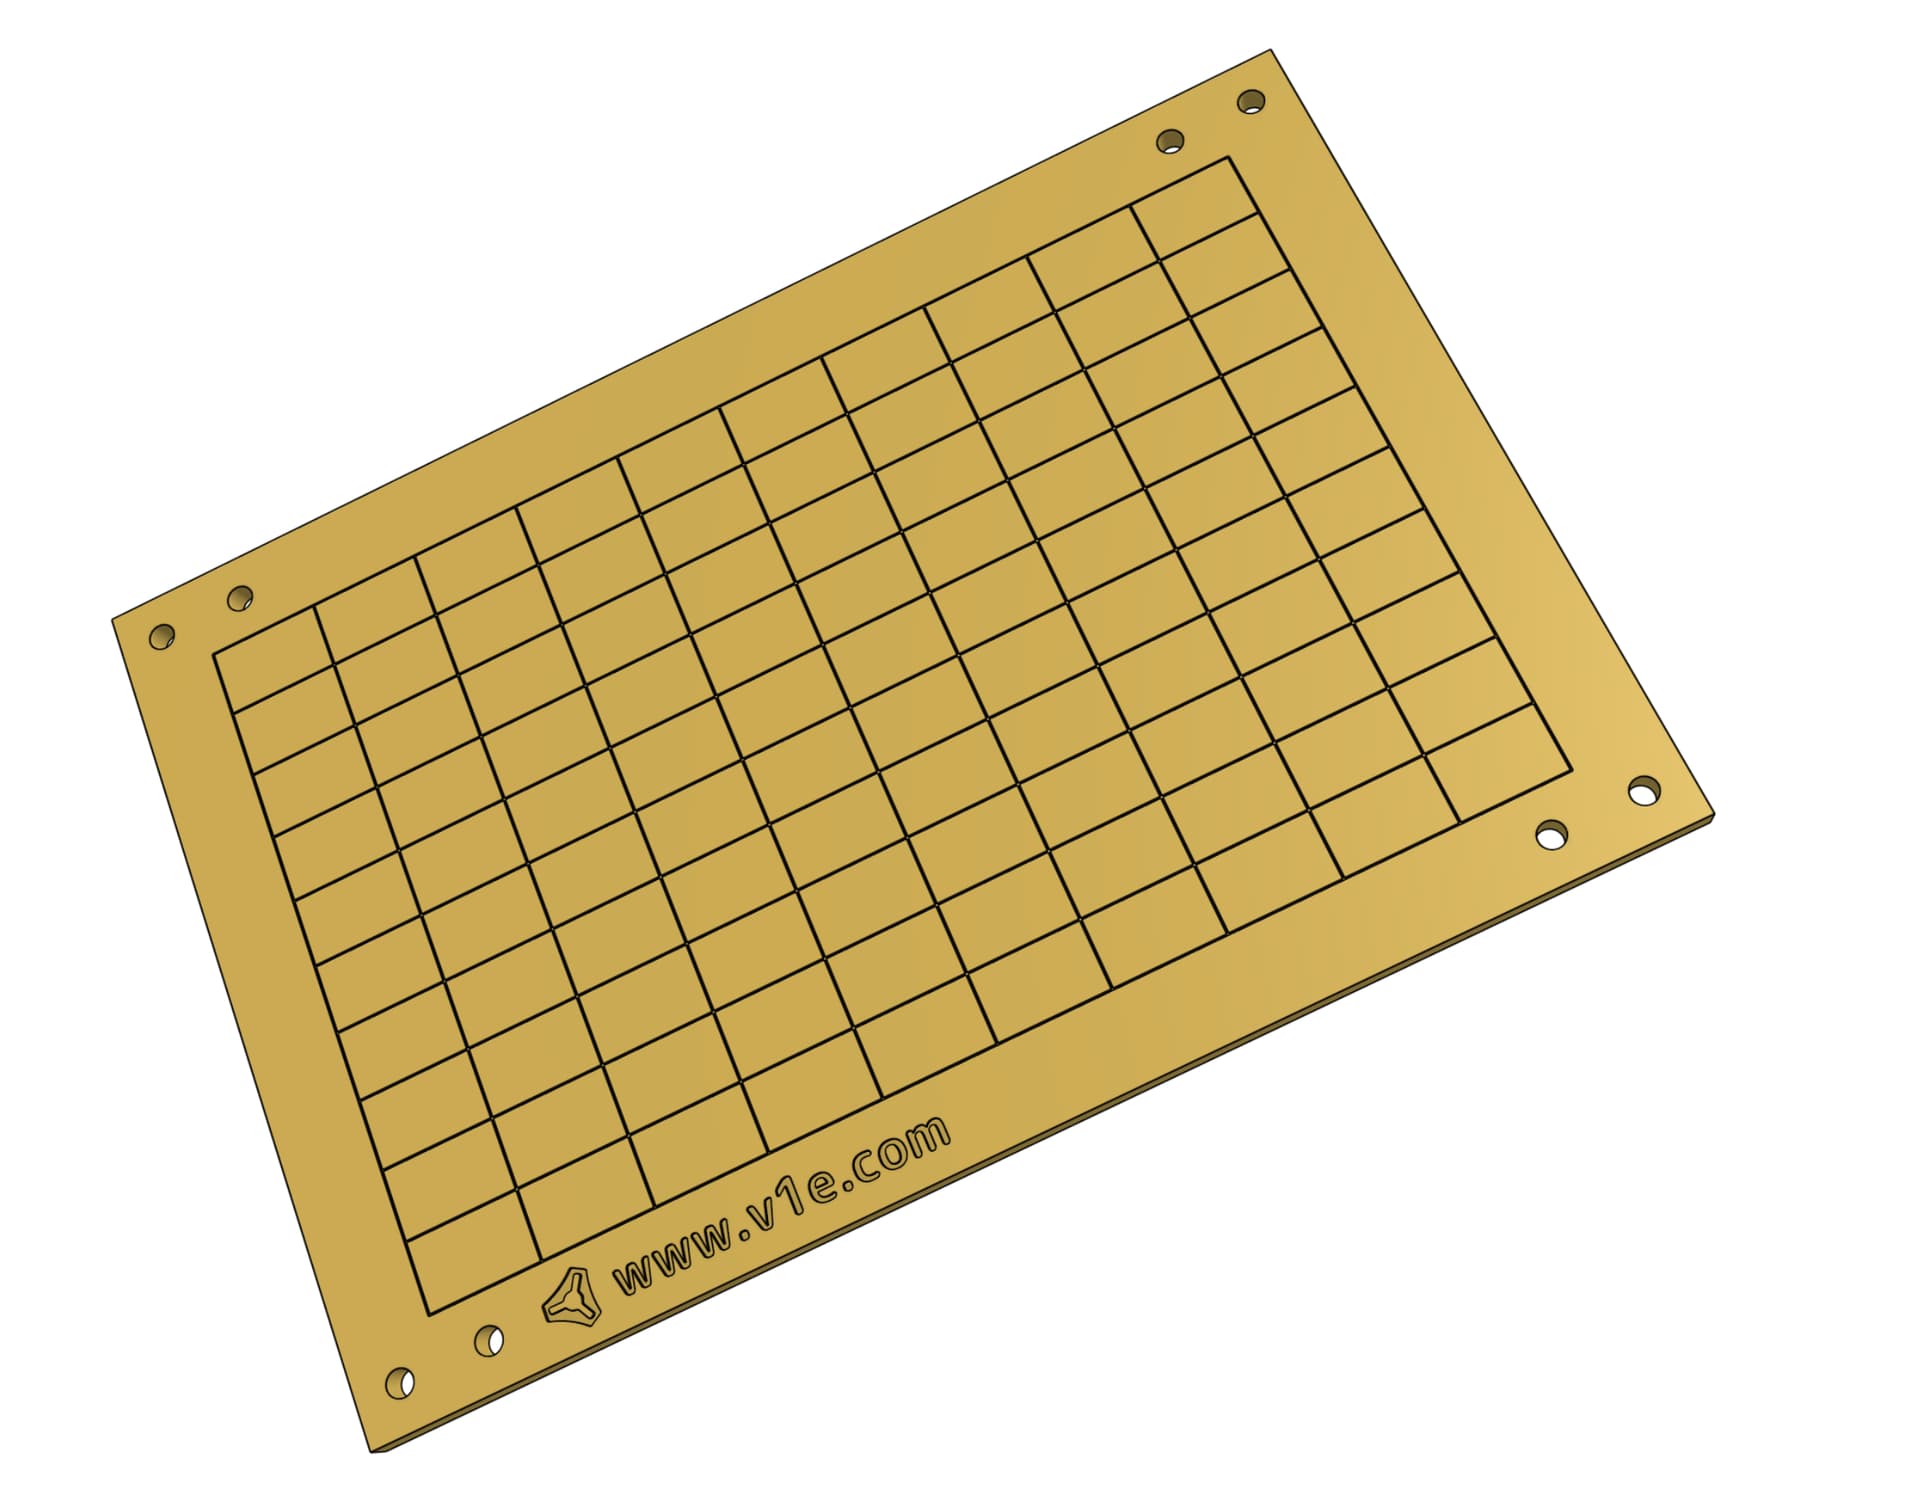
I have never really understood the fancy spoil board thing, where the spoil board becomes a work of art that really isn’t disposable - just bung in a couple of screws I say, and let 'er rip! Now however I am committed in my mind to carrying out the greatest act of hypocrisy reported on this thread to date, and building some “decorative” spoil boards using the concept illustrated in early September.
This will give the ability to swap out or flip over one third of the surface area at a time, and it will be very easy to treat each one separately - I had thoughts of keeping the Ymax end plain to use as a backing for laser or plotting, to make a simple grid with some dog holes in the Y) end, and to make some tee slots, using double sided cnc in the middle section. It all reeks of samples which is exactly what it will be - experiments mostly “because I can”.
Then there’s the enclosure for fine dust collection, which I am hoping to get away without building, and I have a few sketches but not worth sharing unless there are questions, but it would be a cross between @Fabien’s version and a geodesic airolite..
So there we are, we leave on a business trip to Japan on the weekend ( Being retired is what we do for a living, therefore it’s all business!) so remind me where I am when we get back will you?
See my concern is after a while there so many holes that you can’t. I want to build a fancy one because I think it’s be just as quick as screws and I don’t have to worry about offsetting the screws or anything. On the other hand I agree cause it’ll just need replace than redone. And depending on how you do it a fancy one sometimes can’t be resurfaced.
Going to miss your responses! But at least you’ll be having fun. I had some friends that would have killed to go to Japan, congrats!
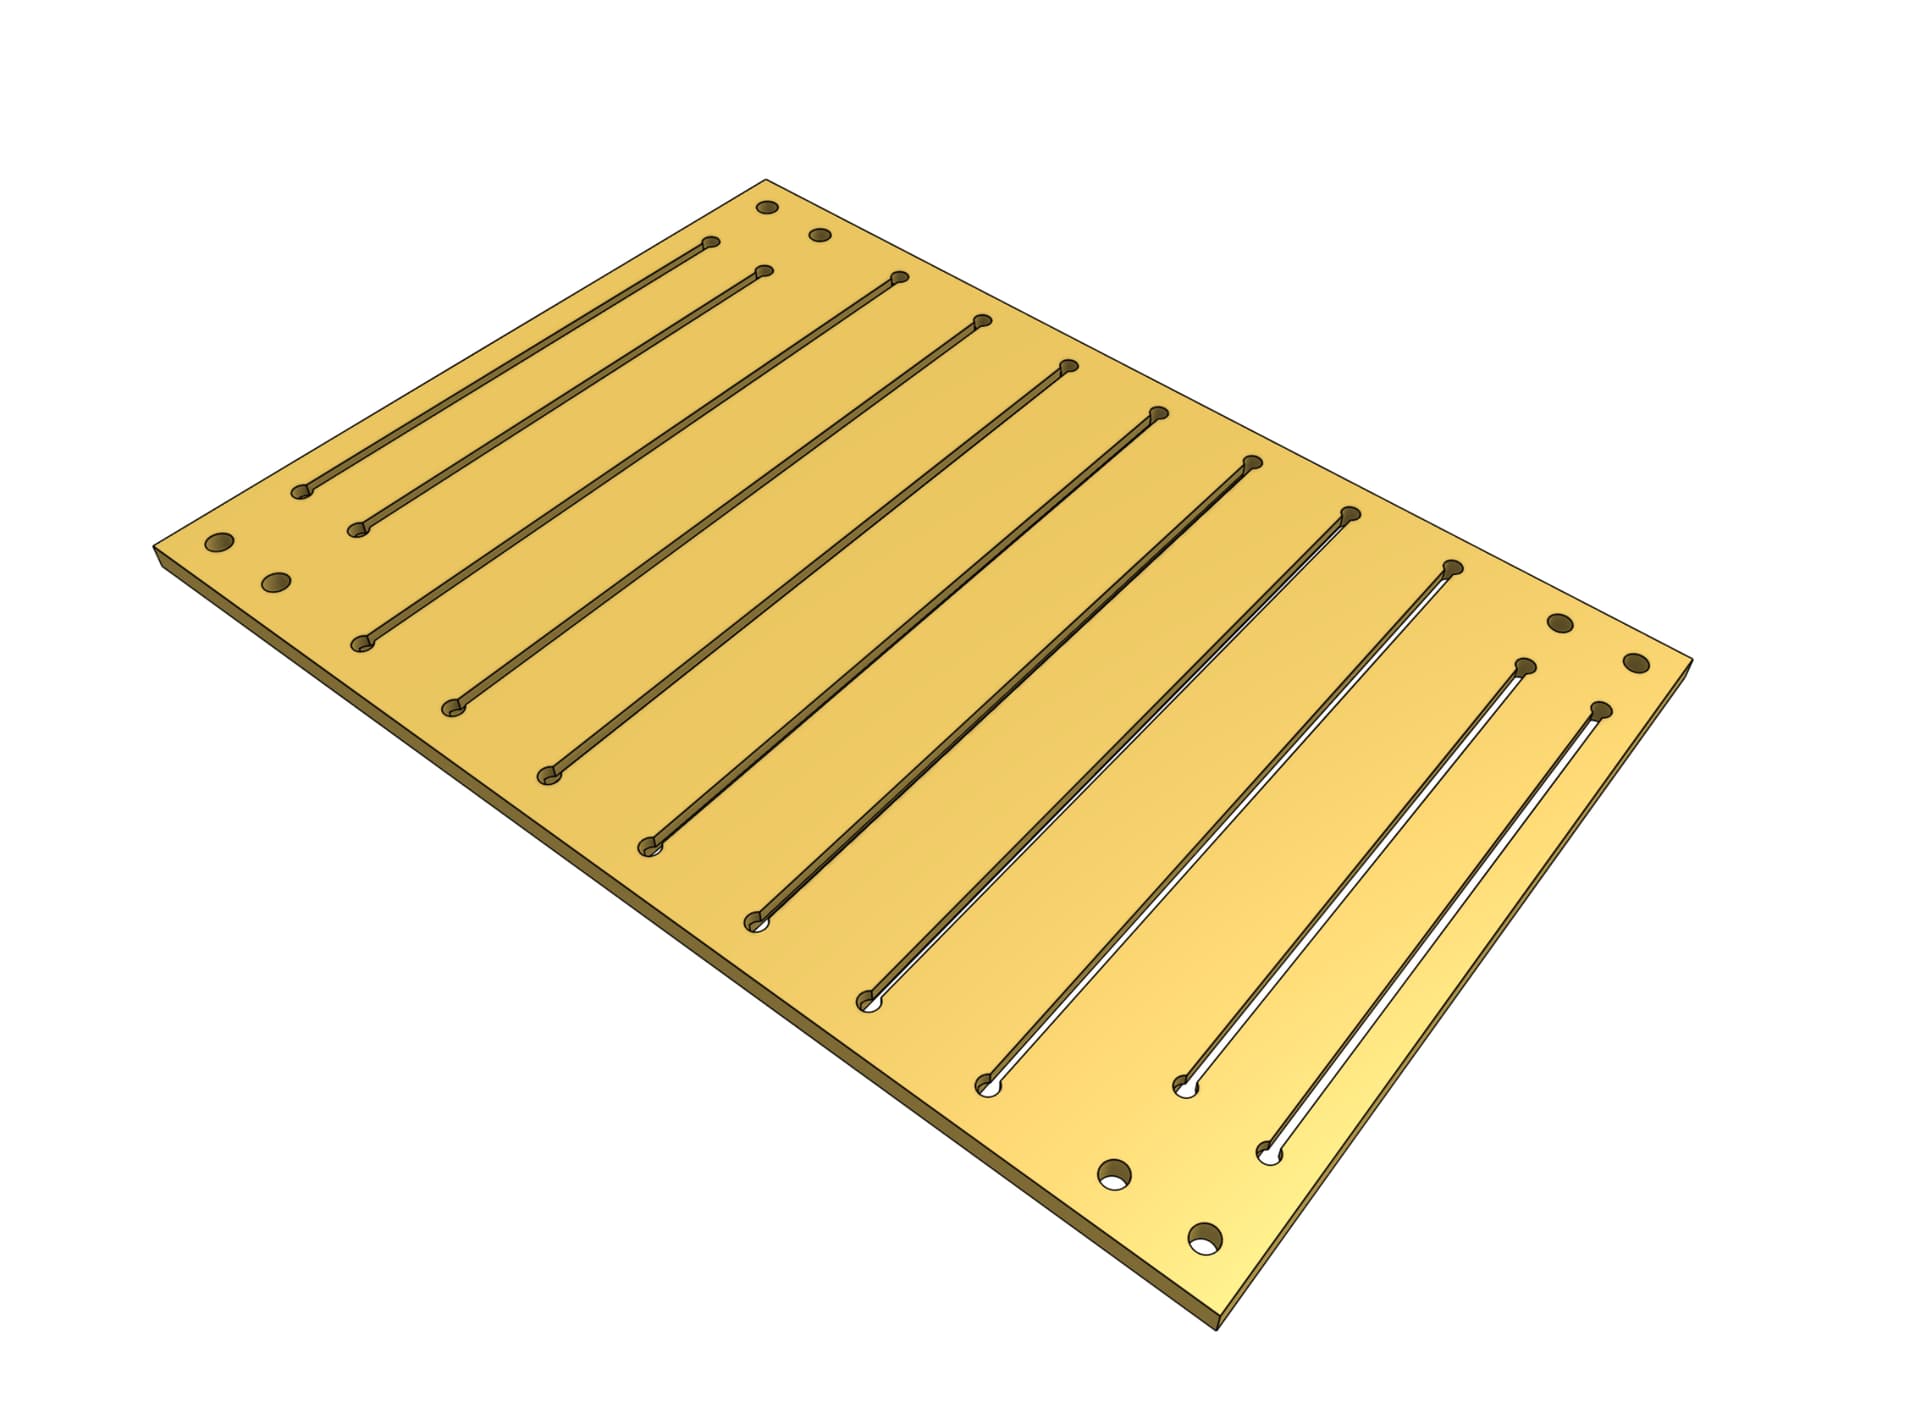
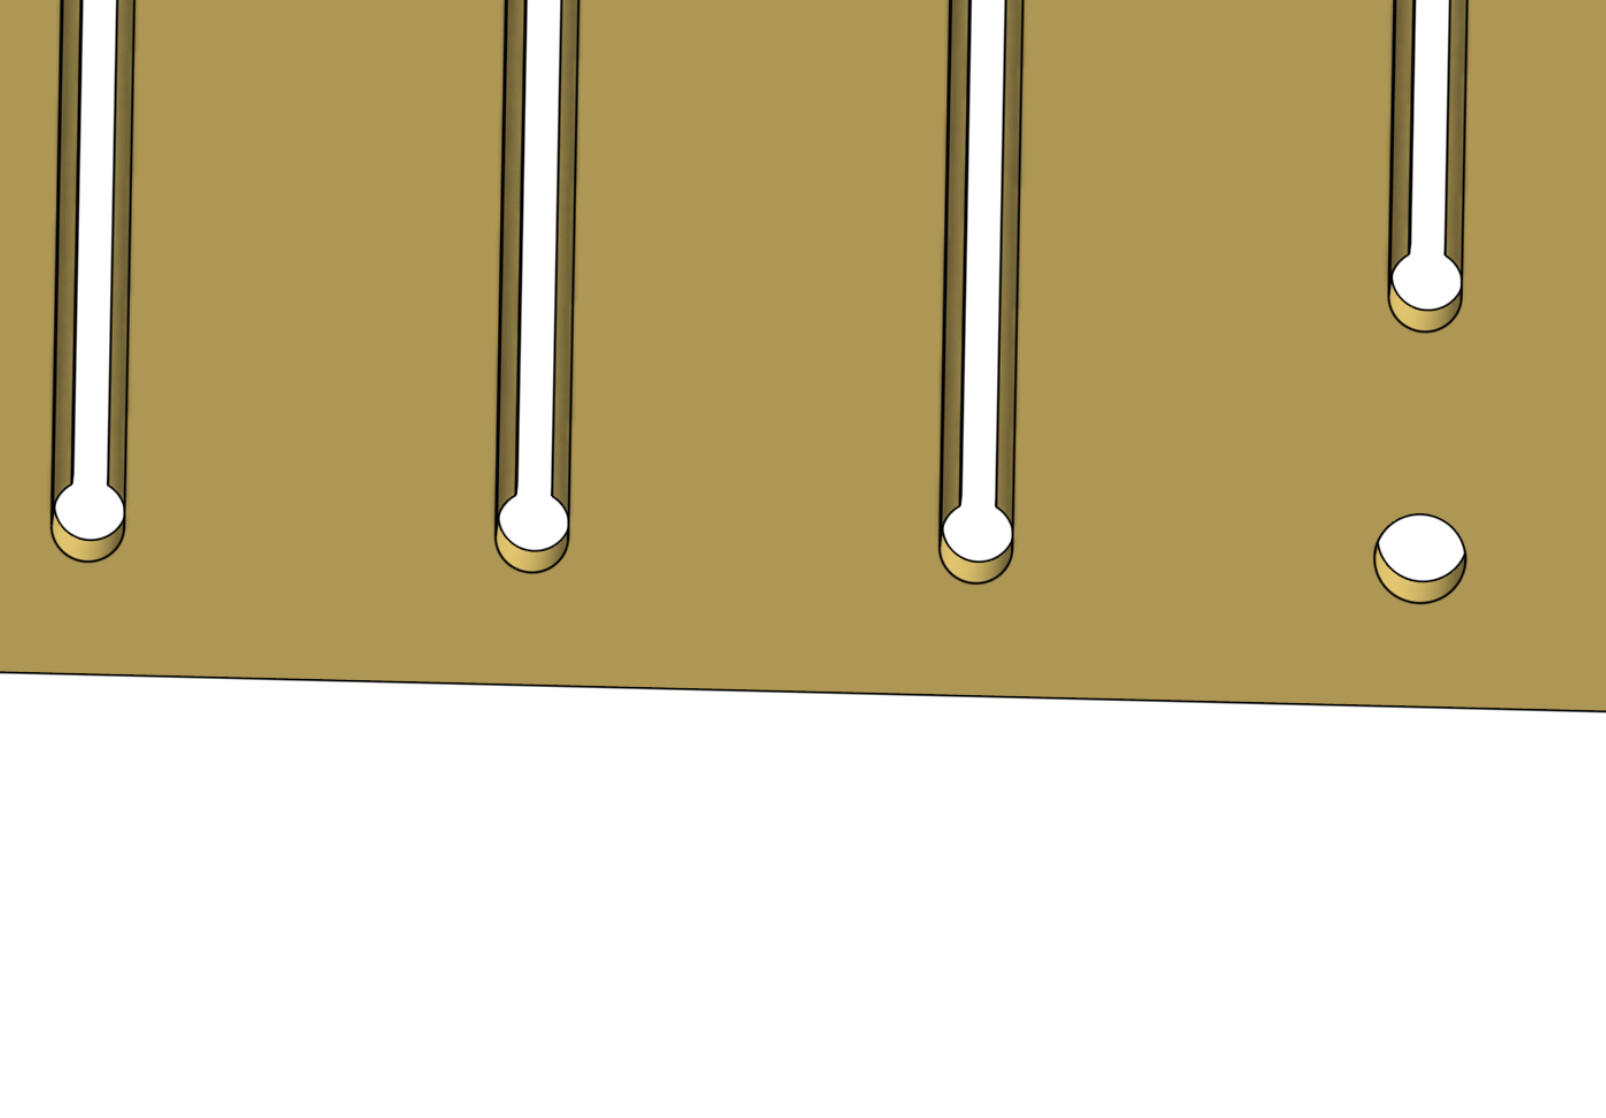
Well here’s my plan for the slotted panel - 6mm slot on the topside with 12mm diameter holes in the ends. 12mm slots matching below so you can pop in a 6mm carriage bolt and the square bit will bind in the slot. Or you can use regular hex bolts and adjust the slot at the bottom to suit. Of course you can add slots to taste and it’s not costing anything but a bit of machine time. I can’t see the point in spending money on tracks, and while you probably can’t flip this one over - it won’t cost very much to replace.
I’m definitely planning to attach a laser diode to my LowRider and burn a grid on my spoil board, especially now that I’ve made the switch over to the Jackpot board, which is more capable of better engraving speeds for laser than the SKR board was.
That’s when you replace it. The top gets chewed up by through cuts anyway. Easy come, easy go. You have a more precious table top and the spoil board is just the top surface that takes the abuse. 3/4" material that can hold the screws.
The LR doesn’t have a lot of clearance either. So any big clamps will hit the gantry or the core. So you either need screws or the tape/ca glue trick to hold stuff down.