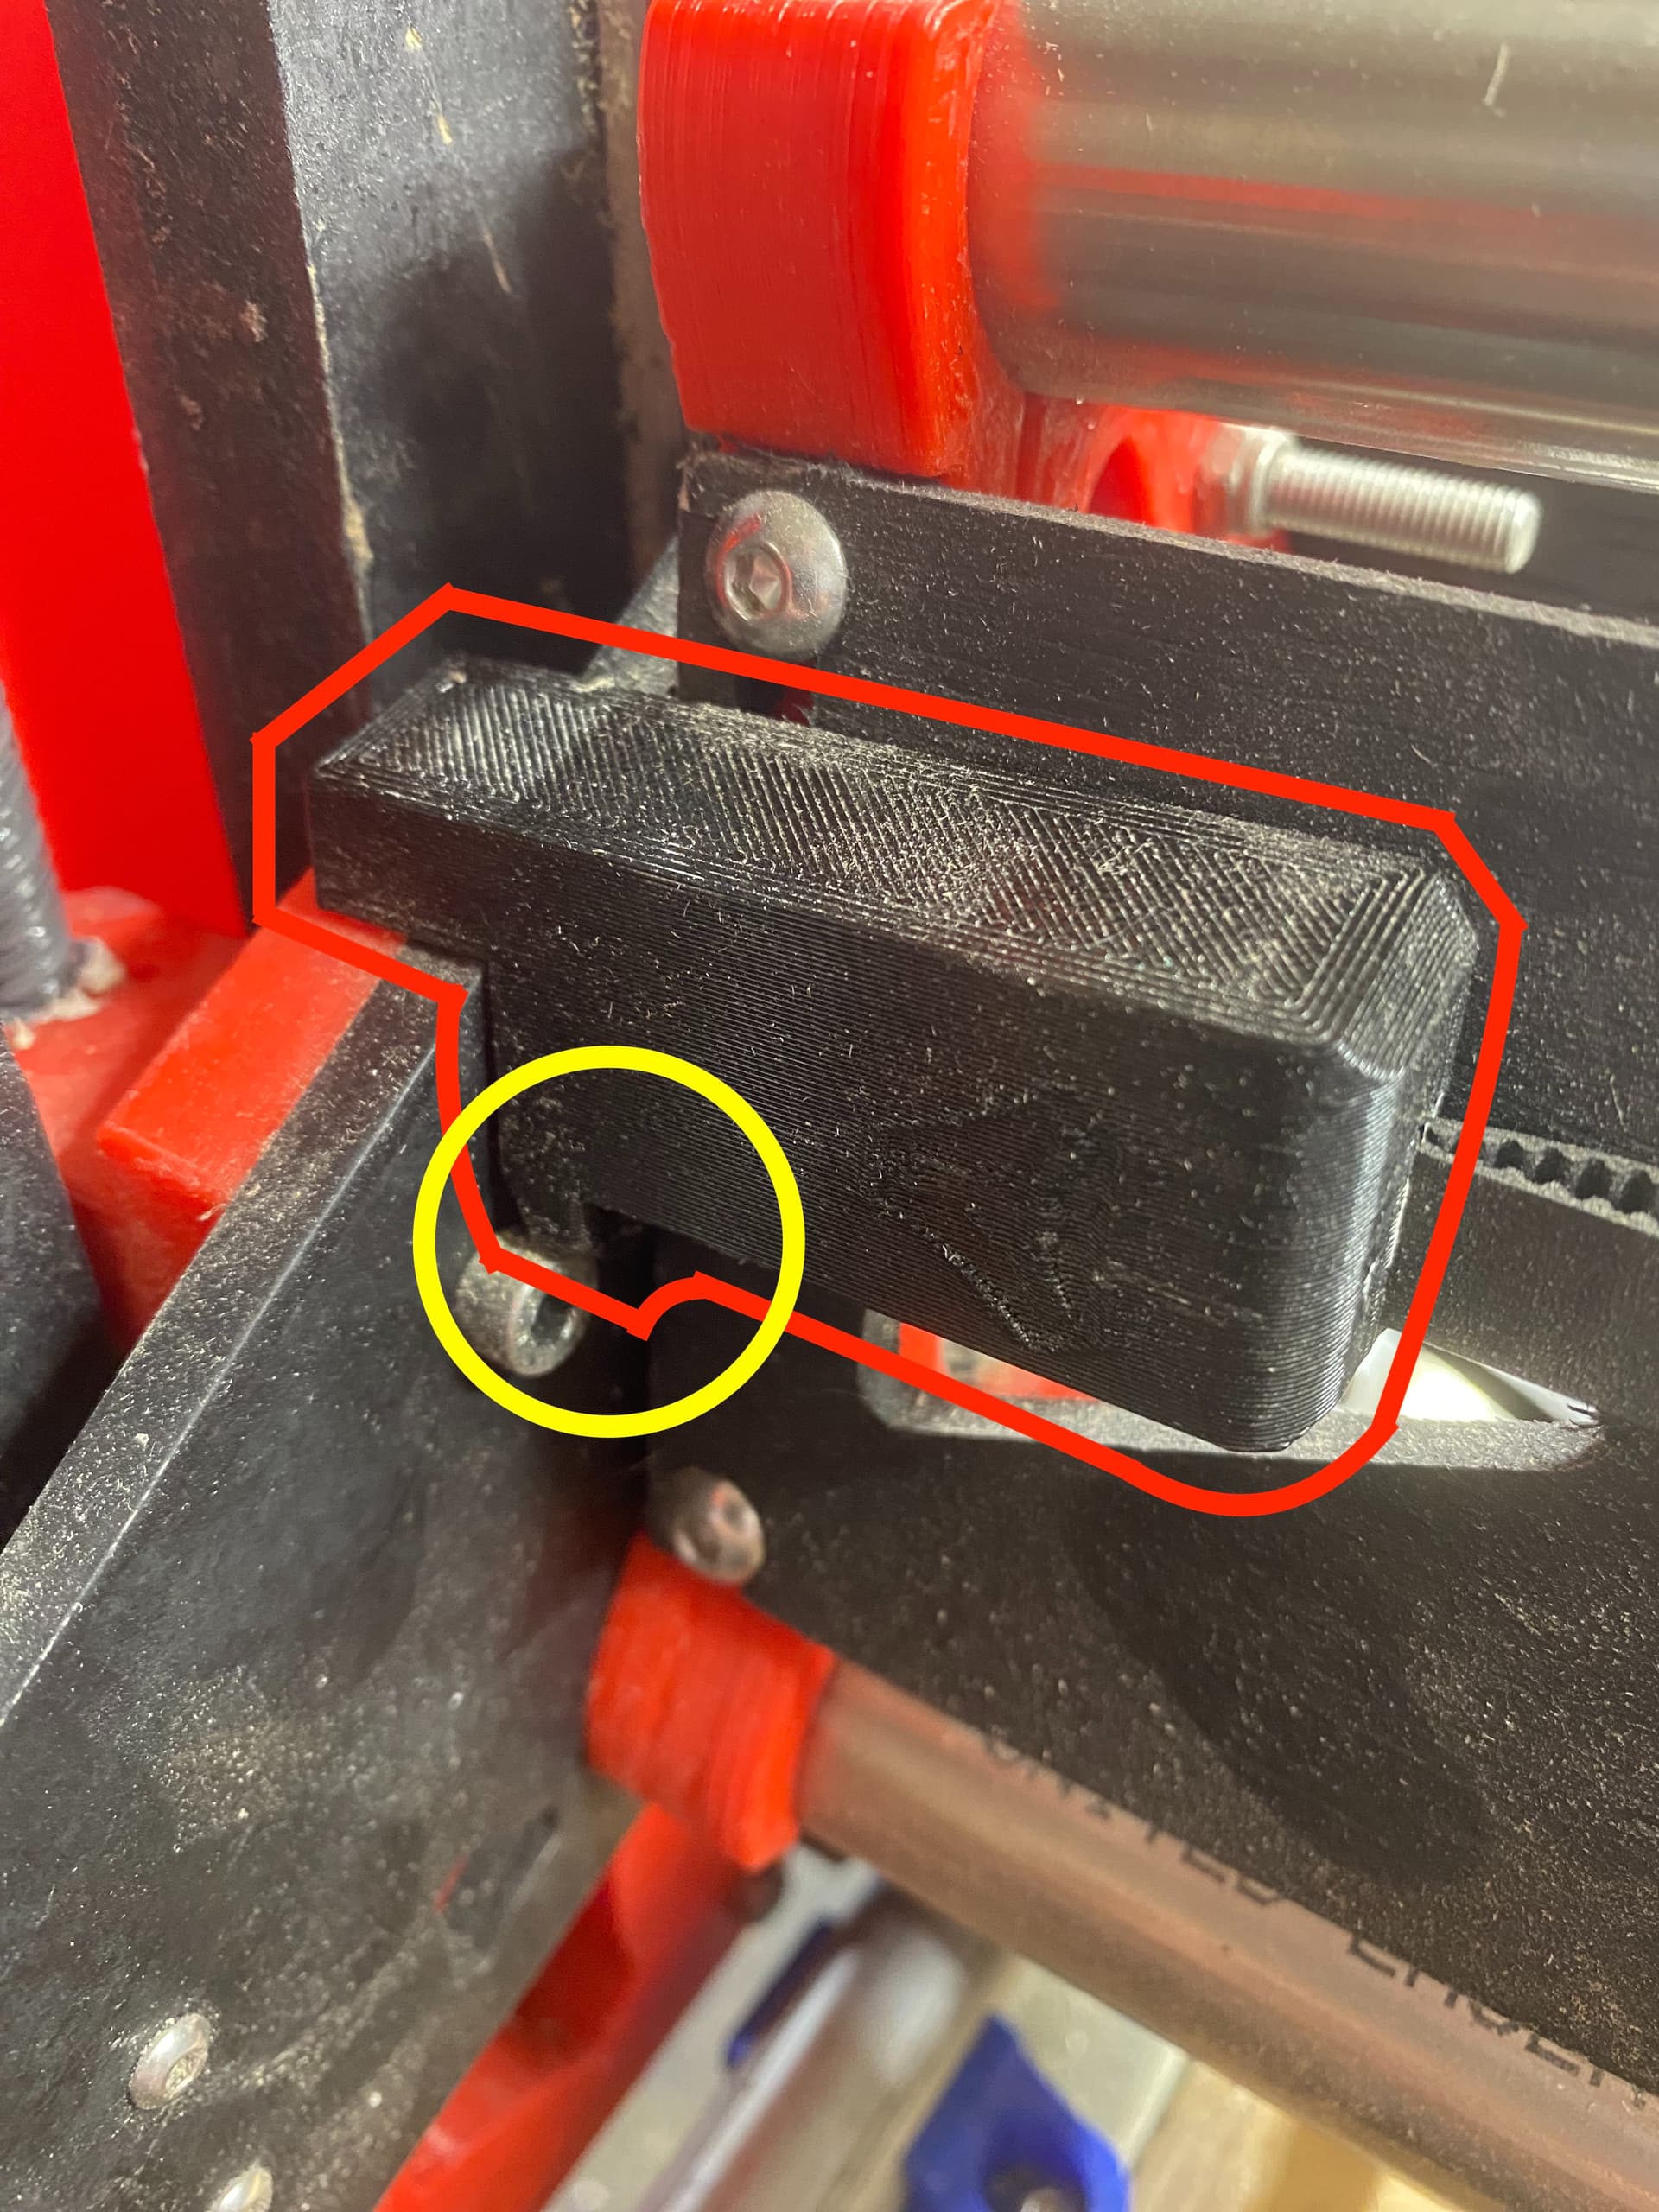
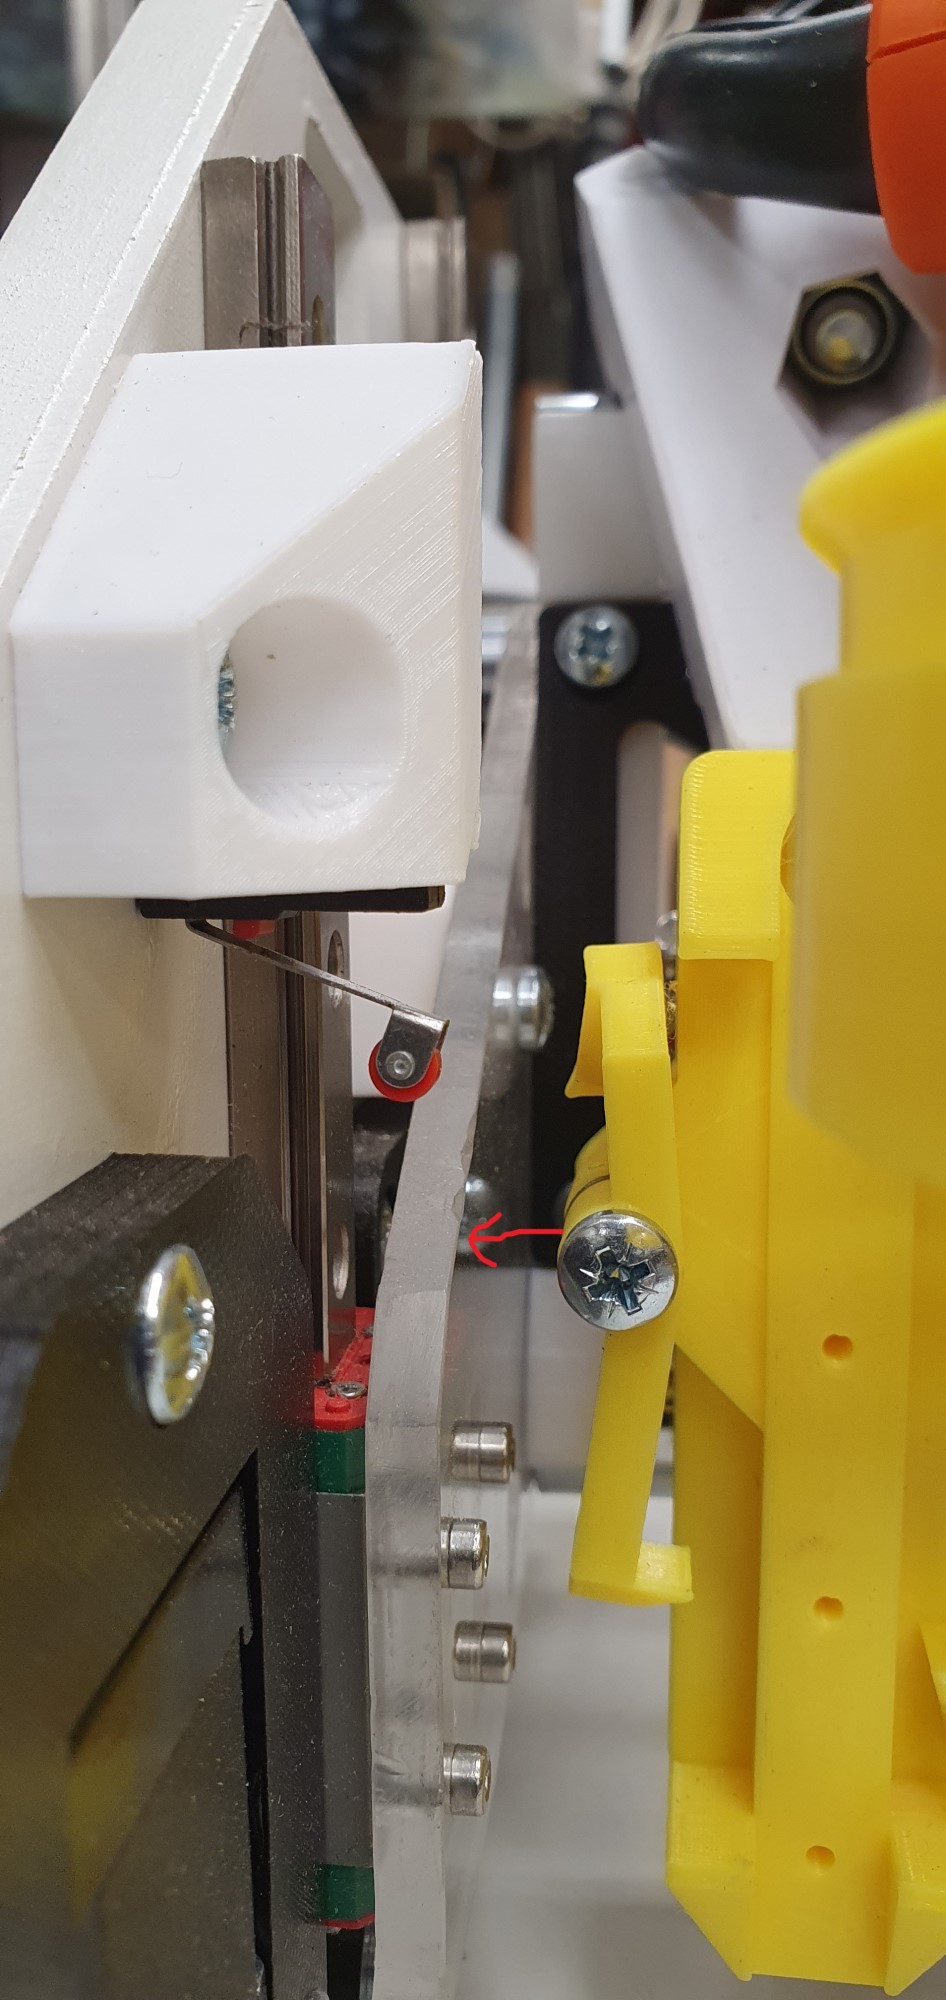
From what I can see, it looks like you are missing the fact that the end stop switch for the X axis is supposed to use the X-belt tensioner’s “end stop nub” as its end stop. It appears from the photo, you’re trying to get the end stop switch to use a bolt head as its end stop. Do you have this part installed?
If so, the end stop switch should be using the right side of that little nub at the bottom of the printed part as its end stop. For me, that nub is further right than the bolt head. Does this help?
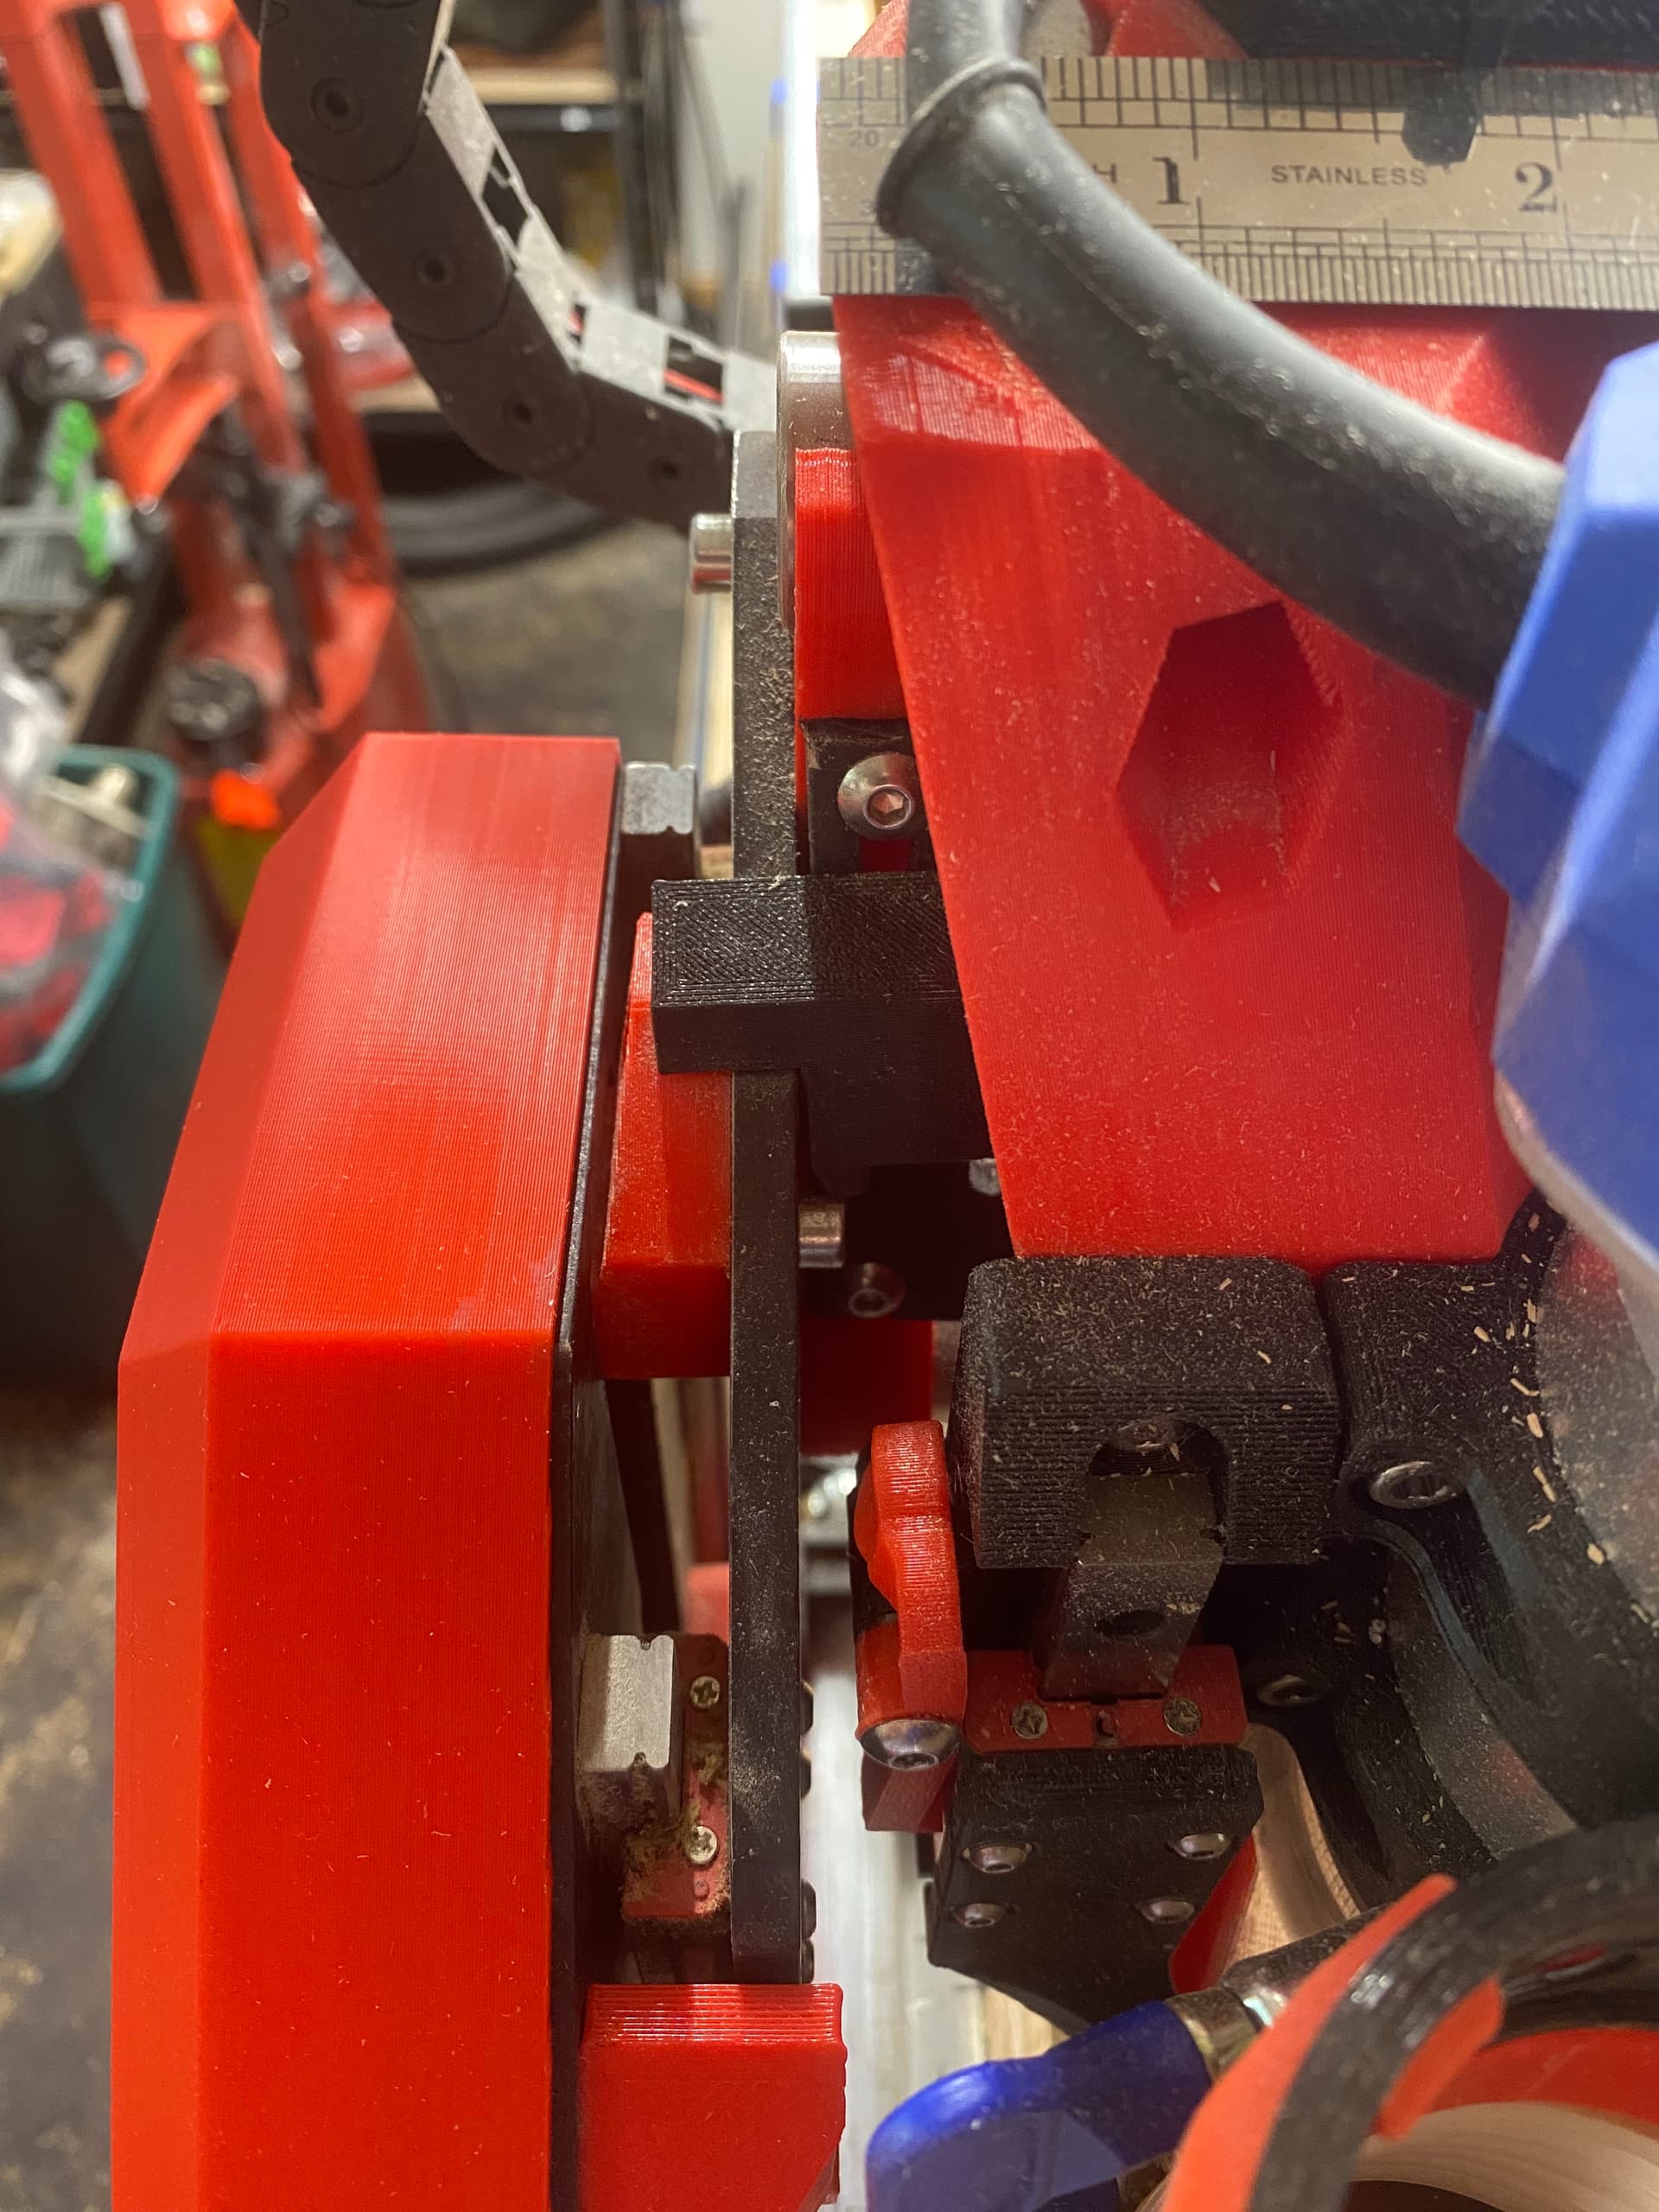
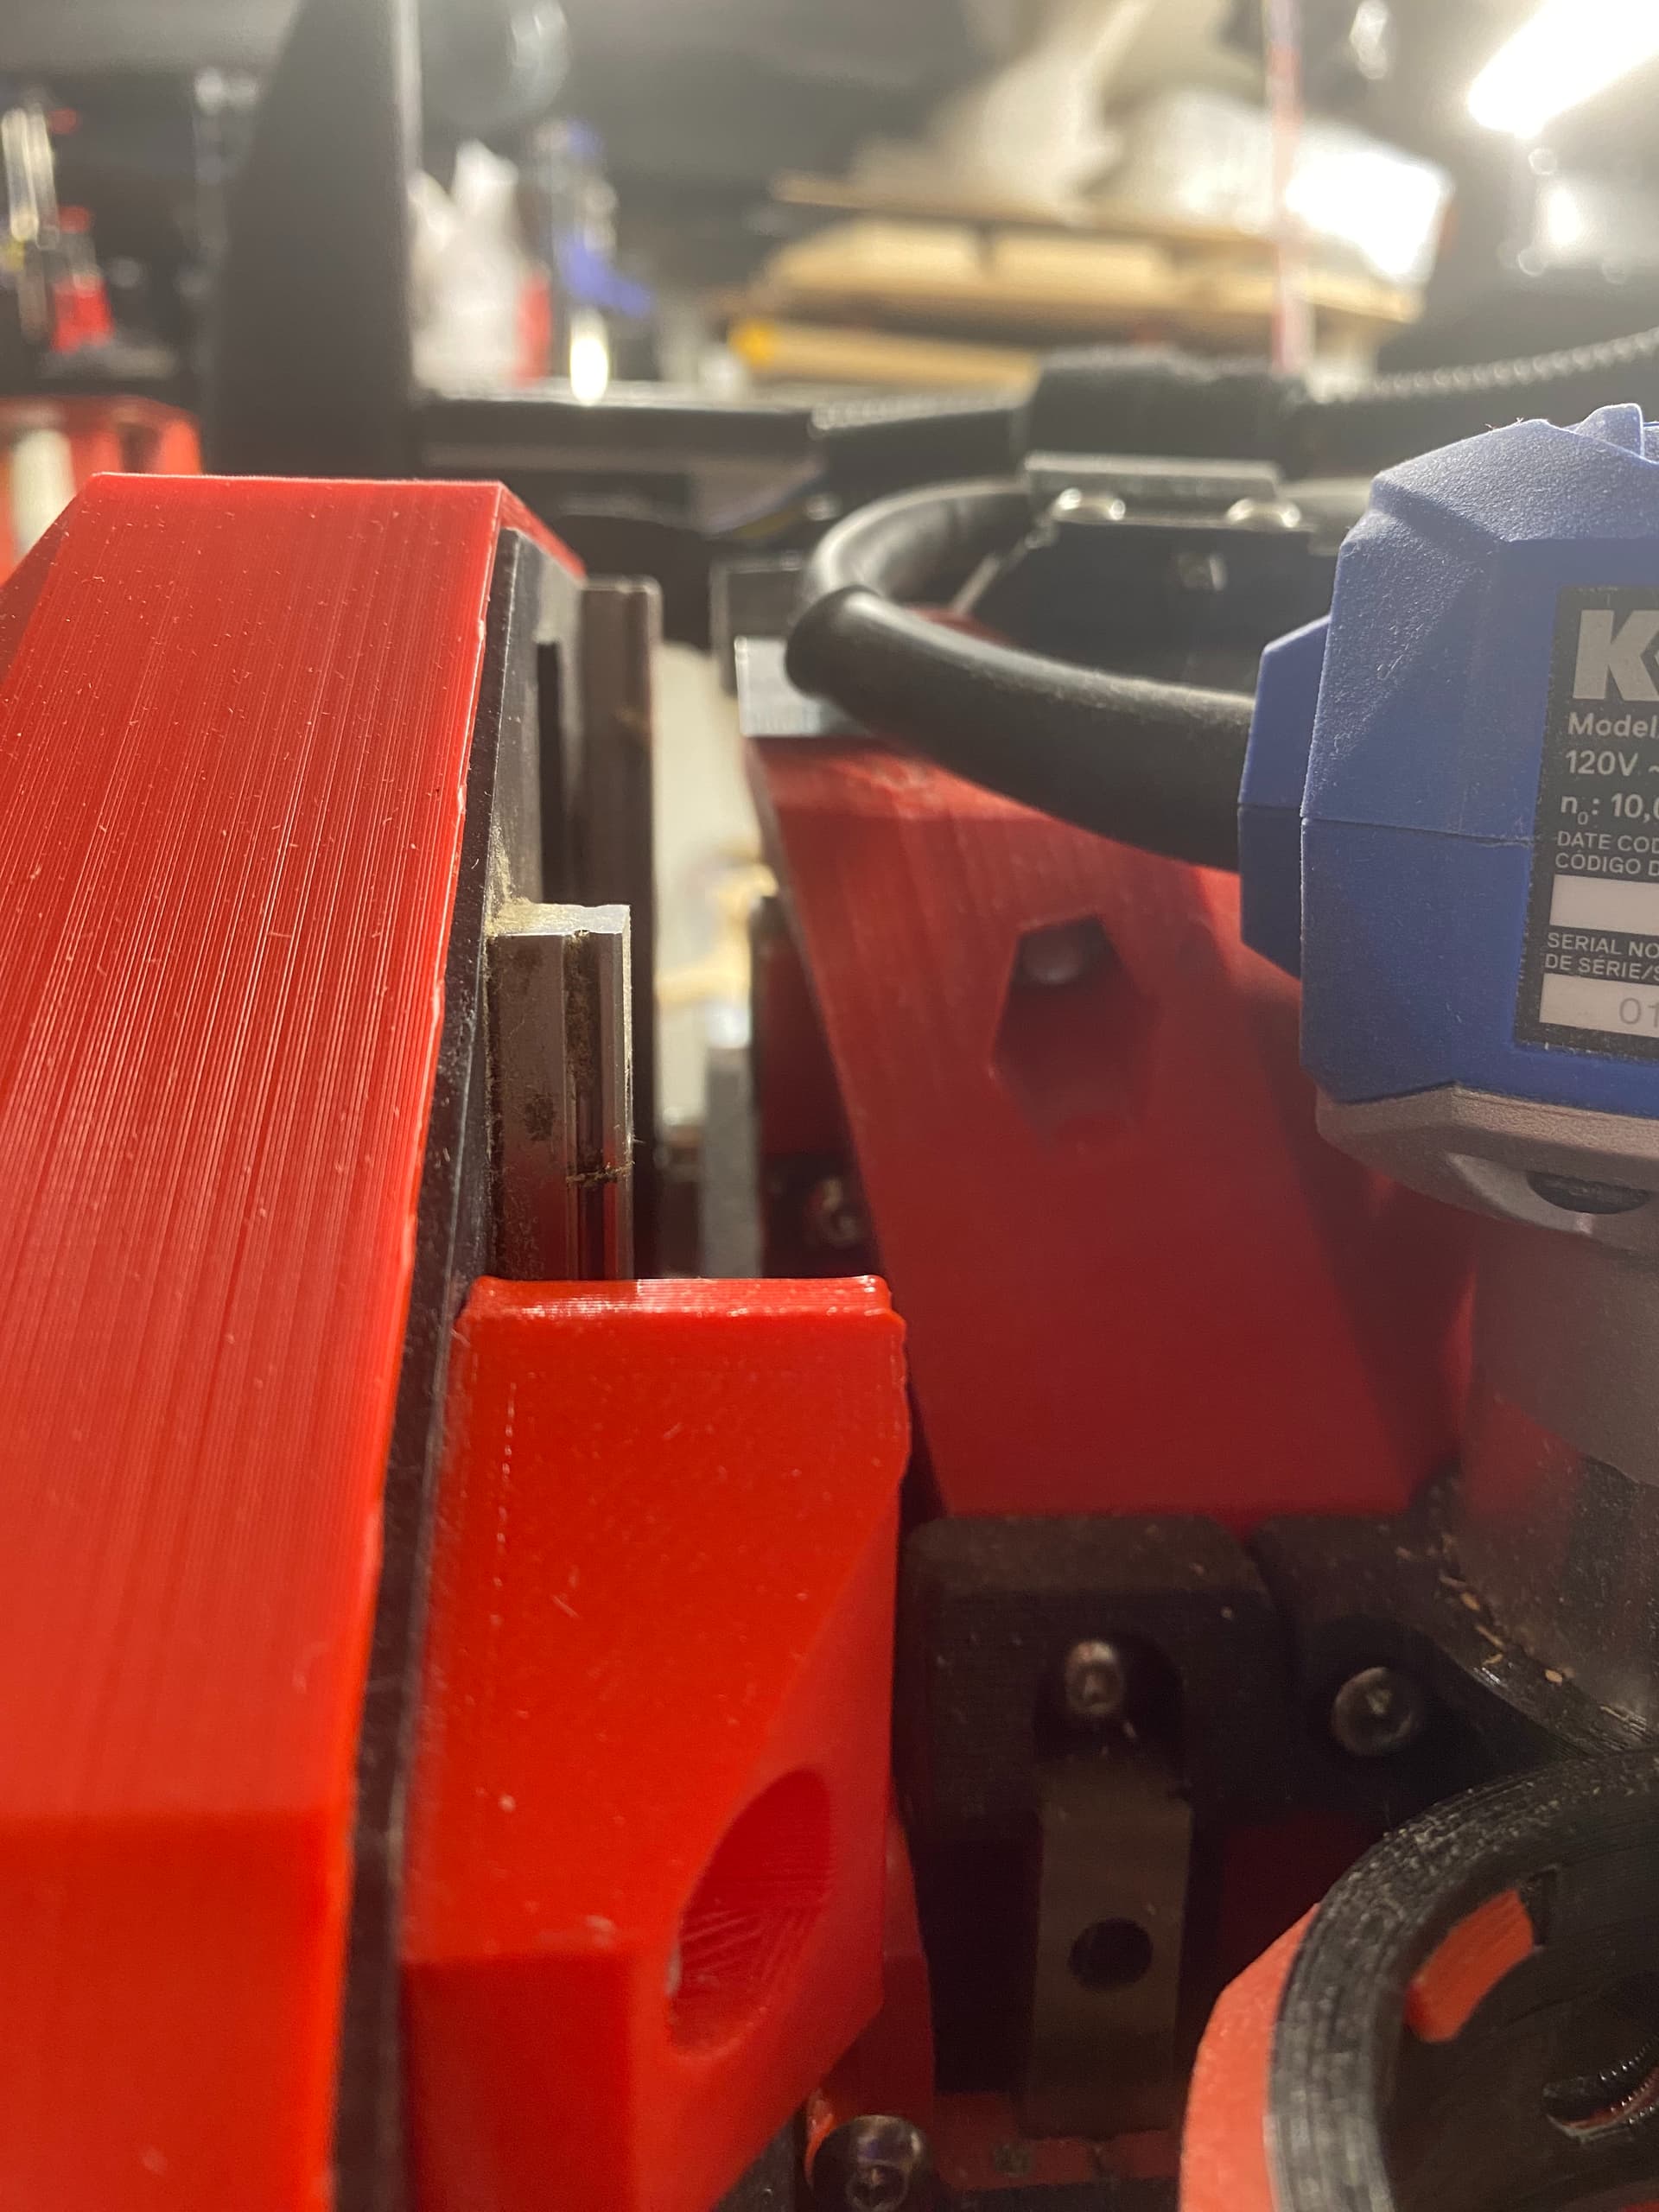
Also, just for clarification, I can get my core all the way to the left, such that the top of the core on the left side is past / beyond the end of my metal tubes, before my “floating Z” bits are even touching the left side of anything. See pics.
Approaching left side. Compare the top of the core to the end of the tubes, and the distance of the floating Z dust shoe bits to the left edge:
With the core all the way past the end of metal tubes of gantry, the floating Z parts have not yet touched. Your X end stop should have triggered well before this point!
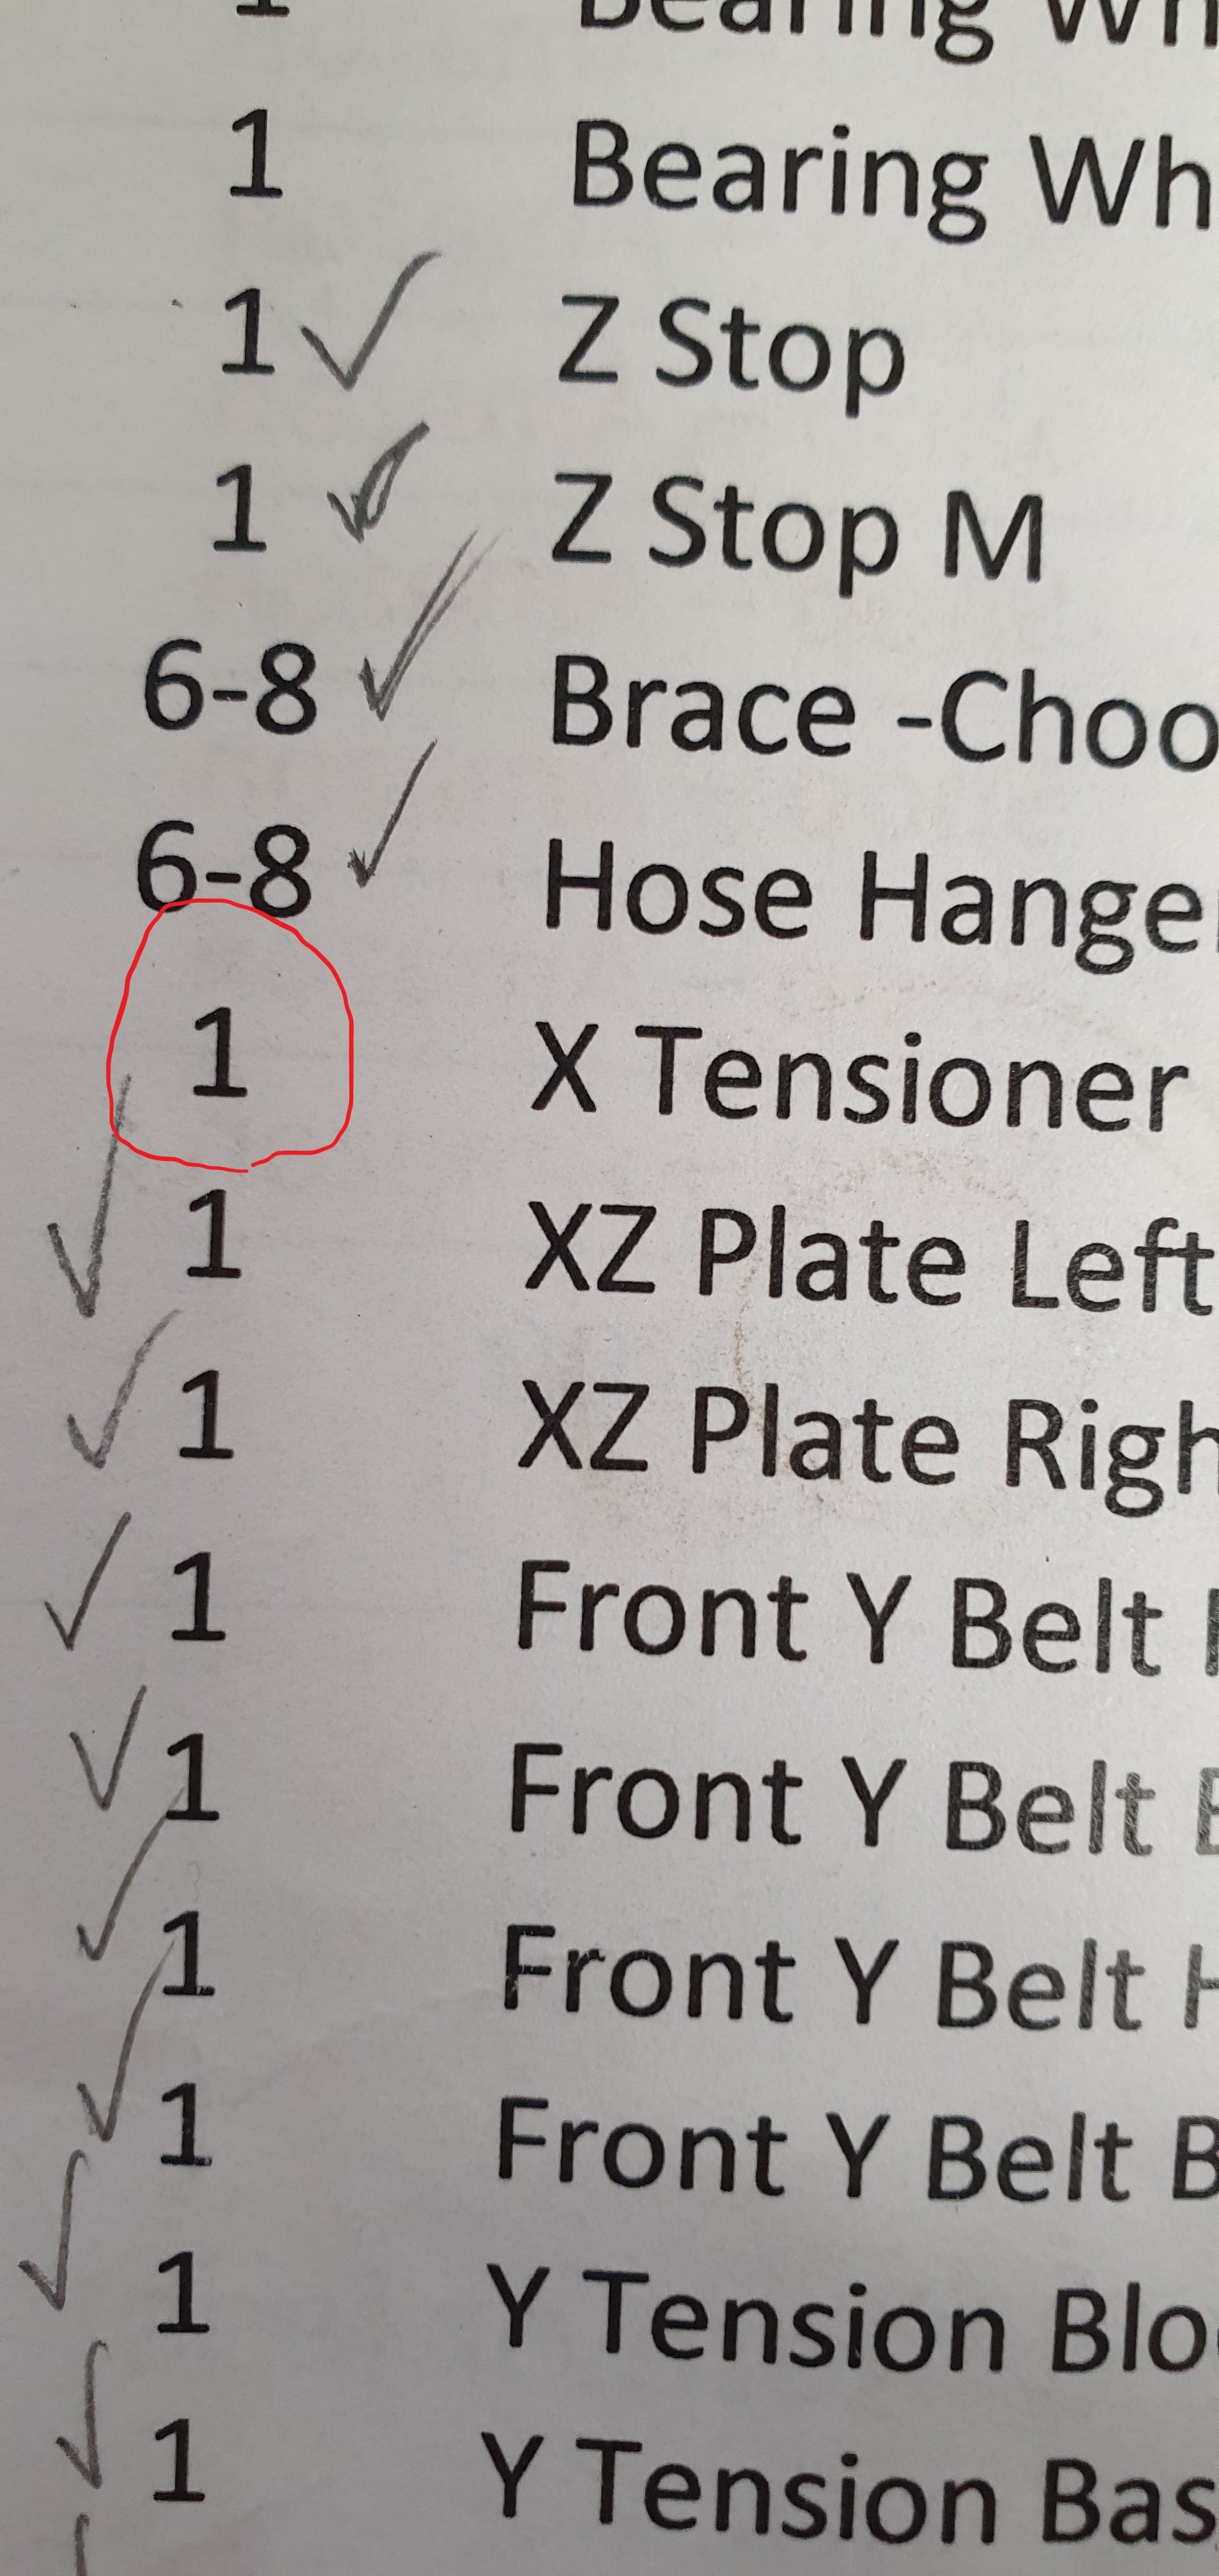
Exellent info! When I saw the picture of the X tensioner I checked my Printlist and noticed that I had forgotten to print that piece. Totally missed that I didn’t have a checkmark there.
No wonder the endsw. didn’t reach.
Since I haven’t set up the belt yet I never noticed that this piece was missing.
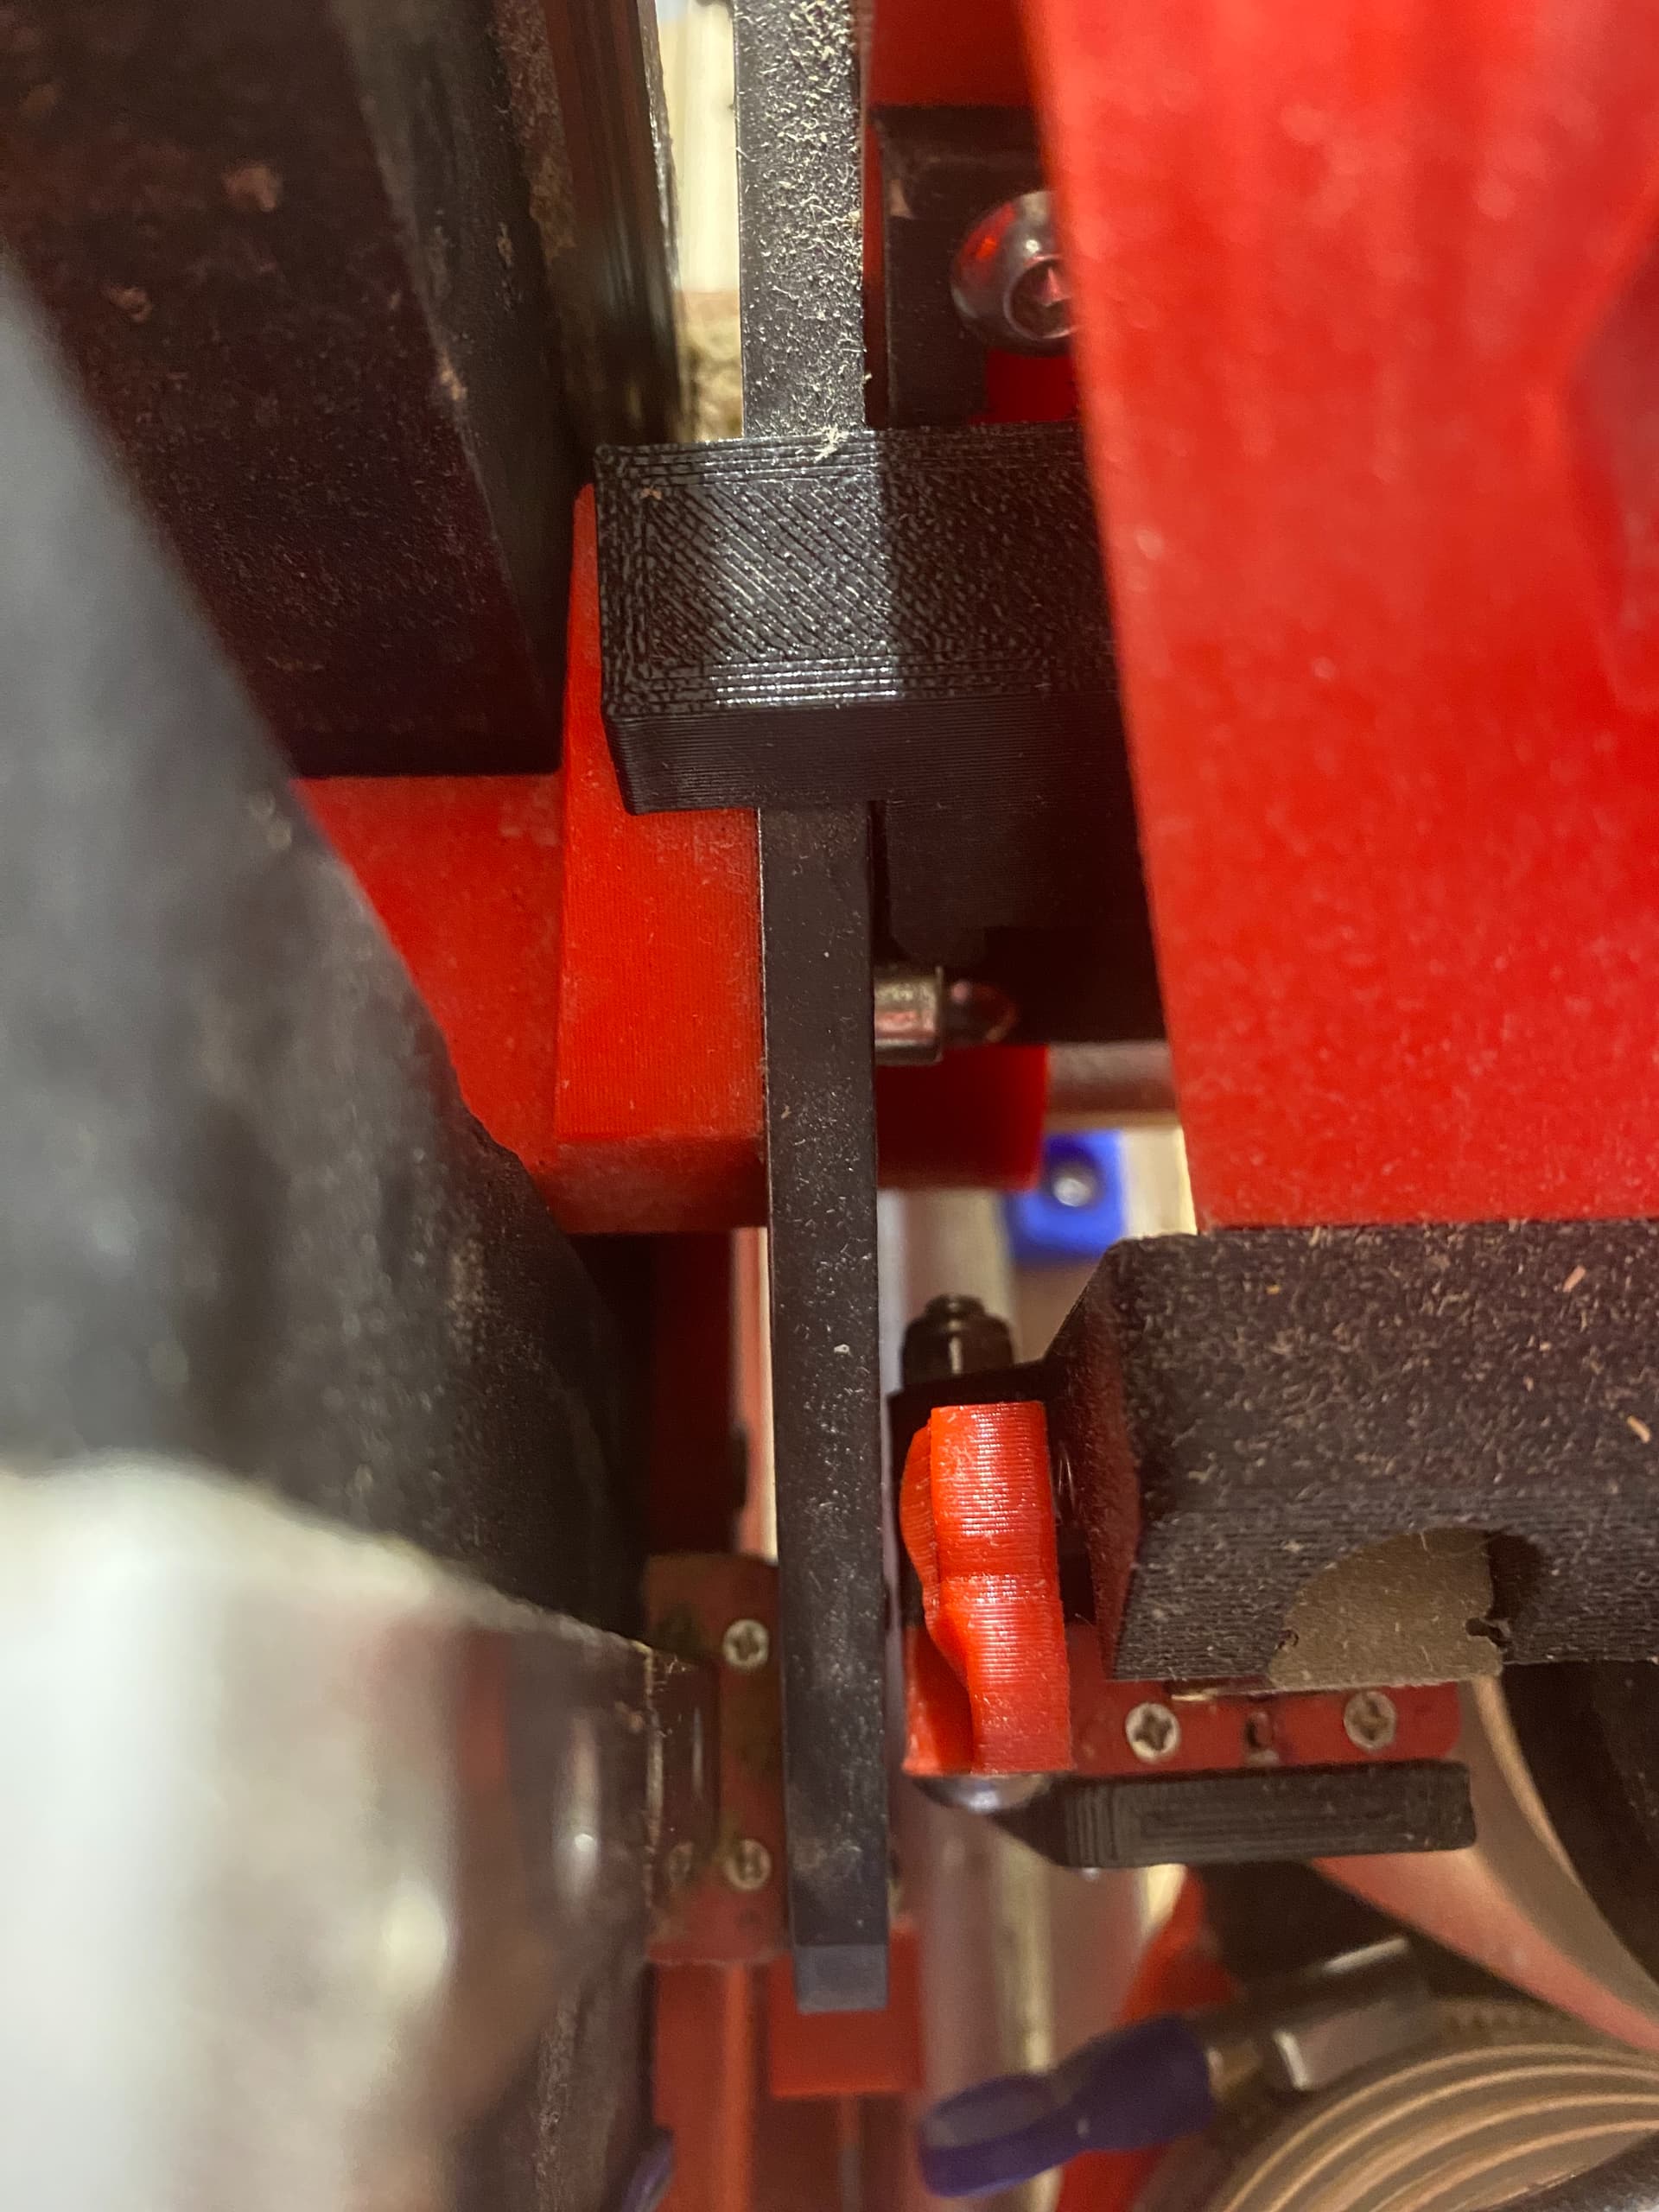
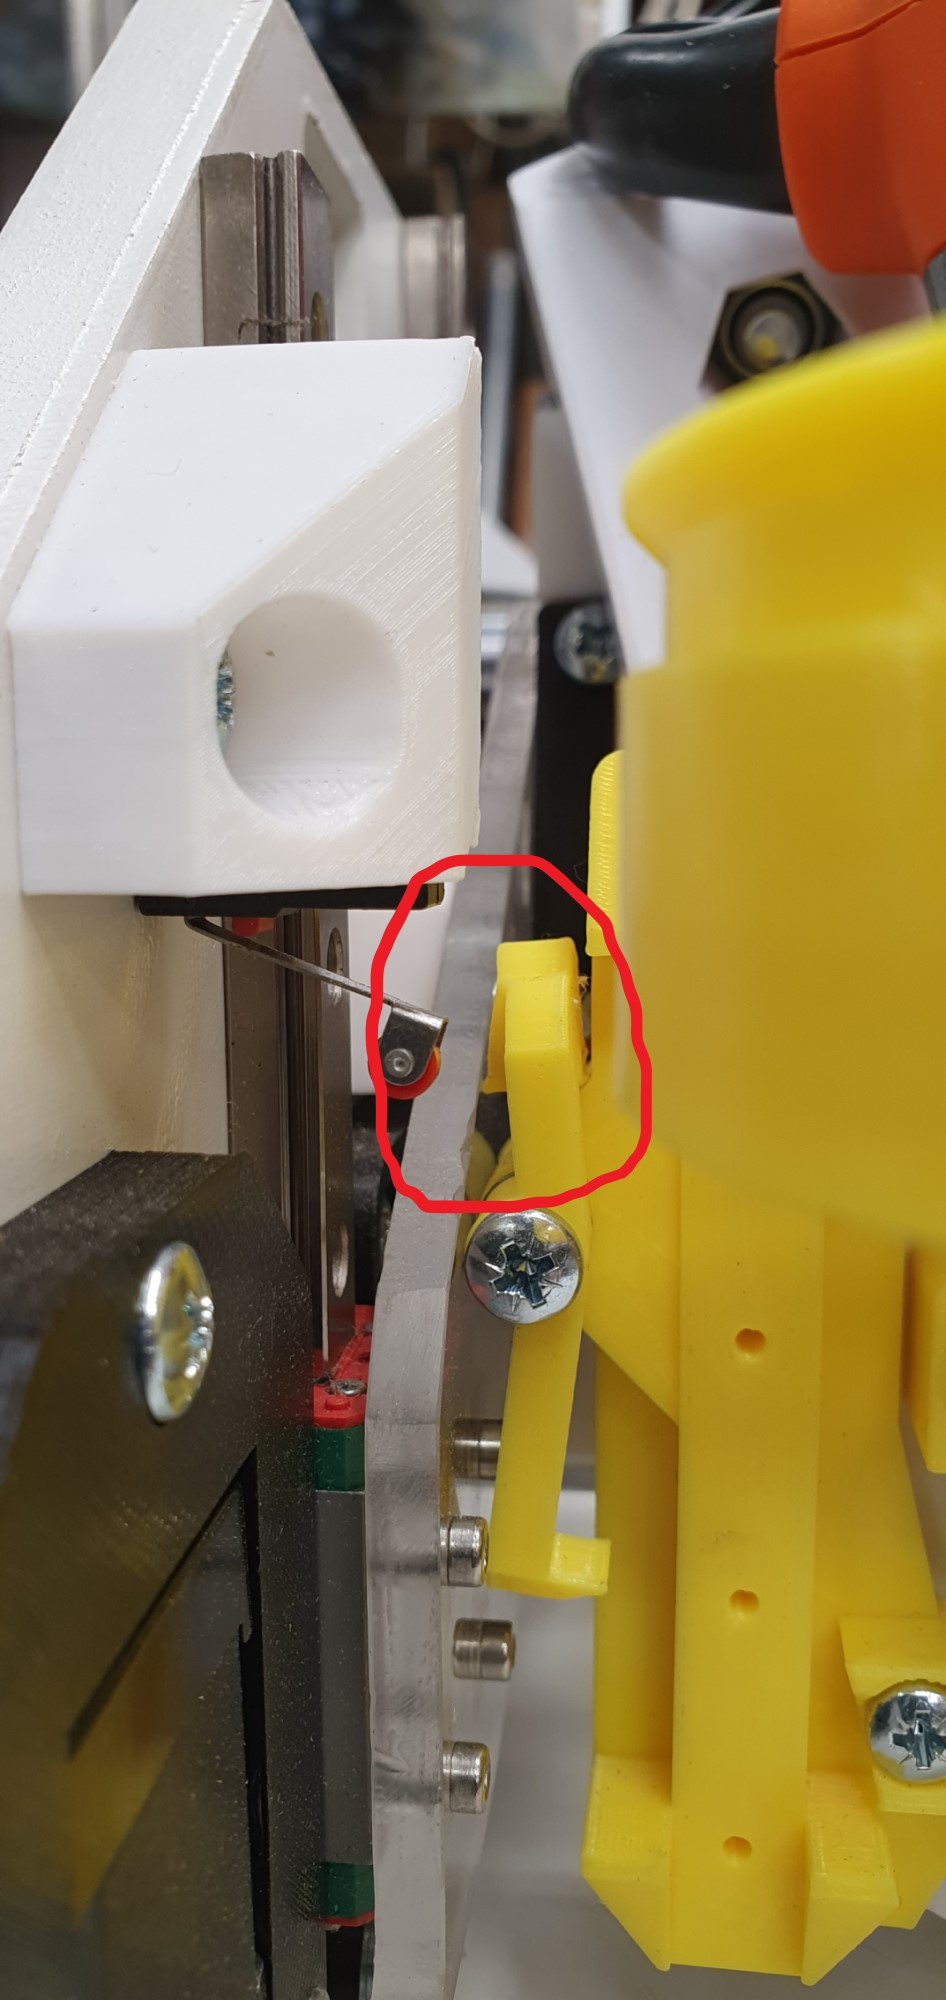
With the X-gantry at the lowest point and the X-tensioner not mounted yet, the floating Z slide latch is stopping at the XZ Plate as I try to show in the following pc’s.
I ended up adding about 10mm to my stop block because it seemed I had to leave it pretty far out to get this to work. That made things loose. I feel like maybe too far to hold without a longer bolt than Ryan provides. Adding the 10mm means my block, is tighter to the YZ plate.
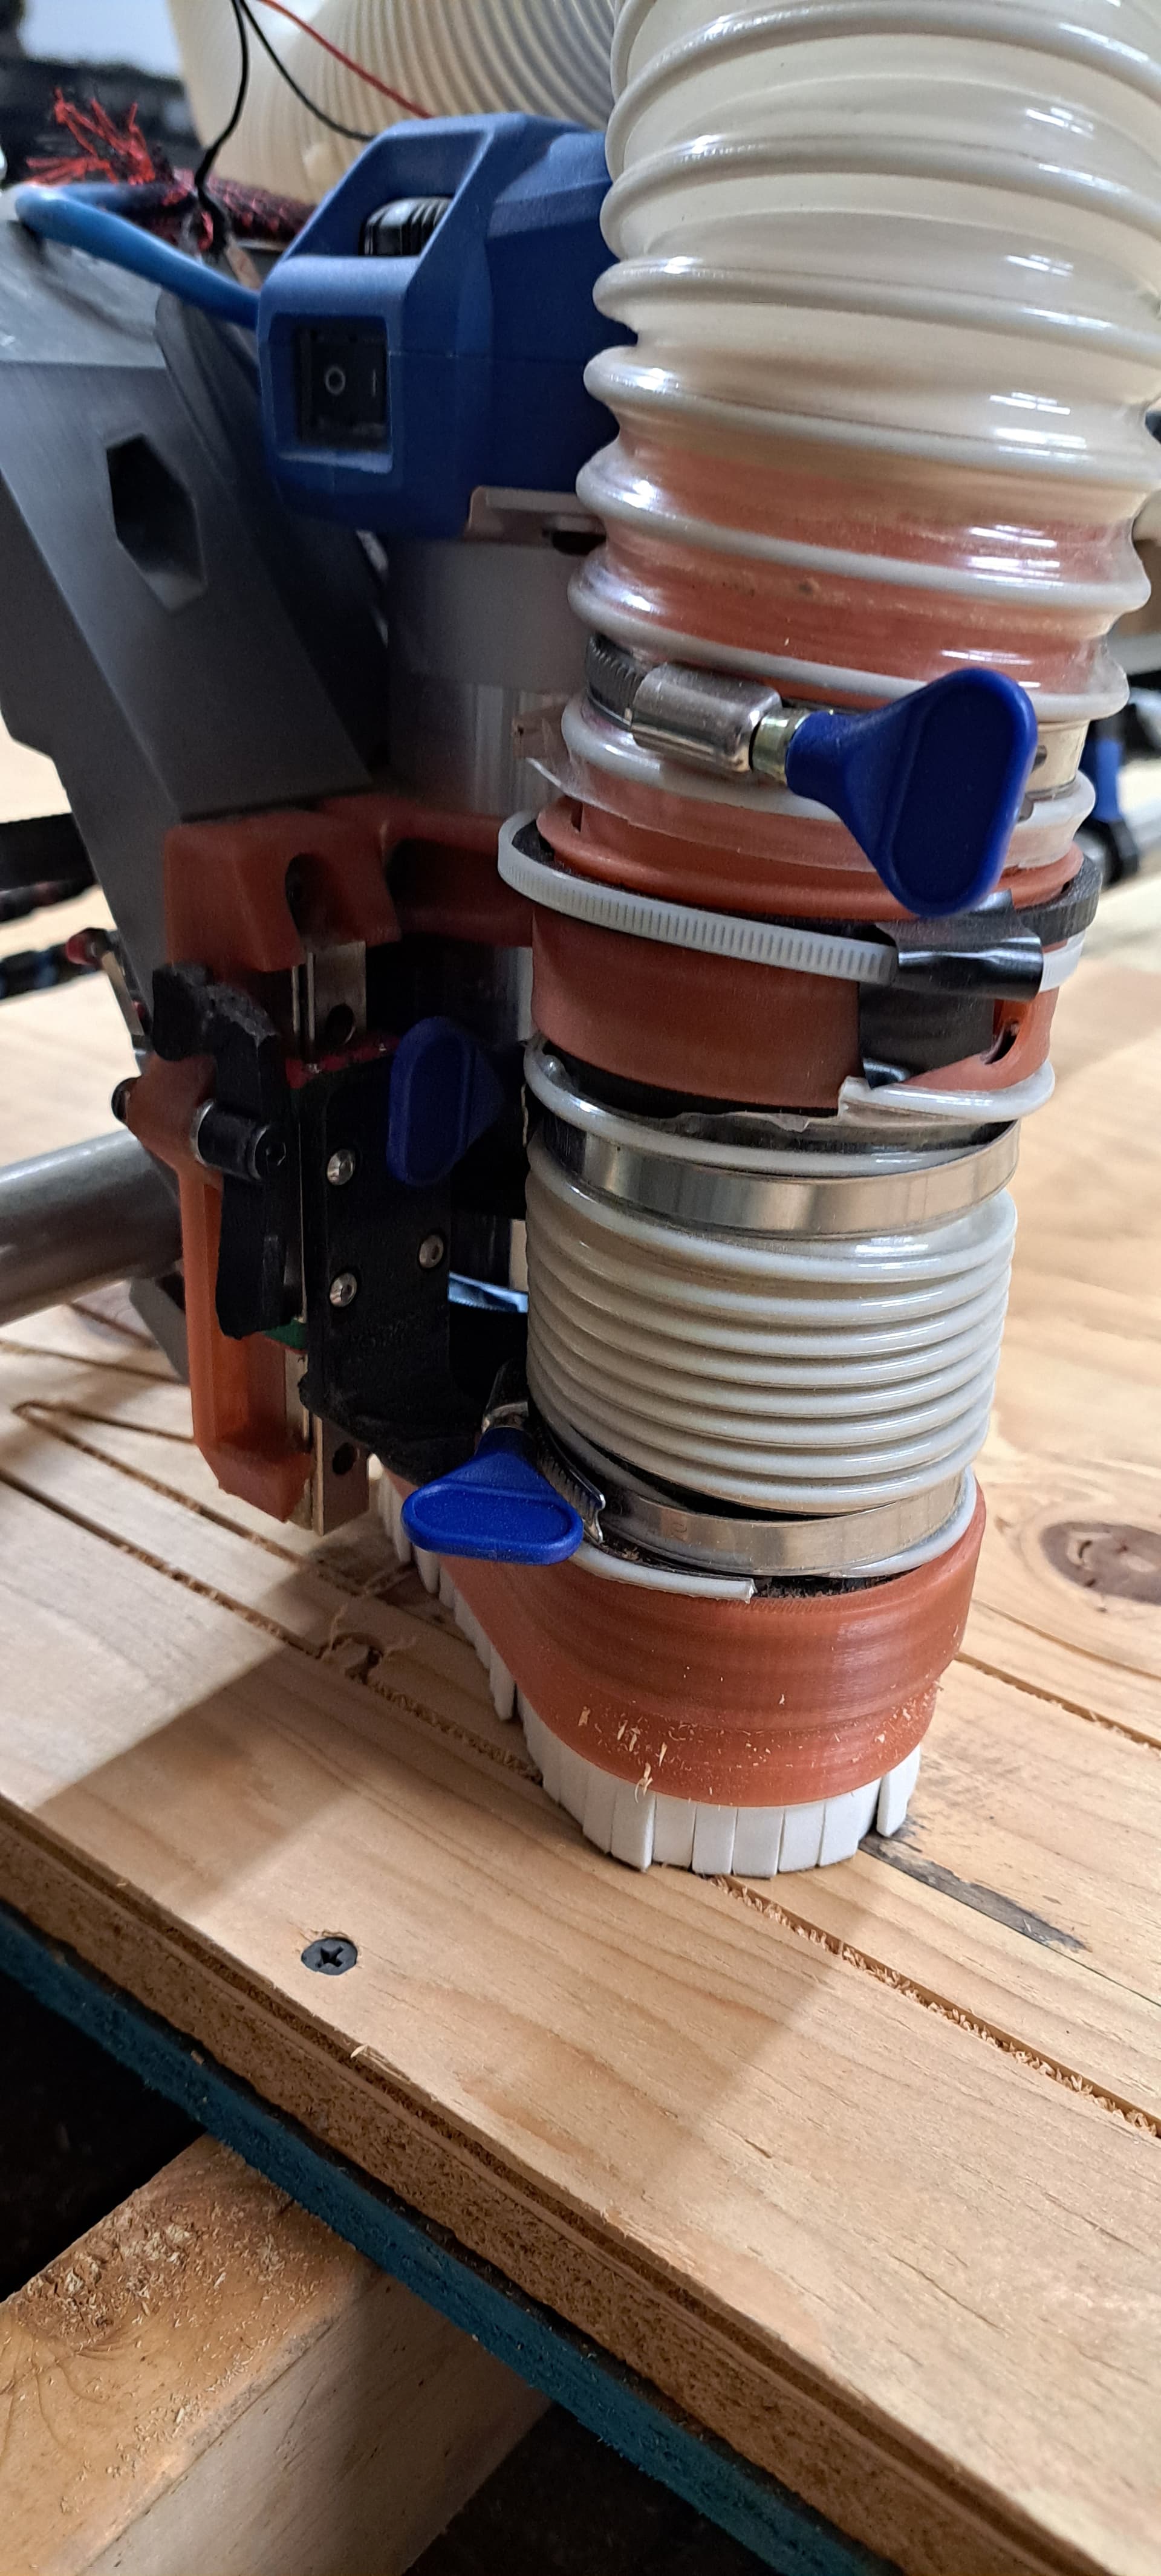
Only two issues I had was the tightness of the boot sliding onto the mount. Tightened it up with some fabric tape stuff. Other issues was the retainer C-clip isn’t strong enough to hold my vac hose end in so I need to zip tie it. Mostly due to bad printing I think. I think I will make a clip with a bit longer tabs.
Great design – Works wonders with collecting dust.
My install is using the kobalt – I just ran a relatively long slab flattening and noticed that the router body had heated mounts such that the PLA top bracket was deforming due to the forces at the hose connection. Printing with ABS to see if it can mitigate this softening and deformation.
Routers can get pretty warm on long operations, and PLA is susceptible to warping in those instances. Definitely hope you get a successful solution to that problem by printing with a filament that takes a higher melting point.
Top mount print is nearing 80% complete, and I figured I would print the bottom bracket too. Reading a little and cooling could be improved with a faster router speed setting… I’ve got a 1.25" flatting bit on the end so I’m hesitant to turning it up too much, but with my typical 1/4-inch bits heat is likely not a concern.
I’ve a second run (opposite side) so I’ll be able to provide an update this week. Reading about ABS-CF which will have the melting point of ABS and rigidity similar to PLA – Thinking this might be the ticket.
Have you (or anyone else) used the Floating Shoe with the Kinematic Tool Holder in general, and with an Air/Mist system in particular?
Are there any clearance issues with the 2.5" vertical expanding/contracting vacuum hose being too close to the Air/Mist chassis?
Is there still room to fit the Air/Mist nozzle into the chamber so that it directs air/mist onto the end mill? (On the factory dust shoe I routed the nozzle between the vacuum hose and the tool holder, but I’m not sure if that space is still therfe on the floating version)
Does the enclosed vacuum chamber defeat the air/mist system? IOW, does the vacuum suck up all of the coolant and air flow from the nozzle before it has a chance to clear the chips and cool the mill?
My main concern is to have a reasonably high level of confidence that the floating dust shoe and the kinematic tool holder/air-mist sprayer are compatible before I buy all of the materials and print all of the parts and then find out that it might not work.