2024-01-23
LowRider v3 CNC - floating-Z dust shoe - new bubble bumper! - part 4 + Fluid Dial Pendant dev tests!

2024-01-23
LowRider v3 CNC - floating-Z dust shoe - new bubble bumper! - part 4 + Fluid Dial Pendant dev tests!
Have you considered a ball bearing roller? Cheap enough from aliexpress to give it a whirl maybe (hah, whirl, geddit?)
Edit: sorry don’t mean to backseat or second guess you, thanks for all the work you put into the design and the videos.
I thought about it a bit but didn’t know what was available and also trying to keep the cost down and parts list short. But something like that could indeed work…
Probably unnecessary, it’s just what it reminded me of at first glance.
Still watching the video - really digging the m5dial interface!
Yesterday they promoted the best dev branch up to “Main” on the Fluid Dial firmware repot on Github. It’s super impressive. Details here: Fluid Dial (Fluid NC dial pendant by Bart Dring, using M5 Stack's M5 Dial) - #153 by DougJoseph
EDIT: And today, they merged the “MSG_JSON” branch into FluidNC “Main” so now the pendant’s firmware is reckoned as “released”!
Hi Doug
Like all the time, very good job. It is fantastic and I want to print it too.
But I´m a little bit confused. I have an 65mm CNC spindle and do not know, what I must print now. Can you help me ![]()
Greetings from Germany
My current design on Printables for the FLoating Z dust shoe, has 3 motor mounts in these three sizes (designed around 3 router brands):
As you can tell, the Makita would be a very tight fit, but may work. Would require some stretching of the printed mounts. Might work. The Kobalt is a little bit loose for your router, but might work. Would require some extra tightening.
One other option might be to use the scale option in your slicer to slightly adjust the size of one of them. I think the printed opening size you should try to target would be about 65.4 mm. Hope this helps!
Thank you very much Doug. I will start printing now.
Please let us know how it goes.
Hi Doug!
Like the floating dustshoe projekt and printed it.
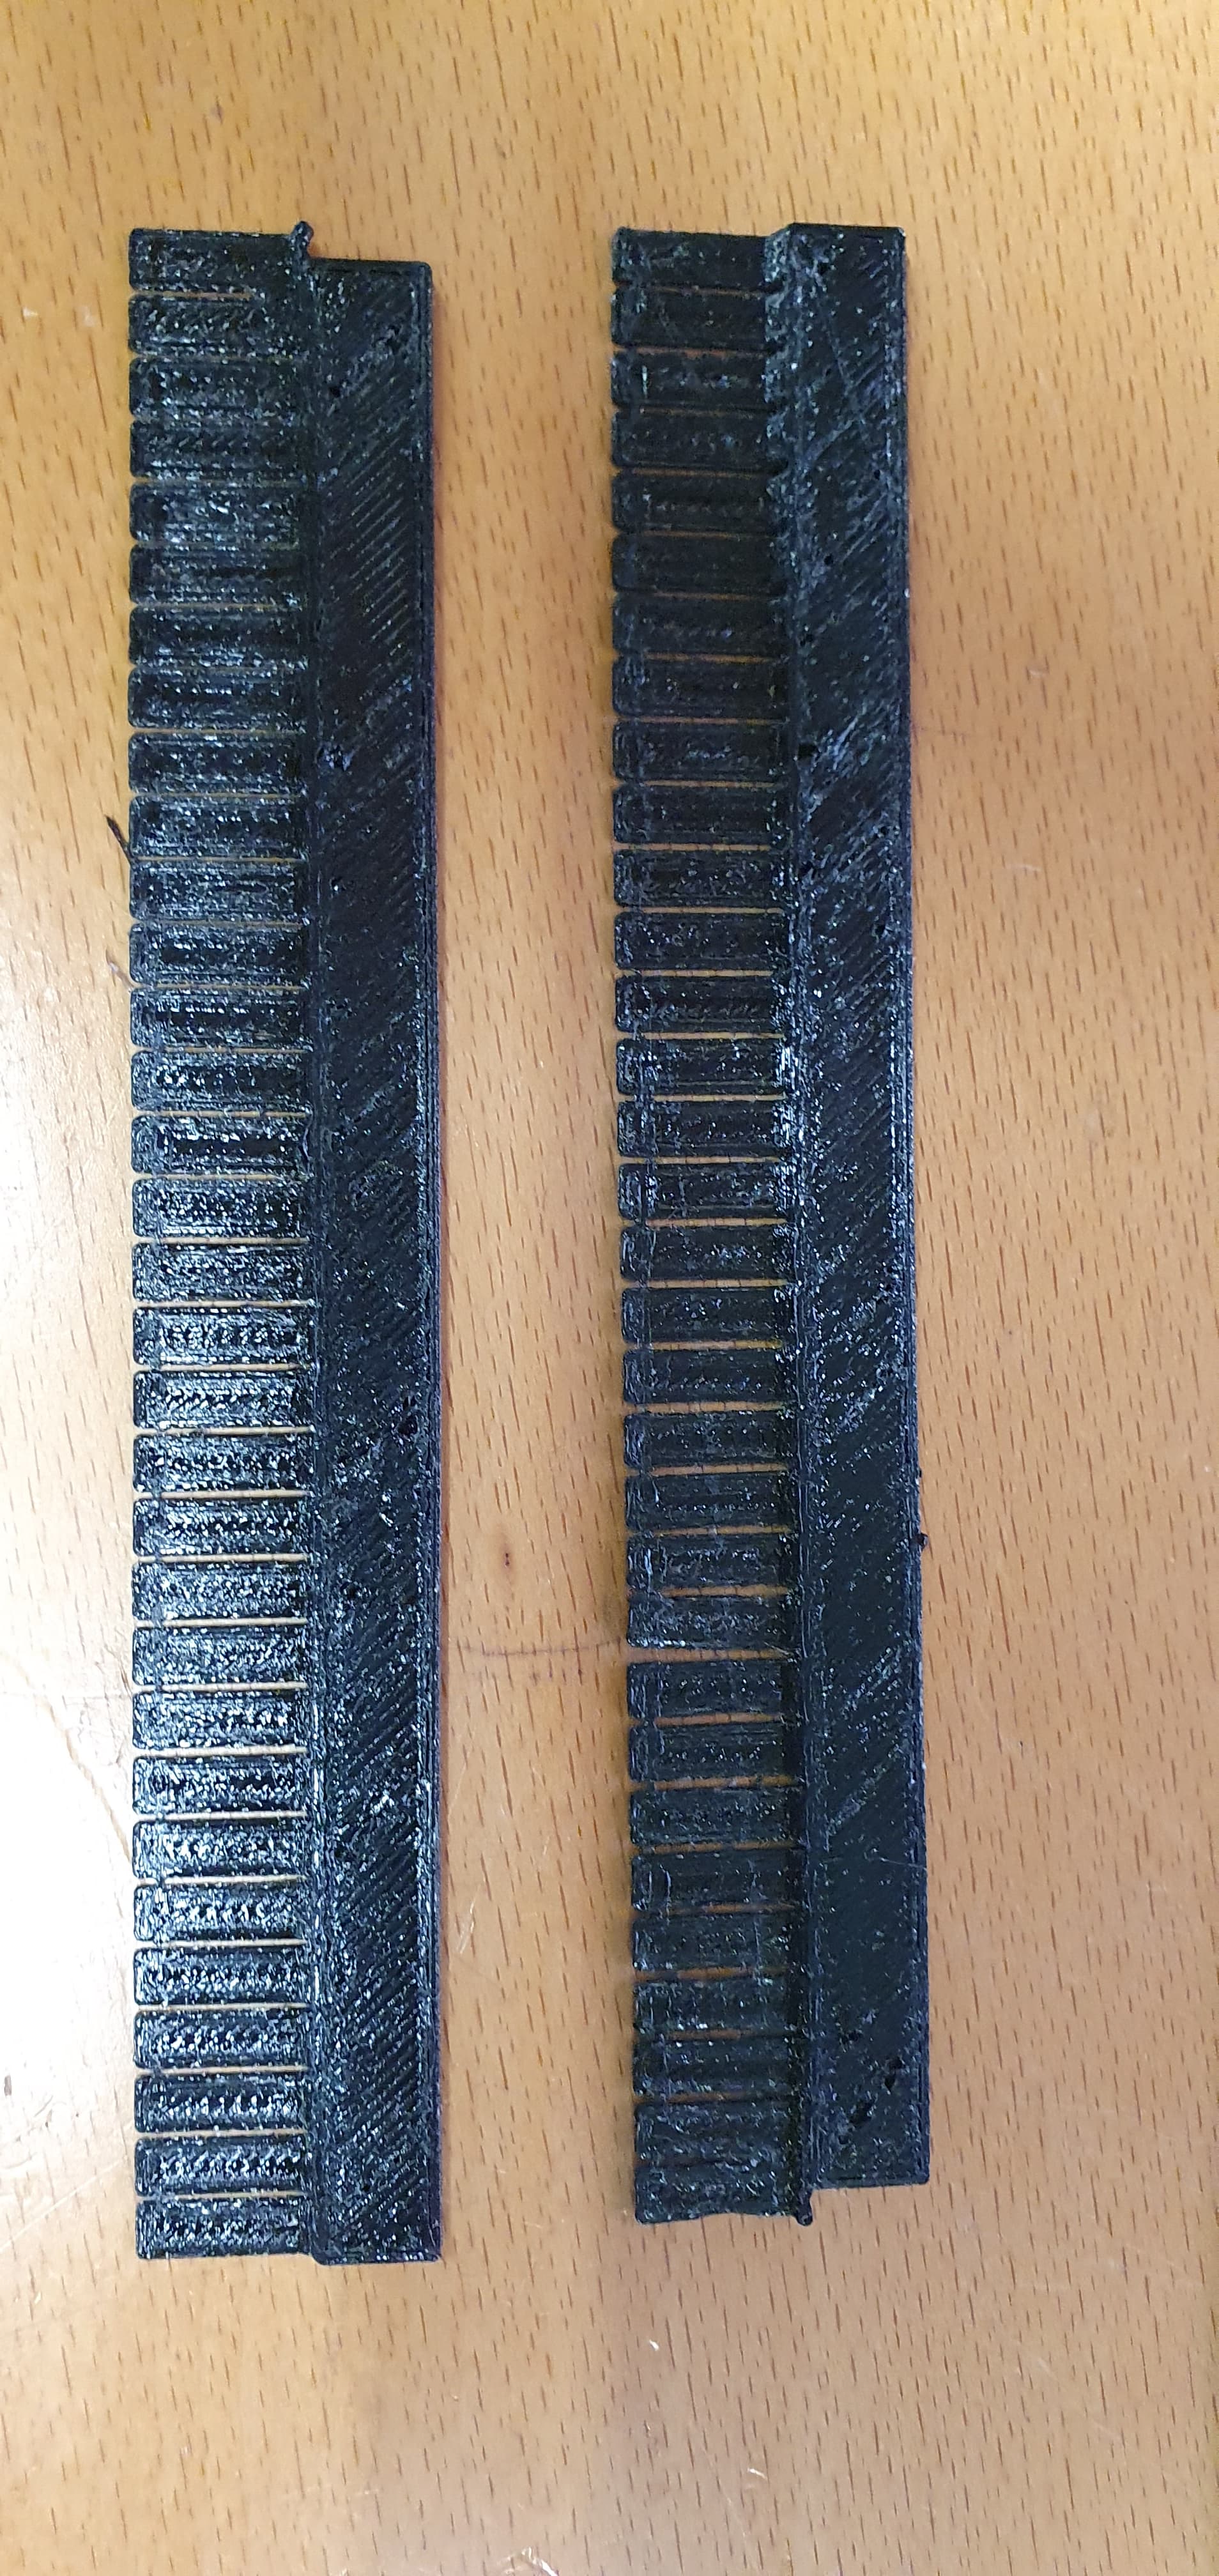
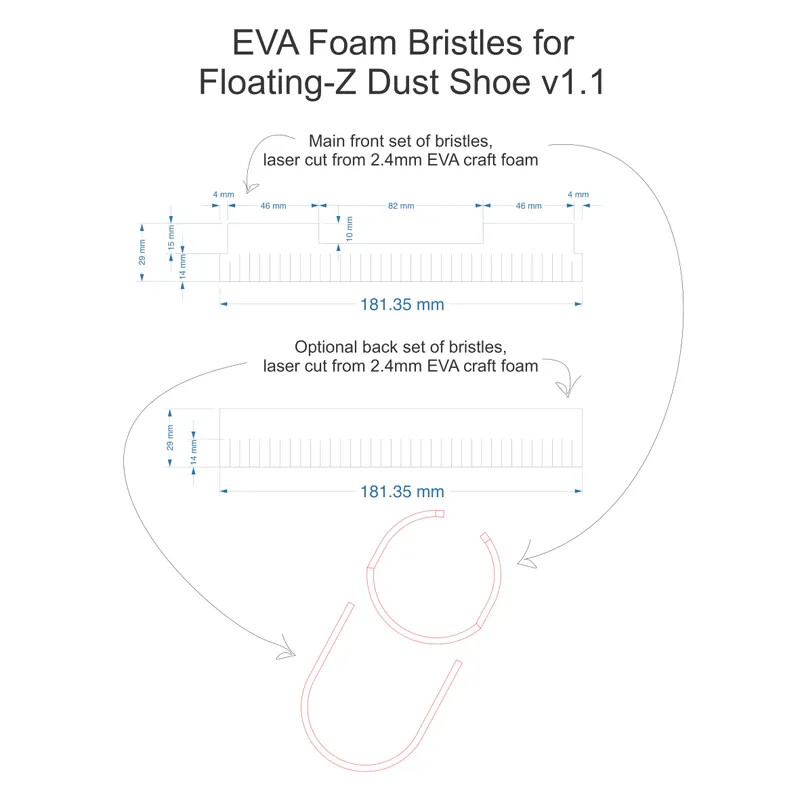
Also the bristles was printed in TPU, but I only find the stl. for the bristles in the ver1.0 and noticed that the do not fit the v.1.1
So I dont have a laser to cut froam foam but I have TPU so how can I get .stl for the ones that will fit the dustshoe v.1.1?
Appreciate all help I can get. ![]()
Also when I’m on it another question that I wonder about!
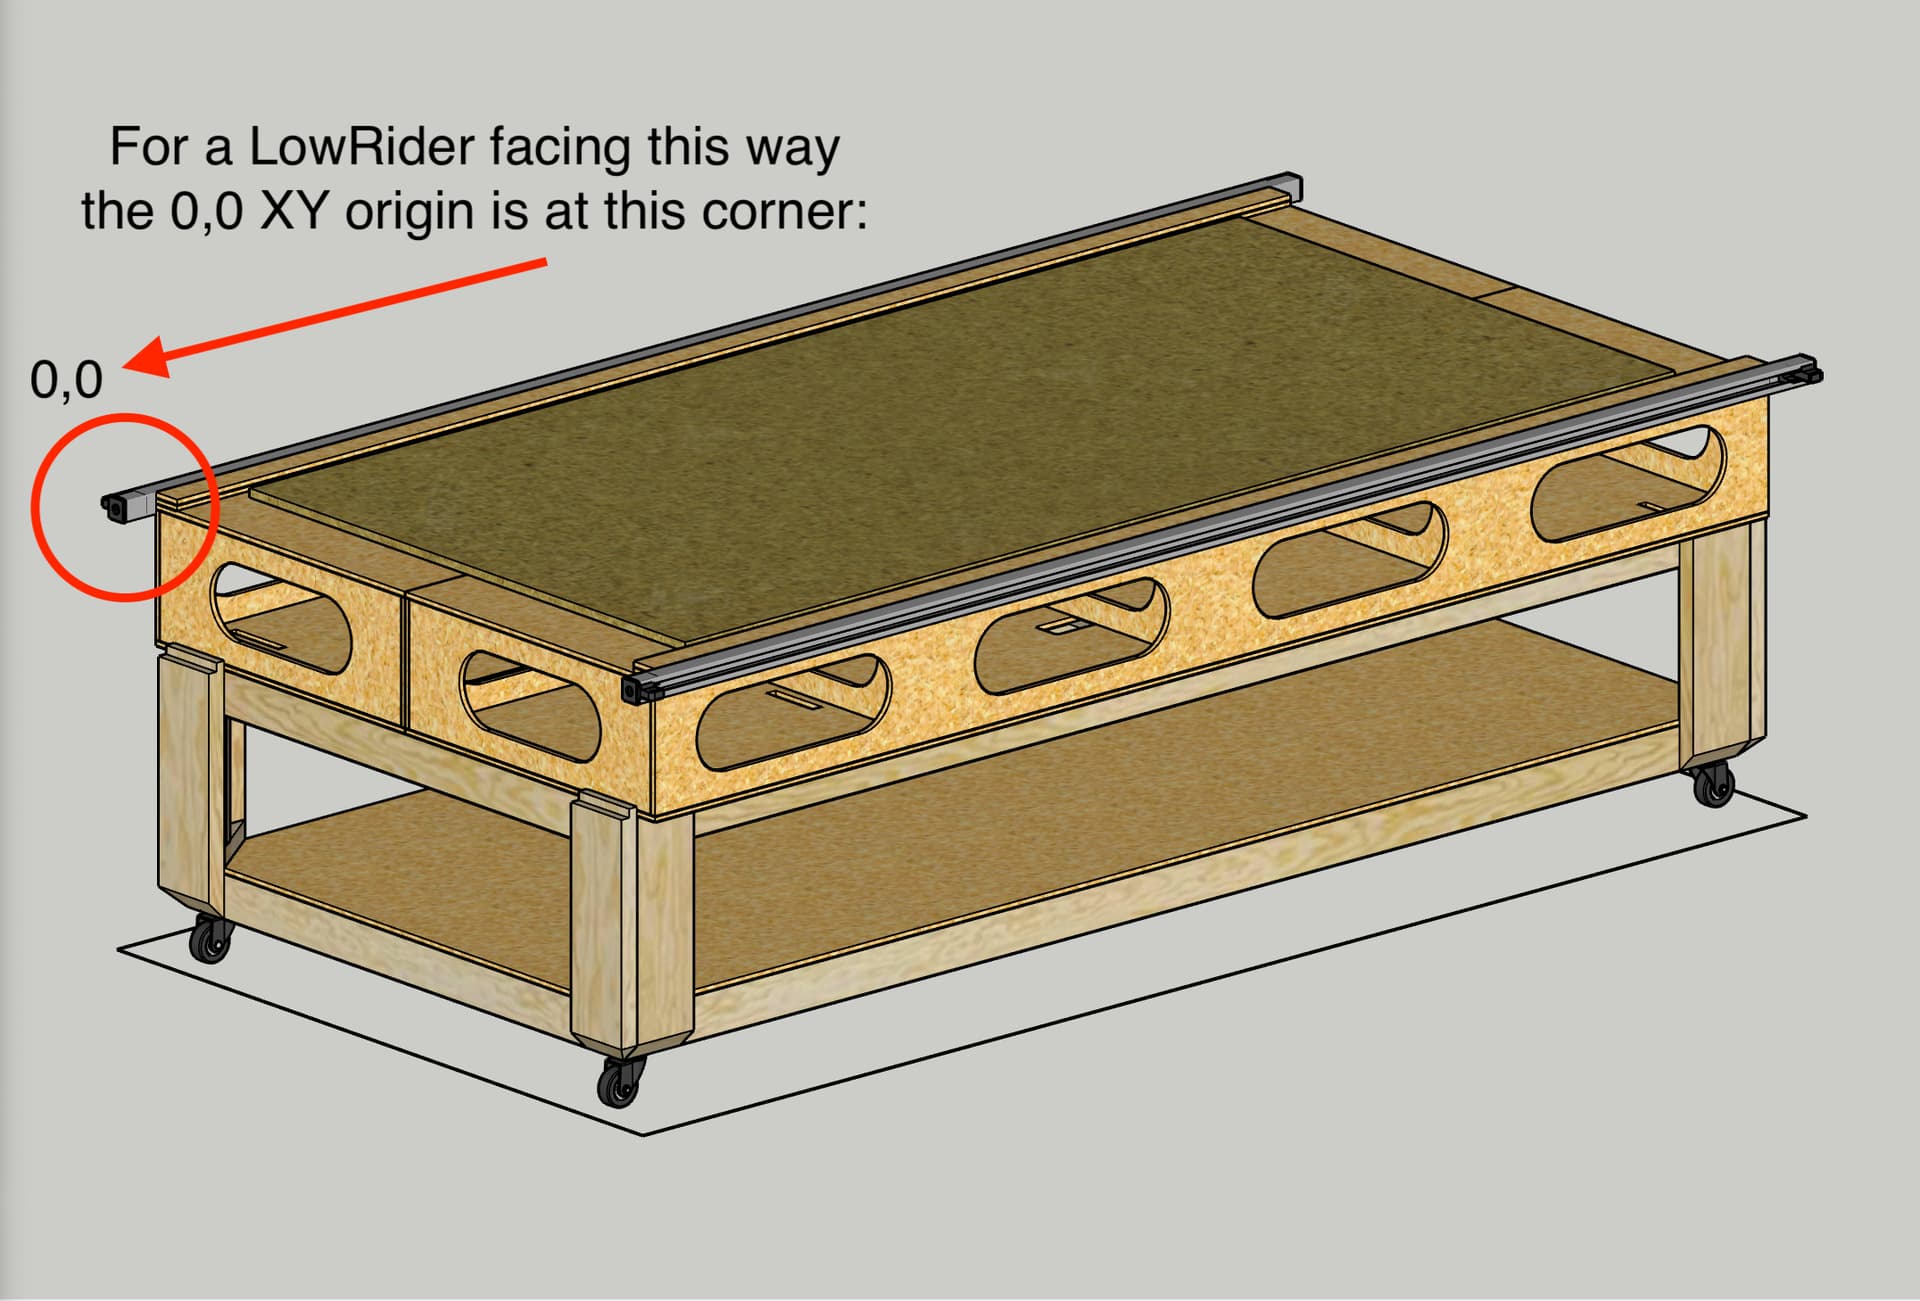
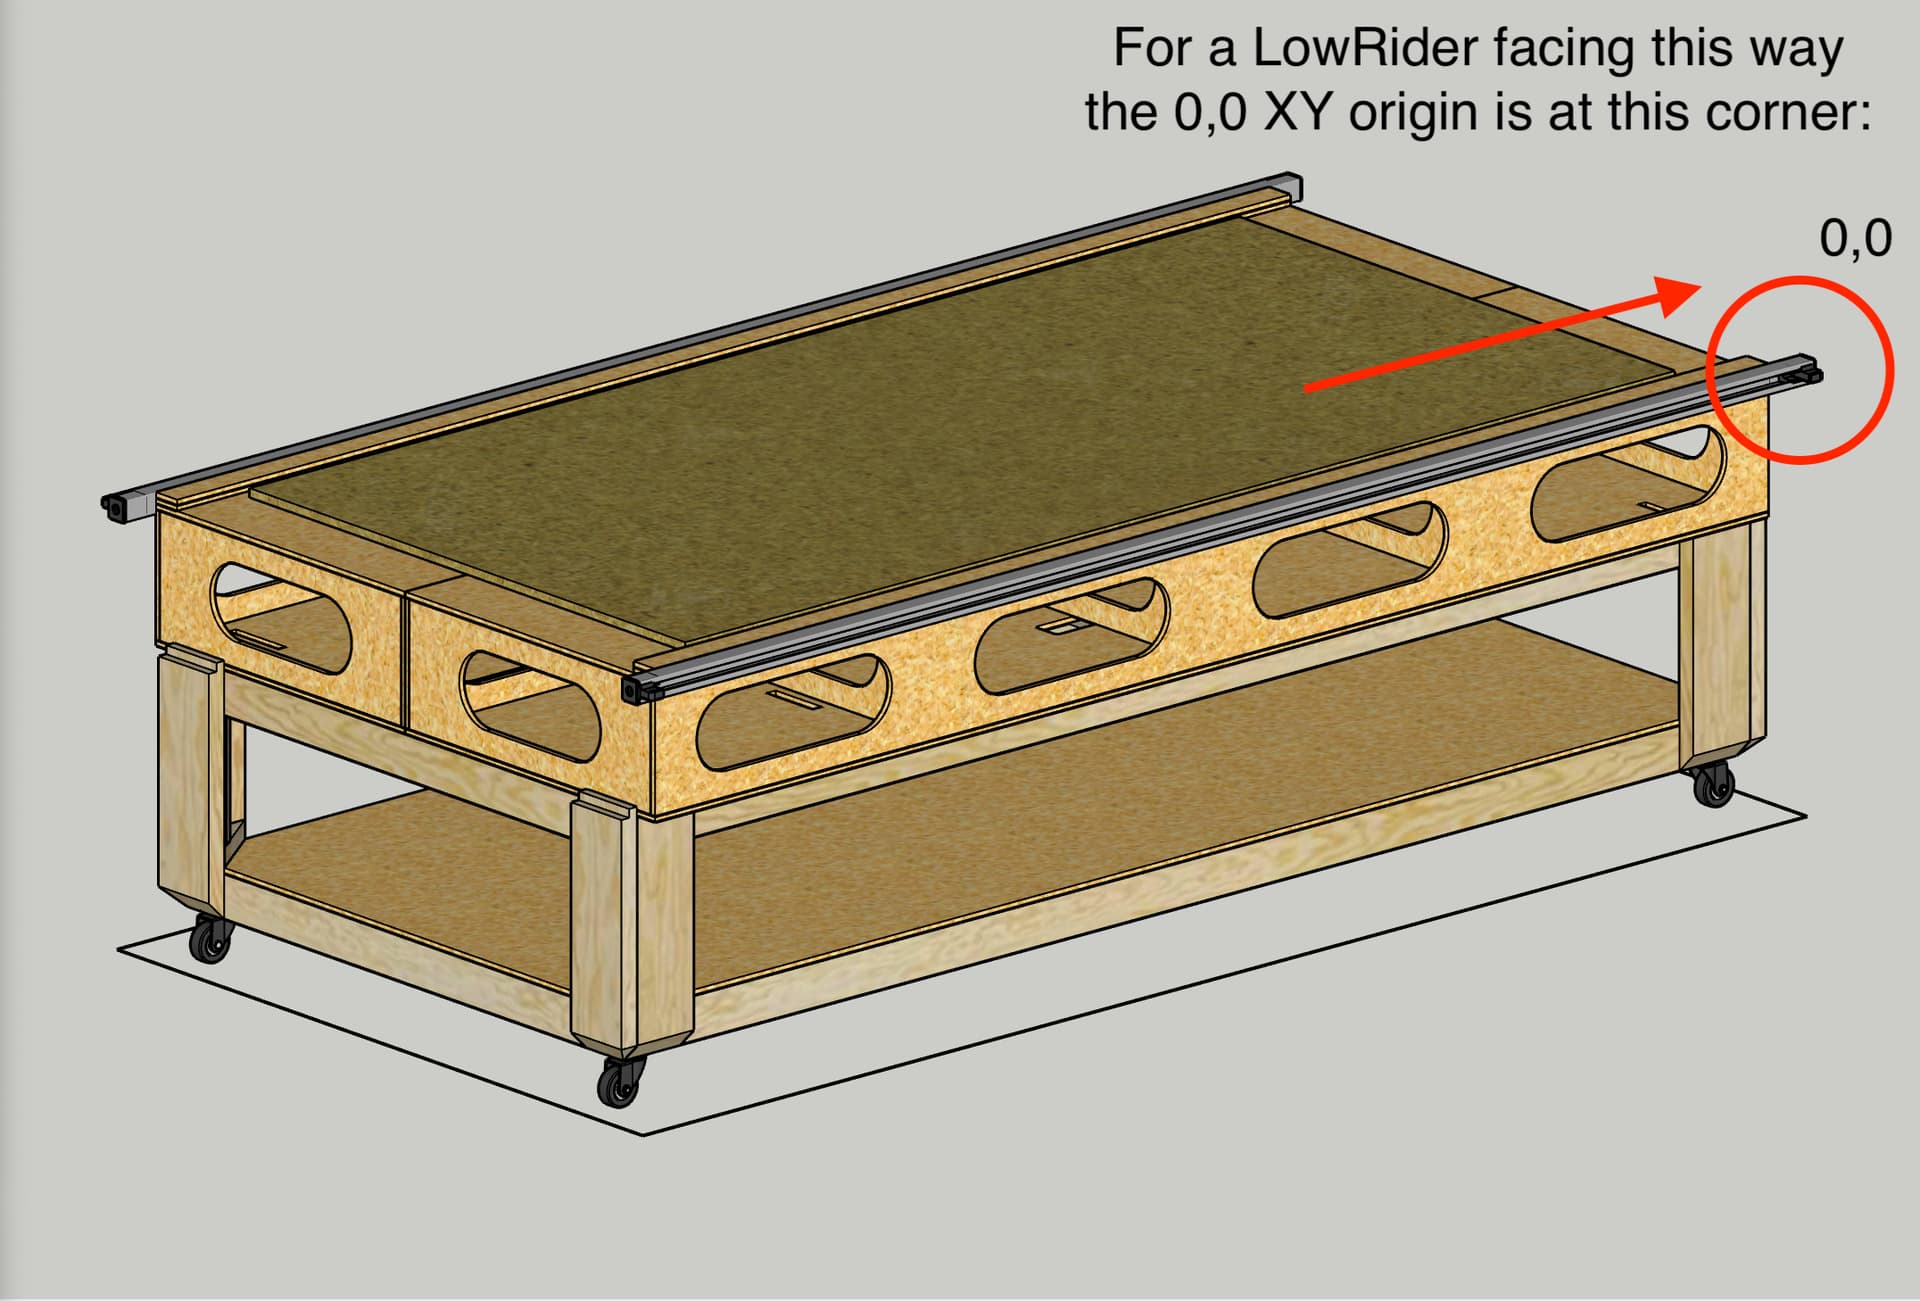
What would be the most common corner for the Zero point of the LR3? ![]()
Which for me would determine what side of the X-gantry i would mount the Controllerboard.
Thx in advance!
Good catch, and I have now fixed this. Please check the newly updated listing and you should now find the STL’s for the new printable TPU bristles for v.1.1: Printables So sorry for the oversight.
If you have printed a LowRider’s parts as they are normally, then you can face the front toward one end or the other, to get a choice of two 0,0 XY origin spots:
The only way to get the origin set in either of the other two corners, is to modify things by swapping X and Y and doing some modifications to the (former X, now Y) gantry’s homing by moving the end stop switch and creating a new end stop for the switch to hit.
Also, the only way to move the long EMT Y rail to the other side, is by mirroring some printed parts.
I have done both those mods, as in swapping my X and Y, and moving the (formerly Y, now X) rail to the other side.
If you look closely at this stock LowRider image, courtesy of Ryan, you can see the control box is toward the left. That’s its default location.
Thx’s very much!
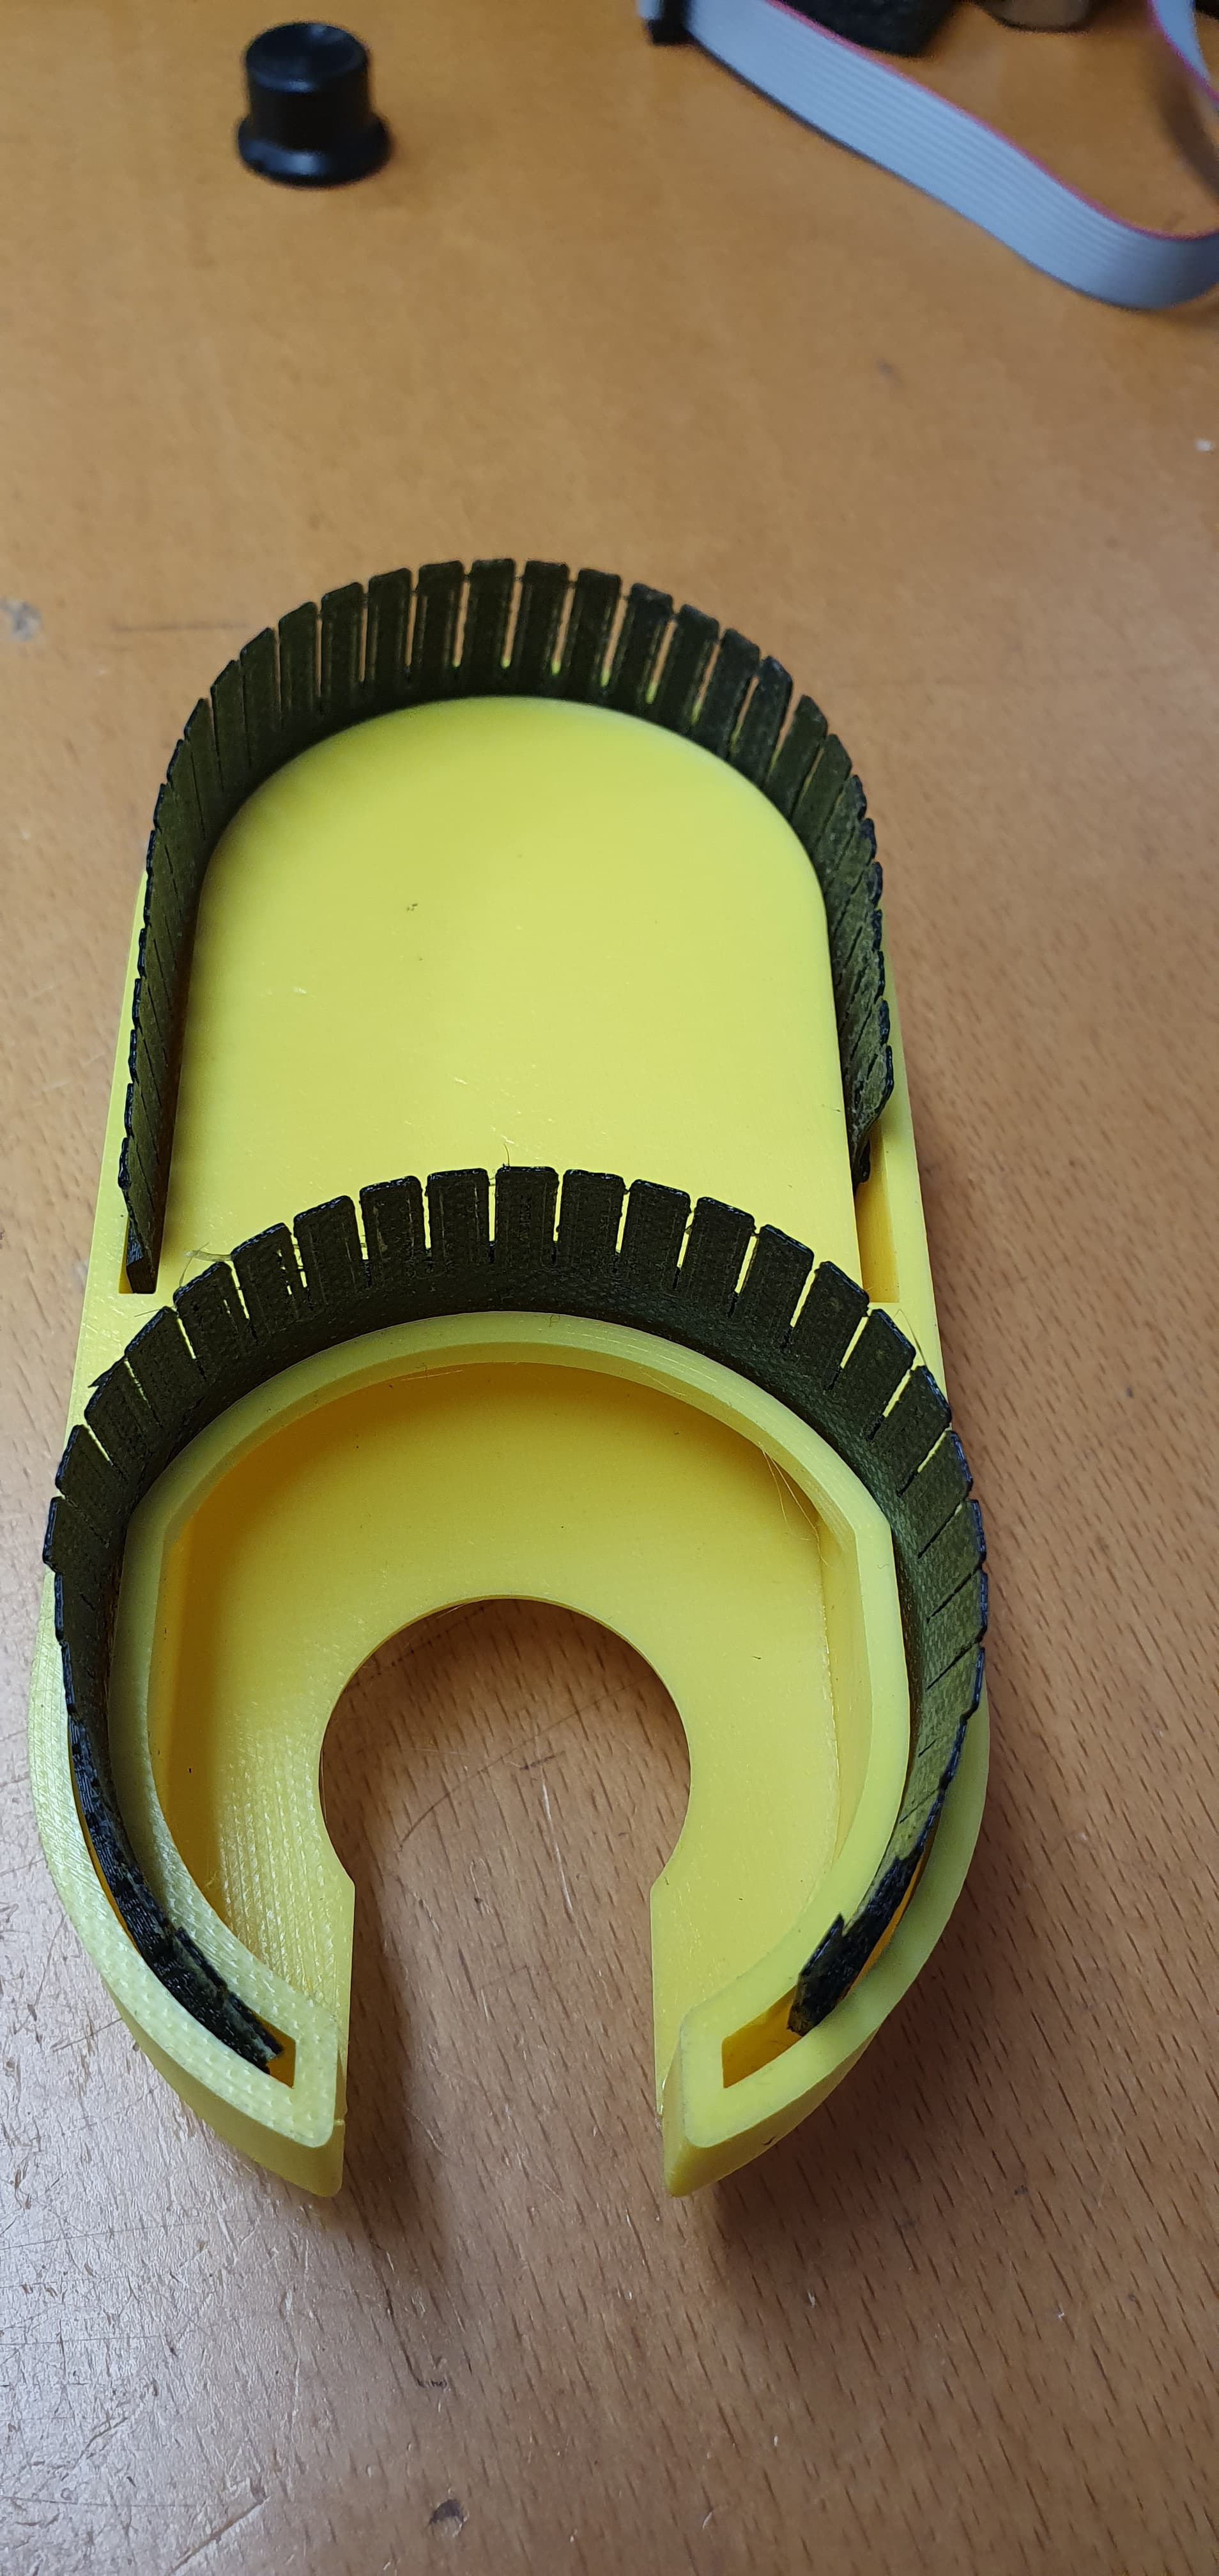
Here is the result and as you can see just a tad short the rear bristle.
For the effect it probably doesn’t matter only for the looks sake. ![]()
Looks good. Have you seen the new addition of the round bubble bumper slopey rampy thing? It really seems to help as far as I can tell. I posted a video of it. It’s just a print and glue on thing.
Also, if you get a chance, upload a photo and post your make on printable‘s!
I mentioned also in the video that the new round bubble bumper slopey rampy thing, means the back bristles are no longer needed, if they ever were. Much more optional now. Still, I will look at the model so the fit is better.
I’ve watched this whole project silently, (more or less) just chuffed that it comes so close to answering my original question - undecided about whether to build or go off on another tangent (You know I will!)
The whole time I’ve wondered about the purpose of the back bristles, now I know!
On the other hand -
Where’s the fun in that? ![]()
Yes yes, seen and will print out that as well! ![]()
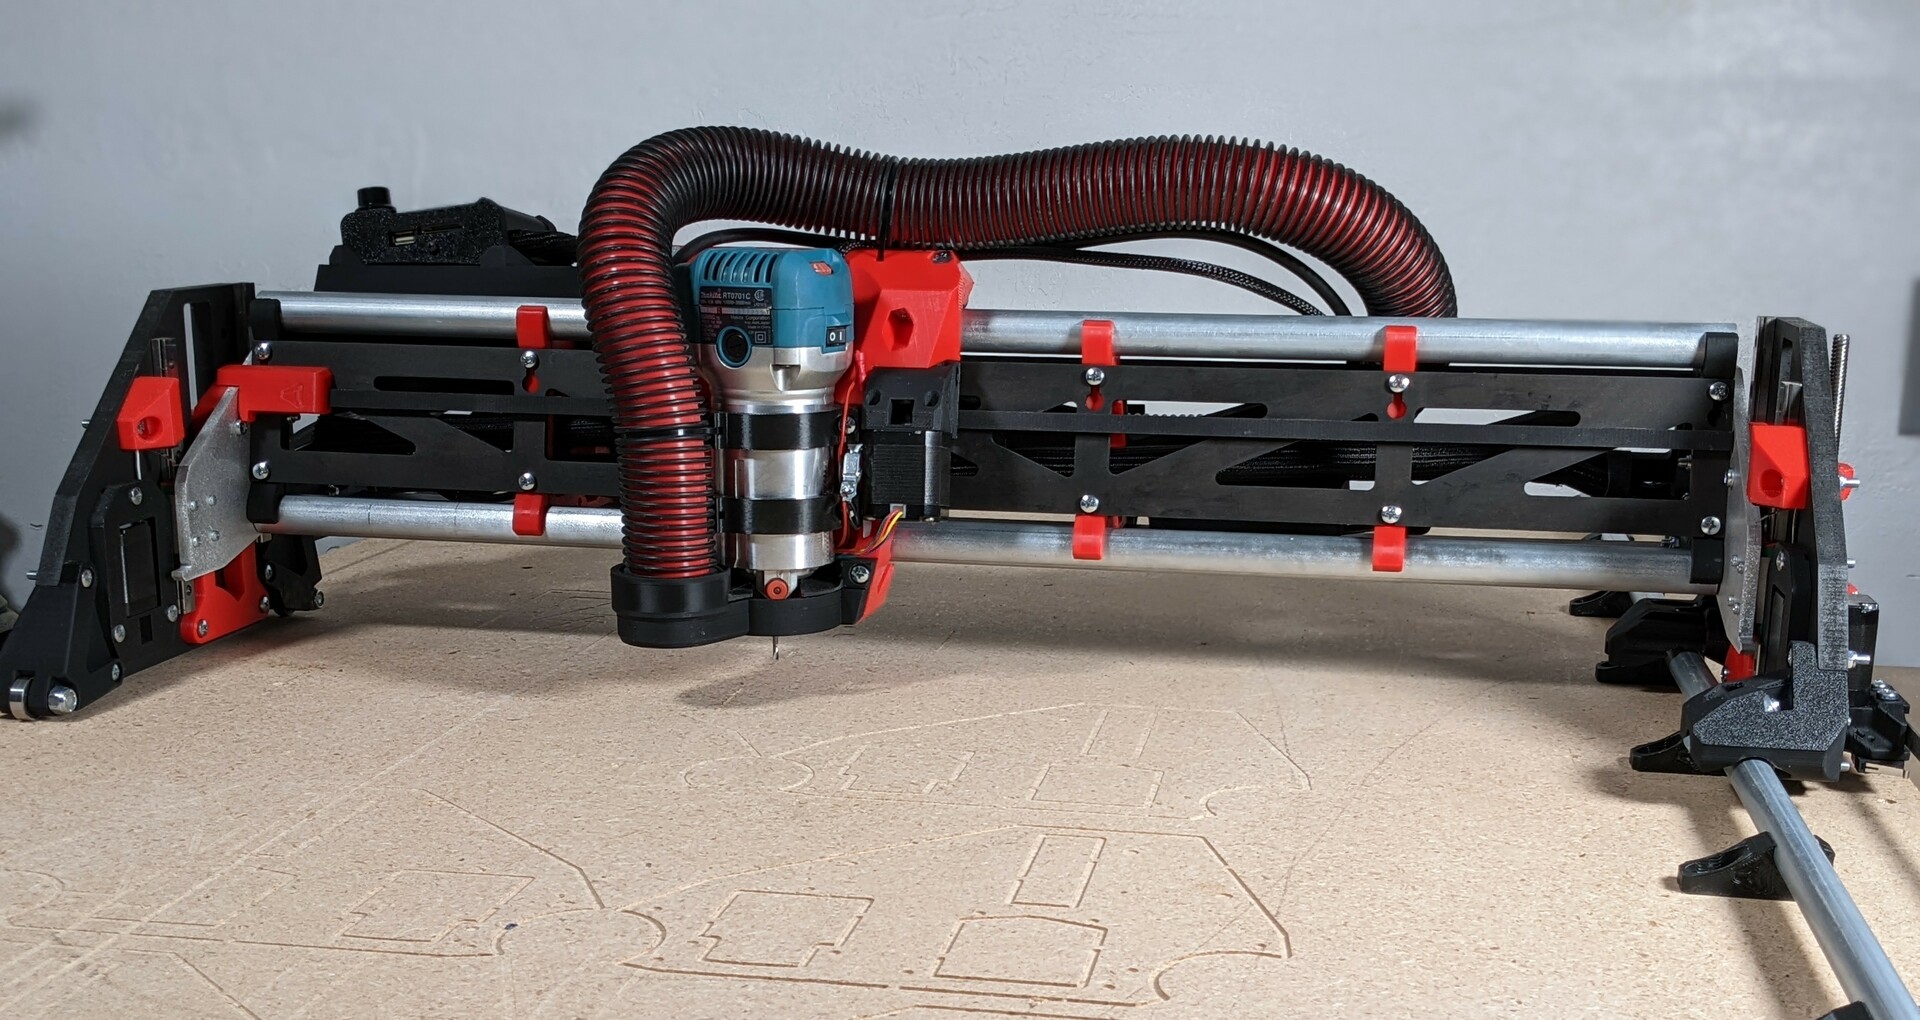
But I have another question about the endstop for the Z carriage.
On the picture the problem is obvious, when using the floating carriage.
Point A hits first, then as seen at point B the endsw. can not reach the side to be triggered.
Will try do that when all parts has arrived! Still missing the Linear rail!