That’s awesome!
Looking forward to watching your modification.
That’s awesome!
Looking forward to watching your modification.
I am eagerly waiting for you to tell me this works so I can do it.
Boom, Outdoor IDEX build! Your turn, start building…
Looks like I need to get off my butt and finish enabling Marlin on Jackpot. Once the 2209 serial multiplexing is sorted, it’s all solved and IDEX will work, guaranteed.
On FluidNC it is theoretically possible.
Am sticking with Marlin on Octopus for this LR3 upgrade to IDEX. Looking forward to using Jackpot for future project…
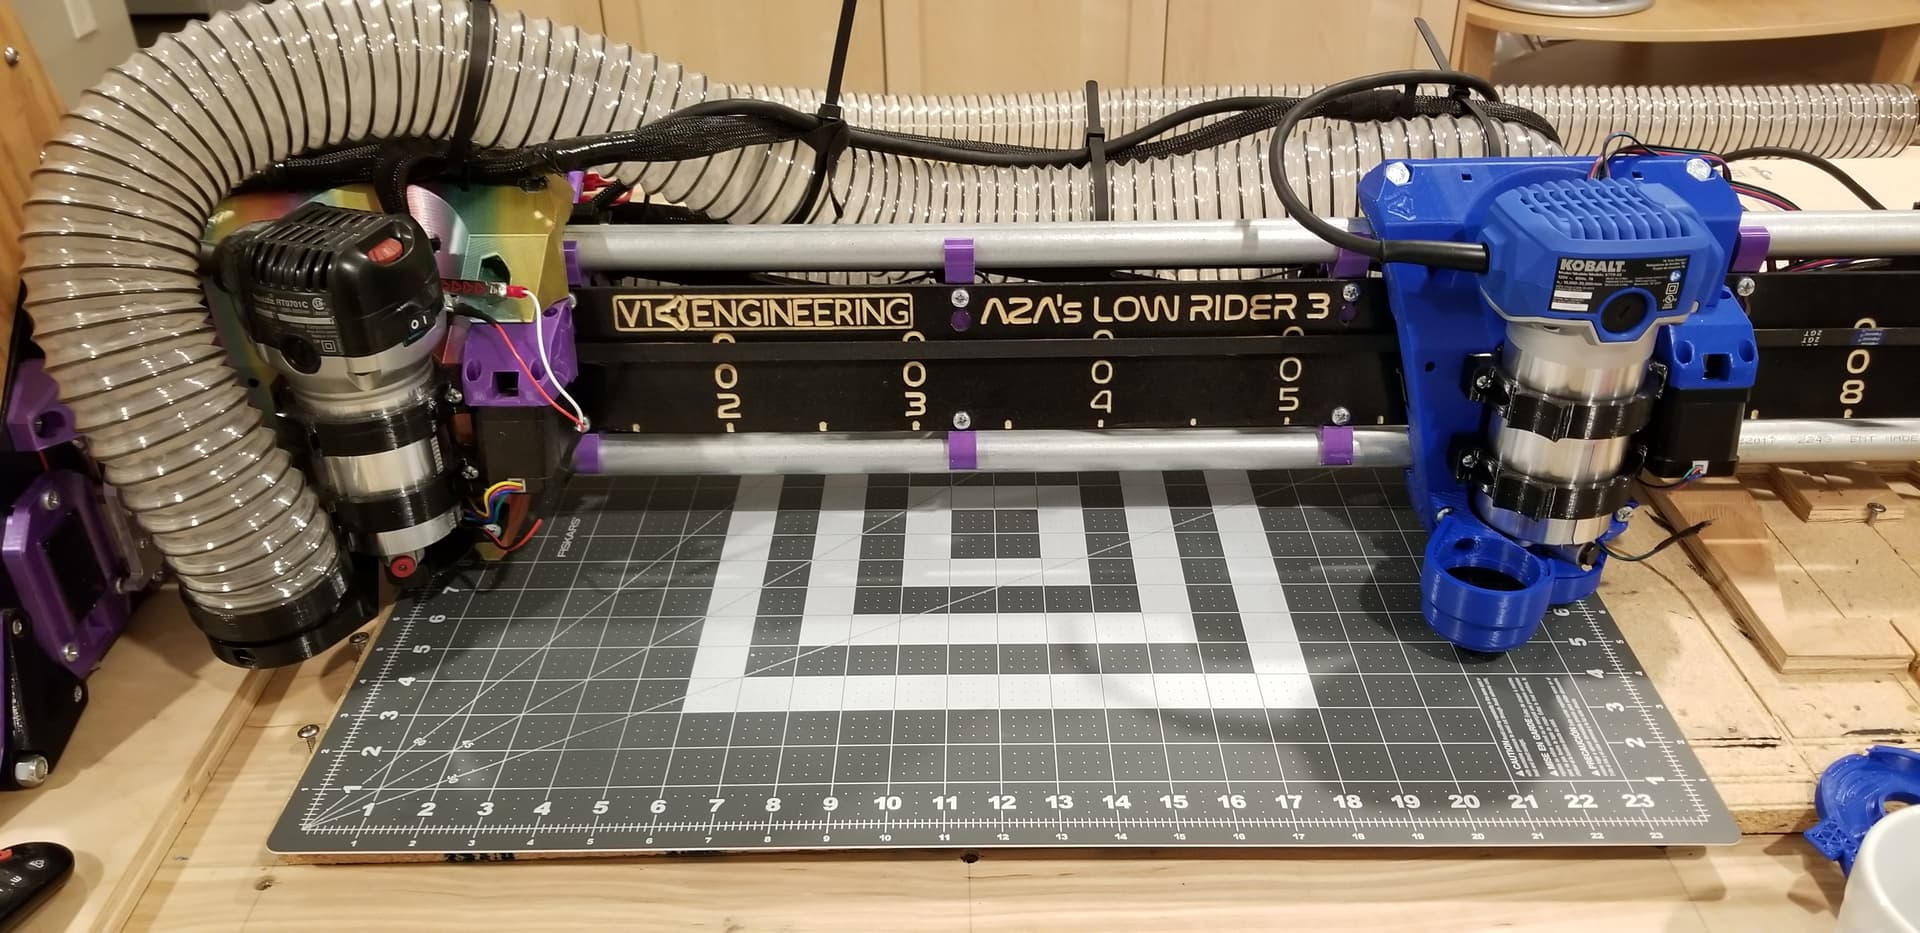
Err, am I the last person to realize the LR3 Core can be mounted and unmounted without having to remove XZ plate from Gantry’s end brace? Can just add/remove two of the top bearings.
Longer term, thinking about belt length adjusting quick’sh release X belt holder mod, and/or right leadscrew stub mod…
Like the quick release x belt thought - don’t quite understand the leadscrew stub mod?
This would be a cool feature so you can remove it if you need your whole cut volume again
Ryan recommended in another thread to remove the lower two bearings in order to remove the core without disassembling the gantry
But the upper bearings are a lot more accessible if that works!
@jamiek and/or any other LR3 IDEX builders out there, curious if you have any related models/ideas I can use to help with wiring/vac mounting and splitting? Have been digging thru Jamie’s IDEX build.
There was a recent topic with an impressive mother of all drag chains that encapsulated a Vac hose and wiring for Y axis. Impressive work. For now, am going for just enough effort to function.
You and me both. Am still figuring out if/how to allow quick’sh release via belt holder / stub / X drive mod(s). E.g. Mod X drive to have channel cutout for belt to slip on/off. Then make a removable belt clamping clip that cinches/tensions belt close to right XZ plate. Still thinking/experimenting…
Cheers!
I’m wondering if it’s possible to get an over-centre lever in the space available… The clip below isn’t applicable, but it might just inspire a different thought. I’ll have a bit of a sketch and a think (in that order!)
Put the vac on the one that will make the biggest mess. That is a cool challenge though, split the hose and only use the one that moves, some sort of servo gate or something. Or it always closes when they park so a manual bump switch.
But yes, get it working first.
Cut the screw hole into a slot bend the top just a tiny bit so it can not vibrate loose. Kinda like the Y axis quick release.
I’d probably just do a quick release of the X belt motor. Replace the M5 screws with pins, and add a clamp, or use a spring washer and clevis pins. When you want to remove the second core, you pop the clamp, and move the X motor all the way to a parked position. Then you don’t have to unplug the second X motor, so no wiring issues, and no possibility of plugging in the motor backwards, no need for a belt tension clamp, because the motor pulley and idlers are still on the belt, and a quick re-connect.
Bonus points if you have a homing switch at X_max and can then just home the second X motor.
Speaking of pins… Use some 8mm smooth rod to replace the 2 1.5" 5/16"/M8 bolts that hold the bearings on the top of the core, and drill clevis pin holes in it. THen removal of the bearings becomes a snap, no tools required. Pop the clevis pins and the bearings slide right off, then the core can easily be removed. For bonus points, add a pocket to store the skate bearings while the core is off.
Cheers for all the suggestions, making a note for future improvements after getting end-to-end functionality working.
For today, am trying out just making a hole in the Strut to shove excess belt through…
 Part ??? — Flexible X Belt mounting options")
Will use X Belt Holder as is. Might chamfer belt holder, and/or make a clip to ensure Core doesn’t catch on the Belt holder as the Core moves to X min.
Edit: Dan’s clevis pin idea is neat, will order some to try out, e.g. https://www.amazon.com/s?k=m8+clevis+pin&crid=2CBVPV6A7SNM9&sprefix=m8+clevis%2Caps%2C219&ref=nb_sb_ss_ts-doa-p_2_9
Somehow, I like the idea of using a LowRider v3 core as a paper weight or some such. Perhaps intriguing. ![]()
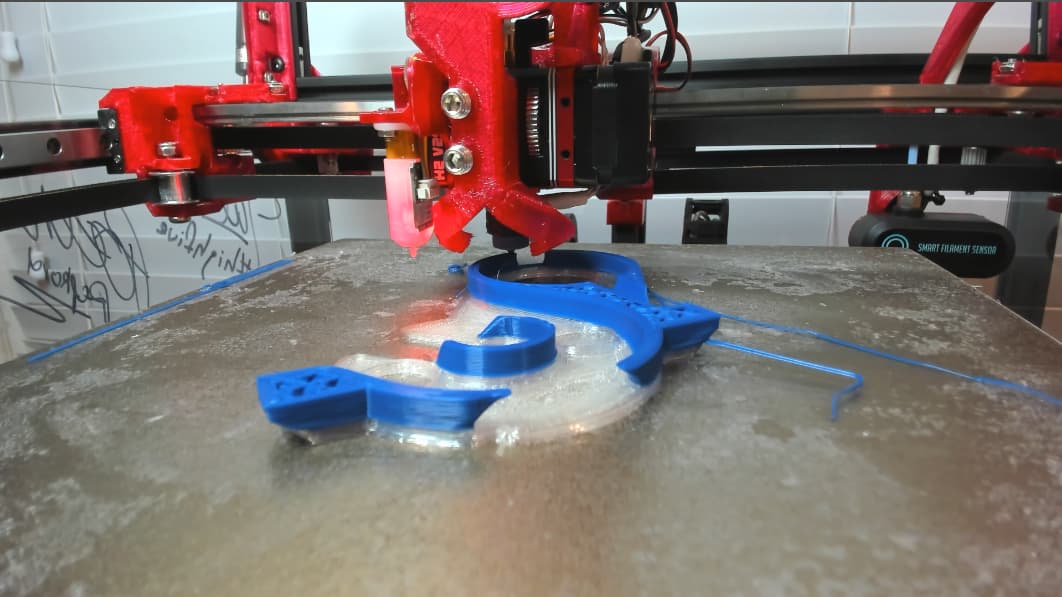
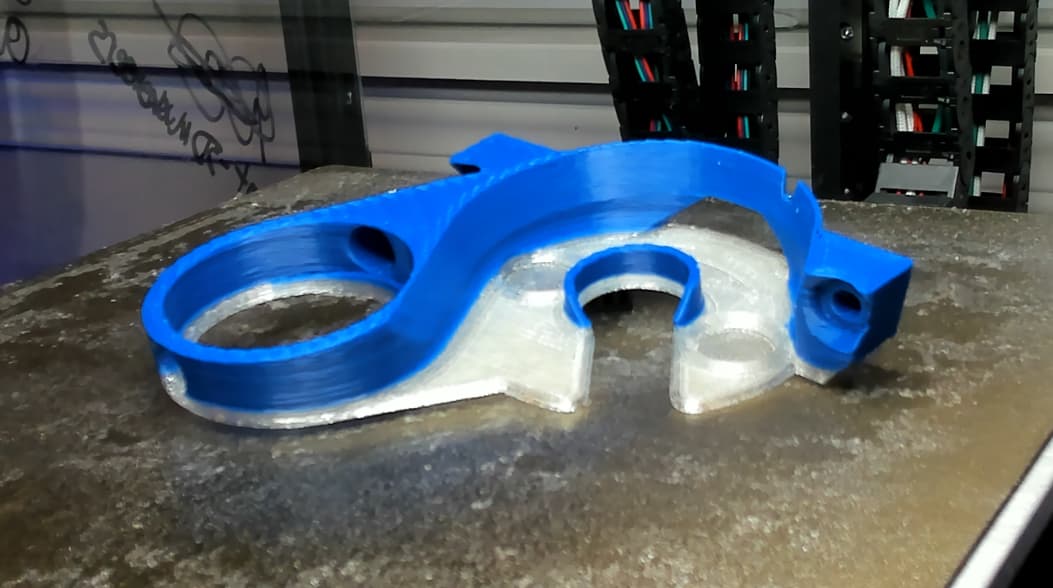
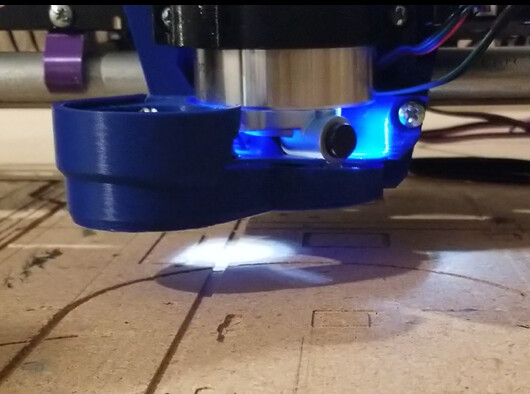
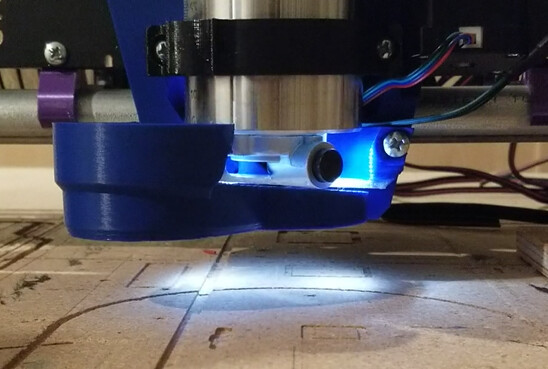
Hoping to increase light on stock/bit by modifying Printables > V1E > Kobalt Router LR3 Mount.
Printing mix of transparent and Kobalt blue PLA… Swapping filament after printing bottom 3mm.
|
Blocked bottom… |
Clear bottom… |
Will edit this post and share files when done. Need to see how well the Clear SunLu PLA and SliceWorx Royal Blue PLA bond…
Edit: For this situation, looks like change filament at layer height would be more straightforward than using the z-offset plugin.
There’s also the old trick of starting a single print job in one color filament, then pausing the job at a certain height, changing the filament, and continuing the print. There’s a plugin for Cura I think that allows setting which layer to insert a pause at.
So the sliceworx royal blue is the good match?
I just ordered some sliceworx yesterday, but royal blue wasn’t my guess for the Kobalt.