In looking at @Jonathjon 's post in another thread about tuning with orca slicer, I downloaded it and decided to give it a try.
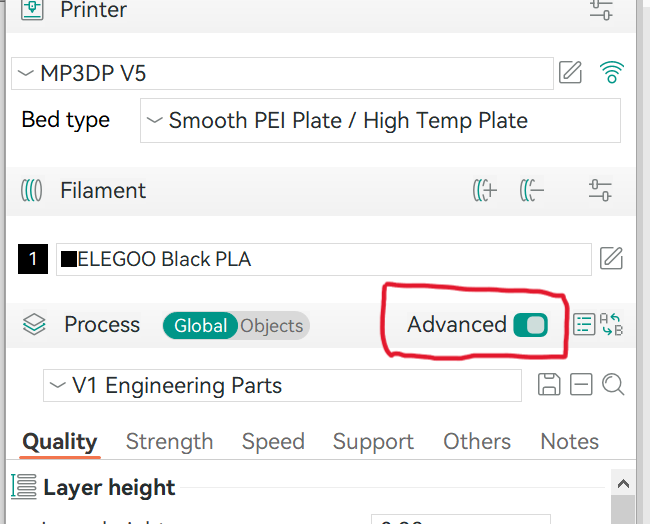
Basic settings for everything except max acceleration that I had tested previously and a layer height of 0.36 mm that wasn’t available, left all the rest at default stock settings:
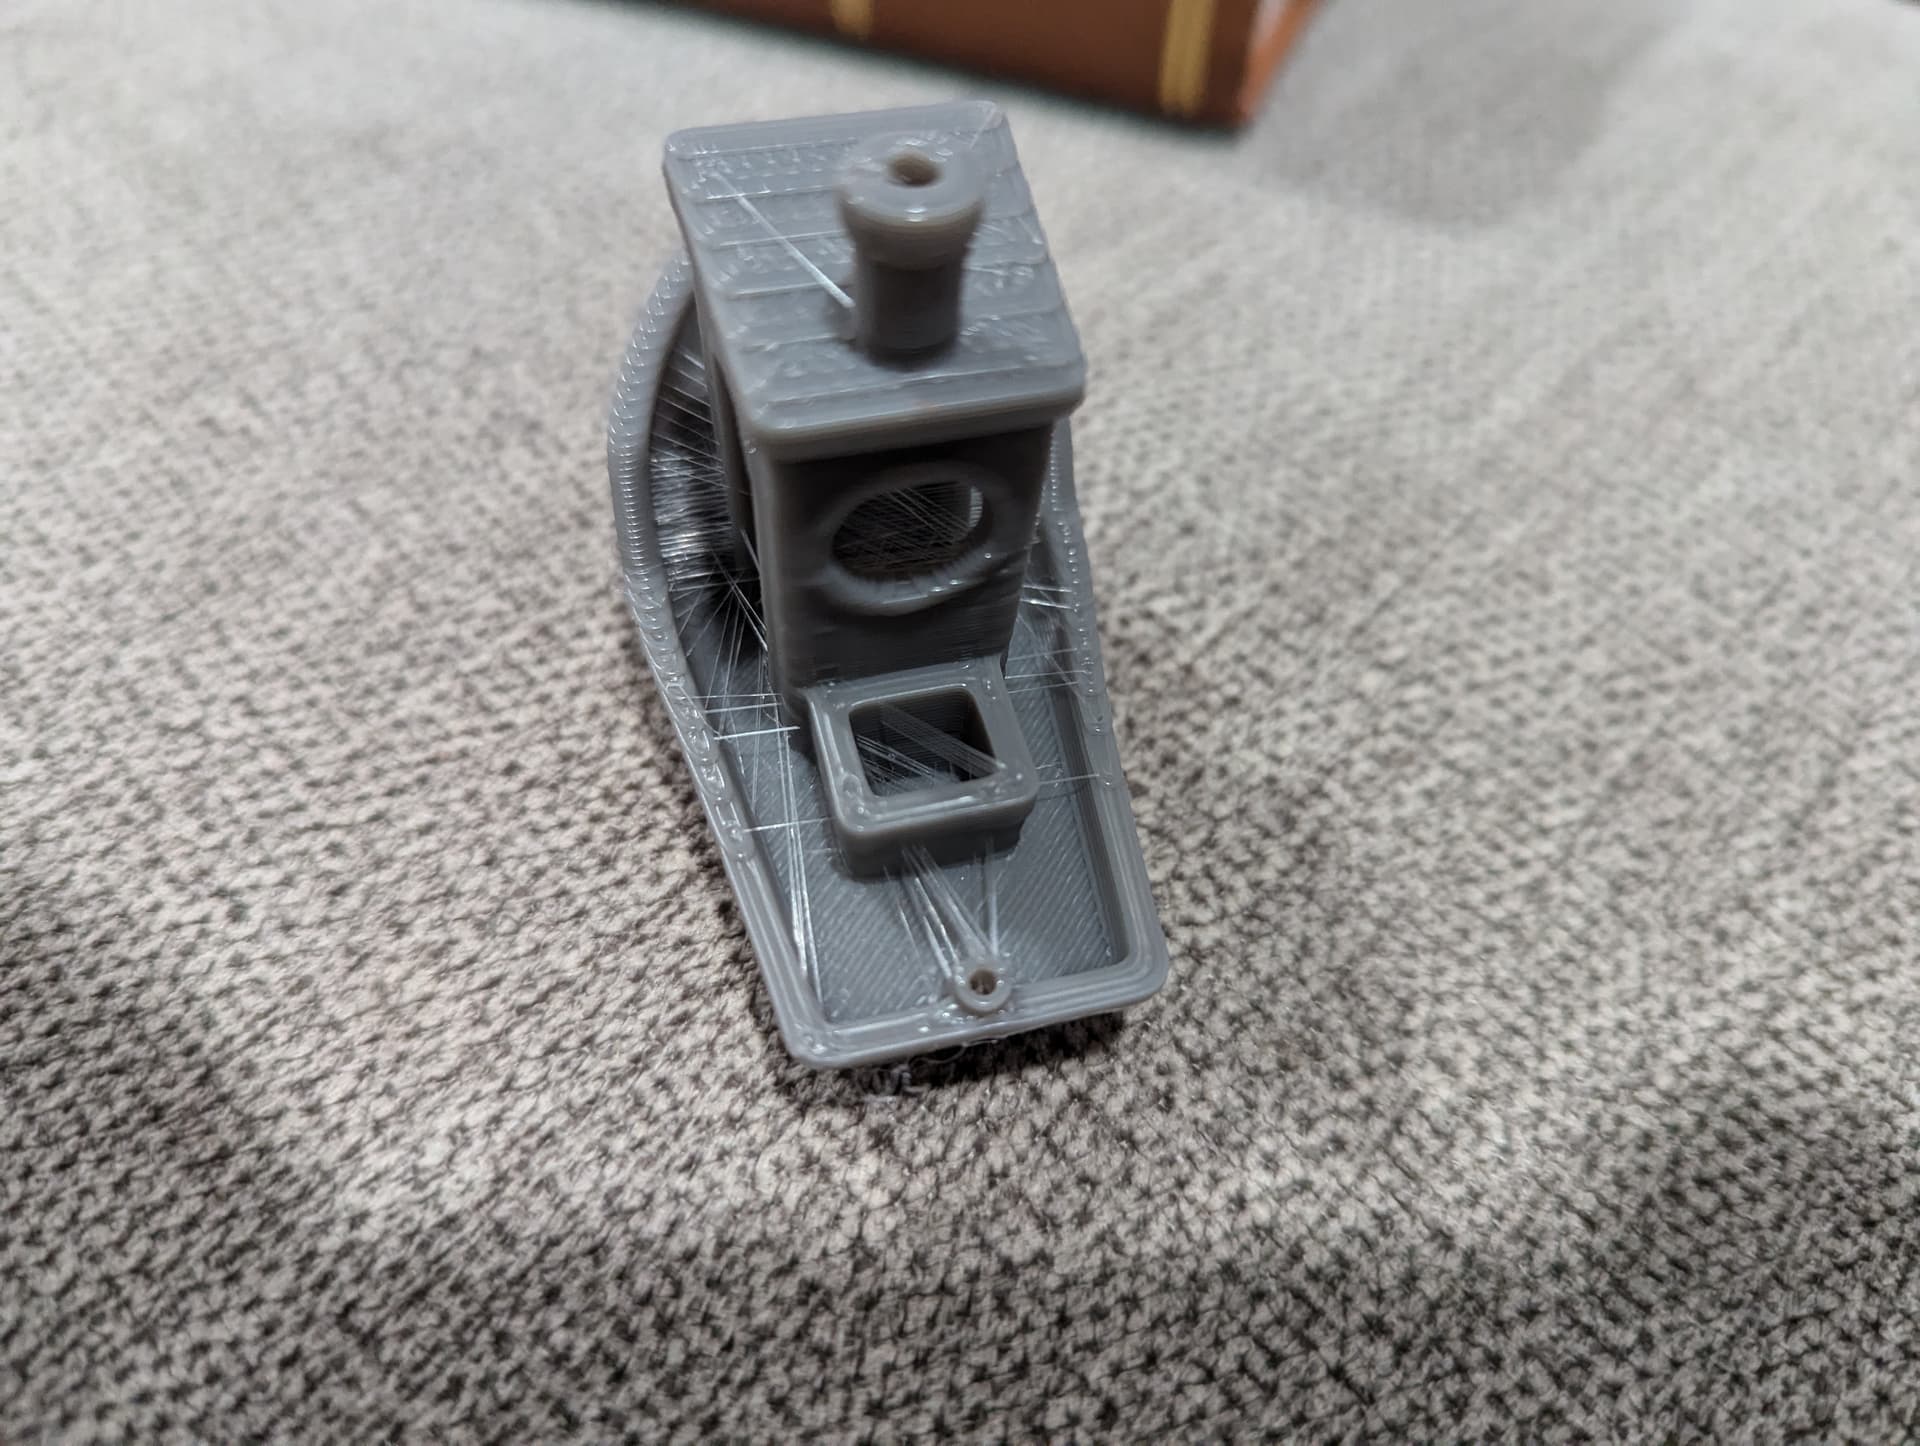
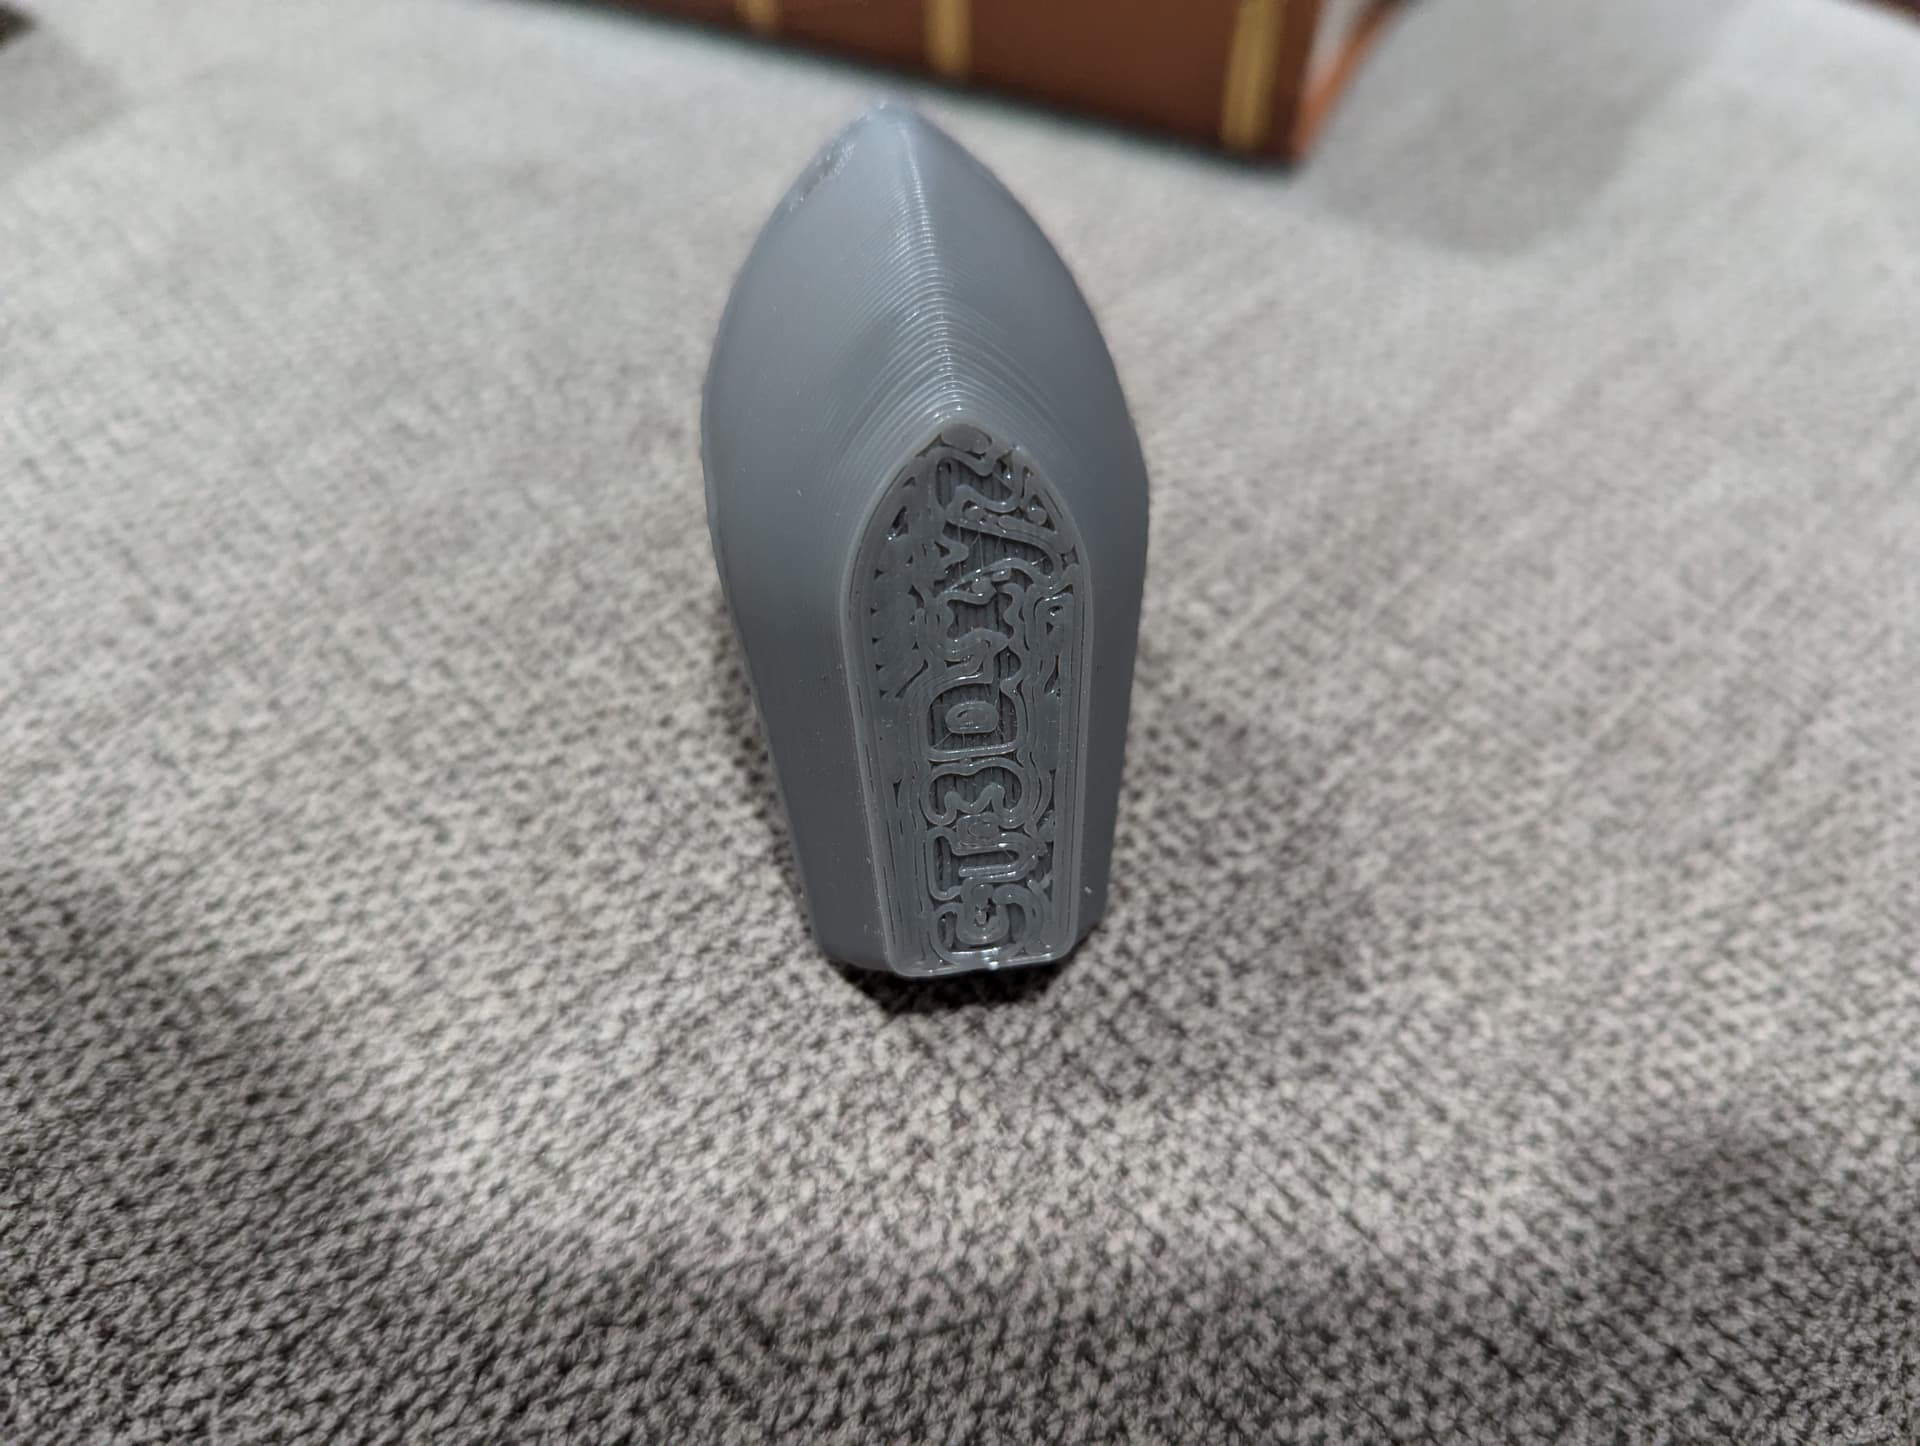
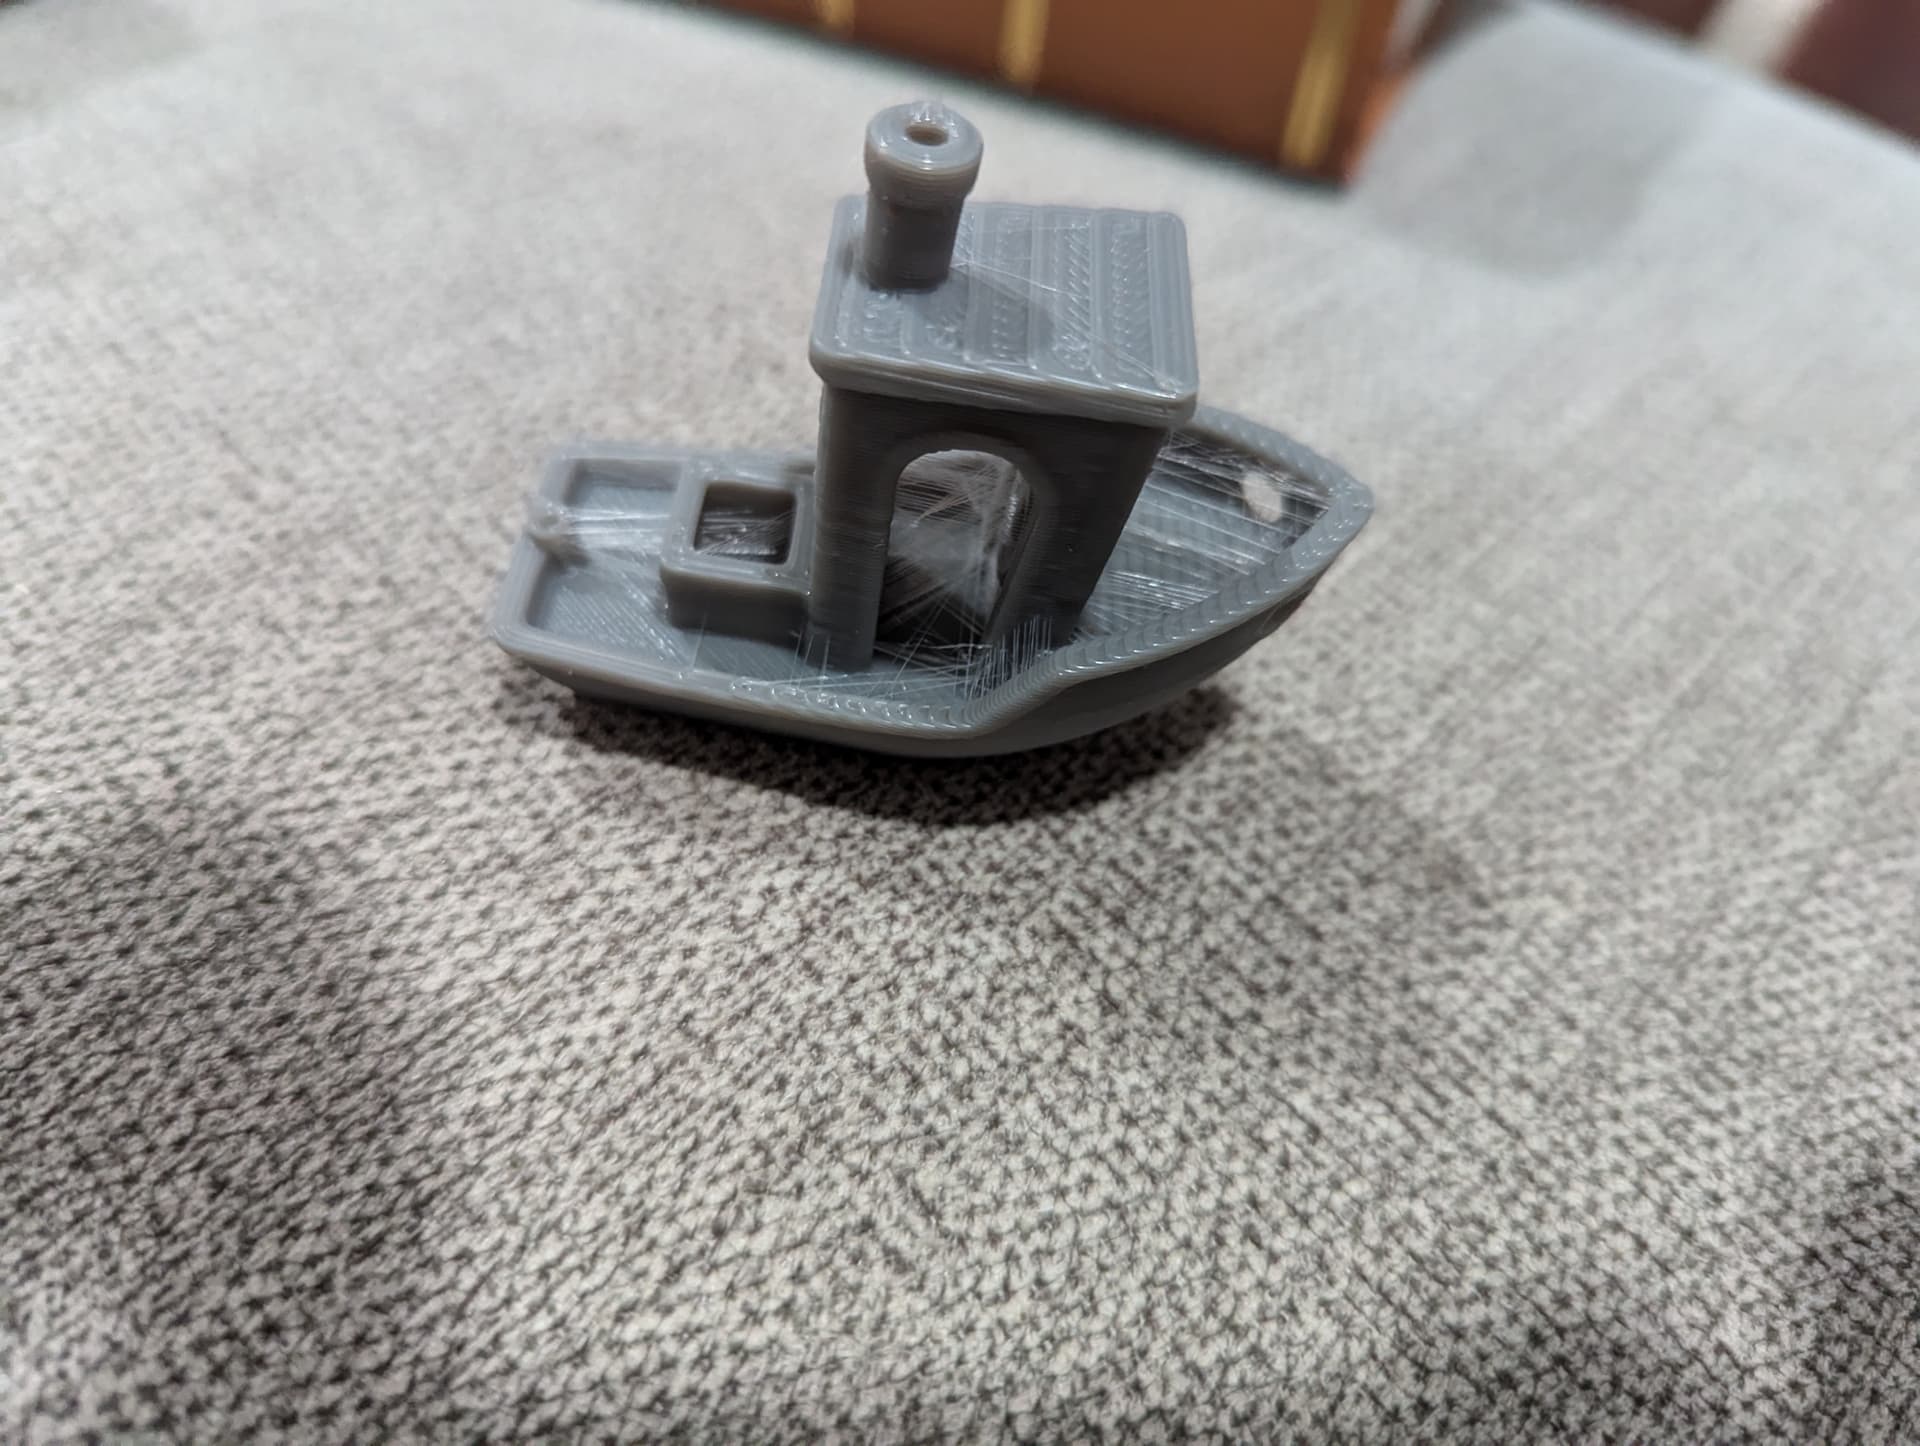
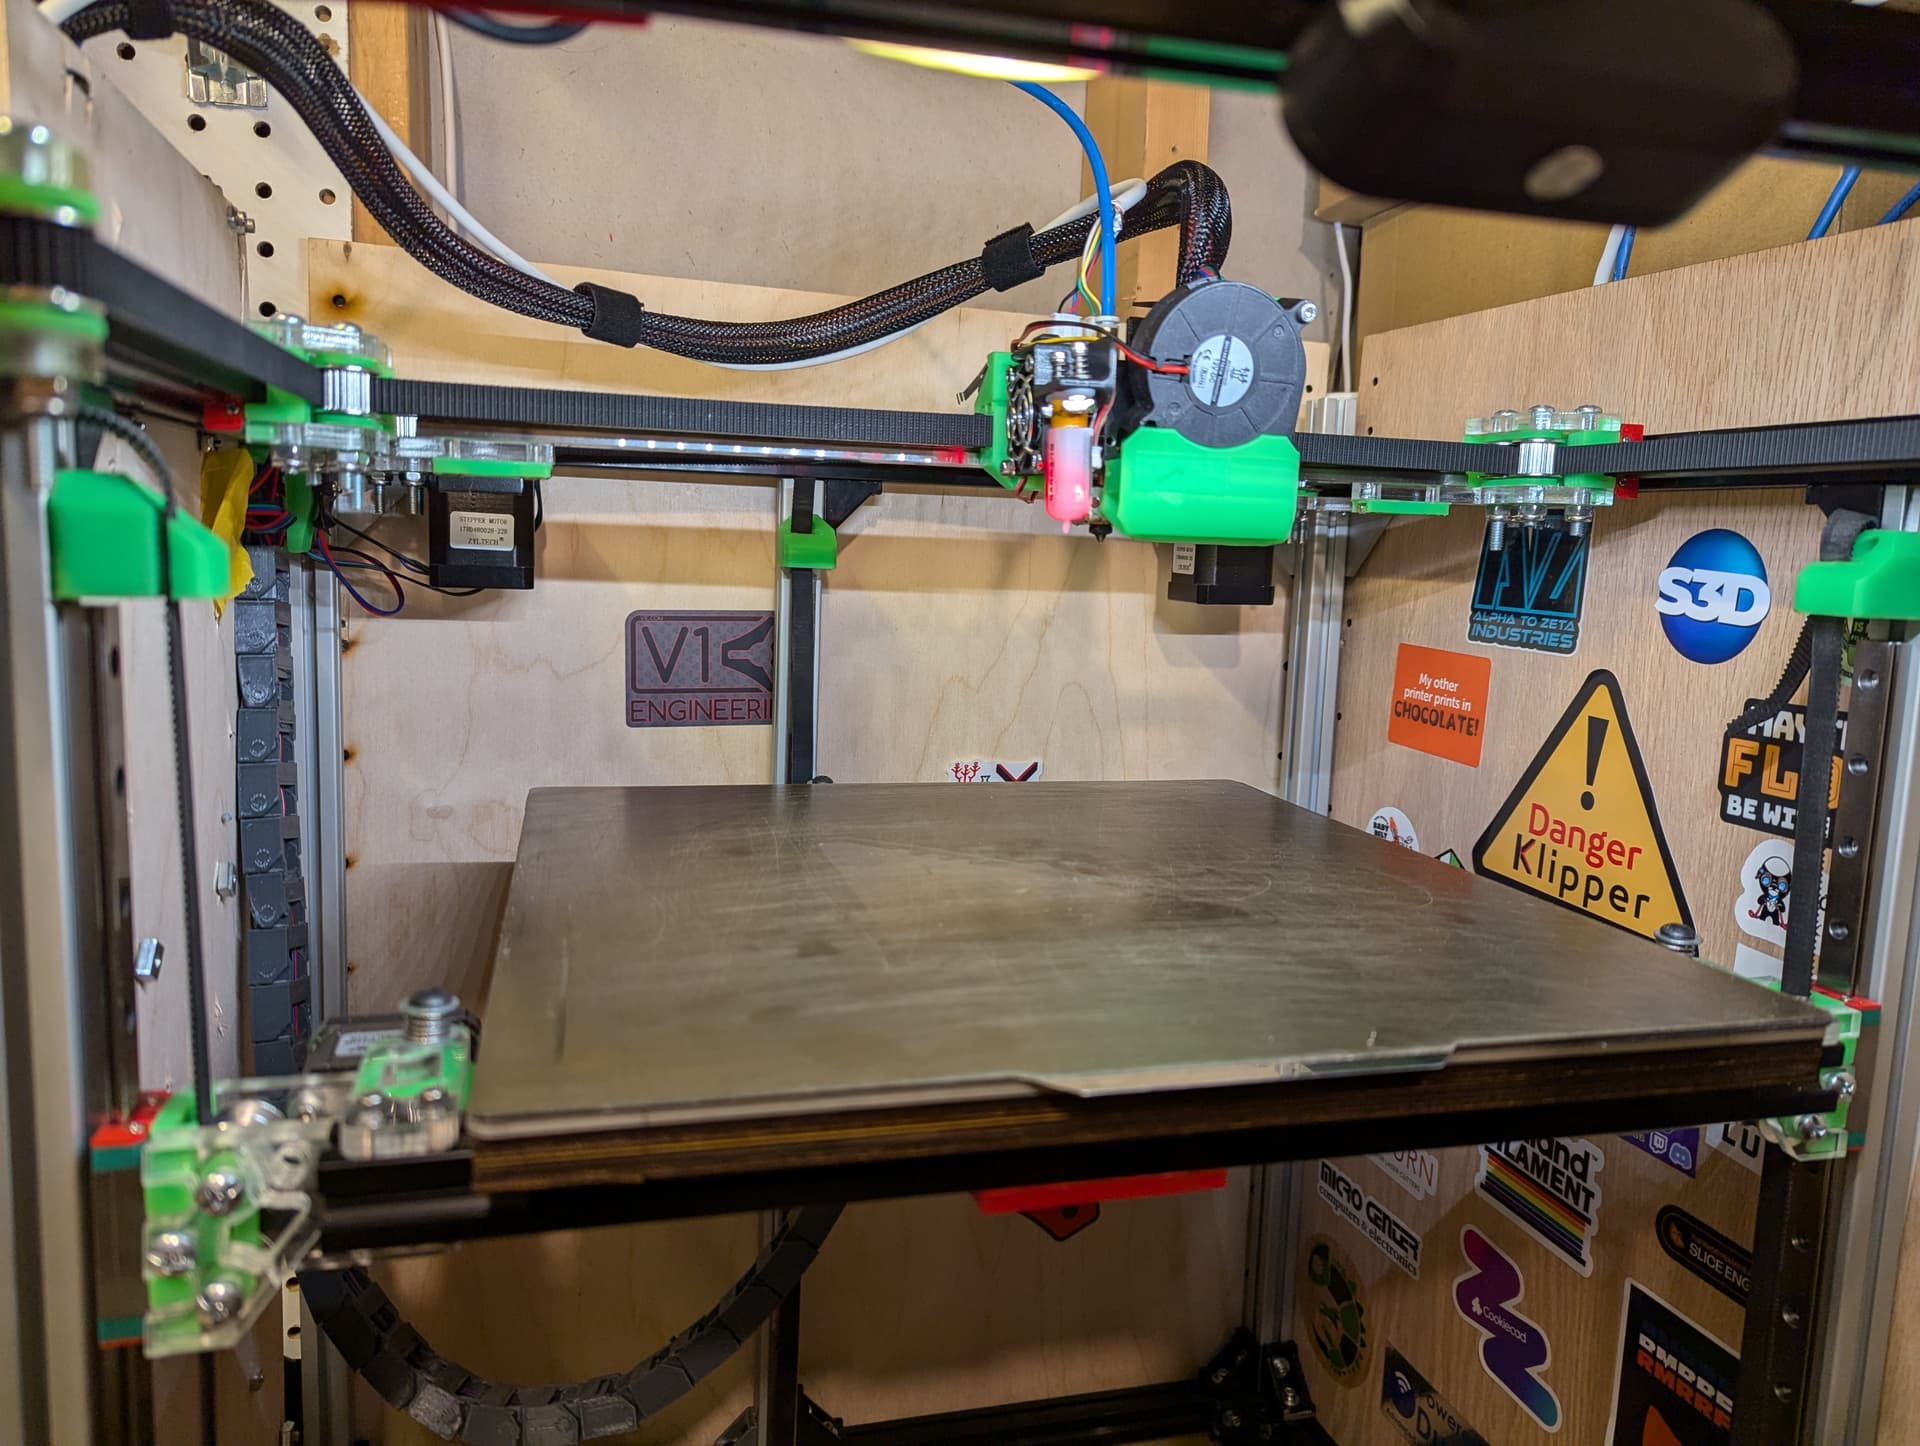
and it printed very well. The stringiness is likely an artifact of this batch of the PLA, though in the past it hasn’t done that. Is it the best print ever: no, but it is far better than it was printing and good enough for LR parts printing.
The goal here is to use the built-in tuning tests. after looking at the print, maybe retraction needs to be tuned, but I’d crank stuff out with this as it is from a “look” perspective. Dimensional accuracy is still in question.
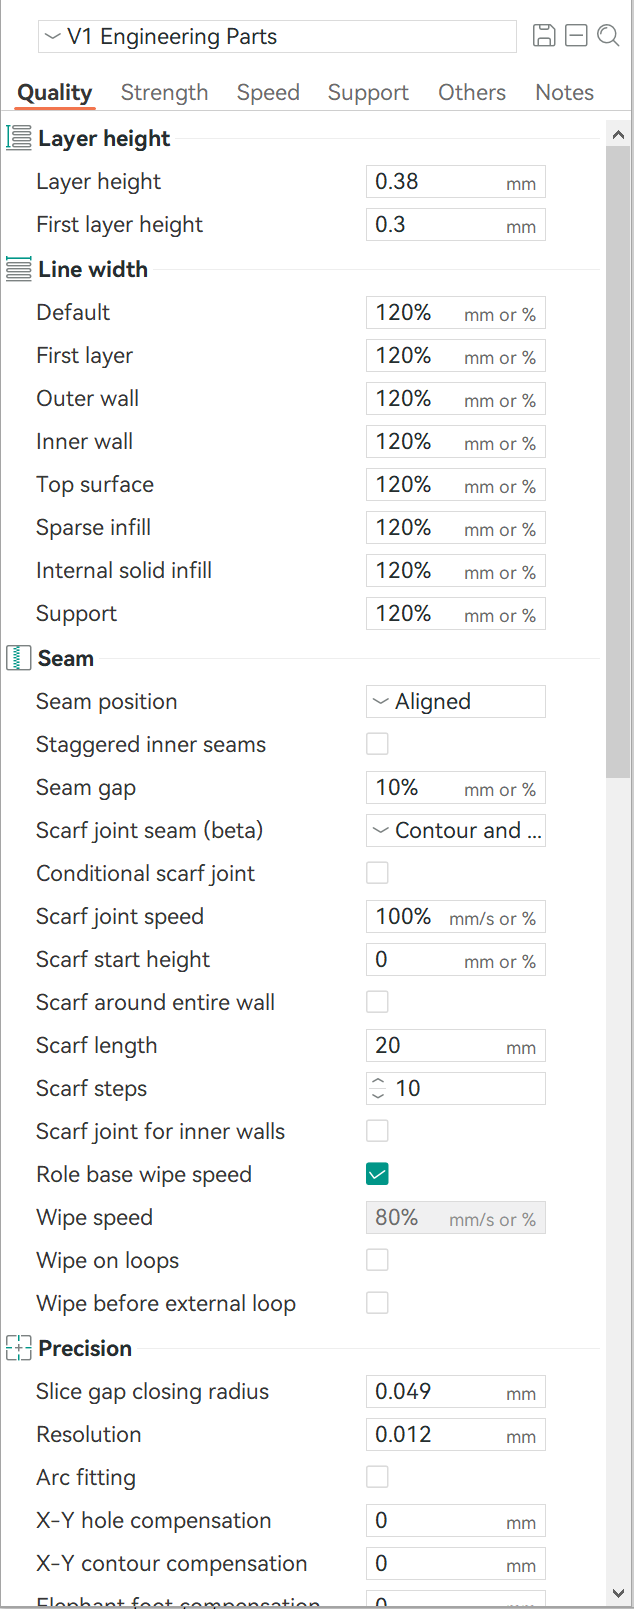
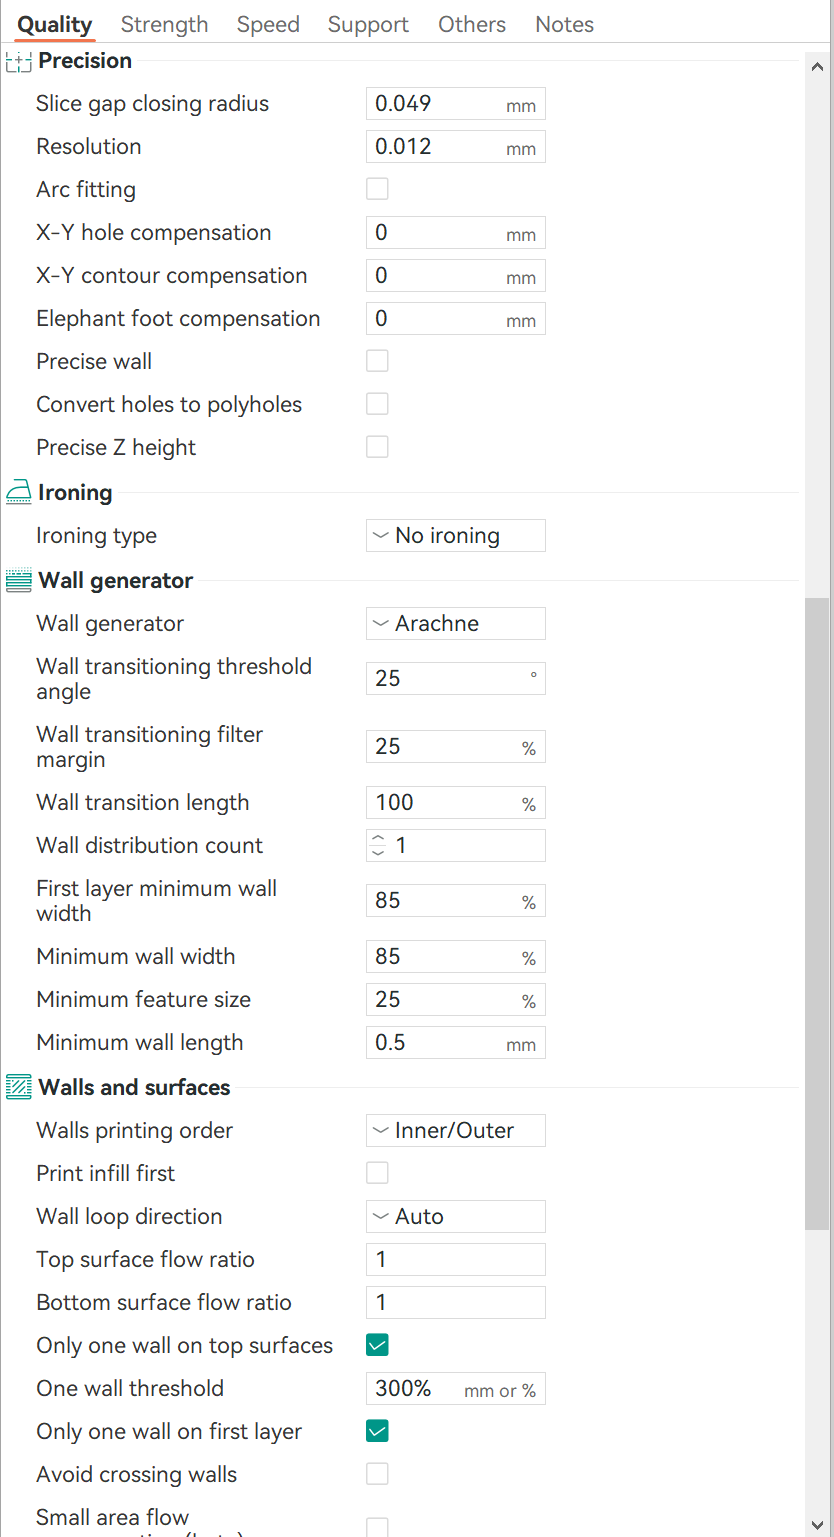
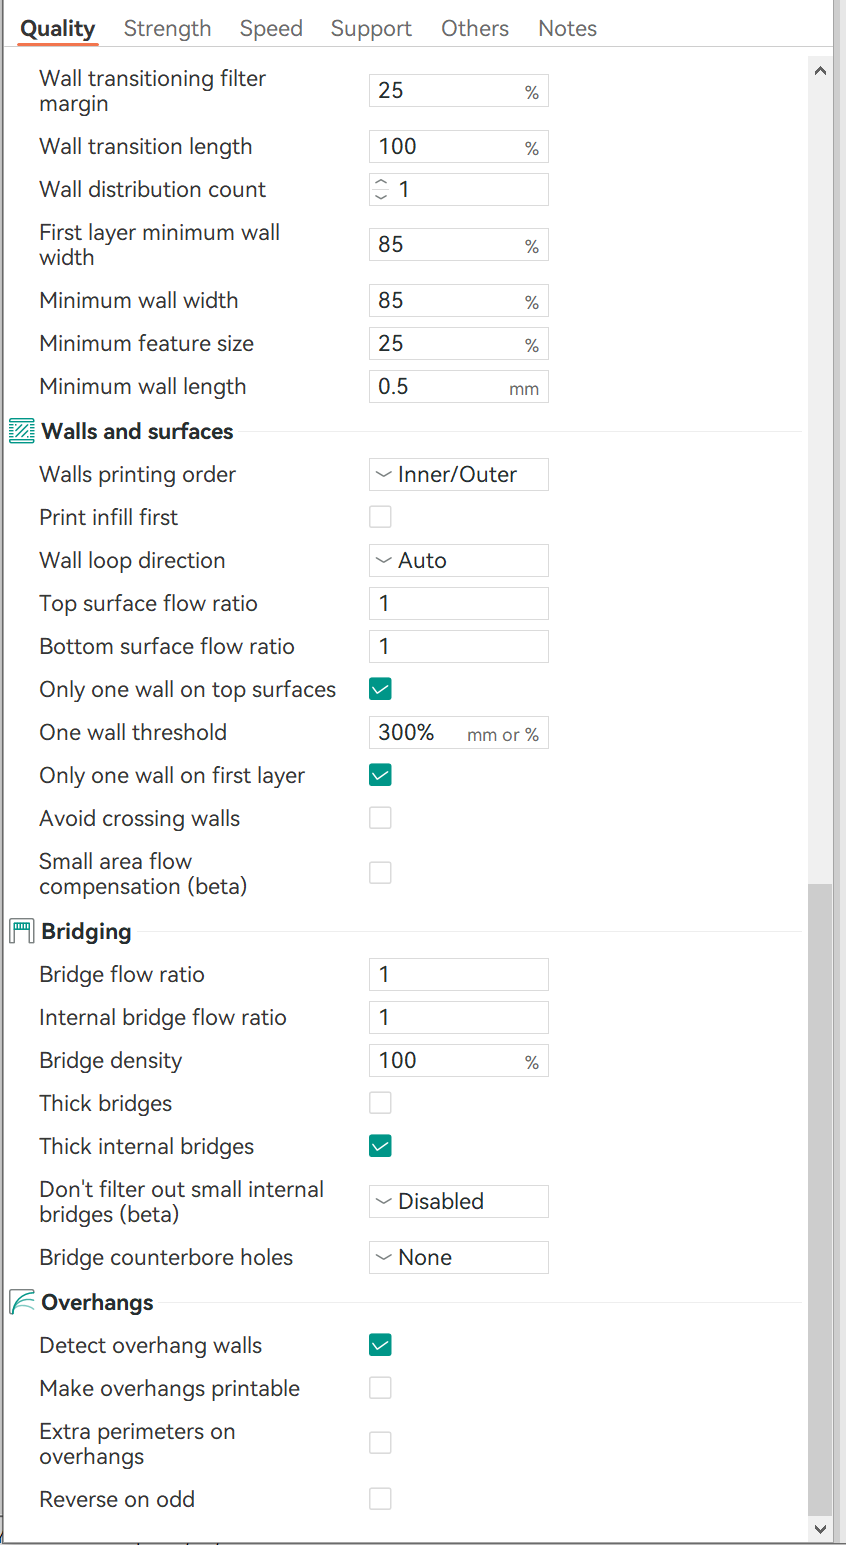
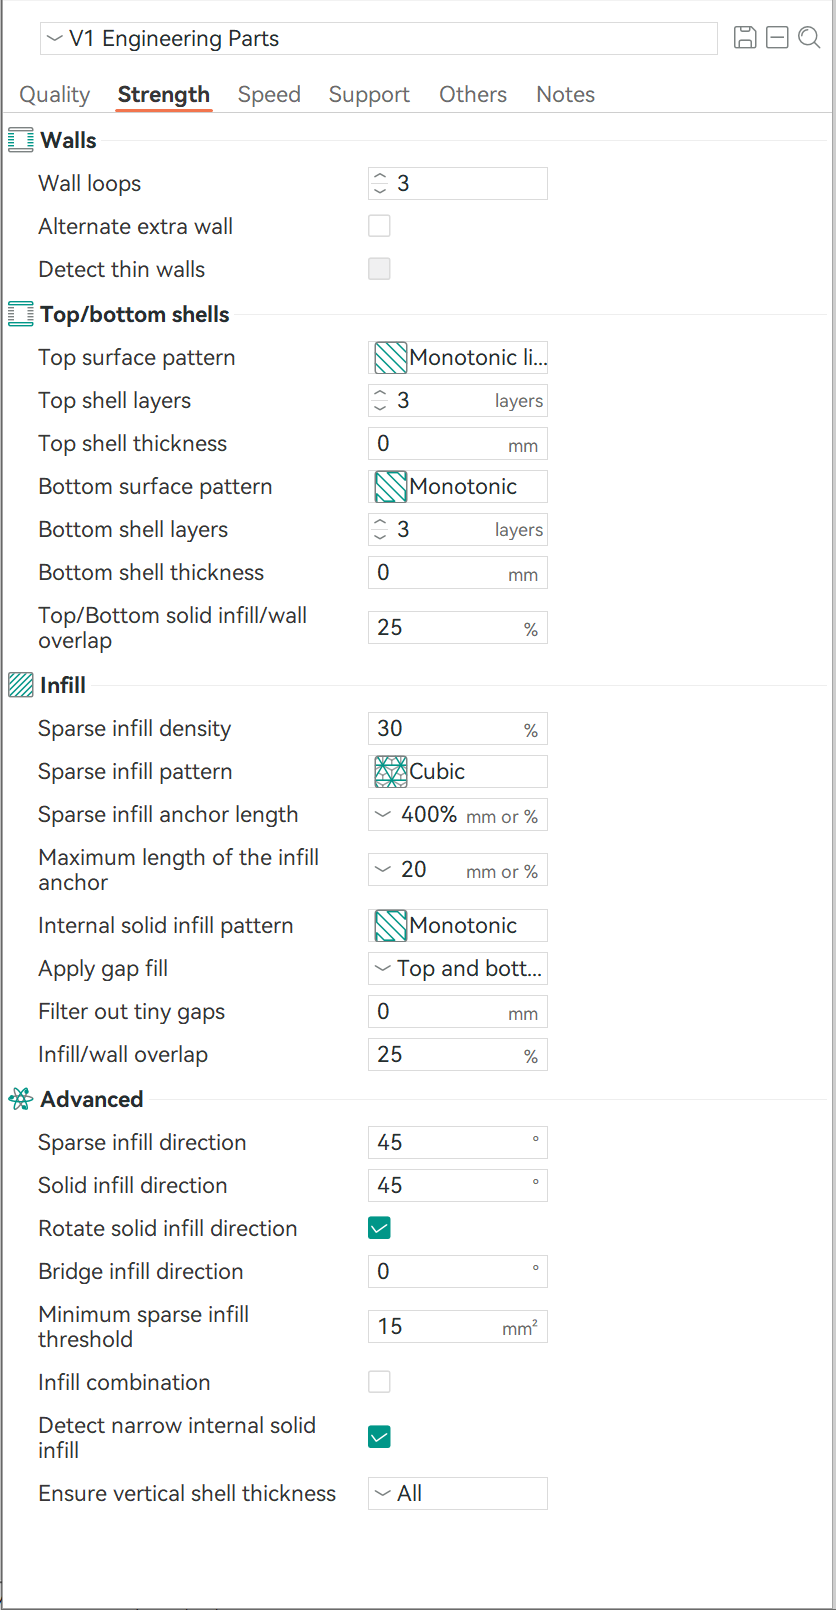
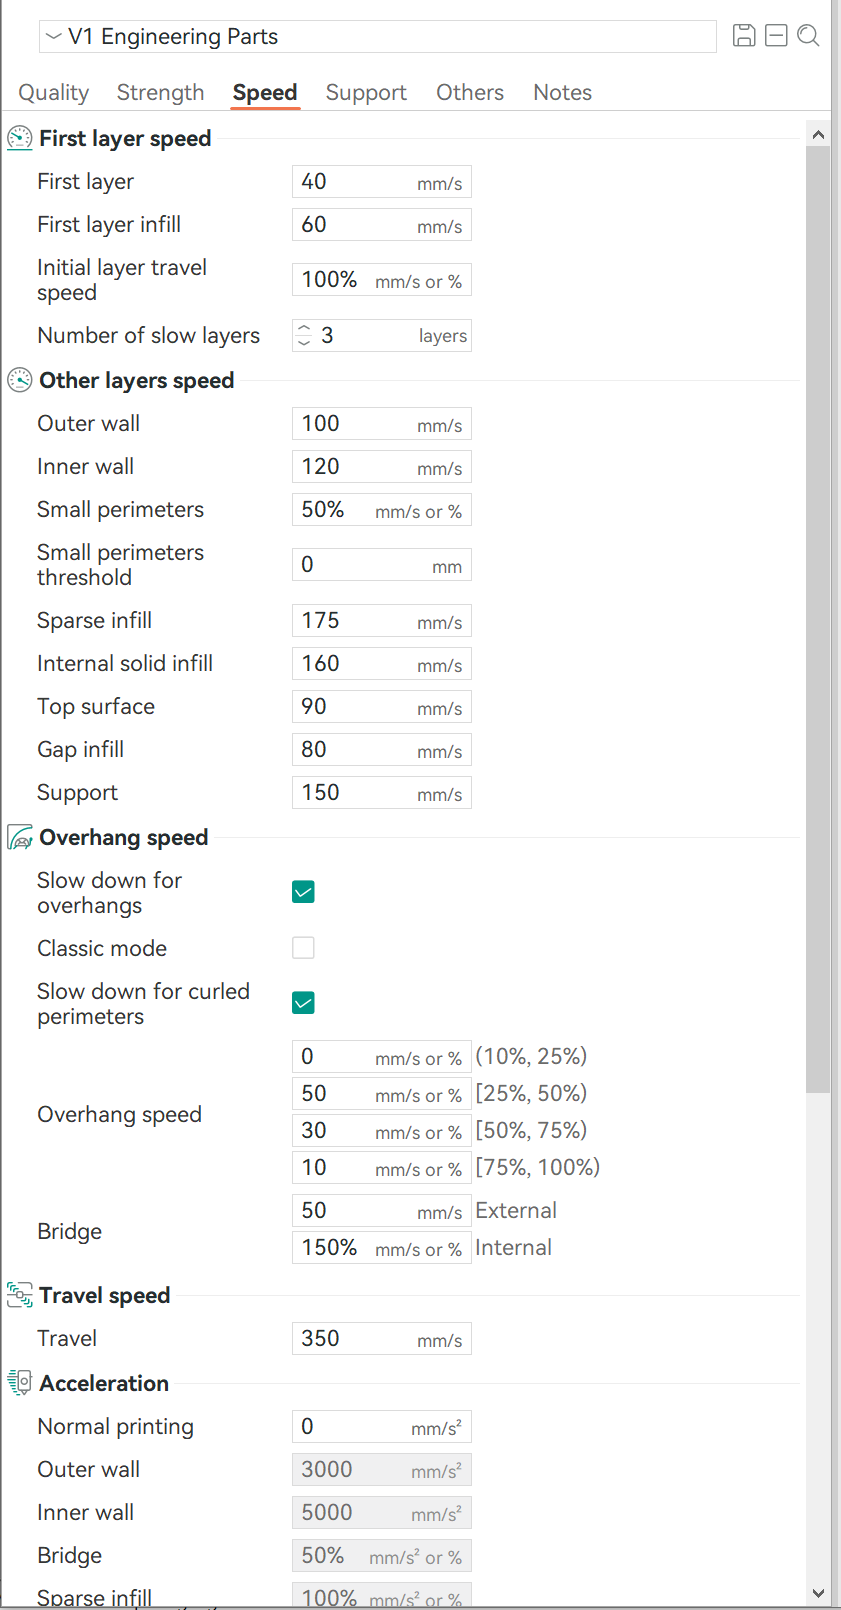
Then here is what I have under the different tabs. Use how you wish. Just offering a starting point that has worked well for me. (will be a few screen shots for each as I don’t know how to scroll and screen shot at the same time )
I don’t let the slicer do anything with accelerations. I have that set in firmware and can change on the fly if need be from mainsail. This also lets me run the same profile for both the V4 and the V5, while the V4 runs at 4k accelerations and the V5 at 8k
Everything else is just as needed stuff. I do run a skirt but thats optional and up to you. I also use @Michael_Melancon V1 Purge but that is set up in my PRINT_START macro
A lot of what I tune from the built in calibrations are per filament stuff. So just because you tune it for one, don’t think it will be the exact same for each one. “Usually” same brand same color you are good, but even same brand different color can need different settings so its best to take the time to tune each one individually. The time it takes sucks for sure, but the time lost and filament wasted to prints is far worse!
If you have any other questions dont hesitate to ask!
So today I discovered that the top mounted axel 345 wires on the print core had all but 1 broken off the connectors. The sensore is plugged into a pico and USB connected to the RPI.
Somewhere in assessing the situation a wire touched and the octopus shut down. The octopus is also connected to the pi by USB.
The sensor and the octopus are not connected. The octopus will not reconnect to the pi… ?
The pi can reboot. Klipper screen still has control. Ssh into the pi and running kiauh advanced option to see controllers and it shows the octopus… Wait. I didn’t see the pico on that. Maybe it is cooked. I’ll check that
Yep. Popped the pico. Commented it out in the config and it is up and running again. The adxl has been nonfunctional since the 5 has been in service. So don’t really need it…
but have a spare just because when you live by microcenter, buy them whenever I can because I can… but it didn’t want to flash. another day… EDIT: looks like I blew the ADXL and that is what is cooking the pico(s) because now 2 of them don’t work, but I have a spare one of those too, or at least I did, but need another pico. → probably need to start an electronics recycle center over here.
making a foaming dial soap adapter to put the dispenser in the vanity hole next to the new faucet… tinkercad for the win.
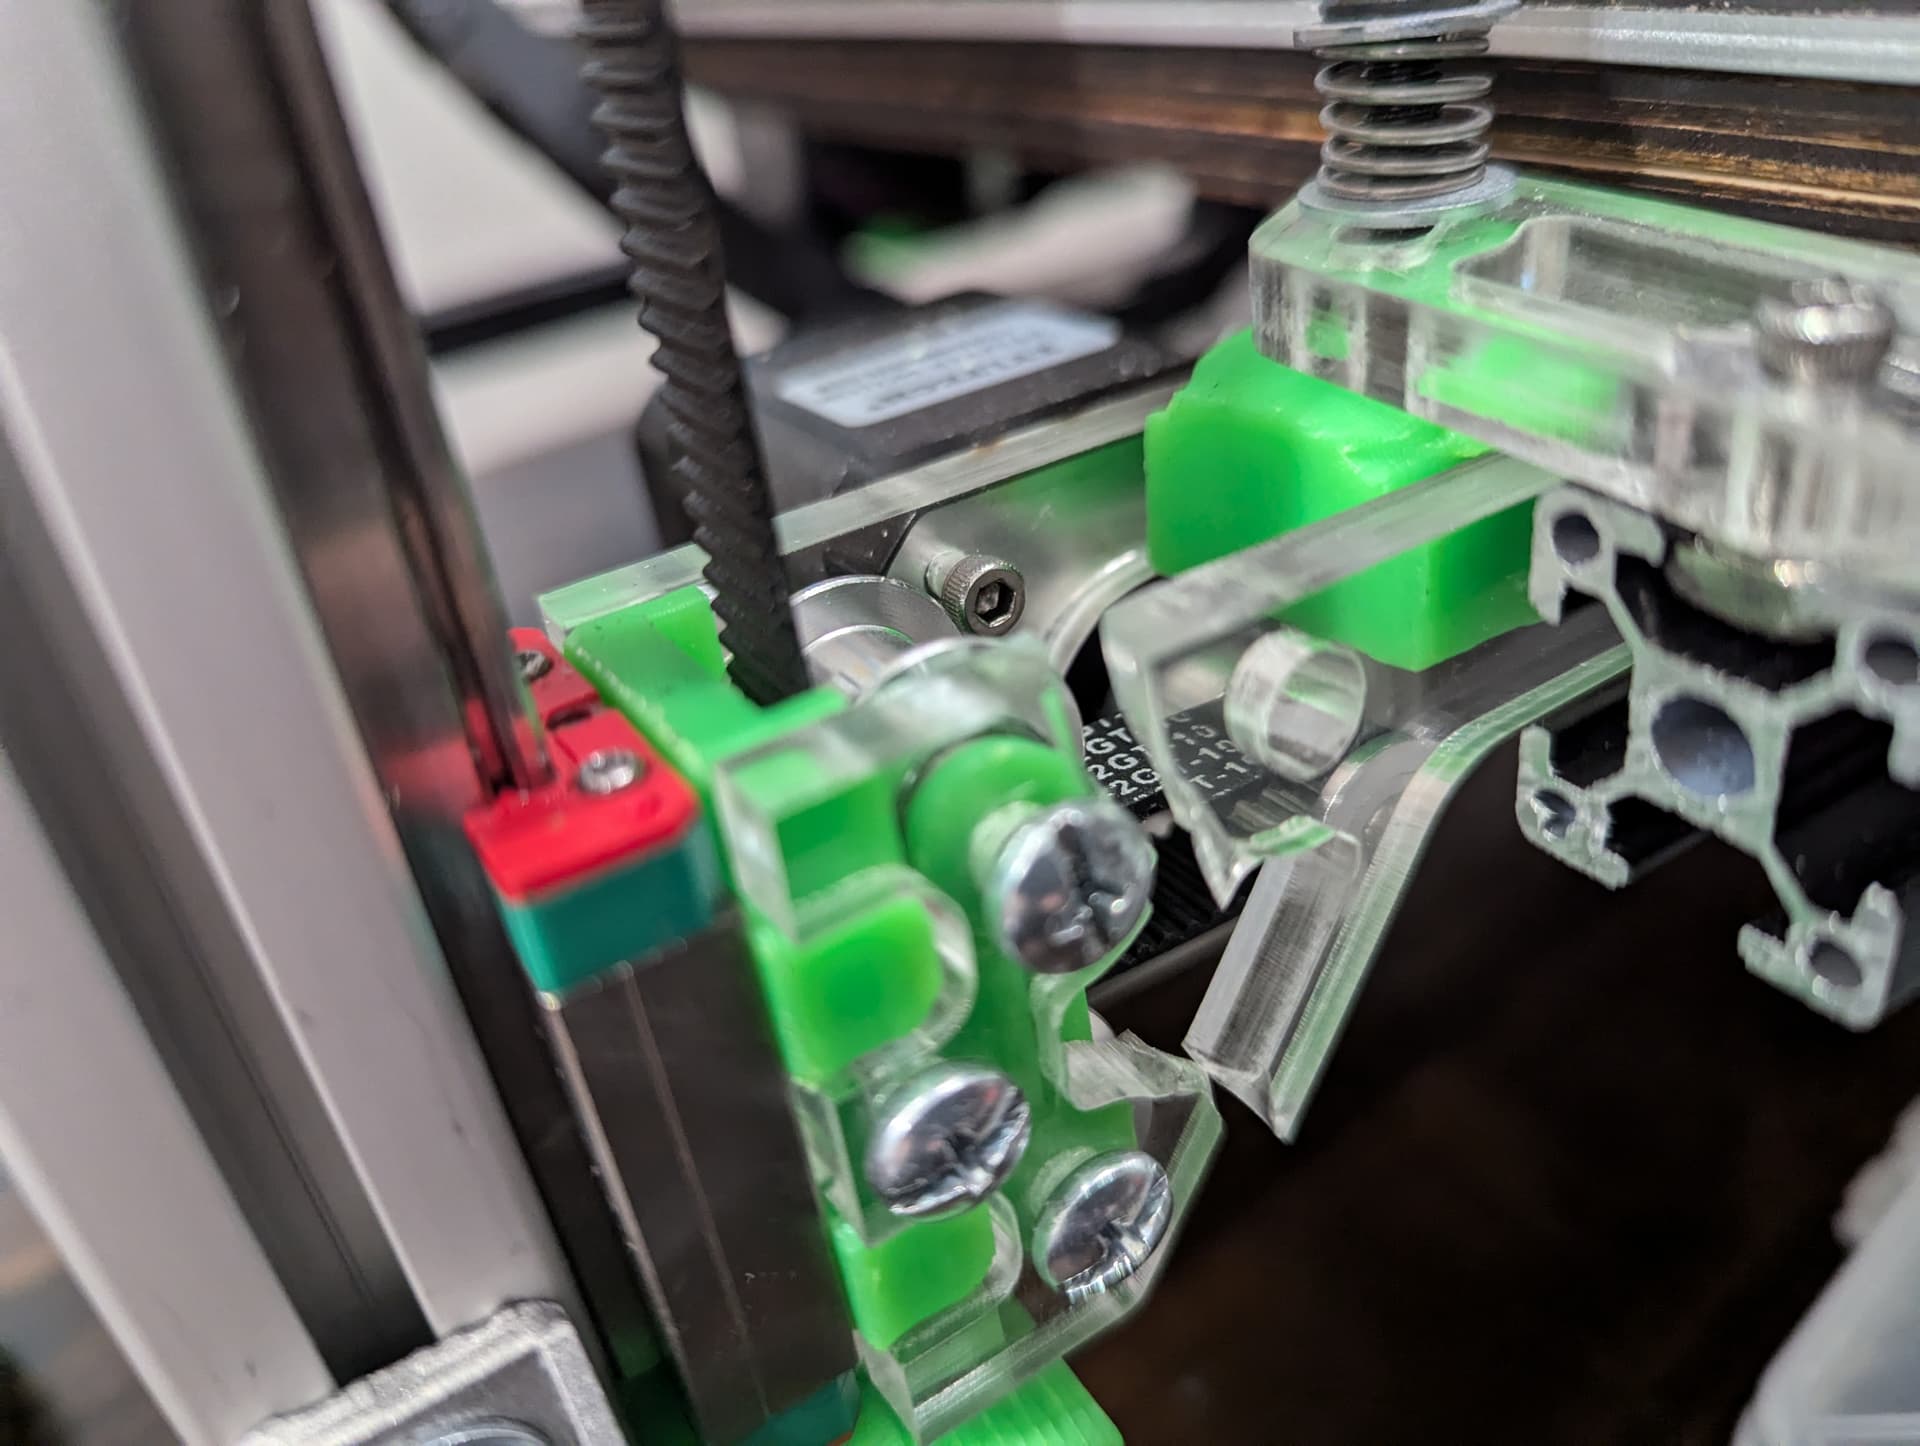
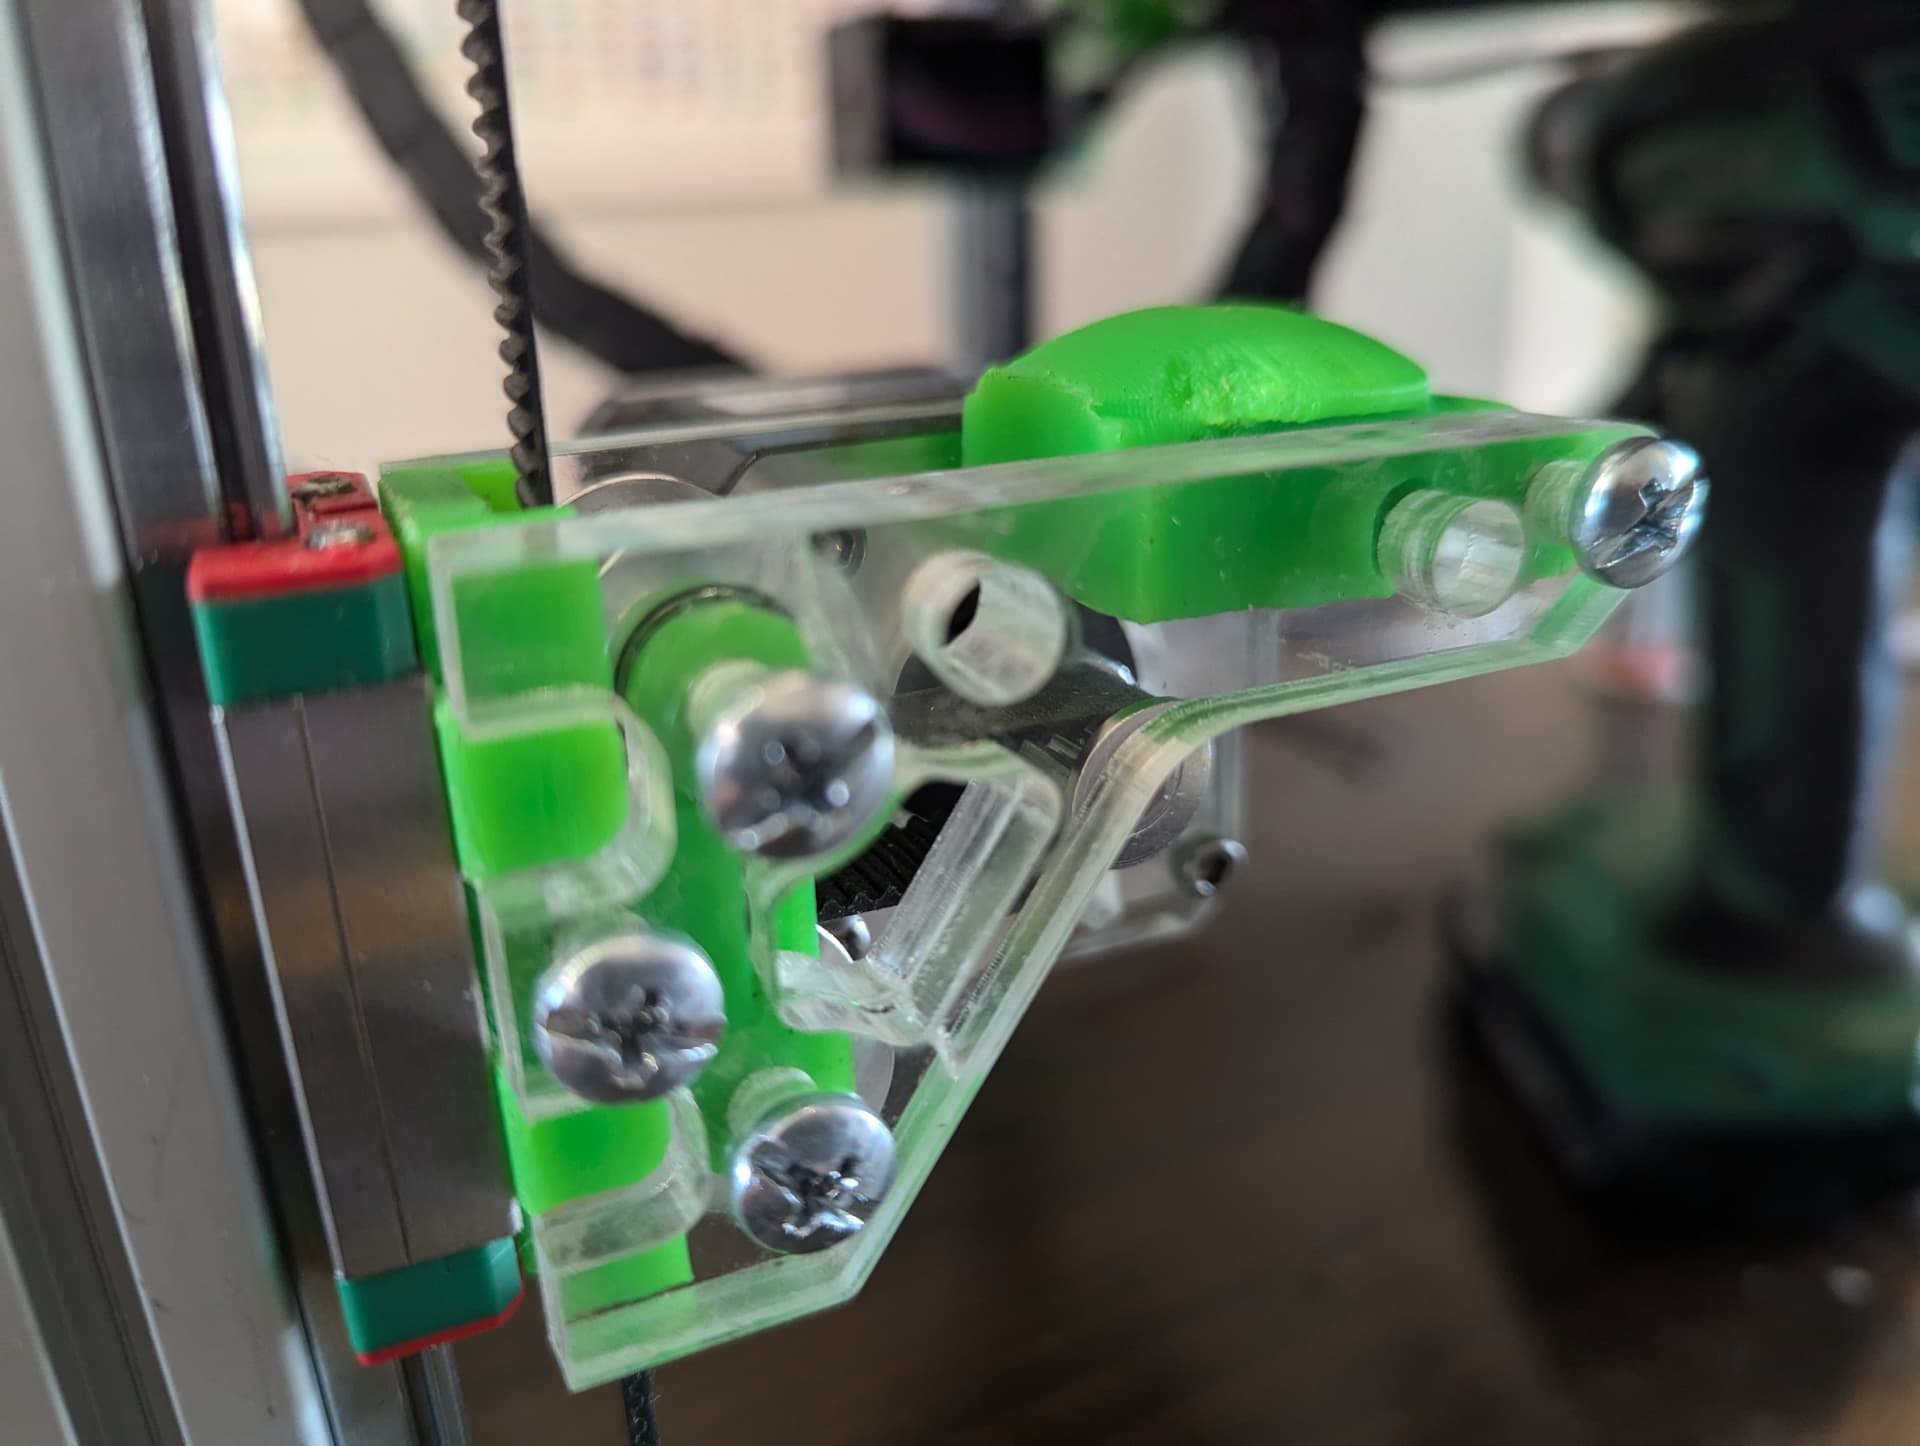
I broke one piece on the z motor. But it was not normal wear and tear, it was when that motor wasn’t wired correctly and went down instead of up with the others. I had cut another piece on accident, so had a spare.
I glued it right next to that broken piece rather than take it all apart and in hopes it would be stronger. It has been fine ever since. 1/4" acrylic is working great. It printed a full lr4 at up to 200 mm/s.
Oh and I ran out of 5mm bolts. So I used 10-24 on the whole thing. Was like $5 for a box of 2" at Menards. A Dremel cutoff wheel was used to cut the excess (before assembly)
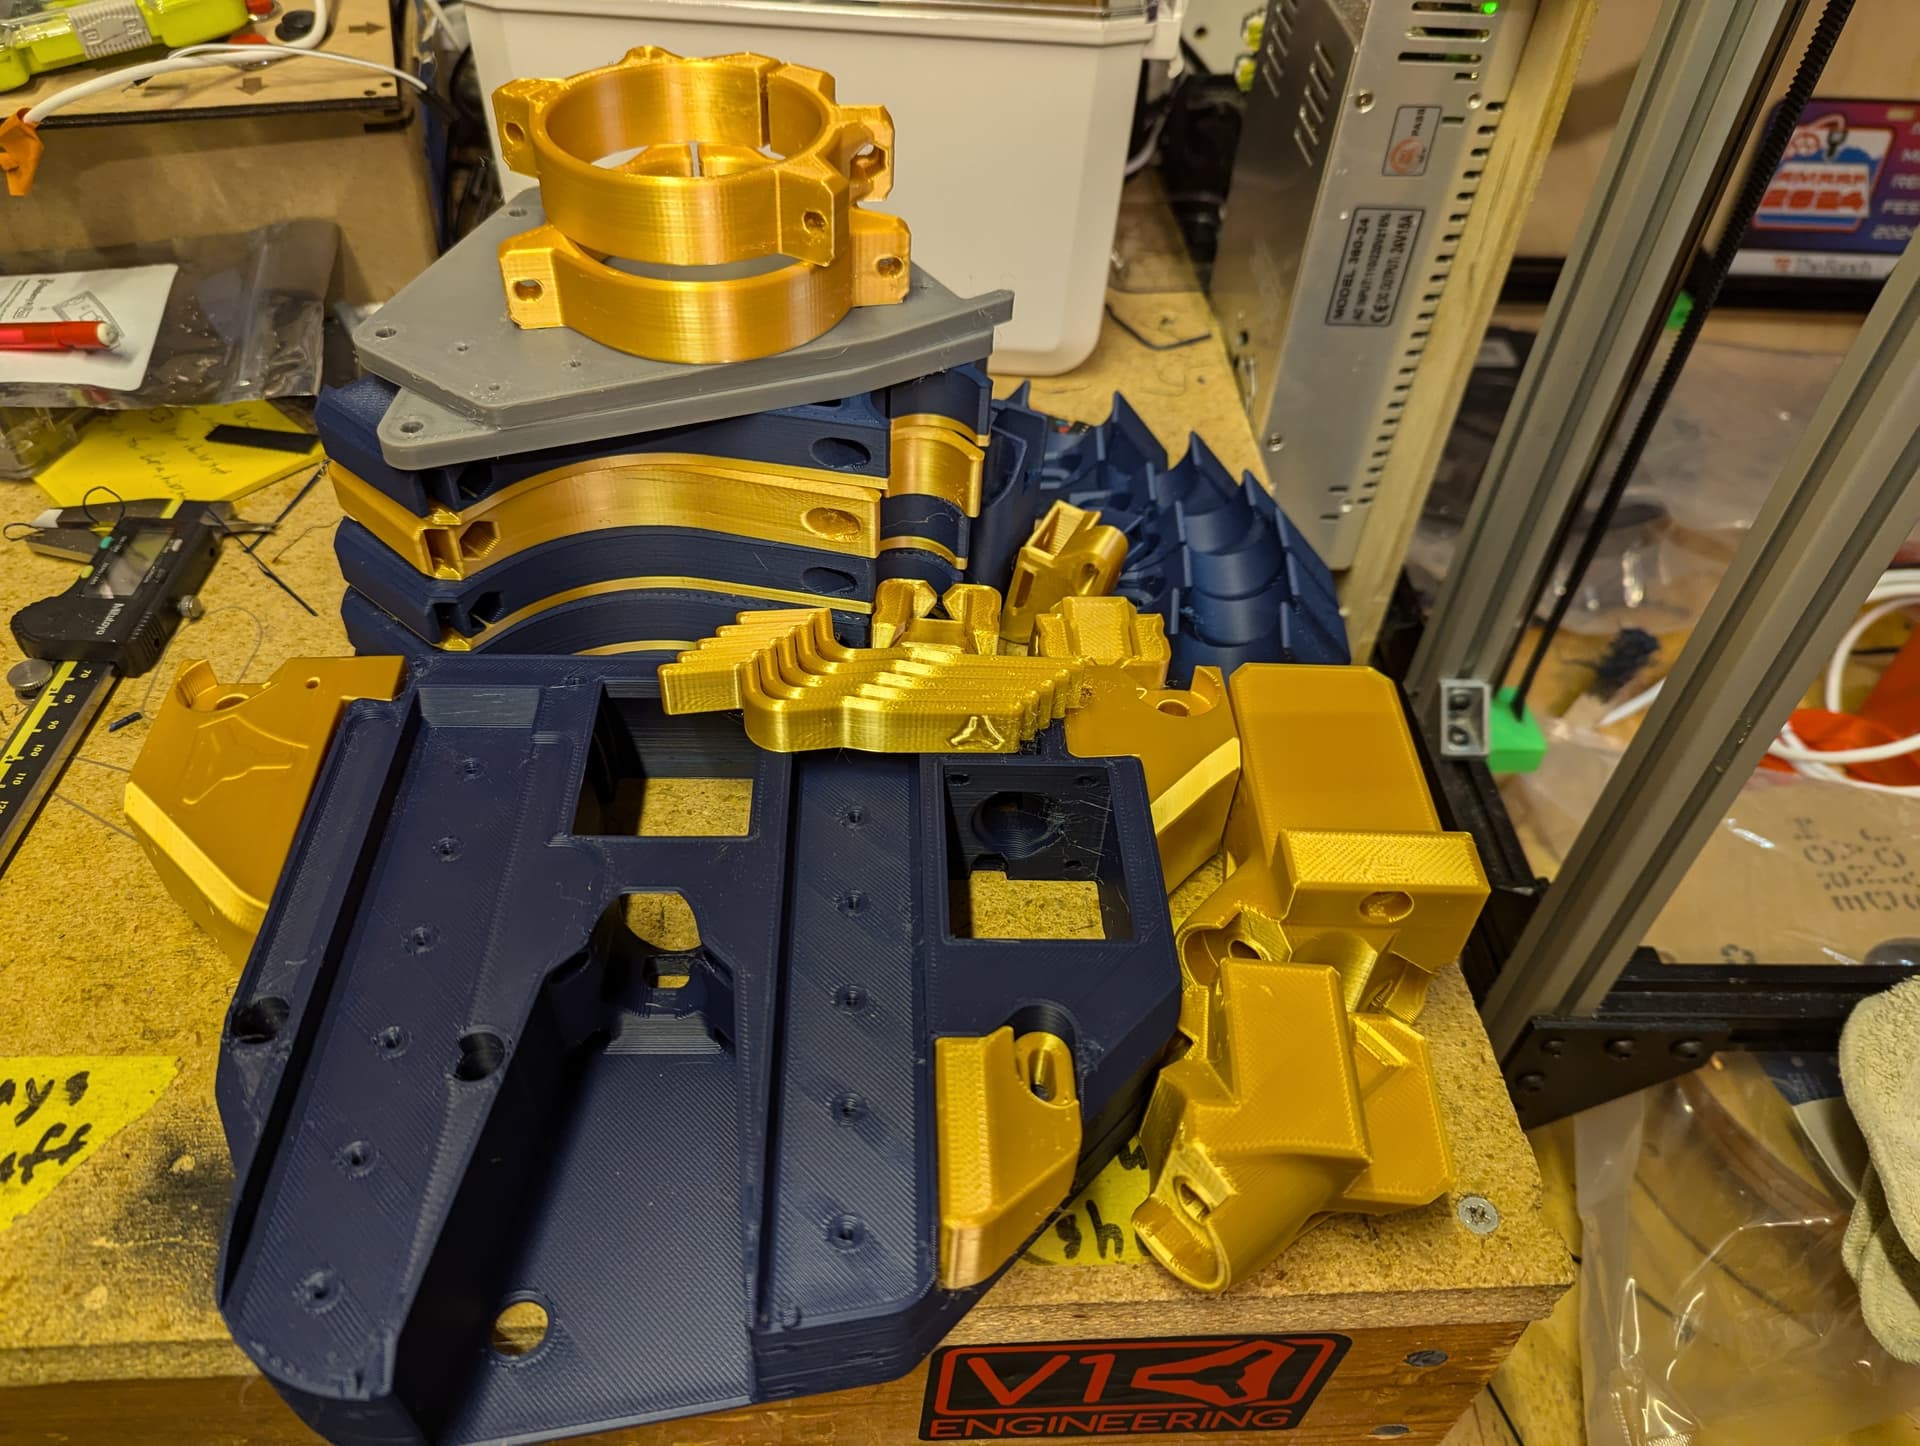
Yes. I cut the milled pieces for the mp3dp out of 1/4" acrylic with the CO2 laser because:
I had acrylic and not aluminum
I’m cheap
The laser was fast and easy
I have access to a laser and it doesn’t get used enough
I’m chicken when it comes to milling aluminum
I wanted to see if it would work.
It works very well. I imagine there was some weight savings on the y movement gantry with 4 of those plates being acrylic rather than aluminum. I don’t think it outperforms the aluminum machines, but have no proof either way.
I was tempted to cut acrylic plates for the LR4, but didn’t think that would be very informative at the time.
the only thing, as I browse your comments, I maybe would not have cut the openings in the parts. I see one cracked on you, wonder if that would have happened if you did not cut the voids.
looks good, are you getting the printing problems figured out?
The broken piece was an initial bad config problem. If I were to make another. I would do it again with the same parts. But manually home the system first and move motors smaller distances rather than pressing home all and praying they work.
Results are in the lounge on the brewers themed build. Calilantern calibration and orcaslicer tuning for the win. It is cranking parts now that are high quality and dimensionally accurate.
Thanks for the response. I’ve also got stacks of 1/4" acrylic offcuts and a laser. I cut plenty of aluminum and have plenty on hand, but the acrylic sure is faster, and I don’t know what to do with all of it!
Thoughts on 1/4 Polycarbonate vs Acrylic (instead of Alu plates for the V5 motion plates)? Any less likely to have cracked, or is 1/4" Polycarbonate too flexible?
Either way, could also use TPU/silicone washers to avoid bolt point pressure cracking the polycarbonate/acrylic?
Polycarbonate is tougher (more likely to flex vs shatter) compared to acrylic, but it isn’t laser friendly because lasering polycarbonate gives off HF fumes.
I want to be clear on the broken part. It was a setup problem. Not a material issue.
Am wondering about printing Polycarbonate parts, then milling 1/4" Polycarbonate plates. Then, using solvent weld and the usual bolts during assembly? With thin TPU washers to reduce risk of bolt/nut point pressure causing cracks.
Wondering if printed PC + milled PC combo would be fast to mill, and mechanically good at the end?
I tied the 4 part Y into the entrance side of the SFS. Apparently this is a bad idea, but shhh I think with klipper I should be able to turn off the SFS to switch filament.
Bill at 3dchameleon shared a “pro” upgrade at RMRRF that would include:
oled display to visually see what mode the system is in (I don’t need this, I’m using the octopus)
runout sensors for each input. This is of great interest. I bought a set, but can’t find the model now for it.
automatic filament cutter. Need a servo for this. I want to mount it on top of the hot end.
extruder position sensor. This is an encoder on the back side of the motor. I’ve not been able to find any additional information about this other than i’ve seen one and it is in a couple videos. I’ll keep after it.
since I purchased the kit in November, it has been released as open source and can be found here.
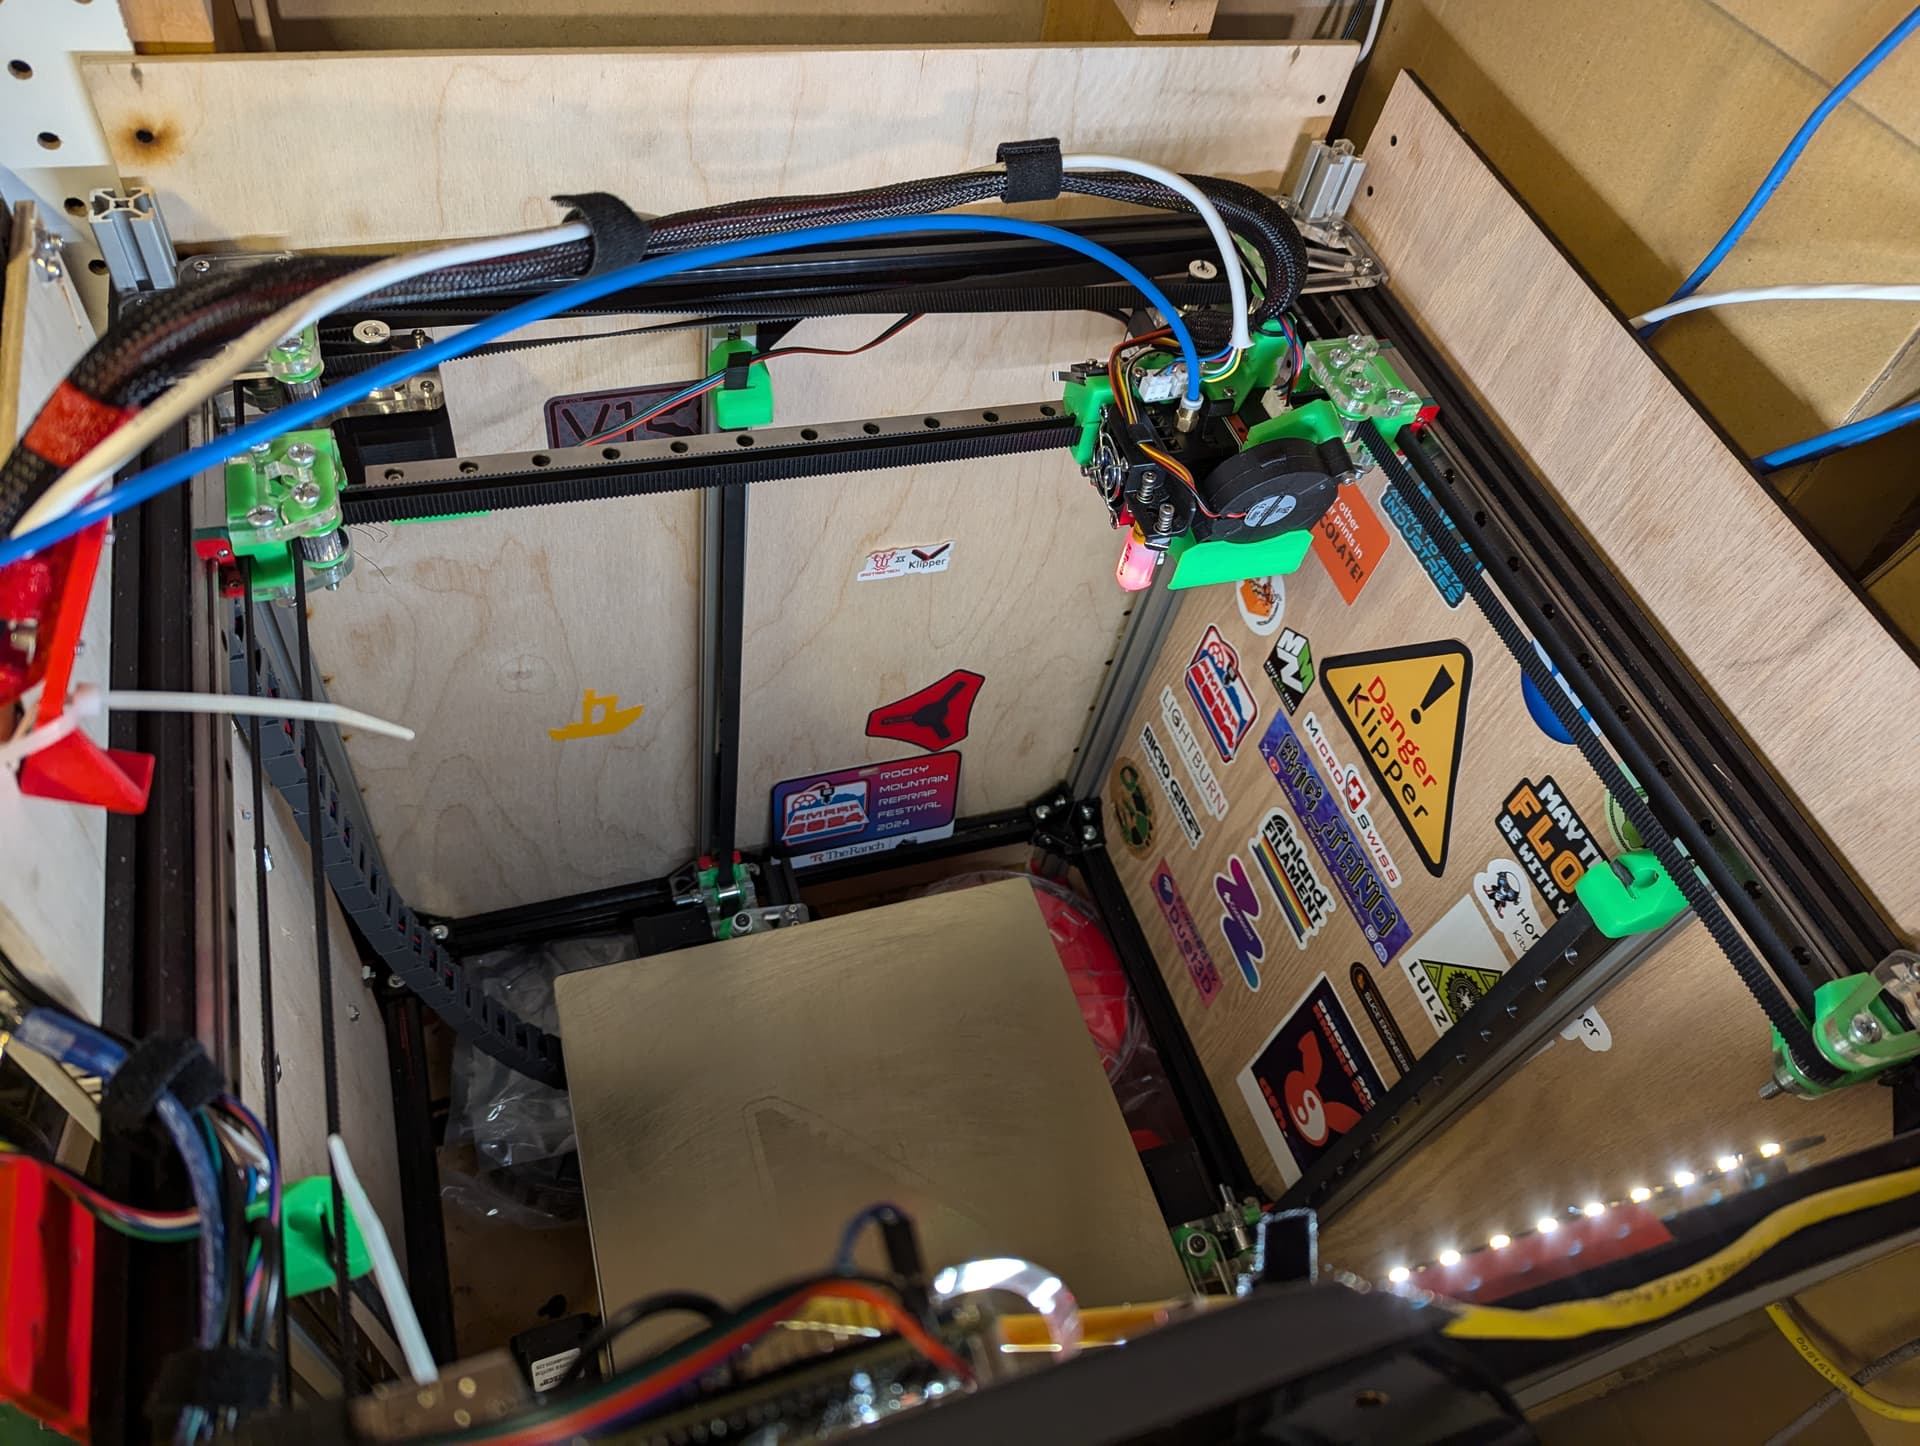
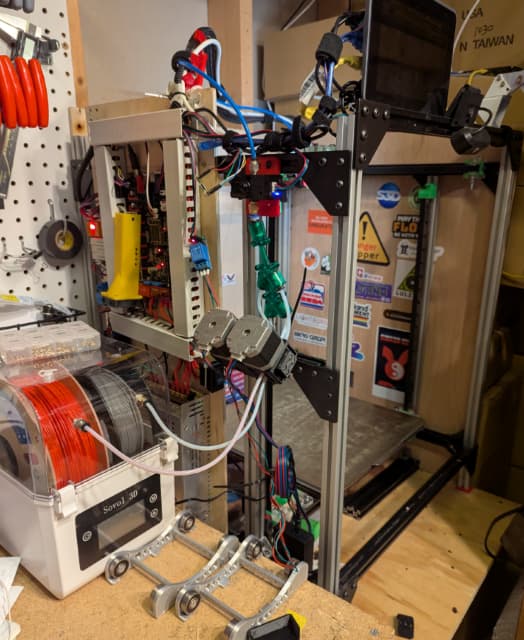
As you can see from my photo, the 3dchameleon motors are mounted on the side just below the Y merge piece which connects to the smart filament sensor (SFS) that is connected to the same reverse bowden tube that has been used with this printer since it was calibrated as a V5 in August.
The short tube length from the motor to the Y is of possible concern, but time will tell if that is a dealbreaker or not. The 3dchameleon came with 3 teflon tubes 1 meter long between the extruder and the Y, but I think a meter of tubing as installed on the kit was excessive, but it is nice to now there is enough to change lengths should it need to be reconfigured. The input to the extruder setup is from a dry box located right next to the printer. The 3dchameleon came with several extra tubing connectors, so a couple were installed in the dry box ahead of the extruder. My hope is to get this to run 2 colors and then go from there.
The 3Dchameleon control board with its two drivers is not connected at all. I found this github site with klipper code to set up the spare 2209 drivers on the octopus board.
# channel 7 on octopus.  goes to left motor as mounted on frame with output to Y pointed up
[tmc2209 manual_stepper selector]
uart_pin: PD3 # @ CS pin
#uart_address:
run_current: 0.4
hold_current: 0.4
interpolate: False
stealthchop_threshold: 0

[manual_stepper selector]
enable_pin: PE0
step_pin: PE6
dir_pin: PA14
microsteps: 16
rotation_distance: 2

#------------------------------------------------------------------------------------------------------

# channel 6 on octopus.  goes to the extruder that pulls/pushes filement to Y above it
[tmc2209 manual_stepper chameleon]
uart_pin: PE1
run_current: 0.4
hold_current: 0.4
interpolate: False
stealthchop_threshold: 0


#S7
[manual_stepper chameleon]
enable_pin: PD4
step_pin: PE2
dir_pin: PE3
microsteps: 16
rotation_distance: 34.408602151 # reverse computed from the ESteps value
The full config will be included below once it is functional. Macros included in this config file called by printer.cfg are in the github link above.
With everyting plugged in, klipper starts ok, but tool init macro runs, z drops, the extruder runs quite a bit, and then x moves back and forth. That isn’t quite right.