That would be awesome. Ideally, if there was options for start of layer and end of layer, that would be really flexible. Even if there was just a comment for each layer, that would greatly simplify any post processing.
You could add a motor to slide the back motor left and right, raise and lower the egg, and maybe even add an automatic pen changer. ![]()
What you need is a pressure sensor as an endstop so you can use a stepper for the clamping mechanism. Then some type of roller assembly for getting eggs on/off the device.
Or just set the amps low enough so it skips steps before crushing the egg.
Um, yeah. Have you ever tried to crush an egg in that axis?
I’d be dubious the steppers even at max current could do it.
I remember being in school and we learned about this - I told my uncle about how crazy strong eggs are and we couldn’t break them and he should try if he didn’t believe me.
‘I play a lot of squash so I’ve strong shoulders’ I remember him saying. Fingers locked, egg between his palms - over the sink so it wouldn’t make a mess. And he couldn’t do it. Hah, that was 40 years ago and I can still see his face, funny what you remember.
3 Likes
I suppose but its still a question of how fast can you crash it into the egg. It’s strong but a light tap will crack it.
For the pen from the side absolutely, but clamping top to bottom I don’t think crushing it is a concern.
1 Like
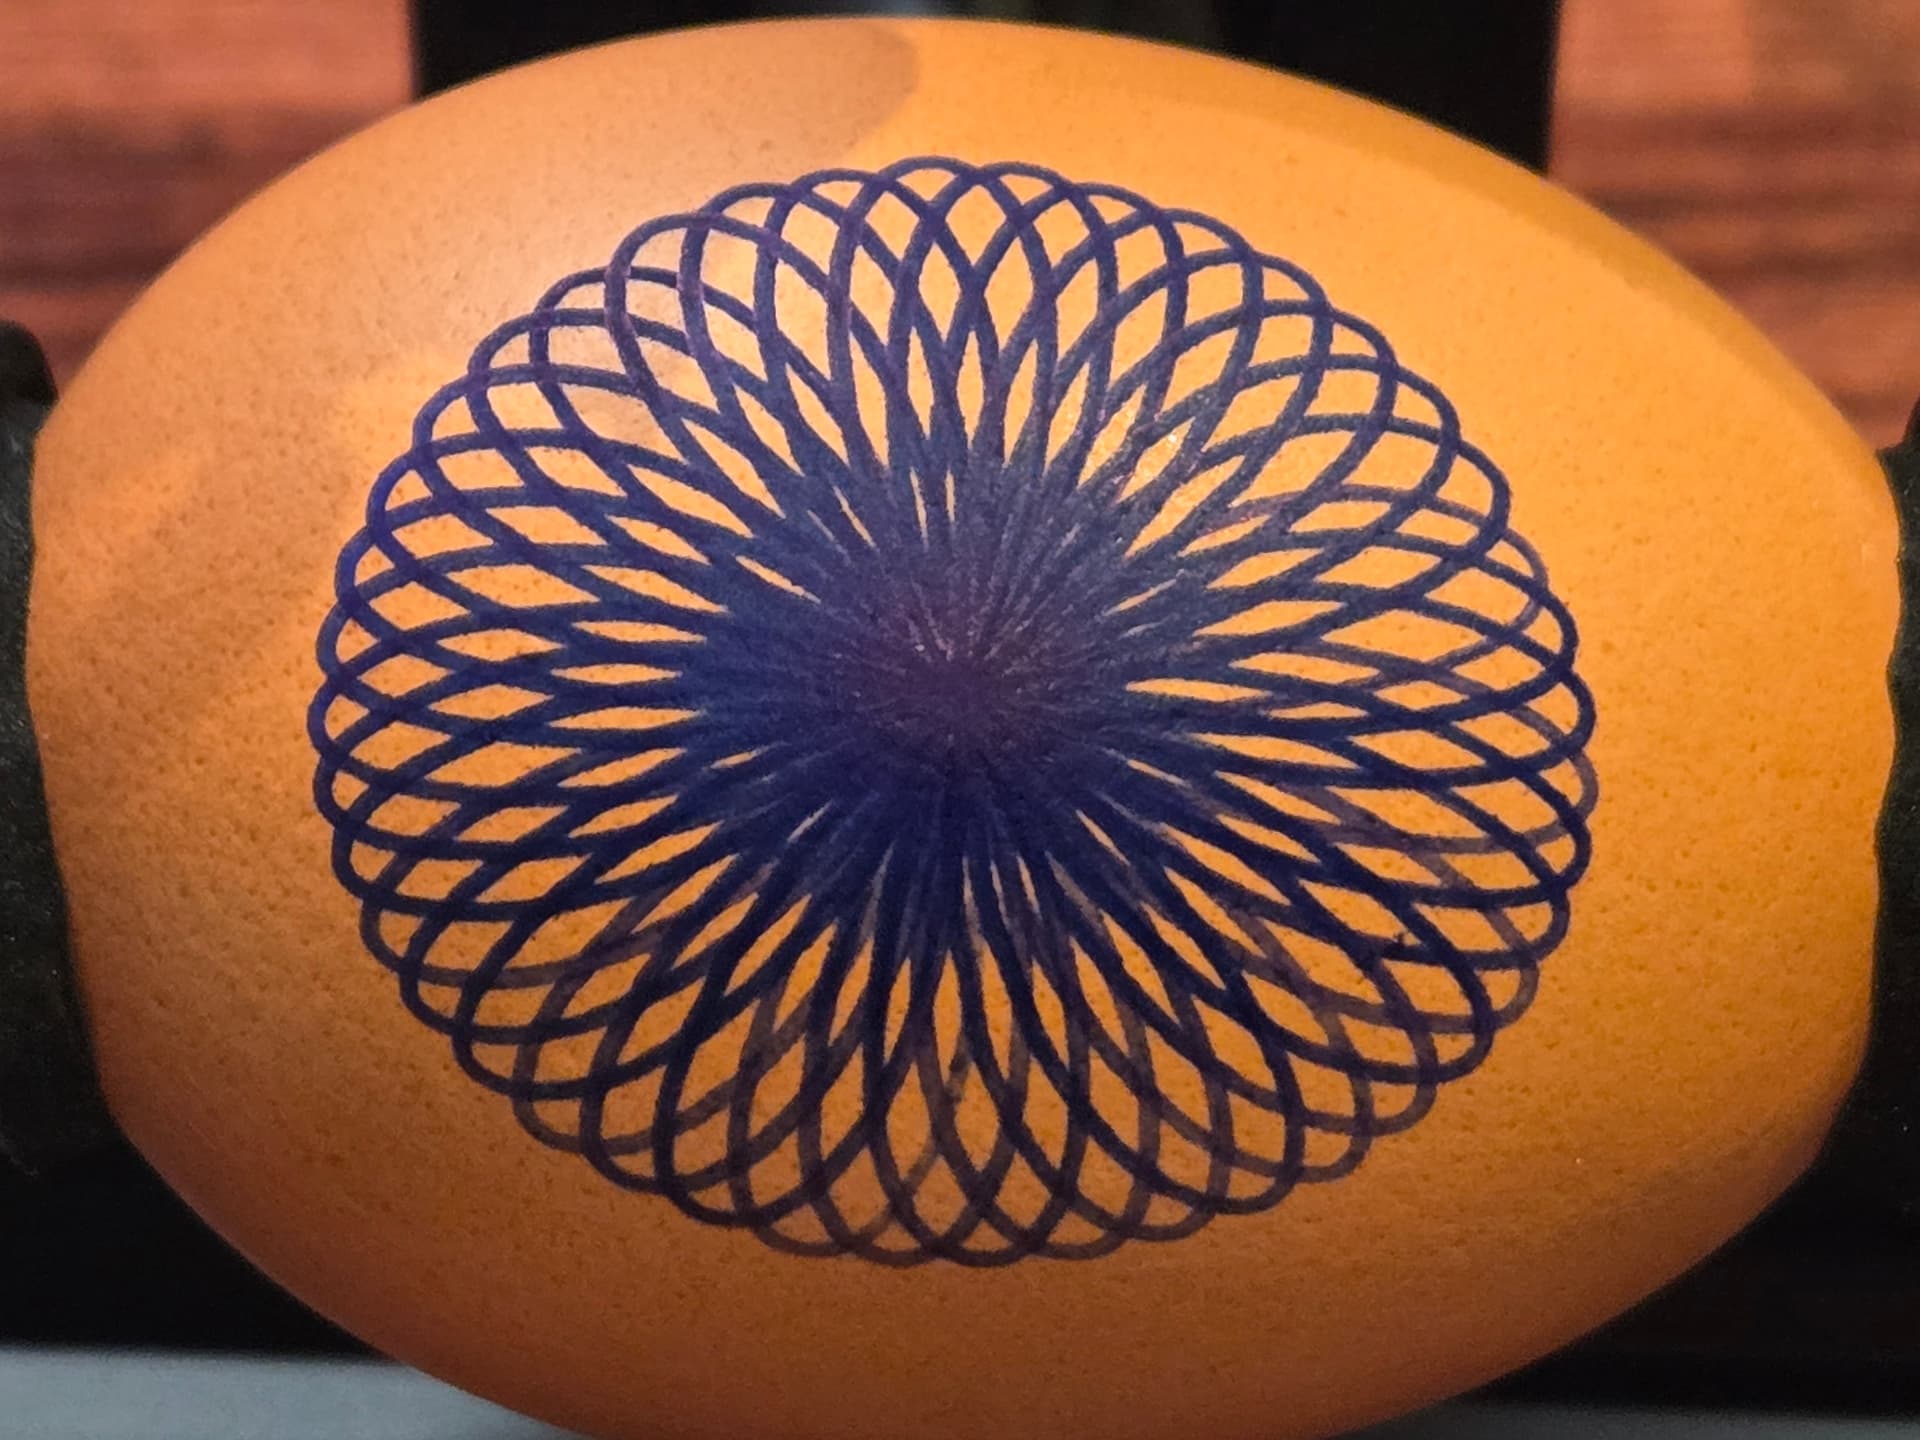
This is a Sandify pattern with a loop. It’s a bit too dense in the middle but the alignment is pretty good. I also did it with 3 colors but lost some alignment during the pen changes.
I need to eat more eggs so we buy more eggs so I have more eggs to draw on.
3 Likes
You need to get you some chickens ![]() then you will have your own personal egg factory
then you will have your own personal egg factory ![]()
This is a real cool thing you have though. Its been neat to follow along!
1 Like
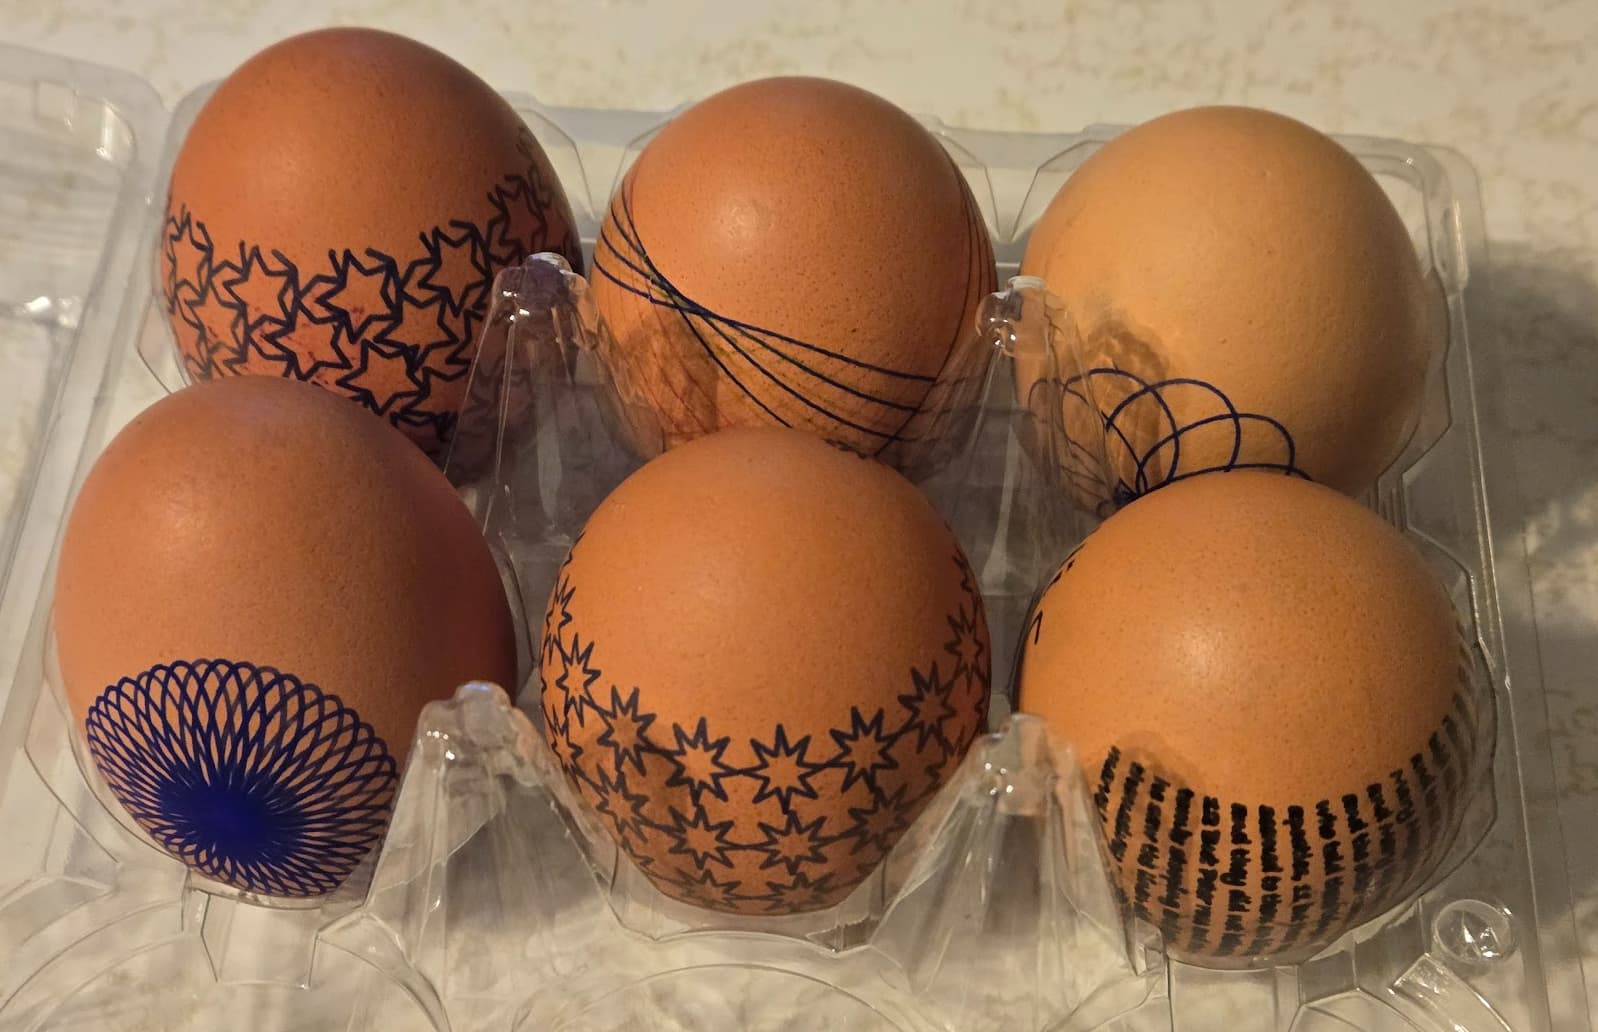
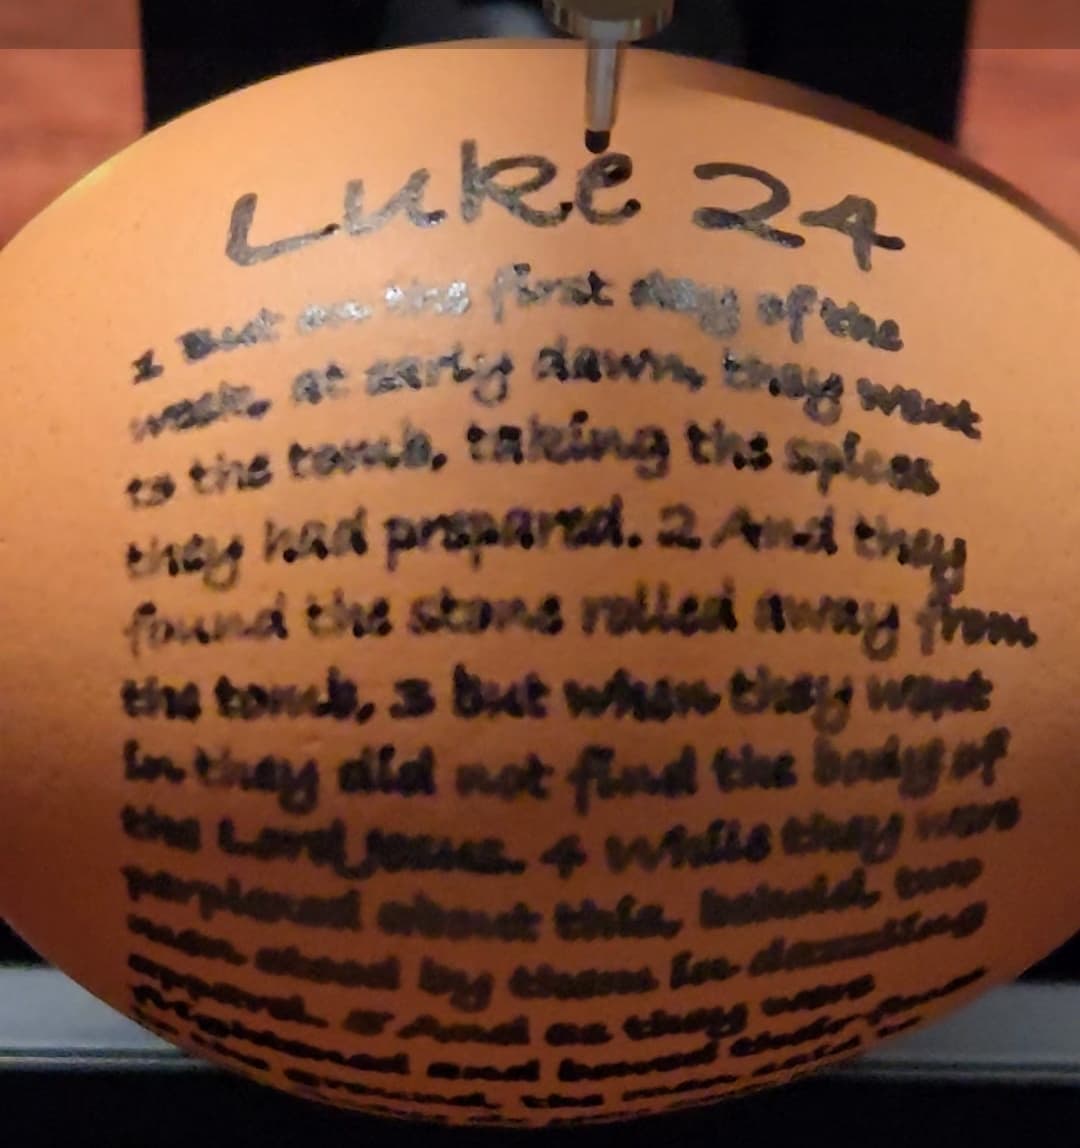
Very nice Jason. What verse is on the lower right egg?
Have you tried a cross design yet?
Luke 24. I think 1-13.
No. I was looking at some SVGs but didn’t land on anything. This weekend we’re dyeing and drawing on eggs with my daughter. So, still figuring out what that will be.
2 Likes
It’s amazing you can get that much text on an egg.
1 Like
Depends on the strength of the egg.
One of our chickens lays rather fragile eggs. Her egg’s shells are noticeably thinner than the other chickens.
My pen/laser controller arrived today. I have been too busy to get parts printed ahead of time, but plan to do that tomorrow. Now that you have made some adjustments, would you recommend sticking with the stock ESP32 Wifi Eggbot @Dreyfus posted or do you have some recommended adjustments? I am comfortable making basic adjustments to the STLs.
I made changes to a bunch of the pieces, some because they didn’t fit right (not sure if my printer or the part but anything that needed to slide onto the stepper was too small) and some because I used different parts (like 2020 extrusion instead of 2060, M3 screws to attach to the extrusion, and an LM4UU bearing with 4mm rod for the sliding part). I’m not satisfied with the round parts that hold the egg. I made them larger and used neoprene to pad them but that doesn’t stick. It works well enough but definitely room for improvement. The thing I really like about that design is that I can modify these small parts individually making it really easy to iterate.
I plan to refine this in the future. My changes are not in a good state for sharing, but here they are anyway in case it helps (STL and FreeCAD files).
EggbotMods.zip (6.1 MB)
1 Like
My big green one used O-rings in the egg holders and that seems to work fairly well. The little one I built was designed to use cast silicone egg holders - I never bothered to try and make any (and wasn’t going to order them) but it seemed like it may be worth trying.
I also have a manual egg lathe and it uses deep cups with donuts of foam rubber / neoprene so they can deform around the egg and hold it - that also works fairly well.
I experimented with a bunch of things I had laying around one year when I whipped up a homemade egg lathe and none of the materials I tried worked very well…but that was before I had a 3D printer and I was using things like 2 liter bottle caps with chunks of foam hot glued to them ![]()
1 Like
so how does it know the curve of the egg? Are all eggs curved the same?
I thought the “wonky” letters was because you were putting a flat item on a curved egg, but you proved that wrong!
For now I’m going with what I have since it works ok. I tried some O-rings a bit. I may revisit that. I also want to try printing something with TPU. I’ve been looking for a reason to buy some.
The pen itself is just held down by gravity so it can move up and down as needed. You still want to try and position the back stepper so that the arc of the pen tries to match the egg.
2 Likes
Great insights. I’ll see if I can get it printed up and put together this evening. Then we’ll figure out the software side of things.