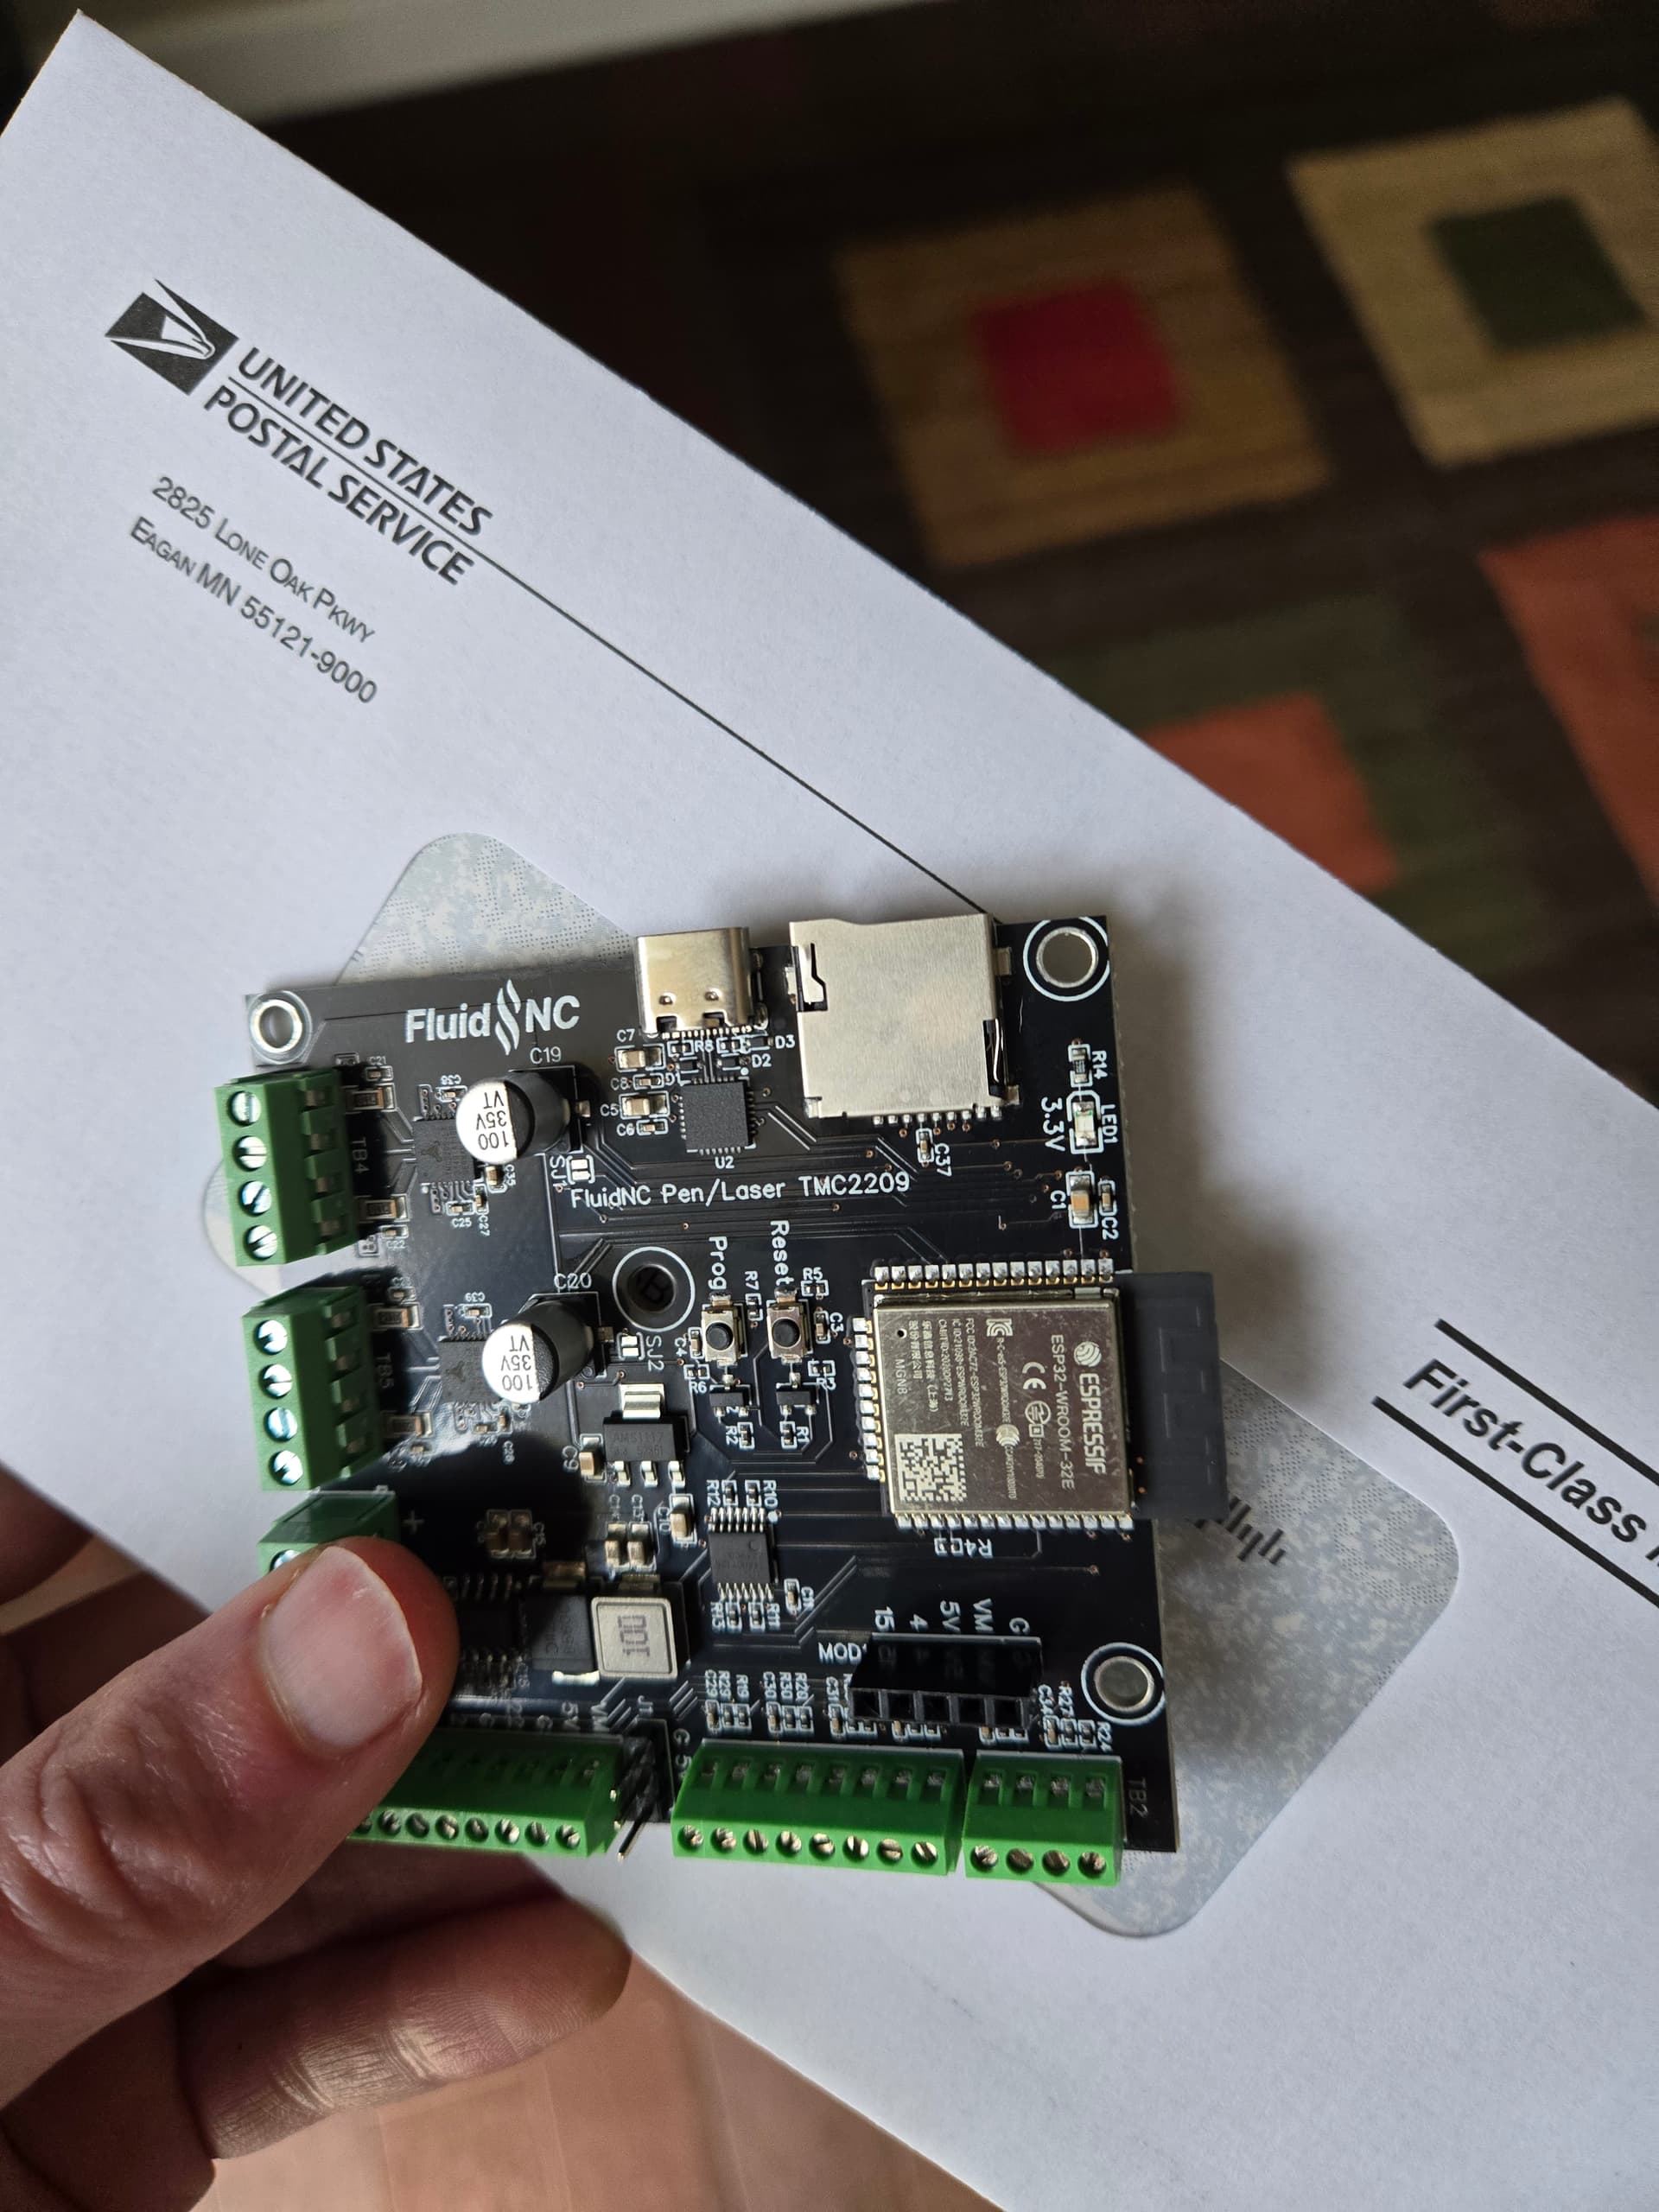
It would have been helpful if I started this sooner but there is no time like the present. My goal is to make an egg bot/painter/sphere-o-bot/eggduino using Bart’s FluidNC pen/laser board. That can drive the 2 steppers and servo. A Jackpot would be overkill.
I’m looking for some advice/suggestions.
Has anyone done this with FluidNC? It seems that most use the Eggbot specific board. I didn’t like the price of that or the fact that it seems to not use normal gcode. There are Arduino GRBL based versions as well. I generally know how to set up the config.yaml. Software wise it will be a little interesting since the Eggbot Inkscape extension seems to be a common way and I don’t think I can use that. But getting an SVG to gcode isn’t a big deal. Optimizing it could be interesting.
Any recommended plans? I’m hoping to not have to buy much more, if anything. I was looking at some 3D printed ones. If I had more time, I’d roll my own and still might do that in the future, but for now I’d rather spend my time dealing with the FluidNC and gcode side.
But redrew it in onShape to make a few small changes:
And then added some legs to it which really made it a lot nicer to use:
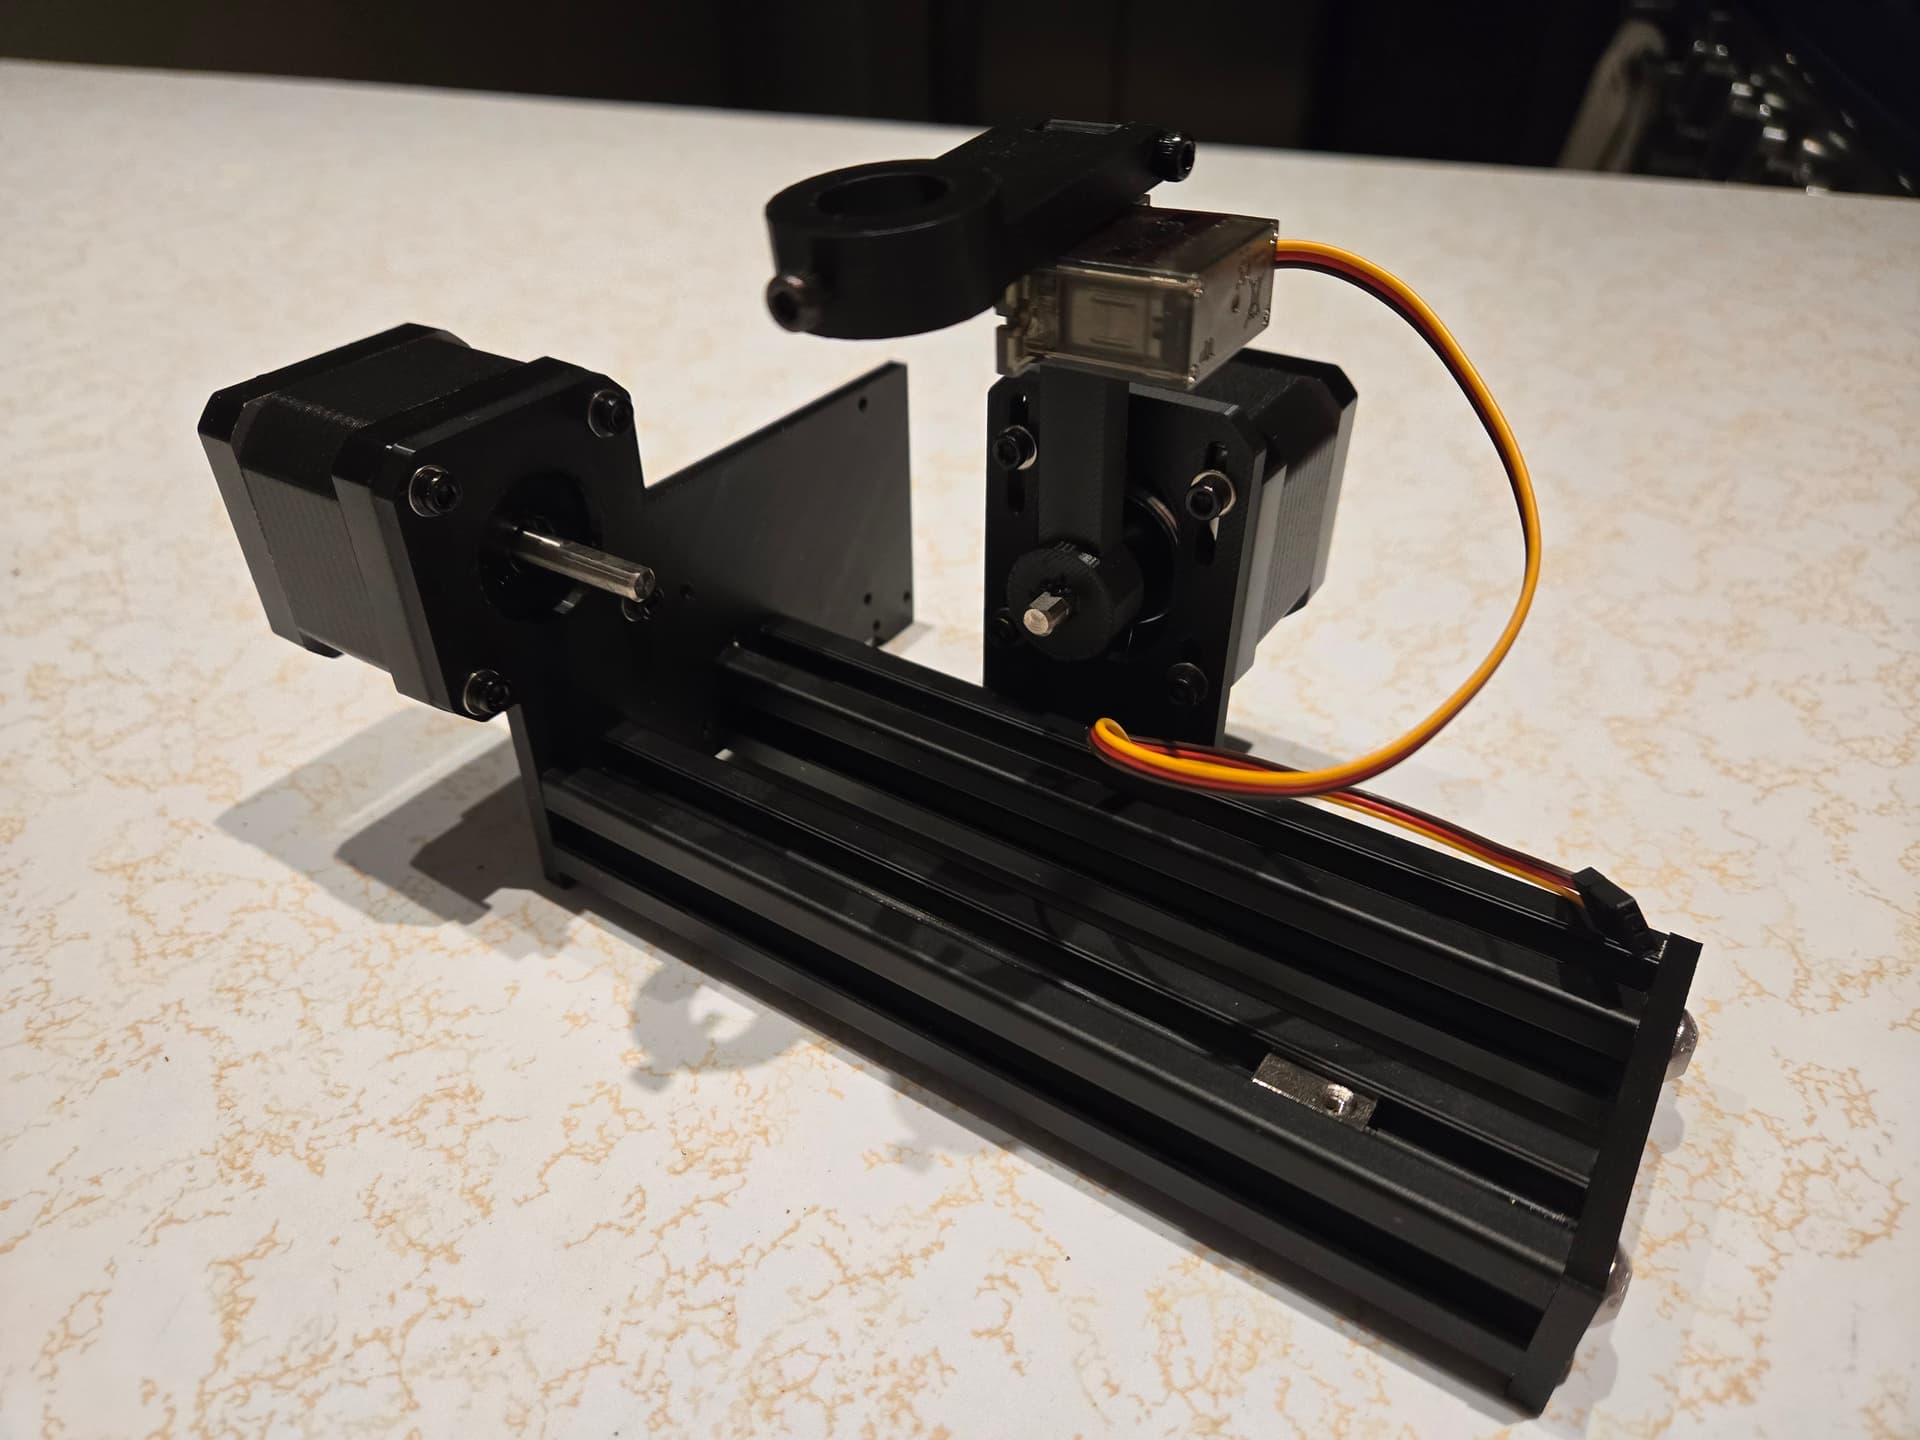
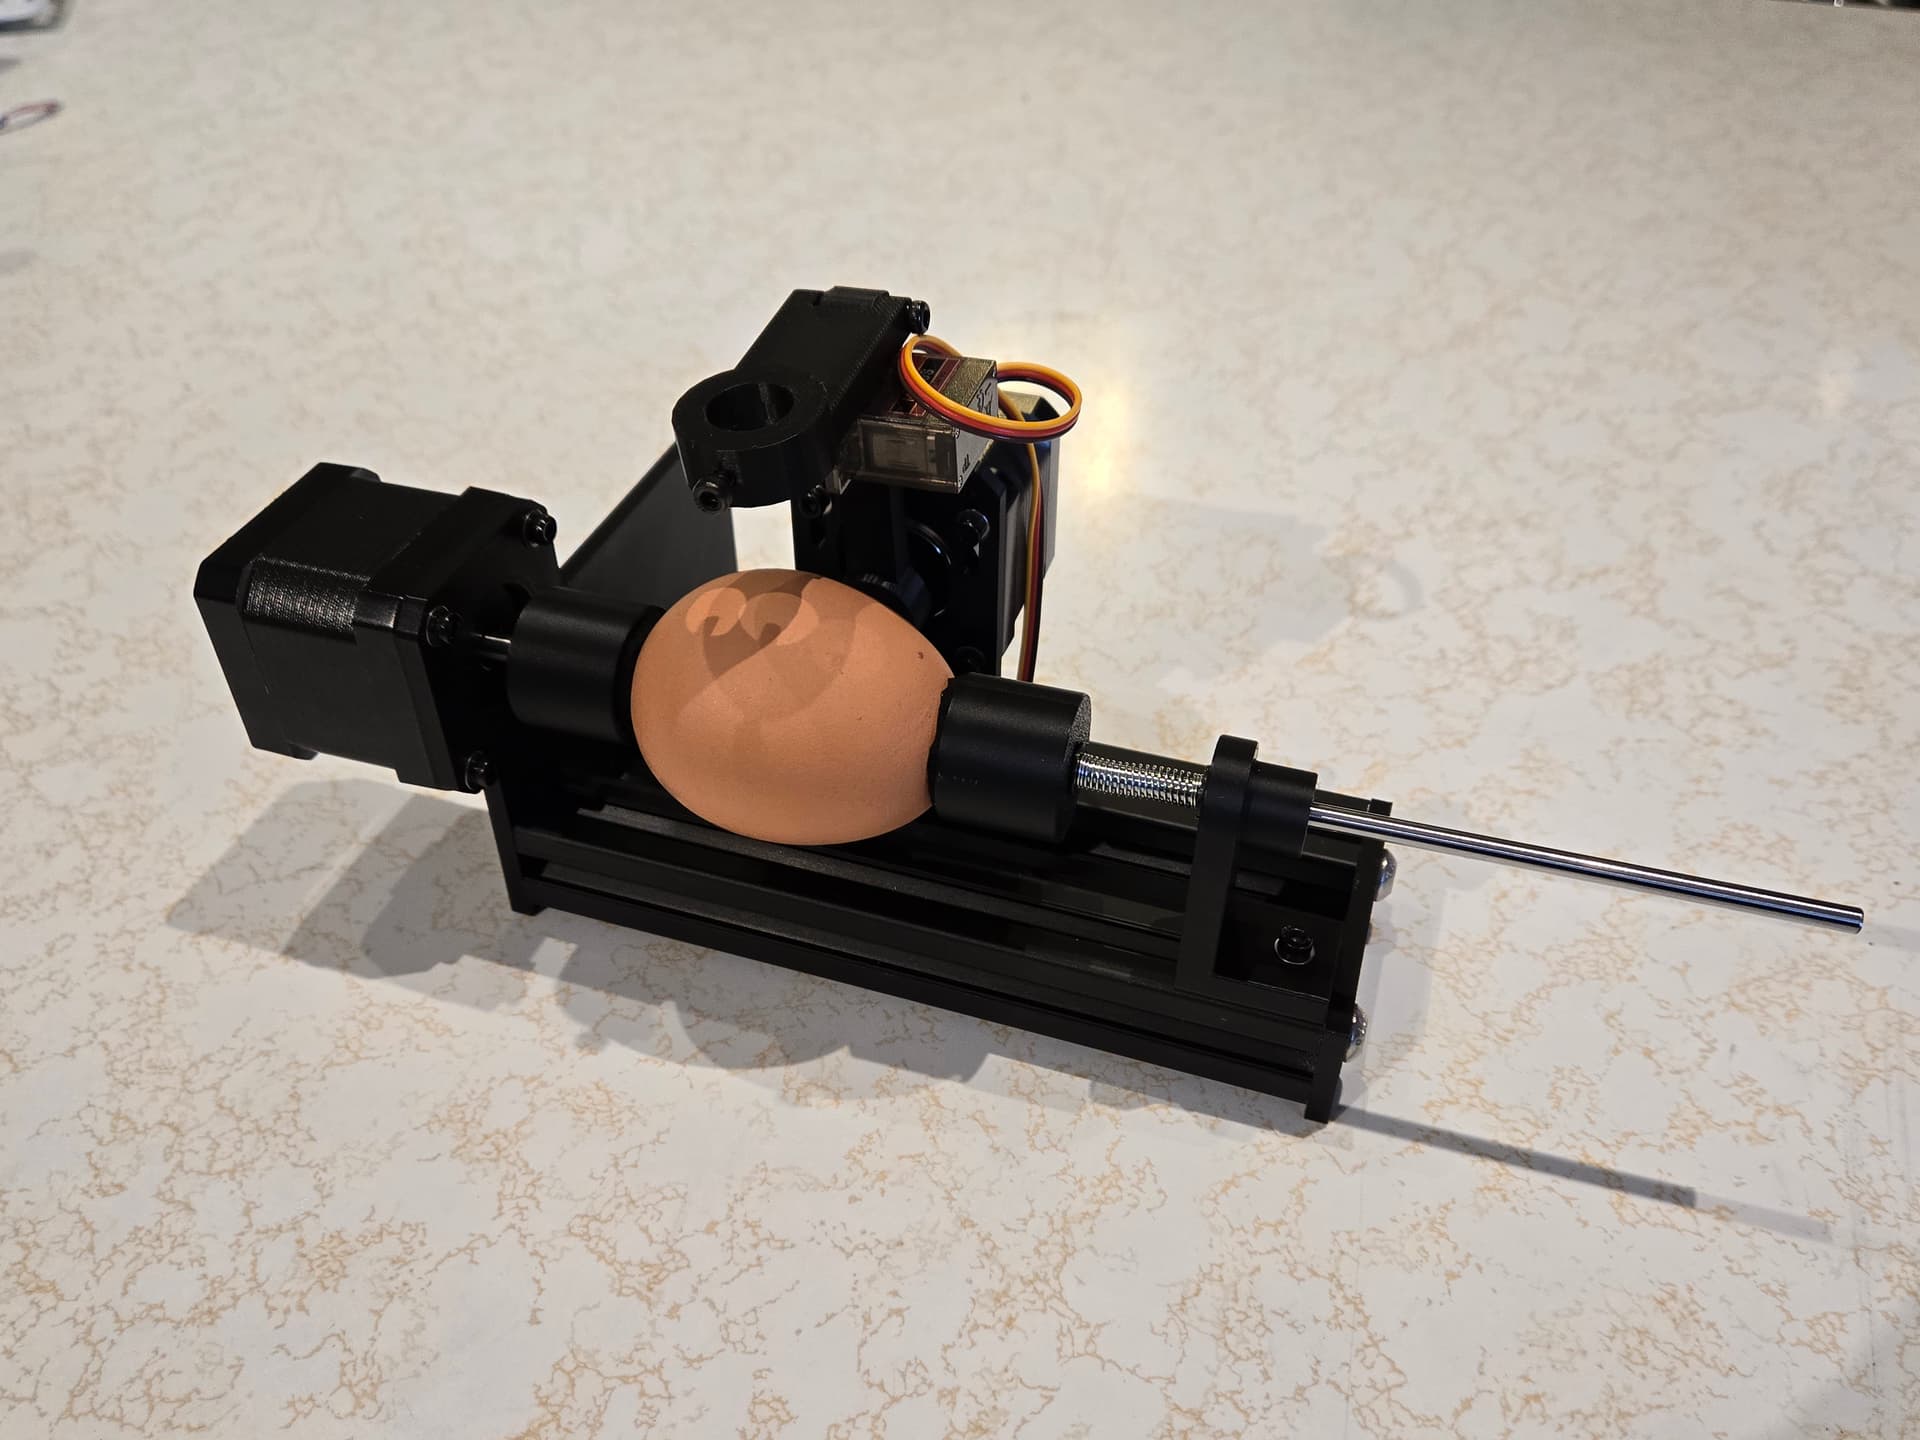
Then I built this one since I had an uno and the steppers laying around and liked how clean and integrated it was:
But…that one isn’t very reliable at all as the steppers are just barely strong enough.
The nice thing about using eggduino is that you can still use the “official” eggbot inkscape extensions which are pretty nice for prepping artwork for an eggbot. i.e. there are nice tools for warping things to help account for the shape of the egg and some nice easy to use utilities for fills and crosshatches and such.
However - the inkscape extensions got updated a few years ago and they changed the board detection routines and I’ve yet to get them working with my eggduino board since. Either by tweaking the eggduino code to make it present itself as an official eggbot board or by hacking the .py scripts in the eggbox extentions to accept the eggbot.
I actually just dusted off the hardware the other day and was thinking about taking another stab at it this week…but now I’m spending all my spare time playing with my LR4 now that it works
Should be able to do it with FluidNC…it’s really just a simple 2 axis machine with a servo channel to lift the pen.
It is nice to get it working with the extensions though since they do make it fairly easy to prep artwork so it looks “right” on an egg. Though you could probably still do all the transforms then export the SVG and use something else to go SVG to GCODE.
Just depends on how integrated and “easy to use” you want it. I was trying to keep eggbot extension support for mine so it would be easy for my wife and daughter to use. But I may just go the GRBL route to get it going again…
I do have spare ESP32’s on hand and some spare stepper drivers but only older ones…not nice TMC’s…so maybe I could try doing it with FluidNC but not sure I’d be able to hack something together before easter at this point
One more thought - the one you linked to looks ok…but that was one of the other issues I had with the more integrated “cleaner” design I made.
Adjustability is pretty important. Eggs are - very organic and not very consistent
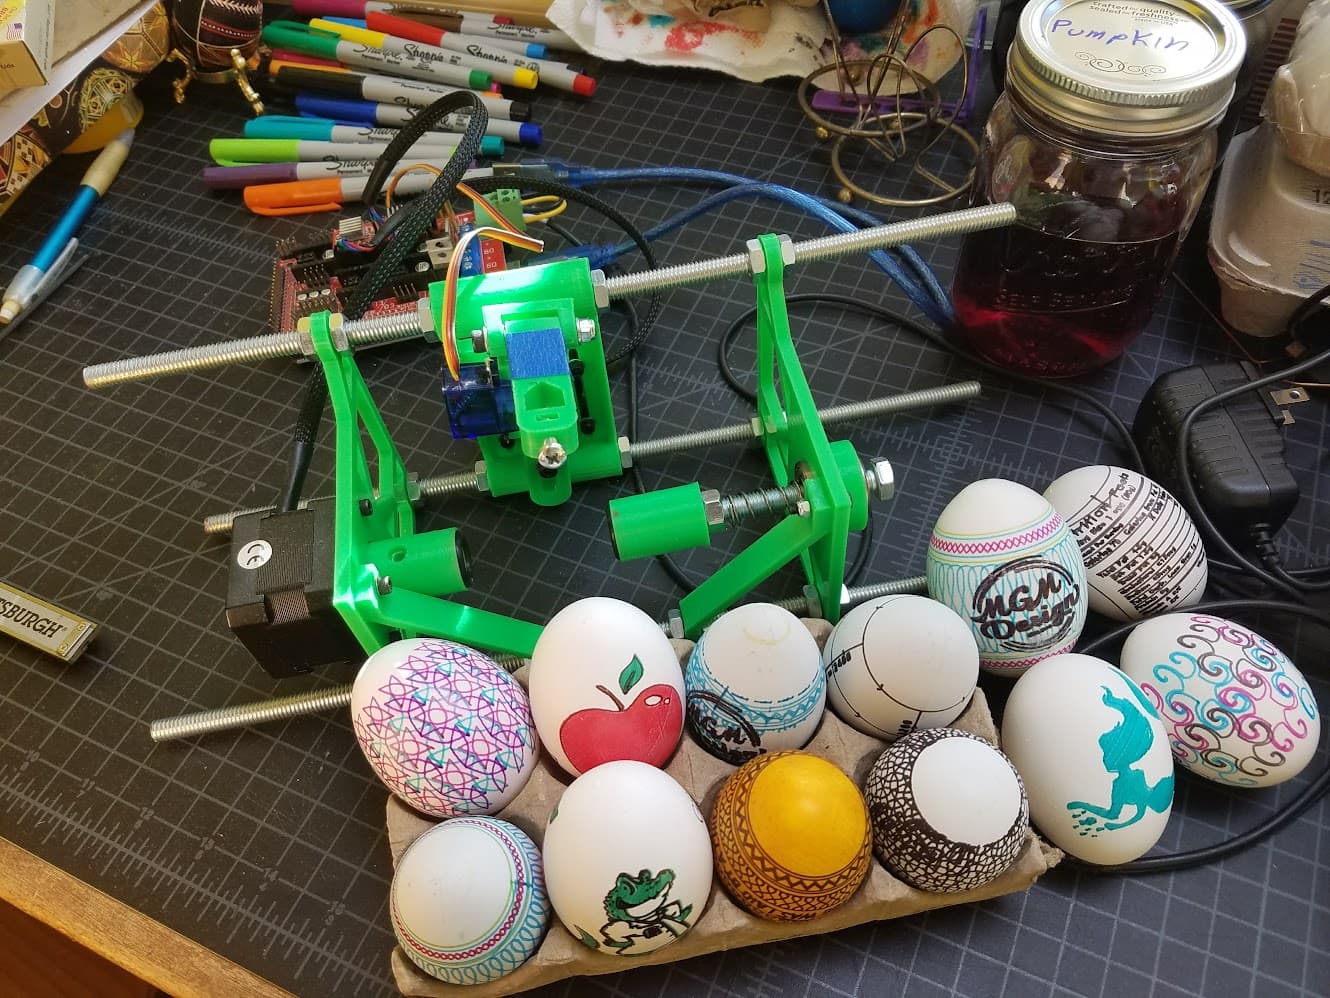
The “big” one I made is nice because it’s very adjustable and is mostly made from a few bits of all thread (which I had on hand) and a handful of simple prints. It’s really quick to print and I was able to build it in an afternoon with parts I already had on hand. And it fits all kinds of eggs/spheres/cylinders.
So it can also do Christmas ornaments, balls, and other objects.
I’ll be using NEMA 17s so that should be more than enough.
Yea, mechanically it won’t be a problem.
I don’t expect this to be super easy to use. But, some stuff I’ve learned messing with my pen plotter will transfer here.
Yea, this is why I don’t have much time on the design side. Once I have something constructed, I can manage something.
Yea, I think the pen holder needs changes. It could use some adjustability both vertically for the stepper and the pen holder so you can get the arc right.
My eggbot has three revisions. The first was using an arduino uno with a simple motor driver breakout board with a4988 drivers. It was a mess. The servo was jumpy because of the noise from the arduino, and the motor drivers were really loud.
Then I got a mlk dlc 32 v2.1, and flashed it with fluidNC. The mlk works (somehow), but isn’t really optimal for fluidNC. But oh boy it’s nice with tmc2209 drivers, rather than the noisy a4988 ones!
This winter I got the excactly same board as you! Using elecrow I got it quite cheap, with regards to shipping, VAT and such.
The plans were a mish mash of different setups, and some details of my own. I don’t know where I got them atm, but if you want to - I can look for them!
I had to stop at the hardware store for some M6 screws. I ran into my cousin there. He was there getting parts to fix an $80k tractor he rented… I was like “I’m building a robot to draw on eggs”. We exchanged strange looks.
I’m just going to make that one that @Dreyfus posted work. I’ve done some sketchy things and some not so sketchy things to make it work with what I have but I’m well on my way. My favorite sketchy thing is a hole was too big because I’m using M3 screws instead of M5. So, I put in an M3 heatset insert and drilled out the threads.
Well dang it now you put the idea in my head I’m tempted to build one too and I don’t need another project.
If there was an pcbway option for
‘Manufacture board and include components for self assembly’
It’d already be on the the way. So dodged a bullet on that one. But please keep the updates coming!
then I think, I could get 5 boards, I have plenty of spare steppers and drivers, make one for the kids and donate the others to their school and scout troop. Would they even want them/be able to use them? Maybe, if there was a browser based designer that could save the files and upload them direct over WiFi….
The parts that hold the egg didn’t fit well and weren’t big enough to hold the egg securely. I redesigned the mount to use an LM4UU bearing and 4mm rod I had leftover. I had a box of springs with one that works. The board should be here on Wednesday.
I was just looking and couldn’t find one. I’m inclined to make one and keep the controller separate. I have a feeling I might end up swapping it around with other random projects.
I have an SD card coming tomorrow. But it works. I think I set it up different than most. I set the pen angle as the X axis and rotation as Y axis. The Y axis might be rotating in the wrong direction. The pen straight up is X0.
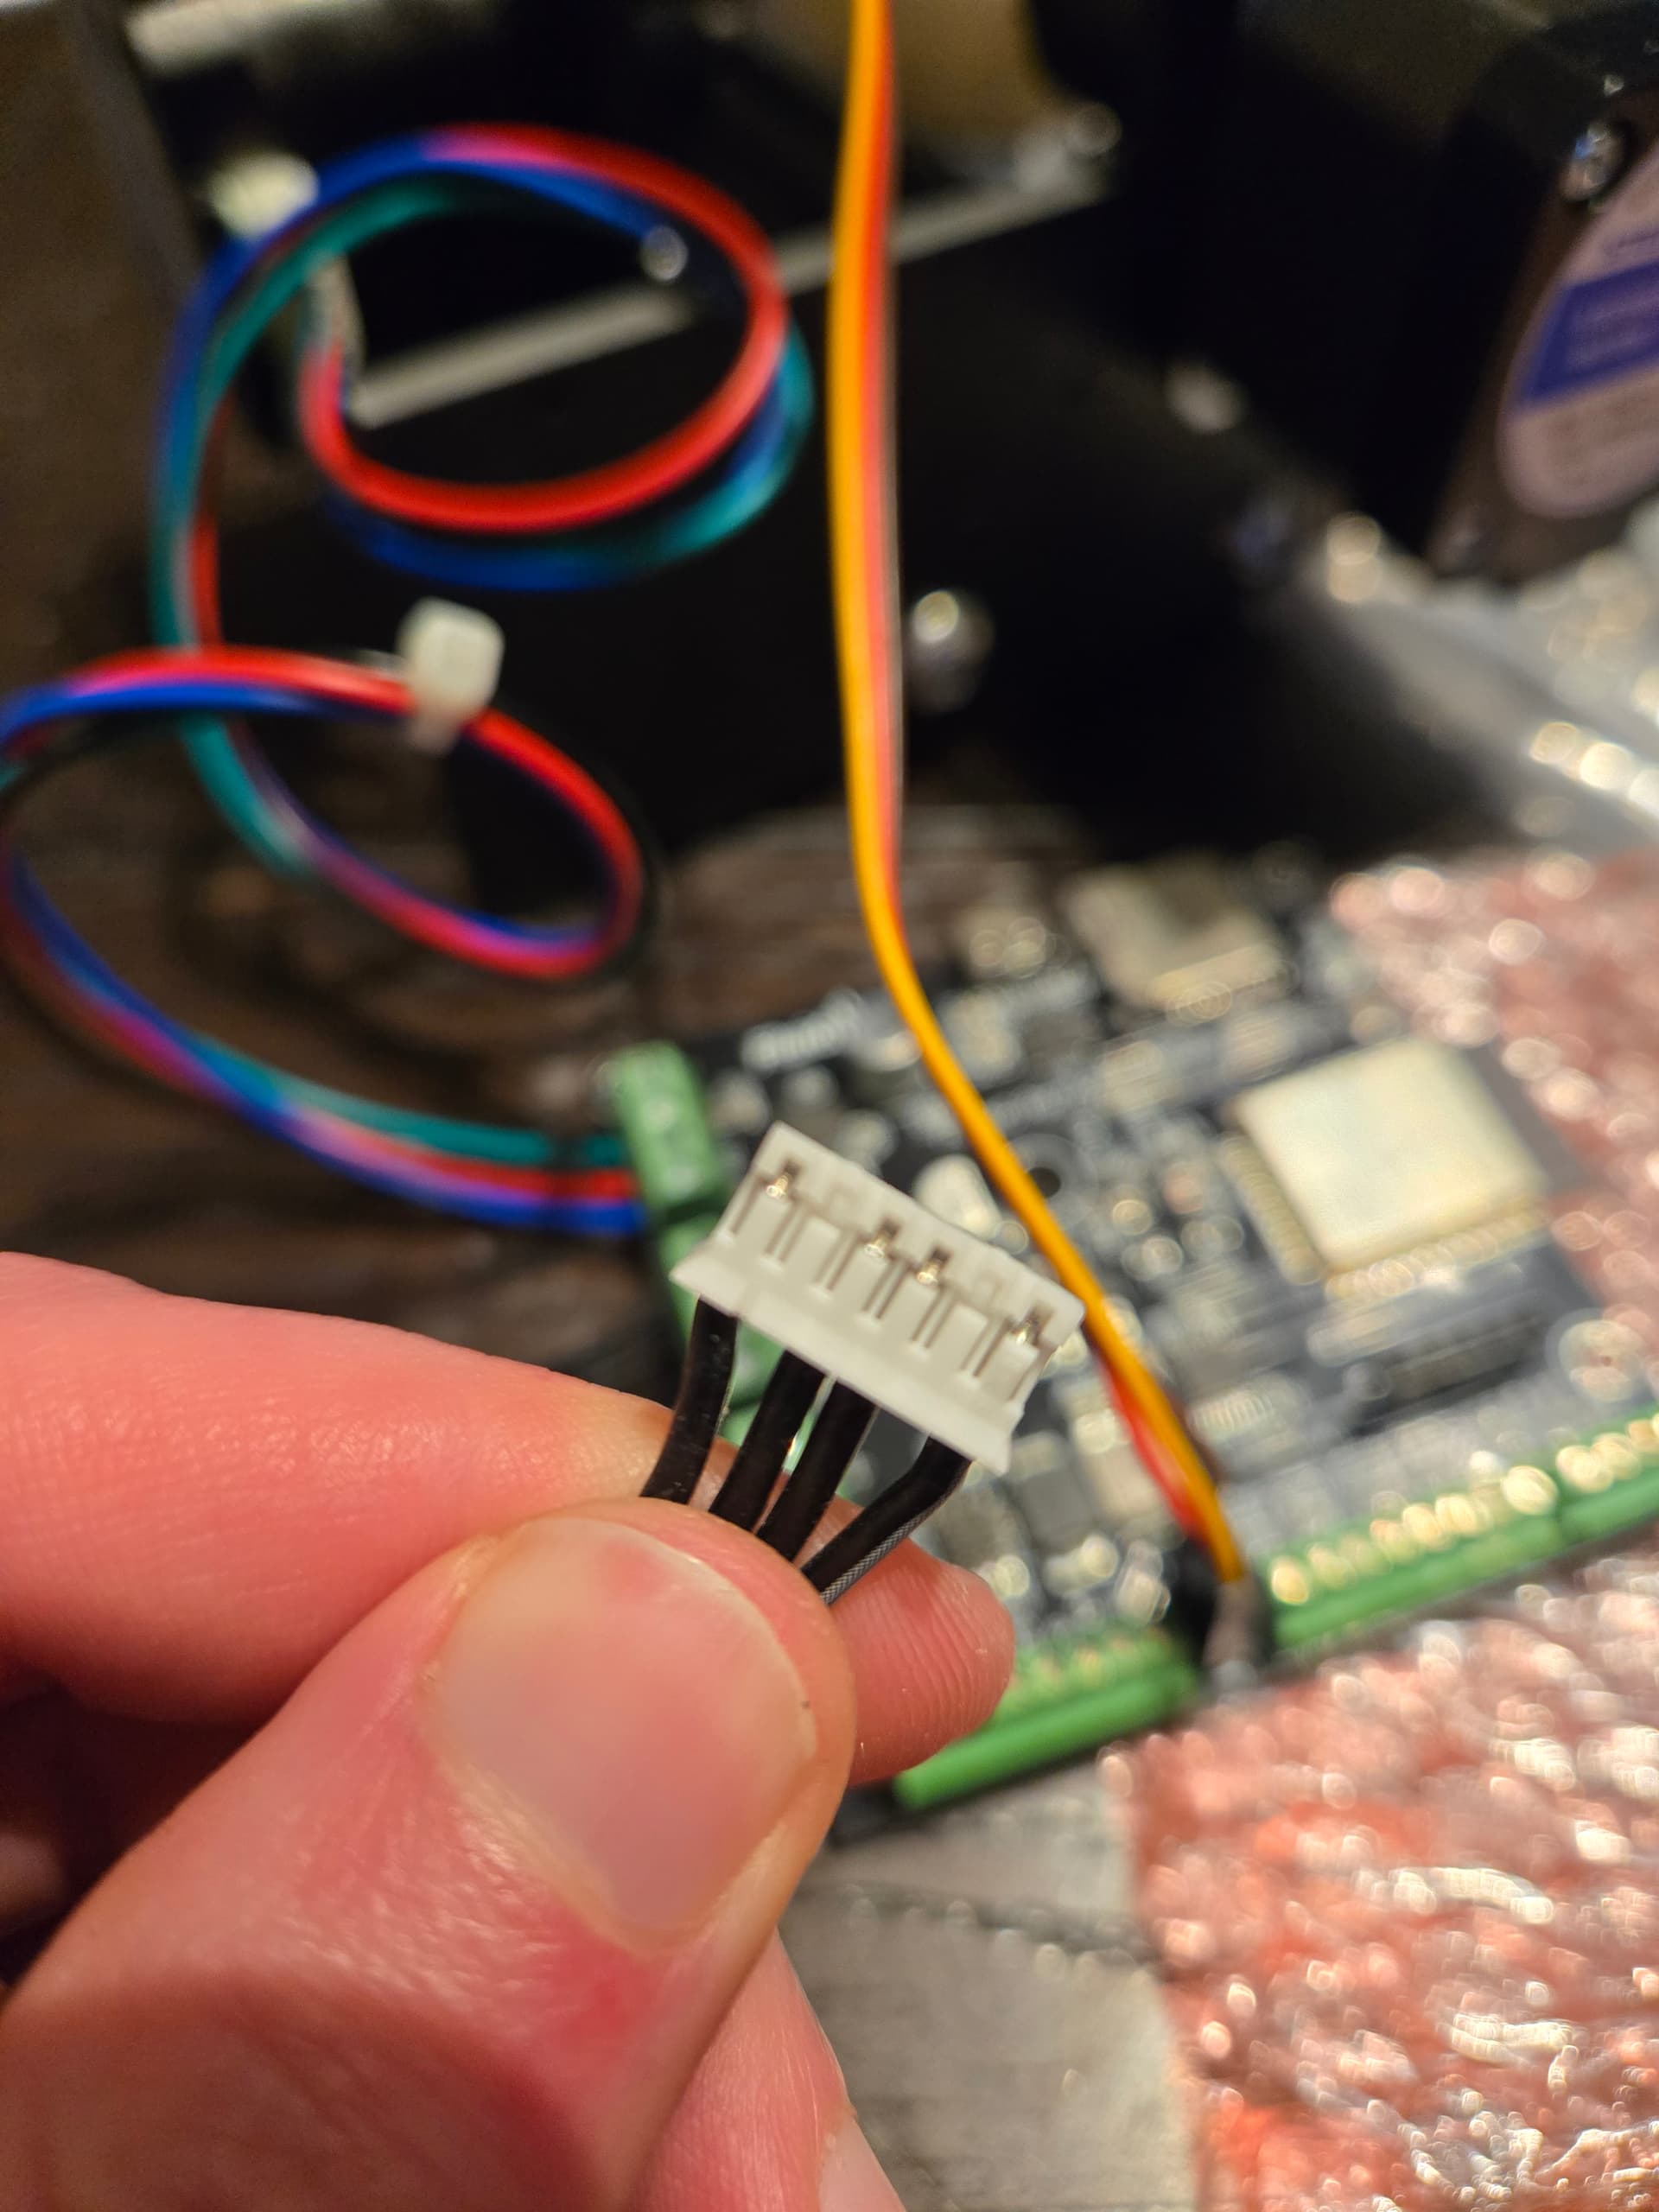
Also, I apparently didn’t hate myself enough today, so I had to crimp a JST-PH2.0. Wasn’t too bad though.
Looking good! I dug mine out over the weekend and hooked it to the RAMPS from my old MPCNC since it was what I had on hand…Got it moving in X and Y but didn’t bother trying to get the servo working yet. May swap it for a GRBL shield since I found that as well…but not sure how to deal with the servo on the GRBL shield and don’t feel like researching that right now