XP11, MSFS or both?
I’m doing a Garmin 530 build, literally looking at your cuts and feeling I’m miles away from such a complex cut.
What CAD software do you use?
XP11, MSFS or both?
I’m doing a Garmin 530 build, literally looking at your cuts and feeling I’m miles away from such a complex cut.
What CAD software do you use?
Looks really great @Kavster, thank you for sharing!
Been a while, but am curious what bit and settings you and other folks here use for Acrylic cuts like this? Please correct/confirm my understanding…
| Quality | Material | Bit | DOC | Feed XY | Feed Z | Speed | Coolant | Notes / Source |
|---|---|---|---|---|---|---|---|---|
| Great | Cast Acrylic | Carbide single flute 2mm | 0.4mm | 10mm/s | 3mm/s | 5k | NA | First Acrylic cut - Advice please - #9 by Kavster |
Cheers!
Would be great to hear, and learn from, what MPCNC and LowRider settings are working for people doing trochoidal and non trochoidal cuts. Cheers!
Appreciate you asking this question @Darwin, am also looking to do acrylic cuts. Been digging around, shared my notes on github, for example…
| Quality | Material | Bit | DOC | Feed XY | Feed Z | Speed | Coolant | Notes / Source |
|---|---|---|---|---|---|---|---|---|
| ? | Cast Acrylic | Carbide 2 flute upcut 1/8" | 2mm | Troch 8mm/s | Troch 1.6mm/s | 7K | NA | @barry99705 step-over:30%, trochoidal-step:20%, trochoidal-width:50%,oscillation: 0.05mm ? - https://www.youtube.com/watch?v=KtqhBiFaDpQ&t=396s - Acrylic Troubleshooting - #21 by barry99705 |
I have some new settings that didn’t work ![]()
Although…I cut at 12mm DOC so wasn’t expecting anything but a broken bit.
Trochoidal Stepover		10%
Trochoidal Width		50%
Trochoidal Oscilation	.1mm
Quality			?
Material		? 12mm thick
Bit				1/8" Single Flute Upcut
DOC				12mm (!!!)
Feed XY			15mm/s
Feed Z			2mm/s
Speed			~15000 (2.75 on Makita RT701C)
Notes
It cut…
But looks like melted garbage.
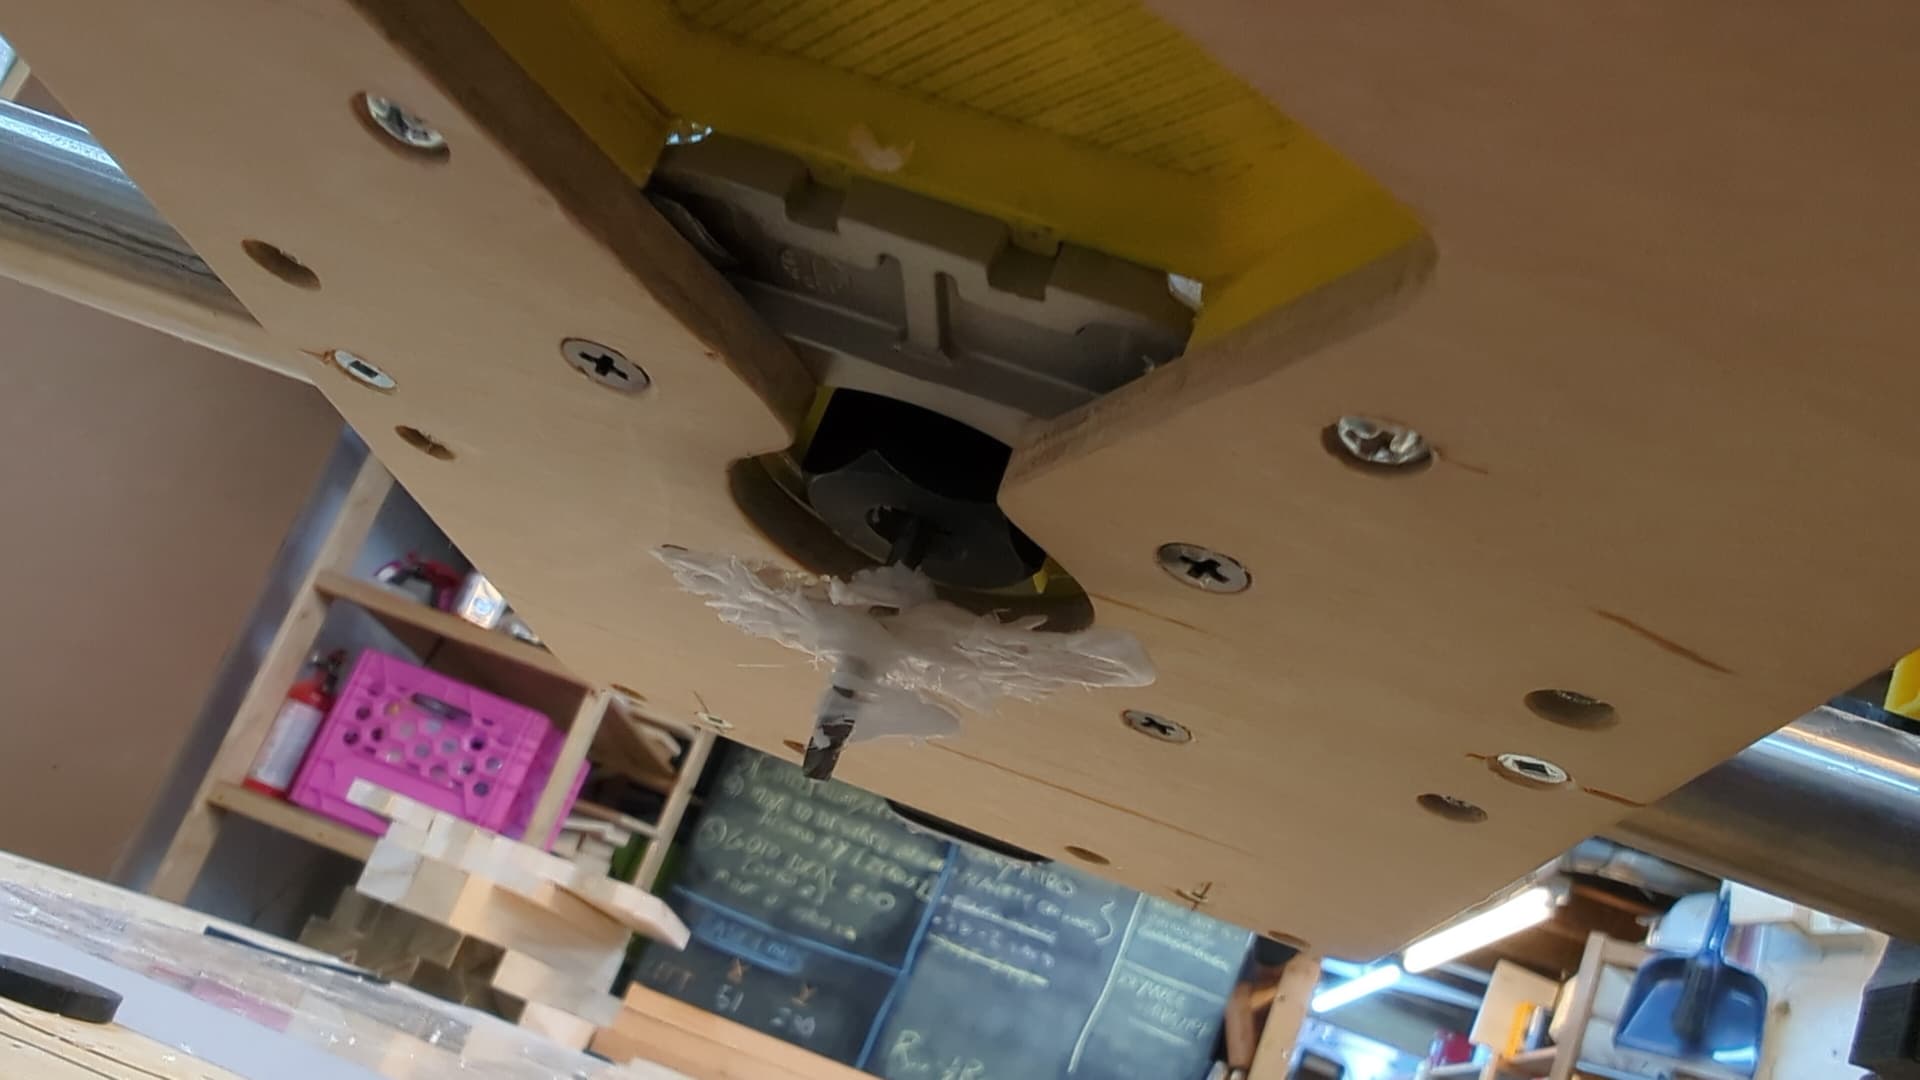
The bit didn’t break and now has an attractive acrylic fan wrapped around it.
Those are my settings, sorry for being lazy. ![]()
You are going too slow and you can use more stepover I guess. ![]()
/edit: Make absolutely sure that you can catch those stupid shards. They really gum up everything, your bearings especially!
@Tokoloshe, cheers for sharing your cut profile details! Please correct/confirm my milling settings understanding.
| Quality | Material | Bit | DOC | Plunge Angle | Feed XY | Feed Z | Speed | Coolant | Notes / Source |
|---|---|---|---|---|---|---|---|---|---|
| Great | Cast Acyrlic | Carbide 1 flute upcut 3mm Wirbel 1 Schneider? |
5.5mm | 60deg | Troch 25mm/s | Troch 7.5mm/s | 10K (Makita Lowest setting) | NA |
@Tokoloshe step-over:75%,trochoidal-stepover:20%,trochoidal-width:50%, oscillation:0mm , - Video @ Control Box for the Open CNC Shield 2 - Der Froschkönig - Lowrider 3 in Oldenburg, Germany - #91 by Tokoloshe - First Acrylic cut - Advice please - #26 by Tokoloshe |
| ? | Alu | Carbide 1 flute upcut 6mm | 10mm | 60deg | Troch 25mm/s | Troch 7.5mm/s | 10K (Makita Lowest setting) | NA |
@Tokoloshe step-over:???%,trochoidal-stepover:???%,trochoidal-width:50%, oscillation:0mm, - Der Froschkönig - Lowrider 3 in Oldenburg, Germany - #91 by Tokoloshe |
Cheers!
Aluminium was a little different, have to look that up. ![]()
Holes at 250mm/min, straight cuts trochoidal milling, 900mm/min, 10mm DOC, 60% stepover, 7% trochoidal stepover, 50% trochoidal width, 0mm oscillation, done on Schnewittchen (MPCNC Primo Schneewittchen - Oldenburg, Germany).
Lol, post processor that injects gcode rapids to occasionally take ice bath dips?
Was that trochoidal cuts or just regular straight cuts?
Are inside and outside edge of trochoidal cuts the same quality? If so, would you cutout acrylic panels using this or some other approach to obtain acceptable quality with minimal time and material?

Less lazy me would go figure out and test, am asking anyway since people here will know and share knowledge I wouldn’t have self discovered. Cheers!
All straight cuts, I think I have figured it out I am thinking of adding a ice cube tray “hole” in the project.
Put said ice cube in the cutout or basin if your spoil is particle board.
Then depending on cut do perimeter then do a drill in the center of said cutout(into ice). Then continue with the rest of cuts. And at another 3 mins depending if it’s a constant cut etc do another drill hole in cube and continue.
It should cool the bit and collet and knock off any clingons.
Alternate option is just get a ss cup and weld a stud on the bottom and use that as a hold down clamp/cooler.
So you can fill it and freeze it and have it ready to go
Things worked great at the speeds I had and swarf was flying nice just things got warm and well did the obvious

A lot of folks use air-assist nozzles on their laser cutters. Maybe add that to your router with it blowing on the bit?
Progress?
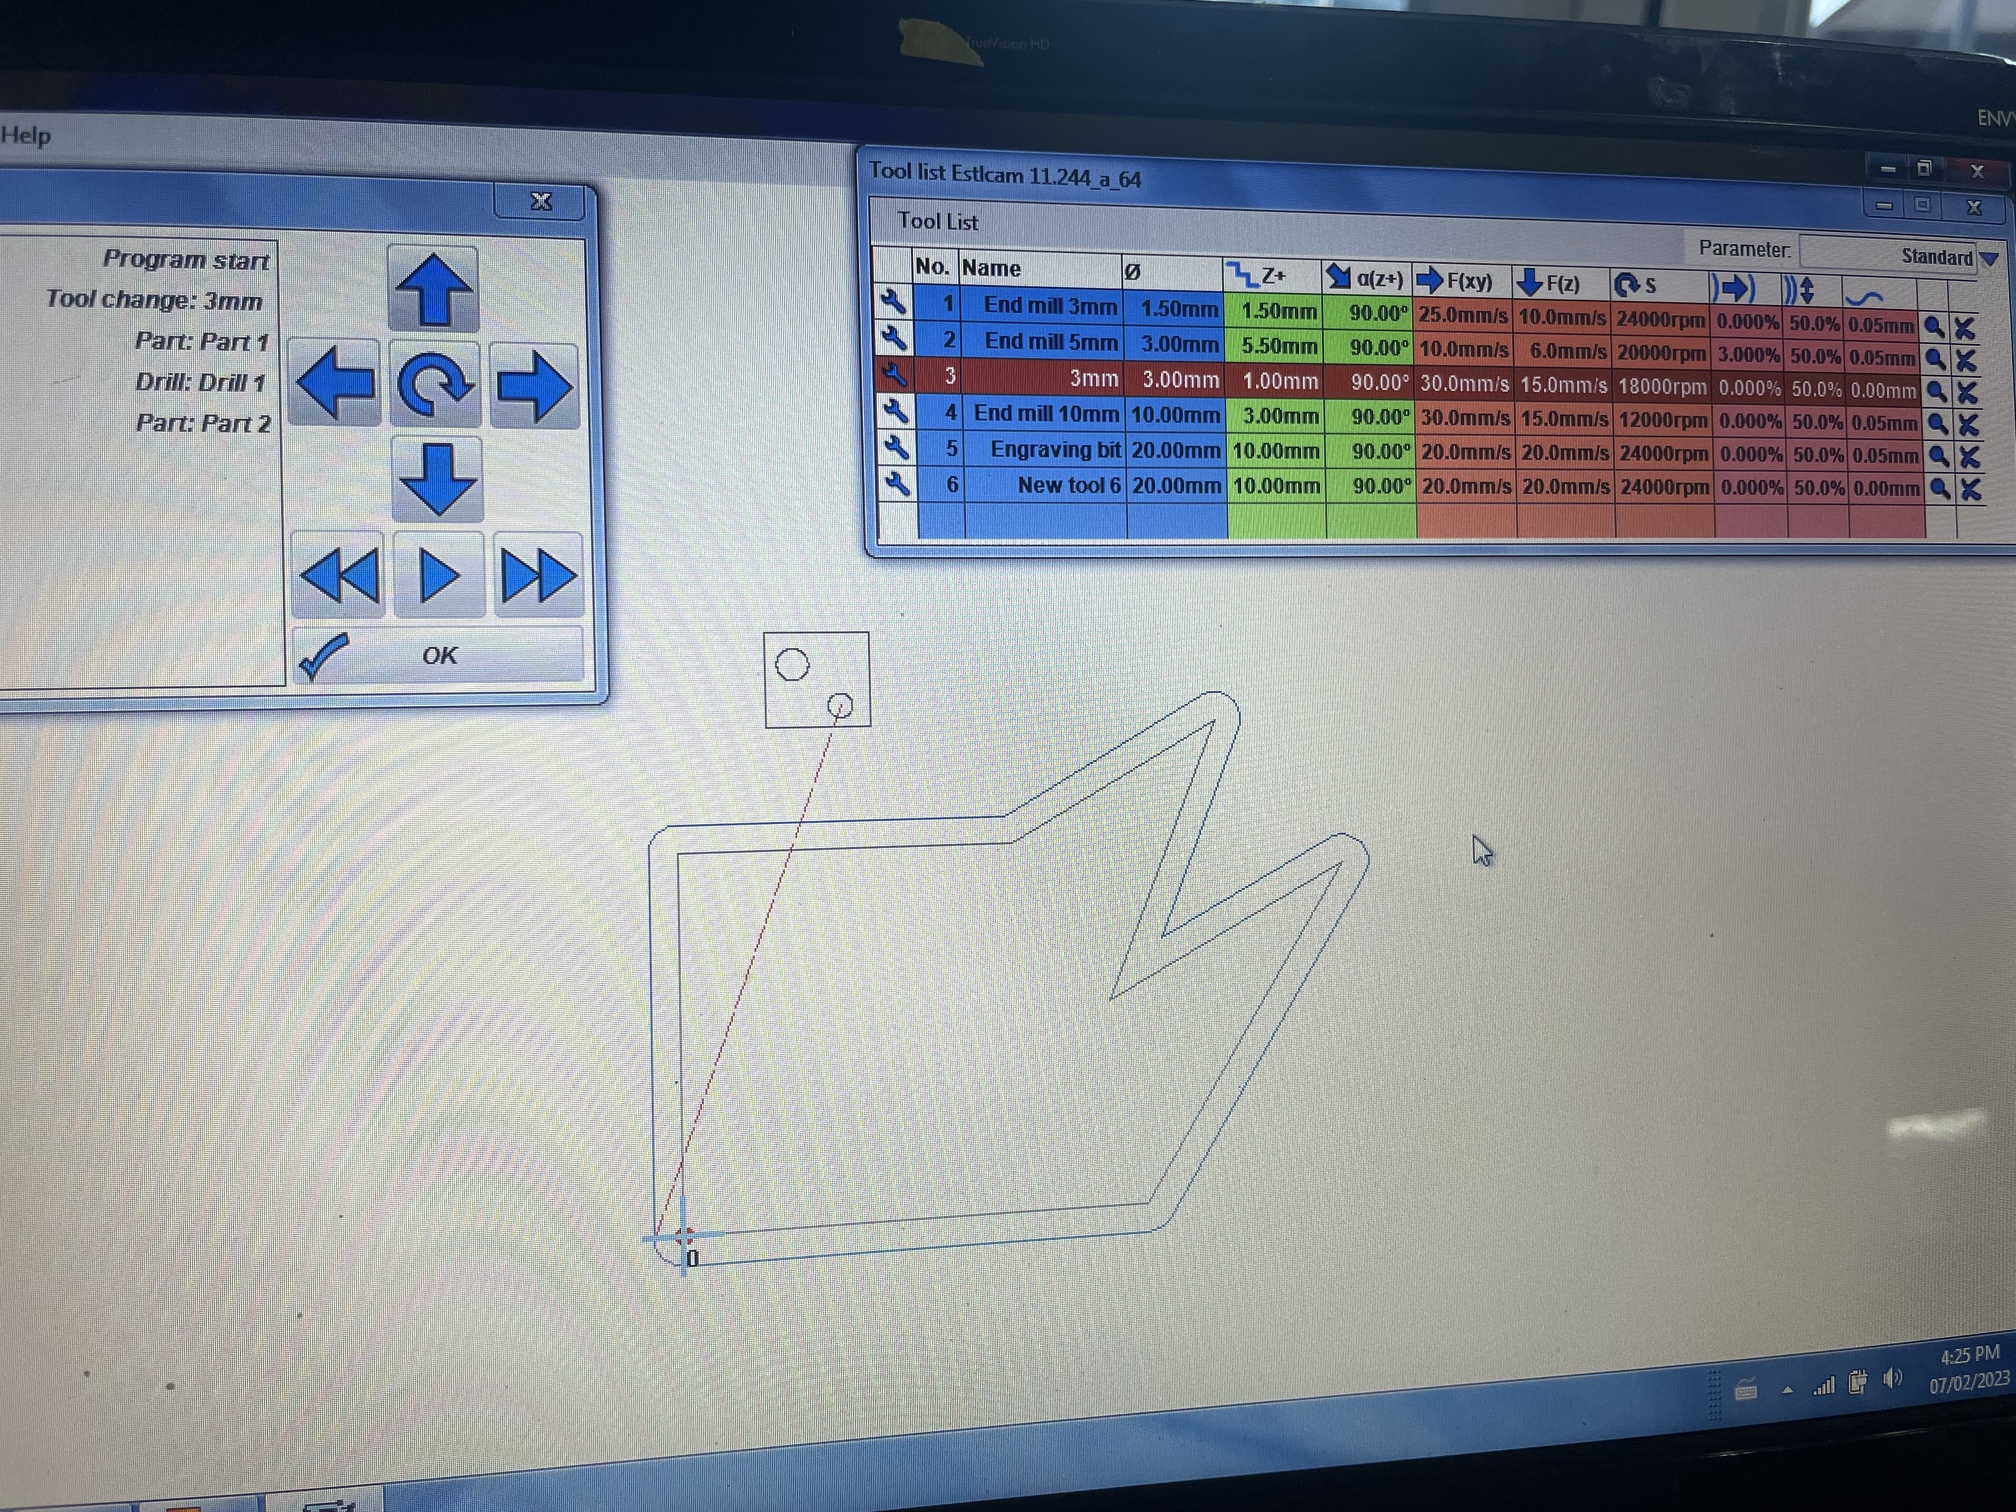
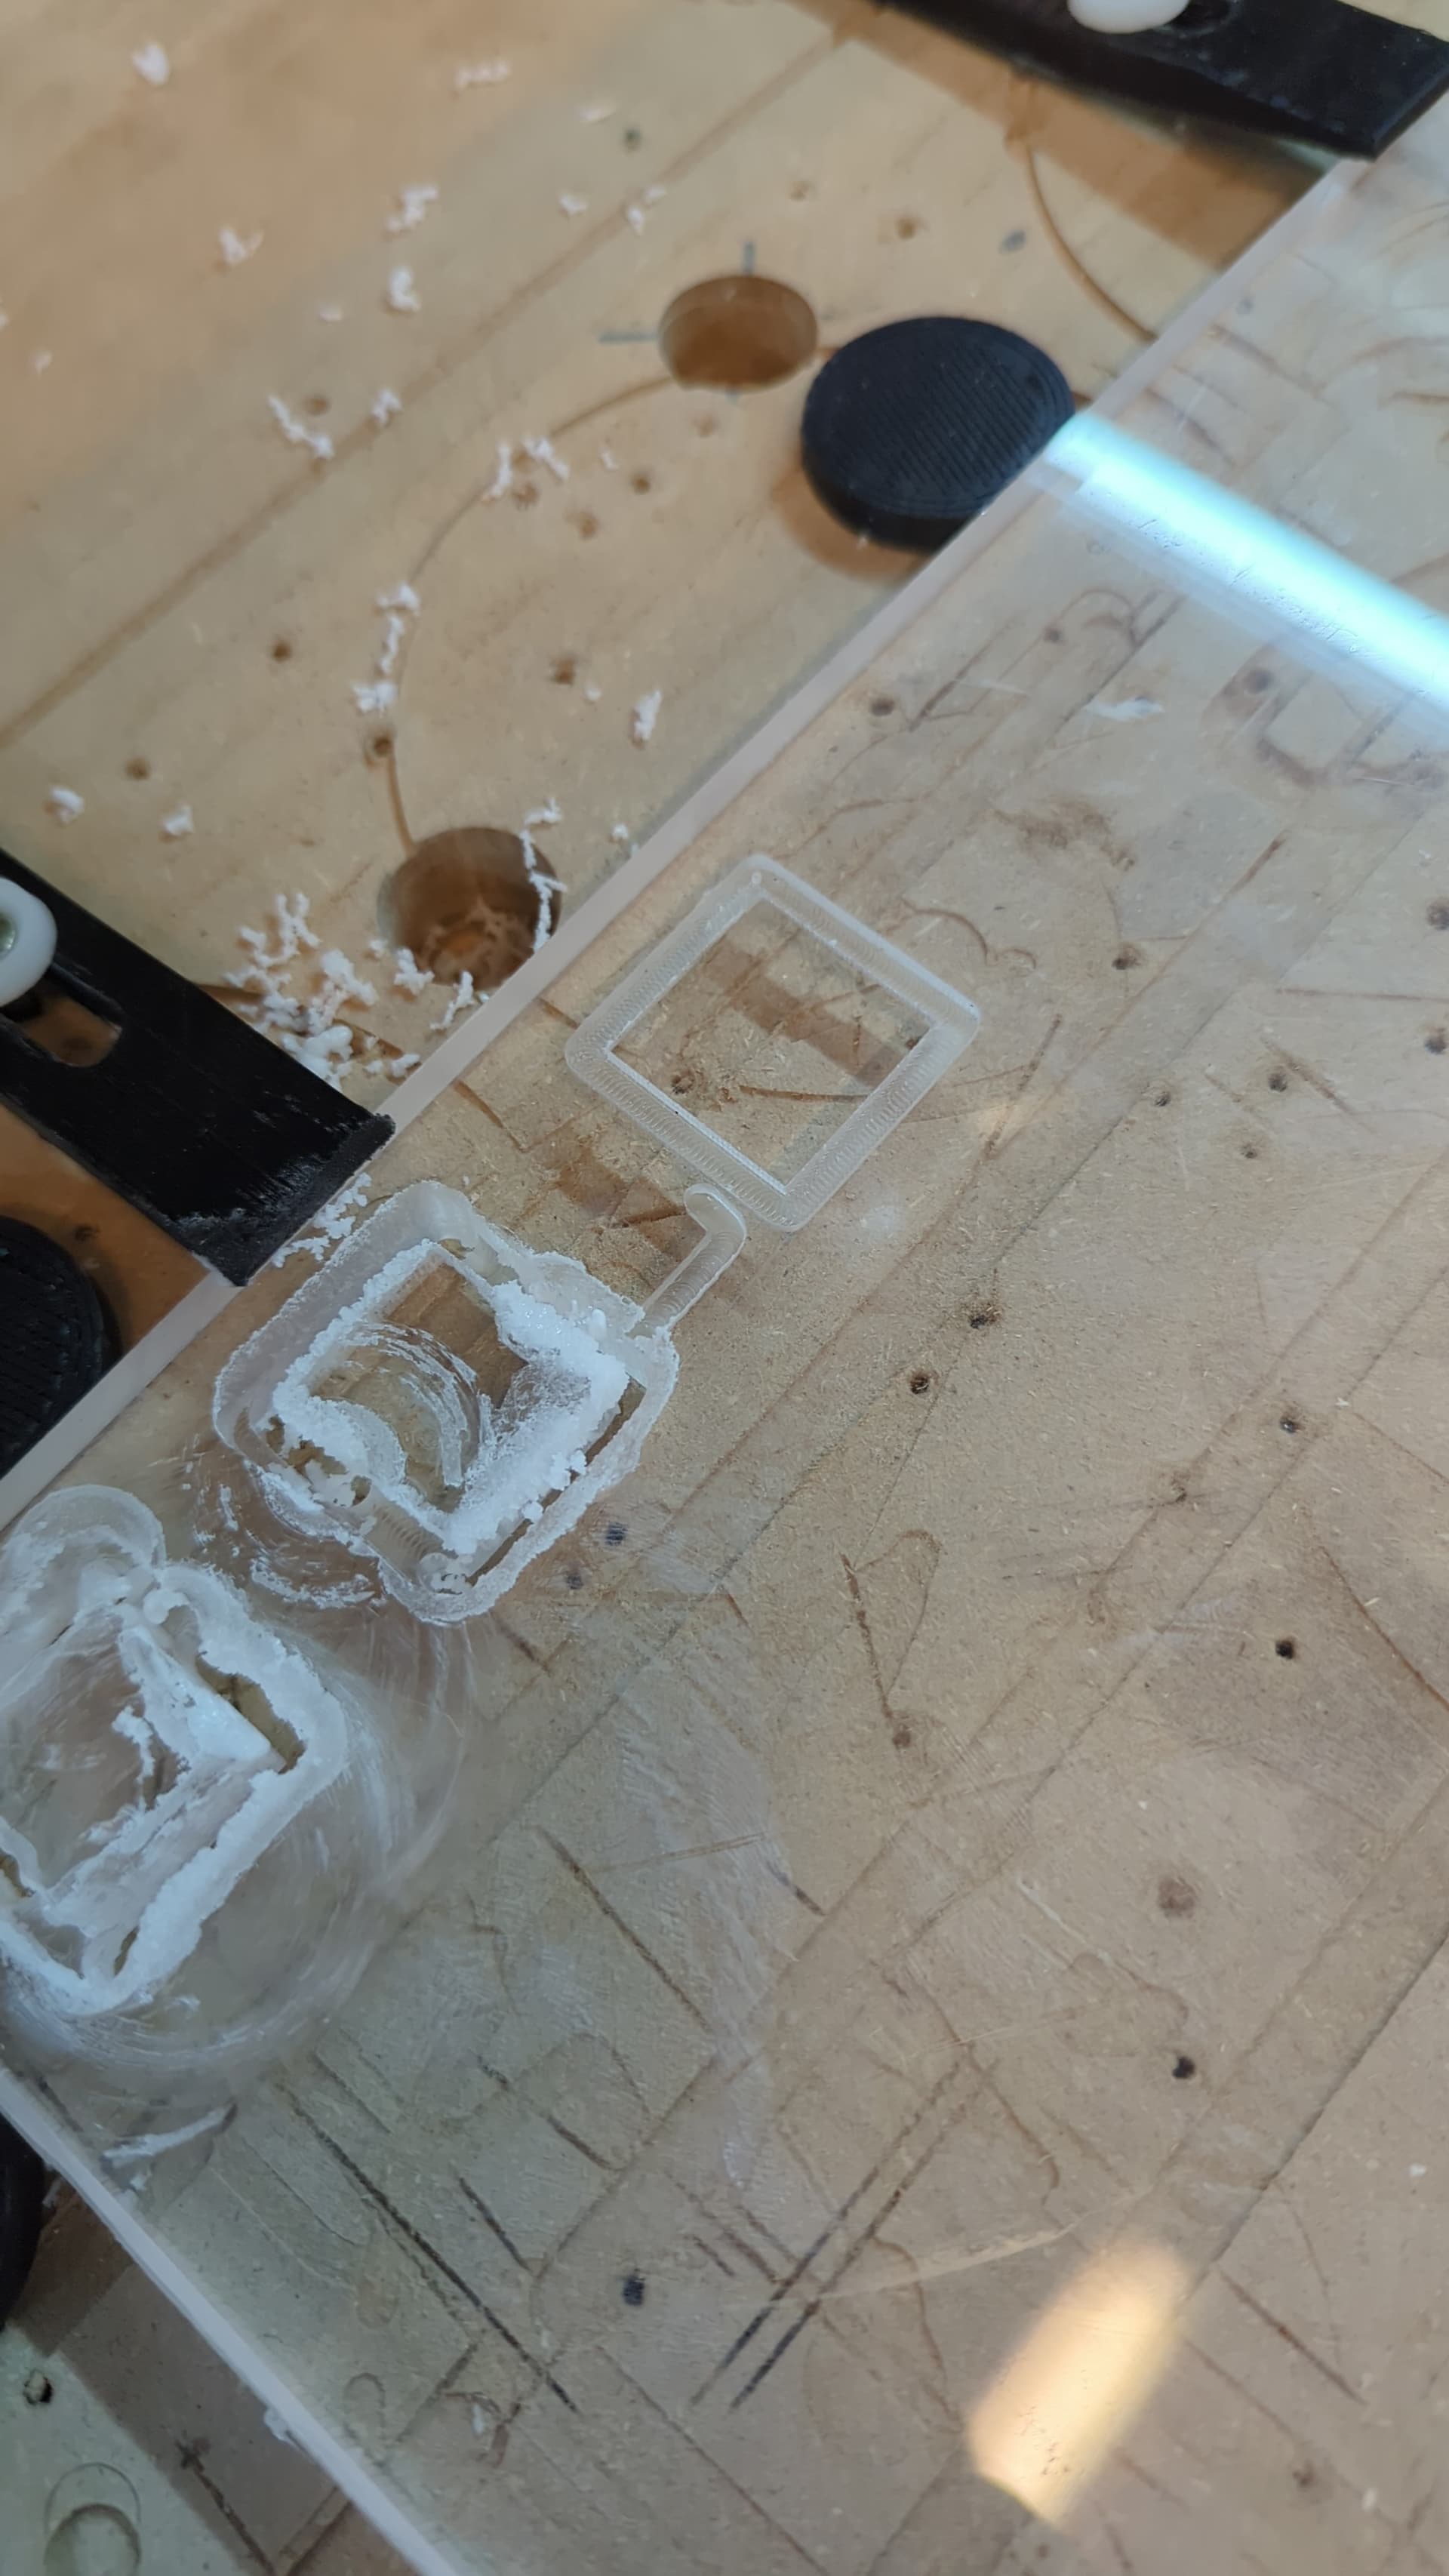
Changing settings to what @Tokoloshe recommended for trochoidal cutting in 2 passes at 6mm per step down (feed 25mm/s, Troch Stepover 20%, Troch Width 50%, Oscillation 0) - Top Square:
Cutting only 2mm depth, Changing settings to feed 35mm/s, Troch Stepover 20%, Troch Width 25%, Oscillation 0.1
Yay!
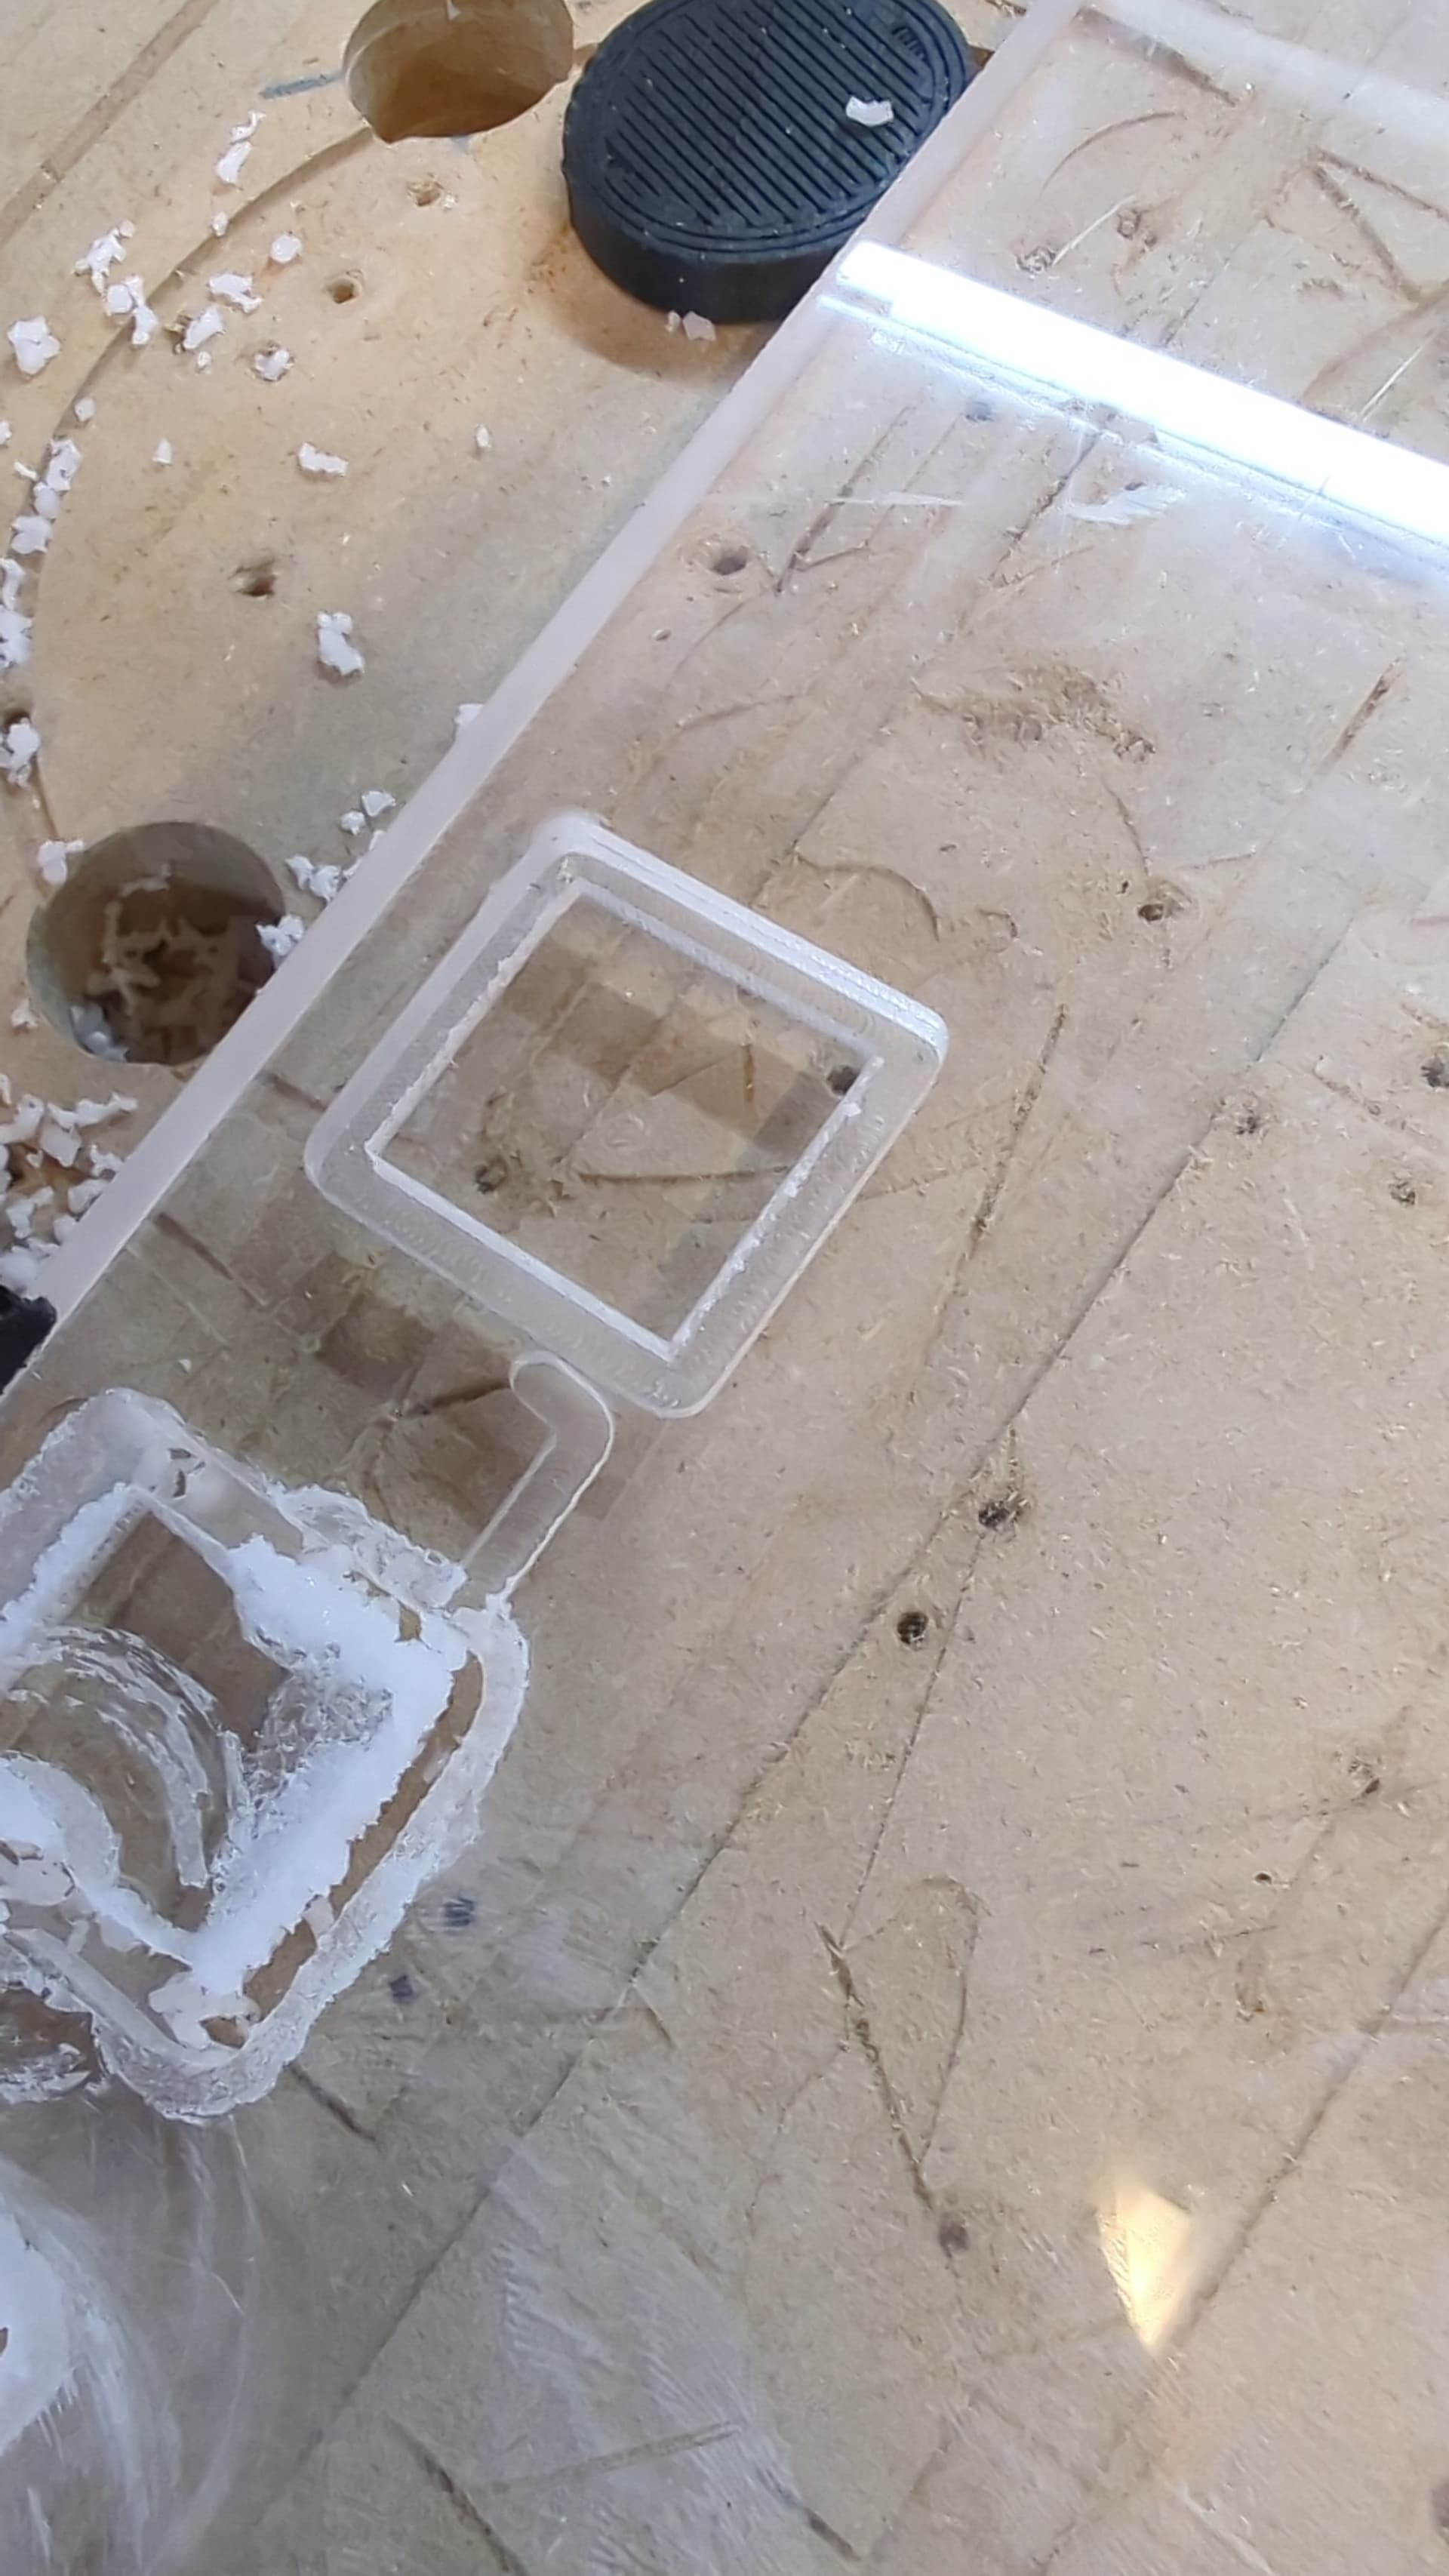
Try a second 2mm cut starting 2mm down, up the feed (feed 45mm/s, Troch Stepover 20%, Troch Width 25%, Oscillation 0.1)
Double Yay!
Try a 3rd 2mm cut starting 4mm down (feed 45mm/s, Troch Stepover 20%, Troch Width 25%, Oscillation 0.1)
Ok. I’ve got these settings dialed in.
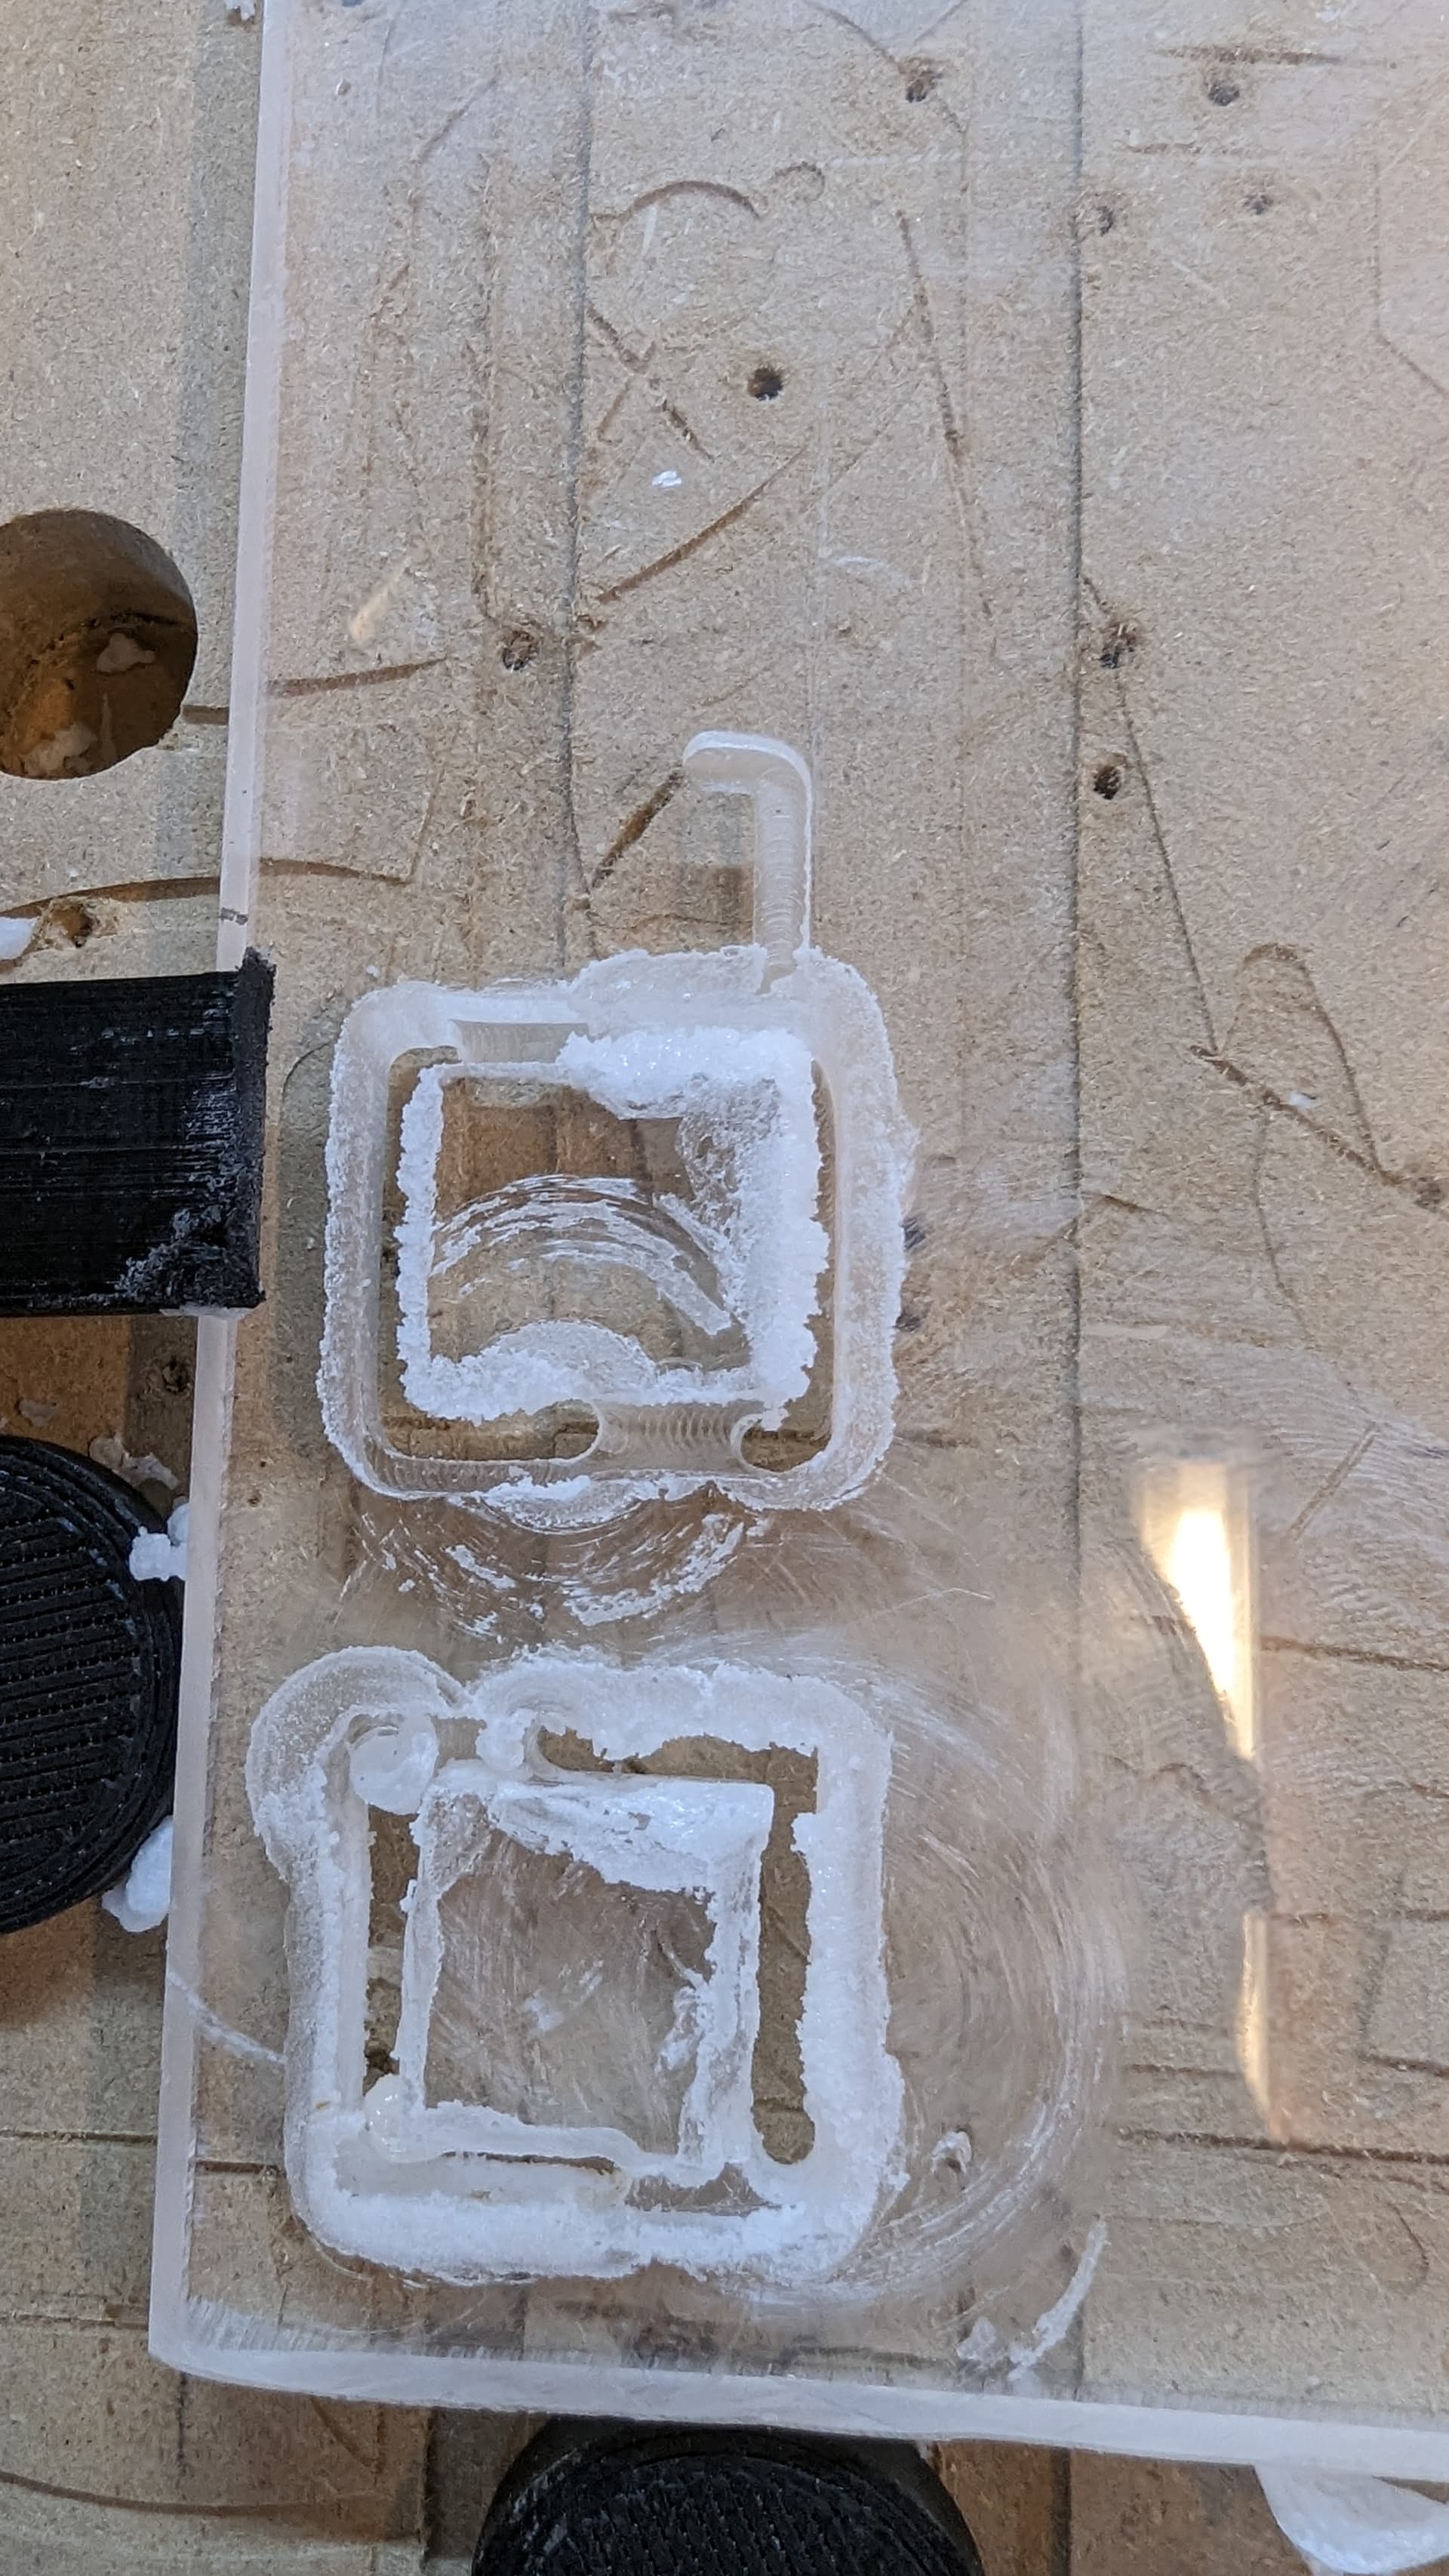
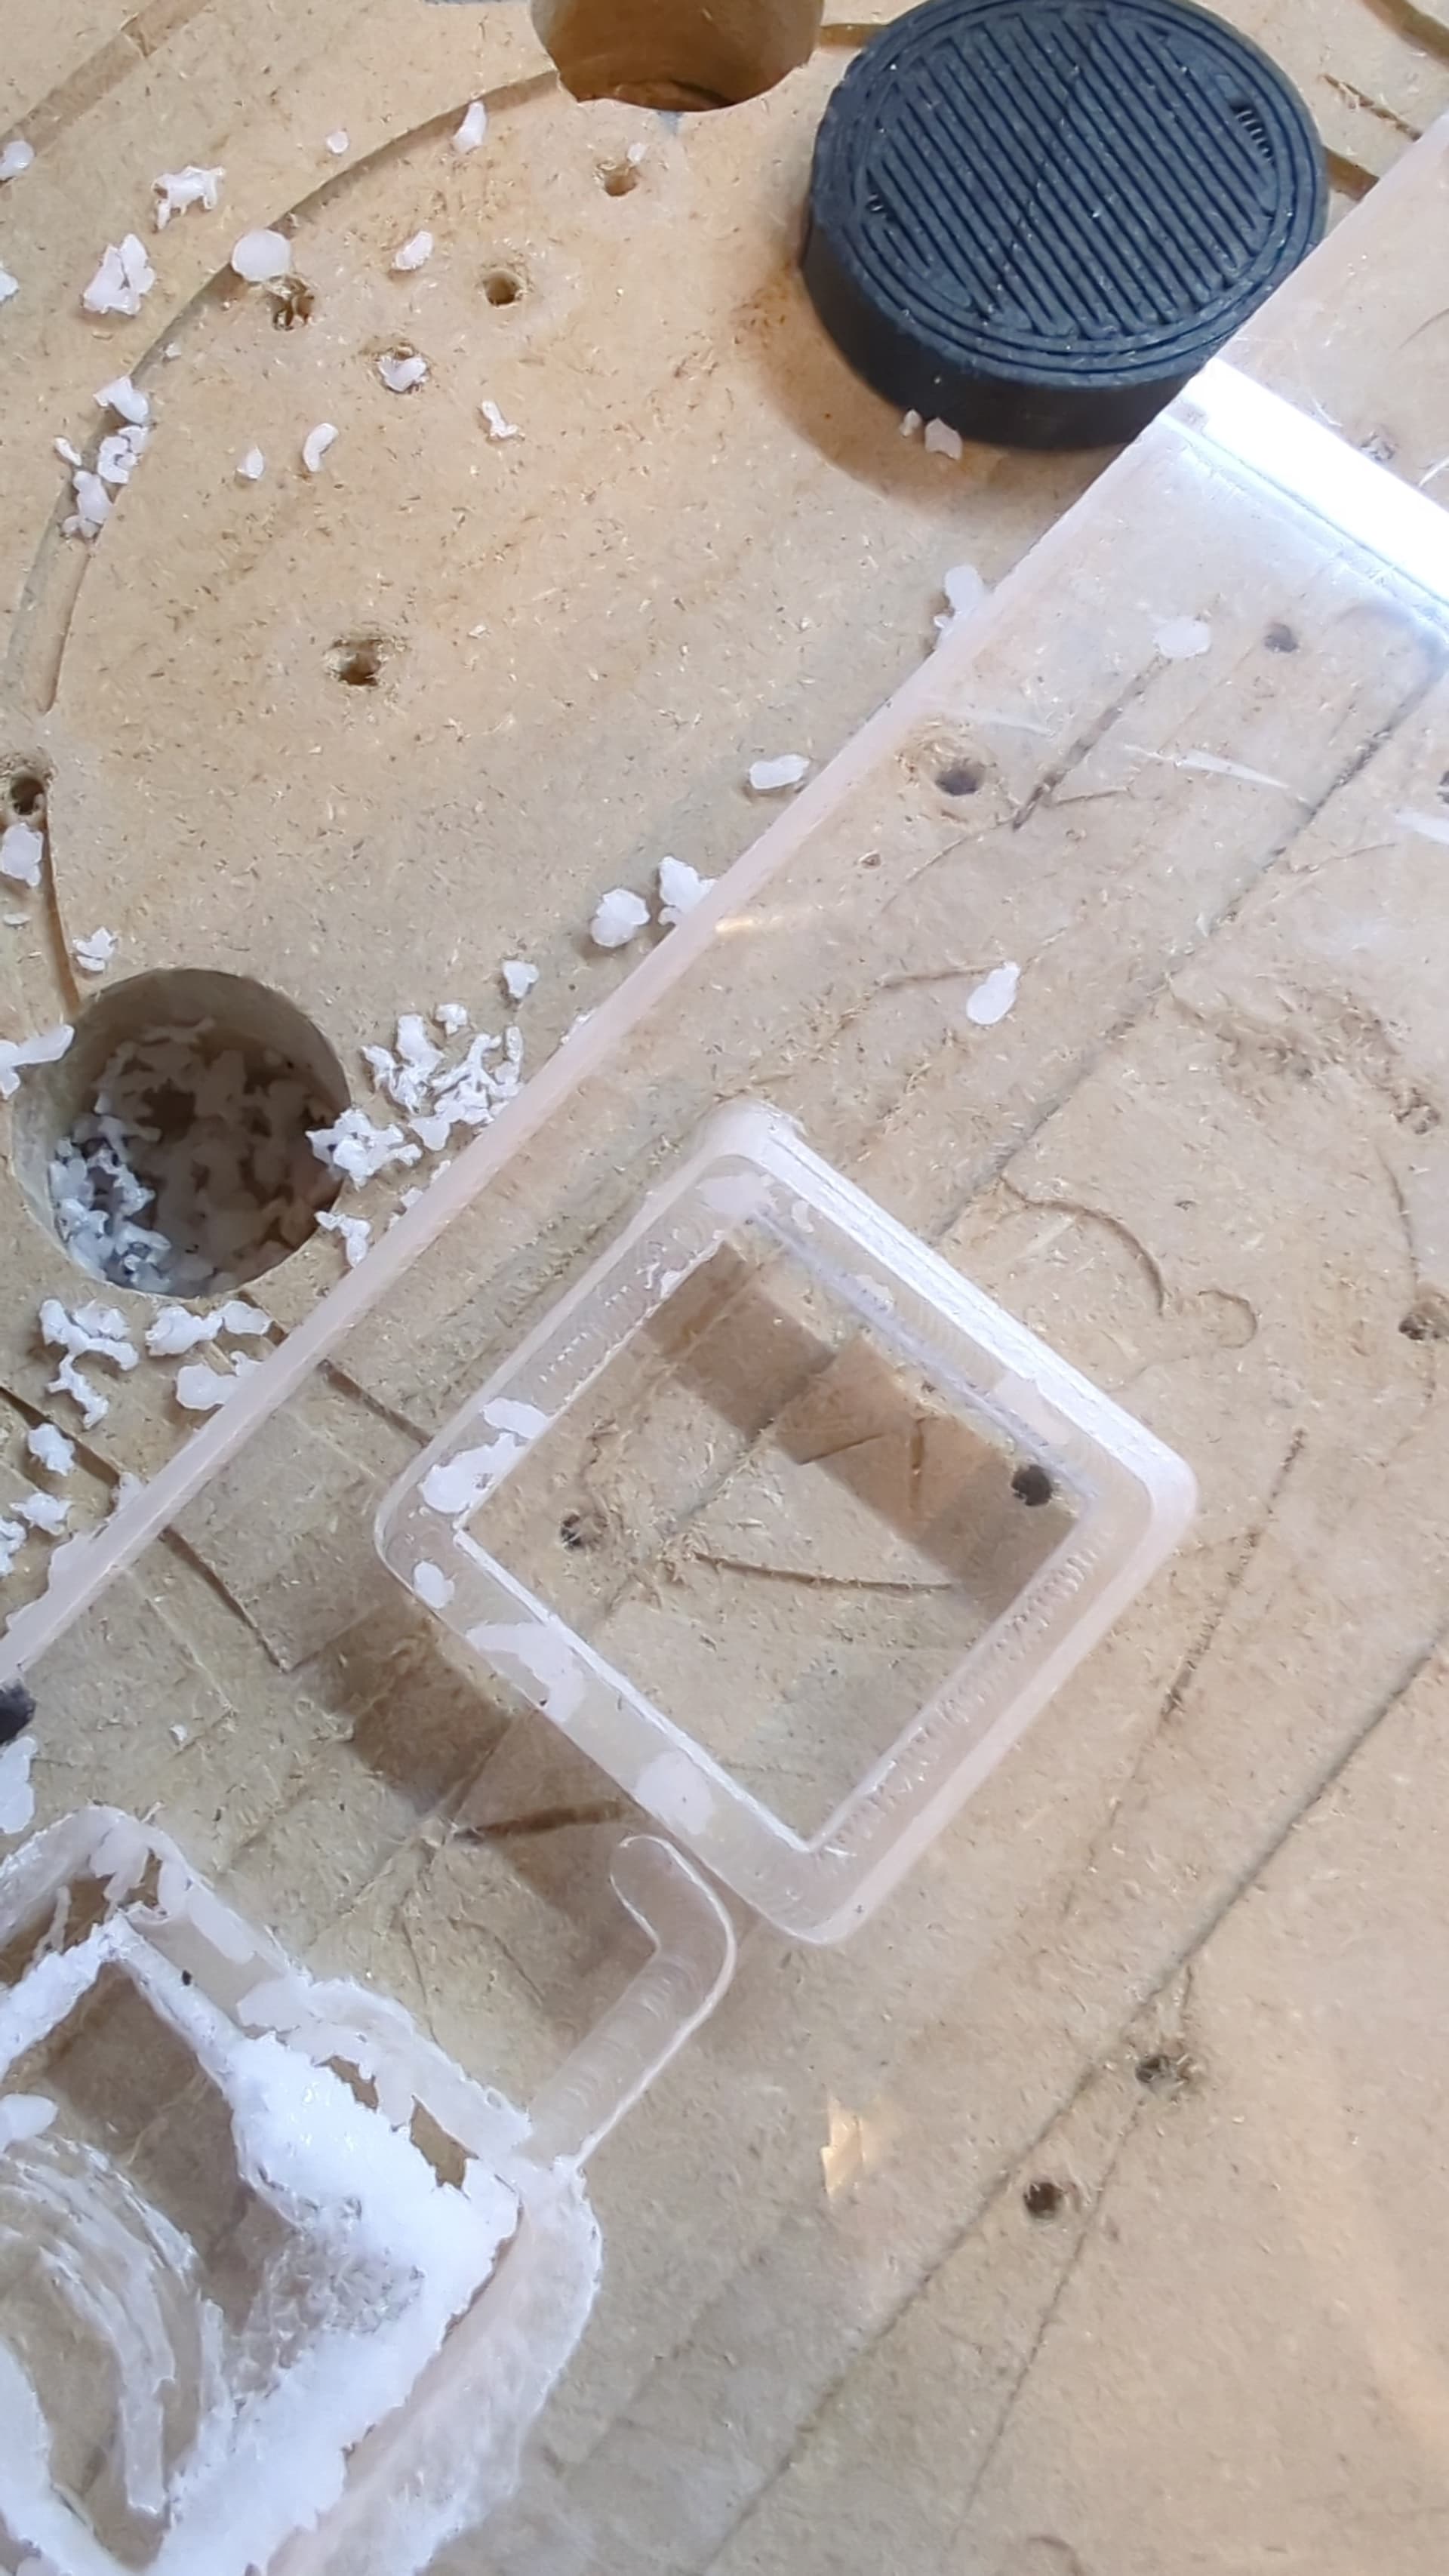
Full bore, 12mm cut in 2mm increments (feed 45mm/s, Troch Stepover 20%, Troch Width 25%, Oscillation 0.1):
Fudge.
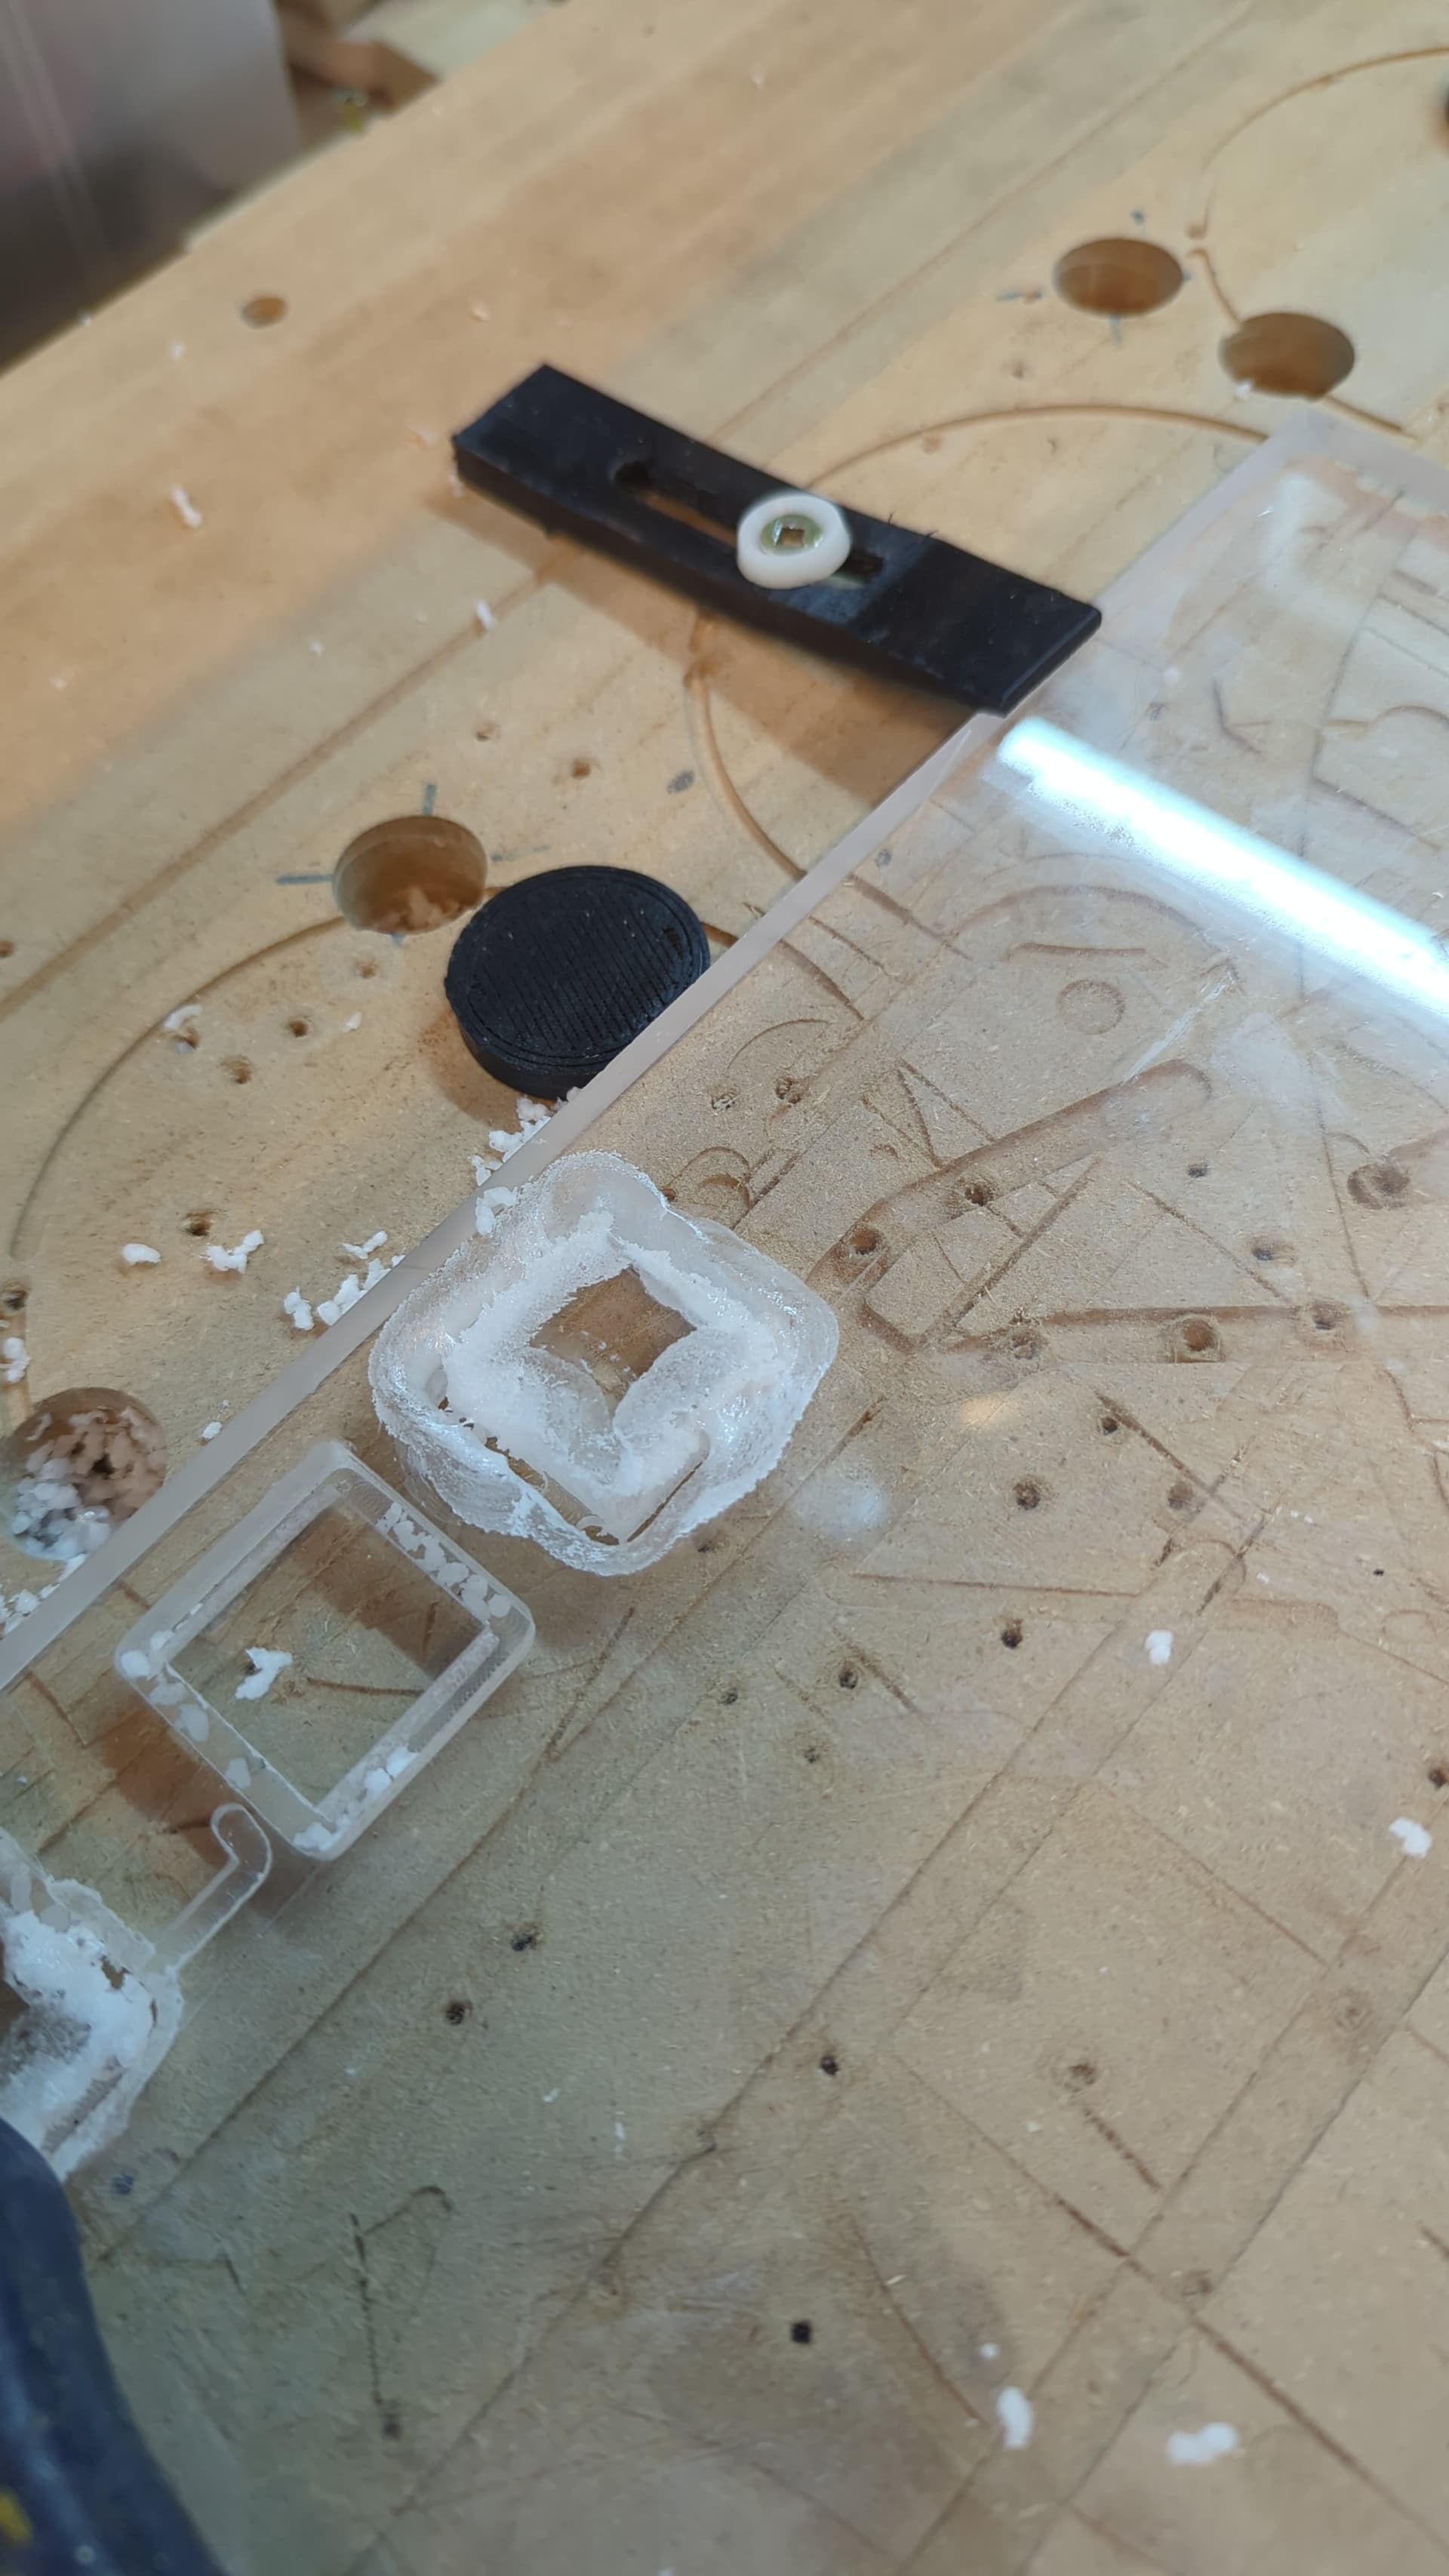
That heat. For this sized cut my settings work with a 2mm depth and a cooldown period.
I’m going to try a longer 2mm cut.
Even a timeout injected every so often might be enough of a cooldown. Would be nice if Estlcam would let you add code after each DOC increment.
Nice! Appreciate seeing your update and settings that are working better (or less bad) for you. Am also trying some cuts today as well…
While figuring out how to configure drilling chamfered holes, I noticed Estlcam does let you add gcode in a few ways (beyond just start and end of the job).
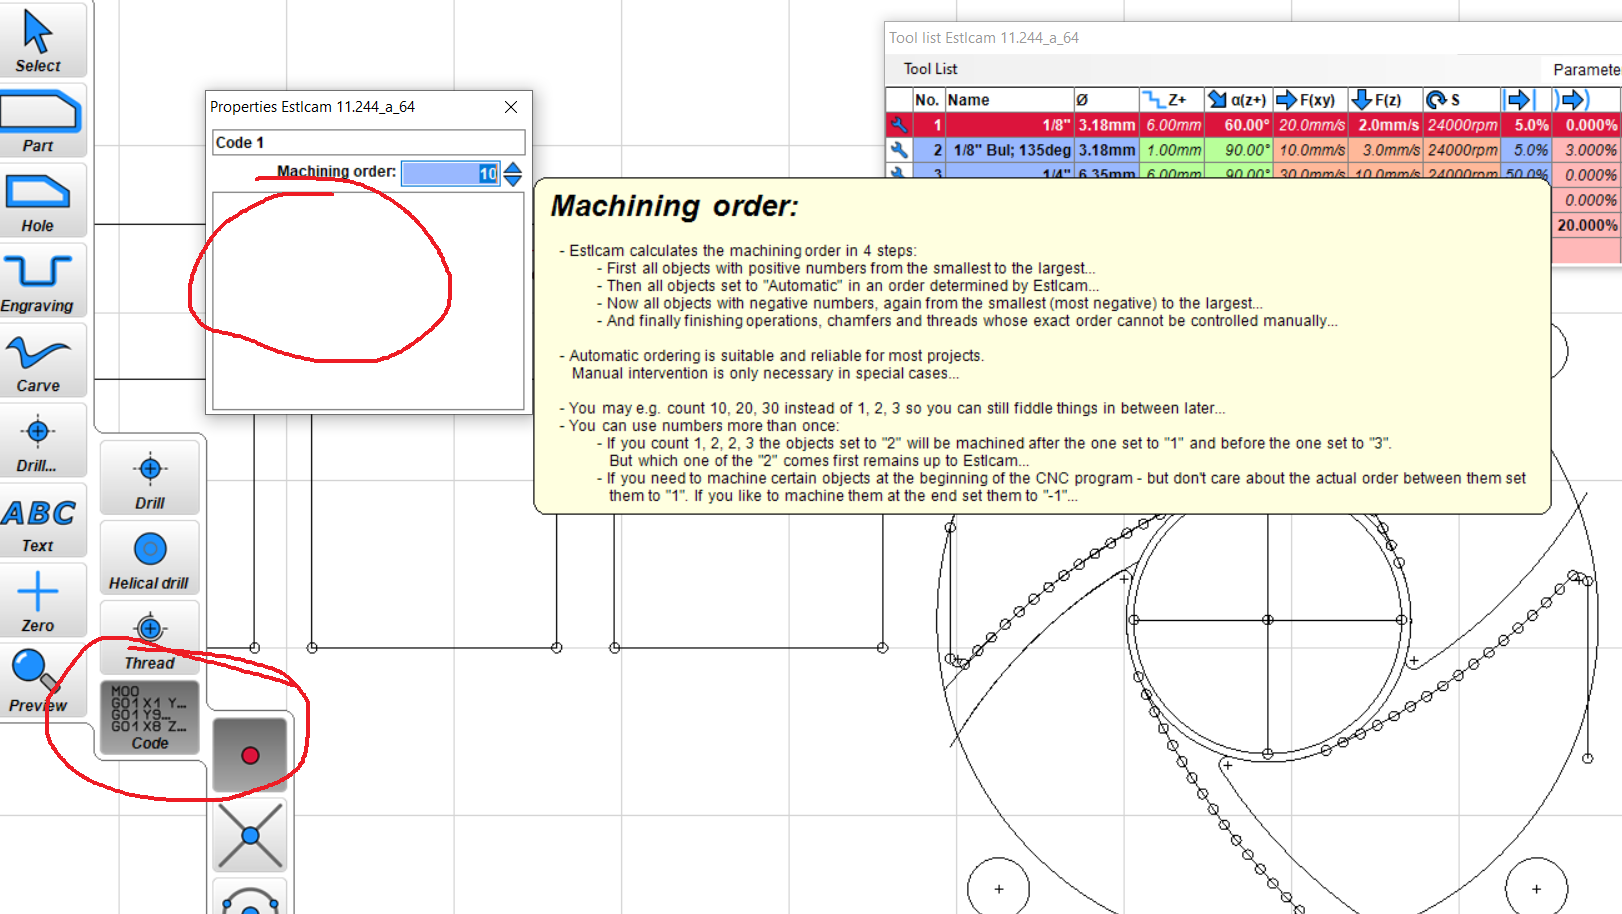
Drill has a gcode option for some reason… Could maybe add pause, Dwell | Marlin Firmware e.g. G04 S5 would delay 5 seconds. Depending on how the planner sequences the cuts, you might need to explicitly set machining order.
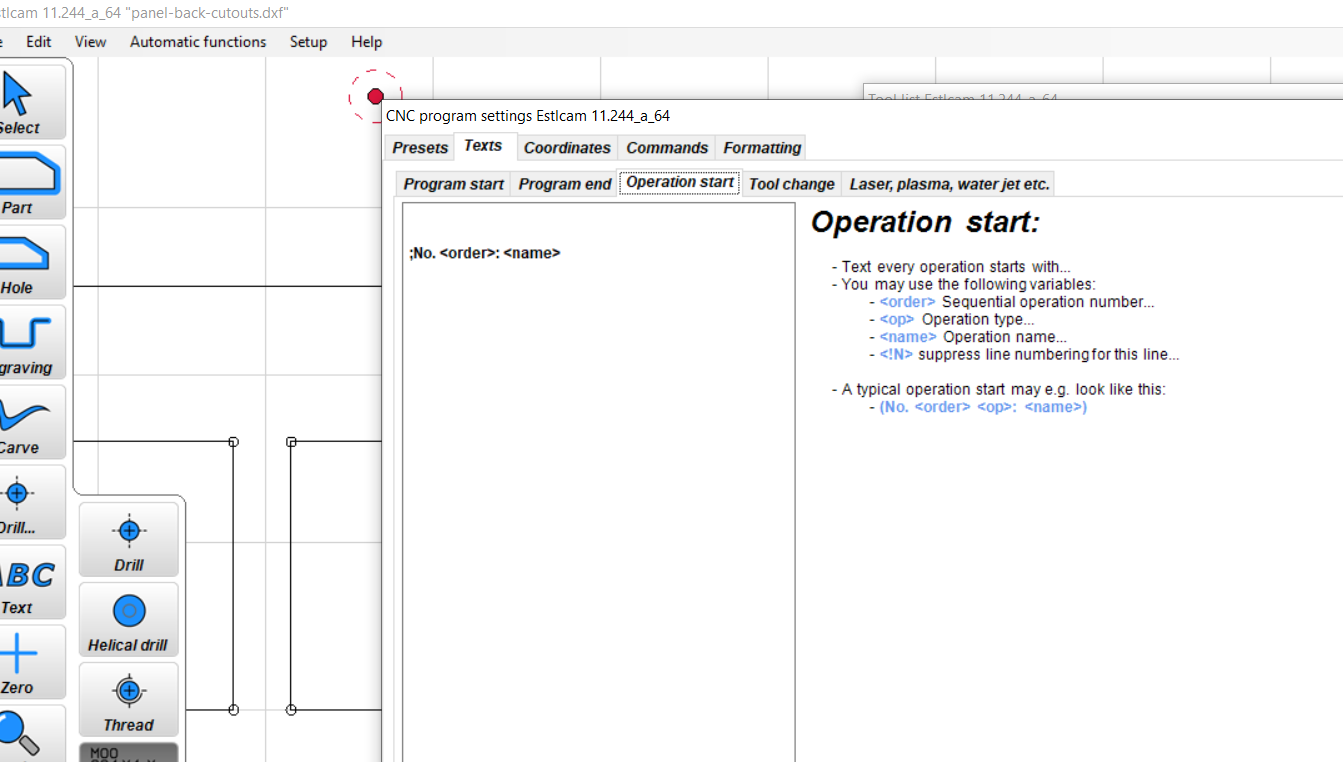
Another option… Within Setup menu → select CNC Programs menu item → select Texts tab → select Operation Start tab, maybe try messing around with that for a bit. Maybe adding G04 here would work. Just need to remember to revert the change when done so other jobs are not slowed.
Maybe add some M300 commands to beep, Play Tone | Marlin Firmware, to help understand if/when the Operation Start gcode gets executed.
Disclosure… I know next to nothing about Estlcam, for example I only just realized it can be used to drill threaded holes, discovered that one while trying to discover how to drill chamfered/tapered holes. Good luck!
You can also just open the code with any text editor and add a pause. Or add a toolchange that actually doesn’t happen. The program pauses for that as well.
Would Trochoidal Width 50% reduce load/friction and heat?
Good ideas…
I looked at the texts tabs already. I think a hole is treated as a single operation so it wouldn’t give the opportunity to put text in between DOC steps.
However…maybe cutting the whole project in 2mm increments would work. In between parts/holes you could add a pause. Then either save multiple gcode files with different starting depths or manually G92 a 2mm change in Z and rerun the same code.
I looked at this too.
If you set an oscillation greater than 0 then you can’t search for steps. Z fluctuates by the oscillation amount. It would only need to be done 6 times per part for me but…
Yes, I guess it would roughly double the heat dissipation. ![]() Without having any knowledge about it at all.
Without having any knowledge about it at all. ![]()