Der Froschkönig - Lowrider 3 in Oldenburg, Germany

It depends on the final accuracy you need. Professionals using machines far more rigid than we have use finishing passes for machine work, when they are looking for 3 decimal place accuracy. For most woodworking, we can probably get away without, depending on how much we are pushing the machine. Going slow to start, we may not need it, but if you are pushing the machine, you probably are getting some deflection of the tool, in which case a finish pass will leave a more accurate dimension.

I don’t use finishing passes for things like screw holes, but usually do for things where edge finish and accuracy are desired.

2 Likes

I re-read some (not all) of your build thread and I was wondering about your workflow.

Perhaps you could post more videos? And do you use the laptop and the laptop wallstand often?

You can check my Youtube channel: HaWiWe.de. You will find a few videos with the workflow. :slight_smile:

Since I use Estlcam as PP as well, I need it all the time. :slight_smile:

1 Like

The king has been crowned:

7 Likes

and now, today is going to be a great day!

3 Likes

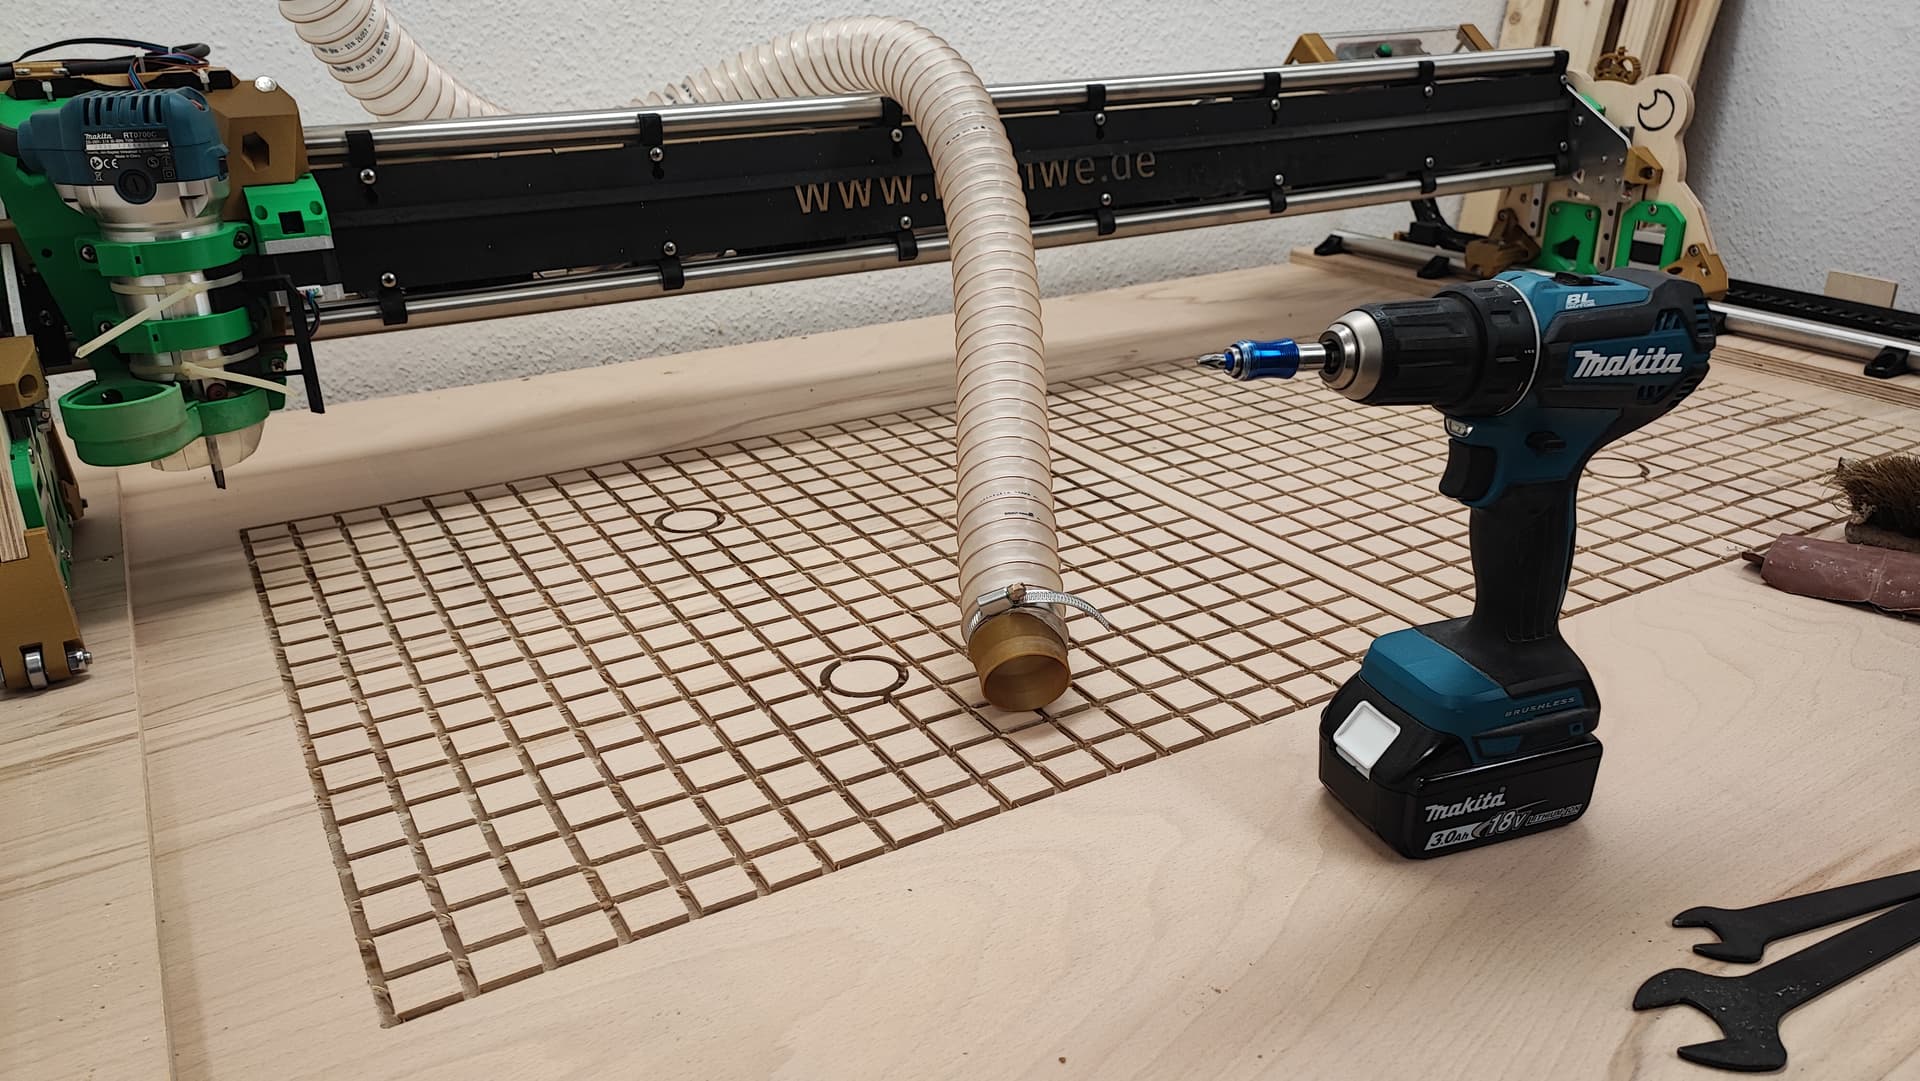
Also: vacuum table coming along nicely. Took 24 minutes with 3000mm/min and 6mm DOC (which made the side lift off the rail a bit. Whoops…).

4 Likes

That is a bit fast, guessing that caused it. I did a 8mm Deep 12mm wide cut in walnut that was wild, I don’t think mine lifted. Do you happen to be using a downcut bit? Was it a fast plunge or while slotting?

I don’t think I have heard of a lift yet, Kinda want to make sure that is not a common issue.

3 Likes

It was an upcut bit, but beech plywood and very low, lower than you’d normally go. I also adjusted my rail afterwards, one bearing had been lifted when it was square even though I had measured carefully before. I also think my plywood YZ plate might be a bit bend.
I tried to take a video, but the movement is hard to see. It pushes the bearing outside by a mm or 1.5mm, but only at the front, the back is fine. Happened while slotting. Interestingly the depth of the cuts was not altered by it, they are all 6.2mm deep. Pretty neat. :slightly_smiling_face:
Will try with less speed in the next days after having finished the table.

1 Like

Okay that makes sense. Sounds like you have a bit of a twist in your build, Heffe had that at first as well. You can usually just twist it out the opposite way.

No big deal.

1 Like

What I find interesting is that the stop blocks are both exactly 29mm from the edge of the table, but then the one bearing lifts. As soon as I push it by hand, the bearings both touch the rail but the sides are then off by 4mm. That should not really happen I guess. :smile:

Okay, it’s kind of fine now, it really is the YZ plate where the plywood is not completely straight. Meh. The front roller on the rail is now pushed out by 0.5mm or so, back roller is fine. So it’s definitely not the LowRider’s fault but my plate’s. I am going to monitor it. If it affects the cuts, I will swap it.

1 Like

You should be able to twist it out. Like, if you push on the front or back on the rail side, if the bearing taps, you should be able to man handle the thing and twist it out. The beam itself can get a little twist in it, but you can twist it out. Worse case you can loosen the strut plates a bit and give it a twist and tighten it back up.

I doubt you would need to replace any parts.

2 Likes

Had a lot of discussions with the piping of my vacuum table to fit. You have to imagine piping that can’t be changed much because it has already been built into the torsion box, plus the box being a bit lower than needed so you have to cut the pipes and then put plugs that will fit into the holes in it from the top. Then three of those match the wholes and the fourth one dances cha cha cha and is like: no. I had to print an adapter for one of the pipes, now it fits, it sucks (tested with my old household vacuum, the pipes are still a bit dirty and I don’t want to destroy my side channel blower), the only thing to do is to get a fitting piece of MDF. :slight_smile: I also smell like burned plastic because I used a Dremel with those little discs to cut piping. It begins to stink and smell… :sweat_smile:
What I can say though: The autosquaring is awesome. The grid in post 100 was made in two separate programs, first the holes, then the grid and they line up 100%.
Now I can go back to the problem of the bearing lifting a bit. I tinkered around with it some more but I still think it is because of my YZ plate being a little bent. Will try it further the following days. :slight_smile:

1 Like

I only now understood what you mean. :smiley: Going to try that later. Thanks, that makes sense in my head. I did rotate two of the pipes to have the bearings make contact, might be that it got twisted then.
And I just had Z levelled nearly perfectly. :cry:

Edit a few hours later: twisting it did the trick, what an easy solution. :sweat_smile: Thanks! Hope it stays that way, or should I fasten the screws more than I did?

1 Like

The twist is back. :scream: Not as much as before, but when planing the spoilboard every second line (from right to left) is raised because it pushes the bearing off the rail. So I have to do the thing I didn’t want to do and loosen all my screws on the gantry… Ugh.

Yikes, that must be a nasty twist.

1 Like

I used my 10 months old as a rubber ducky, undid all the screws except for the bottom, took it off the belts, twisted like a gorilla on crack, put it back, zeroed it, fastened the screws, turned the power off, the left side still moved a few mm back. Let it drive from X0 to X800, told rubber ducky that, lo and behold, it does touch the rail after the first 10cm. Moved the rail at the front two positions 0.6mm farther outside and now it seems to work. Stupid sexy rails. Good baby rubber ducky. :smiley:

Now I have to see whether that fixes every second row looking like a mountain valley. :smiley:

And another question: How do I get the tramming tool to the back? Left and right are tight, but the support triangle thingy blocks the movement when using it with the LR core. :smiley: Or can’t it be not perpendicular there??

Your collet should sit flush with the bottom of the core, so the tool should clear by a few mm minimum.

I pushed it all the way on the collet, because I thought it had to be to work, but that’s not true. :sweat_smile: Thanks.

I printed some shims, 0.4 and 0.3mm. 0.4 makes the grooves nearly non-existent.

Before on the left, now on the right. Can live with the very small groves, I guess.

Edit after planing the whole board: need to shim a bit more. :sweat_smile:

2 Likes