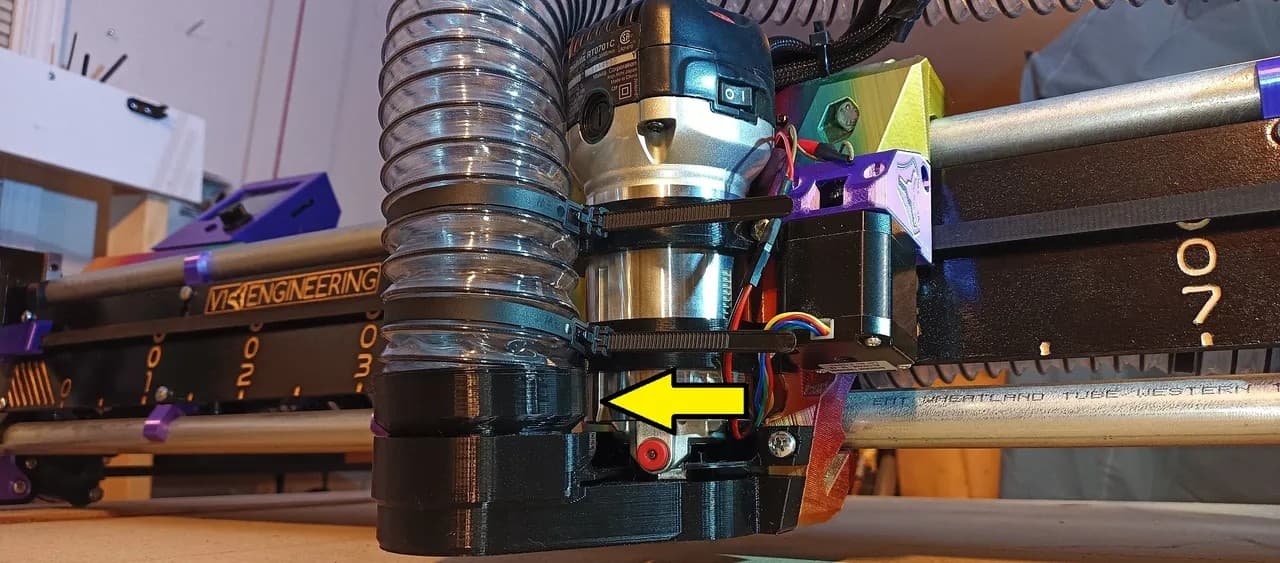
What size vacuum hose (OD) is the standard LR3 Makita Tool Mount and Dust Shoe designed to use?
I have gone through the forum search tool for the answer to this question, but it seems that the LR, LR2 and LR3 all used different vacuum hose sizes in their stock design, so many of the answers I have found don’t necessarily apply to the LR3, and by this point my poor aging brain is overloaded and confused.
I have two hoses already that I would prefer to use if possible (cheap bastard that I am). One is from a built-in vacuum mounted in my garage/work area. The OD is 1.5" (40ish mm) and the ID is 1.25" (32ish mm), and is 50’ long. Not sure if this is what is called 1 1/2" or 1 1/4" hose.
The other is a Shop-Vac brand hose. The OD is around 2.35" +/- 0.15" (kind of hard to get exact, as it flexes so much that it is hard to keep exactly round) with the OD at 2.0" (51ish mm), and is much shorter at around 10’ long. Again, not sure if this is called a 2 1/2" hose or a 2" hose.
Ideally I would like to use the standard V1E Dust Shoe, and the built in vacuum system, as the hose wouldn’t have to be coupled to reach the vacuum (the Shop Vac one probably wouldn’t reach all ends of the 5’x10’ table and still have enough length to reach the vacuum). But I would consider using adapters and/or one of the many alternative dust shoes if that is what is needed to make it all work.
I think that I have read somewhere that the Makita Dust Shoe (LR3 version) needs a 1 7/8"" OD hose. If this is true, is there a threaded adapter for my 1.5" OD hose, or should I just start wrapping duct tape around it until it fits?
Designing hose fittings is the cliche starter CAD project. You should bust out the calipers and print an adapter.
I don’t know the answer to your question. @Ryan designed the hooks and a standard size (it is something you can find at the home center). @DougJoseph made a mod for larger tubes.
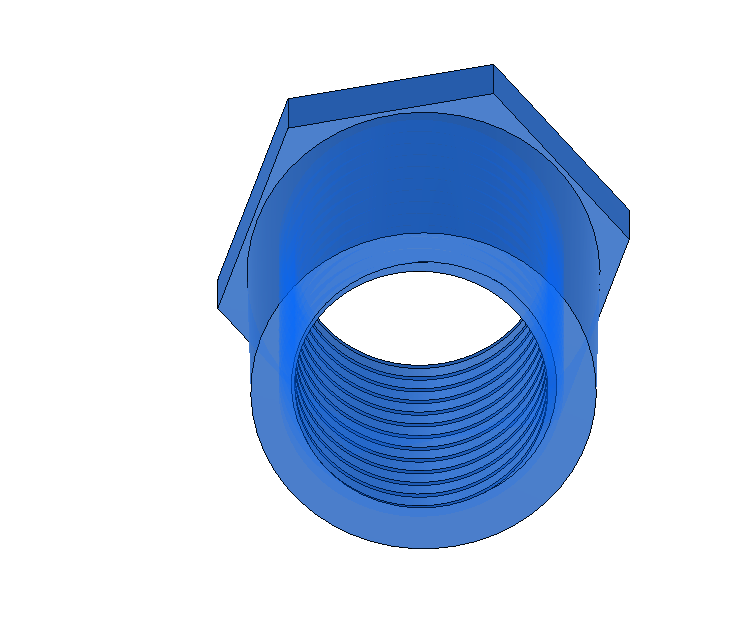
Here is my original remix for it, which was made to accommodate what is nominally referred to as 2.5" hose — but be aware that (I think) some manufacturers have different dimensions on what they call a 2.5"
EVERYONE is confused about hose sizes and adapters.
I think just about every tool in my shop has a different size outlet on it. I gave up on finding the right size hose, etc, and just made some magnetic couplers (like everyone has done).
Adapting vacuum hoses to tools and parts to hoses is the bane of my workshop existence
I used the same hose that fit the LR2, which is much smaller, so I did a quick adapter using the OD of my smaller hose, and the ID of the dust fitting, put a 5° taper on the extrusions so that it fits in nice and tight and never looked back…
Thanks. That works out to about 1 7/8", which seems to match what I found in some of the forum threads
Apparently the same can be said about 1.5" hoses as well.
Not sure about everyone, but I sure am!
Tell me more… Did you use a threaded connection for screwing it onto the hose, or is it just a push-on fit? Is this shared anywhere?
Sigh, I was kind of hoping that wasn’t going to be the answer. My starter CAD project was supposed to be customized LR3 struts and a parametric torsion table. I’m not sure that I yet have the skills or spare time to design a threaded hose adapter with a tapered end. Something to work towards, I suppose, but I was hoping to get the dust collection sorted before cutting all sorts of MDF and Aluminum, so perhaps I’ll need to rearrange my project list.
I never shared it, it seemed a bit specific. It might be in my LR3 PLOG… Nope…
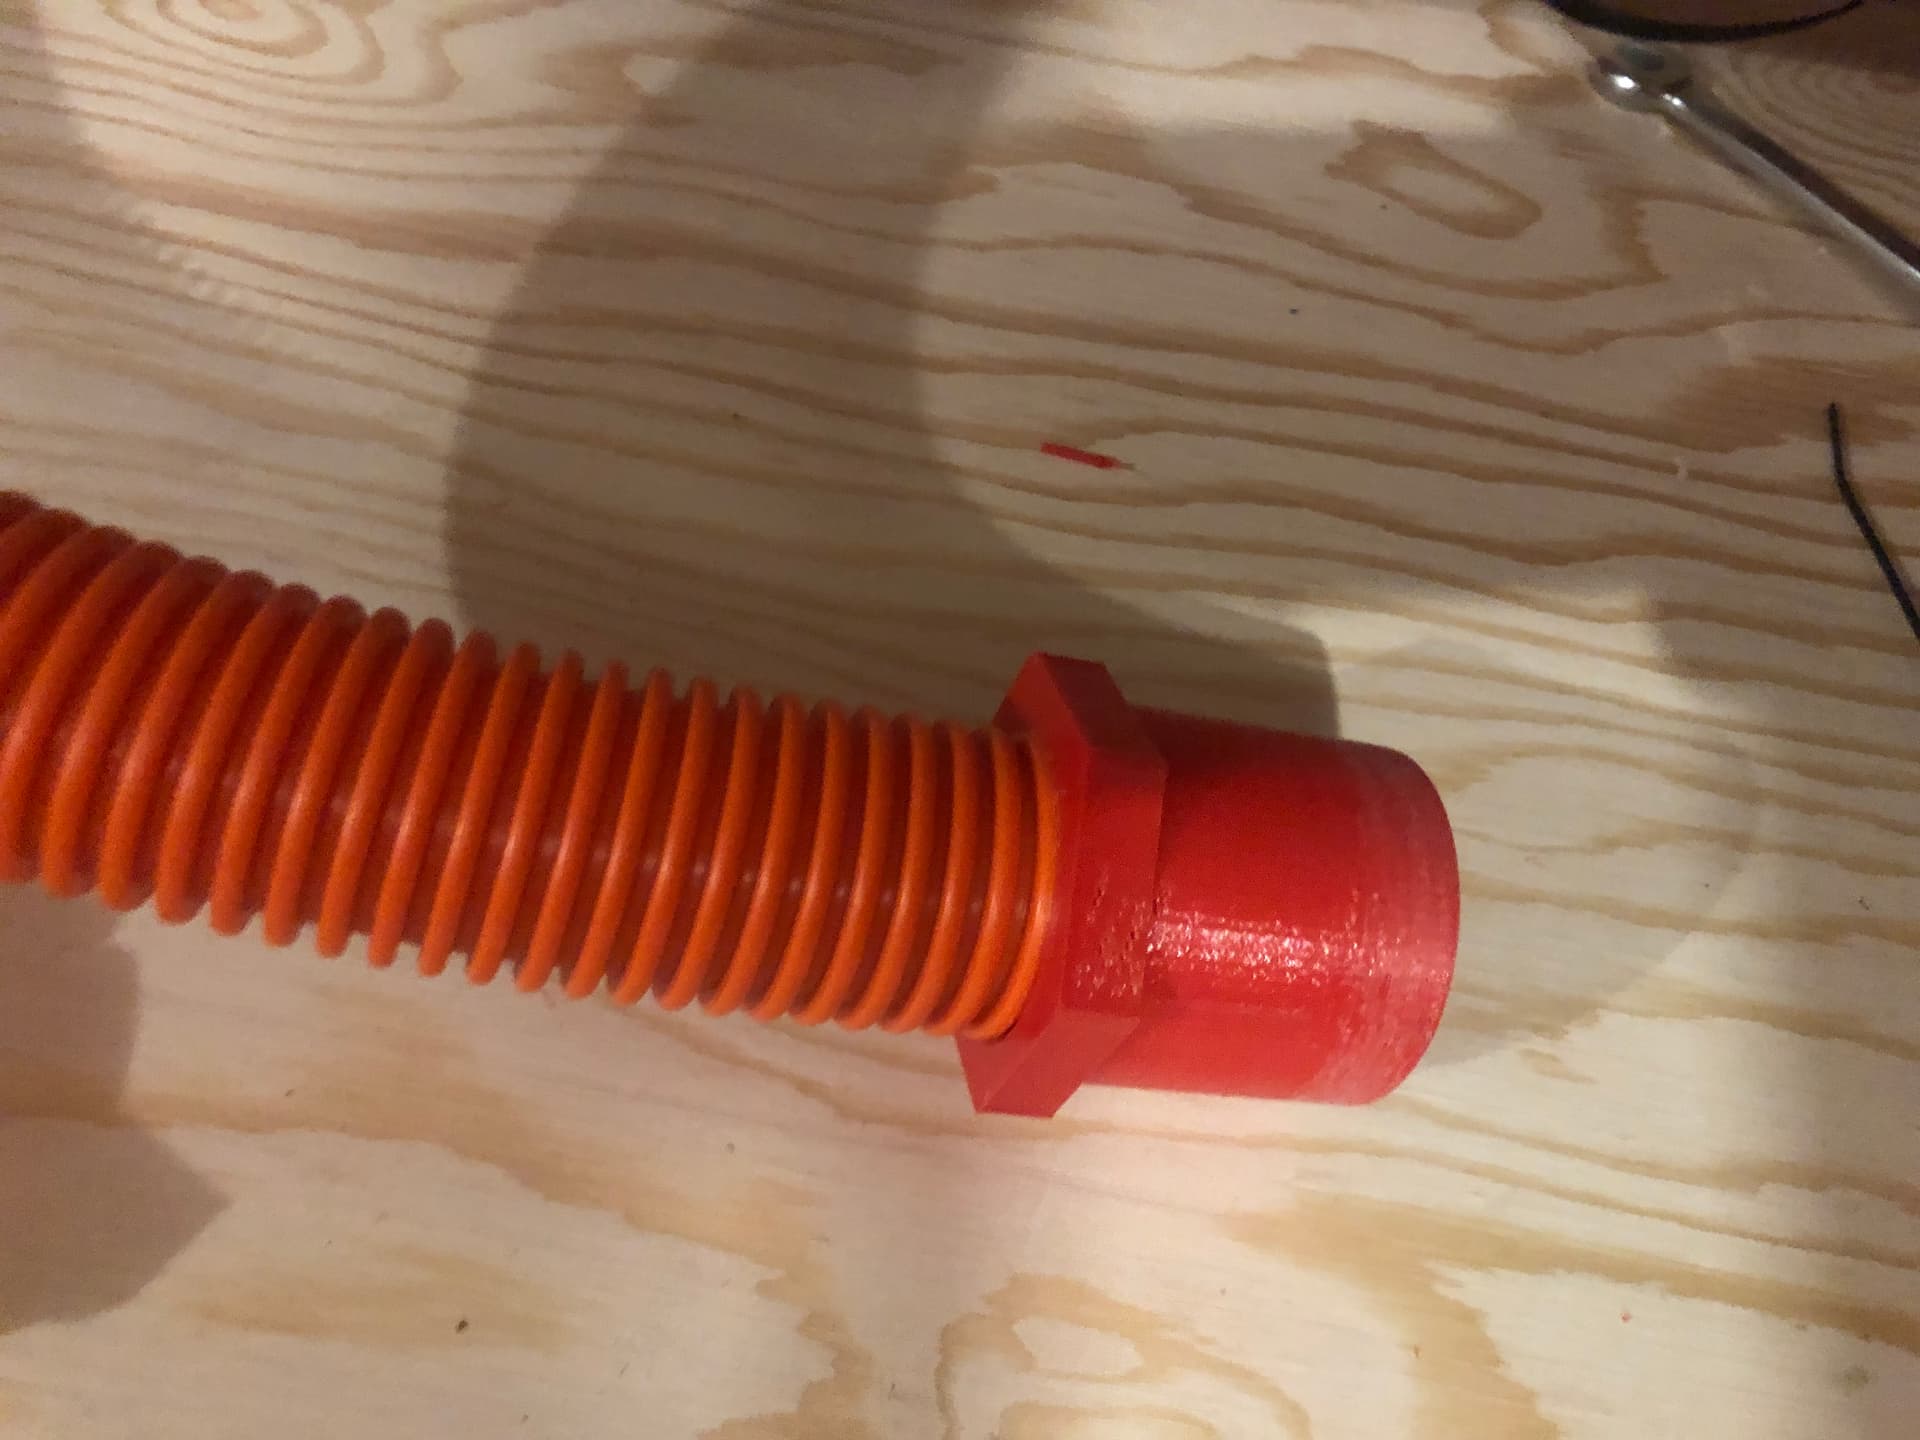
It’s a donut. I don’t even remember what I modeled it in (Probably FreeCAD at the time.) It just wedges in (that’s what the taper is for) until it’s tight in the dust shoe and then the hose wedges in until it’s tight in the donut, and a zip tie keeps it from backing out.
Wow, that sounds like you’re offering to design something for me. Much appreciated!!! But now that the challenge has been put in front of me, I think that I m going to give it a try and start climbing the learning curve. If I crash and burn horribly, I’ll possibly take you up on it later.
Currently using this configurable parametric OpenScad based adapter which snuggly pushes into Doug’s 2-1/2" vac mount. Snug enough to not even need layer(s) of tape to make acceptably air tight. Held by friction and obstructions that kinda lock the adapter in place. Didn’t bother threading. Seems good enough, that most suction losses are happening elsewhere.
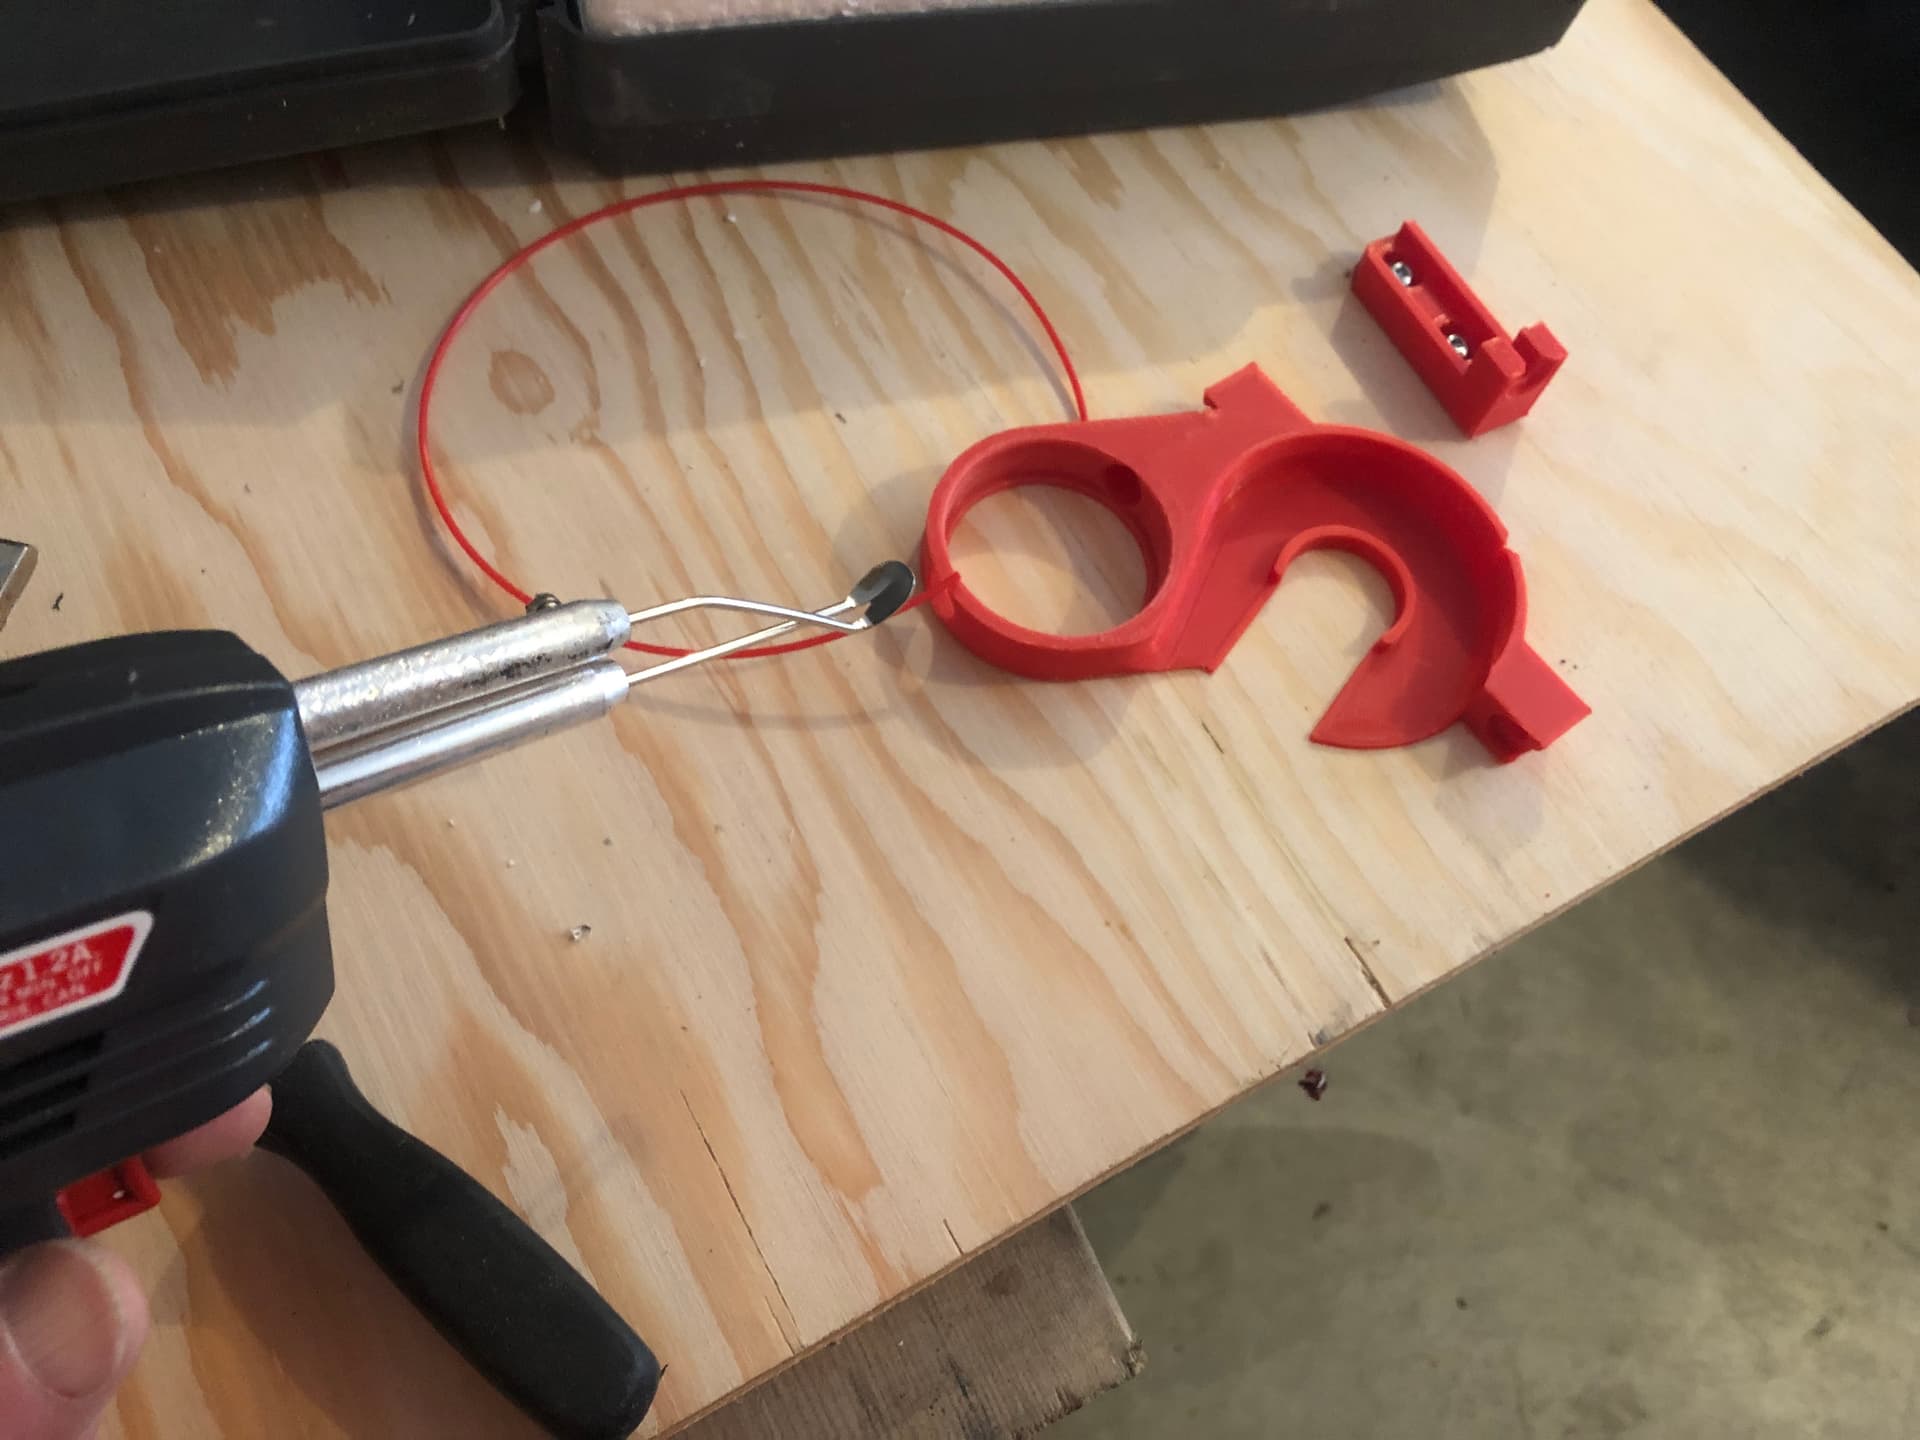
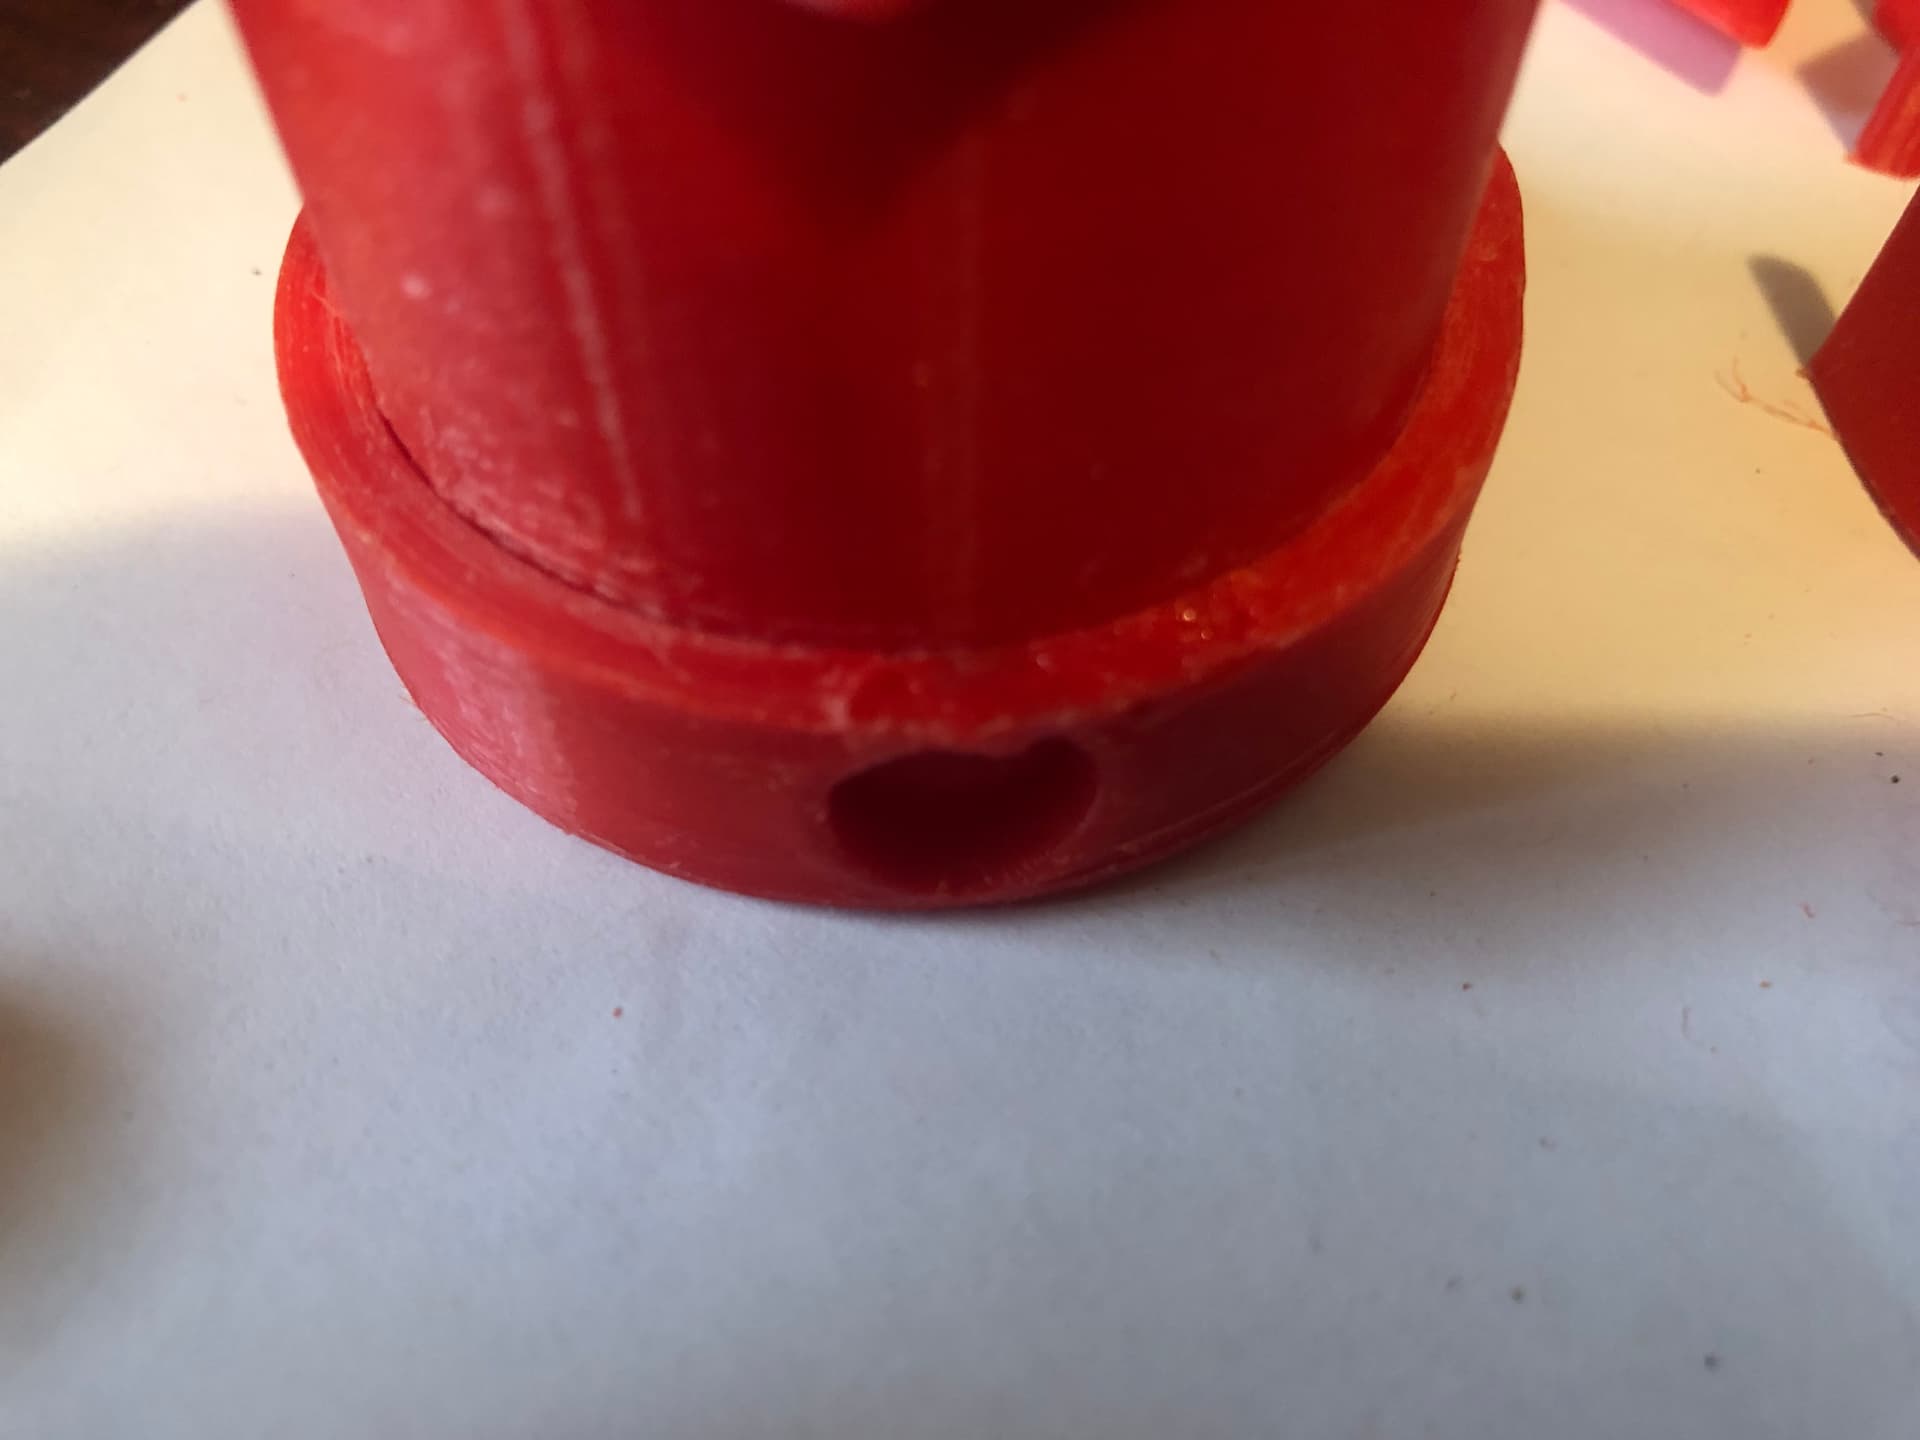
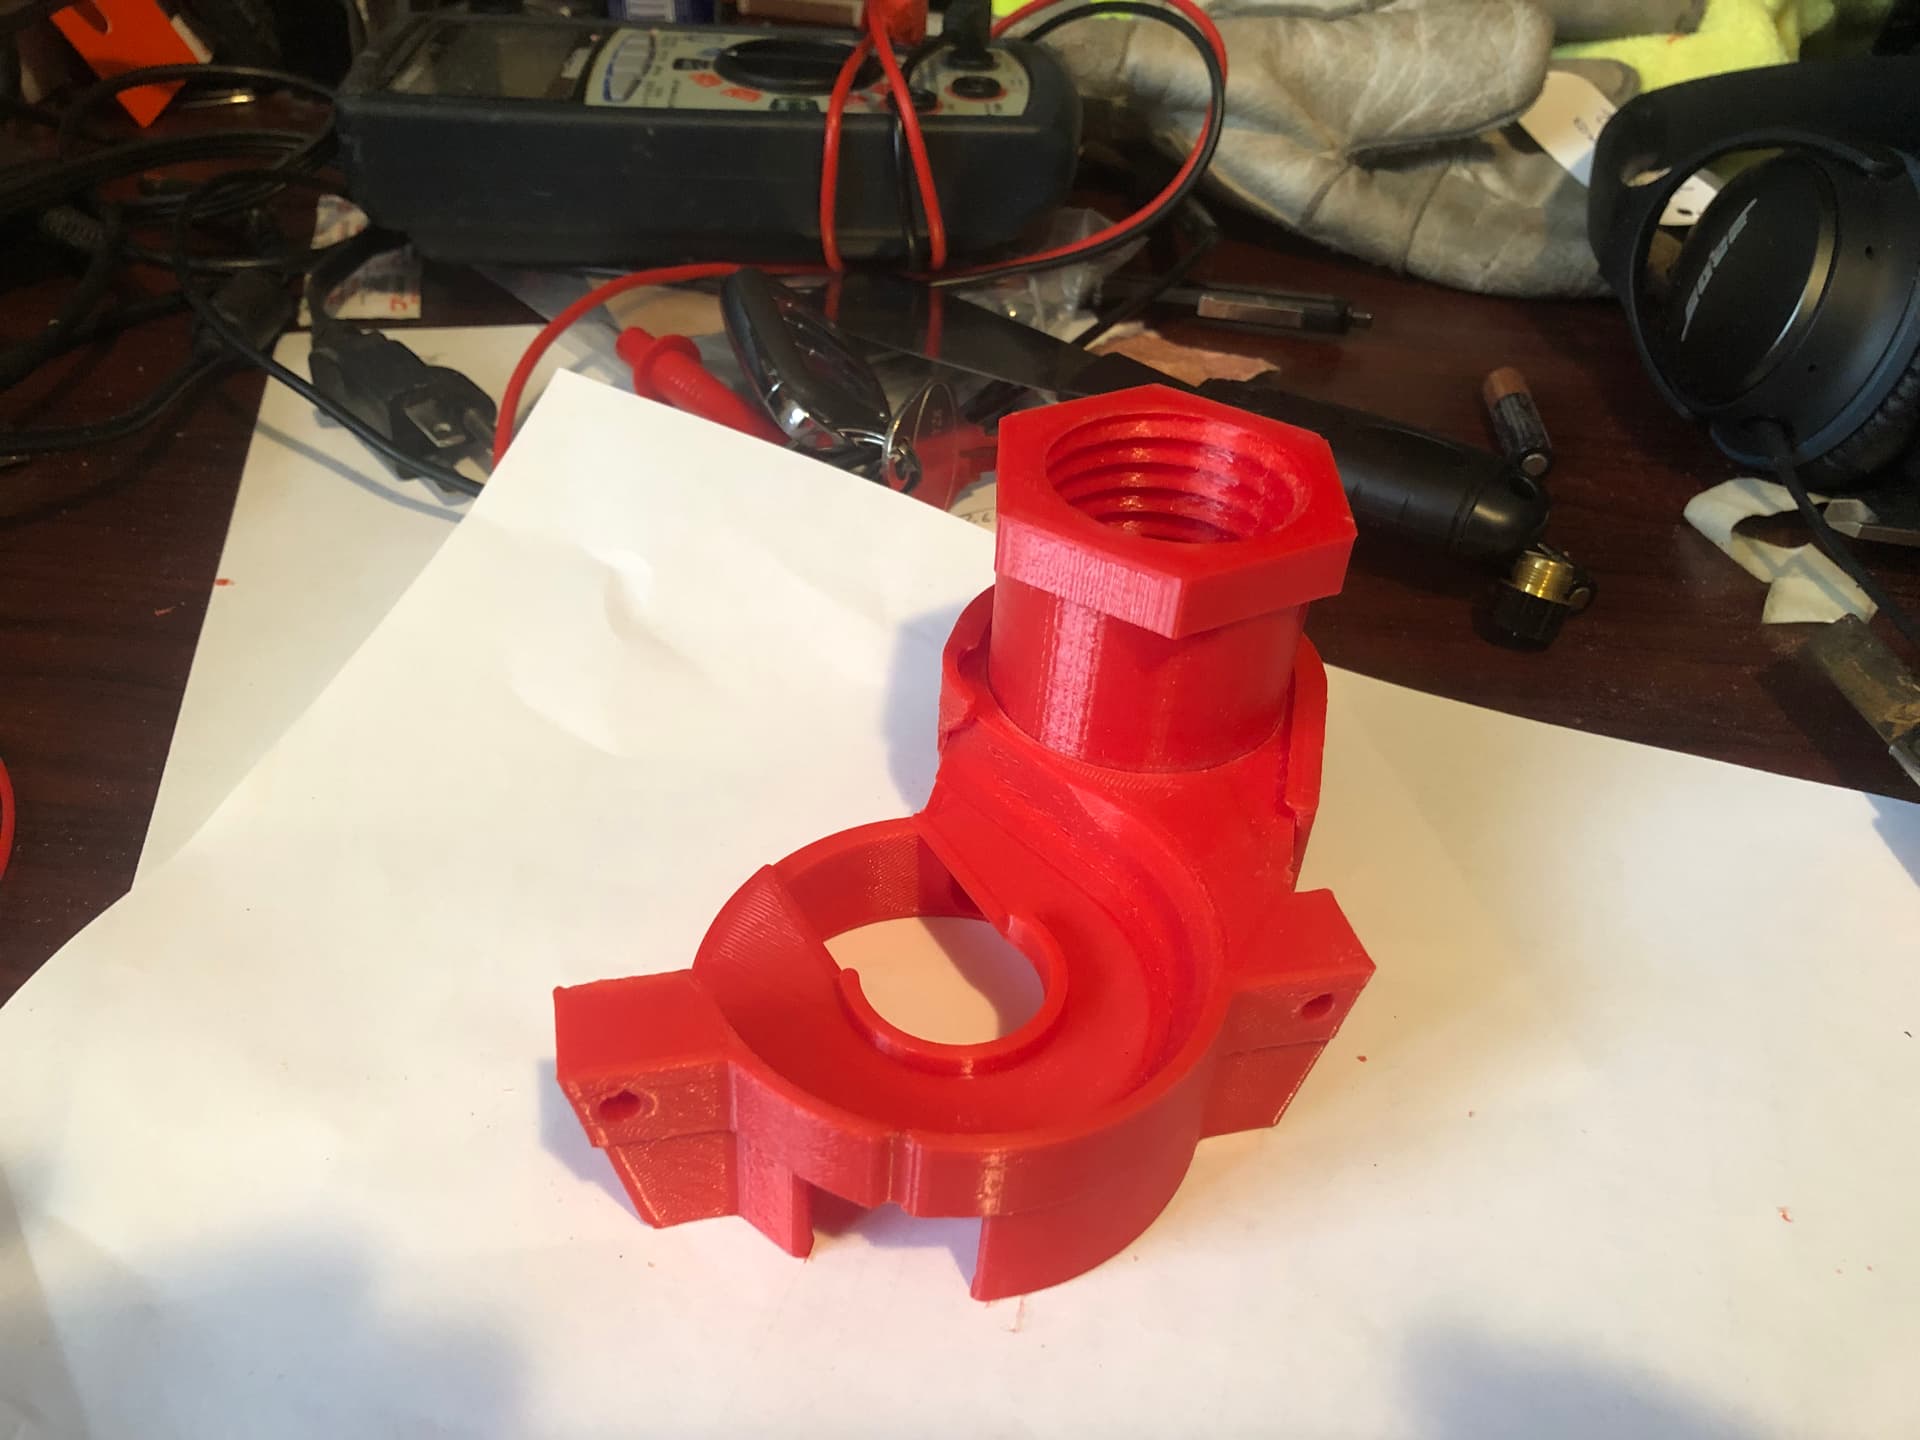
So the first two attempts were close, but not quite at the cigar stage. The first attempt was way too small at the threaded hose fitting, and a little too large where it fit into the dust shoe (taper was a little too small). This latter issue ended up breaking the dust shoe at the screw hole:
This led to me not only having to adjust the design, but to also repair the crack (using the handy solder pistol that has been sitting on my garage shelf for a few decades)…
I then went back to Fusion 360 and adjusted the barrel taper, and re-sized the threads to 42 x 5 mm. This version was a little too small at the barrel (taper too large), and the threads were close, but started binding after 1-2 turns.
The third attempt was pretty much spot on. I split the difference on the taper (ended up with 0.95 degrees), and added some offset to the thread faces, allowing for a bit more clearance. This version was very close, with the barrel fitting snugly into the dust shoe without any force required (after a tiny amount of post-processing with some 120 grit garnet paper), and the threads turned smoothly for the first inch or so before becoming a bit stiff. So I decided to award myself the cigar!
I wasn’t thinking of tapered or threaded (although those are easier than they look, just not great for your first project). Just a straight hose adapter with a friction fit.
Not sure how many people relate, but the first thing I modified in fusion is still showcased to people who ask, along with the first one I designed. Both tied to the same project which was nothing more than a spool holder, which someone else designed, and looked like it would work for my spools, but theirs have a difference hole size than mine. I know that feeling to a “T”. Designing my own STL was the second game changer for me. First one was a 3D printer. Third was a V1 machine.
And here I thought I was so happy adjusting sizes in my slicer, to make hose adapters that couldn’t be purchased in stores. Once I was designing them……
Guessing, trial and error, re-printing in my slicer vs just setting the correct size in CAD, game changer.