I am back to debating whether to get a laser engraver yet, or a new reliable 3d printer like the bambu labs P1S.
Do you have more maintenance on the 36W engraver? I am on the Atezr email list and received an email from them yesterday on maintenance for that engraver. Sounds like mirrors on this occasionally break. Does cleaning it help alleviate this? I am also wondering if the 36W is more prone to this than the 24W since it is more power. I found a link to the article on their website here: Laser engraving machine maintenance knowledge (atezr.com)
Pretty much all laser lenses can get sooted up if some sort of positive air pressure isn’t there to keep the smoke out. And any debris or buildup on the lens that is in the beam’s path can heat up and possibly damage the lens… as well as rob you of power at the workpiece. So, one routine maintenance operation is to periodically clean the lens. This isn’t Atezr specific… it holds true for most all lasers.
I’m on their email list as well and think Atezr is just putting out some handy routine maintenance tips and information for their customers – many who are probably new to lasers – rather than responding to a spate of reported problems. They also include any specific disassembly/assembly instructions for getting to the lens; i.e. screw locations, removal of the air-assist cone, cleaning tools/solutions, etc.
I tried to order one of the Atezr L2 24W laser & 2 accessories that all came from US warehouse but got this error: Some items in your cart can’t be shipped to the address you entered. Review your address to ensure that all fields have been entered correctly and try again.
I sent them an email about the problem, but probably won’t hear back from them for a day or so. I also had one item from the EU warehouse but taking that off the list didn’t help. I am wondering if this is because of the Chinese New Year celebration?
@dkj4linux The material setting page for the atezr p20 plus, the values dont really make any sense, was wondering if you had any setting for materials that worked for you on that machine that you can share?
I don’t see anything terribly odd about those pages on the Atezr site but I also have never relied on them. I have some Lightburn .clb files that I’'ve downloaded from the @lahobbyguy’s site where members (it’s free to sign up!) can download from the “members only” folder. I’ve never compared the settings between those two sources but since they both identify materials and give speed (mm/min), power (%), and other pertinent info… I’m not sure what doesn’t make sense to you.
I’ve done very little since Christmas with my lasers. I’ve also never been one to play with a lot of different materials. Of those I have played with – and documented in these threads – I always tried to share details about the settings and methods I’ve used. If you have specific questions, I can try to help but beyond what I’ve already shared in my posts… there’s little more I can tell you.
I found my ordering problem. My credit card had flagged it as potential fraud & called me this morning about it. After talking to them, I was able to order it. It’s interesting that they didn’t call me yesterday, but maybe it was a different problem yesterday. I only ordered the L2 24W Laser engraver for now as they didn’t have the enclosure & rotary attachment I wanted.
My L2 24W arrived today & I have it together & will test it tomorrow. I had several hiccups with connecting the outside with the 16 - M4 screws. A couple of them didn’t want to line up at first. I couldn’t get the transfer shaft to go through the frame as that didn’t quite line up. After taking that side of the frame off & putting it on without going thru the outside of frame it worked. Also, the wiring wasn’t obvious to me on 2 or 3 of the connectors on which way they went. After watching a couple of videos, they seem to be correct.
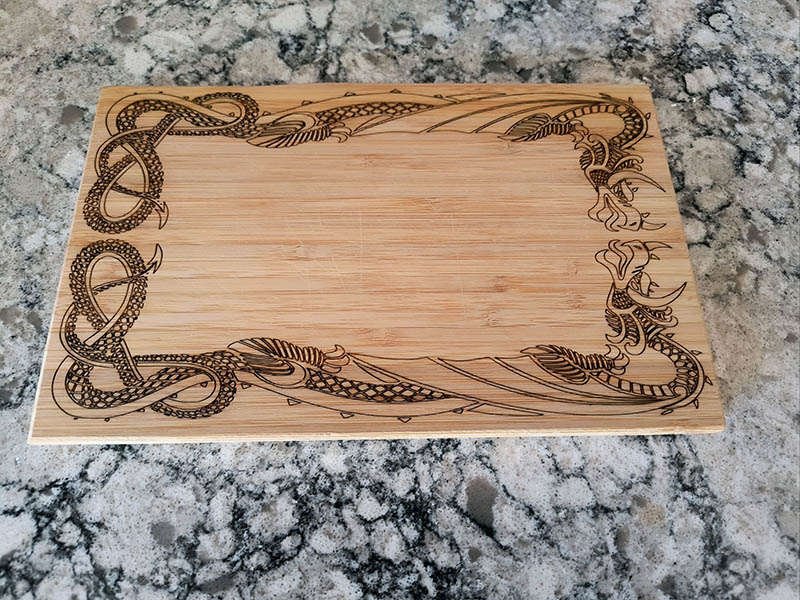
Thanks for all your help & guidance @dkj4linux . Thought I would post just one photo here of my 1st real project today with the 24W Atezer. I used it outside so it would not smell up the shed. I really don’t need eye projection with this since it has that orange acrylic around the laser, but I wore them anyway. This was a dragon border design I found here: 1,672 Dragon frame Vector Images | Depositphotos It is engraved on a small ikea bamboo cutting board. I did a test burn on some 3mm baltic birch plywood (actually closer to 2mm). I thought it came out quite well. I really like this laser engraver. I ran it at 3500mm/min & 80% power with air assist.
@dkj4linux and @geodave. How are you liking the Atezr L2 lasers? When I built my MPCNC I always thought I would add a laser to it at some point, but it looks like these are a much better option. One thing I found interesting is that the specs and performance seem to rival most others in this class, but when I try to find comparisons, the Atezr brand does not show up in most lists. The best comparisons I found were actually on the Atezr site. How did you end up with this brand and would you buy it again?
I bought mine based a lot on what @dkj4linux said about it. I built a couple of DIY laser engravers & really wanted one that just worked. I really liked the adjustable Z-axis, but after watching this video,
I need to double check to make sure it is actually in focus. I have not really used mine much yet, because it has been too cold for the most part in the shed to use it. In the meantime, I am designing some adjustable 3d printed legs for it.
I’m liking my Atezr lasers very much. They’ve enabled me to easily do all the “projects” I’ve shown in this and my “easy inlays” thread. I’ve actually purchased three Atezr machines now… the P20 24W generation 1 machine in the first post of this thread, the L2 36W generation 2 machine in post #26 of this thread, and a refurbished P5 5W gen1 machine most recently for engraving ceramic tiles, slate, etc.
Over the past year or two, we’ve seen a rather sudden influx of laser machines using “stacked diode” technology… combining the outputs of 4, 6, and even 8 ~5-6W laser diodes in a single laser module, giving ~24, ~36, and ~48 watts of actual optical output power, resp. As I had previously purchased three of the dual-diode Neje A40640 10W laser modules and fallen in love with what they could do… I had also bumped into their limits. So, about a year ago, when reviews started showing up on the internet of some of these newer machines, the Atezr P20 24W for a time seemed to be garnering a good bit of attention for its robust construction and full Lightburn compatibility… with several respected reviewers even touting it as “commercial duty”. With holiday sales and significant discounts going on at the time, I took the leap… and haven’t regretted it for a moment.
One word of caution: there are some manufacturers – Xtool, in particular – that have chosen to bundle their latest, greatest, and very expensive machines (S1, F1, etc) with their own proprietary software (XCS) and custom firmware. And while they’re currently claiming “Lightburn compatibility” in their advertising… nothing more than the most basic functionality is available in Lightburn. All the more advanced features of their machines can only be exercised using XCS… which most consider far less capable than Lightburn. And their usual response, so far, to requests for help with Lightburn issues is… “well, you should be using XCS”. While their hardware and advanced features seem to be fantastic, locking folks into their proprietary eco-system seems to be their primary goal… and many Lightburn users seem to be regretting their Xtool purchase.
While I love the idea of a motorized Z-axis, and I’m glad I have it… I’ve discovered I really don’t care for, or use, the L2’s auto-focus functionality. It’s too slow and I don’t care for all the homing and moving after the focus is auto-set. My workarea is often cluttered with tools and material, outside my actual job coordinates, and I’ve had collisions when the laser decides, after probing, to run “home” and return along a cluttered path.
I also never use “absolute coordinates” in Lightburn… choosing to manually focus (using the provided ruler/focus tool) and position the laser head and use “user origin” or “current position” instead.
Someday I’ll strap a pen/marker on the laser head and try out the L2 as a pen plotter… but for now, the motorized Z-axis is unused.
Thanks for the info. In the device settings of Lightburn, do you have Enable Z axis & Auto-home on startup turned off? Do you use that pointer offset? I was wondering how to use that until I saw the video I mentioned earlier. I just noticed my Y-axis is a little out of square. I found that difficult to get exactly right as the grub screws are not accessible when I have the carriage all the way at the end as they show in the assembly manual. I also notice there are 4 - M4 screw threads in the top of that frame that look like they could be used to mount a frame to support a camera above.
I never “auto home” anything on startup, Dave. Again, I don’t use “absolute coordinates” (machine coords) but prefer to manually focus and position the laser head where I want it to start on my material (job coords)… and when I cycle power everything stays where I left it.
I did measure the distance between the laser beam and red X-pointer (x=56, y=0) and have enabled the pointer offset… and use the red X-pointer to position where I want the job to start [where the green dot (job origin) is positioned prior to generating gcode or pressing Start]. I find that very handy and reasonably accurate.
I have an Atomstack camera but since I don’t use LB to control my machine (I create gcode and use V1Pi/CNC.js over wifi) and my machine is inside the Atezr enclosure that has limited overhead space… I don’t use it. I prefer, as described above, to simply position the red X-pointer at the desired job start position and return to my recliner and control the job through CNC.js.
The grub screws on the Y-driveshaft can be hard to get to. IIRC I had to loosen the coupler’s motor shaft grub screws as well, position the gantry hard against the stops, rotate the coupler by hand so I could get to the screws, and then retighten.