Wall Mounted Pen Plotter

Does this post exist?

I see the macros inside the control.zip listed here. They make sense. At some point, I want to set this up as an ATC with M6 macros. Since that means the tool number would be available, I think that will allow for a single macro script using the gcode parameter and expressions stuff. Functionally, it doesn’t matter. I just want to try it.

I understand the general idea of what has to happen for post processing but still have some dots to connect.

I have all but the servo connected and everything is jogging in the correct direction. I just had to swap the 2 middle wires to get the Z stepper to work right. Now for calibration and pen holding stuff. Yay!

I probably got sidetracked and never made that post, which is probably a good thing because I have been modifying my macros and tool changing processing in the last few days. A strange thing happened (on 2 separate plotters) which I have been unable to duplicate and I suspect it had something to do with tool changes. Essentially, the plots were executed in the machine coordinate system instead of work coordinates. I suspect the tool change arena because that is the only time I use G53 (use machine coords) in any of my gcode. The strange thing is that it had never happened before, or since, and I have plotted many things.

Anyways, I don’t claim to be a gcode expert, so if someone who knows what they are talking about wants to chime in and correct my reasoning I welcome it…

Here is a typical tool change macro that retrieves a pen:

G90 G53 X67 Y710 (Go to Absolute, Machine coords, Toolbin entry/exit point)
Z1.0 (Move Z to pen retrieval height)
G91 (Switch to Relative moves)
Y0 (Line up with the pen#. Pen#1=0, Pen#2=-30, Pen#3=-60 …)
M3S100 (Open servo)
Y4 (Move 4mm up so pen ‘claw’ clears the pen bracket)
X-66 (Position claw over pen horizontally)
Y-4 (Move claw down around pen bracket)
M3S0 (Close servo)
Z10 (Lift pen to Z removal height)
X66 (Move back to Toolbin Entry X)
Y0 (Move back to Toolbin Entry Y, Pen#1=0, Pen#2=30, Pen#3=60 … )
Z-5.5 (Position Z to safe travel height)
G90 (Switch back to Absolute mode)
G54 (Ensure we are back in Work Coords)

Here is the macro that replaces a pen:

G90 G53 X67 Y710
Z10.5 (Move Z to pen replacement height)
G91
Y0 (Pen#1=0, Pen#2=-30, Pen#3=-60 …)
X-66
Z-9.5
M3S100
Y4
X66
Y-4
Z4.5
Y0 (0=Pen#1, 30=Pen#2, 60=Pen#3 …)
G90
G54

Notes

  • I recently added the G54 at the end to hopefully prevent the glitch from happening again
  • In the first line, Y710 represents the Y position of the 1st (uppermost) slot in the pen holder (toolbin). That can be wherever makes sense on your plotter.
  • If you use my 3d Printed holder, pen spacing is 30mm
  • Note that the variables are on lines 4 and 12 of each macro.
  • Y distance = (pen# - 1) * 30 and either positive or negative depending on the situation
  • Consider making the X offset (where you see X66 and X-66 above) a variable. That way, if the homed X position needs to be tweaked a tenth of a millimeter or two in order to smooth out the pen replacement and retrieval, you can do it in the post processing instead of adjusting the X homing screw on the machine. Same goes for the Z heights.

So, the logic I use in my post processor is:

  • When it hits T00 or M30 in the gcode, it replaces the current pen if needed (2nd macro above) after moving Z to a safe travel height.
  • When it hits T?? in the code (where ?? is 01, 02 …) if it has a pen already, it replaces it (if the number is different from the pen it has) and then retrieves the new one (1st macro above).
  • Safe travel height (Z) is up to you. Technically 2.0 is safe as long as the paper is laying flat on the back board, but that is not always the case. I currently use around 5.0.

!!! When creating macros or doing post processing, always consider the Z height before moving in the X and/or Y.

I’m a bit mesmerized by this…

5 Likes

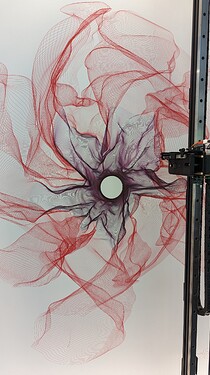
Talk about mesmerizing. Wait until you start drawing generative art.

Never gets old. AI is definitely in it’s future. That way even I won’t know what it will do next.

6 Likes

And when you’ve plotted something already, you go back and mess with the colors, do an overlap or offset and come up with something even more interesting…

7 Likes

There are so many fun things to do with this that I don’t even know where to start!

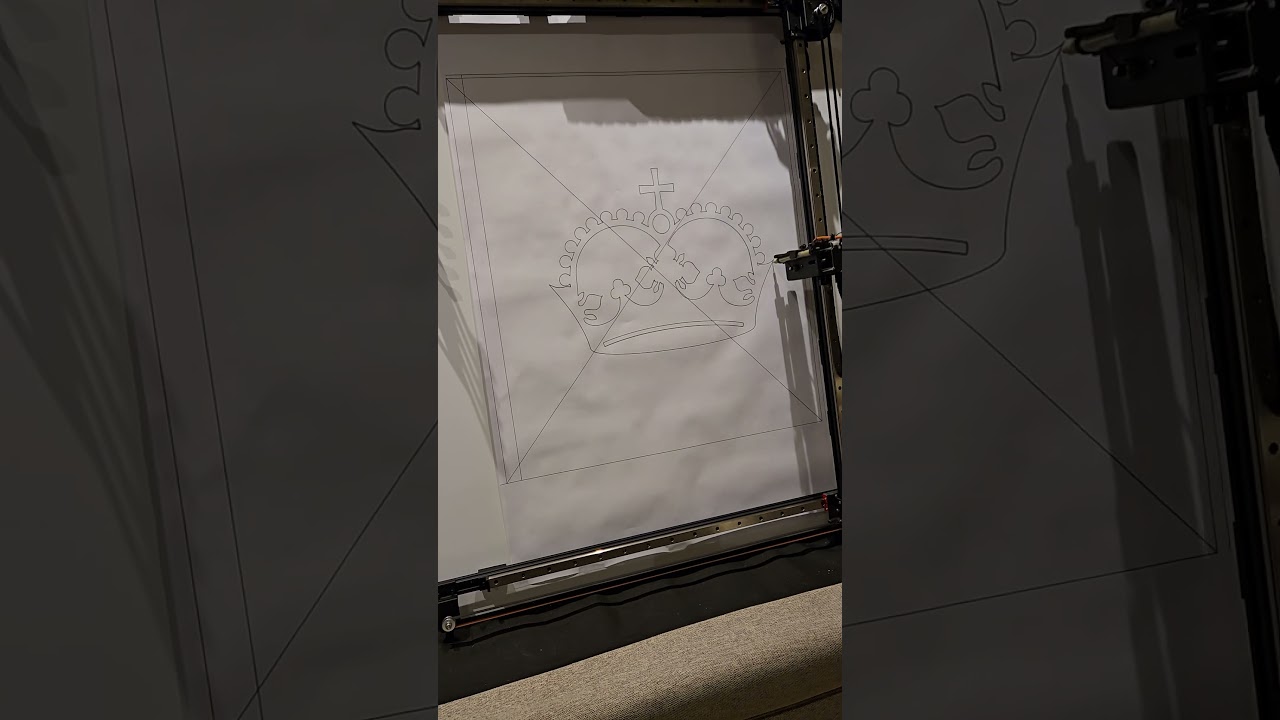
So, I went for the crown. Drew the same one a few times. Decided to go for some speed tests. Landed on XY max feedrate mm/min at 12,000 (from 9,000) and upped the XY acceleration to 1000 (from 200). Feedrate at 15,000 mm/min was fine in Y but sounded bad in X. I haven’t done anything with Z yet. This doesn’t even make sense given the zen nature of drawing but I bet this would make the tablet touch drawing much faster!

4 Likes

That’s awesome!! Crazy fast. Like you said, that will definitely improve the real time drawing app, which by the way was a huge hit with my 3 yr old granddaughter. What pen are you using?

1 Like

Went with your recommendation. Pigma Micron 05

I’m not sure yet if I’m using a good Z height for drawing. I’m at -8. It touches around -1 and bottoms out at -11. That doesn’t mean mm so I just picked something. The spring will let it move up from there about 3 mm.

I’m not sure it was necessary but I added 3 extra washers to the spring. That was a couple weeks ago so it wasn’t anything I changed based on actual usage. My thought at the time was to give the spring slightly more resistance when fully extended.

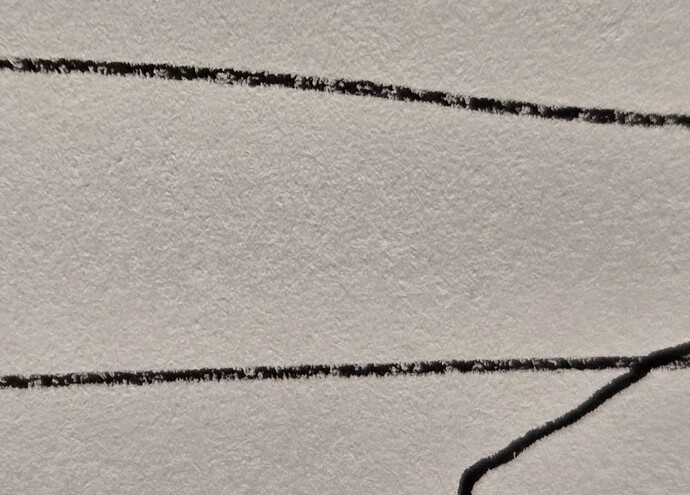
I’ve found that when using a Micron, you want the least amount of pressure that keeps the tip of the pen in contact with the paper. The Microns will last about 5 hours that way. With 3 washers, I think you would reduce that time. And after 30 mins, the line will start getting wider as the tip wears down. Actually, you notice the increased line width with just one washer. But for speed drawing, I think you might need the extra pressure so the pen keeps up. For ball points, the extra pressure is probably better.

So, does the Micron keep up at 12,000 mm/min? It looks like you went over the crown in multiple passes, so hard to tell what it looked like after one pass.

1 Like

It does ok but it’s definitely not as solid.

Playing with the tablet drawing now. It still has a considerable lag but still fun.

2 Likes

After watching Bart’s video about g-code coordinate systems again, I made some changes.

I setup G54 for my work coordinates. For me, that’s X90 Y0 Z0. So, after homing, I entered this.

G90 G53 X90 Y0 Z0
G54
G10 L20 P0 X0 Y0 Z0

Then I setup G28 to be store that same XY location but at Z10. So, it’s a quick way to jog there.

G90 G53 X90 Y0 Z10
G28.1

Then I setup G30 to be the starting point for tool changes. For me, that’s X90 Y500 Z10.

G90 G53 X90 Y500 Z10
G30.1

So, that means instead of doing this, I can just enter G30.

Also, instead of the 66mm X moves (90 for me), I do this instead so I don’t have that hardcoded number.
G1 G53 X1 (move to X1 in machine coords)

Then I got M6 macros working.

Updated the startup macro in the config.yaml:

macros: 
  startup_line0: $SD/Run=init.gcode

init.gcode

#<_PenActive>=#5400
$H

Updated the m6 macro for the BESC spindle in config.yaml:

BESC: 
  ...
  m6_macro: $SD/Run=penmacro.gcode
  ...

penmacro.gcode

#<Feedrate>=5000
#<PenNew>=#5400
#<PenOld>=#<_PenActive>

G54
F#<Feedrate>

(Return the old pen)
o100 if[#<PenOld> GT 0]
  #<YOffset>=[[#<PenOld>-1]*-30]
  G30 (move to the toolbin entry point)
  G1 Z10 (lift the pen so it clears the well)
  G91 (switch to relative)
  G1 Y#<YOffset>
  G1 G53 X1 (move to X1 in machine coords)
  G1 Z-9.5 (lower the pen into the well)
  M3S100 (release the claw)
  G1 Y4 (move the claw away from the pen)
  G90
  G1 X0 (move back to the entry point X)
  G91
  G1 Y-4 (move back to the entry point Y)
  G90 (switch back to absolute coords)
  #<_PenActive>=0
o100 endif

(Get the new pen)
o101 if[#<PenNew> GT 0]
  #<YOffset>=[[#<PenNew>-1]*-30]
  G30 (move to the toolbin entry point)
  G1 Z1 (this is the height at which the claw grabs the pens)
  G91 (switch to relative)
  G1 Y#<YOffset>
  M3S100 (ensure servo is open)
  G1 Y4 (move 4mm up)
  G1 G53 X1 (move to X1 in machine coords)
  G1 Y-4 (move down 4mm so the claw is around the pen)
  M3S0 (grab the pen with the servo)
  G1 Z10 (lift the pen out of the well)
  G90 (switch back to absolute coords)
  G1 X0 (move back to the toolbin entry point)
  #<_PenActive>=#<PenNew>
o101 endif

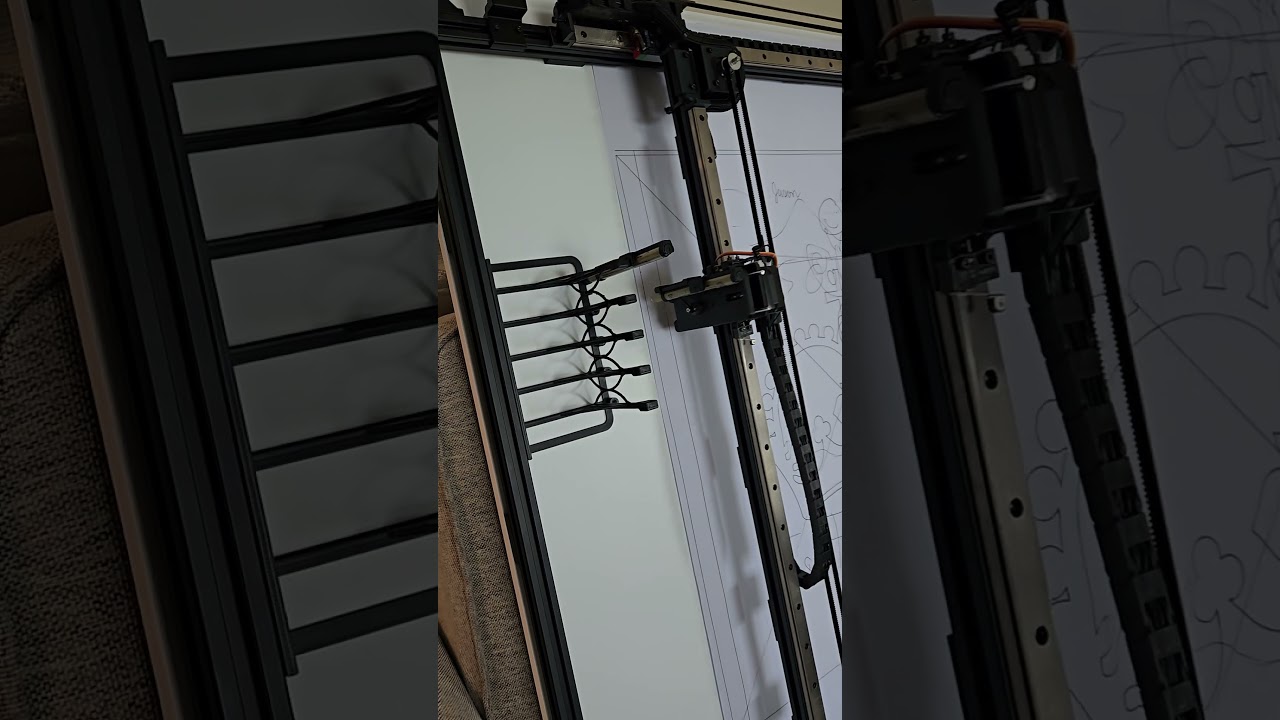
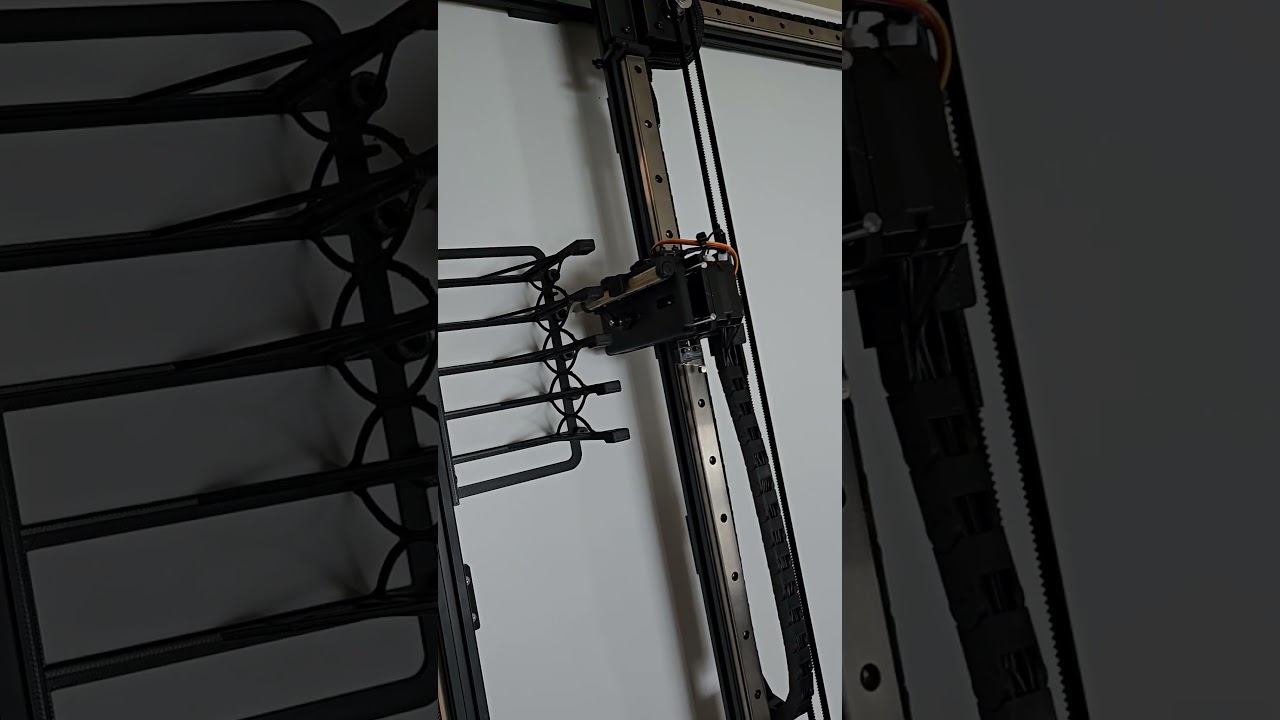
That should simplify post processing a bit. Here’s a video. This is just running “M6 T2” and then “M6 T1”. I may make some minor tweaks but it works. If you send “M6 T0” it will put the current pen back. I might update the script to send an alarm if you use a tool number higher than 5.
5 Likes

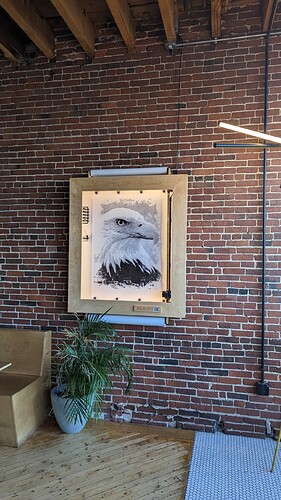
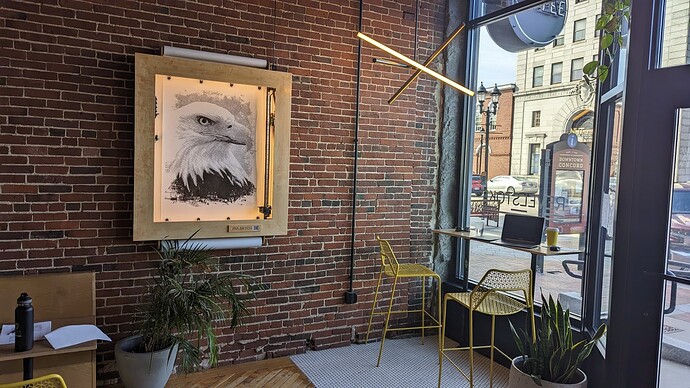
Finally hung a plotter on the wall at the coffee shop.


13 Likes

I removed my extra washers. Without them, the now flattened tip of the micron doesn’t have enough pressure for a fully solid line but it’s great with a fresh pen.

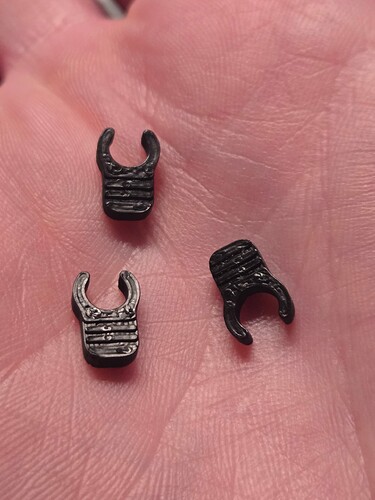
Instead, I printed out some ridiculously small clips that I can use to test out different spring pressures. They just clip on next to the washer. I need to make the tab bigger but it conceptually works.

3 of them uses 0.34 grams of filament.

1 Like

Dude, that’s crazy cool!

Thanks. It’s been a huge hit so far. Lot’s of interest, comments and suggestions. It’s cool that you can make something with old technology (pen plotters were first introduced back in the 1960s, I believe) but present it in such a way that it captivates people who are otherwise calloused by new technology.

We are trying to plot at least 3 things a week. Keeping the photo conversions related to local lore or landmarks or a “this day in history” type of thing. I think Albert Einstein is on deck because he submitted his paper on the General Theory of Relativity on 20 March 1916. It took them a few months to actually publish it, probably because nobody understood what he was talking about at the time. :joy:

Anyways, there is a QR code on the frame that opens a page with a description/explanation of the device (embellished by AI) followed by a link to the current plot and from there you can see the entire history of what it has drawn.

RevelSketch QR Code Link

7 Likes

Just wanted to say this thing is awesome. After sorting out creating appropriate gcode and such, it’s been quite reliable. I’ve got a bunch of ideas of things to do with this, but I’ll create a separate thread for that so I don’t pollute this one more than I already have.

The only annoying thing is that the power supply is noisy. It’s a high pitched whine that fluctuates with stepper movement. So, I’m waiting to see if that improves when adding the load of the LEDs. If it doesn’t, I’ll try a different one. I’m not using the one in the BOM. It’s a Meanwell 24v 6.5 amps which is way overkill, especially without LEDs. I think I’m going to find that with this power supply and 24v FCOB RGBW LEDs, it will give this thing sun-like capabilities and I can probably downsize if needed.

I ended up buying the DrawingBotv3 app. There’s a crazy number of options. I’ve been drawing things at quarter size for trying things out. I’ll end up slowing the speed down to zen mode when I’m not playing but not currently doing speed tests either.

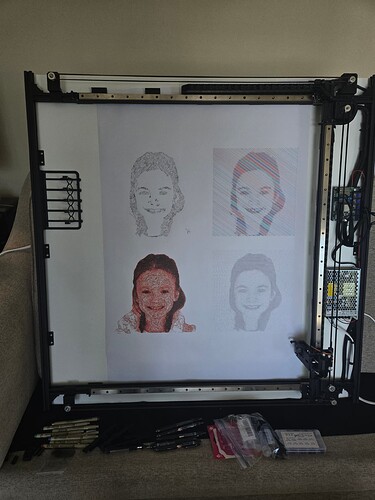
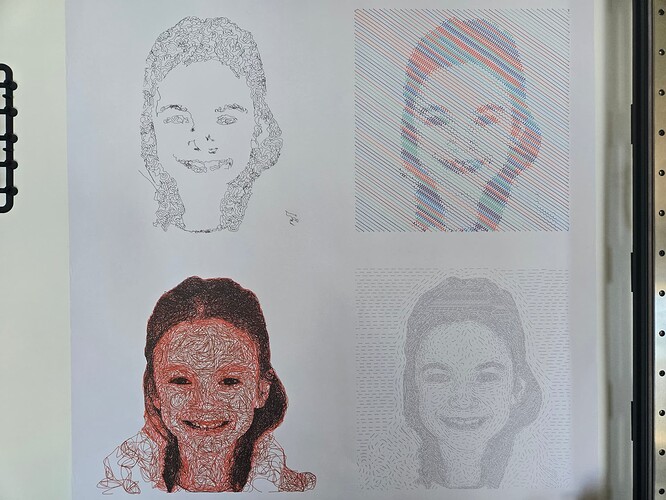
Here’s some drawings of my daughter using the same image. Top left and bottom right are with a Uni-ball Powertank. Top left is darker because I made it skip steps to force the pen onto the page and drew it twice. Bottom right has over 7400 pen lifts. Bottom left is 3 colors with Pigma Microns. Top right is 4 colors with Pigma Microns.


Now I just need to get it off the couch. My wife isn’t a fan of it’s current location that is conveniently right next to my computer. I plan to put it on the wall in the next week and do lighting and frame afterwards.

7 Likes

I was thinking your plotter was quite loud when watching your videos but assumed it was because the speeds you were running it at. For informational purposes, my power supply is silent regardless of how fast or slow the motors are running or if the led lighting is on or off. I can barely hear the motors when it is drawing at 1500 mm/min, but I do notice them when it is repositioning at G00 speeds (9000 mm/min). Still not too bad though. I keep my 12v leds at 25%. Duty cycles larger than that are too bright for my liking.

I think you want to go with 12v for this.

Another thought - I have several devices mounted on various walls in my house that use 12 and/or 24vdc and I always mount the PS in a closet or in the basement or attic and run a 16/2 awg from the supply to the device. I plug the supplies into a smart outlet so I can control them with my phone since they are not easily accessible. You might want to consider that before you add a 120vac outlet to your wall. Fishing a 16/2 low voltage through a wall is much easier than Romex and you only need a 1/4" hole instead of a 2"x4" outlet box. For long runs, I crank up the adjustment screw on the supply to account for the voltage drop if I need to. Something to consider.

1 Like

Same for me at 1500 or 2000 mm/min.

Yea, maybe. They’ll be connected separately running off a WLED controller so dimming them is not an issue. I’m not running far enough where I’ll need 24v to not have to inject power.

That is a great tip! I can easily mount the PS in my basement and run the wire up to it.

1 Like

If that’s the case, you can stick with the 24v and the run can be as long as you need since voltage drop won’t be an issue.

2 Likes