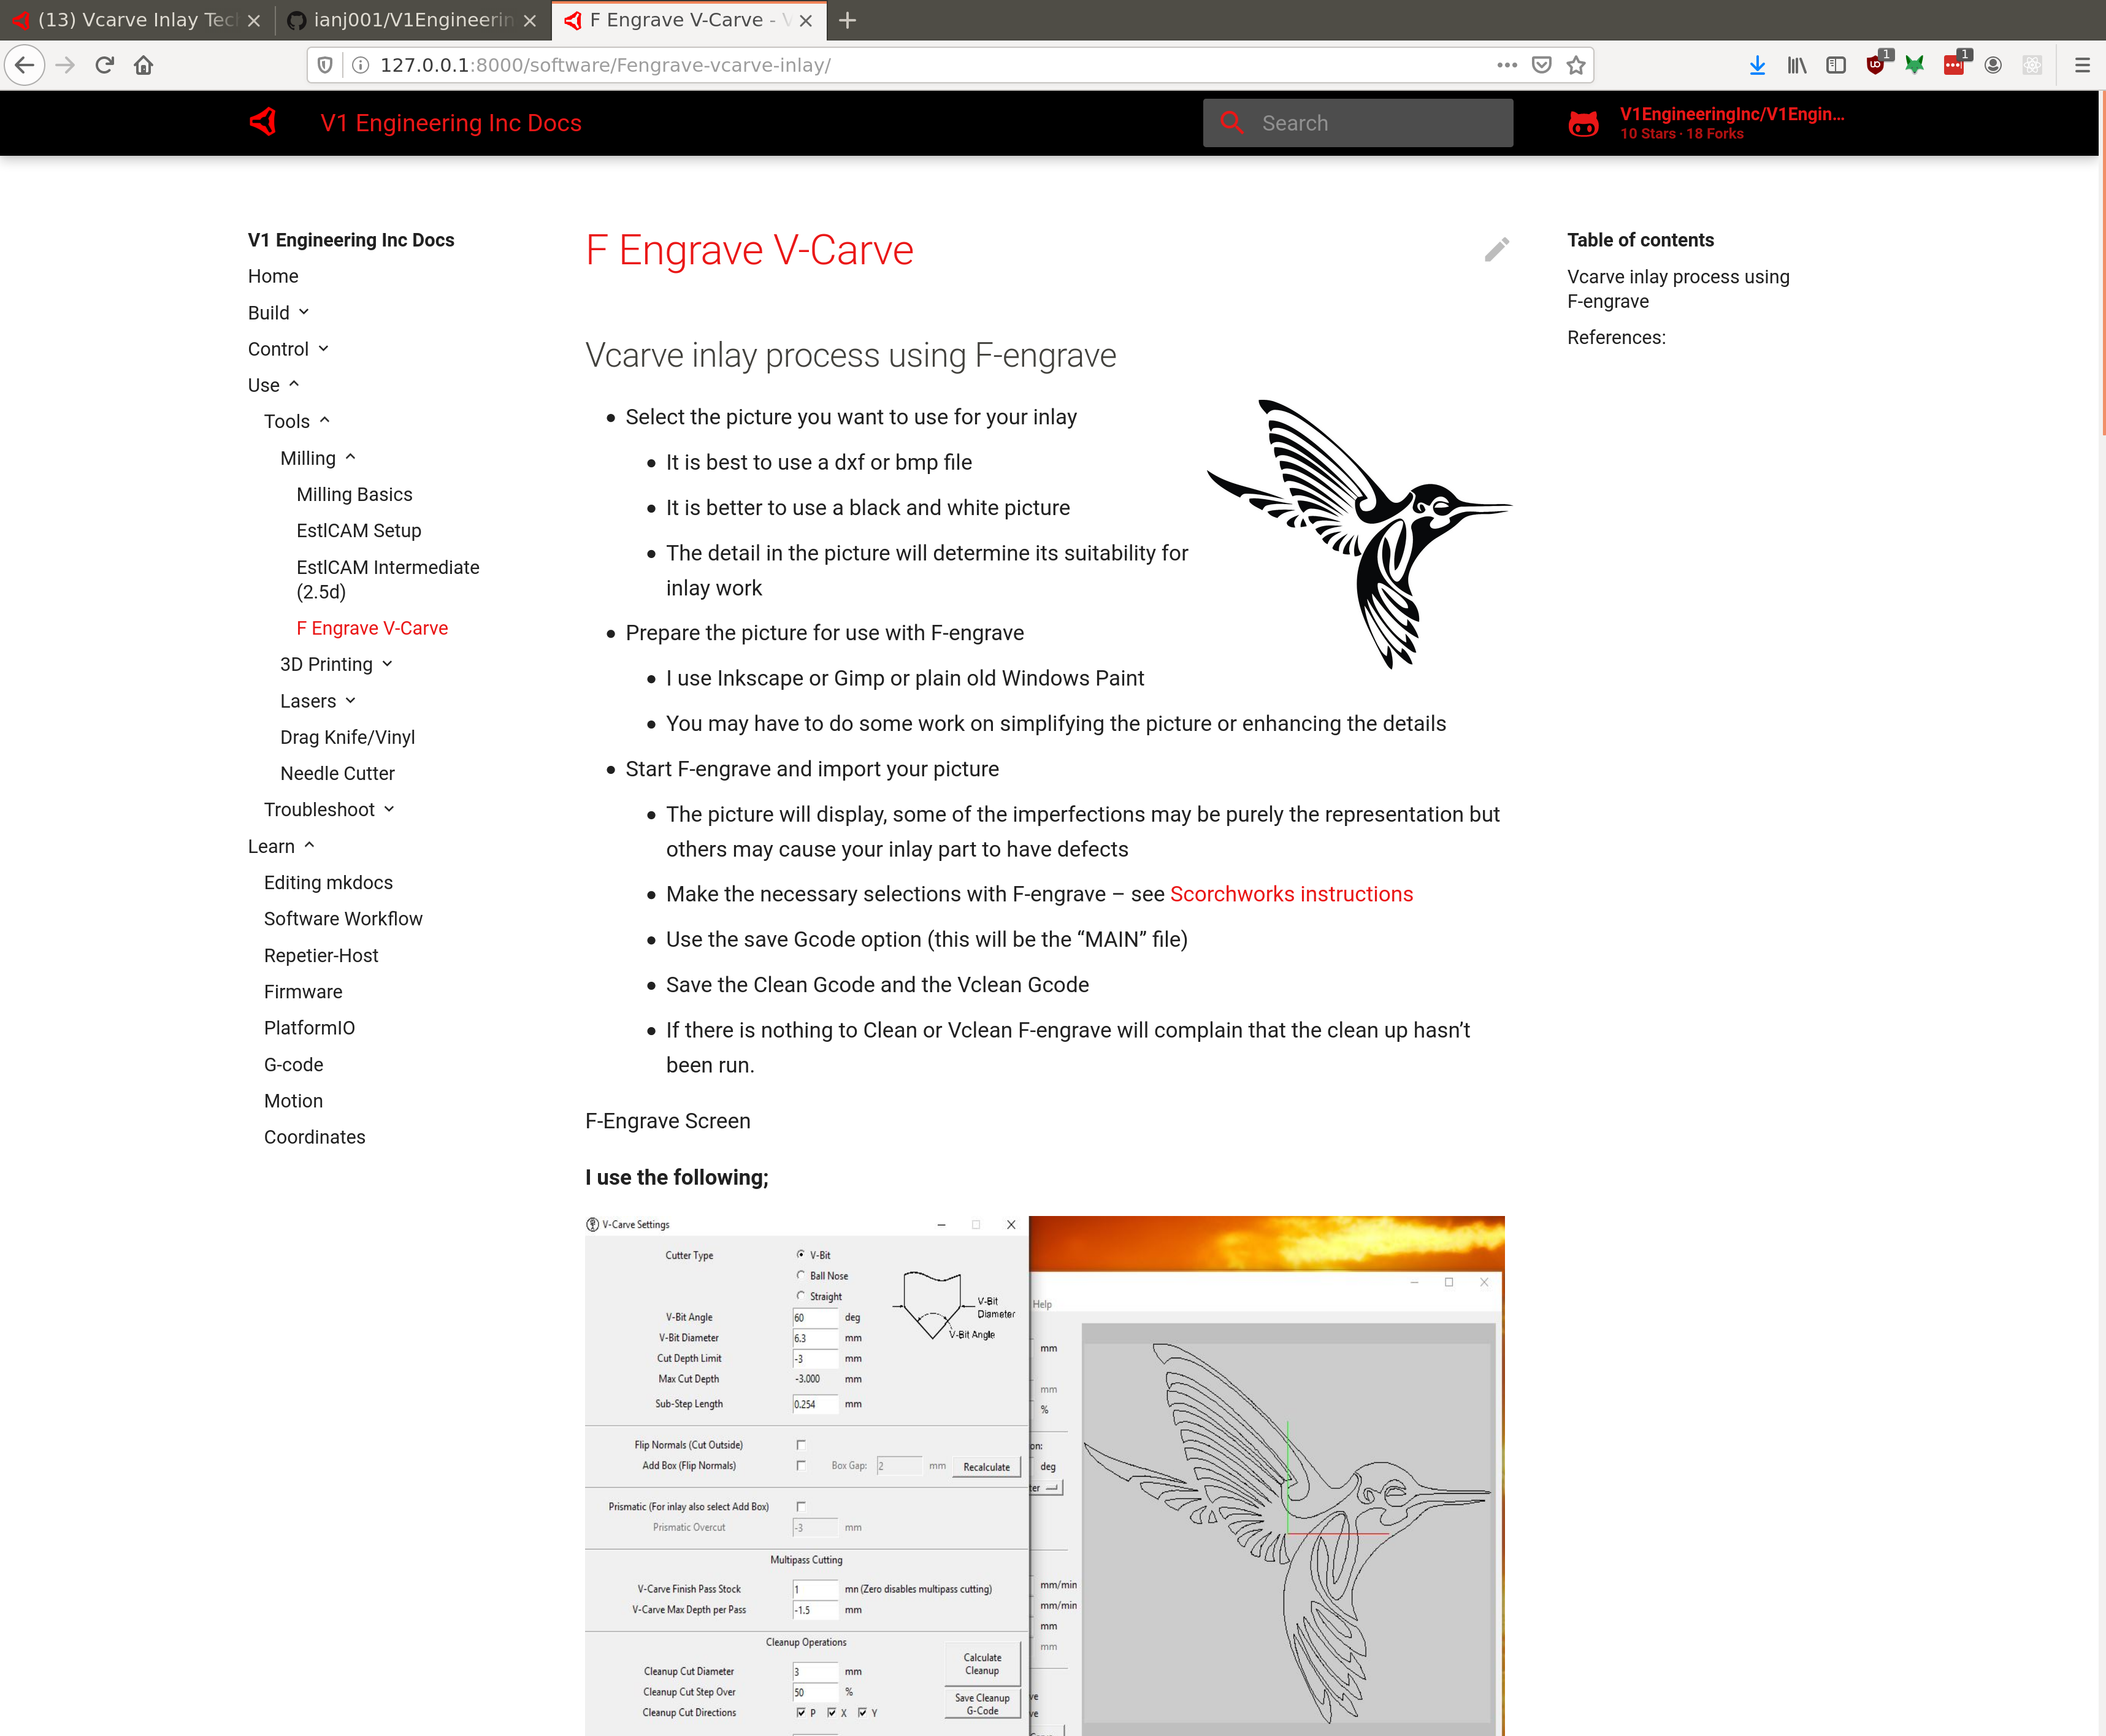
A little preview of how it looks in mkdocs:
1 Like
OK. I am done for now (Lunch break over). I think this would be considered approved. It is better than what we had before (which was nothing). So that meets my minimum requirements.
If you’d like to try out the mkdocs on your local machine here’s what I do (this is in ubuntu 18.04):
git clone https://github.com/ianj001/V1EngineeringInc-Docs.git
cd V1EngineeringInc-Docs
virtualenv -p python3 venv
source venv/bin/activate
pip install -r requirements.txt
mkdocs serve
Some low hanging fruit that we could do next:
- It would be great if someone could actually test these instructions by trying to follow them and at least make some gcode. I didn’t, and I just assumed they would work.
- The hummingbird file probably shouldn’t be included. You have attributed it, and I think that is fine. But it isn’t super clear that this is a copyrighted work.
- Some of the carving steps are probably ok to leave out. I would like to assume that the user of this guide knows how to set up and carve jobs. It is fine now. This may be me just being nit picky.
- A video, if you’re willing to make it, would be awesome. I know that a lot of people pay more attention to video instructions than text. Some people are the opposite.
Just link to it.
Great, I think I have zeroed in on using OBS as the screen recorder. It’s more complicated that I really wanted but it will work. I will make a video that shows how this works. I will include footage of actually making a part too. - It should make the whole process easy to duplicate.
Yes MODfef is my post processing tool.
I have a file that I created myself, it’s actually a seahorse but is fine for demonstrations purposes or we could just link to it. I didn’t create link because I am never sure how long that link will persist.
Agreed. Using your own file, or one of the v1 logos, or a public domain image would all work well.
1 Like
OK, I have made a few changes and confirmed that it is working now on Windows, Linux and Mac. You will need Python3. I will update the documentation with the prerequisites.
You can clone the repo with git:
git clone ianj001@bitbucket.org/ianj001/modfef.git
The windows exe version is still downloadable from my website at MODfef2.zip It’s in a zip file that contains both the exe file and an ini file.
I started work on a video but didn’t like my seahorse (it took too long) so I will use the V1Engineering Logo. - I will update that in the documentation too.
4 Likes
I created a video to help people understand how to use it. I uploaded it to YouTube here MODfef video - I welcome feedback.
5 Likes
To set up the mkdocs server in Windows it’s slightly different:
git clone https://github.com/ianj001/V1EngineeringInc-Docs.git
cd V1EngineeringInc-Docs
python -m venv project_env
project_env\Scripts\activate.bat
pip install -r requirements.txt
to end the session:
deactivate
2 Likes
I must be missing something. When I try to edit the file after looking at it with mkdocs serve
I get a
So I can’t actually edit it that way.
Do I still need to edit and do a pull request?
I also can’t navigate to that doc from the menu.
Never mind… I think I got it. - I edited the file created the pull which merged it then downloaded again using mkdoc serve
You can edit it in the cloned repo. Where you ran mkdocs serve. Then you would use git commands or a git gui to commit and push them to your branch.
This all looks really good to me. This has surpassed my minimum bar for a PR. I will leave it for @vicious1 to take another look. and merge it though.
Thanks!
Sorry guys I am soooo far behind on emails. Let me see what I can do after shipping today.
Merged. Deployed. Looks great!
https://docs.v1engineering.com/software/Fengrave-vcarve-inlay/
Thanks again, Ian!
1 Like
Sorry I have been so distant, crazy busy times.
It does look amazing. Great instructions and video to go with it. Really solid work there. Proud to be able to include it on the site. Thank you so very much!
2 Likes
Bookmarked and ready for testing… Maybe this weekend since it looks like rain again.
Thanks @vicious1I am happy to post to this community.
I have uploaded a second video showing me actually cutting the female part with the MPCNC.
I am trying to get the hang of creating these videos so please bear with me 
2 Likes
Thanks so much for putting all this together. It’s on my quarantine todo list !
1 Like
No problem, I am having fun putting the videos together.
Here is the second part in the machining series
2 Likes