Lol, appreciate the sentiment, but I’m definitely dumb lol.
Wonder if I can put it down to LC and get better Medicaid. Symptom number 6
Lol, appreciate the sentiment, but I’m definitely dumb lol.
Wonder if I can put it down to LC and get better Medicaid. Symptom number 6
DIgipots so you do it from the screen and save the settings.
A little too high and you will melt the stepper mounts though, be careful.50C max
Unless you have skipped a step recently, no benefit. We typically fight accuracy at high loads and small vibrations. So for our rigidity we are pretty dialed in terms of torque. The frame is our hold up not the steppers.
Good Info, thanks.
I’ll leave them as is… it’s working, no need to tweak!
Figures- a big client wants a walnut table top with some epoxy fill and a logo, 37” wide
My X capacity is 36”… so I can’t surface after the fact. Guess I’ll need to build a surfacing jig…
Can you surface all but just a tiny bit and then flip it around and catch the little that you missed? or will it not fit at all? Sounds like a good excuse to widen your machine a little LOL
That’s not a bad idea. Would definitely be worth figuring out even if it’s purely for the benefits of having dust collection.
At maximum X travel, I do have something like 2” before I cross into the area where the Y carriage runs, so could be doable. Maybe only surface 30” wide. Then flip it around and surface off the remaining 7”. That way I would avoid crashing the gantry into the right Y plate if I was a little off. My absolute max is 36”, leaving a 1/4” clearance on the Y plate.
Thanks for the great idea!
Screwed up today
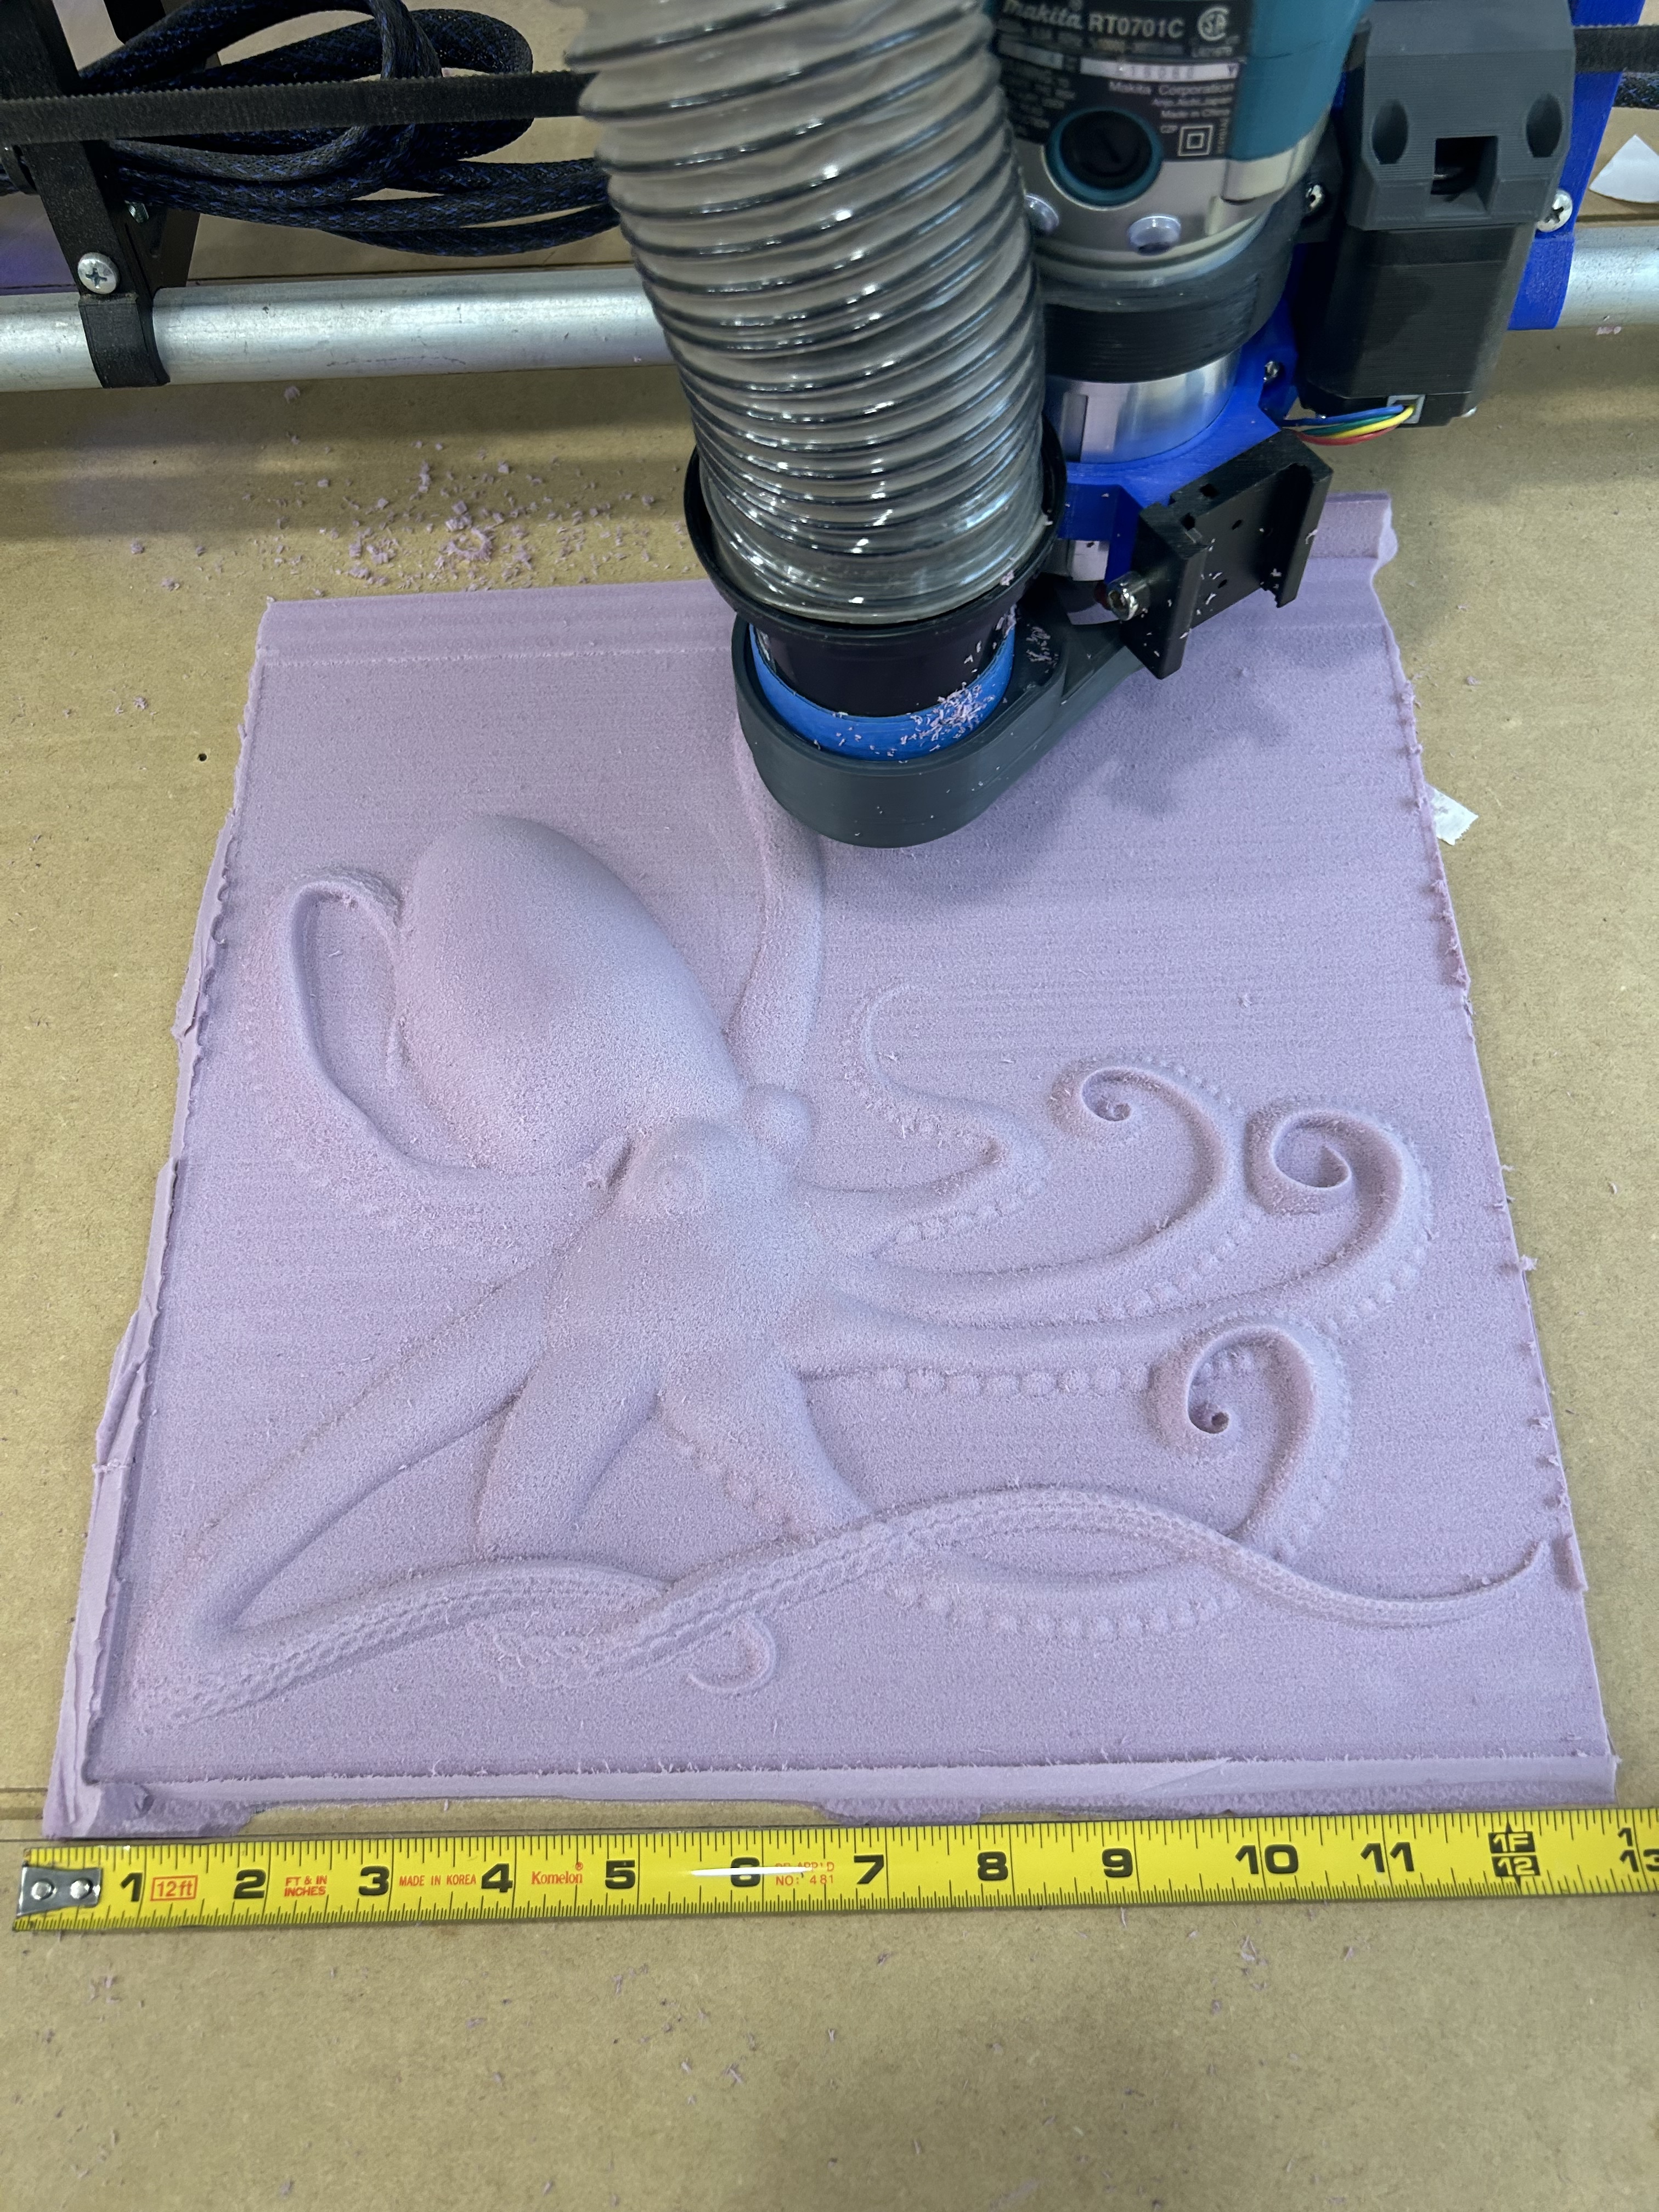
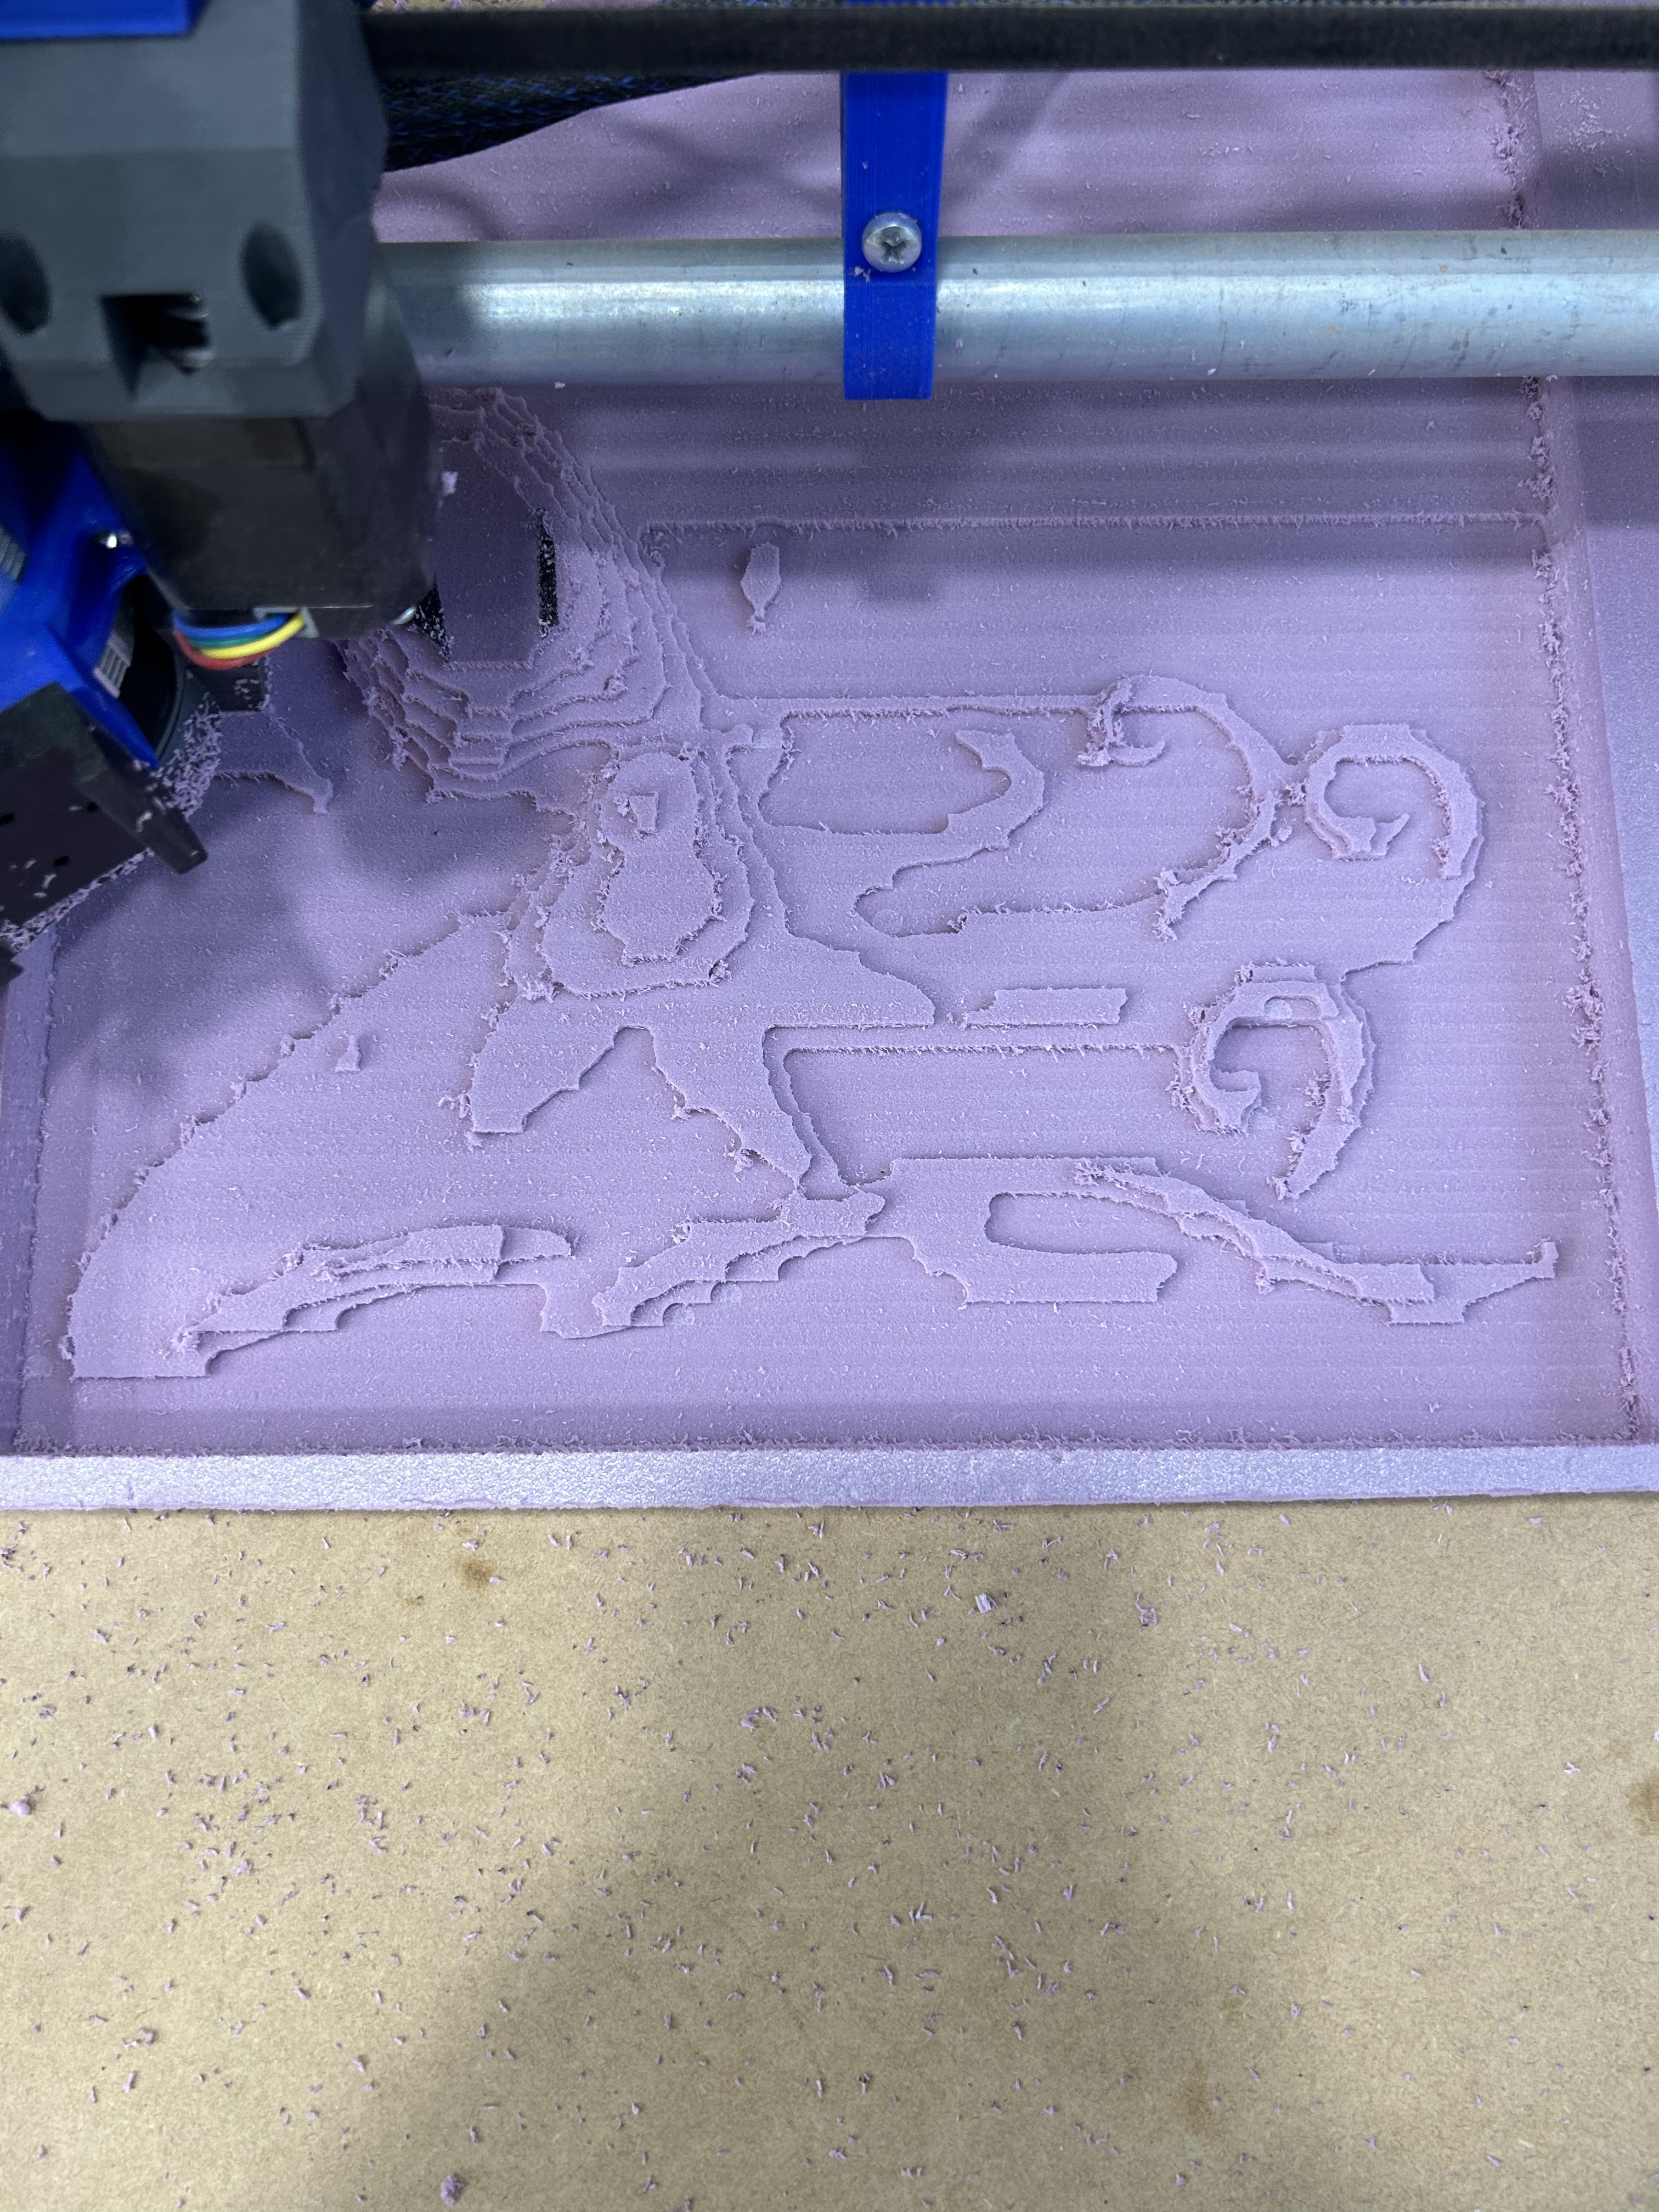
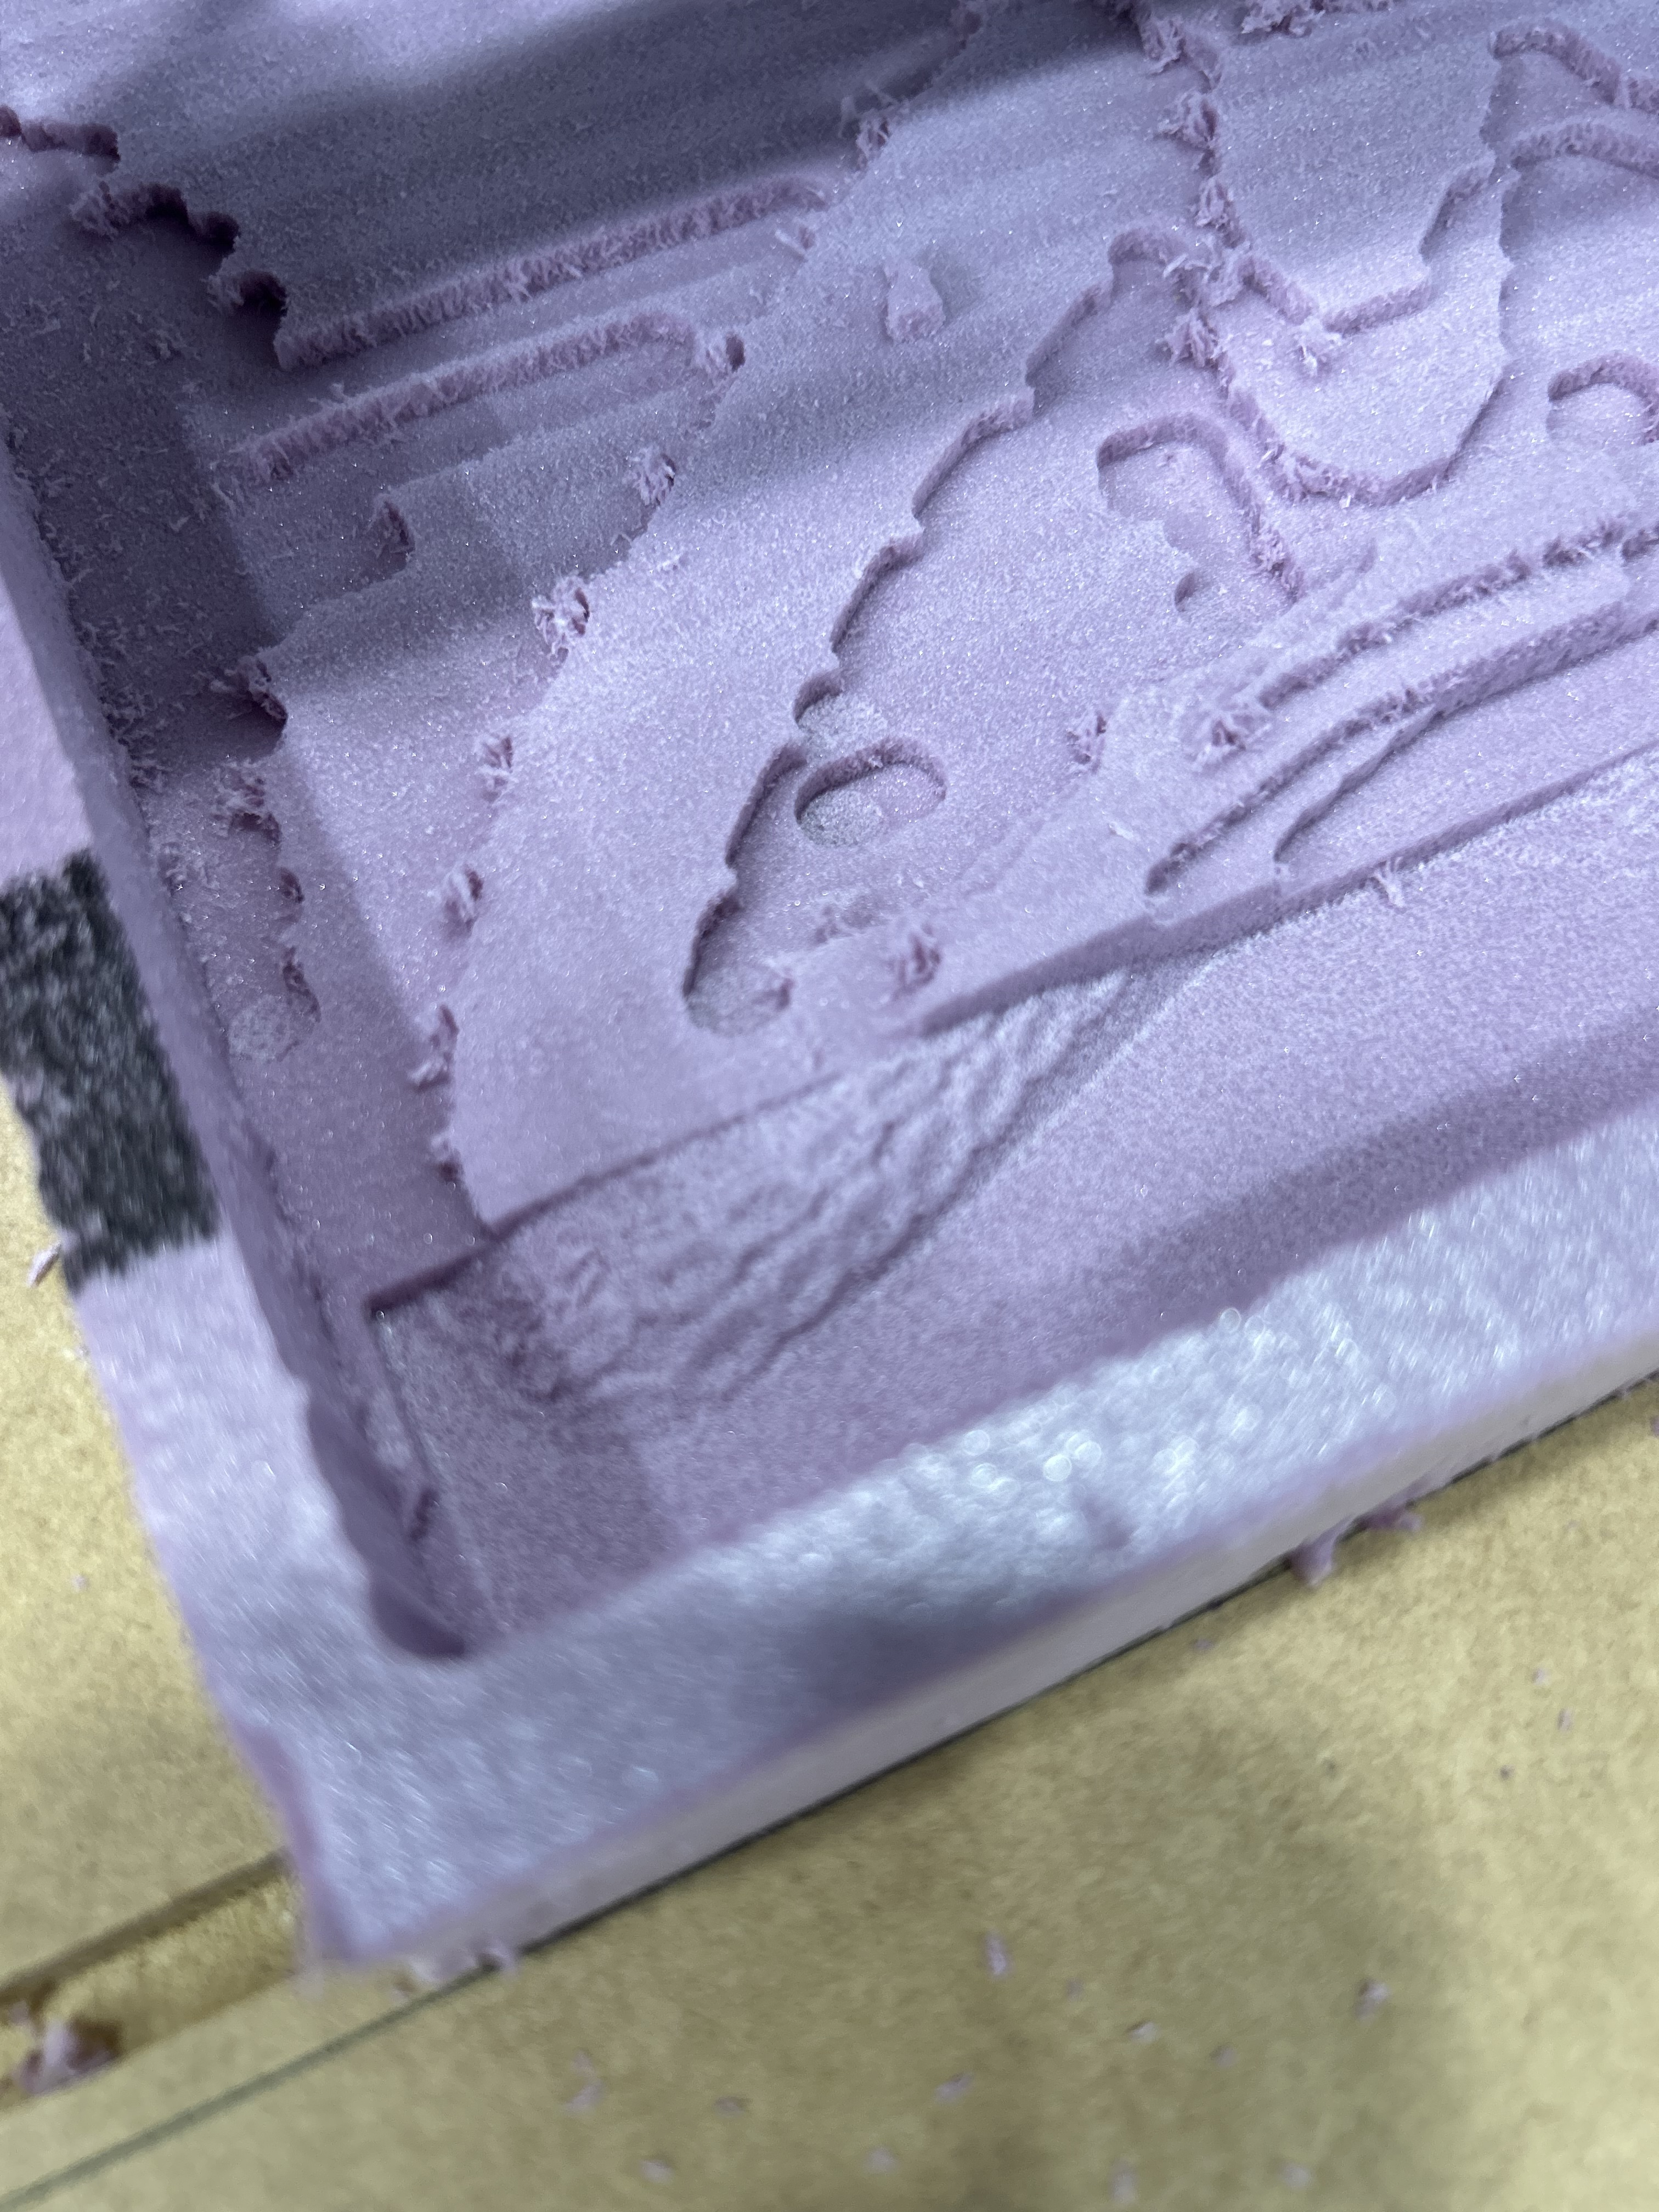
Running my 1/4” bit to clear out a bunch of foam for Halloween props. Had a bulk area clear 1/4”, text finish 1/16, then a profile, 1/4”. I set the profile a little high so I could run toolpath 1+3, then switch the bit and do 2
The other day, I made a macro to take me back to X0Y0Z0 for laser engraving a batch of tins. That way, finish one tin, z rises 30mm, replace tin with new one, hit macro, goes back to start, then I hit go. Worked flawlessly for 10 tins
So, after I did the bulk clear out, I raised to 50mm, hit the macro, and it took me back to the start. Hit go on program 3, and the bit overpenetrates into my mdf spoilboard, and runs at 80mm/s at 10mm DOC
Machine is fine, foam avoided major damage, but my spoilboard has a huge gulley in it now.
Issue- I sent the bit home to X0Y0Z0, but my starting gcode has a G92 X0 Y0 Z10… because I normally do a z-probe and the macro for that raises it 10mm afterwards so I can remove the plate
So, I ended up telling the machine that my foam surface was at Z10, when the end of the bit was actually at Z0…
User error, and one I won’t repeat
But damn, I think I’ve been super conservative with some of my speeds and doc when it comes to this 1/4” endmill
Every mistake makes me rethink how much I baby my cuts.
I just need to bite the bullet and spend an afternoon pushing bits until my lines look like shit
I had the speed at 80mm/s, stock firmware, no changes to settings.
It was actually 50mm/s, right? Speed is software limited until I change it?
Yes stock firmware is limited to 50mm/s If you are running SKR then you can easily change it on the screen. I’ve changed both my LR3’s to 100mm/s so I can run faster rapids
Yeah, my rapids are slow. 30 I think
But I ditched the screen and use the web UI. I think there’s a spot for it in there too. I’ll look later, thanks!
Tweaked the values and I just ran it at 100mm/s in X and Y.
Are the travel speeds set in the PP?
Appreciate it
I’m using carveco (for some reason couldn’t get hang of Estlcam) - I’ll look around in the settings and see what I can find
Thanks
Roger that. Its always hit or miss with that lol.
You are getting near a limit if you are on a 12v system. Deeper is faster than faster. So try to optimize both not just one at a time. If you can get to 2-3x diameters deep than start pushing your speeds.
I try to move as slow as possible, fast travel is when steps can get skipped a lot easier.
When I go through a hold down screw and I don’t skip steps, I am the same way.
I cut a screw the other day and it actually chipped the endmill. I was oddly satisfied. Made me think like I was going fast enough in wood that I could not cut steel finally. If that makes sense.
It took a while, but I worked it out! ![]()