Taller LR3 build

The dust shoe brush arrived today. It says 100mm, but the usable range is probably closer to 75-80mm. The rest is webbing/stiching etc. Not even sure how much resistance it would cause if I go all the way down and let the foam reach the webbing area. So the actual depth of cut with this thing mounted is a big question ATM.

I mocked up a larger dust shoe to test things out. Will print it over night and try to run some test cuts tomorrow. The diameter is 170mm from side to side.

If this doesn’t help, the next step will be to make a deflector to make sure enough air is sucked from the bearing area. I left the bearing zone more open deliberately. And/Or mount another brush at the back of the dust shoe to wipe the X rail during X movement.

1 Like

OK so the dust shoe came out of the printer. There were some minor issues, but I was able to assemble and test it today.

Long story short: it works ) There is probably 85-90% less dust with the dust shoe compared to me standing with the vac hose and following the endmill all the time. And now I can drink beer while it’s cutting! So it’s a win-win.

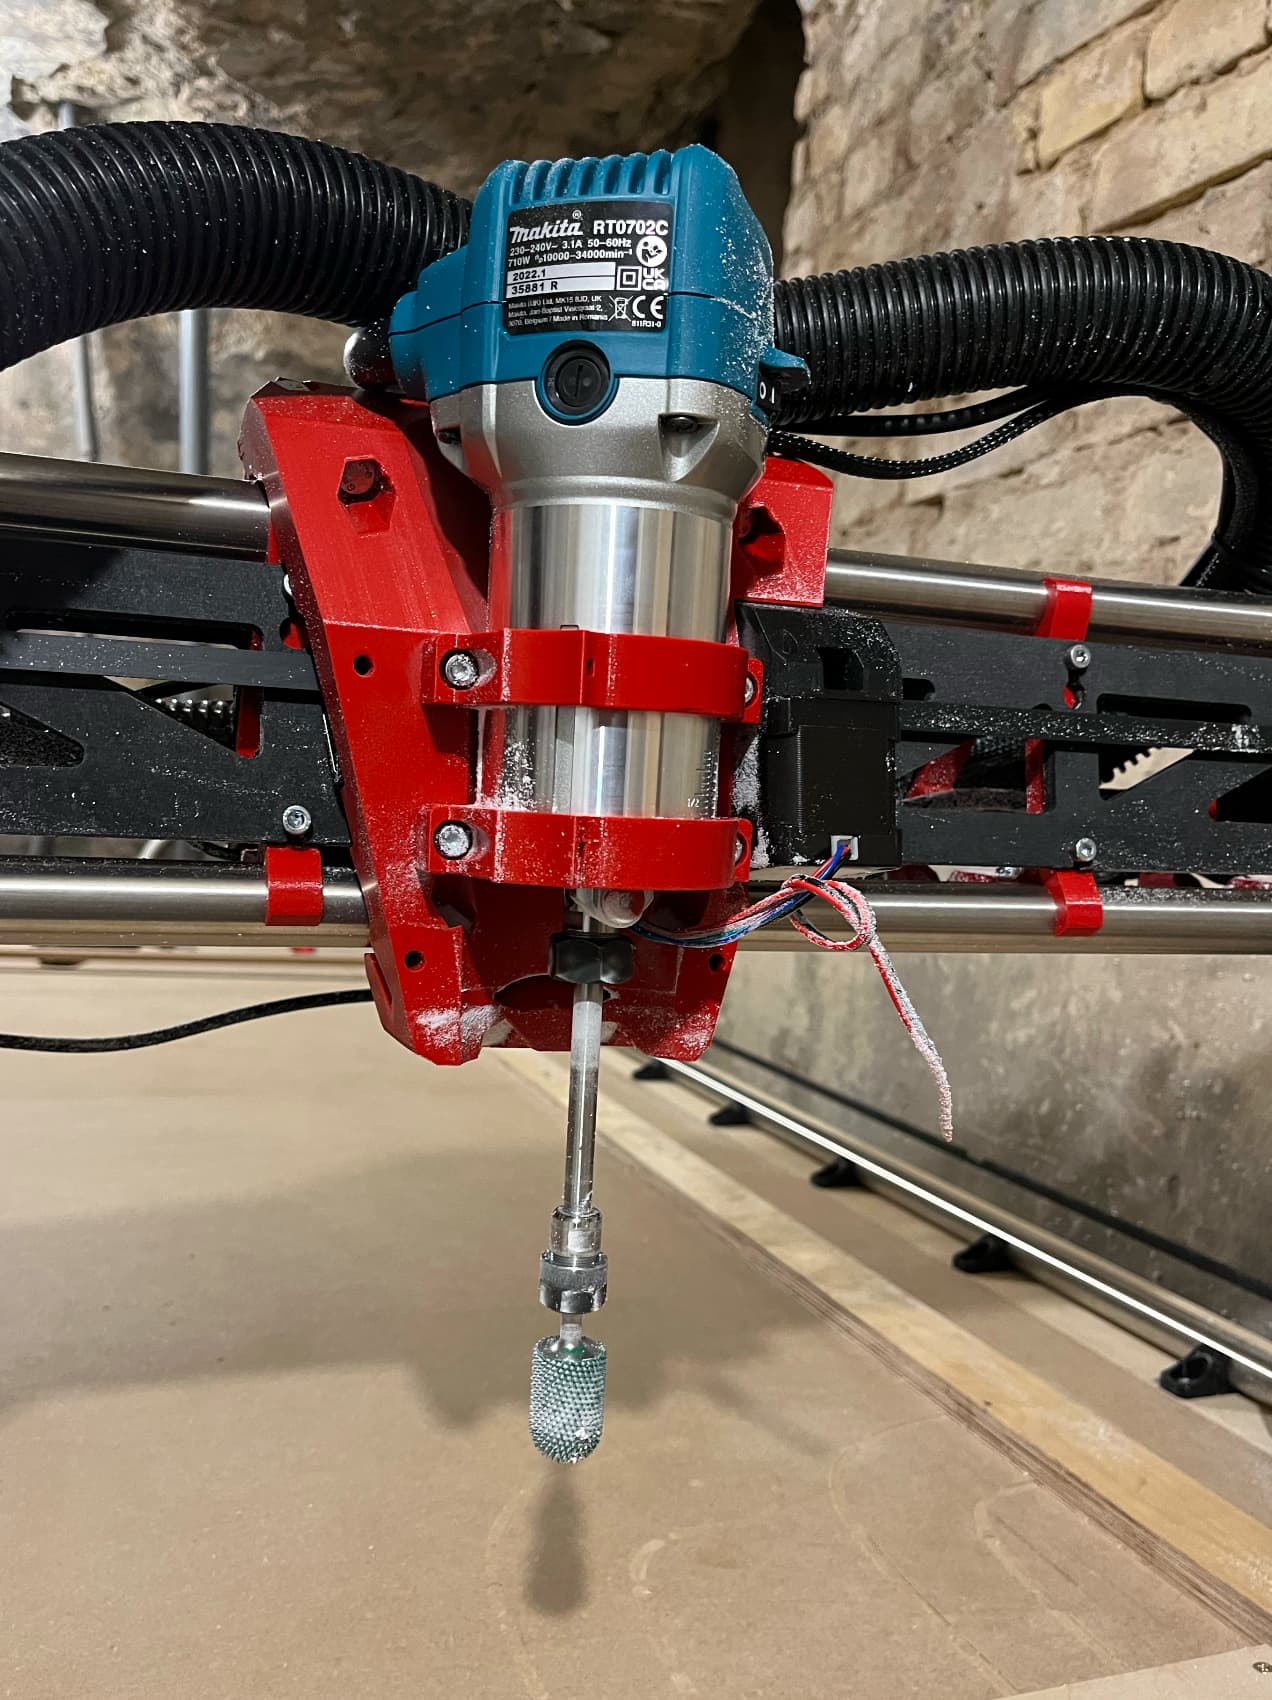
The Makita also seems to be nicer than the chinese 500w spindle. While the chinese spindle is quieter while not loaded, makita seems to be quieter when cutting. This is probably related to higher rpms. Overall it’s good. The makita is also a bit shorter, so I had to add an extension:

I’ll need to trim that extension a bit later.

The powder accumulation on the X rail is 90% solved. During 1.5 hours of cutting, I did pause the job 3 times to clean things up a bit. It would have probably been OK to let it run all the way to the end, but I wanted to keep things tidy.

I would probably benefit from a secondary cyclone, as the vac filter is getting clogged with the powder after 20-30 or so minutes of cutting so I need to empty it quite often.

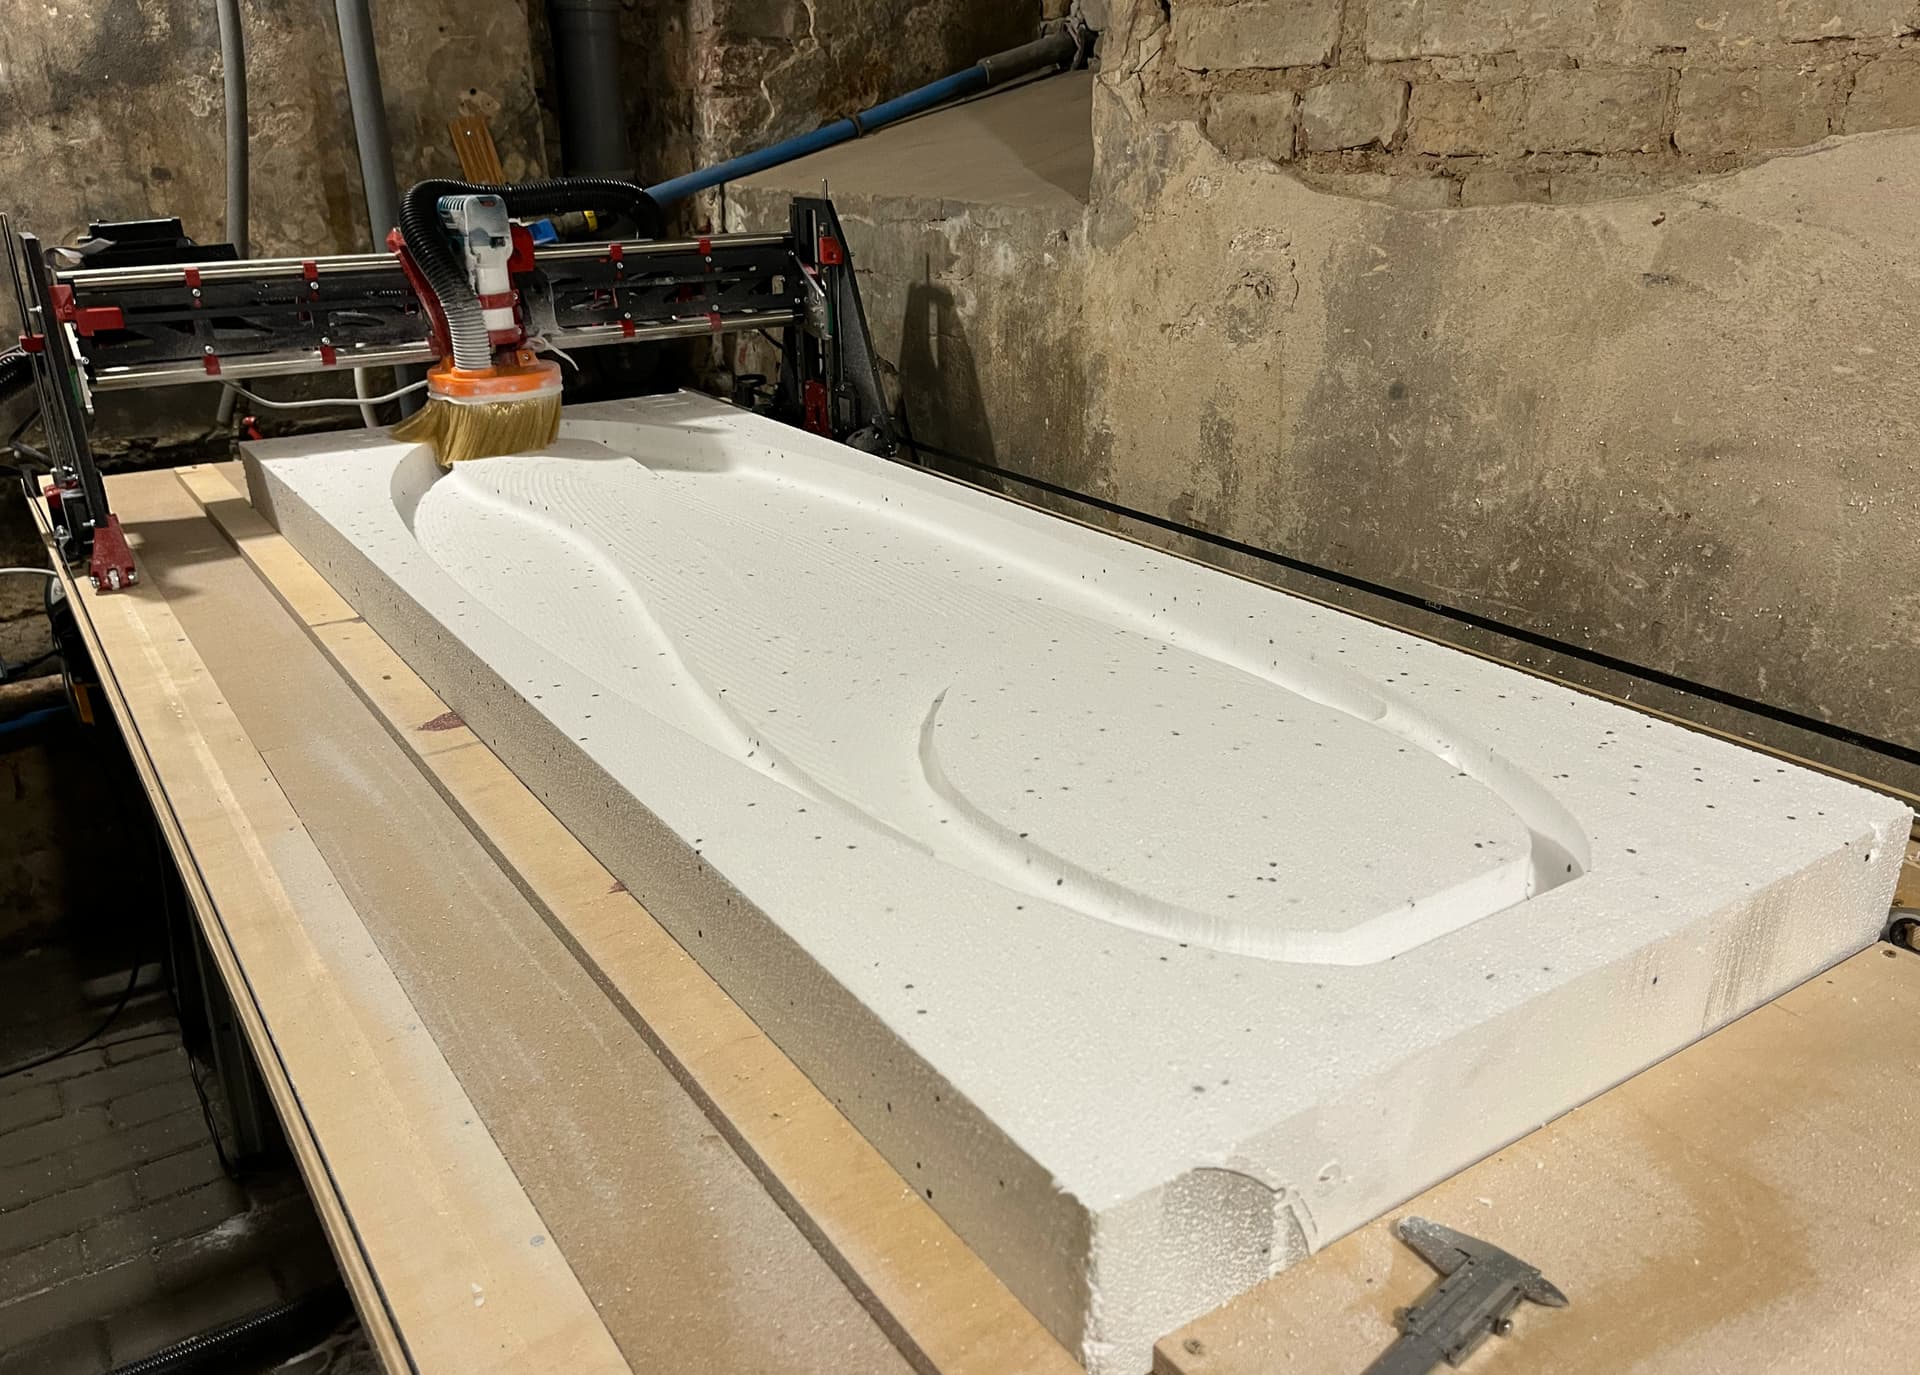
Now the not so exciting news. After 2 roughing passes, the stock looked like this:

To me it looked pretty sweet at the time, except… that bump on the tail shouldn’t be there. The problem is that the entire cut is about 15mm too low. There can probably be too reasons for this: either I miscalculated Z height being in a hurry, or some steps were skipped during the cut. I am kinda leaning more towards the 2nd option.

Why would there be skipped steps on the way up? I had this happen with my plywood cuts a few times as well, but usually just 1-2 mm or so. Honestly at this time I have no idea. If I’m right about the skipped steps, I could benefit from “crash detection” feature that prusa printers have. I wonder if that is a built in marlin feature or a prusa thing. Will need to research a bit more.

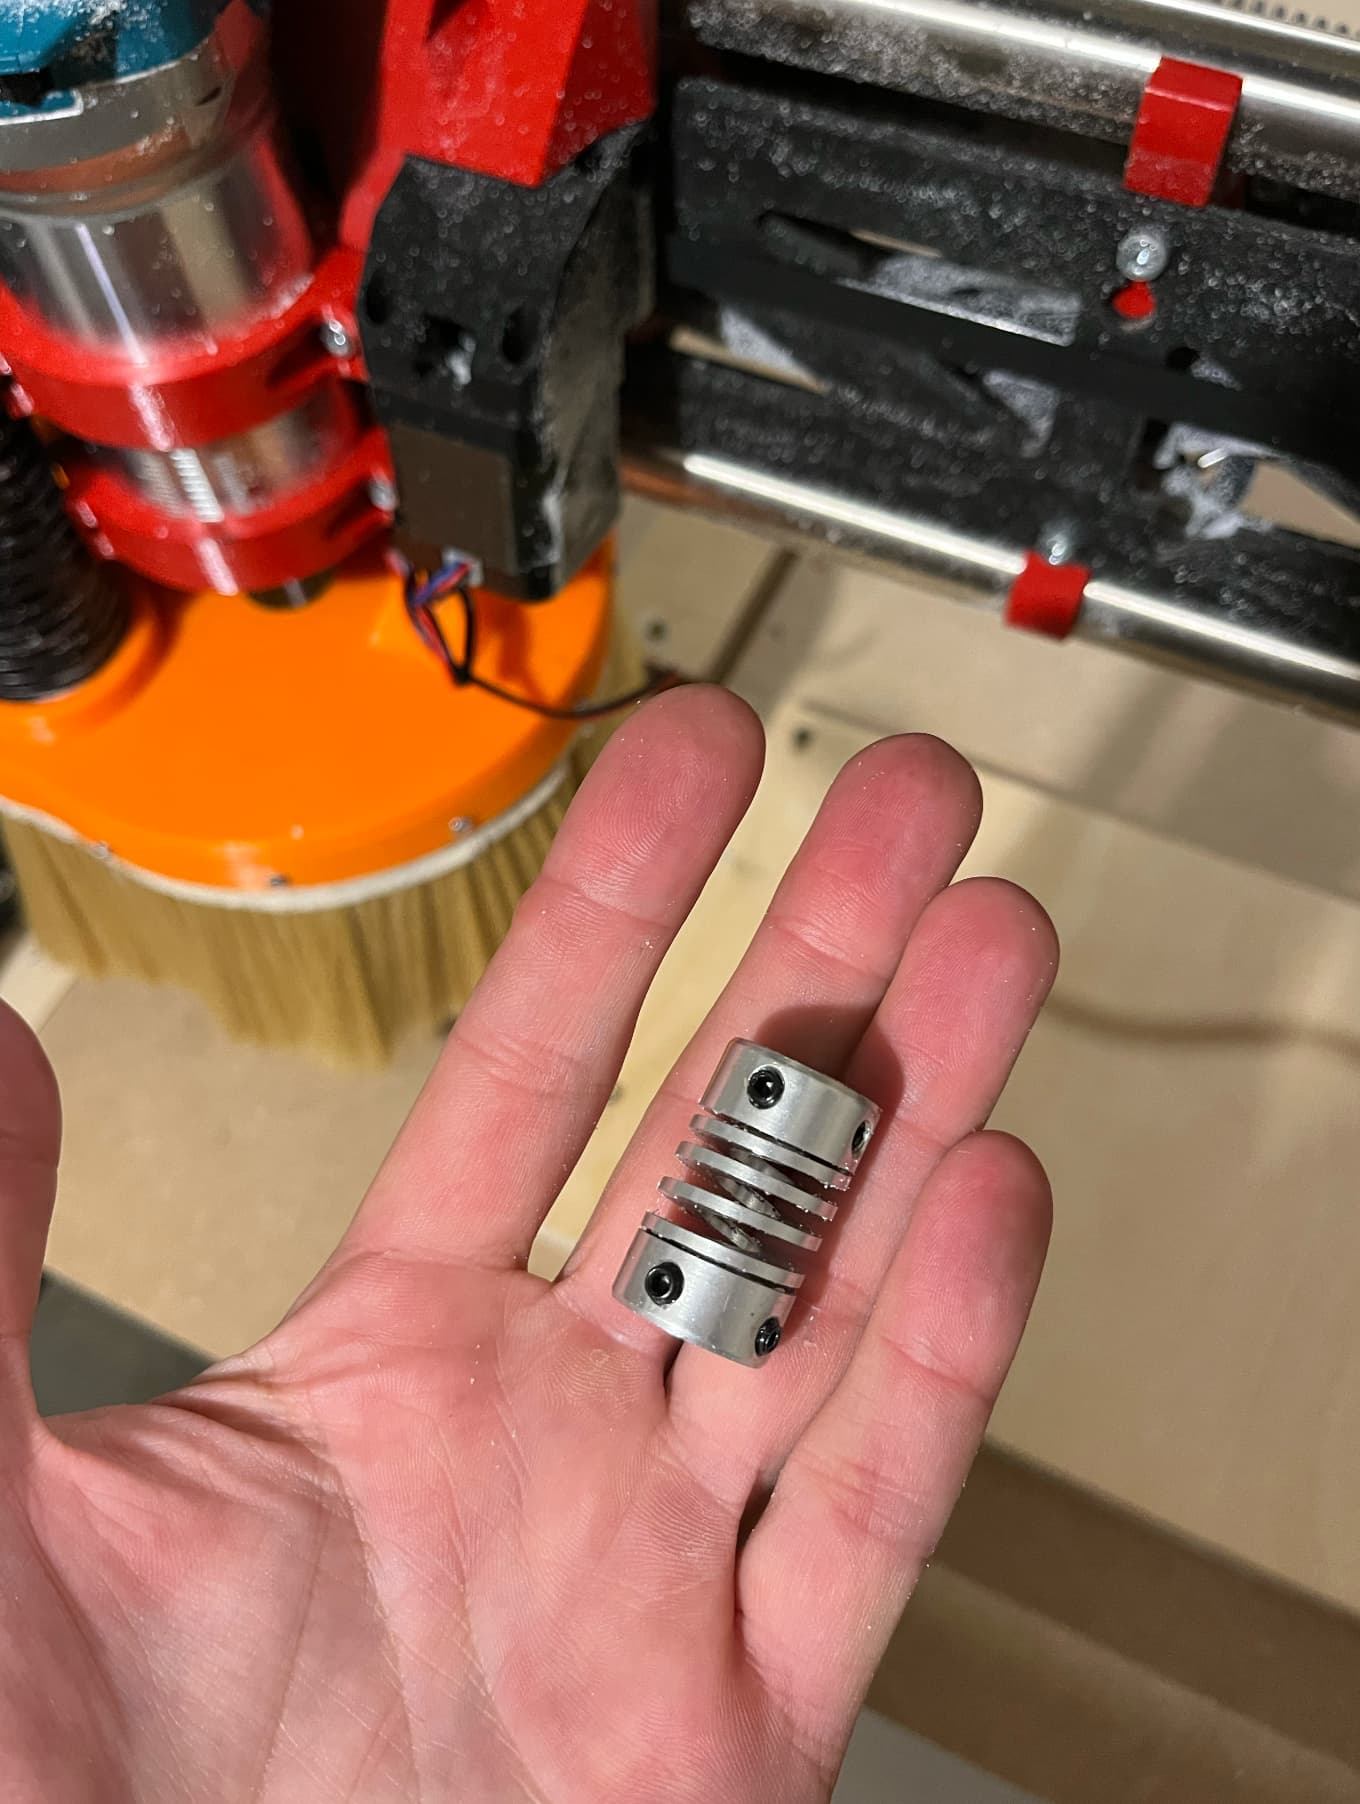
Maybe related: the Z movement is a bit jerky every once in a while on the way down. I think this is caused by backlash in combination with spring couplers. Usually it’s moving smoothly, but I think there is a certain speed where it starts oscilating.

I ordered 2 start leadscrews and will give them a try.

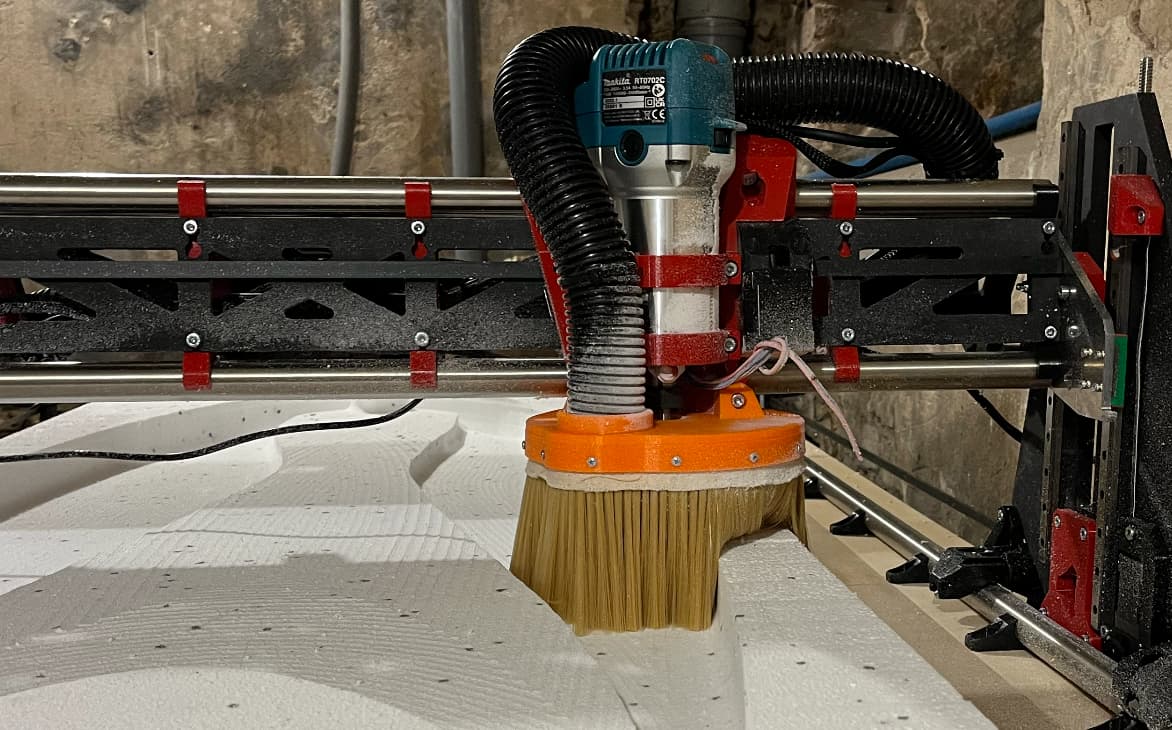
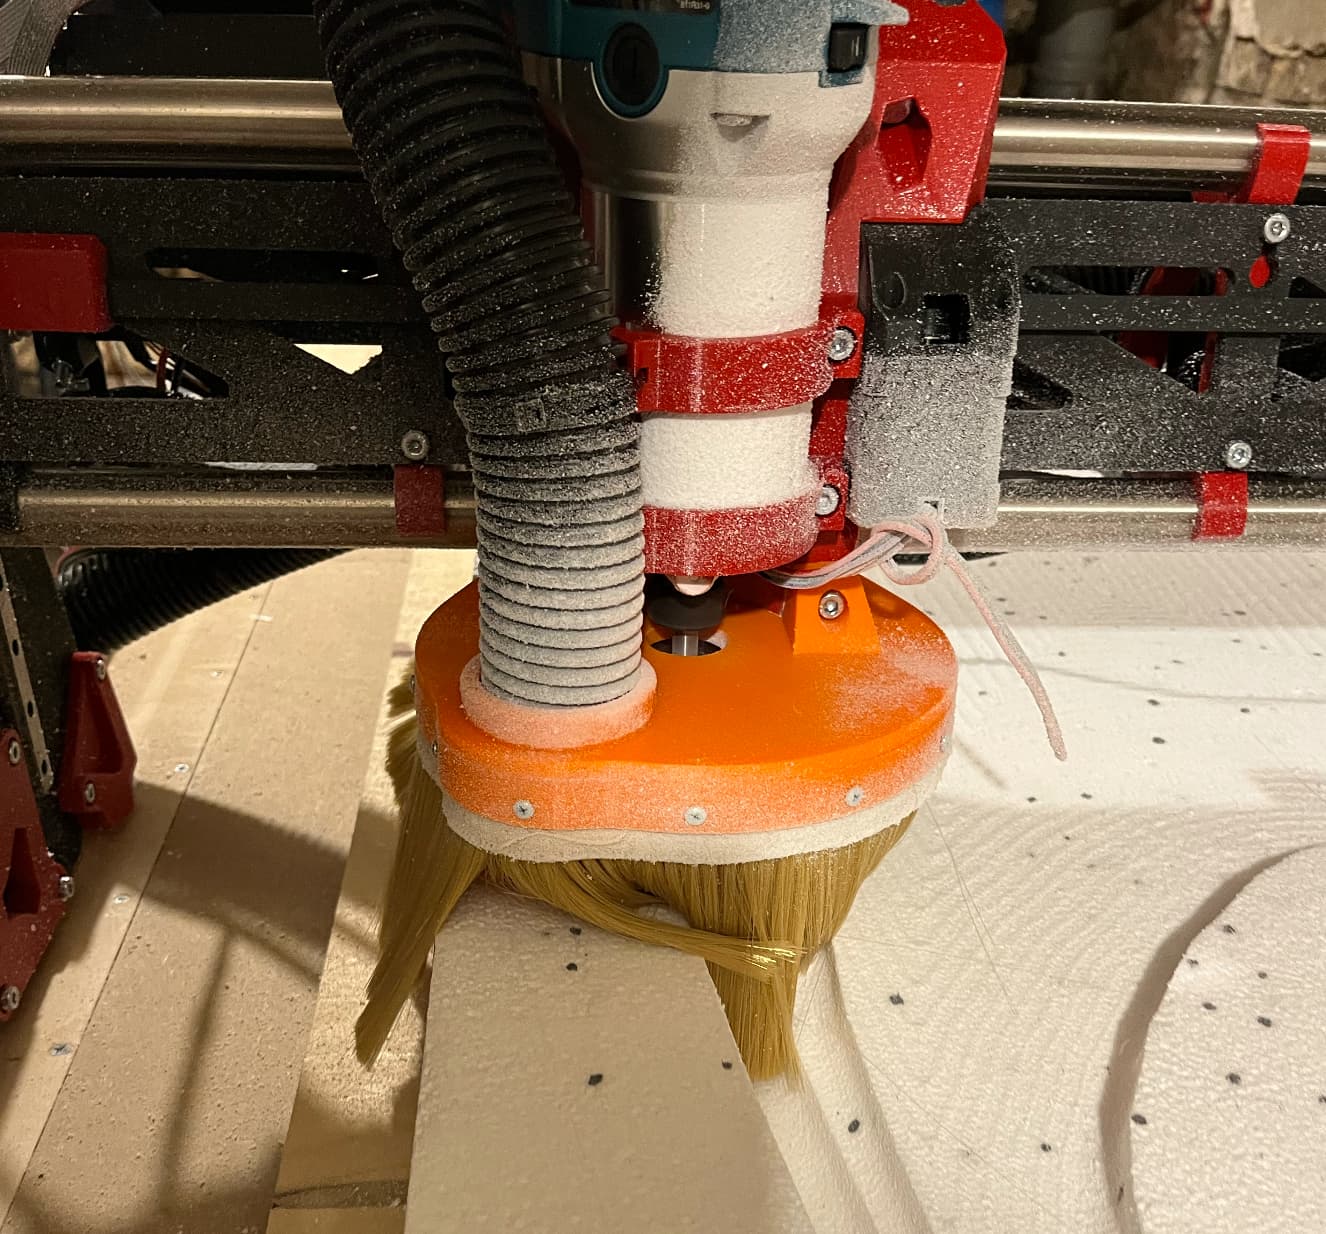
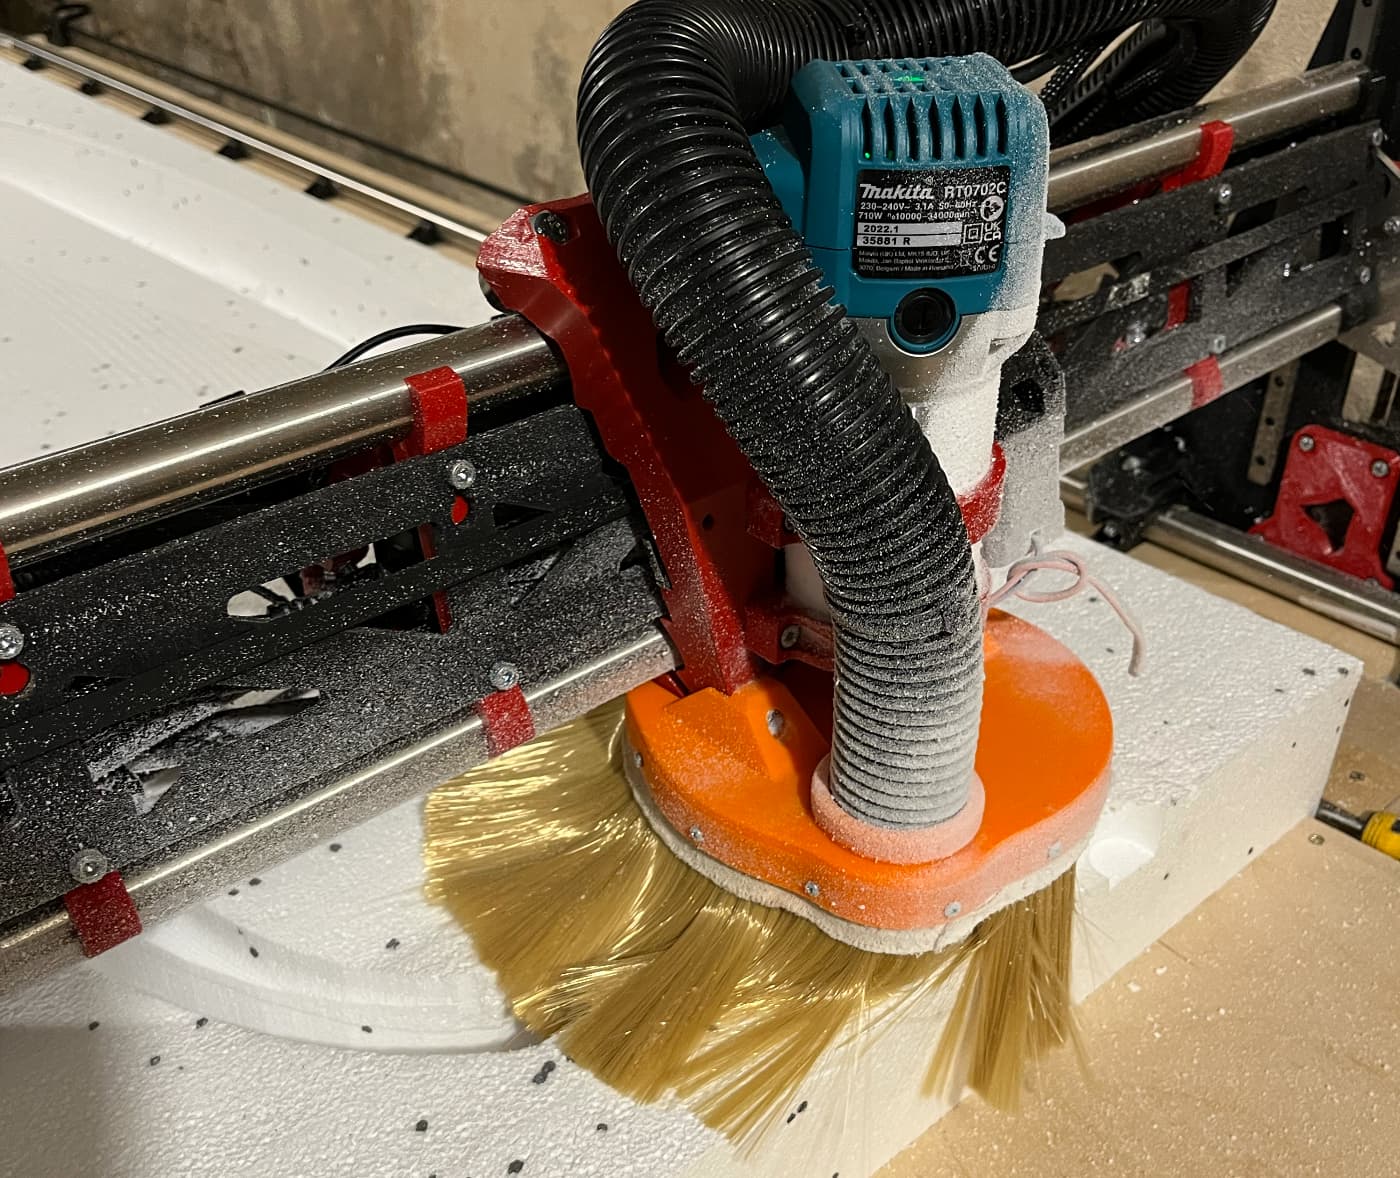
Some pics of the dust shoe in action:

1 Like

BTW the endmill was protruding below the dust shoe about 20mm. This is because the brush is a little bit too short for my needs. I think if had the endmill at the same level as the dust shoe bottom, I would have almost no dust. Luckily I found taller brushes on amazon, so it should be here in a week or so.

If you skip a step you do not skip them back so your cuts would get progressively worse. Hard to really know what is going on though.

Already found the problem! It’s so stupid…

My setup became taller as a result of adding the endmill extender and my machine didn’t have enough height to run the program, so the gantry bumped into the Z “ceiling” causing both motors to skip. So basically it skipped before it even started cutting. With the router and the vacuum noise I didn’t hear it.

I’ve seen a setting like “abort on endstop hit” somewhere in the firmware. Looks like a good option right now!

What surprises me is that the firmware doesn’t allow Z to go below 0, but allows to go above max even though Marlin clearly knows the machine limits after homing. This doesn’t make sense.

On the bright side, the solution is as easy as trimming the extender a bit and/or adjusting clearance height in Fusion.

That should not be right, All I do is go below Zero. Some control programs have soft limits built in but the firmware absolutely allows it.

No, I am very hesitant to this. Any line noise or static could cause you to stop and lose your position. I highly suggest only enabled during homing.

You go below relative zero, the one shown on the TFT display. But the firmware has a hard limit (200 in the default distro) and it will not allow you to go past that point. After you home Z, the hard limit kicks in (Z value becomes known). When you reset coordinates using the menu, a probe or G92, you set a relative zero (Display shows Z = 0), but Marlin still keeps track of the absolute Z value from last home operation, although it is not displayed anywhere. When using the default YZ plates, this is not a problem because the total range of Z motion is probably around 80mm for your machine, so 200mm allowance from top is more than enough. My range 230mm, so I noticed the hard limit very quickly :slight_smile: This was the first reason to recompile firmware.

What surprises me is that the hard limit is enforced on one side and not enforced on the other side. Will check the firmware settings and see if I find anything interesting.

Found it:

You can see that MIN_SOFTWARE_ENDSTOPS option is enabled and MAX_SOFTWARE_ENDSTOPS is disabled by default. ATM I don’t see any drawbacks of using MAX_SOFTWARE_ENDSTOPS, so I will enable it and see how it goes. I believe it would have saved my stock today :slight_smile:

EDIT: MAX_SOFTWARE_ENDSTOPS seems to be enabled by default in Marlin, but disabled in V1 distro according to git_diff.txt. It kinda makes sense for a generic distribution where you don’t know the size of the machines that will be running your firmware.

Right, the taller part of your build. Sorry Keep forgetting about that.

If I may suggest the following changes to your future firmware:

  • disable MIN_SOFTWARE_ENDSTOP_Z. This will make it possible for anyone with a 200+ Z range to use your firmware without recompiling. Default YZ users will not notice anything, as they are not reaching the 200 limit anyway.

  • Enable MAX_SOFTWARE_ENDSTOPS, but disable all of them individually, except MAX_SOFTWARE_ENDSTOP_Z. This will make Z axis behave in the same way as X and Y axes (no travel beyond endstops). I believe this would be beneficial for all the users. It is better to round coordinates that are out of machine range instead of crashing into the frame, skipping steps and continuing to cut with incorrect Z position.

Just an idea :slight_smile:

1 Like

The min is a good idea but I can’t do the max. Routers, and vacuums, are too electrically noisy for me to trust that.

Best practice is air cut the parameter if your part before running it. That checks for clamps getting in the way, hose and cord snags along with bad gcode.

MAX_SOFTWARE_ENDSTOPS doesn’t use endstops while cutting. It remembers the position from the last home operation.

Plus, you are already doing it for xmin and ymin. It’s the same feature, just on the opposite end. You have endstops placed on the opposite end for Z axis, but that’s not reflected in the configuration.

I analyzed my gcode that caused Z steppers to skip. My max is 230mm, and the gcode wanted to go to 236. So technically I was 6mm too high. But the offset I see on the board is about 15mm.

My current theory is that once the motors start skipping, there is a time interval when nothing is holding the gantry and it just freefalls for some miliseconds. This way a 6mm travel out of range could cause the 15mm offset I had in my cut.

I’ve run the same cut in the air with modified firmware for 4-5 hours now and I don’t see any issues with the Z height. Hoping for the best, will do some more cuts today or tomorrow.

Yeah, that is true. This is just the LR firmware, so it is enabling only the soft stops for the Z axis endstop side.

I wonder if that would be affected by a G38.2 probe operation.

I think you meant Z.

Yes! Thank you.

Today I went to the store to buy some filament and noticed 30cm 1-start leadscrews on the shelf. And they were cheap! So I said why not. 10 minutes later they were installed and spinning on my LR3.

  • Max speed @24V: 36mm/s
  • My current max setting in the firmware: 25mm/s (65% of max, should be very safe)
  • Torque: enormous (I couldn’t physically stop the gantry from going up)
  • Is it enough for my fast foam cutting setup? I think so. Will play and see.

and best of all NO MORE CRASHING on the stock on reset or power loss. If anybody asked, this would have been my best birthday present. Seriously, i hated that feature, now I feel so liberated :smiley:

I hope the leadscrew nuts don’t get red hot.

Probably 2-start leadscrews would be the best of both worlds: fast + no crashing, but these are difficult to find here. I ordered a pair from amazon several weeks ago, still waiting.

3 Likes

With great power comes great responsibility :smiley:

I mistyped Z coordinates by accident, next thing I know the CNC is floating in the air and spring couplers not “like new” anymore. Motors didn’t skip )

One thing I noticed about marlin… it handles combinations of X/Y movements very well, but things are not so smooth when Z motion is added at the same time. Such as following the rail of a surfboard. It can’t decide between fast and slow and the motion becomes kinda jerky. One of the reasons for that was that accelerations were different for XY compared to Z. Then I made accelerations equal (200), the motion got smoother, but still not as nice as XY alone. I guess it was designed for 3D printers in the first place.

Some more pics from todays cut:


And the first board:

The pic was taken before the last contour cut so the edges aren’t perfect, but overall I’m pretty happy. Need to modify the design a bit and do one more :slight_smile:

5 Likes

With this dust shoe I can cut about 80mm deep. I need to cut up to 100, so I was getting ready to design a bigger dust shoe, but then I would need to recalibrate homing, table size etc, as a bigger dust shoe would be hitting the sides of the machine.

It turned out there is an easier solution. Limit the depth for all cuts to 80mm, and then remove the dust shoe and do the final cut below 80mm without it. By that time 99% of the board is done, so there is almost no dust. The endmill mostly walks along the rail and cuts some mm of the deepest part of the nose. I think I will be using this approach for now.

2 Likes

Interesting. Try turning off S curve accelerations, or try classic jerk. I can’t remember which bot at higher speeds one is clearly the bottleneck. For the masses I have it set right but for you flying around you need to change that it seems.

1 Like