Here is how I got there, Real world testing of 12v vs 24v - #14 by vicious1
Honestly I don’t remember what settings I changed exactly, it was a few weeks ago. I went through Configuration.h and Configuration_adv.h and changed the settings that were related to table size, Z travel and possibly something related to feed rates, not sure.
I still have default max feedrate unchanged in my firmware:

Says override with M203 and that’s what I’m doing.
In order to get to 40m/min, I had to up the acceleration to 800, which honestly seems way too much. I will probably be using half of that.
Here is a link to the motor pack:
https://www.amazon.de/Stepperonline-Stepper-1-8deg-connector-printer/dp/B07CPQC1Y6/ref=sr_1_2_sspa
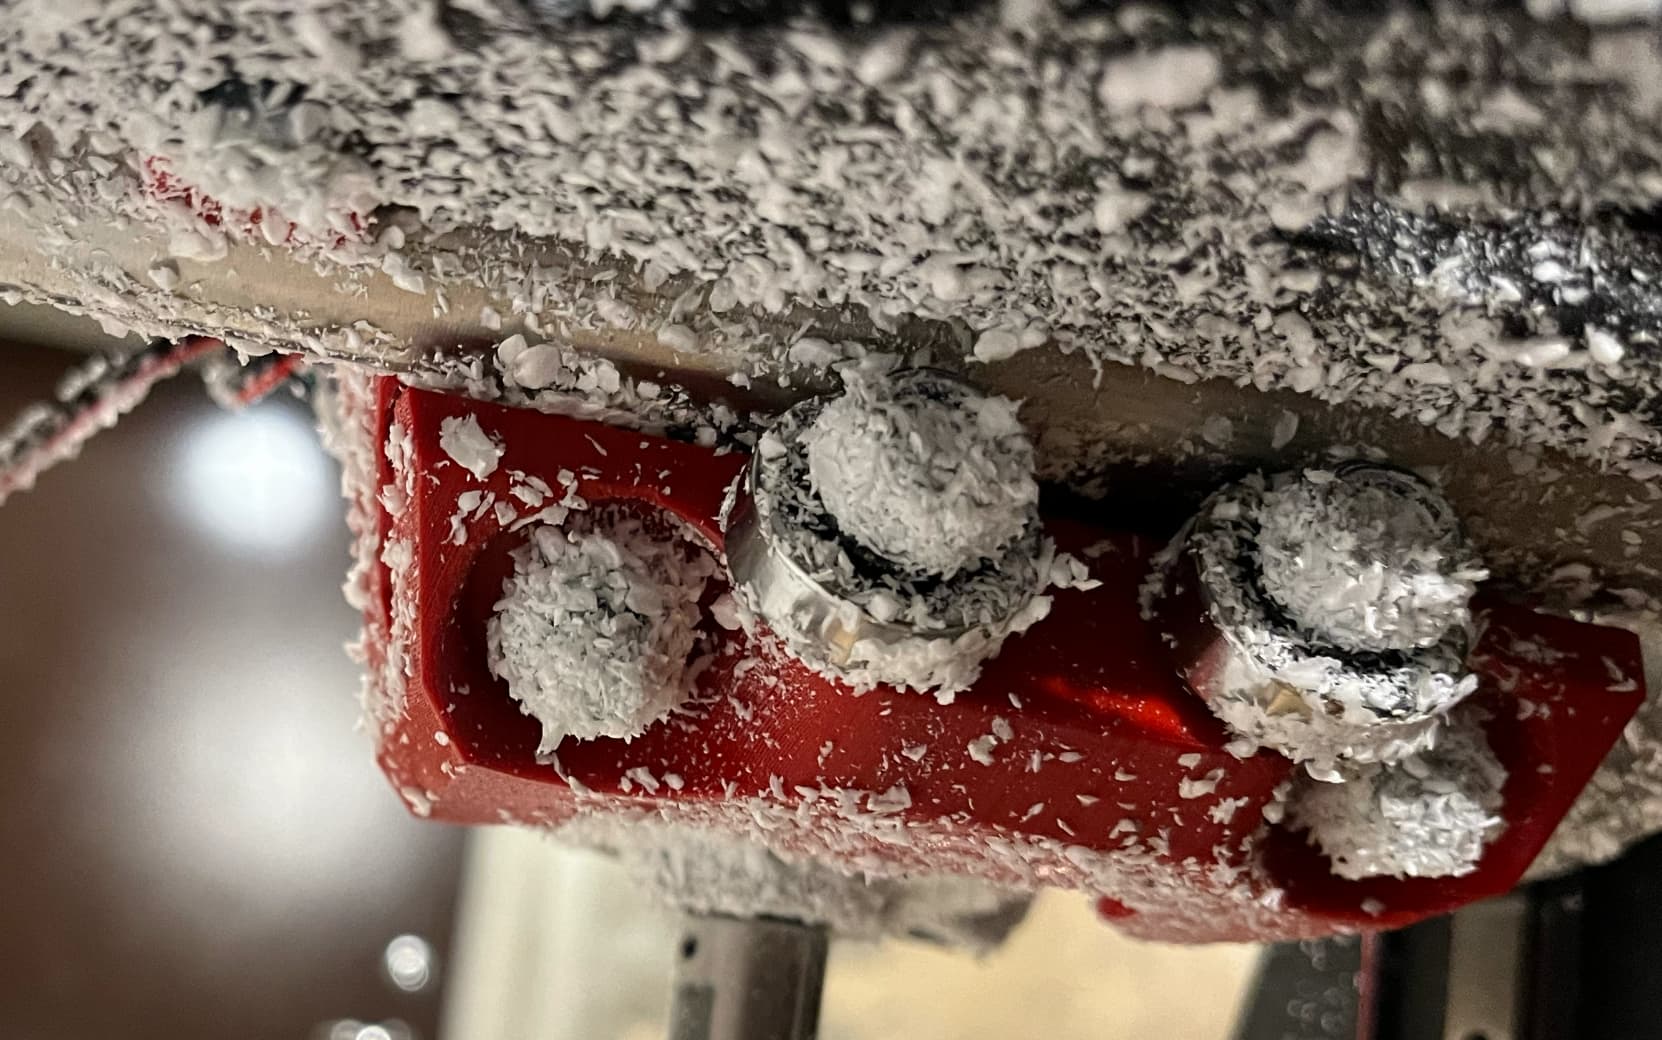
They are not melting the mounts ![]() In fact they are as close to melting the mounts as your finger is close to melting your left mouse button hehe. A little bit warmer than my hand but that’s about it. The stepper drivers are way, way hotter! But still seems to be in the OK zone.
In fact they are as close to melting the mounts as your finger is close to melting your left mouse button hehe. A little bit warmer than my hand but that’s about it. The stepper drivers are way, way hotter! But still seems to be in the OK zone.
I have a “lab” PSU with knobs for adjusting voltage and current and it also displays voltage and current in real time. When the motors were driving around at full speed, I saw the current jump to 1.6A for a few milliseconds, but most of the time it was staying around 1A for idle and 1.2-1.3A while moving.
The reason I started experimenting with speed settings was that… well, surfboards are big. With the default speed settings it would probably take ~6 hours to mill one side of a board… kinda boring. Especially when the finishing pass is just driving around removing 1-2mm of foam with almost zero resistance… why not speed it up if the machine can handle it?
Here is how to figure that out. https://blog.prusa3d.com/calculator_3416/ You can actually change everything from the menu in the lcd.
That sounds better.
Absolutely. We always need to double check when big numbers get mentioned. People used to say 1000mm/s+ not realizing they never got past 50 from my limiting.
2 Likes
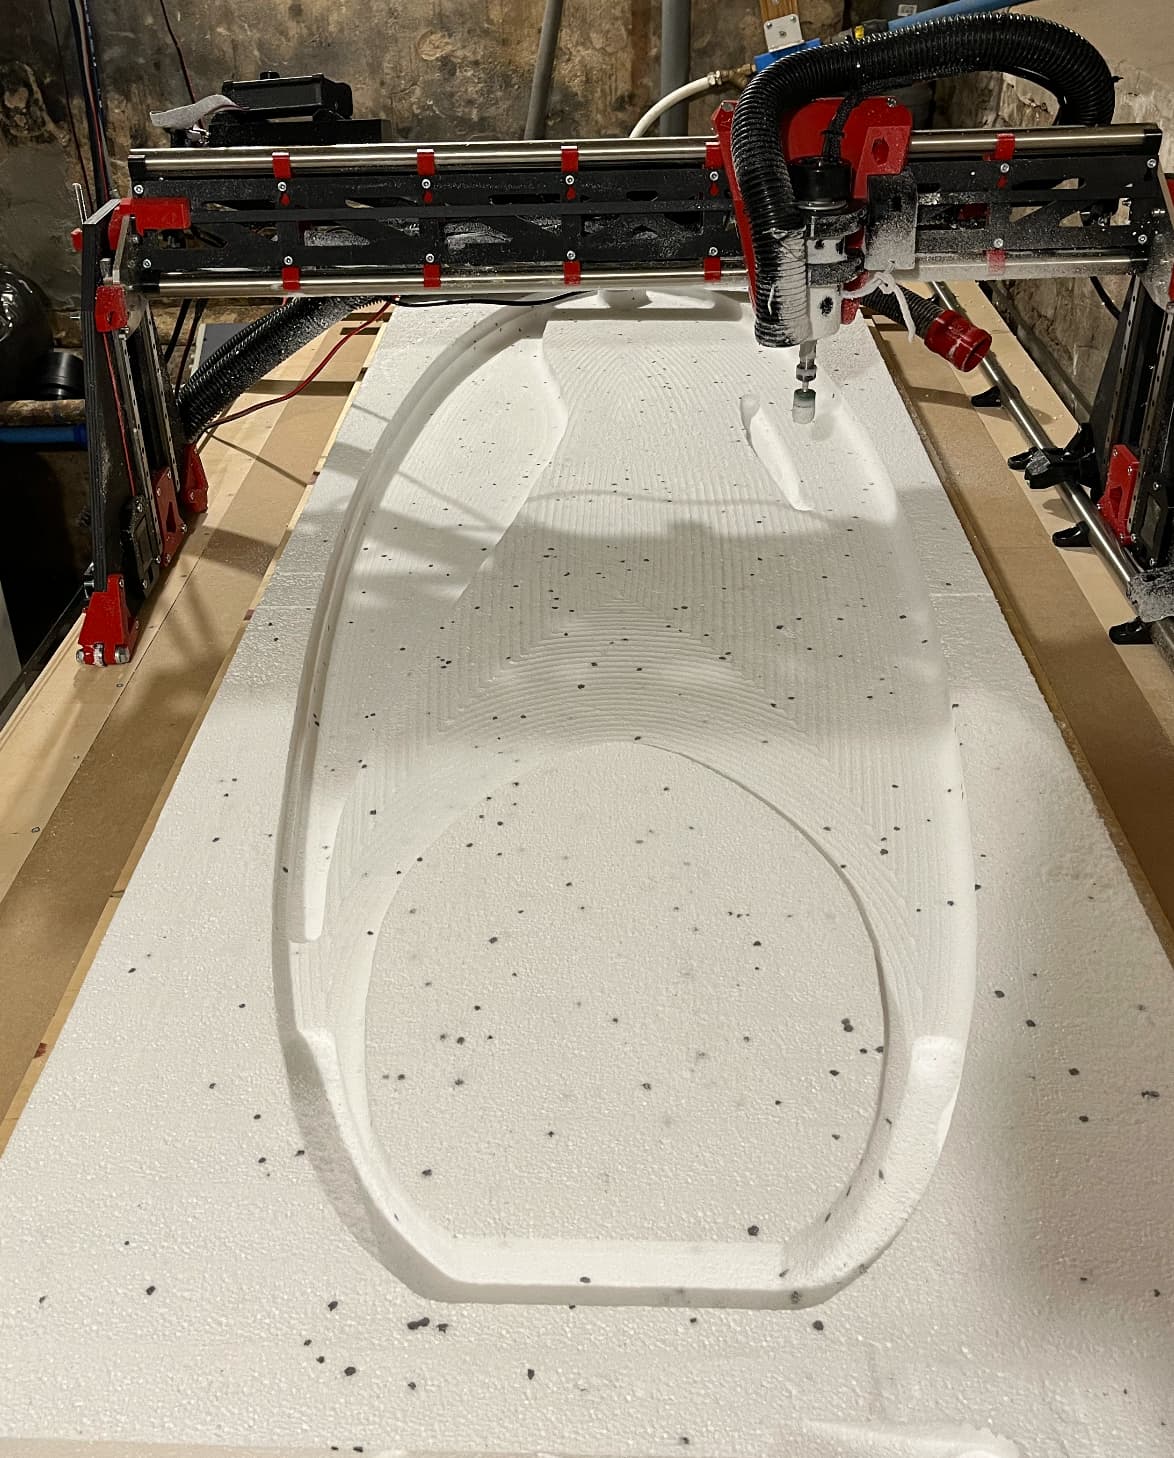
Another update about my progress: I tried milling the full size board. OK, where do I start… milling foam is obviously more complicated than I thought.
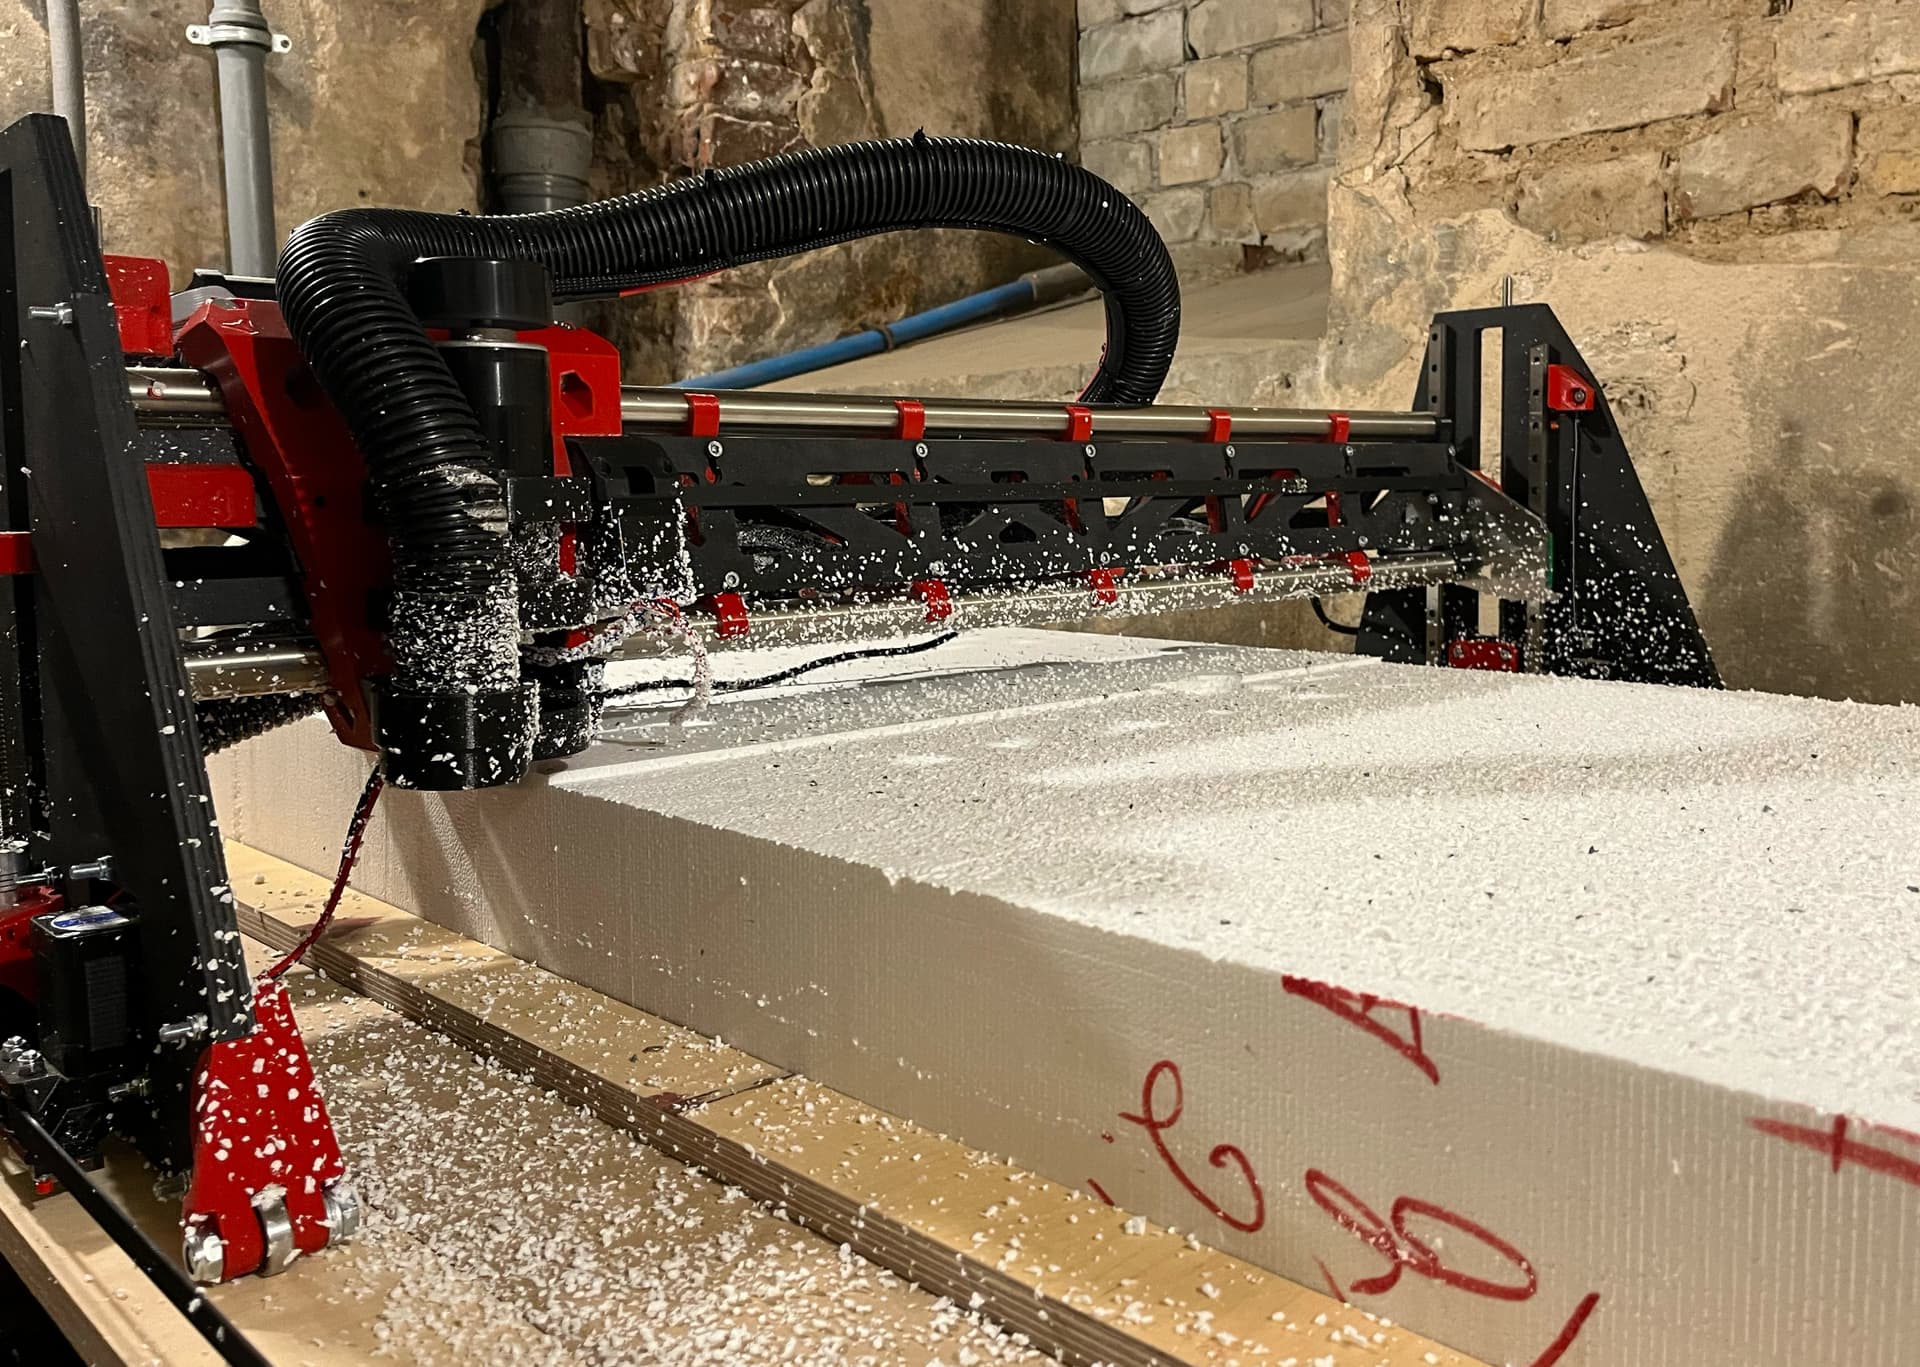
I had to calibrate the stock and make a flat surface at 100mm. I used a 30mm flat surface milling bit with 2 flutes. The endmill makes bigger foam chips instead of powder that comes from the burr. The chips fly everywhere and stick everywhere. Super sticky! The chips stuck to the X bottom bearings which later started jamming the X movement. I had to stop half way, because X motor started skipping.
Since I didn’t need the endmill to go deep for this pass, I raised the spindle, installed the dust shoe as close to the surface as possible with a hope that it will contain the dust. Honestly - not much help. Slighly better, but the bearings were still covered in foam chips.
OK so its a short pass, I paused it a couple of times, cleaned things up, eventually got the surface done.
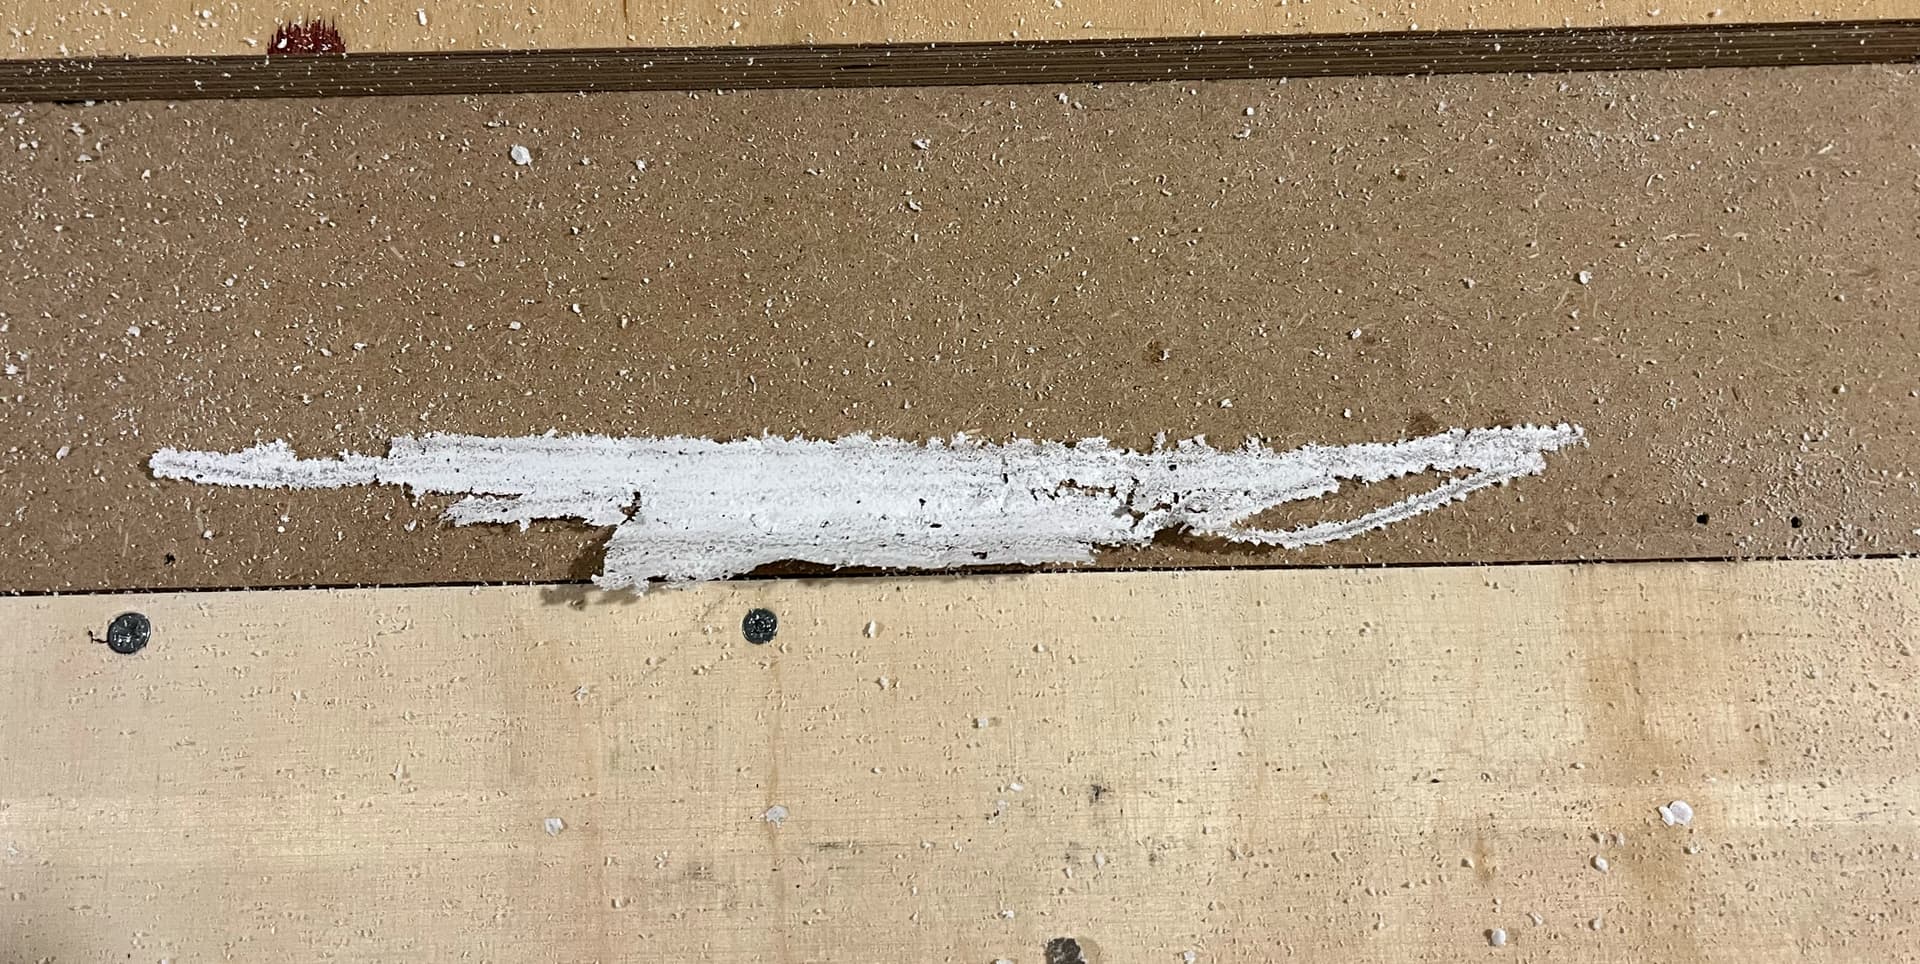
Next was the pocket roughing pass. The burr cuts much nicer and the dust stays around the cutting area. Life is much easier BUT the bearings are still covered in foam. As the bearings roll around the X rail, they compress the foam and form some kind of material similar to paper, which then rolls around the bearings creating a mess. Basically I had to babysit it and vacuum the bearings manually every minute or so. Boring stuff, but it works.
In the middle of the first pocket cut, my chinese 500w spindle proudly passed away after an outstanding service life of about 5 hours. Honestly I don’t think it liked the dust all that much. I liked the chinese spindle because it was so silent. Oh well, now it’s even more silent! Luckily my stock doesnt seem to be damaged, so I am off to the store to buy a makita.
I think in the end I will need to design a custom dust shoe and make sure it also sucks the air away from the X bearings. The question about whether MGN rails will jam because of the dust/powder is still open.
For what you are doing, you need long bristles. I designed that shoe for close wood cutting. You have a very unique build, That I wish I could replicate but I am too far from the ocean to start shaping boards. Add some long bristles to the shoe to get them all the way down to the cutter. you can glue or screw them on to the shoe I designed if you do not want to redesign. That should take care of more then 90% of the mess. Maybe -Amazon.com
You can also add a sweeper to the lower rail to cover the bearings and sweep the rail as you move you have inches to spare on each side. I do think some bristles will make it so this is not needed.
Oh and make sure your Vac hose is grounded…so much static.
I wish you were nearby. I would love to help solve this problem first hand. This is a new one that I did not expect to be so difficult.
Any chance you could build some sort of shield/wiper around the bearing so that foam is kept away from the bearing-to-rail interface and the foam dust gets wiped away as the carriage moves across?
I actually ordered these a few days ago! Still in the mail. But that got me thinking: If the bristles are long (say 100mm, the longest I could find) and the dustshoe radius is not so long (say 30-40mm) then there is a chance that the bristles will reach the endmill rotating at high speed and then… well, i will probably need a new dustshoe )) Or not?
From there I thought I would have to design a dustshoe that is wide enough to ensure that the bristles never reach the endmill. That probably means R=100mm give or take a few mm. That seems kinda big ) But if that’s what it takes, why not.
Do I still need it if I bought antistatic vac hose? I don’t see any foam stuck to the walls.
It is still amazing how much support I can get in this forum! Thank you for all the help.
2 Likes
Sailplanes have wipers across the length of their wings to wipe away stuck flies and mosquitos and increase aerodynamic efficiency. If that can be done, I am sure some sort of wiper for LR3 bearings can also be invented!
Not sure Can you feel the static build up anywhere? If I get near my dust bucket I get zapped when I touch the ground, SO I need to ground that thing as well. I wanted to even print the dust shoe out of conductive material just to get it to ground more. I am becoming a ground-a-holic.
I think it all comes down to the parts you are cutting. Along the sides is where you will find out. flat surfaces are easy. That is one of the things I would want to see in person!
I had a bunch of static in my vac hose and it was causing the controller to reset and ultimately killed a built in driver.  . It is one of those weird things that you don’t expect.
Each piece of foam doesn’t create a ton of static, but a couple of million pieces can add up.
It is my impression that an anti-static hose will have a continuous piece of metal as the spine (and maybe they mix up some special plastic, IDK). Do you have to ground that spine to make it work?
The easy way to ground a vac hose is to just use some ground wire (like from a romex) and put it through the hose, and ground it on one side. If even a few volts start collecting at one end, it will leak or short to the wire instead of being able to build up to the point of being dangerous. As long as you aren’t sucking in big big chunks, the wire won’t cause clogs.
If the spine is already the ground wire, then I think you just have to ground it.
1 Like
No, you just have to pay 5x the price of a regular hose ![]() There is no built in wire.
There is no built in wire.
Would static be reduced by terminating last 6-8 inches of regular vac hose with rigid aluminum ductwork (usually used for dryers), grounded and non sparking? Also, ensure router body is grounded?
Random ideas… positive air flow along the rails, or bristles fastened to core, or motorized bristles even rotated/oscillated by small motor. Bonus points for making a Core Addon with rail cleaning bristles mechanically driven by x axis belt as the Core moves.
I wonder if that kind of anti static spray on the gantry could help…
When you start talking about oxygen free copper, we’ll intervene. Well, hopefully before you get to that point…
I like good solid grounds for things, too. Comes from working on audio equipment long enough, and I will admit that I got a bit … overzealous … at one point. There are many problems that a good grounding solution can help solve, it cuts a pretty good swath through the hordes of gremlins that can dog a project like a CNC machine.
A star ground is a good idea to avoid loops that can cause other problems. With anything AC related, it usually comes back to the power plug. At least that’s where all of my ground straps terminate.
1 Like
Trying to manage static charge build up is a tough challenge. I deal with that all the time at work (building spacecraft.)
Running a ground wire through the vacuum hose to keep charge accumulation down at the spindle and in wire harnesses to the spindle is only addressing a little part of the problem.
That insulative hose will be accumulating charge all across its run, and because the material itself isn’t dissipative, every part of it will charge up and attract anything kicked up while milling- even if the end at the spindle gets a ground wire run to it.
The way we try to deal with charge accumulation in harnesses and hoses on systems like I’m used to is that we put deliberate discharge paths in place. You can get things like QQB (think snakeskin, except made of tiny braided silver coated copper). It’s expensive, and abrasive- so probably not a good option on a router. There are other similar coverings like armour lite that use conductive threads instead of wire, and they get absurdly expensive.
But, you don’t have to go to those extremes. On some of my own tools, I’ve wrapped hoses in aluminum foil or aluminum tape and then tied that to a ground point and had good success.
I did similar with a cyclone dust collector and hose that I have on a miter saw, and it significantly reduced charge buildup. I got sick of zapping myself on the bucket- there wasn’t any electronics involved in that one.
This same kind of treatment works well for other EMI or ESD susceptible things like a plasma cutter heads wreaking havoc with controllers.
There are other nuances. Often times at work, we only ground one side of a shield covering even though it runs all the way between devices. Other times, we deliberately tie them. That’s detail outside this discussion, but there are tons of these nuances.
Looking at those pictures, its probably going to need some really good dust collection around the spindle as with the foam charging up as it is, you’re going to have a really hard time keeping it from ending up on everything if it has any chance to get free outside of the dust collection system.
You likely need additional barriers/covers/wipers to move it out of the way, as it will accumulate as those pictures show.
5 Likes
Wont long bristles get caught in the mill? The longer they are the further awat they need to be.
Well, we don’t have to deal with solar wind spraying charged ions at us…
I tried something the other day with my vacuum hose exterior. I don’t know for how long it will work, but the immediate results were interesting. I sprayed the exterior of the hose with Static Guard spray – the stuff you use on your clothing to get rid of static cling. All of the little foam particles from my test squaring cuts fell off and ere easily vacuumed up, even off of parts that were not grounded (yet). I will be grounding my X and Y rails at some point.
Obviously the needs of removing static charge for spacecraft are going to be more demanding, and will need to have less human intervention, but maybe we’re overthinking stuff a little for a machine that has a person standing there.
Too soon to say how long this will last, but it doesn’t seem to affect the bearing performance, and does seem to keep the foam chips off of things.
2 Likes
Yes, but there is also a limit of how wide the dust shoe can be. Wider than 160mm (80mm from the endmill center) and it might start hitting XZ plate while homing.
2 Likes