Look who doesn’t remember all the things that have been built so far… ![]()
You could easily add some spars in between if you find it too flimsy, I like the simplicity of it. My first table is similar, I only put a torsion box on top because my spaces in between were too big. ![]()
Some ideas…
Shared this many times before, but…
Personally wanted full sheet when getting started, but had limited space, so built 5’x10’ rolling sled for LR3 that can be hung vertically using cheap game meat hanger. Reality is my LR3 ended up mostly living on a rolling bar height bench sized for 2’x4’ cuts. Intentionally made top surface a removable half torsion box. Has integrated storage, torsion box can be used separately, is currently indoors, in coffee table mode. Lower bench portion is narrow enough (without top) to roll through door entry for bringing inside when garage is too cold.
Like how LR3 can be quickly switched between tables/modes.
Wondering if anyone has LR3 on NO table. They just rest/bolt Y rails to garage floor slab. Using shims and/or surface XPS/MDF to make level enough? Also wondered what’s the absolute minimal effort easy to repeat path for success with LR3? For 2’x4’, the AllTed bench seems to be the way, other than buying some right sized bench (Ikea, Lowes, Home Depot, harbor freight, etc…).
I went full on ghetto with my table. It was an old beaten up, solid wood dining room table on craigslist for $40. Rock solid, flat and did I mention, cheap?
I agree 100%!
Looks great i just can’t crawl around on the floor like that
![]() wish i could
wish i could ![]() but it is a neat table
but it is a neat table
That makes me wish my garage floor was even close to flat. ![]()
No shame in that. Doesn’t need to be fancy, just functional.
When approaching any design I try to simplify things down to the most basic form I can that meets the requirements of the project.
The lowrider really doesn’t even need a true table only 2 parallel rails with enough cross supports to keep the spoil board from sagging. It’s basically a bed frame with slats.
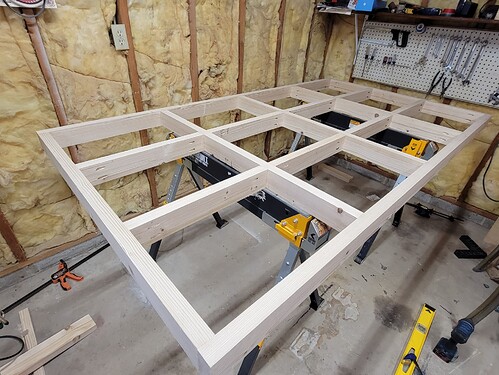
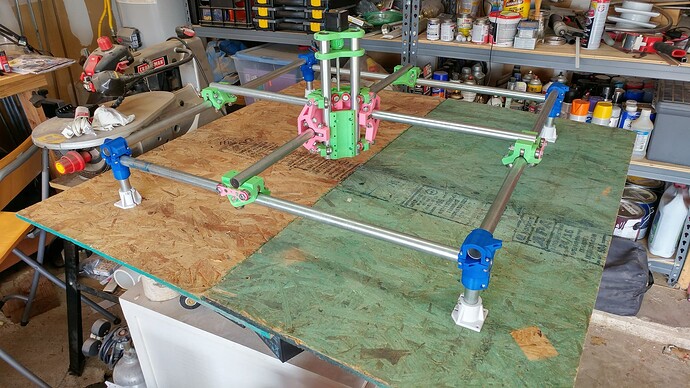
The lowrider 2 had some weird requirements because of the wraparound z-axis that forced my table to look like this:
But if I was building a LR3 I think I’d just use a pair of I-Joists from HD for rails. They come in 22 foot lengths and are engineered to resist deflection .
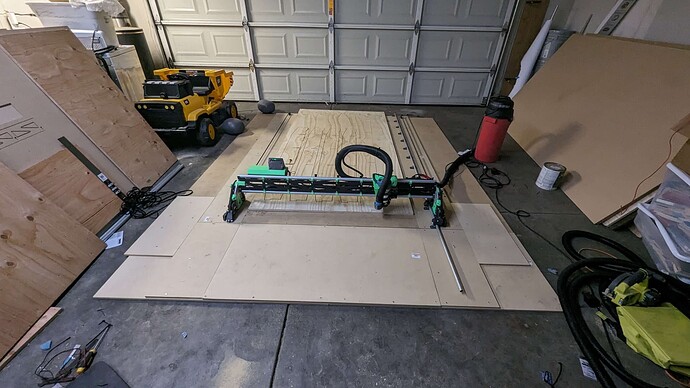
Flat~ish surface #1 (super janky):
Just a couple of scrap 12" strips of 3/4" plywood, a couple of scrap 4’ pieces of 1x4, and a couple of sawhorses.
Not so flat~ish, and obviously not suitable for cutting anything, but it worked as a temporary support surface for assembling the LR3, connecting wiring and belts, and sorting out the first movements. Pros: cheap, fast, elevated things off the ground. Cons: wavy/bendy/warped, only useful for temporary testing during build
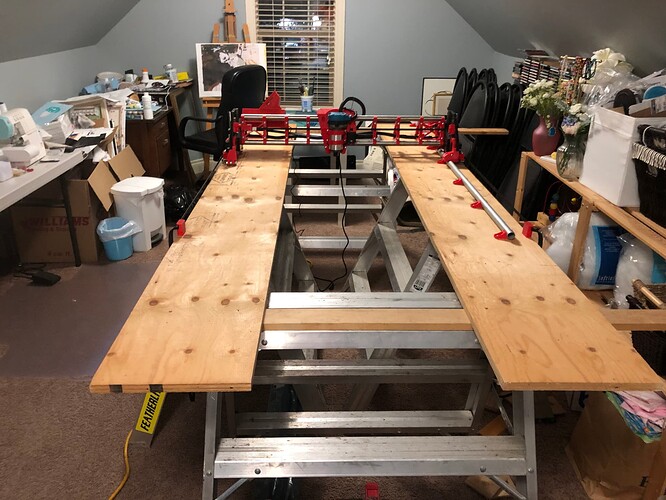
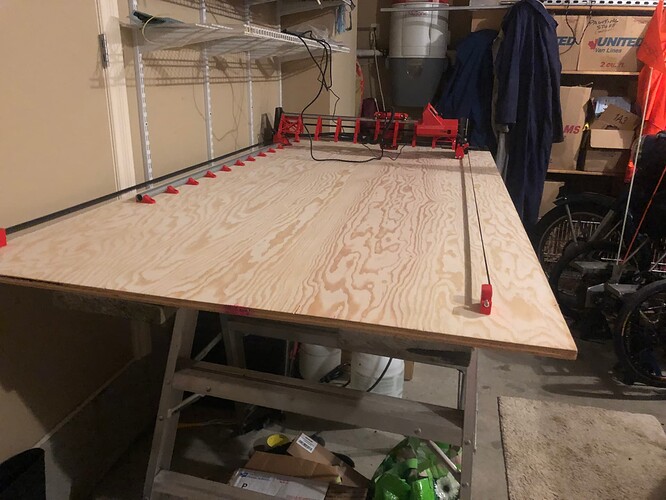
Flat~ish surface #2 (still pretty janky):
Full sheet of 3/4" ply, a couple of 8’ 2x10s that were laying around, and the same two sawhorses.
More flat~ish, bigger, able to perform actual cuts with my shorter temporary gantry. It will allow me to cut my struts, XY/ZY plates, etc, and to sort out some mods that I want to make to the LR3 (side mounted belts, modify the firmware & wiring so that X is the long axis/unit homes on the new XMin/YMin (where XMin/YMax now sits). Pros: cheap, fast, off the floor (same as above), big enough and flat enough to do some basic cuts, easy to disassemble and move out of the way. Cons: not full size, not sturdy enough to use as a work bench for other activities, probably still a little warped/wavy.
Flat~ish surface #3 (future, no pictures available ATM):
Expanding surface #2 with a second sheet of ply (cut), assembled to 5’3" x 10’ surface, 2x4 structure underneath, w/10’ lengths on long edges (Y axis) , following Ryan’s advice and using 5’ supports along X axis every 16 " or so. Still plan to use sawhorses as legs to start, may build permanent legs eventually. Pros: large enough to handle full sheet cuts (once I replace the temporary gantry with the full size one), sturdy enough to stand on/use as a work bench for other projects, still fairly cheap. Cons: somewhat less portable, less cool factor than a full torsion table (but way faster/simpler/cheaper)
I think that’s a little bit unfair. You could have built it with 3 mm skins and a lot smaller sections but you had other design criteria in mind which over rode weight as a criteria. Weight is just a function of material volume after all.
I agree with all you have said regarding the need but light weight is a great advantage for those who need a mobile or folding setup IMHO.
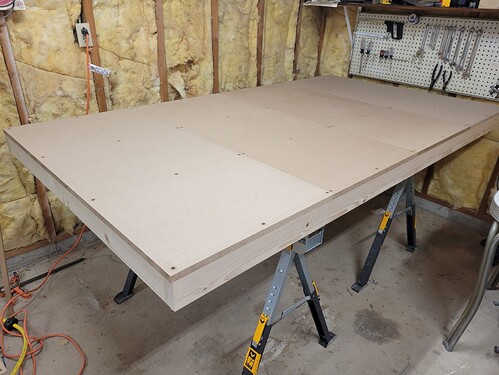
Got my table built. Ended up 49" x 90". Bought some 2x8s and ripped them down but that was probably more work than necessary. I bought a sheet of 3/4" MDF and had them cut it in quarters so it fit in my car. I ripped them down a bit more on the table saw. I ended up basically building a torsion box anyway minus the bottom skin. I used pocket screws. It’s not perfect but it’s pretty flat (certainly more than the floor of my garage). Back to assembling the LR3 now that I’ve settled on the width!
I love this conversation! I know my machine is less than a full sheet, but I had done torsion boxes for various reasons previously, and it did make a great first project (after cutting some struts). To build it I had to design it (I chose to design it from scratch rather than the parametric versions) and do the CAM. Then cut and ruin some material. Then cut the actual struts and spars for the table. I’m sure it’s imperfect, but I’m happy with it, and I’ll level it at some point. I definitely learned a lot.
But - I’ll also chime in that I was absolutely getting serviceable cuts from a sheet of MDF on a couple of 2x4s. I’m not sure it would have sufficed for carves, but for cuts it was awesome. The area was larger than my final table size as well. I love the flexibility of the LR3 in this way. I actually wouldn’t hesitate to go back to a larger sheet on the ground for a project larger than my current table.
I’m pretty sure my table took longer in total to CNC than if I had just used my table saw and woodworking tools… But as I said, I learned a lot.
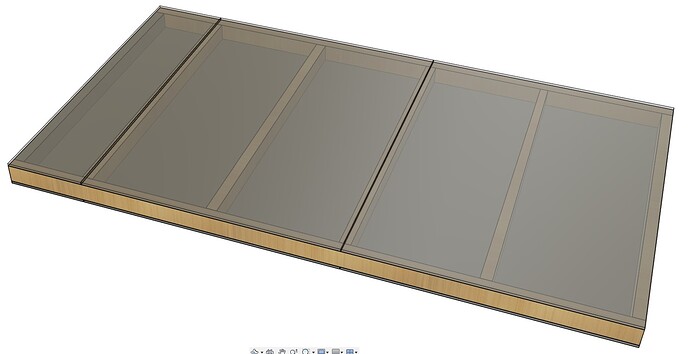
I recently had an email conversation with a new LowRider maker, working through his table plans. I did not promote the torsion box to him. He came to me asking me to make one for him. After our dialogue about it, his currently planned approach is to have help from a local friend to build a temporary table using regular tools, and then he hopes to use that temporary table to CNC cut a torsion box table. Below is the most recent email from me back to him.
This drawing by Ryan shows a way to make a large enough table (for full sheet cutting) using regular tools.
Larger tables magnify any curvature or lack of flatness. A 1% doming issue is no big CNC problem on a 200mm x 200mm table. Flattening that spoil board won’t require deep cuts. However, 1% doming on a full sheet table means the flattening of the spoil board will take quite a few passes and have to dig deep in some areas.
The larger a table is, the more flatness is needed.
The LowRider can deal with twisting of a table fairly well, and with flattening of a spoil board, it can suffer an existing dip or mound fairly well. But getting things fairly flat to begin with, is better in many ways.
The above table can be accomplished by a combination of choosing the straightest wood possible, with the least amounts of bowing, cupping, twisting, or warping, and by making sure the pieces are aligned with each other where they meet.
Planning it so that you are going to process the wood some, like cutting off some of the width of the dimensional lumber to get better straightness (for better flatness), can help if you are able to correct (in your processing) for those existing flaws. That can take more attention than some think at first blush. That comes down to woodworking knowledge, and there are lots of videos about how to account for the irregularity issues during processing. In a related vein, cutting off the rounded corners (of dimensional lumber) also helps with alignment of the boards where they meet.
Bah. Who needs a table.
This was my first build. Scrap particle board sitting on top of my table saw at the time.
I’ve been following this thread with interest as while I have a LR2 sat waiting for a table, I haven’t been able to settle on a table design.
The long term aim is full sheet, but space dictates a smaller table to begin with. My main and most pressing project is ACM sheeting as side skirts for a lorry, so I need min 550mm ideally 600mm width and a max 8ft table length to fit in my current shed.
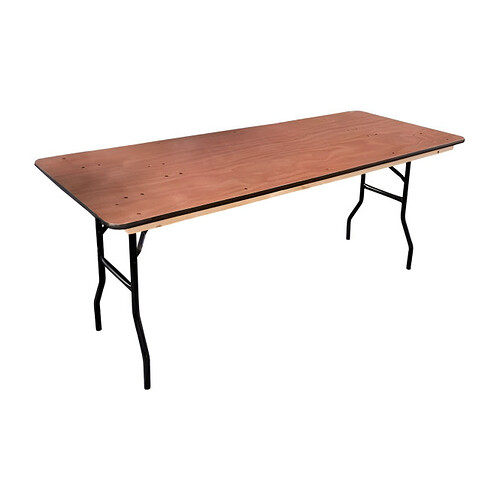
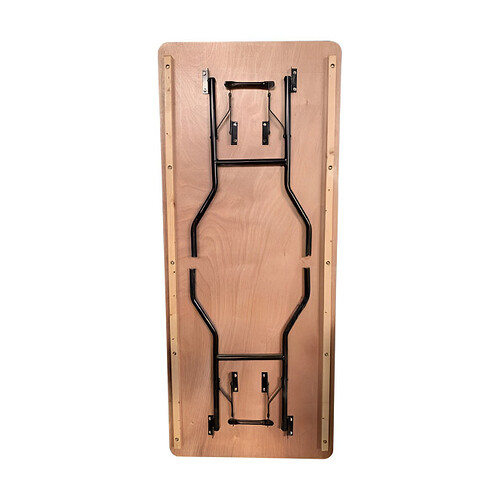
With that in mind I’m looking at options, and have come across ex hire trestle/catering tables, 6ft long, 2ft6 wide. These can be picked up cheaply, and from many years dancing on them, I know they are pretty damn sturdy! I would need to widen, probably by using 2 lengths of extrusion running down the sides. 762mm width plus 40mm extrusions each side should give me enough width according to the calculator
Has anyone used a trestle table like this? Can you see any pitfalls with the idea? It seems to me they provide an easy starting point with a good size work area for a LR? Especially for those of us that are behind the curve! For info, I’ve seen them on marketplace for £25 here in the uk - I can’t buy the timber for that!
Looking forward to any thoughts/comments!
Those could work! if you do it, please report back your findings!
Actually this seems like a good idea to me.
People have used ping pong tables to good effect. I was giving serious consideration to using 2 of these side by side to get a good width. Probably better than the “wings” that I have on my old LR2 table, which have become a bit wonky, certainly cheaper than a new torsion box table. If I were to screw on an MDF spoilboard, I’m sure it would be flat enough.
I think it’s a good idea, you can even extend it a couple inches on each side with a spoil board.
