I think what I read was something like ‘you’re on your own for the table’ or something like that. Even if people are not asking, they are definitely looking for it.
If you search the instructions for “table” both pop up.
My goal is not to leave people high and dry. I write down basic instructions and when someone asks for more information, I fill it in. To date no one has really pressed for more info. There were two other LR’s before this and no one really asked more than a couple basic questions. So no instructions ever got written.
As of the time I first showed up, for newcomers, especially those with little to no CNC experience and little to no woodworking experience, and especially those who have reasons in mind for wanting a full-sheet-cut-capable machine, the table was one of the most challenging hurdles. I think a lot of progress has been made in recent months/years on that. If a drawing like the one above, especially if it included plans for legs, had been in front of me, it would have saved me a lot of work and pain.
@aeversme has a leg up on many, because he has already a sled for his table saw.
For you maybe, but you didn’t ask any questions, you drew up plans and made your own. I never had any idea you had any table issues.
I don’t know what each user does not know. As I said, I fill in gaps as they arrive. 8+ years in and no one really presses very hard about table info. You pressed for table designs so I made a parametric table design, you remade it and released your own version. I didn’t get any hint of you having trouble with tables or I would have filled in info at the time. The biggest question we ever get is, how accurate does the table need to be, The answer is build it to the best of your abilities and then you will have a CNC to try again if you have any issues.
I am not sure what you are going for. We have galleries for users builds so you can look at what others are doing. There is no sense in trying to make a parametric table in fusion to let everyone make the exact table with the type of legs they want. Then you are assuming they know CAD, but don’t know how to make a table?
If you think it will help I will add that picture to the instructions. I had no idea it was a hurdle for some. I can add some saw horses or something as legs. I just do not think I will ever design a table that is easy to resize and will fit everyone’s needs. So I also to don’t want to scare anyone away, making them think they need to build a whole new workbench for this. In reality, we just need a flat~ish surface.
This recent conversation has been very helpful to me as a newcomer. I overanalyze everything and tend to get stuck in “analysis paralysis”. I’m not at all concerned about building the Lowrider itself. I’ve seen issues worked through in the forums, have some basic related (but non-CNC) experience, and have high confidence. It’s the table that’s giving me grief. I would call myself an amateur woodworker and have a table saw and other tools that I can make a table. I could make a torsion box table, but that’s a lot of work and I haven’t built anything that large before. Making a CNC torsion box table from the start is really intimidating. These forums are a great source of information, but frankly all the options are overwhelming. This is why I’m trying to do this as easy as possible and keeping it vanilla for now. This is why I ordered the full kit with the printed parts and plates. I could print the parts, but it would take a long time, and run more risk of having issues if I messed them up. Also, that core (which is wildly impressive to see in real life) is bigger than anything I’ve ever printed. As for the table, I’ve been hung up on size. I would love a full sheet table but that’s more involved and I would rarely need it. I think a table with a 2’x4’ usable area would do 80% of what I hope to do. I think I’m going to end up building a simple table with a 33.5" x 6’ usable area because:
I think that will do 95% of what I hope to do with it.
The supporting table is 4 feet wide with room to spare so it’s not wider than a sheet of plywood.
Transporting plywood is a hassle so getting it cut at the store in thirds would be supported by the table.
If it someday works out to make it tilt up vertically, it works with an 8’ ceiling.
The laser and LEDs and fancy table can come later. There’s a lot to learn before I get there.
You are my target audience!!! So the above table picture and maybe a smaller one added to the instructions would clear up most of the table issues, or is there something else missing…I guess now that you know, what would you add for future new people reading the instructions?
I use a 2’x4’ build and it is amazing. I just do not have the room for a larger table and never make anything that big.
Woohoo! I’m not sure. The picture is probably helpful. I think clarifying what makes sense for a beginner (smaller, basic table) vs a veteran (full size, torsion box) might be helpful. Although, it seems people tend to ignore this. For me, it might have been helpful to mention that there are a lot of options in the forums, but perhaps recommending a basic build to start with. There are awesome ideas in the forums, but you start wanting to do a bunch of them from the start and end up overcomplicating it.
@vicious1 Ryan, there is a lot of good info here in the discussion about table design and beginner->advance thoughts. As this is @aeversme ‘s build thread, maybe break out that part into its own topic “Table talk….good for CNC, not spades!” Or something to that effect?
Holy cow, this blew up! Before I wade through with replies, I greatly appreciate the honest discourse today.
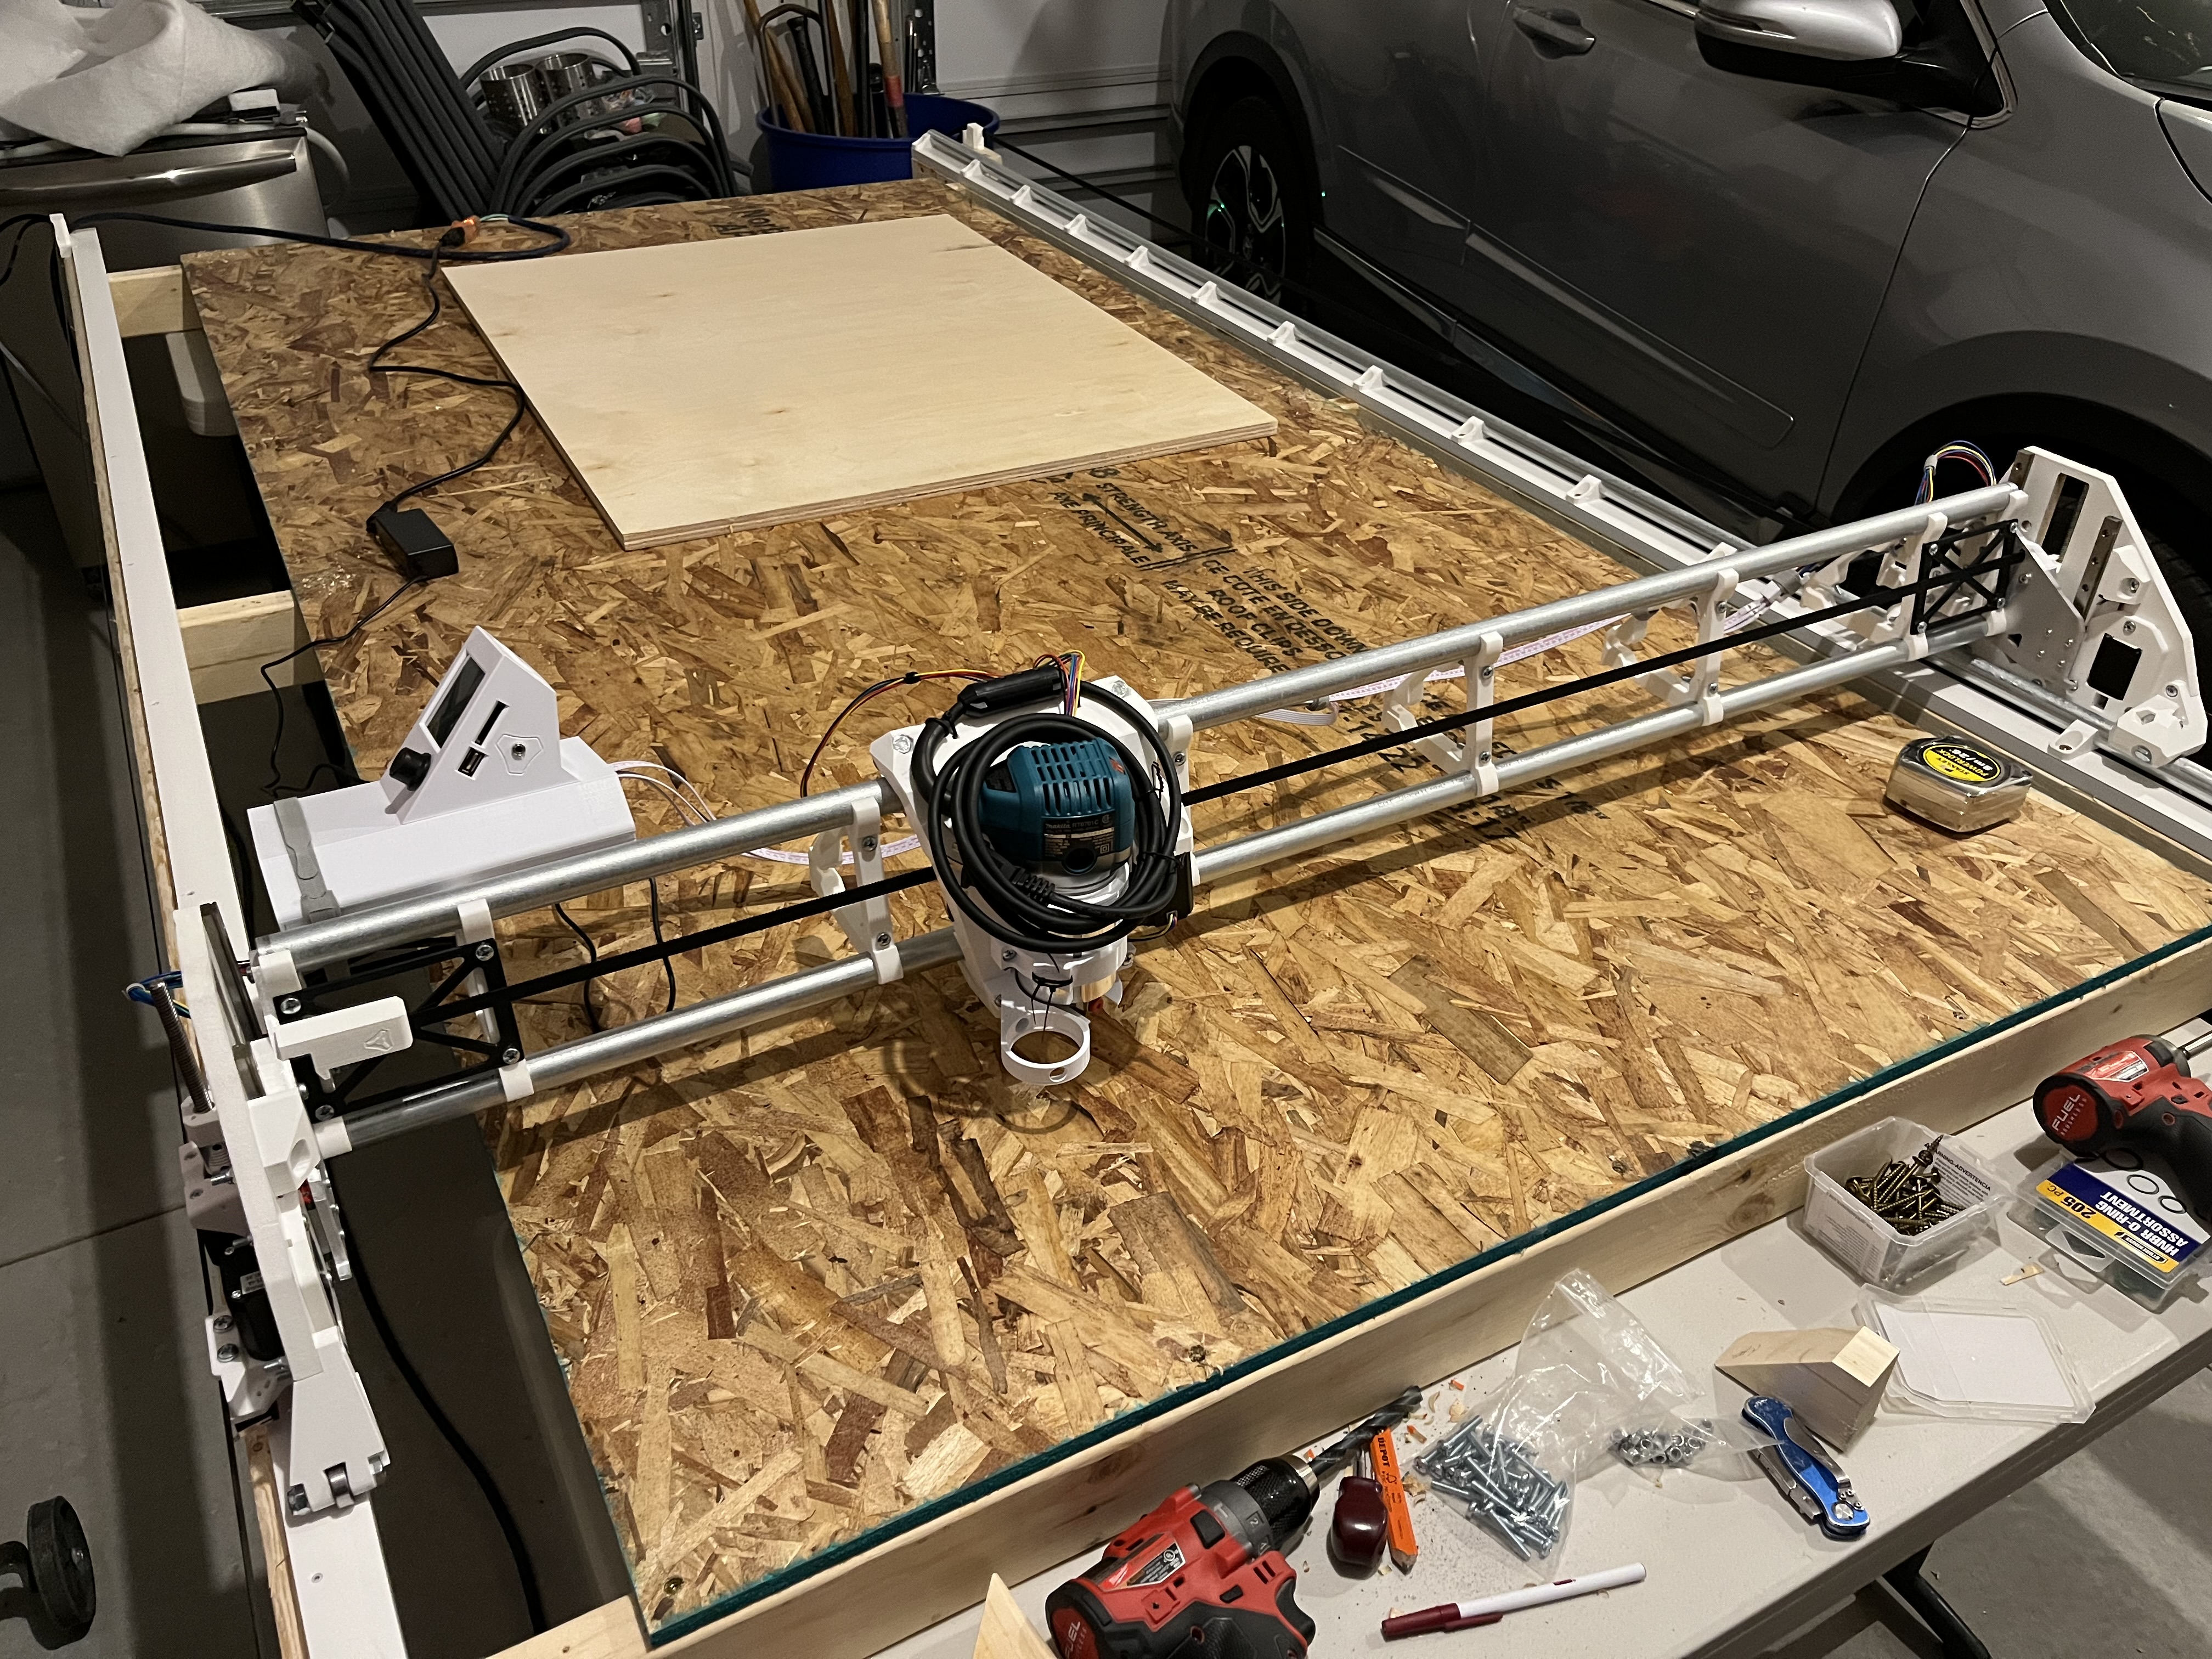
The machine’s movements are repeatable, since it’s all code, but the work to arrange the spars/ribs and the LR in the right place to attempt the cuts was more than seemed necessary, given the type of saw we have here and the ease of just lining everything up and making a quick rip to open up the slots exactly the same.
Yes, there’s some degree of frustration, but I am used to banging my head against a problem as I work towards a solution (thanks to a job in tech). Text is very limiting in terms of conveying emotion and context, but I promise I’m not raging or close to quitting in any of my posts.
The hiccups and mistakes and random failures are all part of the learning process. I went through it with 3D printing, too. There was a wealth of experience and knowledge online as I built, upgraded, and tuned my printer, and now it’s in great shape after plenty of time and effort and failures.
This is 100% understood.
Have I bit off a lot with this table? Yep. Do I regret it? Nope. I live with another engineer, so of course we decided to over-engineer this thing. We live for chasing zeros! Again, it’s been a little frustrating at times, but I’m nowhere near quitting CNC because of it.
n = 1 experience: I don’t feel like there’s pressure here on the forums to add on lots of extras to the process, or jump into complicated table projects right away. If anything, as you said, it could be difficult for newcomers to distinguish what is entry-level vs. more advanced if it’s not stated explicitly.
As for myself, I did add extras because that’s where my muse has guided me. I chose @DougJoseph’s table after reading a bunch of forum posts about table options and decided it would best suit my needs and interests. I agree that it would have been easier to make a “janky” table.
Exactly this.
And this is just one of the reasons you are awesome. Another is the level of help you give the rest of us when we have questions or encounter stumbling blocks. So thank you for all of that!
No sarcasm in any of that. Love this place, and I’m loving the CNC journey so far.
It seems to this outside observer that @Vicious1 and @DougJoseph are looking at this from perfectly valid but fairly opposite perspectives. I’ll weigh in with my thoughts…
The main reason I decided to build an LR3 was that it could do full size (4’x8’) cuts, and that is what I plan to use it primarily for (building custom poker tables using full sheets of 3/4" plywood). So I need a table that is capable of holding a full sheet, and I also want it large enough and sturdy enough that I can use it to lay out and assemble the pieces of my builds. A small table is not something I see needing in the long term. A full size (5’+ x 10’) torsion table is more along the lines of what I think I both want and need in the long term.
However I fully recognize that cutting a whole bunch of very precise slots in 3/4" plywood is NOT a great place to start learning how to use a CNC machine for the first time. And a (smaller?) temporary work surface that will allow me to play around with the LR3 during the learning curve, and to cut out some permanent struts and aluminum XZ/YZ plates (and eventually the skeleton of a torsion table) is a great interim solution.
So the end result will be something along the lines of what @DougJoseph is suggesting, but in order to reach that goal, I need something along the lines of what @vicious1 is suggesting. (In other words, you are both right!).
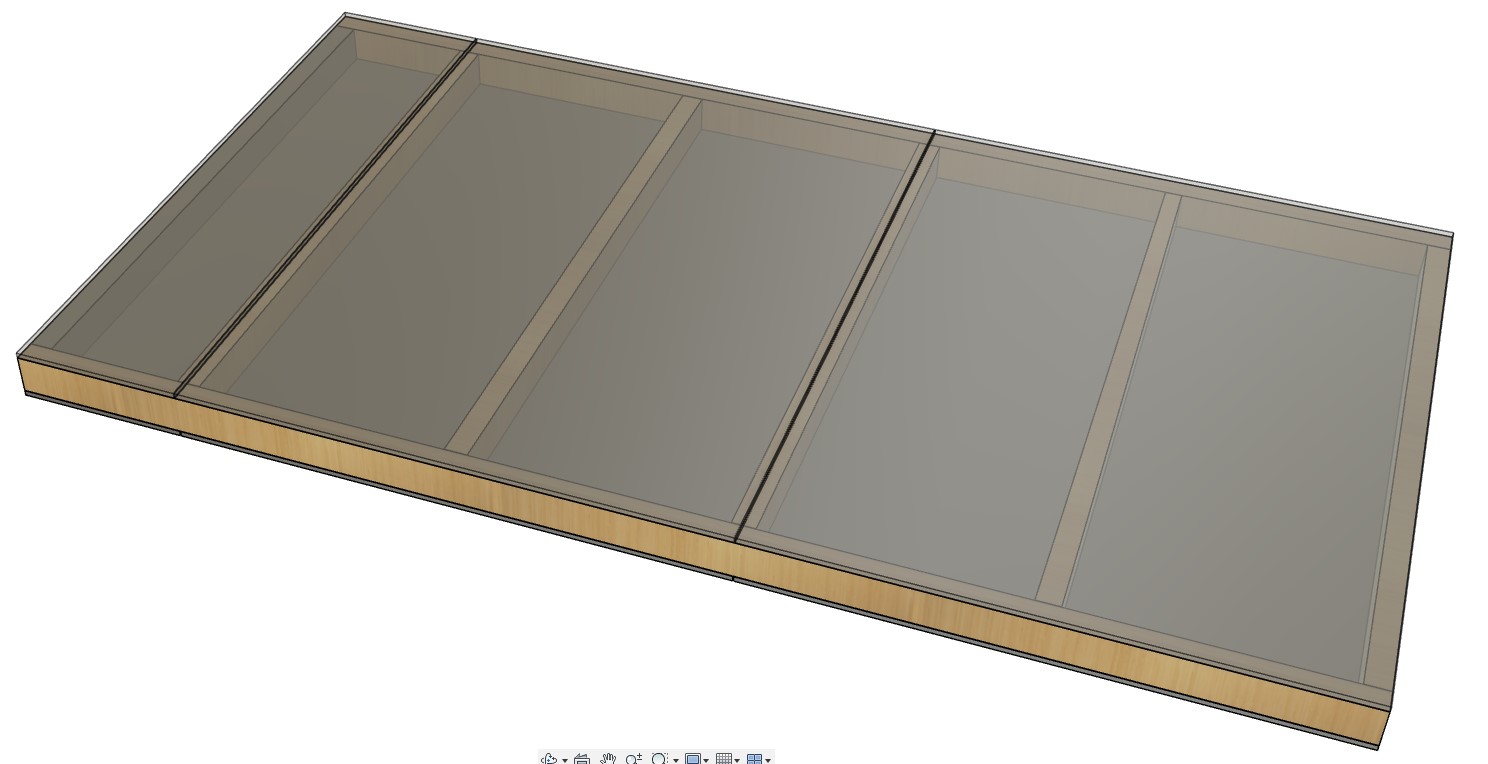
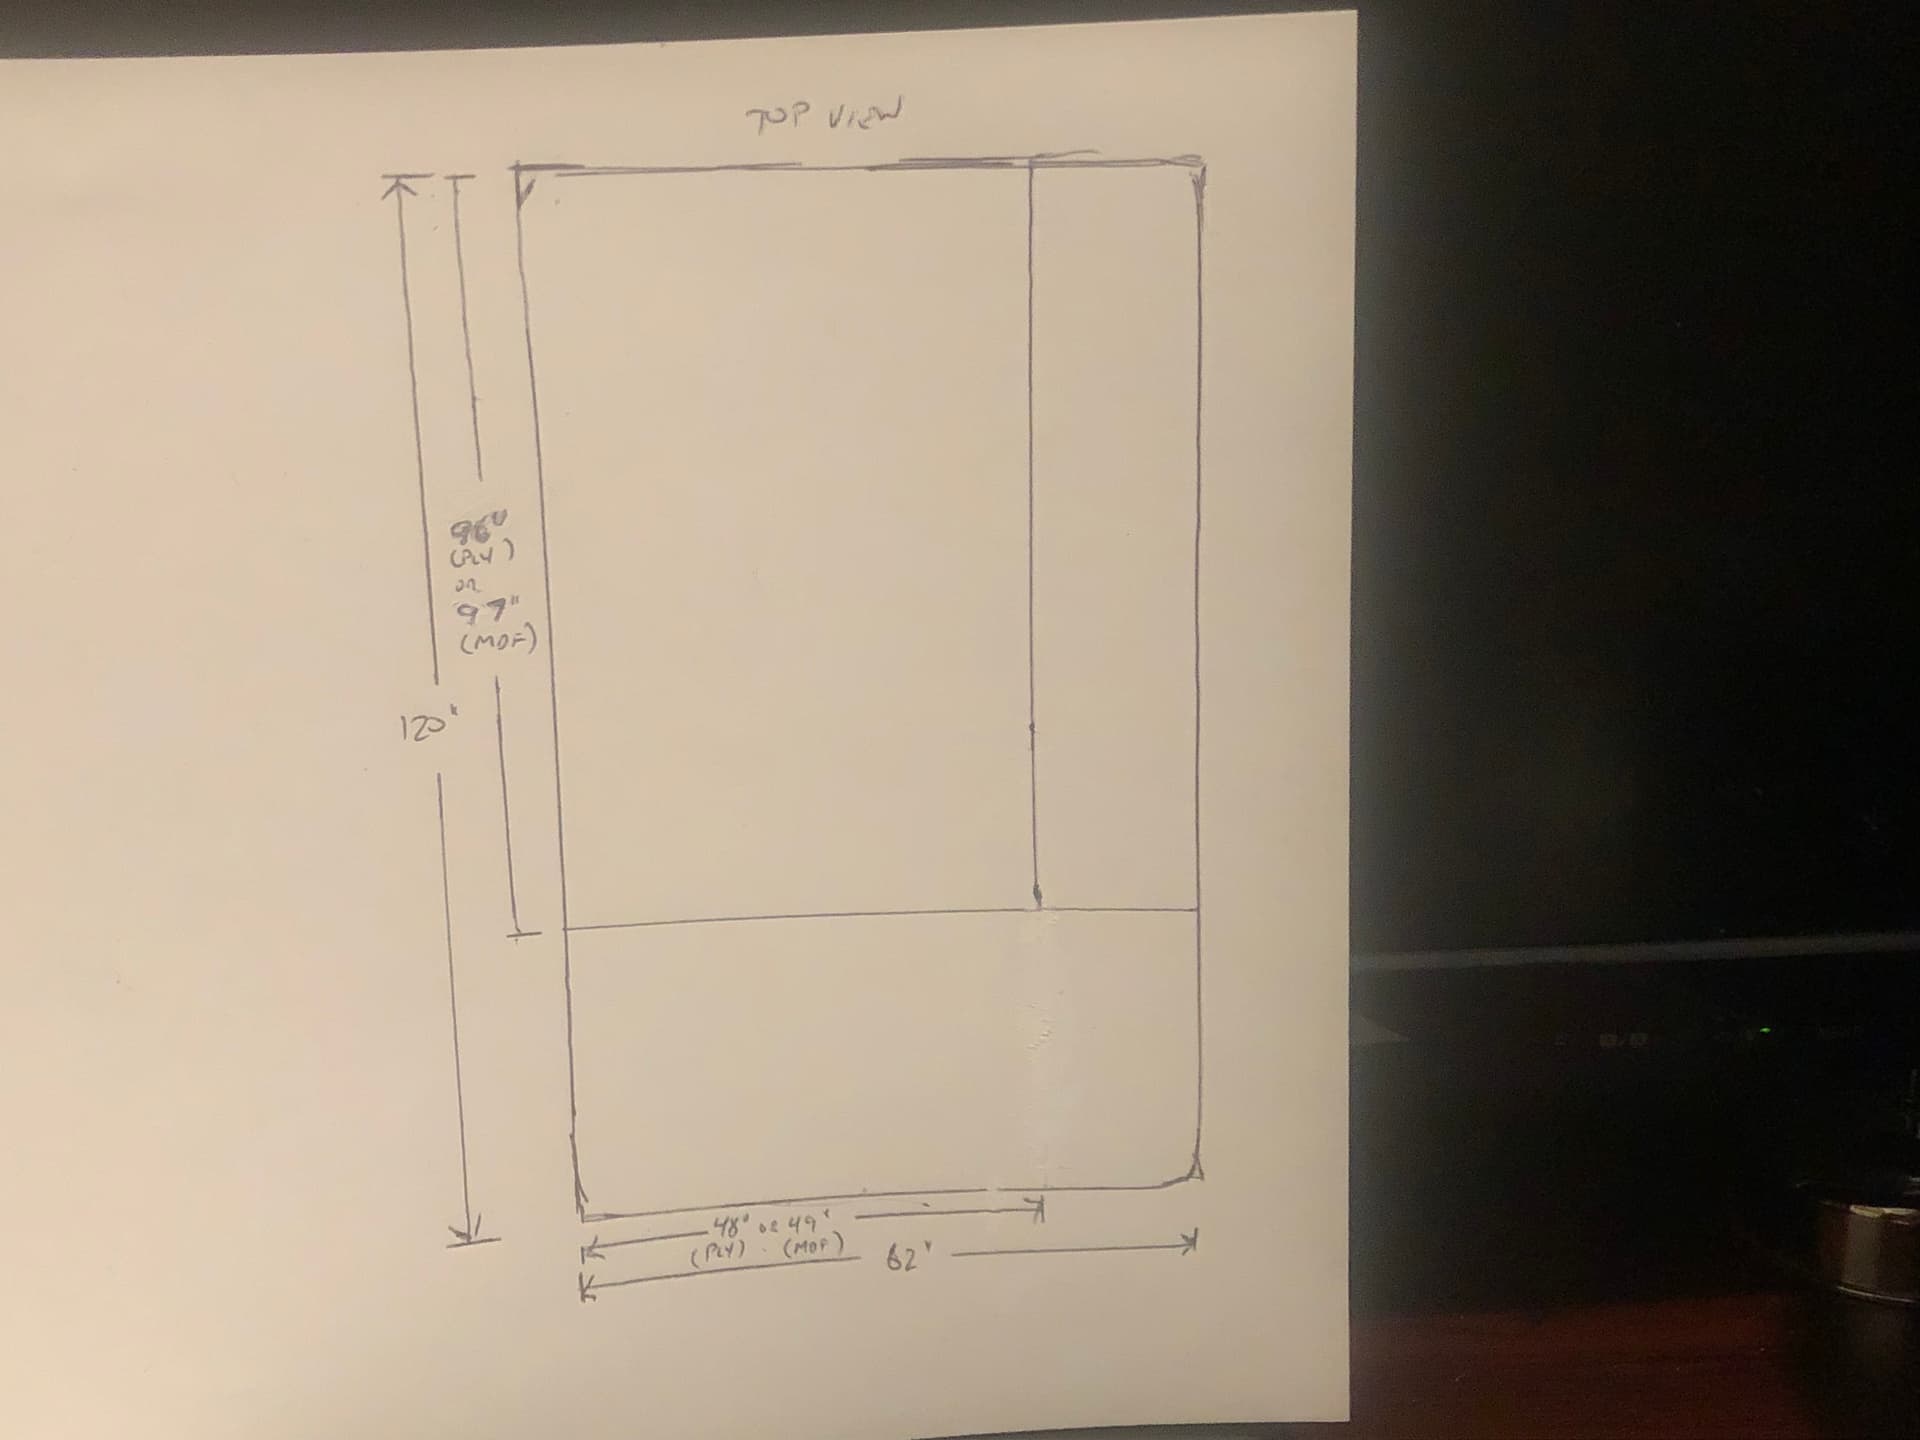
So a couple of thoughts about a “janky” easy to build, cheap full size table. The LR3 calculator shows a table size of 61.5" x 112" needed for a “standard” build (not using side mounted Y belts), so for simplicity sake I am rounding up to 62" x 120" (you would have to increase the X tubes/strut by 1/2"), but you could always adjust this if so desired.
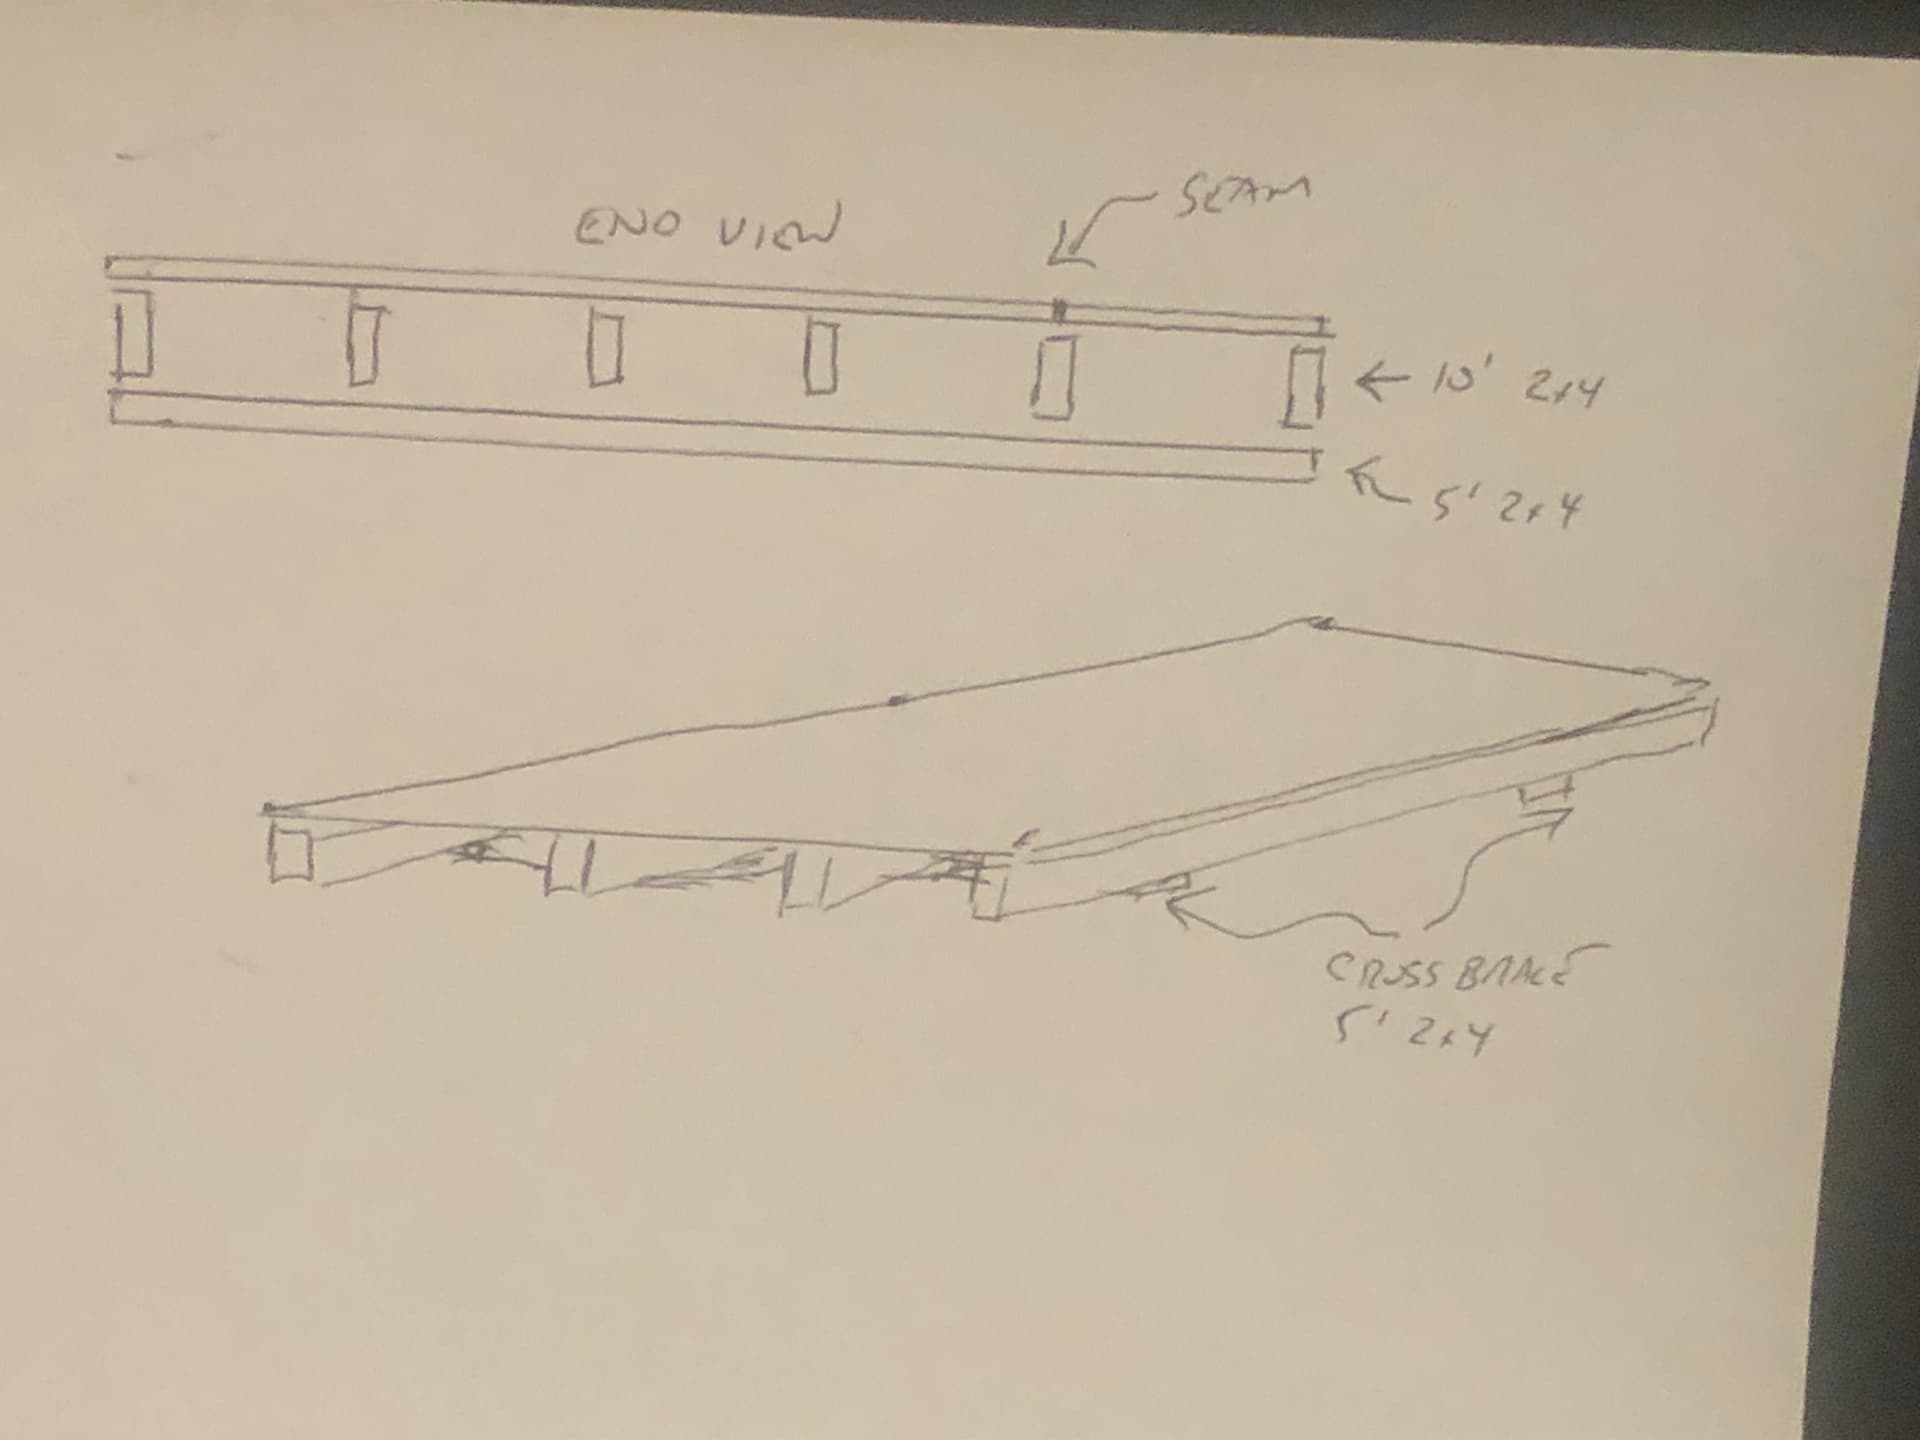
The way I am thinking about this, it can be assembled with 3 cuts on a sheet of plywood/MDF, and one or two cuts on some10’ 2x4’s, which could easily done at the point of purchase for those with limited skills or tools. The plywood (or MDF) top surface can be repurposed as the spoil board for a more permanent table sometime down the road.
Material list:
qty 2 sheets of 3/4" ply (should have at least one “clean” surface) or MDF
qty 7 (possibly 8, if using 4 cross braces) 10’ 2"x4"s
Very quick and dirty, can definitely be refined, but something that someone with almost no woodworking skills and limited tools could slap together in a few hours.
Thinking back pn it, originally, my Primo sat on a chunk of MDF, which in turn sat on an old unused kitchen table. It still sits on the chunk of MDF, which sits on a torsion box made to hold it. The CNC was not needed to make the box, and its main advantage is a large drawer under the work area.
The LR got a torsion box tabe earlier on, but only because I already had the means to make it, and it is actually something of a problem the way I altered it in order to convert the LR2 to LR3. Should have made the wings differently, in hindsight. I may still rebuild that part of the design…
The only thing I really see about that is the LR can handle a Y curve better than an X curve. So I laid my main supports along the X. Otherwise I am sure it will still handle our use case well.
I think the main takeaway here is I need to add a few images to the table section of the LR instructions. That will show people that an accurate, sufficient table can easily be made. If you use screws not glue you can reuse the wood if you choose to rebuild.
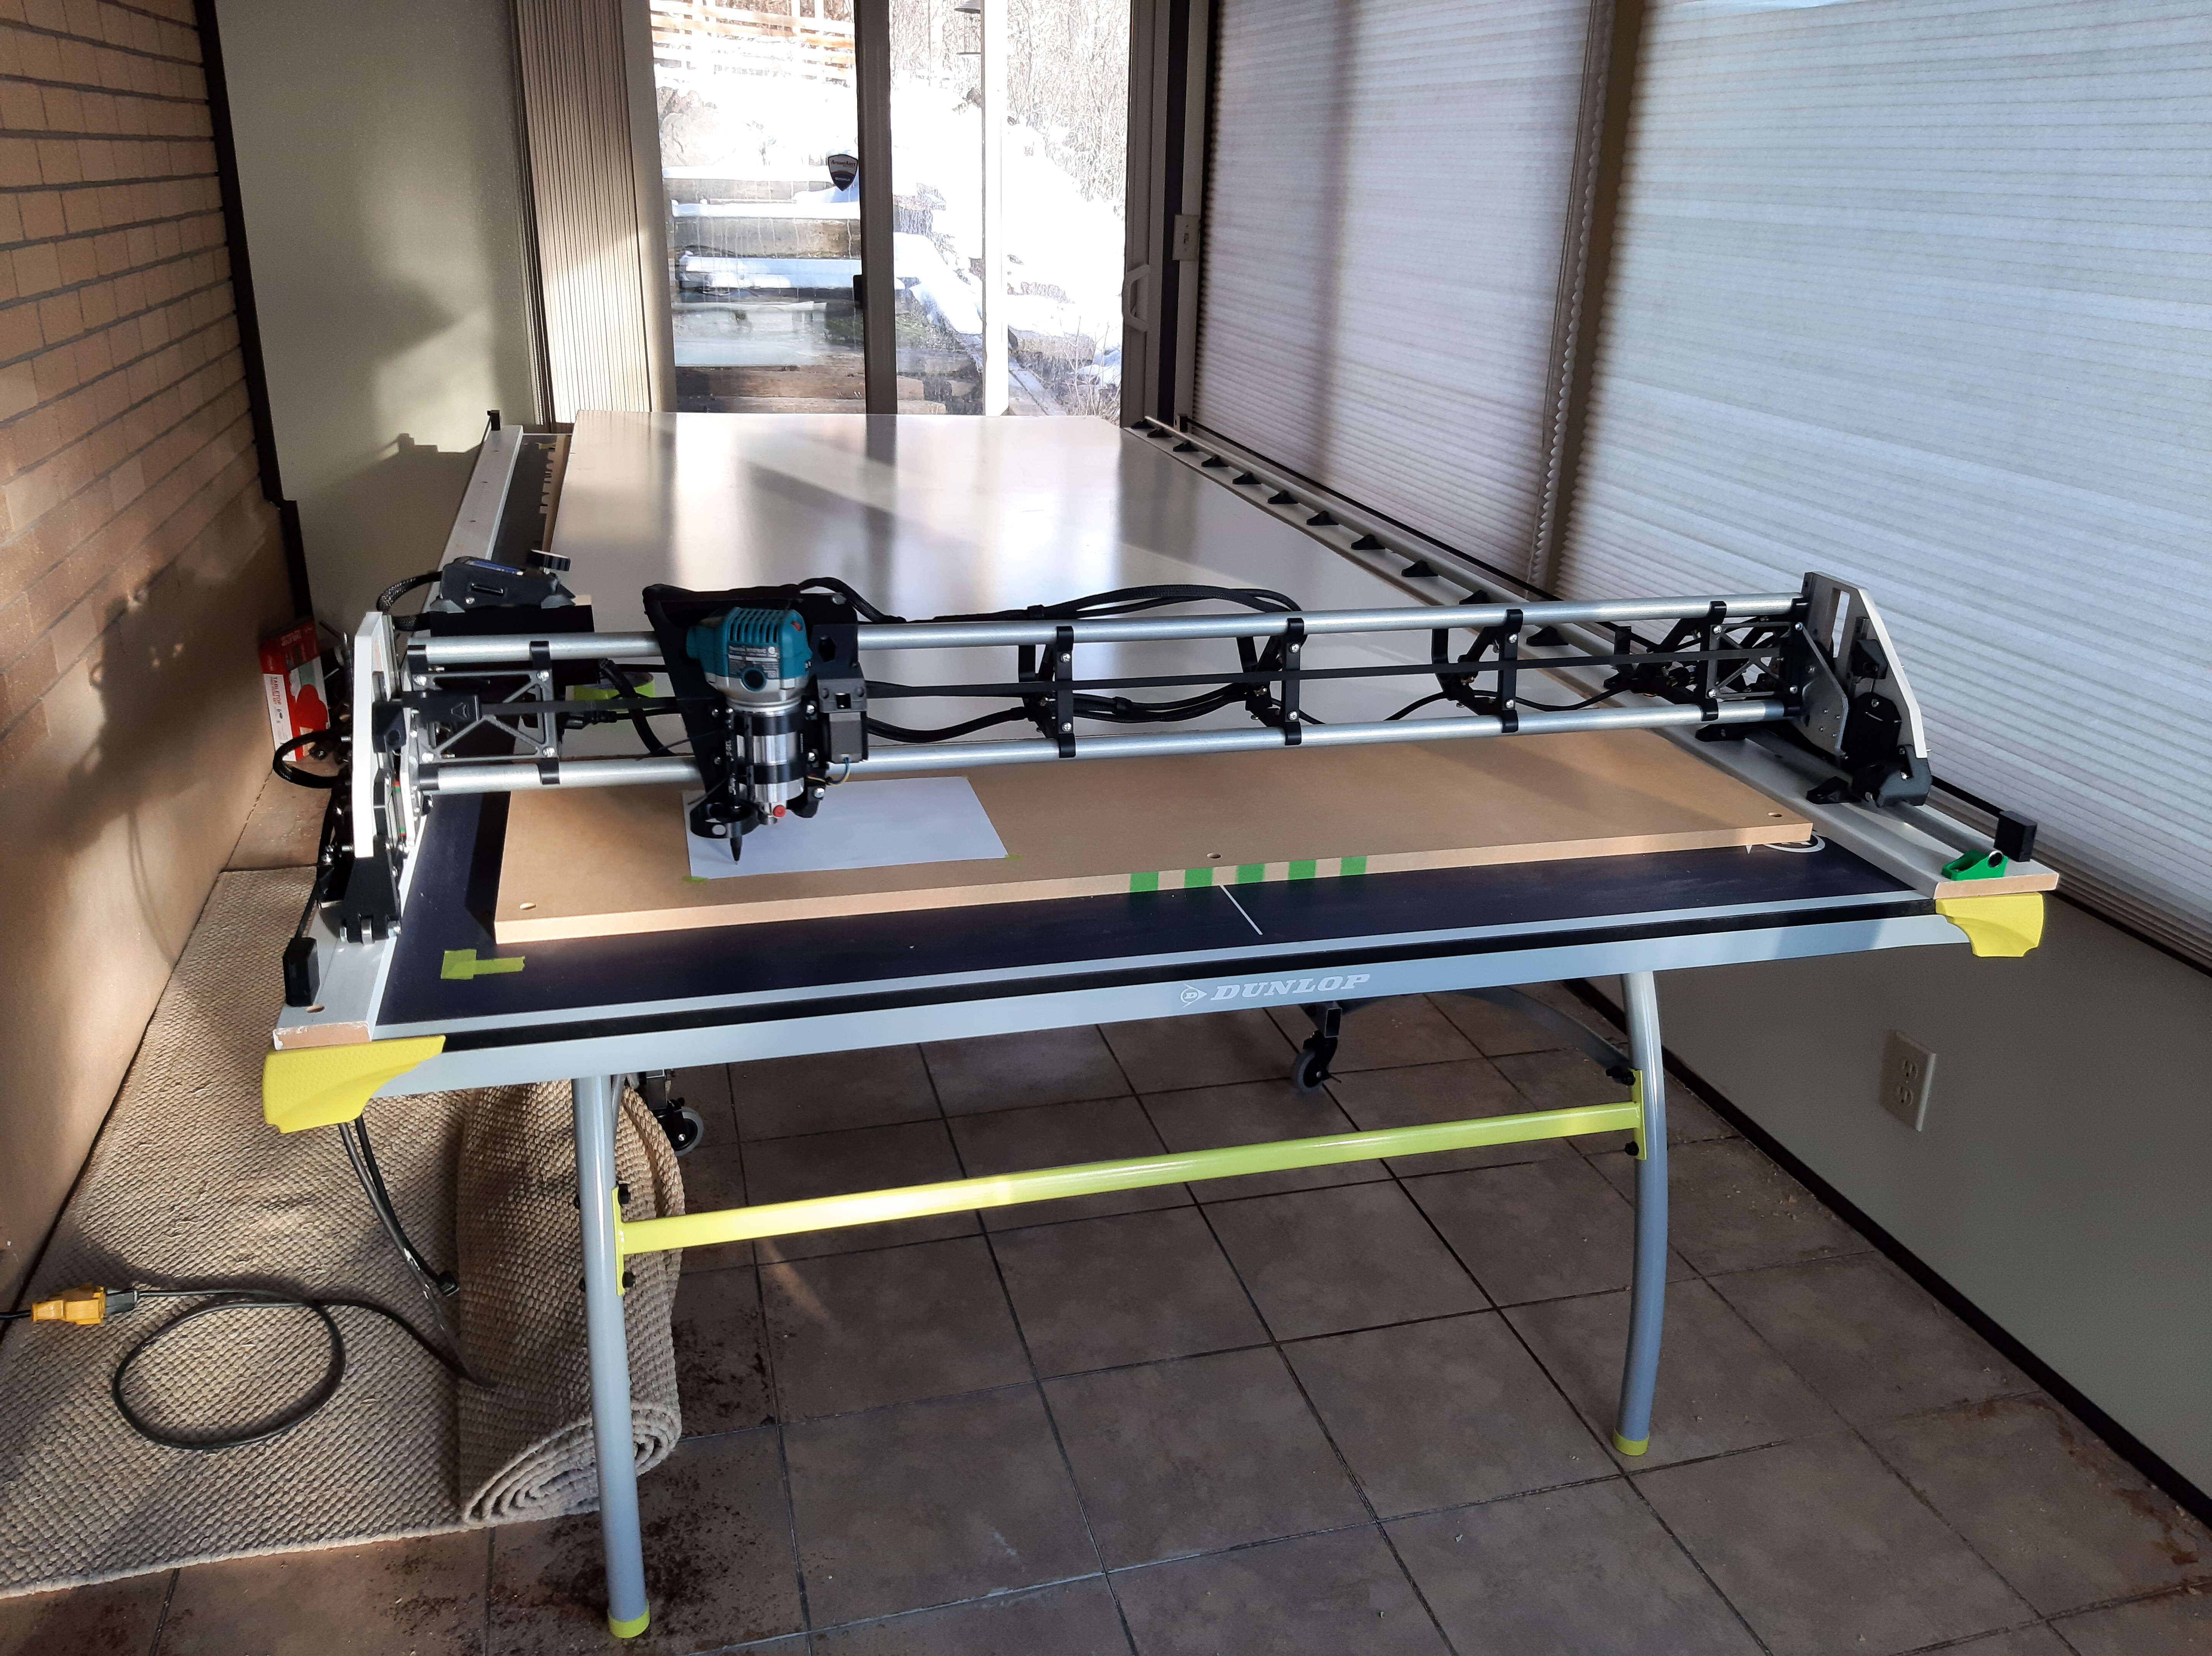
I previously had a ping pong table, which worked really well, and they can usually be found pretty inexpensive on Facebook Marketplace. Now I have a sheet of .5" OSB screwed to 2x4s 24" on center just sitting on top of a couple small folding tables. You can get by with some really minimal setups.
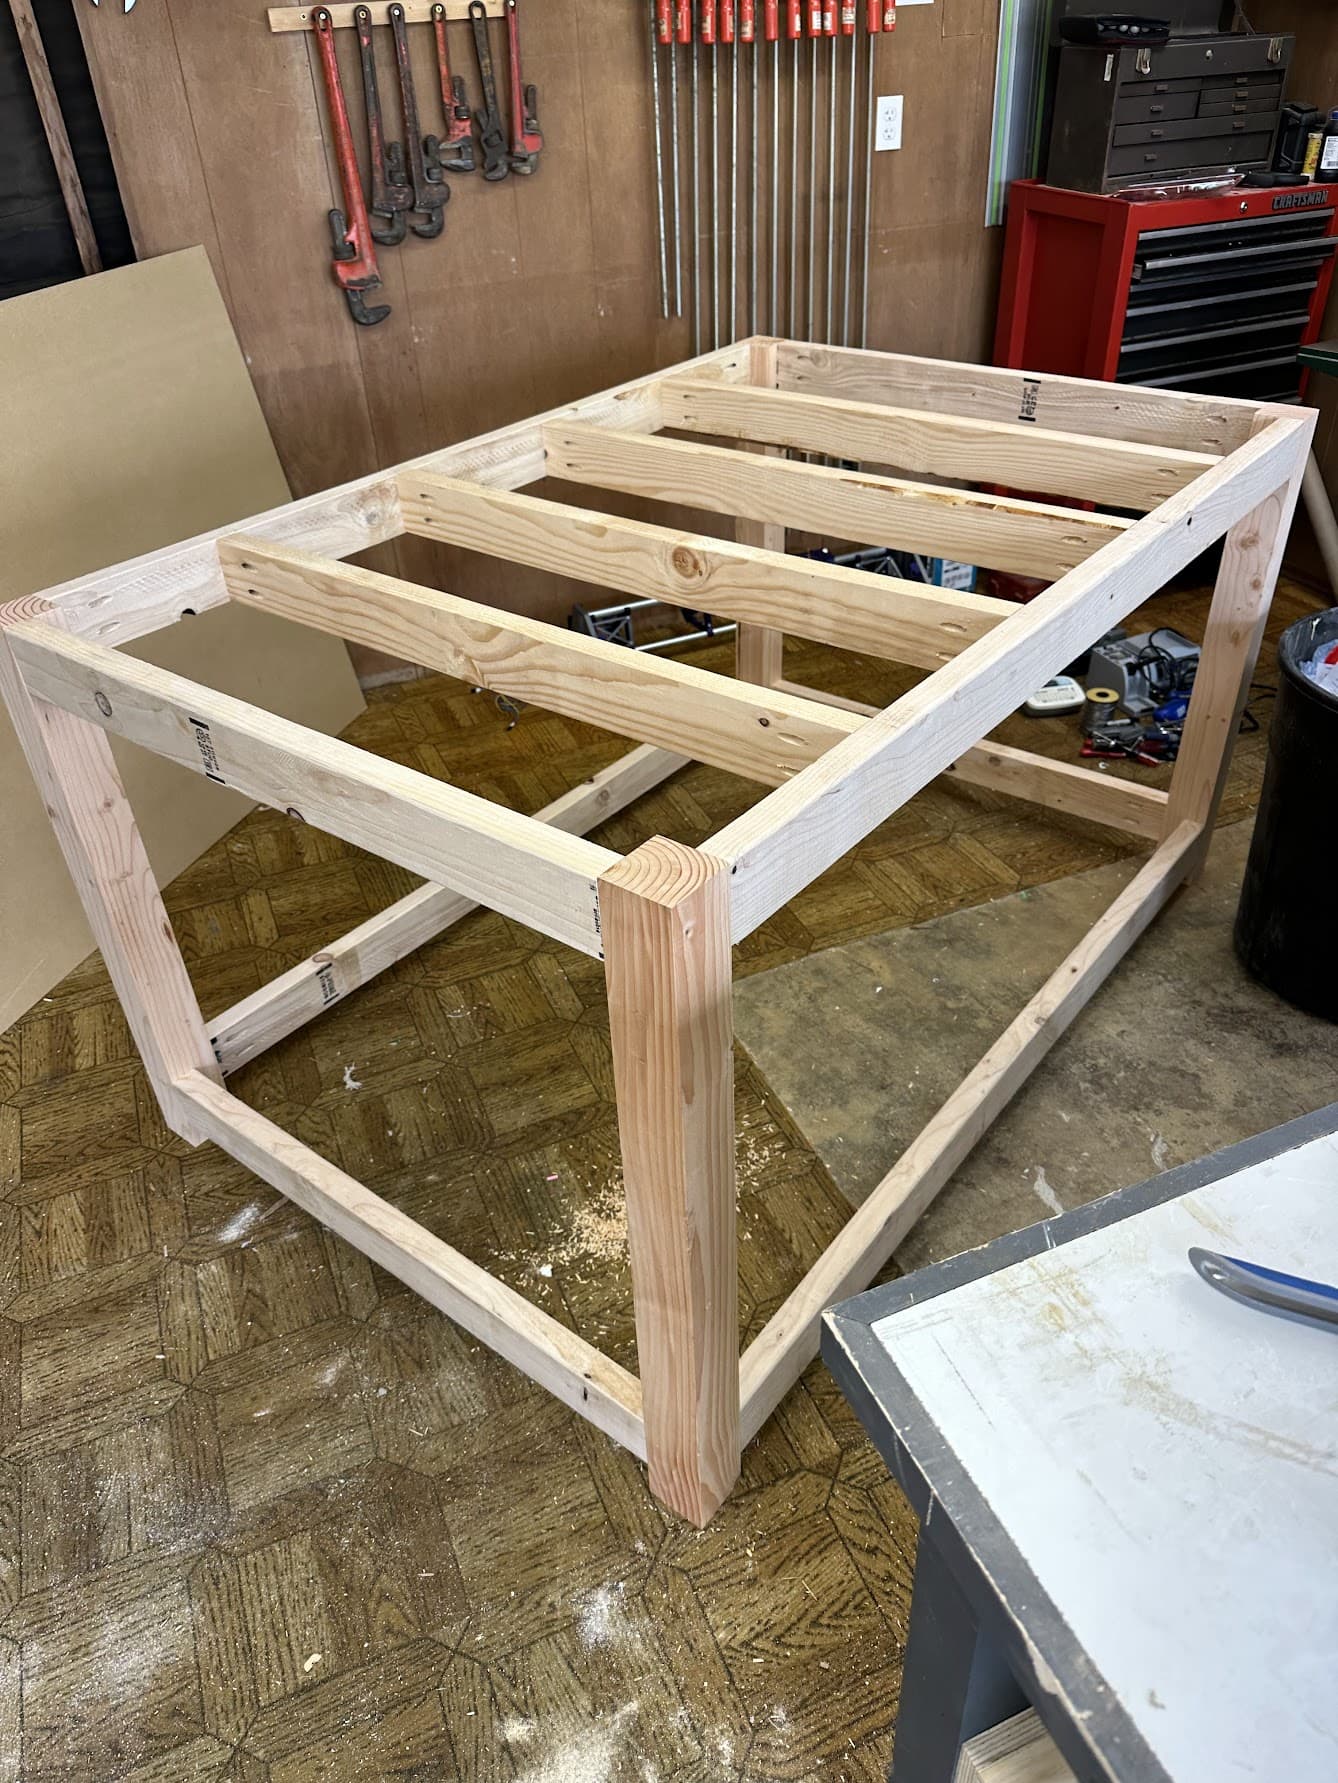
I’ll share my table again. I think this is a reasonable option if you aren’t sure how to build a table. It could scale to just about any reasonable size.
It was built with pocket screws, but those jigs are pretty inexpensive now.