Perfect is the enemy of good.
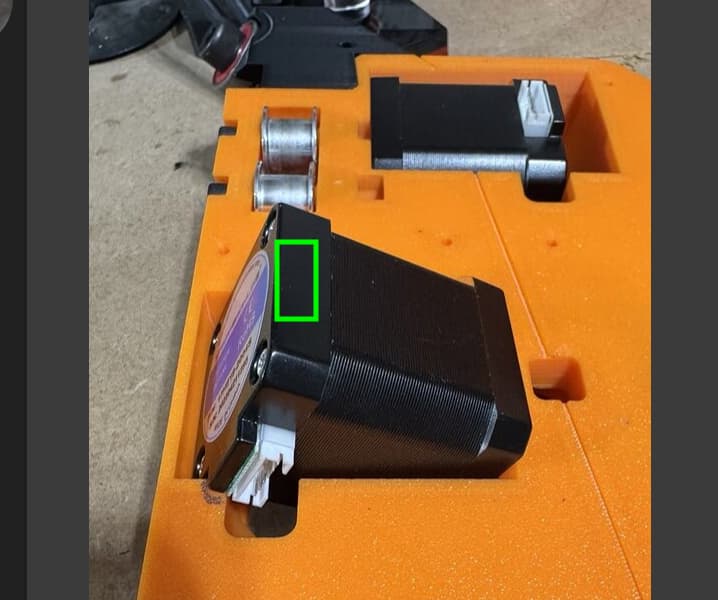
What you can do is rotate the motor so that the connector faces up, and then route the wires across the motor and down into the cable routing slot.
Put the connector oriented where the green box is in my markup.
Perfect is the enemy of good.
What you can do is rotate the motor so that the connector faces up, and then route the wires across the motor and down into the cable routing slot.
Put the connector oriented where the green box is in my markup.
It’s not an option, as I mentioned in the previous post, the connector will obstruct the Y-axis belt.
The status thread isn’t the best place to be responsive to you as it’s got way too much activity.
I hadn’t seen the previous post.
Please start your own build thread and mention these.
I’m sure we can find you some help.
If I had bought motors that didn’t fit, I’d probably be busting out some side cutters and hobby saws and modifying the entry to the cable routing slot so that I could fit the motor in.
Probably you are right, I will.
I’ve sorted it with the Dremmel, just sanded it down.
Just wanted to give you a heads-up, as others might encounter the same challenge in the future
I’m thankful you shared this, and it will help others.
You’ll get plenty of help in your build thread, and I’m looking forward to seeing your machine build.
Your attention to details will surely result in a very nice machine.
I don’t really understand how this works but I love how it looks. Next to my LR2 LCD screen is NASA. Not to mention Doug’s pendulum for FluidNC.
With the wires plugged it do they fit the channel that is there, after you chipped away that little corner?
Not sure if I should make a bigger hole, or just make a not they don’t fit.
The wiring fits fine. I’ll take a picture tomorrow when I’m back in the garage. The notch is necessary for the metal plate beneath the connector.
It’s Bart Dring’s thing - I just built a couple and did some minor case remixes and designed some cradles!
How about warming it up slightly with a heat gun to soften the opening a bit so it could slip in. Not sure if that would weaken it or cause it to deform permanently.
If you’d like, I can test the modified version to see how it works before you release it. I don’t mind reprinting it.
Probably it will work too.
Noticed StepperOnline’s 17HE19-2004S specs say 55Ncm(77.88oz.in) torque:
Note some potential fun to be had while wiring 17HE19-2004S :
Best selling amzn (US) steppers seems to be prewired higher torque capable Stepperonline 59Ncm(84oz.in). Which are more expensive than V1E’s 84oz Nema 17’s (ignoring delivery cost). Hopefully most Makers are using these or some other prewired Nema 17 steppers.
Maybe use prewired 84oz for the Z steppers, if not everywhere.
Thank you for letting me know. This motor has already been used in a previous LR version.
That is awesome , thanks. I took a note. It will be a minimum of a few days until I can get to it.
No problem, let me know when you are ready, regards.
I thought we had someone in the beta using stepper online steppers with plugs like that and it worked? I could be completely dreaming that up as well. All of that is just a blur now ![]()
No, we did, but those black “noses” his steppers have are new. ![]()
Also, check whether they have the same torque rating @igorcutoff. I used to have some like you but they were rather underpowered. ![]()
I can’t say I used them a lot, but for me, they worked well.
Here you can see the size difference:
Usually only the smaller ones have the detachable cables, that’s why Ryan build them for the ones he sells.