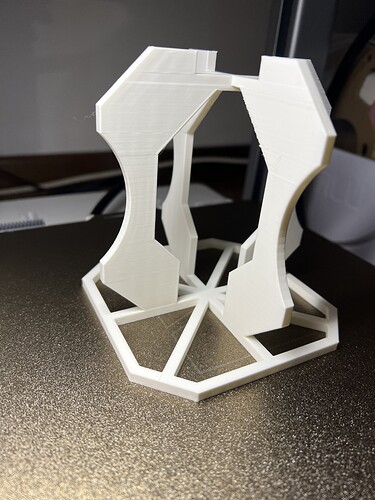
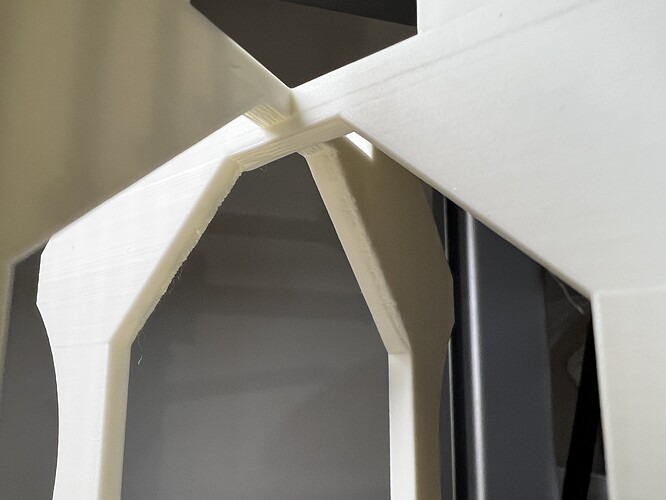
I design my own (more simple) skew test, my bambu A1 is almost perfect in every direction, 0,3% max error on each axis And the bridging of 20mm isn’t a problem at all.
The only thing I notice is a lil’ undersize of the same 0,3%, but i think is due to material shrinking (overture Matte PLA)
Hi everyone. I’m new here, and a total noob to cnc. I was just starting to research building/getting a cnc, and the stars must have aligned or something to have found this project, and I will definitely be building it. I just bought the calilantern to verify my X1C is calibrated correctly.
I kind of browsed the V3 docs, and I’m assuming that is the main assembly instructions? With all the beta testers working on this, will anyone post a full assembly video?
Excited to be part of this!
Welcome @bsmtdweller! Great timing…
Ryan’s working on docs for LR4, expecting they’ll be published shortly.
Personally expecting initial docs to be light, but continuously improved and collectively elevated by the community over time.
Yes, separate from the official docs, for anyone wanting more than the docs there’ll be at least one community member that shares full assembly videos you can play at whatever speed you want e.g. 1x to 1000x…
Hey Sam, Ryan is just working on the new instructions…
Aza was quicker… ![]()
Awesome thanks to both of you.
Regarding perfection, my printer was over extruding. Bolts were too tight. Parts of close tolerance would not fit. I did the calibrations and now not only does it make close tolerance high quality parts, it just works now. My calilantern was a D+ rating, but it was vastly improved and it has proven to be reliable. Bolts fit now. Close tolerance parts slide as they should.
Test print the ymin belt min f and the y min belt lock and see how they fit. If the lock easily slides in and the belt passes through, then you are good. Another check is the z nut and the z stub. They should slip fit together and not require tools to press in. I did the orca slicer calibration tests and the calilantern and my prints went from reasonable to amazing and much faster as well. My beta experience was really learning how to print these parts from what I thought was acceptable to truly quality parts that look and perform well.
Taking the time and extra filament to calibrate is worth it.
Hey, today is Prime Day.
My printers all run MicroSwiss. If you do not know. Amazon has GREAT deals on MicroSwiss on Prime Days!!!
Also watch to see if there is filament, etc. LR4 needs 3 rolls minimum for build.
JUST ORDERED MY V4 Aluminum XZ Plate - Its live!
me too!
Me too! Order is placed. Cleaned up, did the regular maintenance, and recalibrated my 3D printer in preparation for the print files!
now im just debating whether to get a different control board too.
keep the skrpro1.2 with esp32 wifi or get a jackpot
Jackpot, fluidnc is waaaay better than Marlin for cnc purpose.
I am moving from a MPCNC to LowRider 4 - I think I need MGN 12 Rails, and one extra motor? Assuming I can use all the same Electronics?
Same amount of motors, you should just need the rails and the hardware, but I don’t believe there is an upgrade kit from MPCNC to LR4
I’d keep what you are used to. ![]()
Plates ordered! I’ve been lurking this thread and toggling between the documentation pages, the v1 front page and the v1 printables repo. Thanks Ryan (and the testers) for all the hard work and I appreciate that the XZ plates are quite reasonably priced! I was considering making them but $28? Totally worth it.
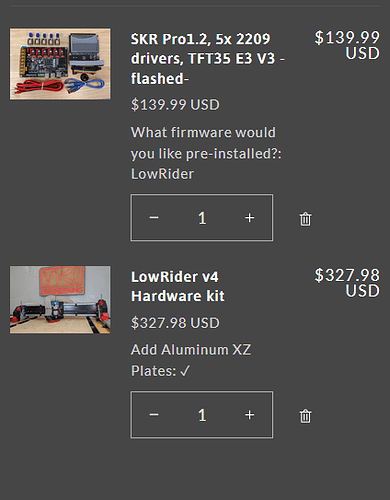
Do these two items look correct for LR4? Controller says V3 installed, will there be a v4 installed for the LR4?
I bet that pallet of plates that Ryan just got don’t last very long. $28 for a set of these plates is an unbelievably good deal.
Most of the beta team used Jackpot boards, though the SKR Pro is still a valid option.
Ryan has Hardware Kits and plates available
Hardware kit:
Plates:
Upgrade Kit:


