
Still having z-homing issues on occasion. Cutting power leaving it for a few minutes and trying again and it might do it properly.
4 Likes
So this appears to be what is happening to me what they touch on here. By homing the X & Y then centering the X carriage and then trying to home Z it is more likely to get the behavior I expect.
What is weird is that I can press the z-limit while it is still low and it will stop but it doesn’t work near the top and I can watch the LED flash on and off as I touch the switch even when it stops responding to the Z limit.
After cutting the strut plates and I go to install the plates I’ll try adding the resistors as mentioned.
Also I noticed that I’ll get the same behaviour on both sides if the X carrage is near either end.
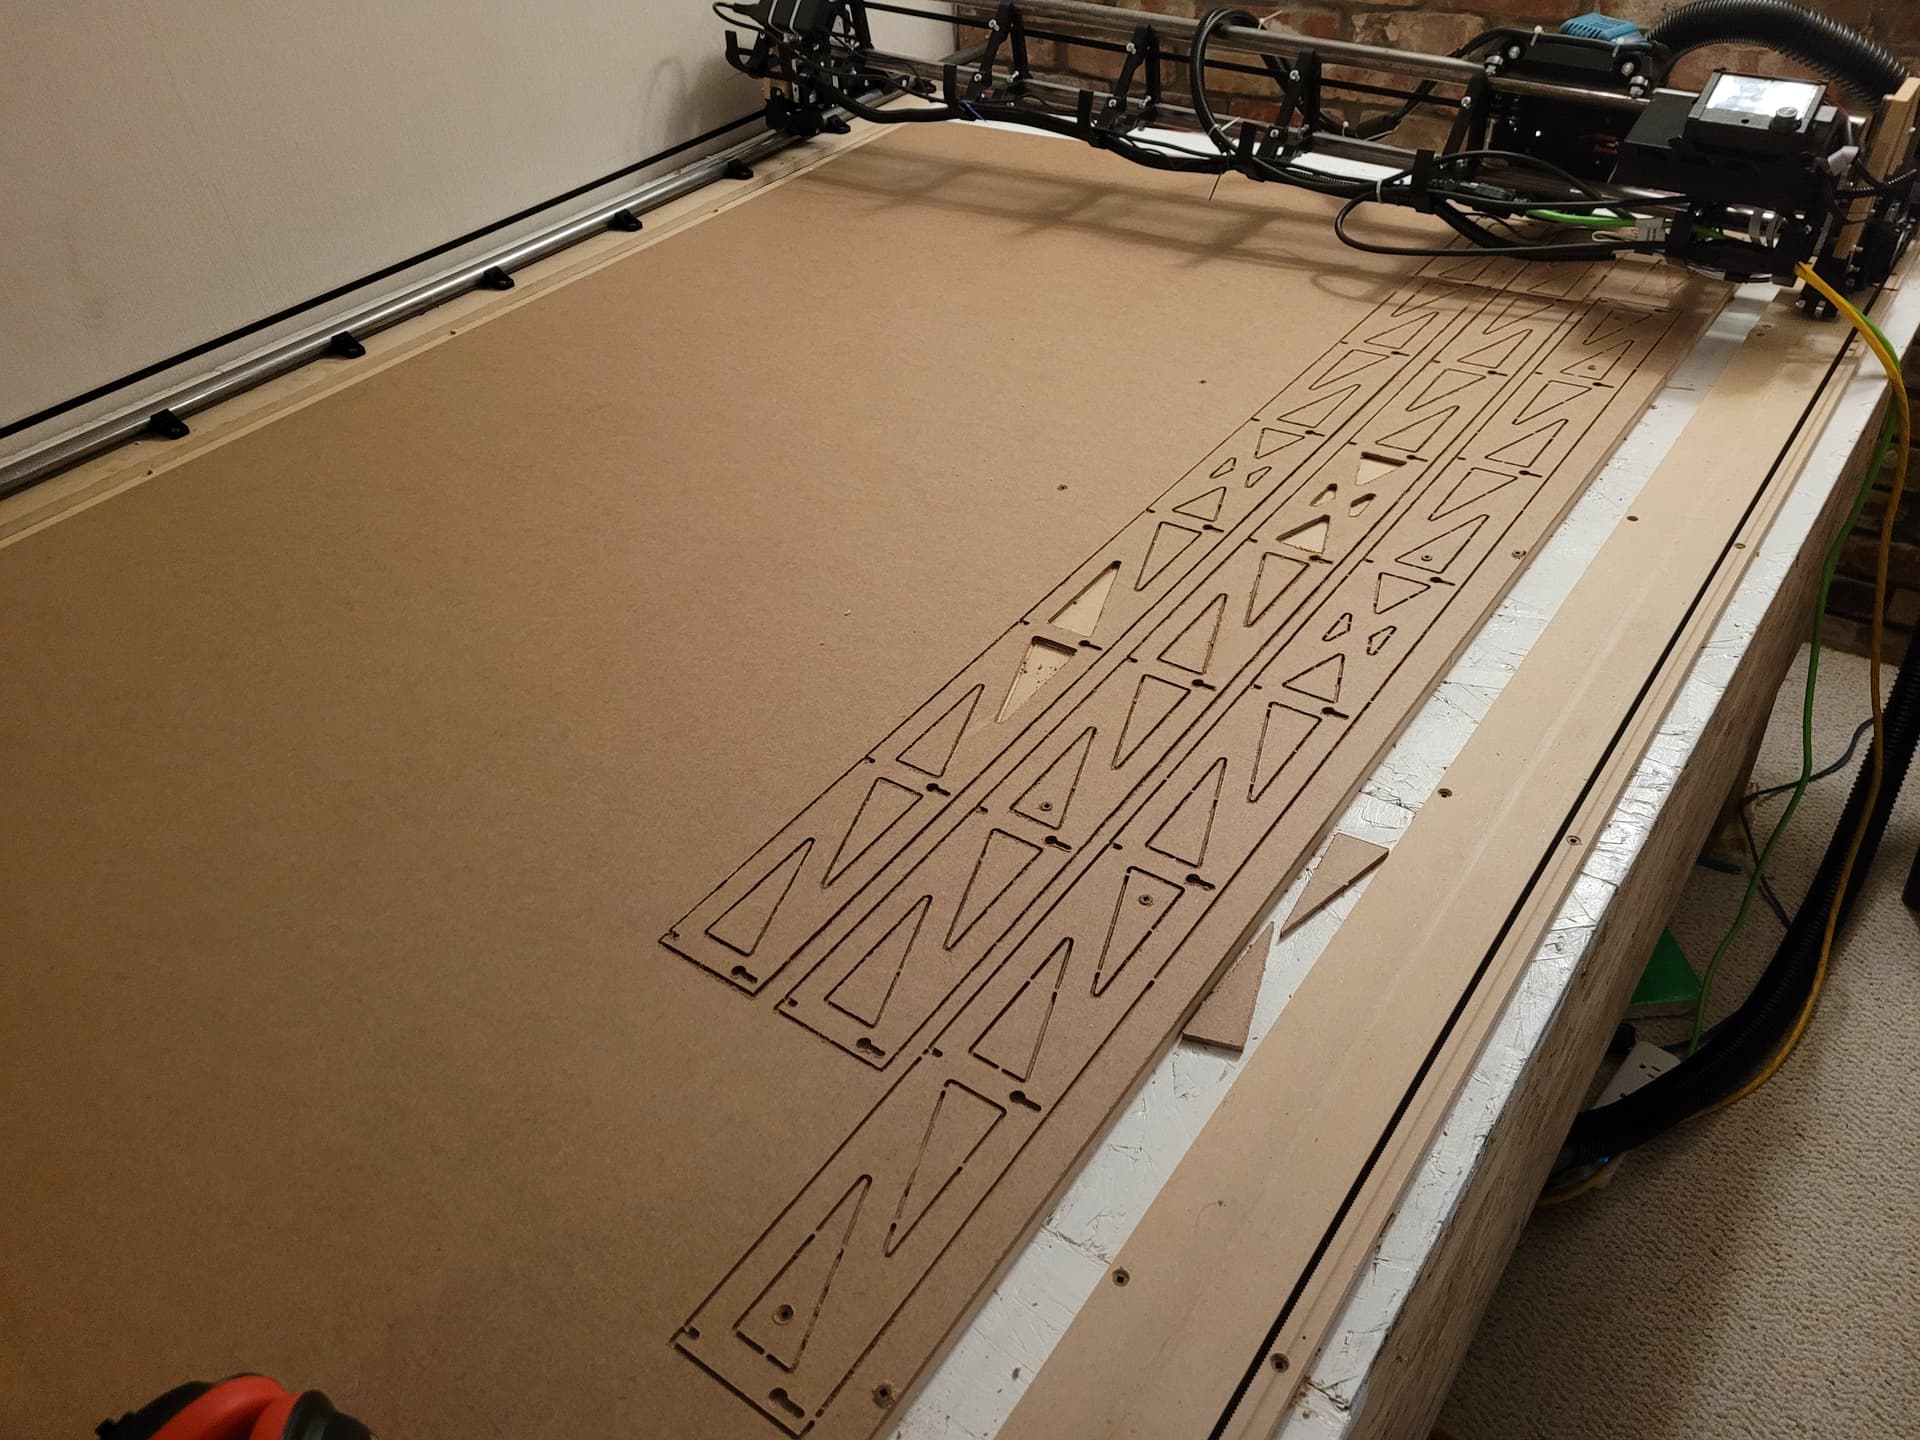
Strut playes cut. Forgot to reset to 0 when i had it where i needed to start for the first one so it is offset from starting a second time.
First full cut was 6 hours since i mindlessly used the settings from the software setup. Low feed rate and 1mm cut depths.
Second one i increased the cut depth fiddled with some of the z-axis movement tab depth etc but didnt touch feed rates and it took a little under 2 hours.
Felt a little more confident with the 3rd one set full cut depth and bumped the feeed rate. Also added the slope in cut so it didnt pluge in at 90’ and increased the overlap for the keyhole cuts and had it down to under 30 minutes.
Now that i lubed the z-axis it drops pretty quick when i cut power. I’ll have to poke around for for posts talking about how to soften that.
2 Likes
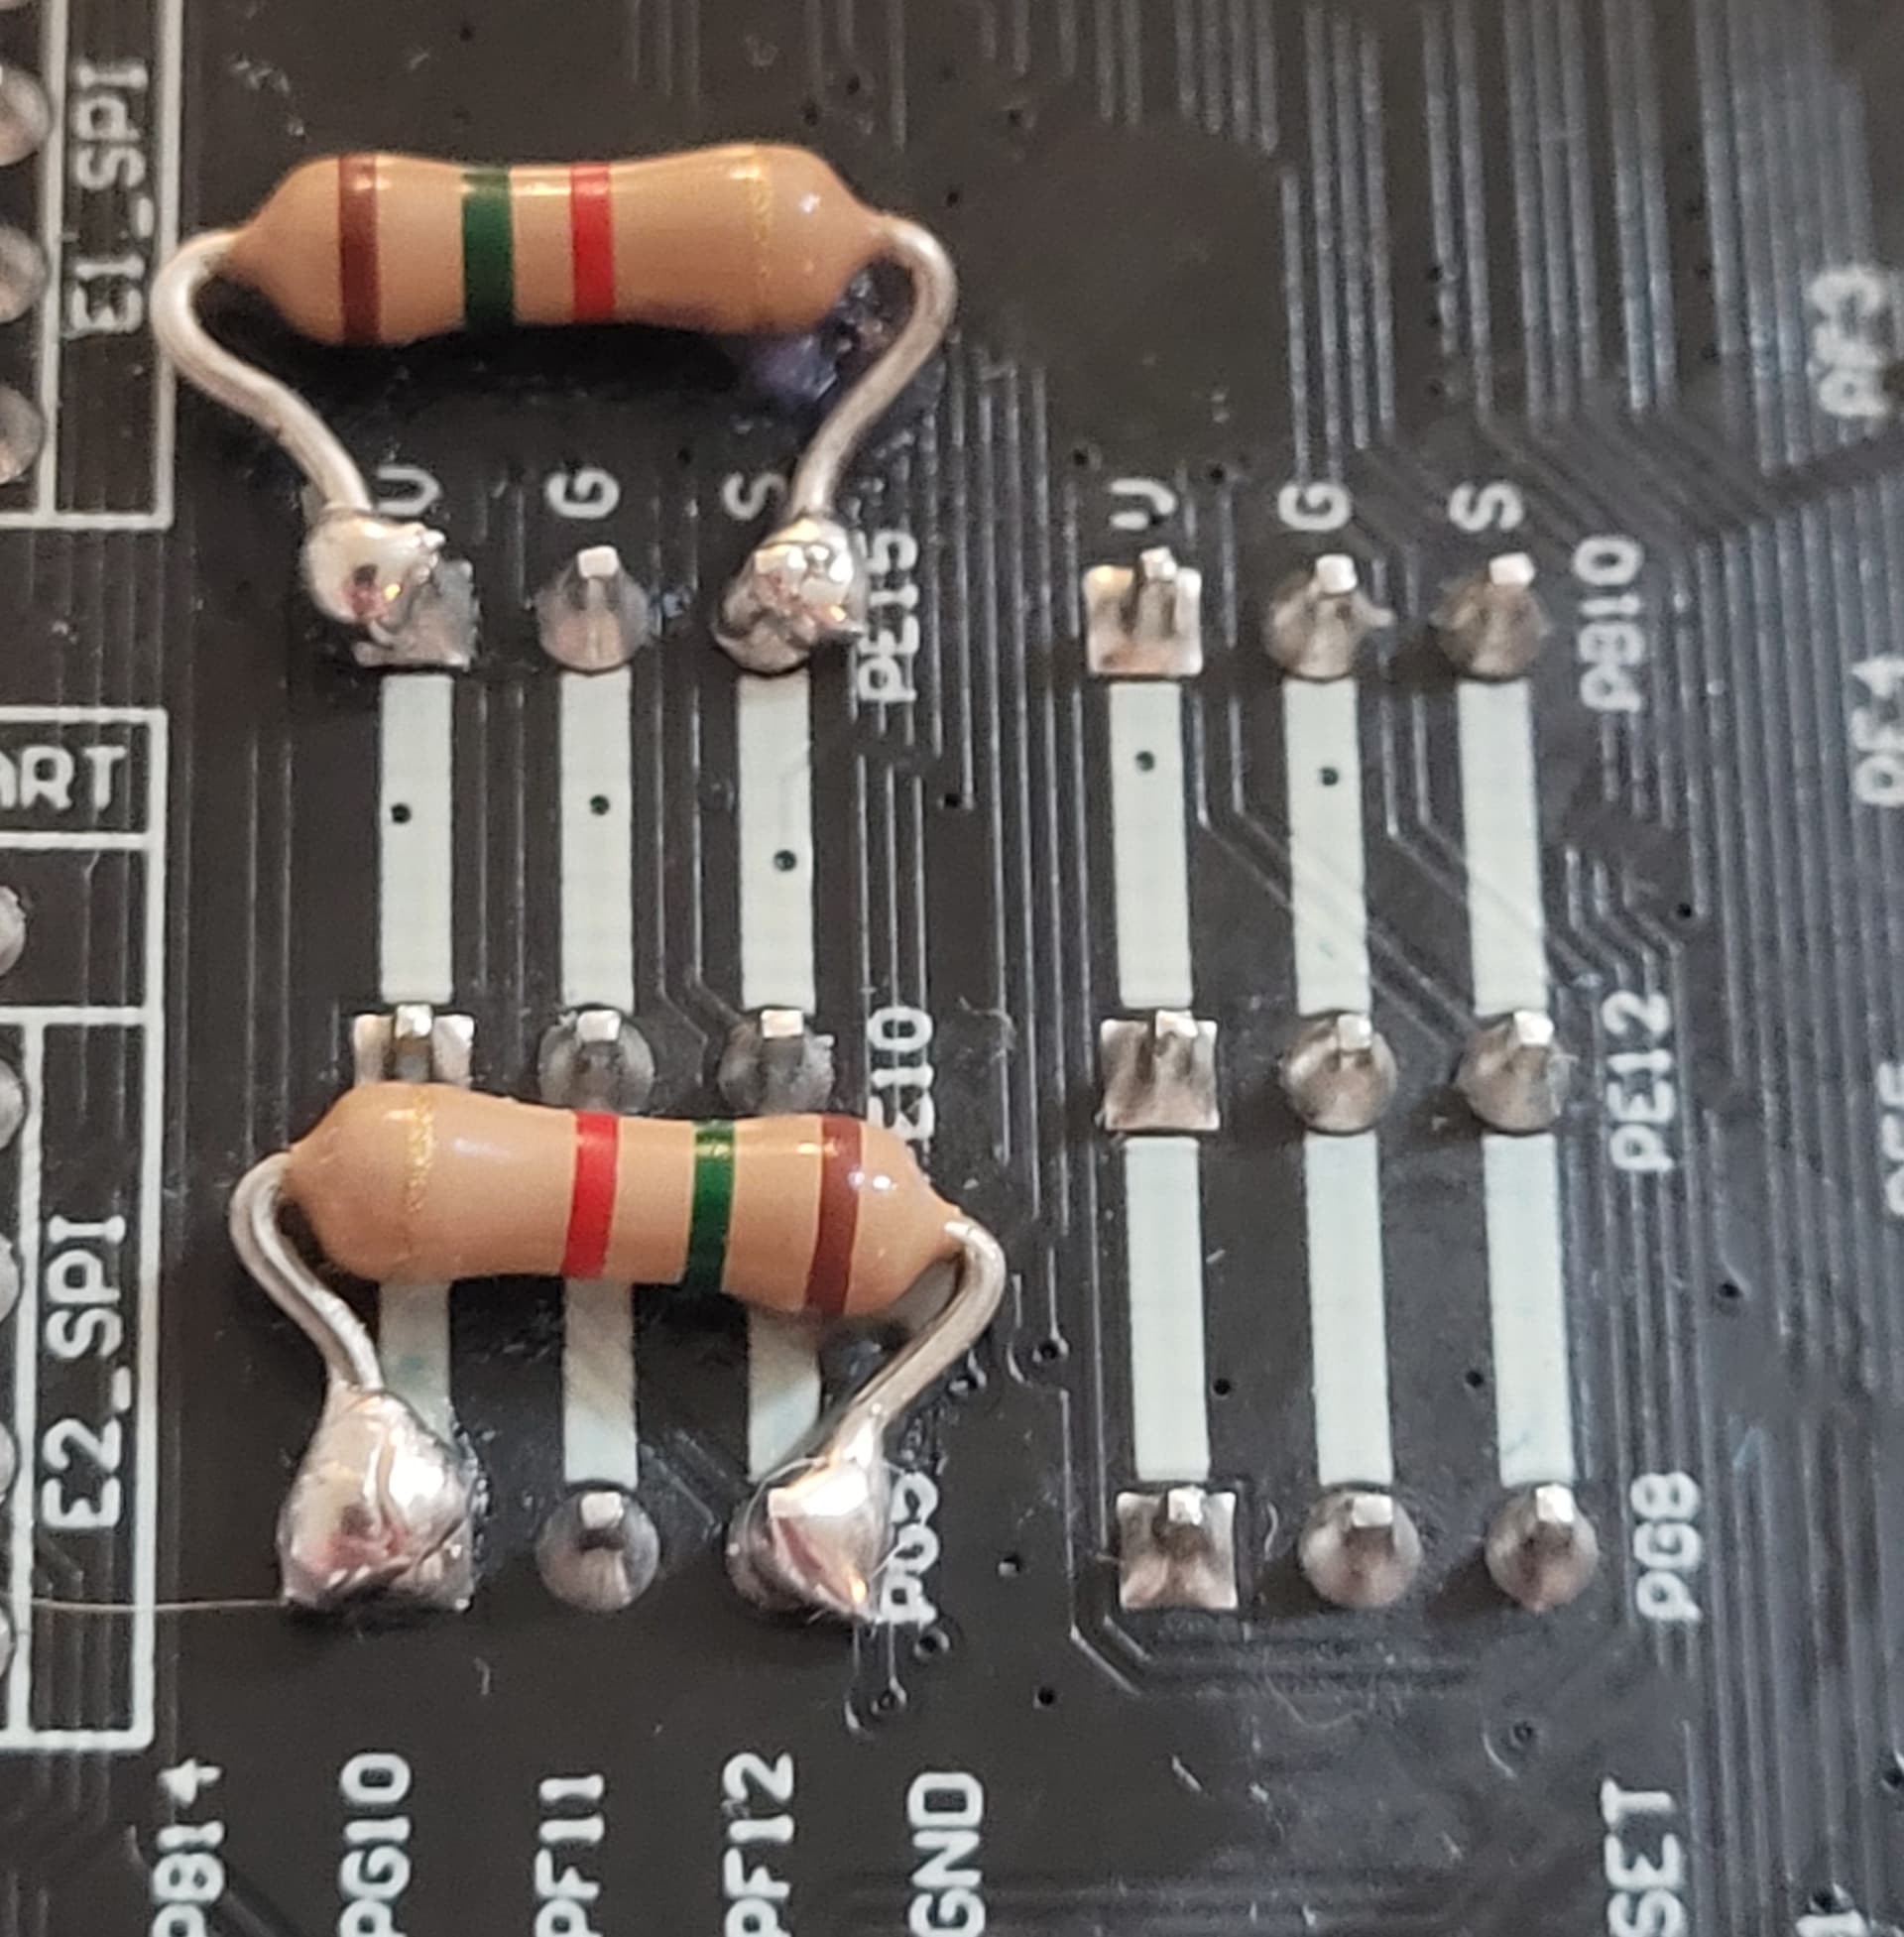
Been a very long time since i last soldered something and it shows. Used to do it on a regular basis.
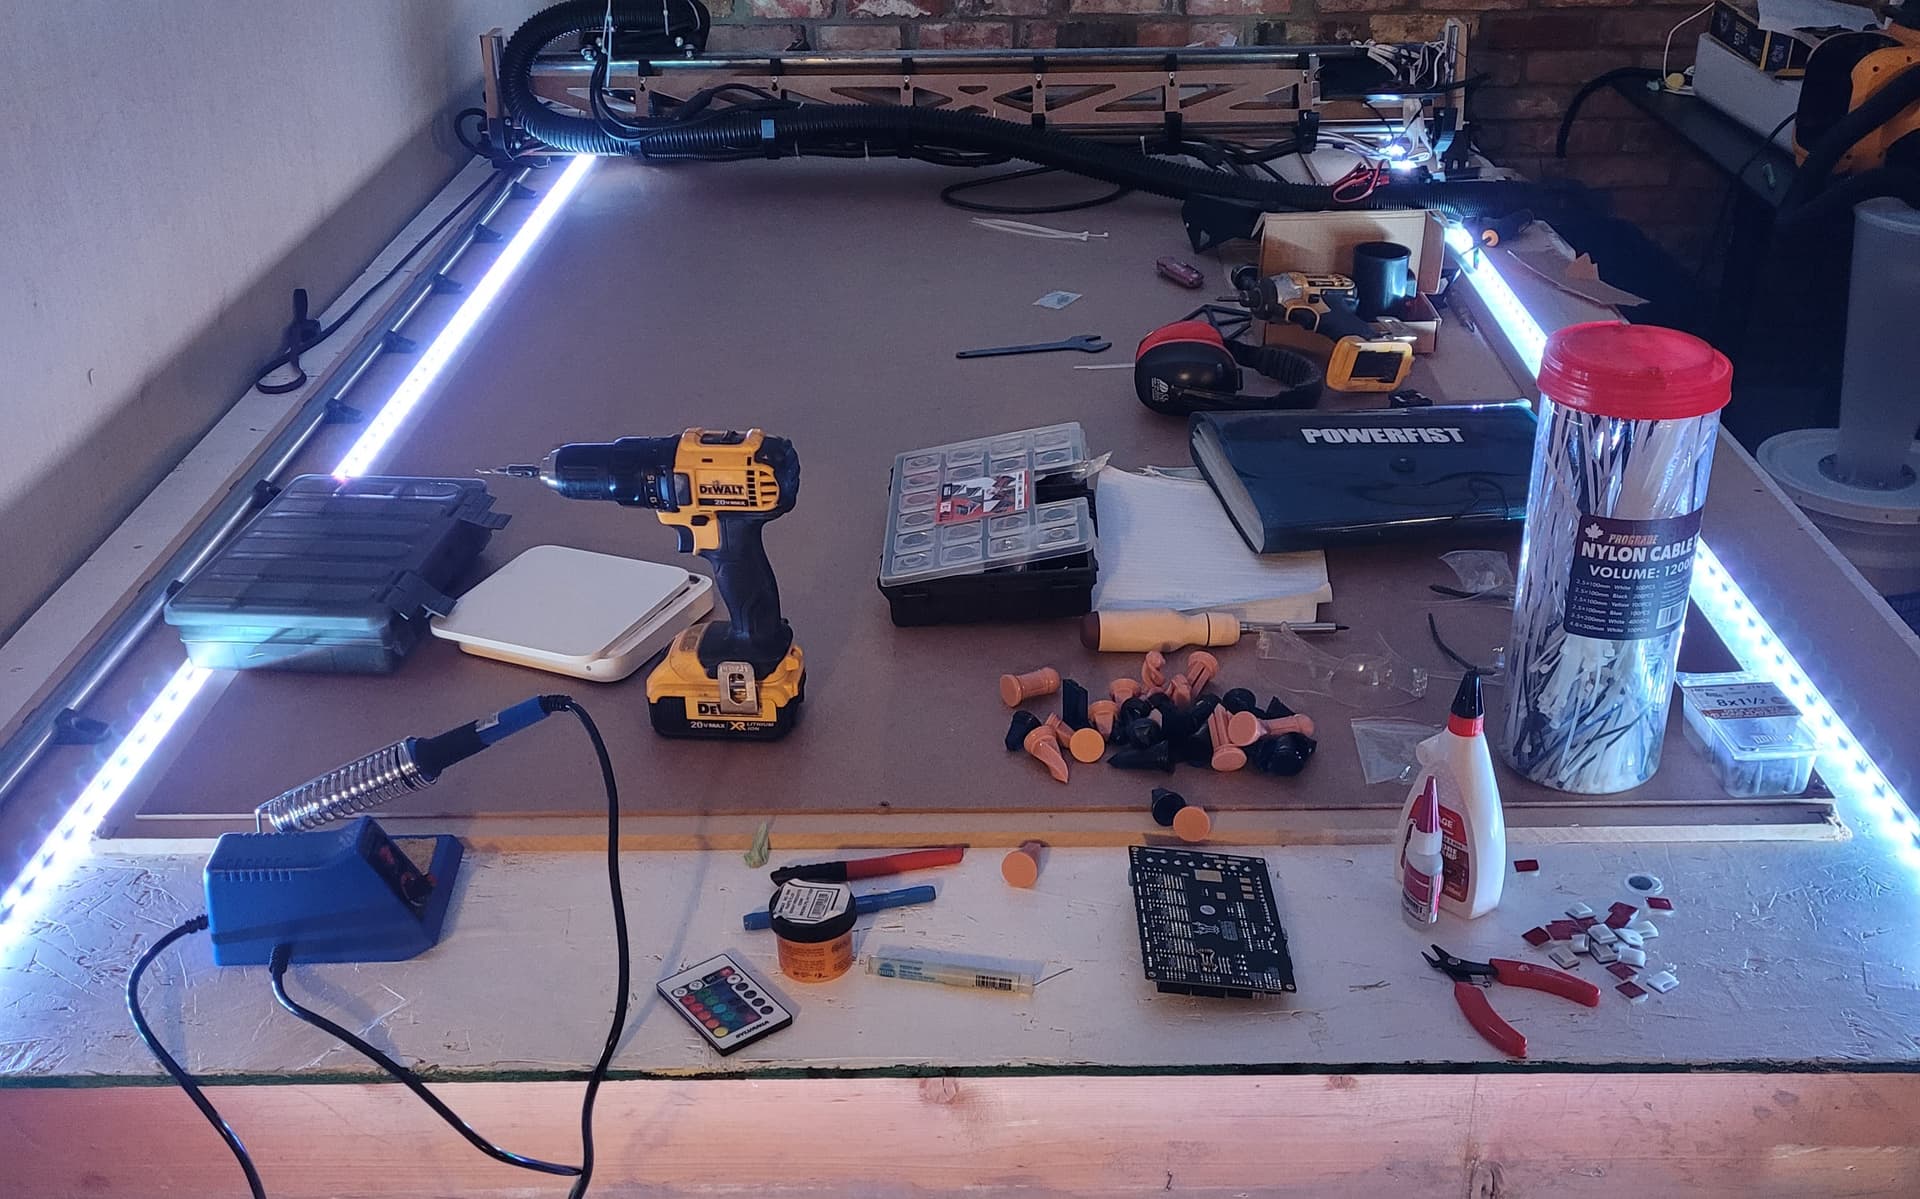
All the supports are installed now and gave it a little bit of mood lighting. Lighting is poor in this area and the extra light does actually help some.
I think all i have to do now is put the board back in and get the vacuum hose to sit in a way im comfortable with.
5 Likes
Had some time last night to mess with the vacuum hose and wiring to make sure i was happy with how everything moved back and forth along the gantry. Vacuum hose reliably goes into the holders, wires not getting tangled etc.
I did find one thing im not happy with though and it is how the hose droops over the edge and actually makes slight contact with the belt.
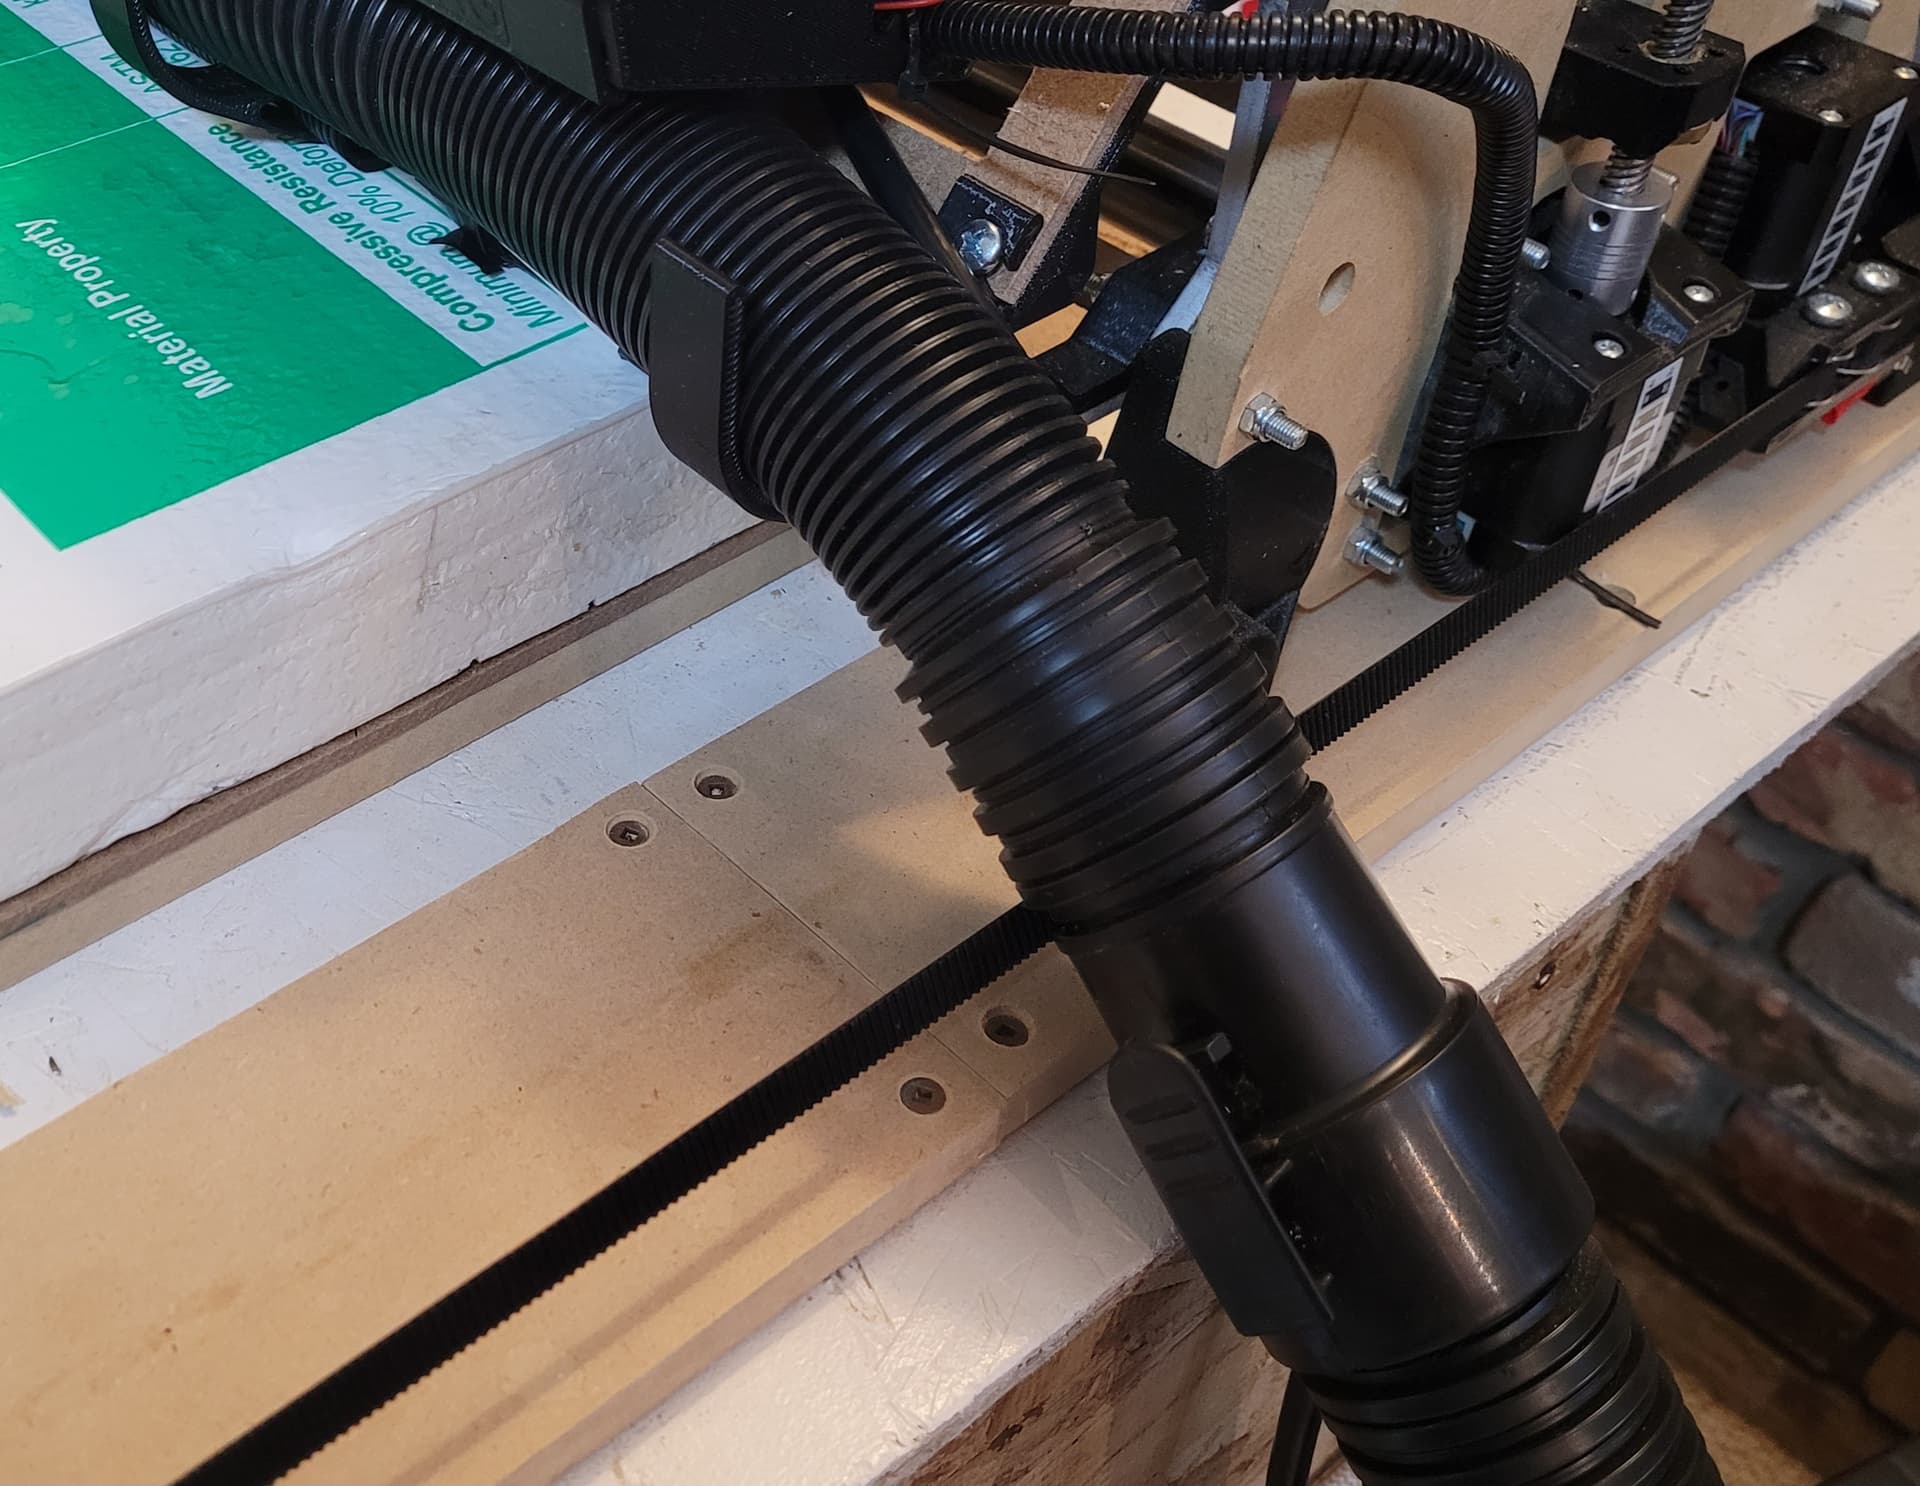
I thought of simply taking a brace and zip tieing in place but im wondering if this is a more common issue with a better solution that im overlooking
@azab2c has a part on Printables made for supporting that. At least one other community member also has an extended support part designed for that. I don’t have a link on me right now, but maybe one of them will chime in and post a link to theirs.
1 Like
I think this is the file that @DougJoseph is talking about.
https://www.printables.com/model/393613-v1e-lowrider3-hangers-25-or-2-for-vac-hose
Its on my to do list.
3 Likes
Also, the LED strips look pretty sweet. Not sure how much it will help see the work, but it does look cool as hell!!!
1 Like
Yes, that’s one. Someone else has one like it, that’s even longer.
probably genetics. idk
i am always surfing printables and adding stuff to various collections. Not all of the files in this collections are LR3 sepcific but they are saved for me to reference later as possible idas. Feel free to check out the collection, or check it every so often for new things I have added to it.
https://www.printables.com/@Spsully_220536/collections/1165753
2 Likes
Thank you for the responses as those printables look promising. I think I have the used ender 5 I picked up dialed in now so printing those actually look like an option.
I printed everything for mine on my Ender 5 ![]()
I did not trust using my modified Aquila (ender 3 clone) to make parts that holds a dangerous spinny thing so I bought the lowrider kit in its entirety instead of printing anything. But a ender 5 with microsiwss DD + hotend was too good of a value to pass up just a couple weeks ago. It needed some tuning but i’m getting better prints already than I ever did with the Aquila.
2 Likes
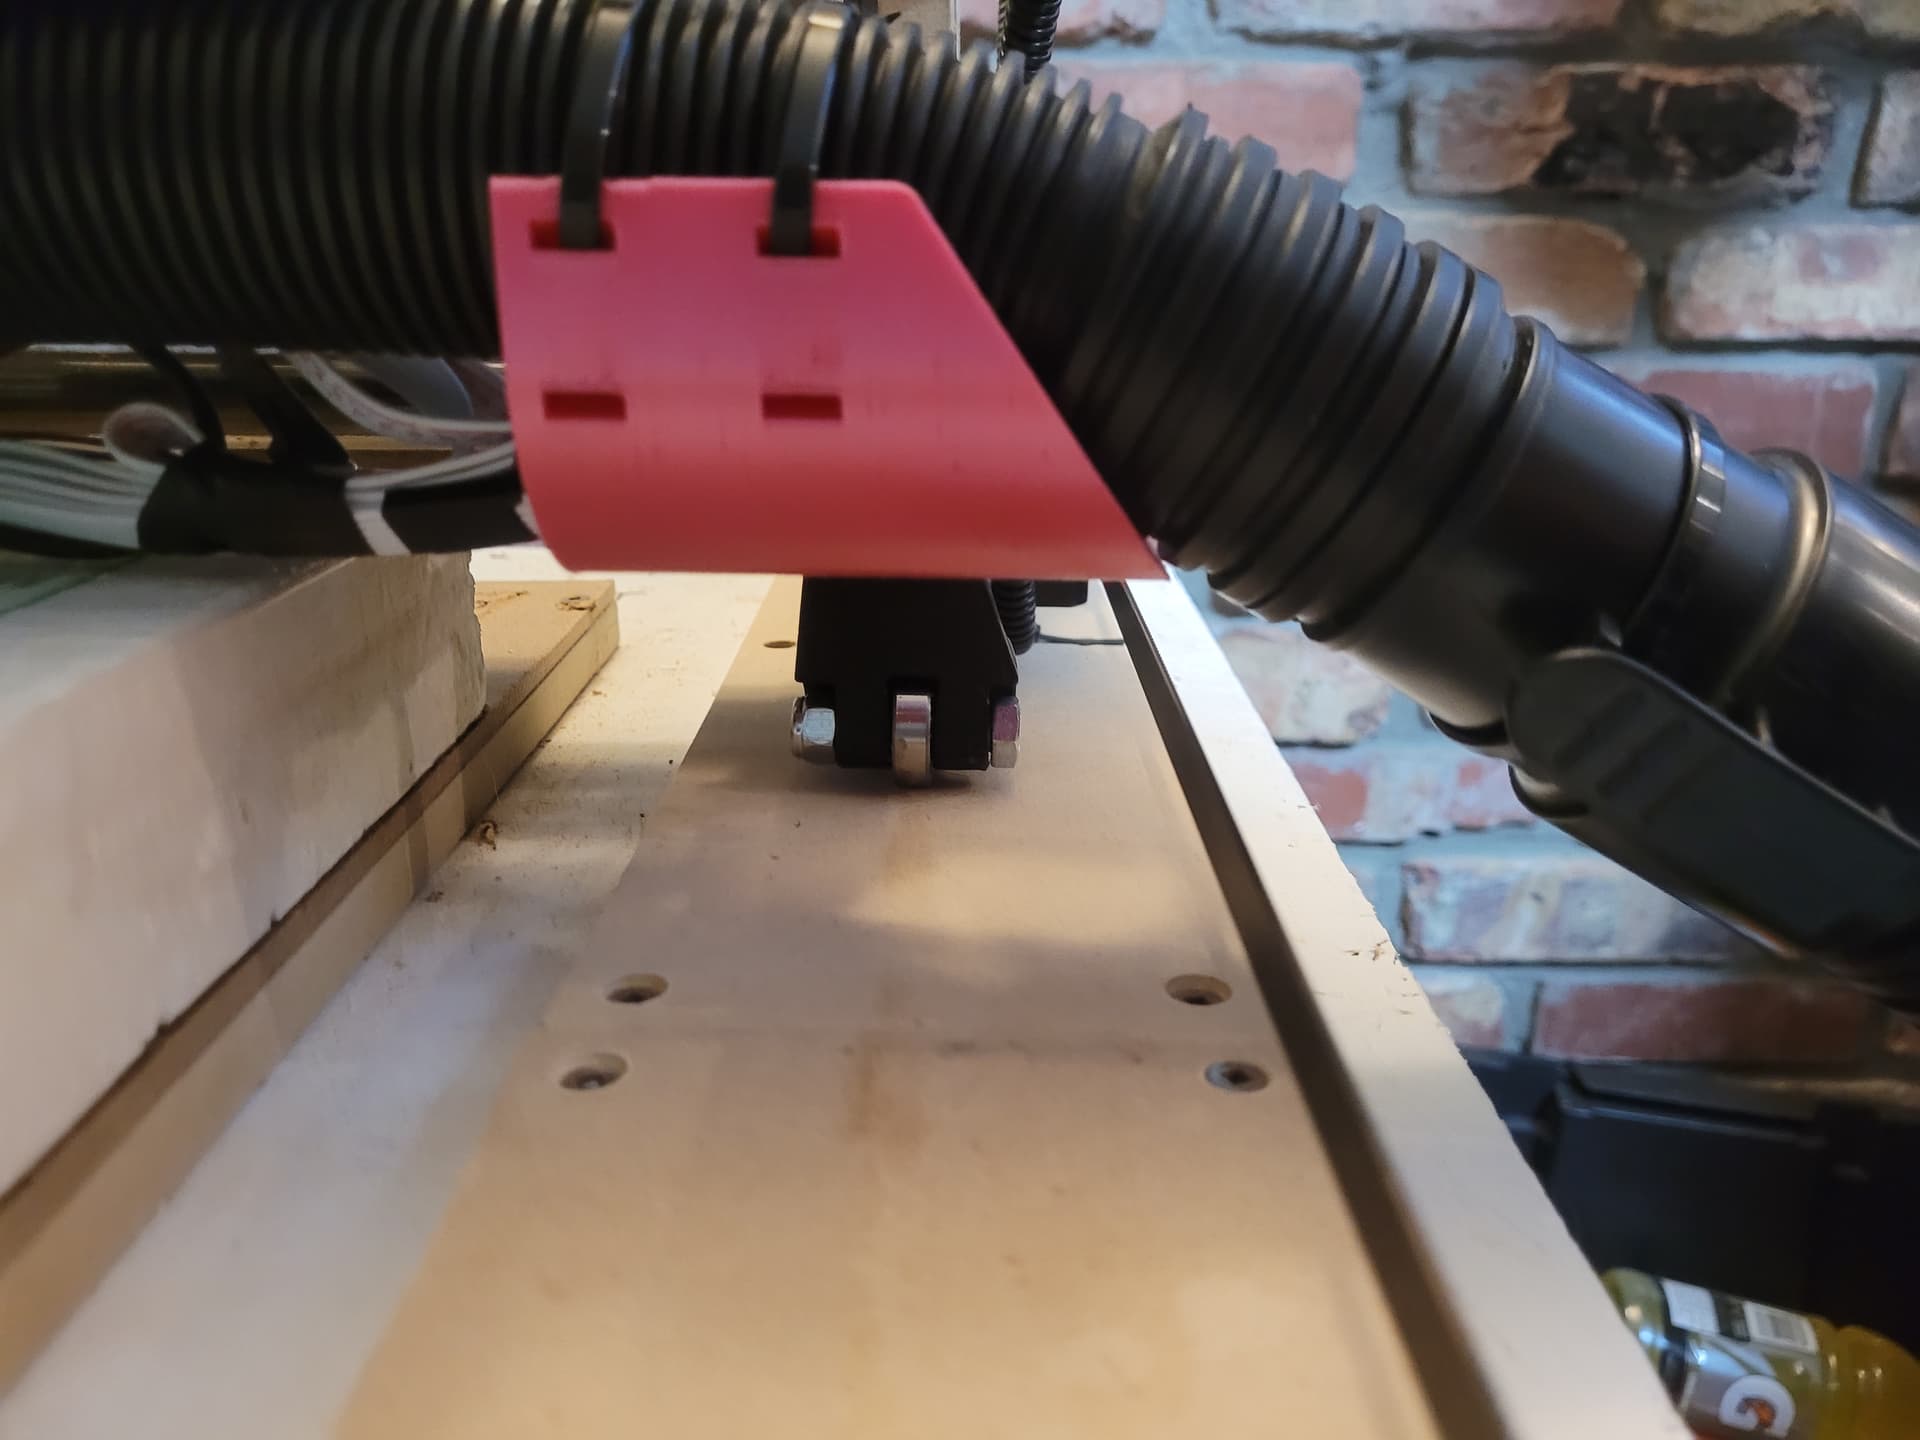
That did the trick nothing is touching the belt now.
Have a surfacing bit now too, so ill surface the MDF tomorrow to get rid of the high spot and time to start getting this to do some work for me.
3 Likes
which one is that? Looks like the first one I linked maybe?
1 Like
Yes the one you linked I liked that one a bit more for my application and space. I’ll likely reprint it as PETG instead of PLA an in black to match everything else but simply used what I had on hand without having to go buy something.
for most of our applications, PLA is actually the better choice
1 Like
Yes, PLA is better except in heat resistance, so for parts like this that won’t be exposed to heat, PLA is better.