Your origin is set to top right, is it your choice ?
We mainly set the origin on left bottom
In device settings you could also try to switch to inline mode. Your UI is in french so if i’m right enable « Utiliser les déplacements G0 »
It is what i use on my machine
1 Like
My CNC origin is in the top Left → After finishing building the cnc, I realized that i was wrong : according to Fusion 360 axes, my cnc origin needs to be localized in top right or bottom left.
I will correct it very soon.
But this doesn’t seem to be the problem (I try with other configuration of the axes in lightburn, the result is the same).
Switch inline mode ? What do you mean ? Where is this option ?
“Utiliser les déplacements G0” → I only see “use G0 move for overscan”, is it what you mean ?
Thank you for your help
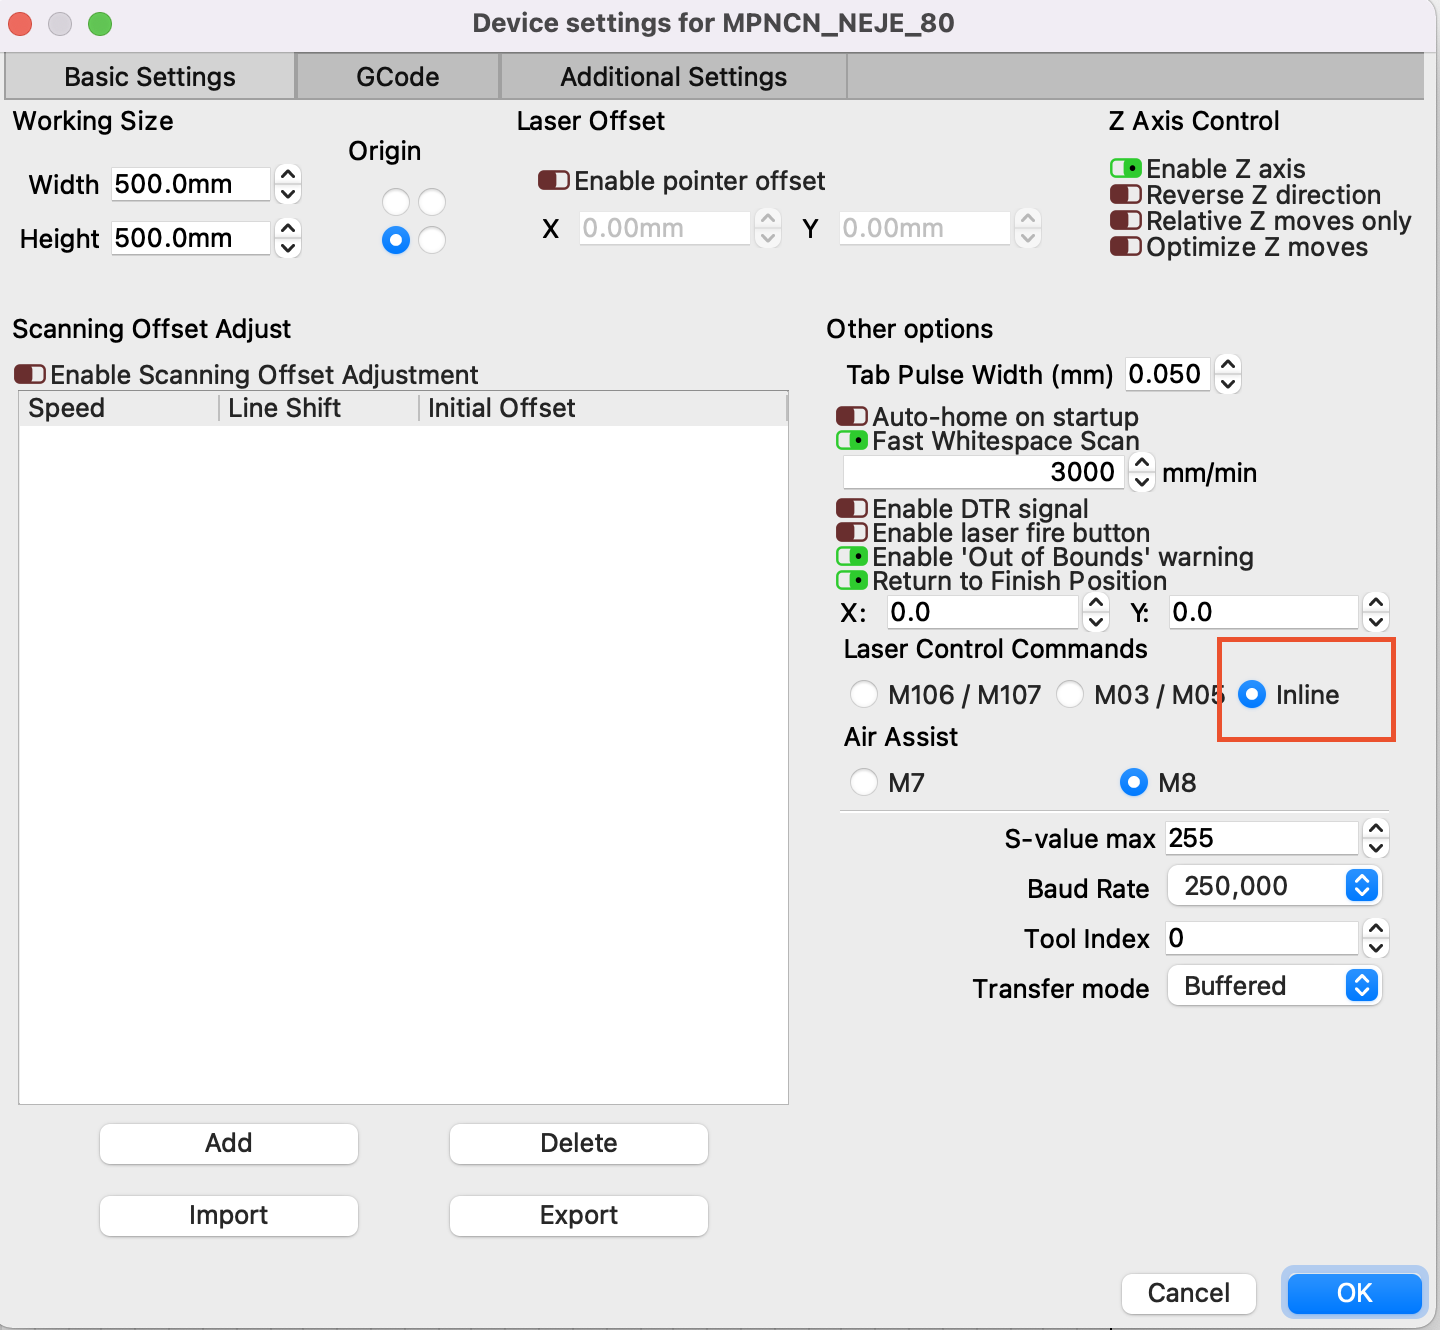
Forget about use G0 move for overscan, my bad.
That’s strange because your device screen doesn’t have Laser Control Commands options.
Do you have Laser mode enabled on your Marlin firmware( then compiled and flashed on your SKR ) ?
Very strange… option hidden because of my free version of Lightburn ?!
I realized that my computer or Lightburn (mac) is unable to find my cnc. I have to configure manually.
I’m not sure about what you said (enable laser mode).
This is my marlin file :
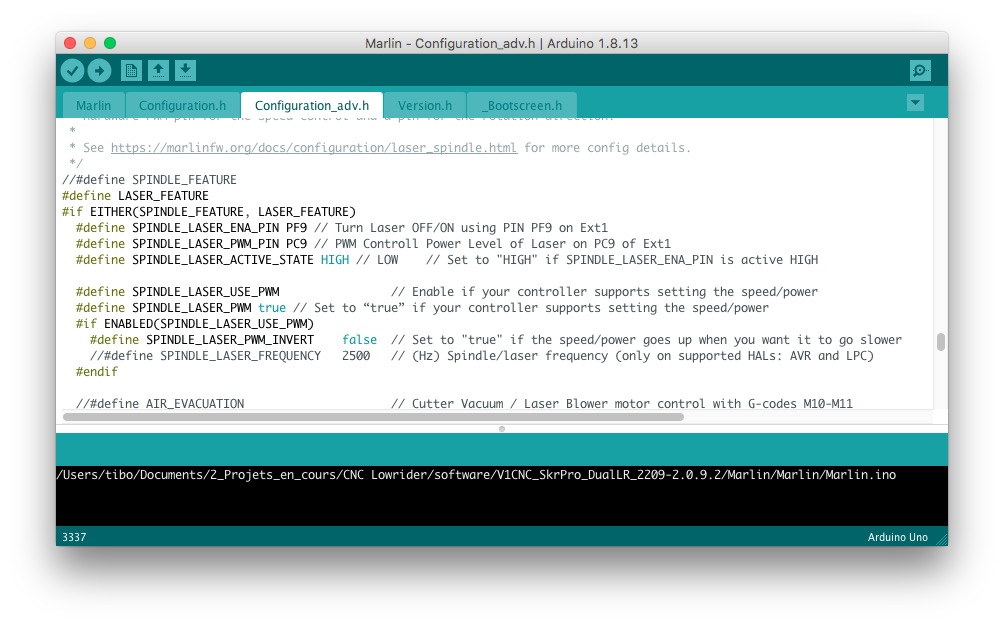
any error somewhere ?
thanks
The standard device setting windows (in lightburn website) looks like mine.
https://lightburnsoftware.github.io/NewDocs/DeviceSettings.html
no option for PWM signal
From lightburn website : " If that doesn’t work, your laser connects with Ethernet, or you have a Marlin device, you’ll need to use Create Manually."
Check for an advanced gui mode option.
I think i enabled something like that the first time i configured LB
I would not worry much about connecting remotely from lightburn for now. So ignore anything to do with ethernet, network, downloading settings etc. First you need to get the rig to burn as you intend… you already created a Marlin device manually (part of the startup wizard… yes it’s that easy).
I noticed in a screenshot you posted above, the first cut is set to 50% PWM, and the second one to 100%. What do you have configured for your max pwm in your device settings in lightburn? Does that match what you have configured in Marlin? I saw Olijouve uses 255. I use grbl which has a default of 1000. If lightburn is sending s1000 and marlin is set for a max 255, this would be the issue.
A quick/easy test would be decrease the power of your second cut to 50%. If it cuts, it’s likely just misconfigured max pwm settings.
[edit: Nevermind, looking at your gcode, your lightburn is also setup for 255, and lightburn is not outputting the rest of your cuts in the gcode (C01 layer is absent).]
I did find an obscure setting in lightburn that could result in this… use the select tool (arrow) to click on the part that is not being cut. Now under the tab “Shape Properties”, verify that “Power Scaling” is set to 100. It looks like this is another way to modify cuts per shape, but I’ve never used it. I checked and if I set it to 0 for a given item, everything else looks fine in lightburn, but the gcode will omit those shapes (or omit the whole layer if all shapes are 0). If you imported svg or similar, I suppose something like that could happen on accident.
I delete the previous configuration of device.
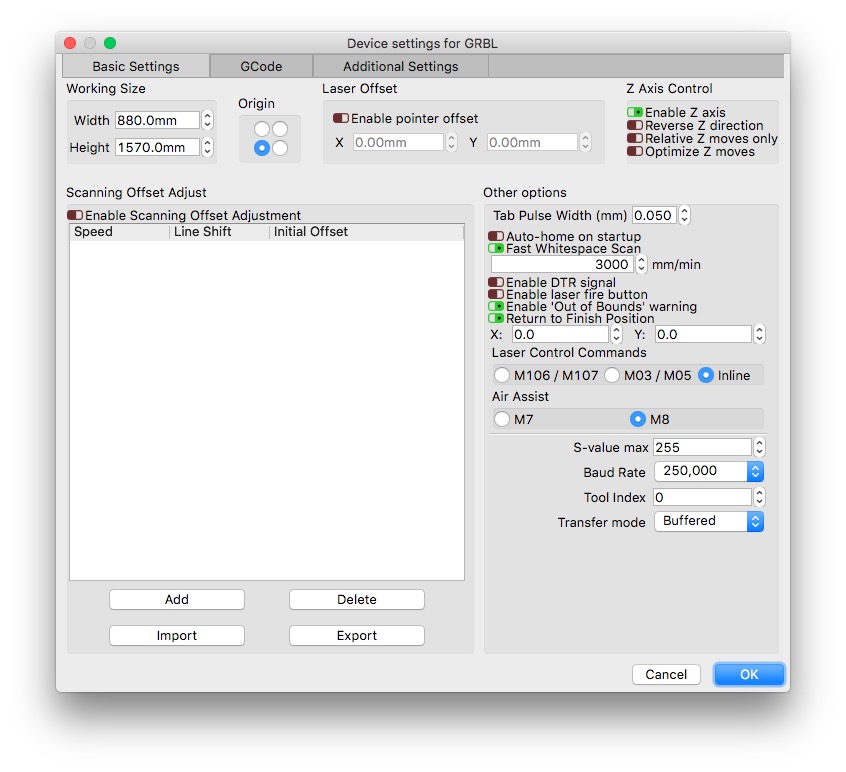
I choose the controller MARLIN (not GRBL!) and the option of PWM control appear !
1 Like
Cool ! does it solved your original issue ?
Not yet… I think I just broke my laser 
 (but I don’t know how)
I was looking for a solution because of the last problem I met : the laser didn’t turn off after finishing the cut.
So i try to connect the PWM laser to Fan port (I put a low power in Lightburn because of the risk of 12v compatibility pwm) → after that, no more light…
On the neje board you have a test button. Plug your power supply directly on the board an press the test button to check. It should ligth at 100%
There’s probably a minimum power level below which your laser cannot fire. Might try bumping up the “low power” setting a bit at a time to see if at some point it comes on.
I’d do the test @olijouve suggests first, then try and tune the Lightburn setting.
Follow that post for good wiring/setup:
1 Like
Exactly. When I recept the laser for the first time, I test it with the button (see previous Picture of the top of the laser), and it was lightning.
Now, the same (and only) button doesn’t put on the laser anymore…
I Check the power direct at the diode wires : 0V.
Maybe the diode is ok and the problem should come from the PWM signal ?
When I puss the button, a DEL twist from yellow light to a blue light (two different DEL) → so the button should be ok.
Maybe need to adjust an electronic component level ?? (Two rings with a cross ?)
I am tired, and I will wait first for the manual (I hope to recieve it).
Thanks everybody
I hate to bump an older thread, but I was able to get this exact hardware working (plus Octoprint) pretty well with a Laser Tree 20 W laser (3 wire)
1st, I split the 3 wire to the 2x2 wire setup as in the picture at https://us2.dh-cdn.net/uploads/db5587/original/3X/a/d/adca81742a33684d8eba3f29c8e585f933881dd8.jpeg
Hooked the red and black up to its own 12v Power source, and the white (Ground) and yellow (PC9) to the PC9 and Ground on the SKR Board.
After that I was able to fire the laser without issue using the stock firmware for the SKR using M3 S10
In Lightburn, I manually set up Marlin but I couldn’t initially see the Laser Control Commands so I could set it as inline. I had to EXPAND the settings window in order for that to appear.
After that my biggest issue was with Lightburn generating the inline codes and the laser not turning on, after a bit of trial and error, I found that I needed to send the “M3 I” command to tell Marlin to enter Inline mode
So I added
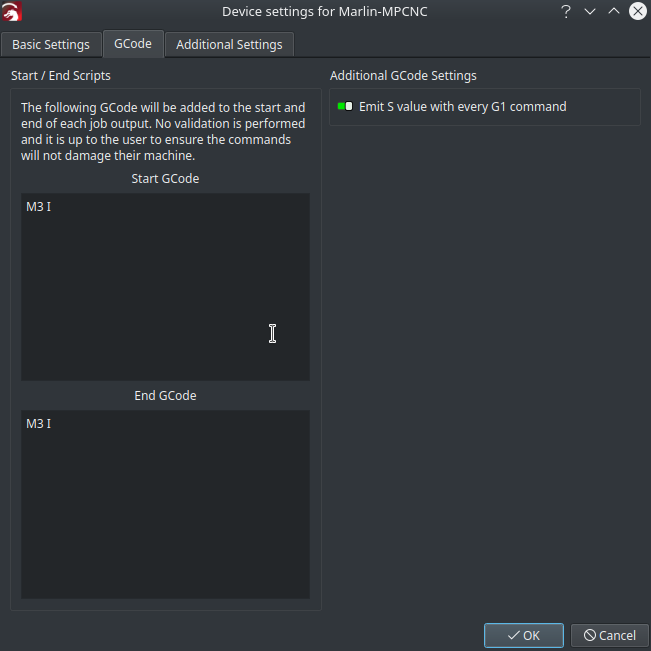
to the Lightburn gcode settings, and the laser turns off and on as it should
With this setup I am able to generate Gcode using Lightburn, and upload to Octoprint (which I am using to control the CNC) and it works flawlessly now
Hoping this helps someone else save some frustration
1 Like
Thanks, all, for the excellent and helpful replies, and especially to @robertbu, whose consistent help to folks on multiple instances this kind of topic have been awesome.
Also kudos to @ringnutz for his help not only in figuring that bit out, but updating folks reading/following along.
3 Likes
Thanks for the great info Adam! Do you think that this 3 wire laser would be the same procedure?
I was thinking about scavenging the laser of the Sculpfun S9 but I saw this and thought I might give it a try.
Do all of you typically run an separate power supply for the laser power? Is that to try to protect the board?