šŸŽØ RiP 2016 MPCNC – Advice for Its Rebirth!

:artist_palette: MPCNC Experts, Help Me Choose My Next Chapter

Hi everyone :waving_hand:

I’ve finally reached the point where I should ask the experts instead of endlessly thinking and printing test parts :grinning_face_with_smiling_eyes:

A bit of backstory :seedling:

About 5 years ago, I bought an MPCNC in a way that was much more impulsive than rational. At the time, I honestly didn’t know exactly what I wanted to do with it. What followed was a huge learning journey — mechanics, firmware, calibration, mistakes, fixes… all of it.

Fast-forward to today, and I’ve come to a very clear realization:

I mainly want to use my machine for drawing and painting.

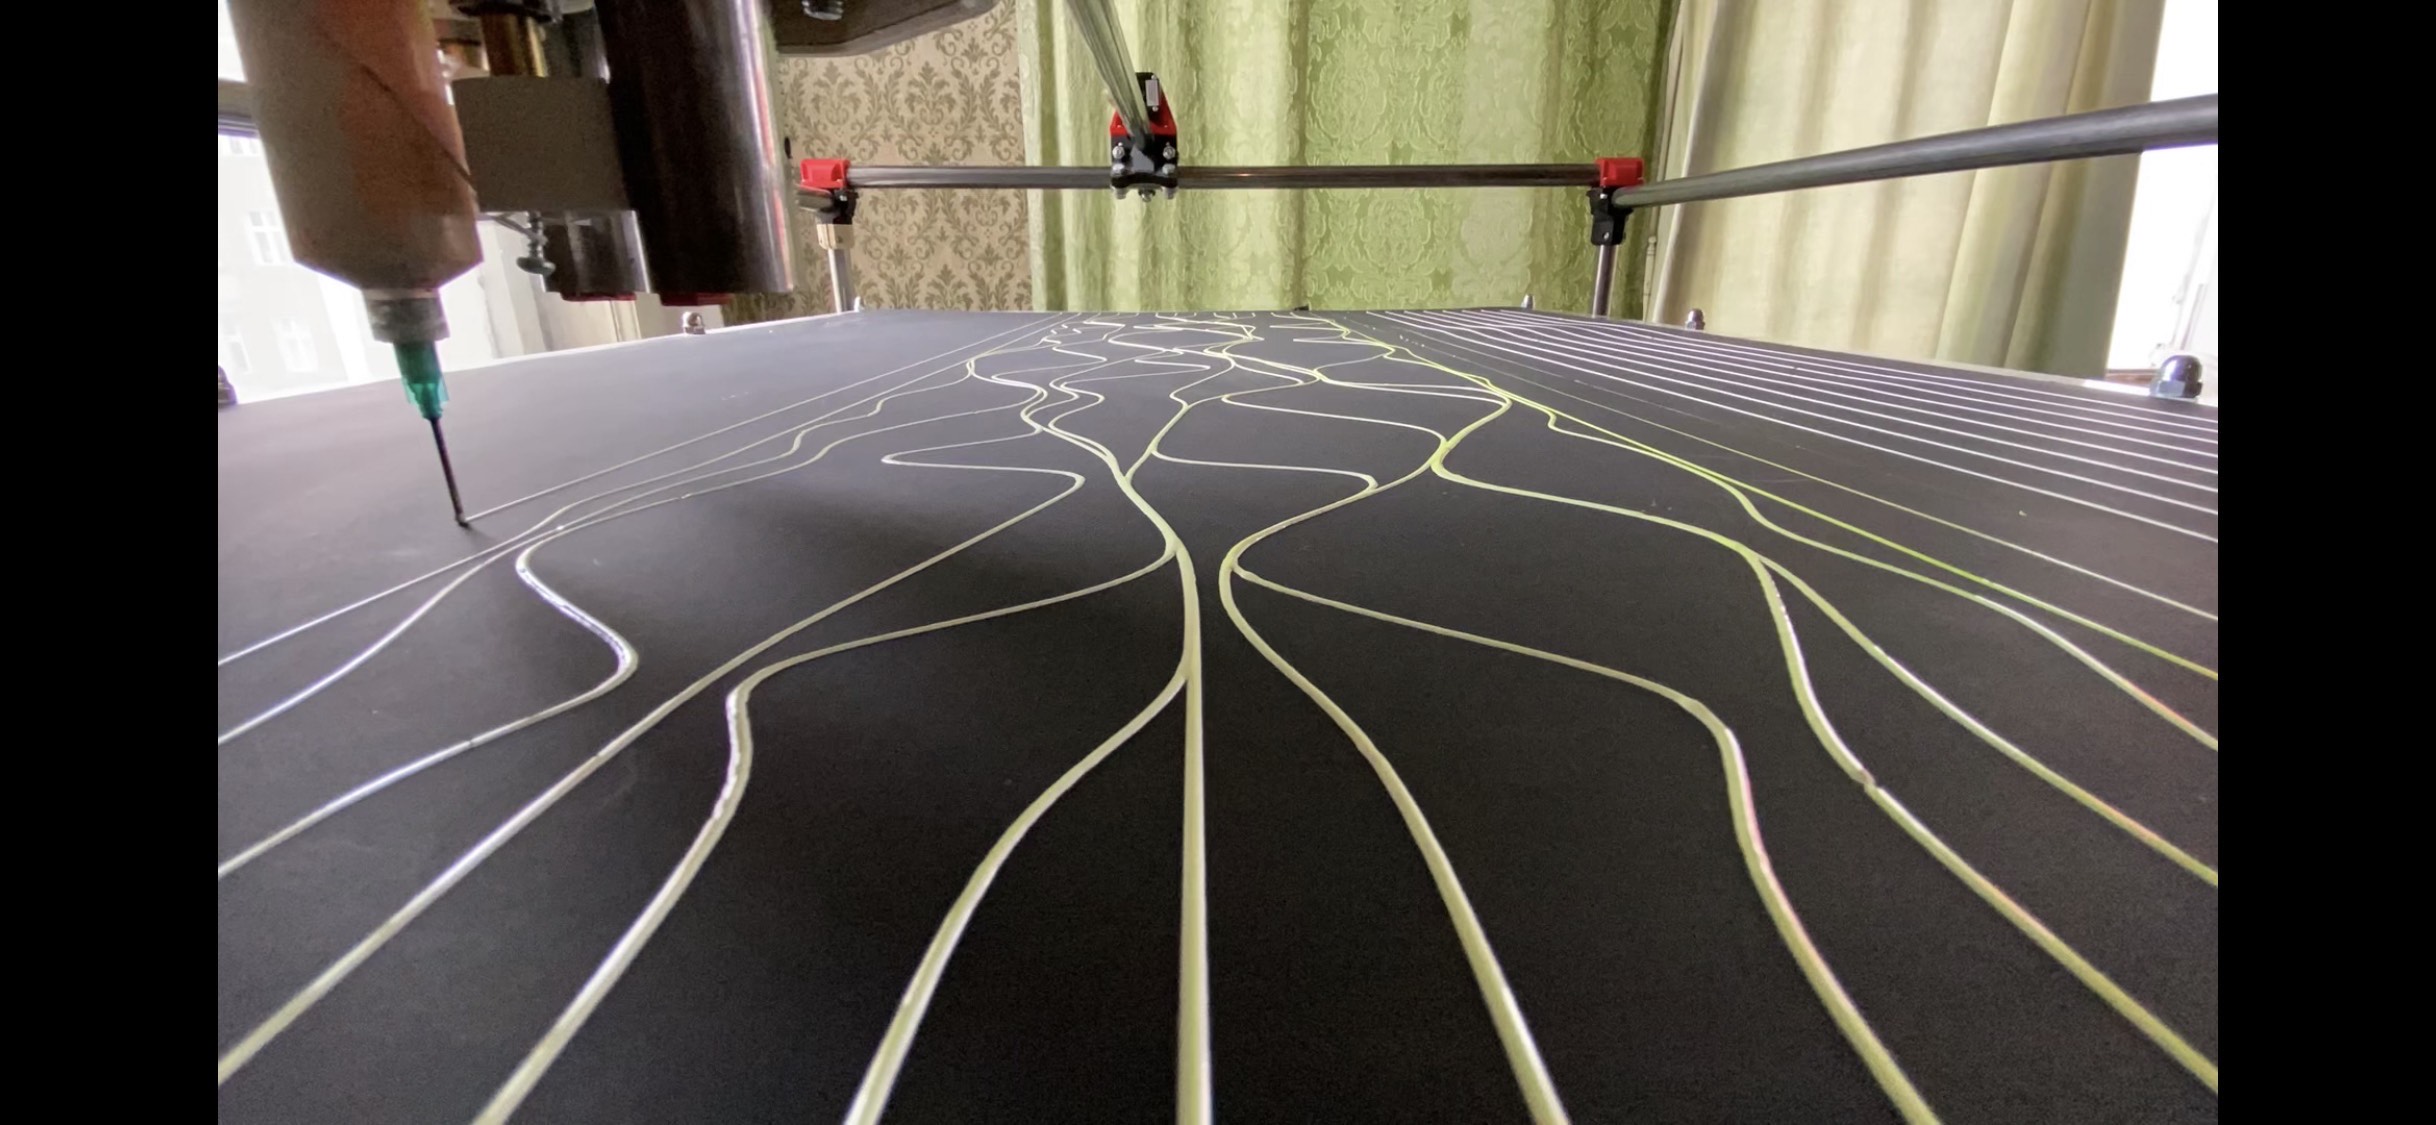
Over the years, I’ve developed my own tools for dispensing paint, and that is now the core purpose of this machine. In that sense, I feel that my current build could be optimized more for my use case rather than following the original MPCNC design.


My current setup :building_construction:

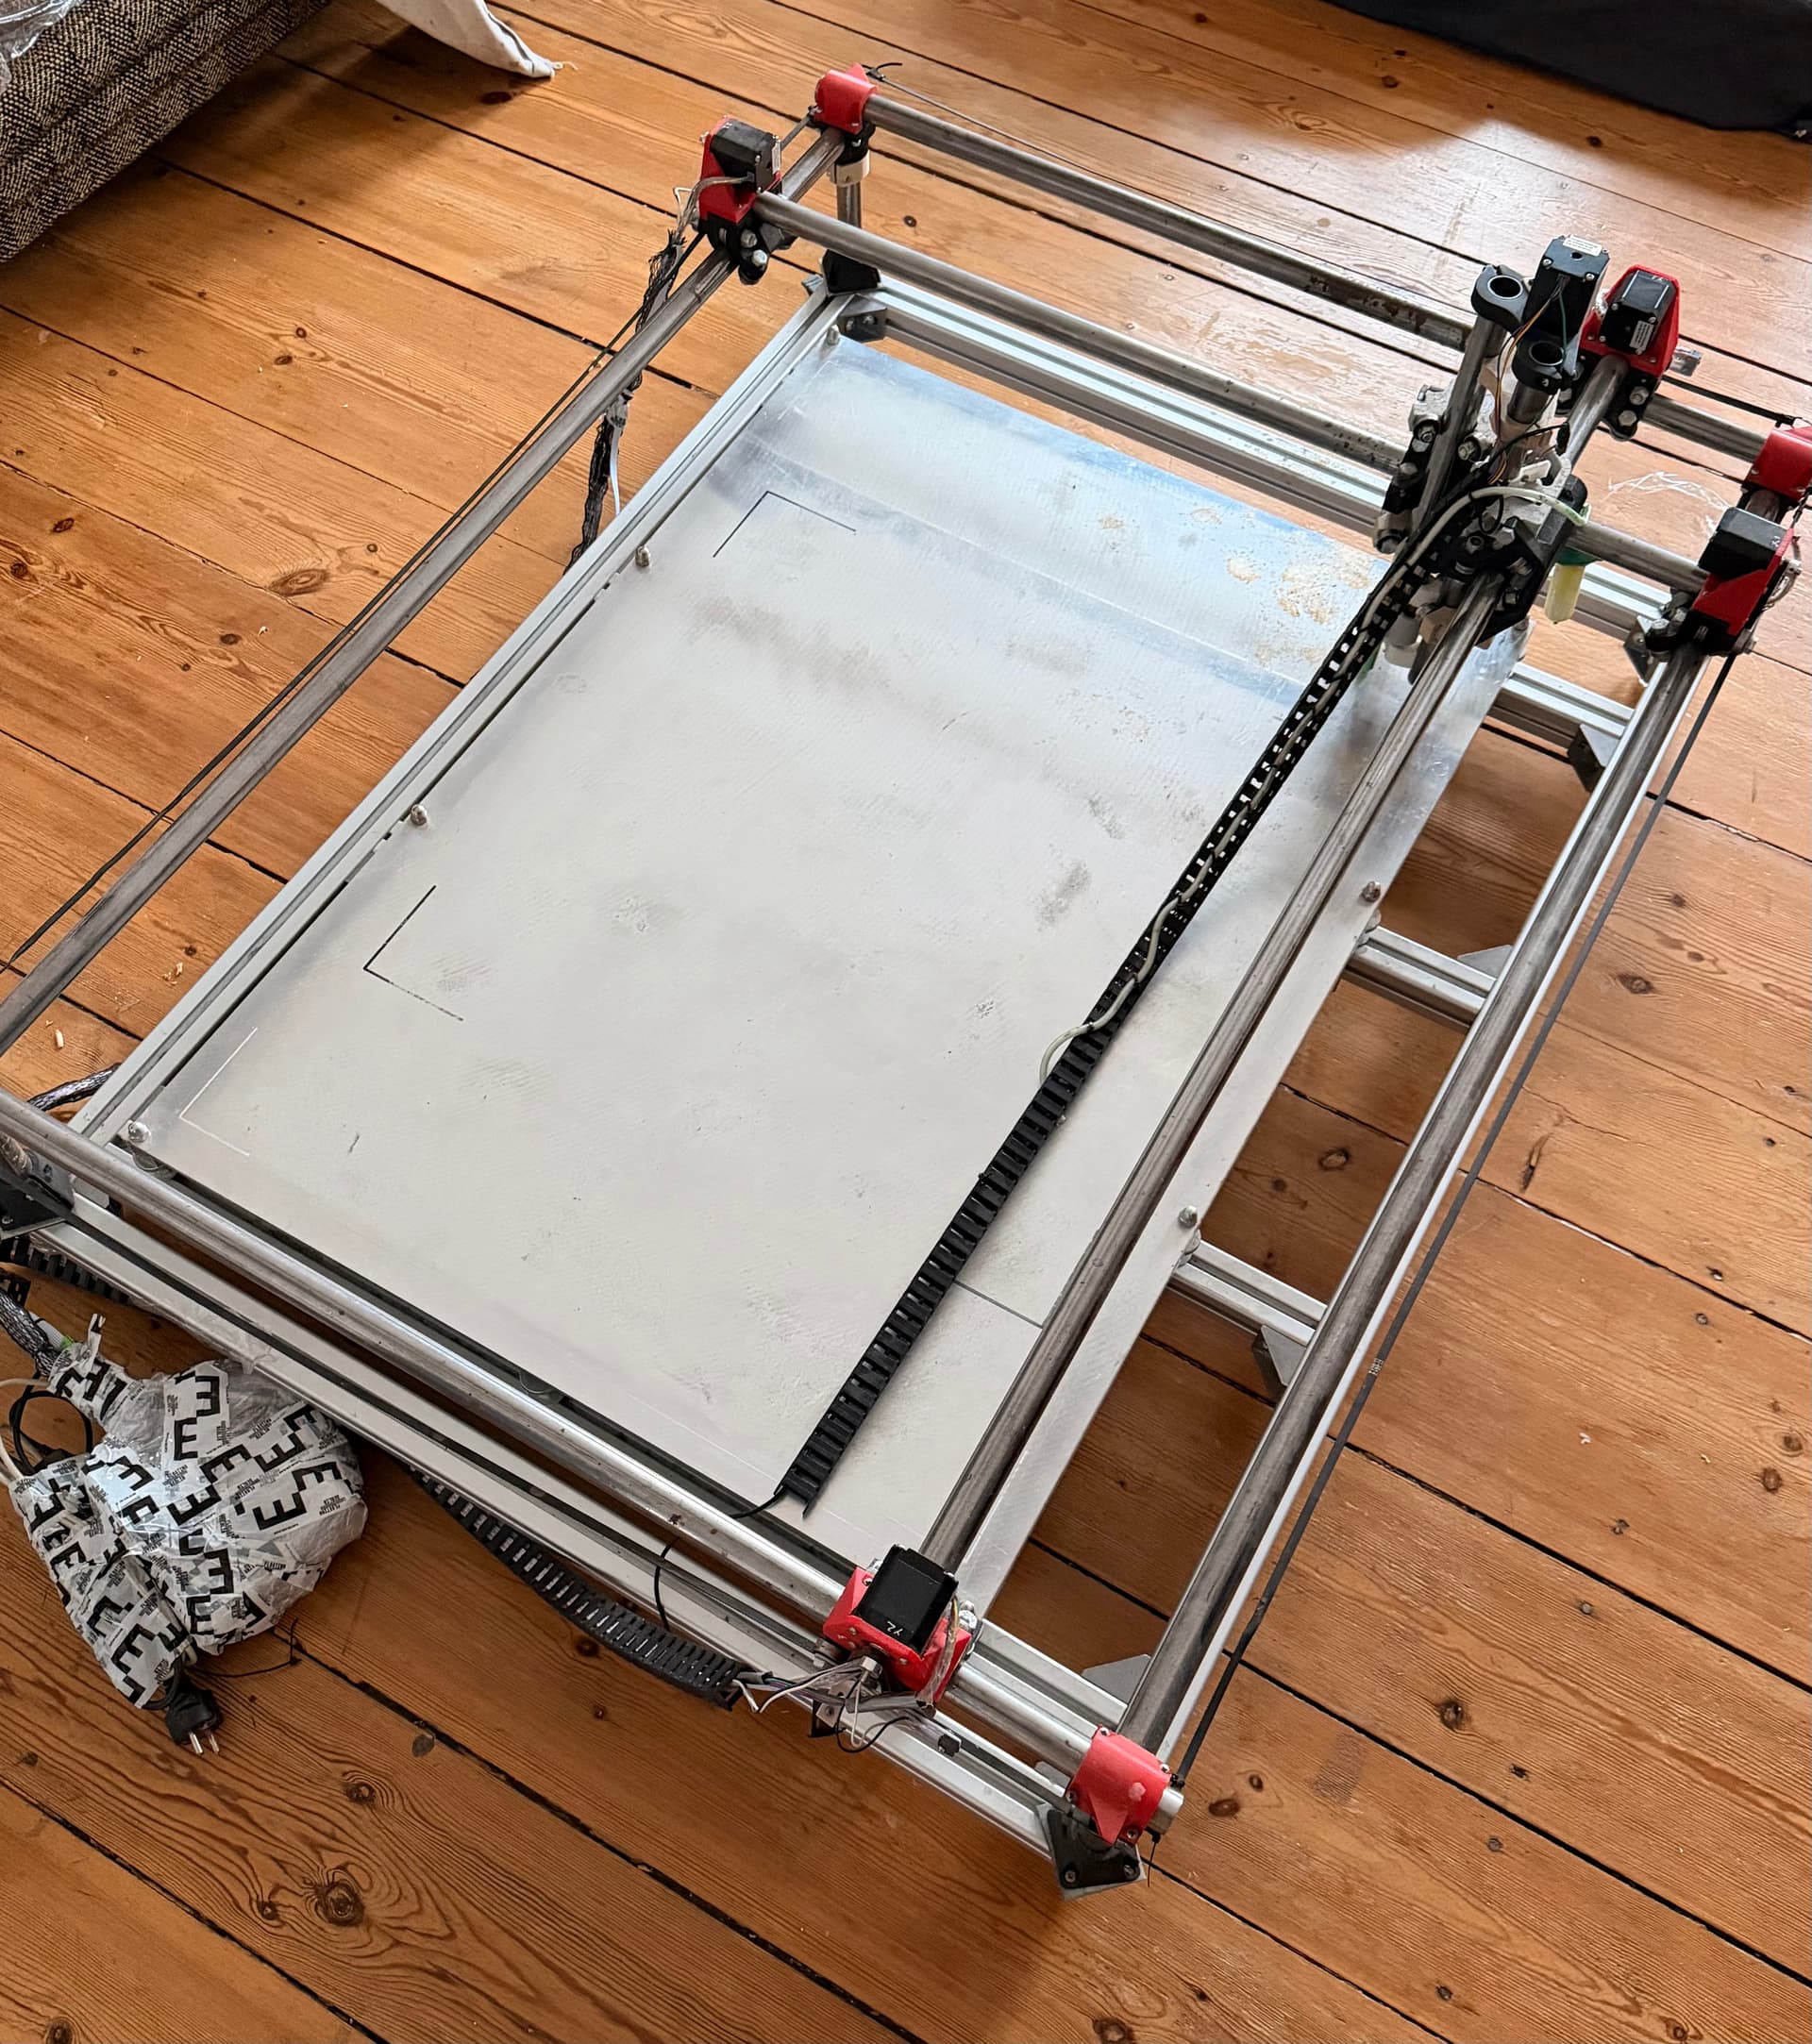
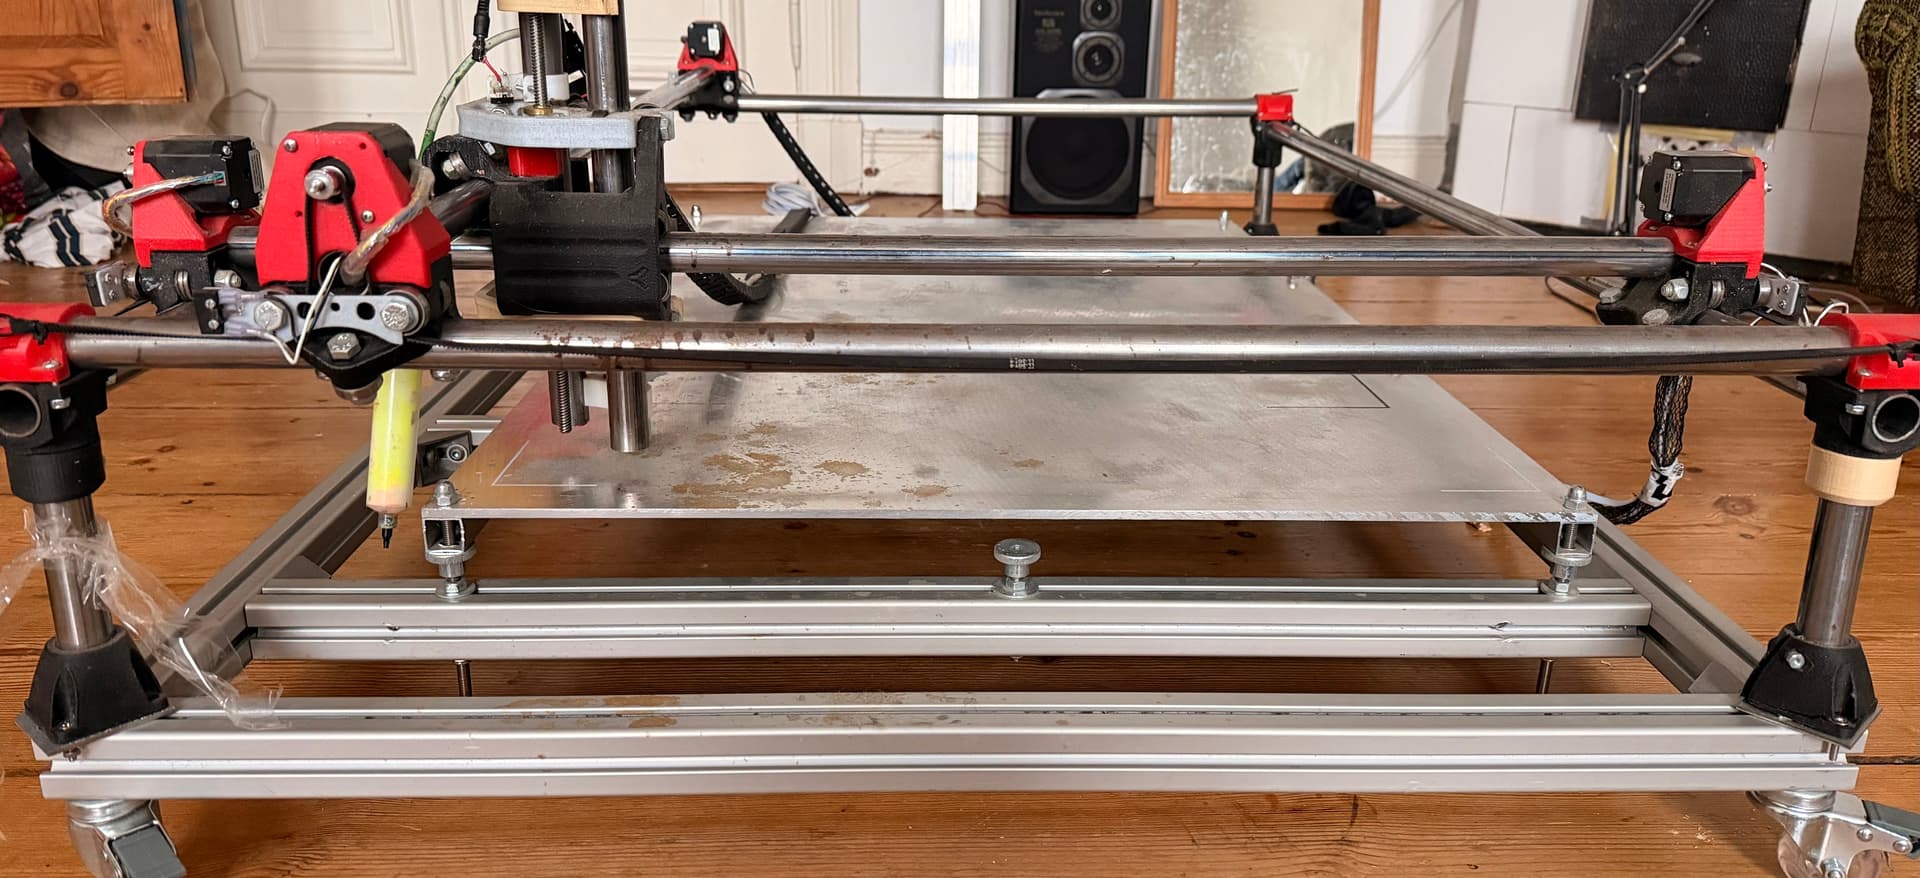
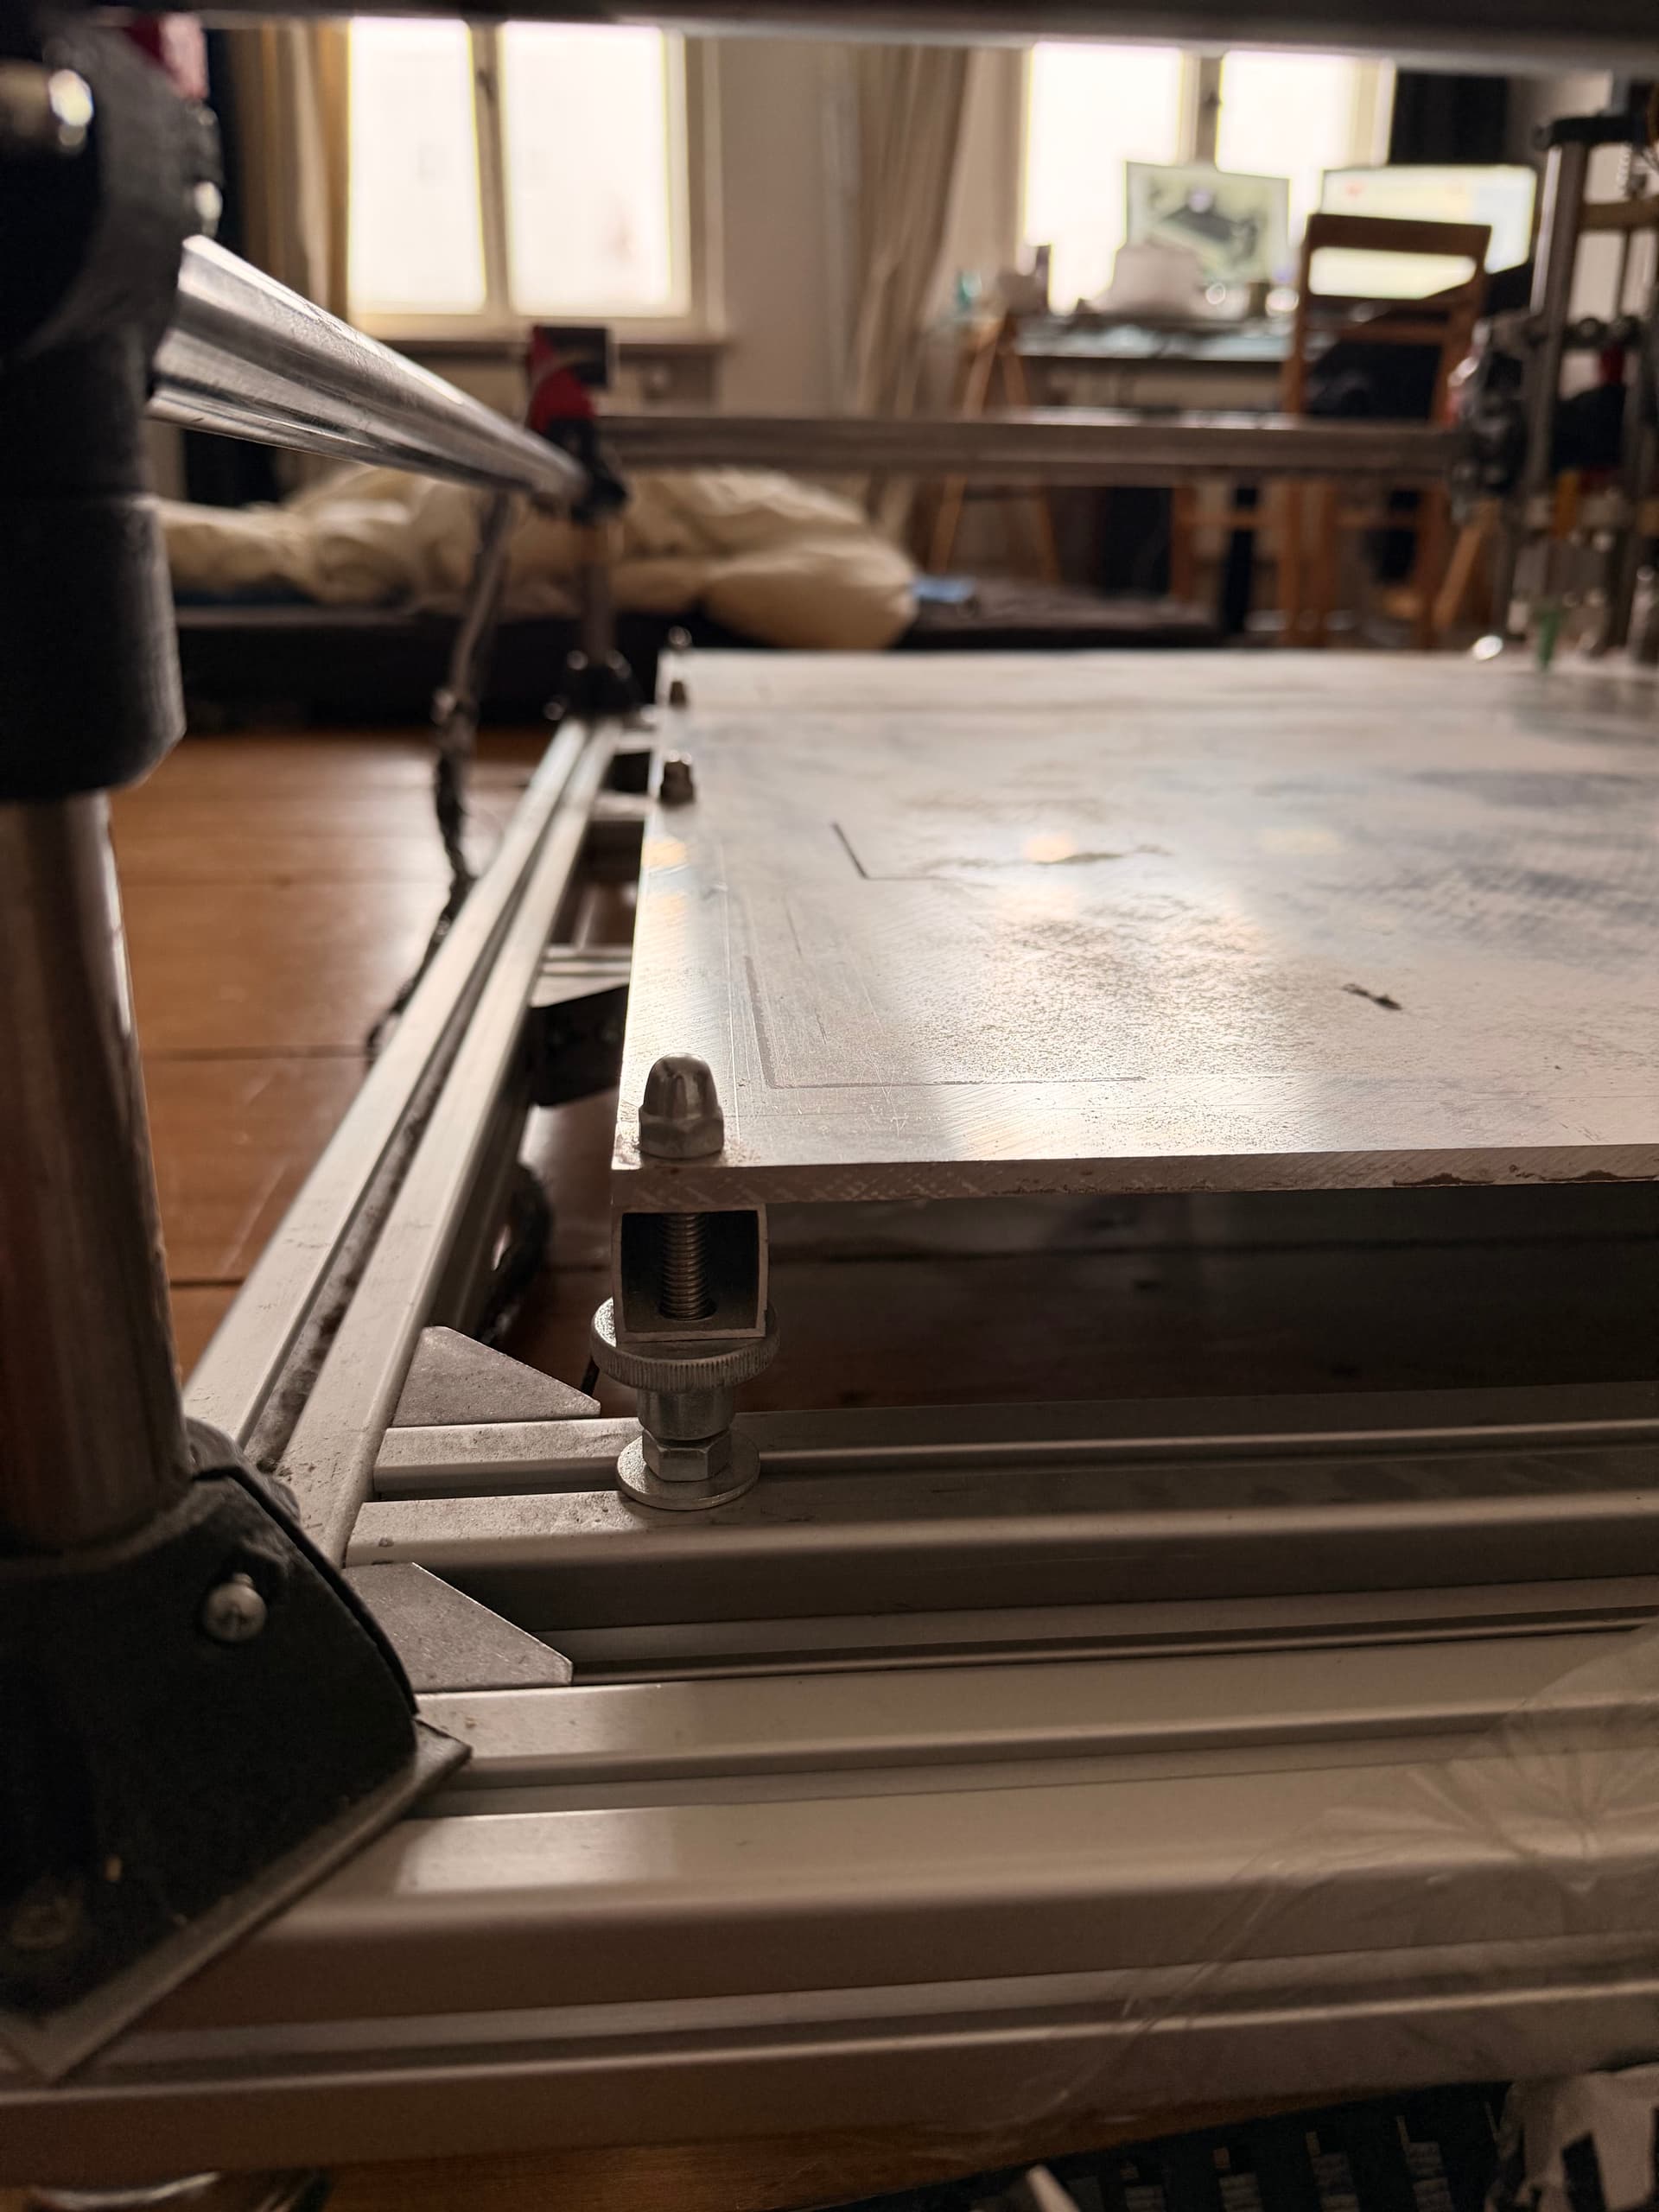
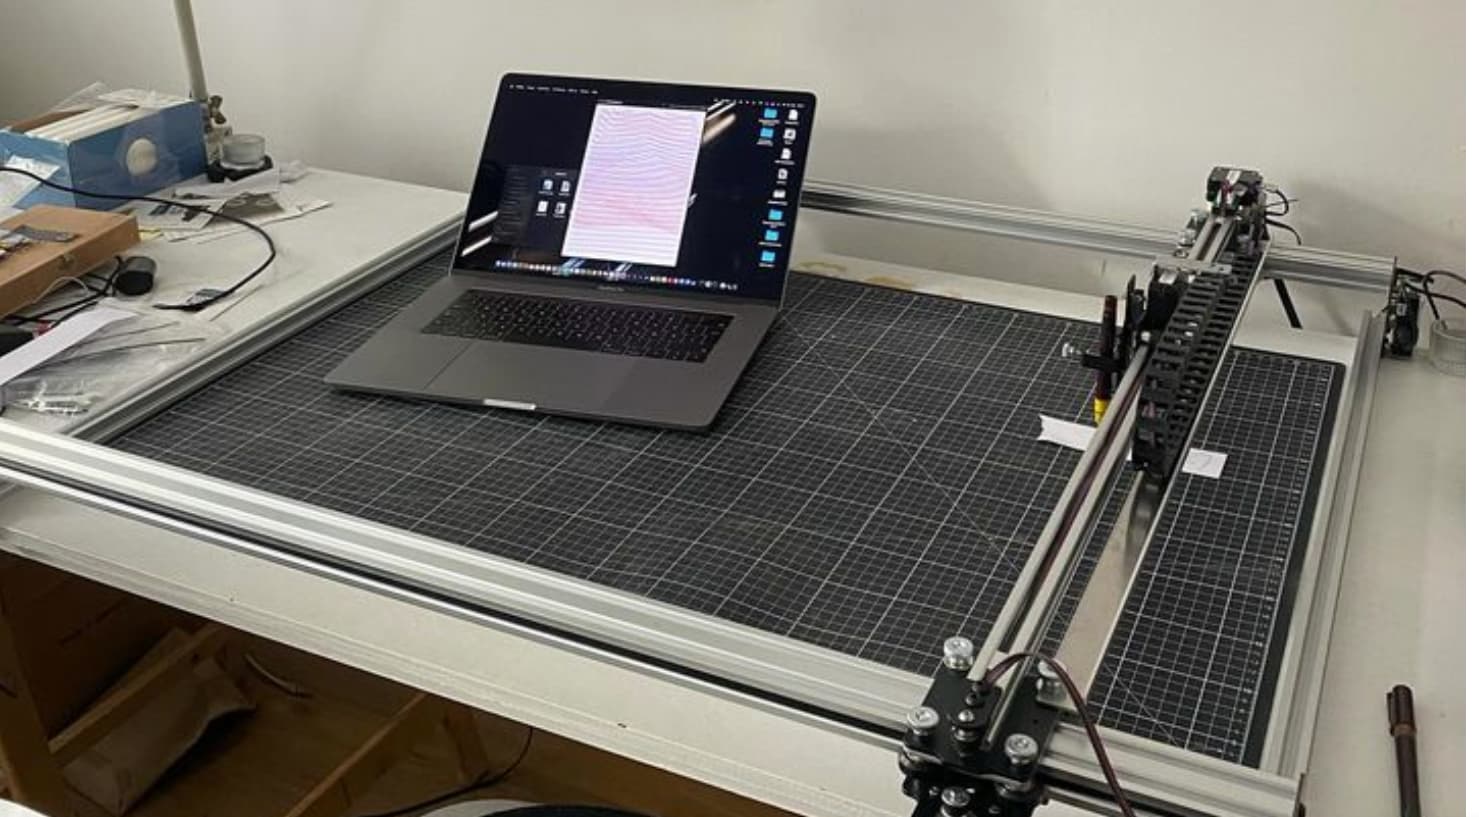
As you can see in the pictures, my machine sits on a very solid, mobile frame with a large aluminum sheet as the working surface. The sheet is carefully straightened and leveled, which is absolutely critical for me — dispensing paint is basically like doing a perfect first layer of 3D printing, but on a very large scale. I’ve gone as far as Measuring the table height at many points and automating calibrating Z per drawing G-code to optimize the height instability issuesšŸ–Šļø

The machine is roughly A0 paper size, with dimensions 1200mm Ɨ 900mm, so it’s quite a big build.

As you might expect from a very large MPCNC, I’m facing the usual challenges:

  • Flex and rigidity limits :cyclone:

  • Long belt behavior :up_arrow:

  • Squareness and alignment drift :triangular_ruler:

  • Speed limitations once things get large :rocket:

Here are some pictures of my build and snapshots of my tools and process.


What I want to improve :sparkles:

I’d love to upgrade rather than start over. The one thing I’m sure of is that I will reprint most of the machine, but now is the perfect time to pause and think strategically.

What matters most to me:

  • :rocket: Speed

  • :writing_hand: Perfect pen alignment and consistency

  • :recycling_symbol: Reuse as much of my existing setup as possible

    • Frame

    • Electronics

    • Motors

    • Screws, bearings, hardware

  • :printer: I’m totally fine printing new parts and ordering some hardware

  • :cross_mark: I don’t want to start a huge new project or design a complete system from scratch


Where I’m stuck (Primo vs LowRider vs ZEN XY) :magnifying_glass_tilted_left:

Since my machine is based on a 2016-era MPCNC, I’ve been looking at newer designs:

  • MPCNC Primo :wrench:(maybe with shorter legs / reduced Z)? :thinking:

  • LowRider V2 :gear:

  • LowRider V4 looks amazing, but feels like way more than I need for drawing :sweat_smile:

  • ZEN XY also seems promising :sparkles: if it had just a bit more Z travel, which would make it ideal for my A0 plotting setup :paintbrush:

At the same time, I feel like the Idraw-style approach (simple, rigid, drawing-focused) makes a lot of sense for my use case if it could sit cleanly on my existing structure.

So now I’m wondering:

  • Should I upgrade to Primo (maybe with shorter legs / reduced Z)? :thinking:

  • Should I go for LowRider V2, since rigidity and large format matter in my case? :light_bulb:

  • Could ZEN XY with more Z be a better fit for my purpose? :magnifying_glass_tilted_right:

  • Are there any community-proven modified builds optimized for large-format, high-speed plotting that I should look at? :glowing_star:

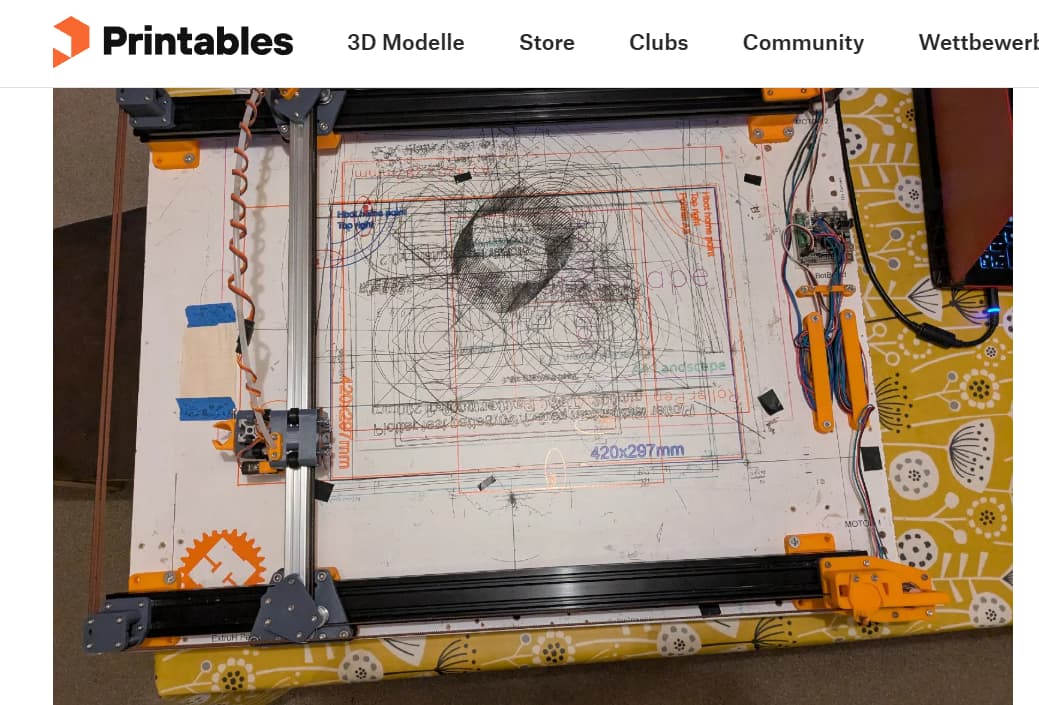
I’ve been very inspired by some community upgrades I’ve seen :glowing_star: but before I start printing an entirely new set of parts, I wanted to ask the experts first :slightly_smiling_face:

MPCNC Primo // Fastest CNC // FluidNC


Given my use case (large format A0, 1200mm Ɨ 900mm, paint/pen drawing, speed, reuse of MPCNC hardware, minimal self-designing):

Which V1 design — or which proven variation — would you recommend?

Any guidance, build references, or ā€œdon’t do this, I already triedā€ advice would be hugely appreciated.

Thanks a lot, and huge respect for the work you’ve all done on these machines :clap:

Okay, can we please do it again without AI?

Don’t take it the wrong way, but I am not reading five pages written by an AI. Just tell us, in your own words, what your goals are. :slightly_smiling_face:

3 Likes

Would the pen plotter be a good option for you?

1 Like

To be clear, AI did not write the content of this post. I only used it to help with formatting, so the text is quicker to structure and easier to read visually.

I’m a bit surprised by the reaction, especially without fully reading the post. I’m simply trying to share my journey with this machine and ask a genuine question based on real experience and the research i have done sofar

This isn’t filled with generic or low-effort content.. it reflects hands-on work, testing, and learning.

If the post feels too long, the short version is: I have a large A0-sized MPCNC mainly used for drawing and painting, and I’m looking for advice on the most suitable V1 design to upgrade to, without starting from scratch

2 Likes

Thanks, I can work with it. I did skim it, but my brain just switches off with the AI formatting. The LowRider 2 is not as stiff in the middle of the gantry and needs an exact table, I would not build it any more.
The plotter that Orob linked seems really great, but is also quite expensive as far as I can see, if that’s too much, I’d recommend the LR4. It can go as big as you want and is really stiff. :slight_smile:

1 Like

How much z axis movement do you need? Im intrigued by your painting and if bed leveling/flatness is of critical importance, have you considered using a 3d printer mesh scan of the work area to get that amazing first layer? This might be a case where a z probe paired with klipper control software could be your friend to map the bed (painting area) and compensate for it in software. I dont know the upper limit on the number of points for a bed mesh in this scenario, but it might be worth investigating. There will be a scan time tradeoff to make the mesh scan.

That pen plotter has a tool changer to switch pens, but its z is basically up or down with some tension in the down so it will write. That mech may mot be ideal for a :paintbrush:.

Yea, that pen plotter (I built one) is designed for hanging on the wall and has limited Z which is designed for using pens with automatic pen changes. You’d likely have to do something different for the Z axis.

That’s actually exactly how I’m solving it :slightly_smiling_face:
I measure the bed at many points manually with a gauge, then use a custom script to take all those points, generate a NURBS surface, and project all drawing paths onto that surface. This way the final toolpaths already include full Z compensation, and the paint is deposited perfectly on the bed.

This approach is commonly used on very large 1m Ɨ 1m Ɨ 1m 3D printers, but I wrote my own script specifically for painting and plotting. The Z axis itself only needs minimal travel, mainly for lifting and tool changes, but it has to be very consistent.

At this point, what I need to figure out is which new build to put on top of my existing structure, since as mentioned earlier in the post, I’d like to keep the current frame and aluminum bed unchanged.

Oh, I just checked it out!! it looks awesome, I really love it :grinning_face_with_smiling_eyes:
And that’s exactly the thing: LowRider feels a bit over-engineered for my use case, while the pen plotter design could actually work very well with a bit more Z travel and if it could stand on a table instead of hanging on a wall.

That’s kind of the sweet spot I’m trying to find…

If what you have works, then what would.help us help you is knowing what you want to be better.

A Primo is a direct upgrade, will re-use most hardware, including rails that you currently use. 3" is minimum Z, less than that, you can’t really build, and doesn’t reduce anything.

A LowRider will re-use motors and some of the bearings, but require other hardware, including rails. Slightly greater cost, a bit more flexibility with the table.

For me when it comes to plotting, laser, or drag knife applications, I tend to preffer a CoreXY solution. This allows more high speed travel and cutting applications. This is important with a laser, nice to have with a pen or drag knife, hard to say with your paint dispenser.

The plotter linked above is a good solution. I have a CoreXY design I did myself, but it’s a bit small for your application. I have one laser that I am using a modified 3D printer stage (MP3DPv3) to move a laser, with the @dkj4linux manual Z axis stage to focus it. In this case, I used the older 3D printer stage because I already had all of the parts, as I had intended to build a second, but then the v4 was released, then the v5. Also I could get the size I wanted (400mm by 450mm) with parts in hand.

A0 is pretty big, and while a Primo can be built that big, it gets wobbly under any kind of load. I would be strongly inclined to use a LowRider for that size. However, it is more than possible to get belt to allow a CoreXY stage to be made. If you were to base the design on the MP3DPv4, this would require some pretty long MGN12 rails, but the result would be fast, accurate and reasonably lightweight. I would favor the printer design over the ZenXY design simply because the ZenXY core is just not designed to carry a tool, while the printer design is designed to do so.

Z is actually not a huge concern for me. It mostly just needs to be stable and repeatable, not tall. As you can see in the images, I’m using syringes and valve dispensers to extrude paint — very similar to a 3D printer doing a single, perfect first layer . In some cases I also use spray, so the Z motion is usually minimal (up/down or light compliance), but consistency is critical.

That’s why I’ve focused more on bed flatness and software compensation rather than mechanical Z travel.

I do have a more specific hardware question though
Why couldn’t I reuse the existing MPCNC rail/tube system for a LowRider-style build on top of my current aluminum table? Is it mainly a rigidity / geometry issue, or more about how the LowRider references the table itself?

And regarding CoreXY.. I understand the advantages much better now, but I’m trying to be realistic about my skills. How hard of a mission would it be to scale something like an MP3DP-style CoreXY up to A0 size? I’m coming more from the artistic / process side than from a deep machine-design background, so I’m trying to gauge whether this is a ā€œchallenging but doableā€ path or something that will turn into months of tuning and redesign.

My goal is really to put the right motion system on top of the frame I already trust, without turning this into a full custom machine-building project.

Thanks again! this discussion is extremely helpful

Using an aluminum frame is fine. Using an aluminum table top is less so, at least for normal CNC routing. You would need to add a wooden (MDF/Plywood/OSB) spoil board, so that you don’t shatter bits when you cut beyond the stock depth, and you would want it thick enough that you can screw into it for holding purposes.

If your purpose is exclusively as a pen plotter, then I can’t think of many reasons that you couldn’t use an aluminum table top, as long as it was very flat. Often times there is enough uneven-ness on a typical table top that surfacing is required (especially for non-through cut projects, which would include a pen plotter). This would be a challenge with an aluminum surface (IMO)

1 Like

The LR4 uses 1ā€ EMT. So the tubes you have now won’t work. EMT isn’t that expensive though. Mine was around $19 for a 10 foot piece.

1 Like

He is drawing on it, not milling. :slight_smile:

Well, you couold for a LR3. but not for a 4. The 3 uses (or can use) the same size tubes, the 4 uses larger ones. The MPCNC was designed around 3/4" conduit (or 25mm or 1" tube) the LR4 is designed around 1" conduit (or 30mm or 32mm tube) This would mean new steel is needed for an LR4, though you could re-use what you have for an LR3.

For hat it’s worth, the LR3 is still a plenty capable machine.

Either style LowRider is going to have a slightly different footprint, so if your table is set up for your A0 size, it might end up being slightly different with a new LowRider.

The LR3 in stock form has less Z travel than the LR4, but as you’ve noted, that isn’t an issue for your usage case. You may be able to get used LR3 parts from someone who has upgraded. This would make the YZ plates easier to come by. You might even score some nice aluminum XZ plates. People would be likely to have re-used the MGN12H rails for an LR4 build though.

Thank you all for the thoughtful responses. I really appreciate the time and expertise you’ve shared

I have to admit I’m struggling with the decision right now because I don’t clearly see the path a few steps ahead. There are several directions that seem possible, but I’m having trouble choosing between them.

One option is to try MPCNC Primo and see how wobbly it actually gets at this A0 size, reusing most of my current machine and testing the limits in practice.

Another option is to go with a LowRider V2 or V3, aiming for a more rigid system that is proven at larger sizes while still reusing as much of my existing setup as possible.

A third option would be switching to a CoreXY-style solution, inspired by MP3DP or plotter builds, but I haven’t been able to find clear examples of this approach scaled to A0 . That uncertainty makes it hard for me to judge how realistic this path is. I only found this ExtruXY (coreXY remix of ExtruH) von pittance | Kostenloses STL-Modell herunterladen | Printables.com but its Using a lot of different Hardware parts

I know that many things are possible and that there is no single perfect choice. My main concern is finding the most efficient solution for my actual use case.

What I am really aiming for is:

  • A fast and accurate machine for drawing and painting

  • Maximum reuse of my current setup

  • Minimal additional cost in new hardware

Right now, the variety of possible directions has left me a bit stuck on which option best balances speed, rigidity, reuse, and cost effectiveness for large format drawing.

If anyone has practical experience or direct comparisons from similar large format plotting or drawing builds, that kind of guidance would really help me move forward.

Thanks again for all the input and support. I’d love to make a confident decision rather than jumping in half blind

I second the core xy option though scaling it larger, i wouldnt use mgn12h rails for y, I’d use v wheels in extrusion and use laser-cut acrylic parts instead of aluminum with to keep the weight down. The x axis movement id possibly use mgn12h rail deoending on the weight tradeoff.

Yes, that’s why I followed up with comments about using it as a pen plotter…

2 Likes

No one said V2. :sweat_smile:

@SupraGuy @orob @jeyeager Another Idea that came after some research to build the plotter / draw bot like the ACRO Draw Bot and would be using all MPCNC electronics (motors, board, PSU, endstops, Belt ) while using OpenBuilds ACRO mechanics for rigidity and smooth motion.

Here is their System : OpenBuilds ACRO System | OpenBuilds

They also sell Drawing Bots but my goal is to reuse as much as possible form the Mpcnc. Here is their A1 ACRO Draw Bot

I would be using the 3D-printed ACRO plates from here: OpenBuilds ACRO Plates on Printables to connect the rails and wheels.

Do you think this hybrid approach is feasible? Any potential issues with firmware, electronics, or mechanical alignment to watch out for ? Or should i stick to V1 Designs rather