Not a lot of progress on MPR&P here, either. I spent Sunday with family and theatrical performance of “Fiddler on the Roof” that my grand-daughter was part of… she was 2nd daughter, Hodel. I did print 2-rail integrated non-slotted end supports for the Y-rail assemblies but haven’t installed them yet. I suspect I should orient the Y-rails to be “motor leads-out” when I do install them and then look into figuring out a way to use a printed drag- or cable-chain setup. Are cable-chains the way you envision going when you get around to doing your wire management?
I think that is how I will do it, but cable chain brings its own nuances.
For now, I’ve modified my printed backplate remix to be 5mm thick, and remove the stiffeners from 69mm of one side (to fit the roller assembly for the 3rd rail.)
It went on the Taz a few minutes ago. I’ll be swapping the axis over today while I scrounge some more for bearings- which I know I have more of but am not sure where I put them. DOH!
I also need to get my butt going and finsish at least one enclosure for a jackpot / airedale so I can get the machine moving with at least one set of electronics.
I’ve never installed cable chains on any of my concoctions so I will be interested to see how you go about it… and see what those “nuances” are all about.
Other than better wire management, everything seems pretty solid and I’m reasonably happy with it for the time being…
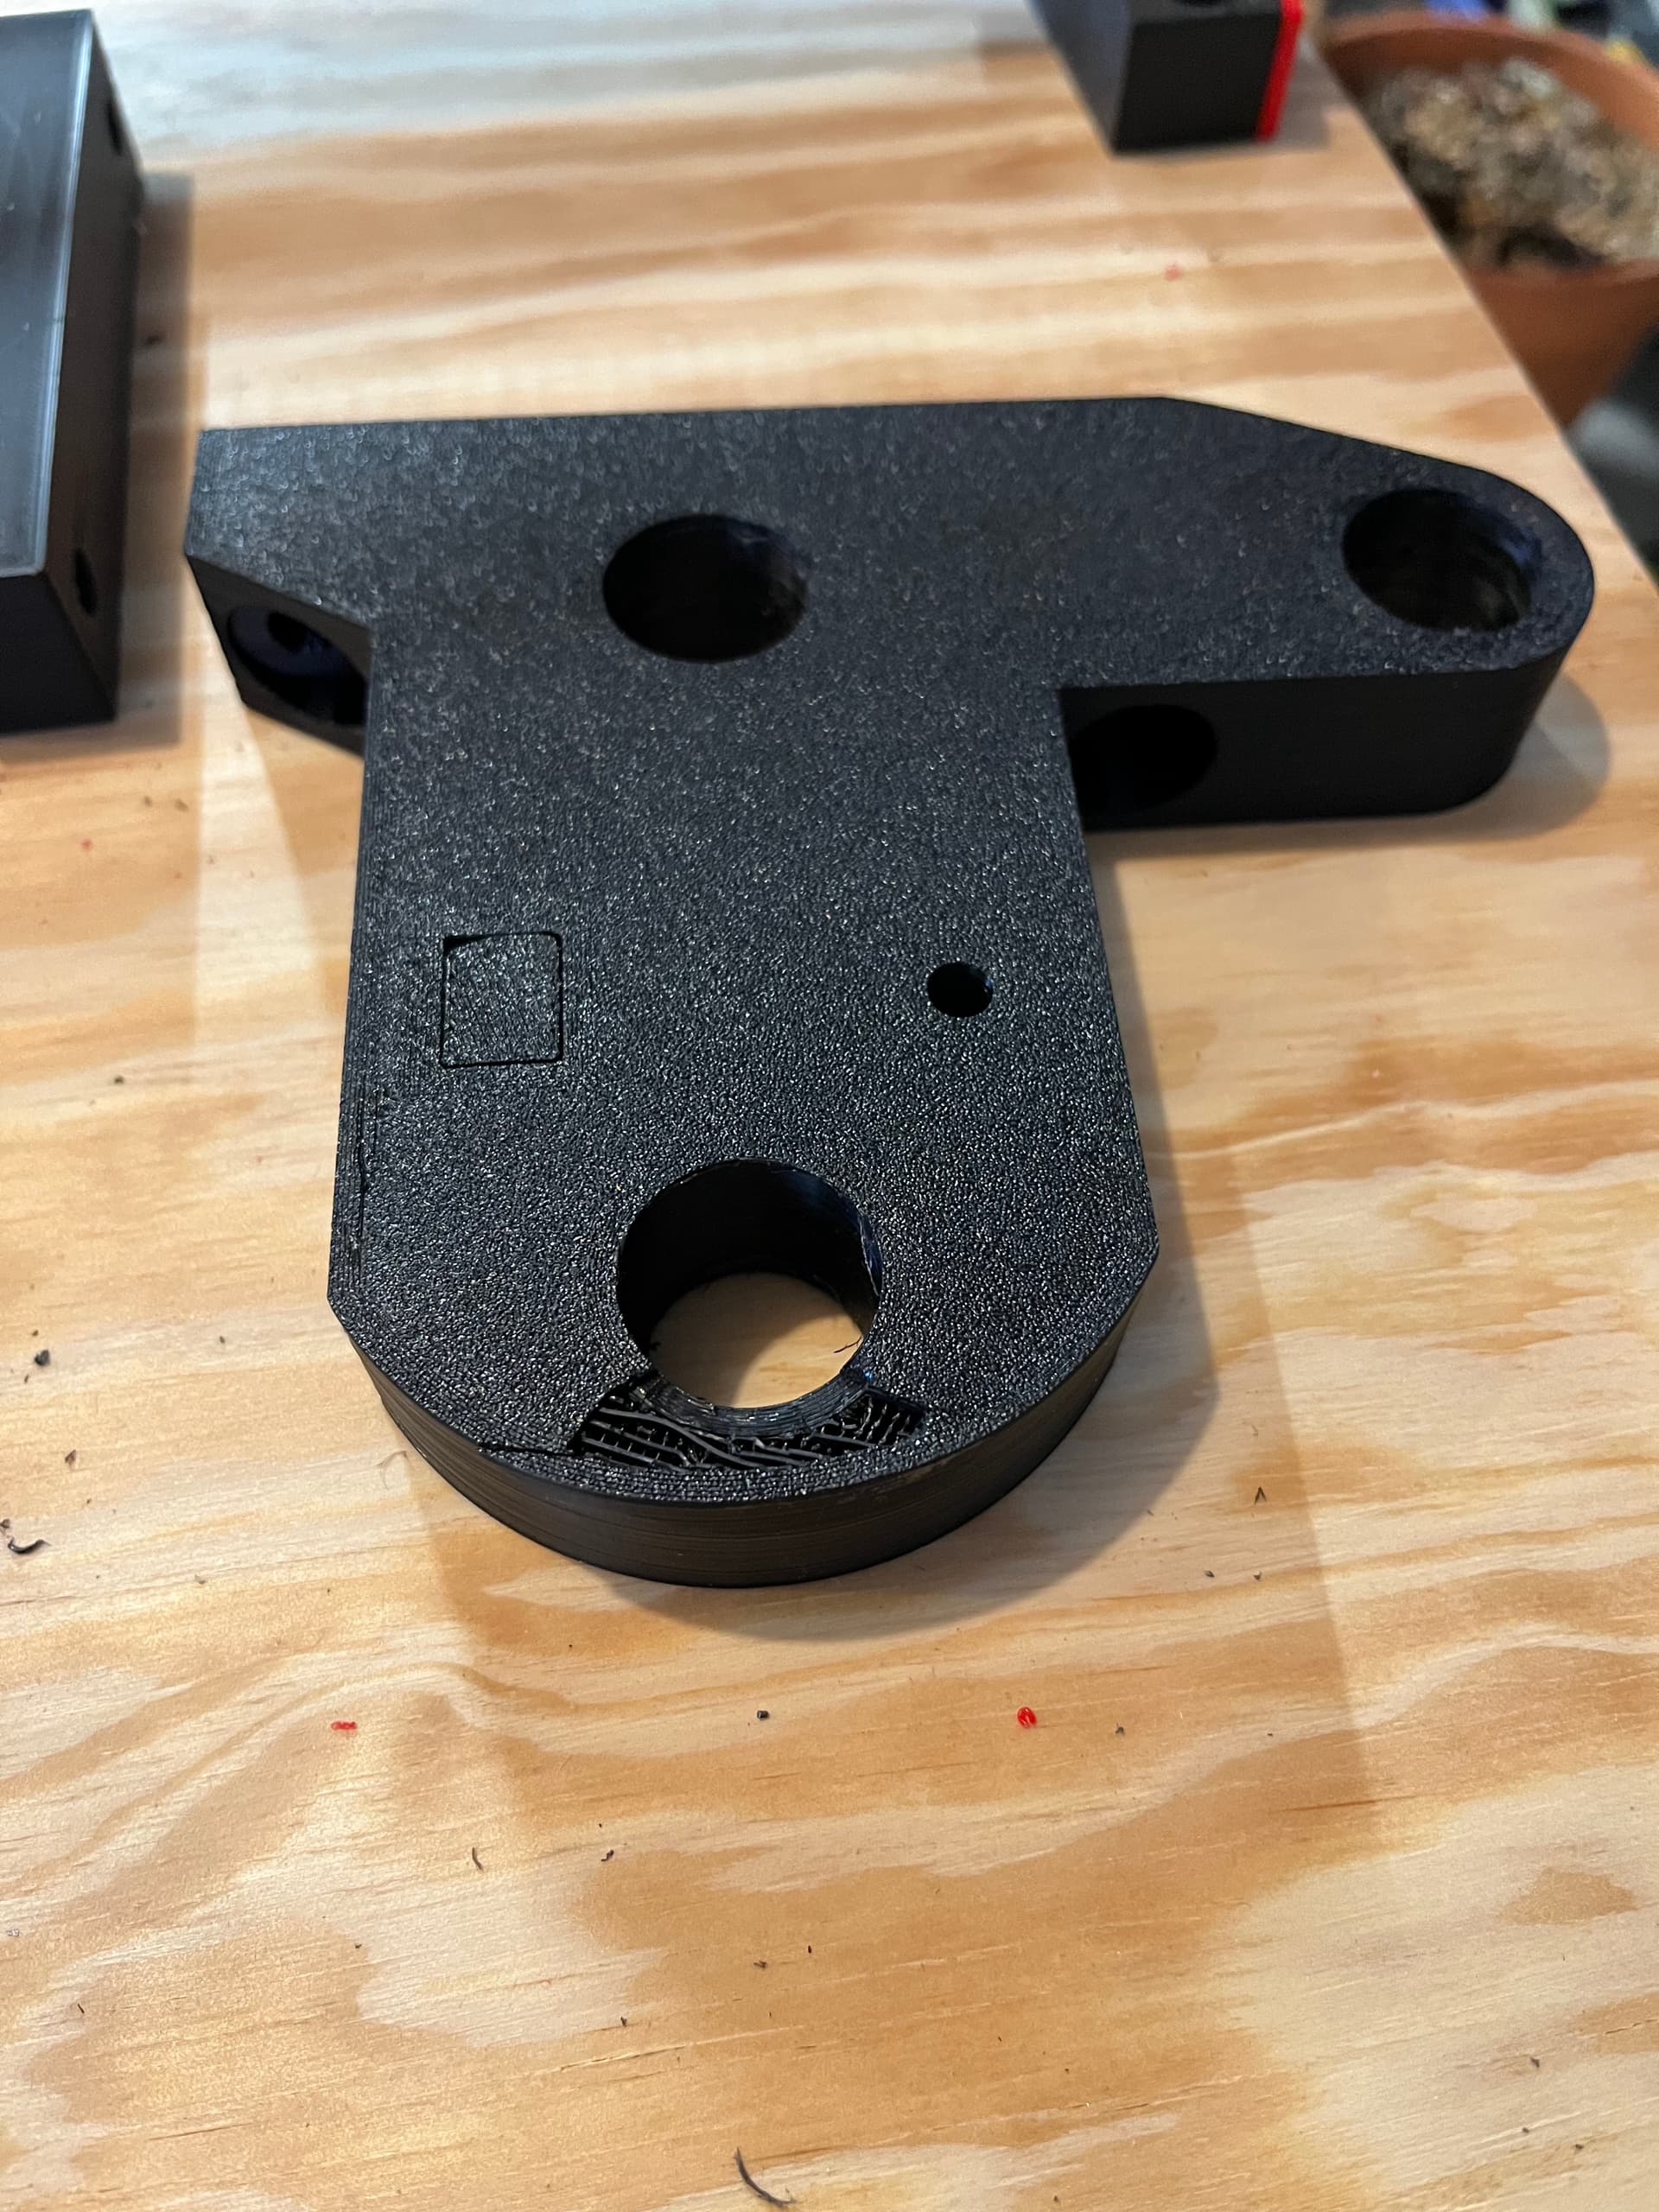
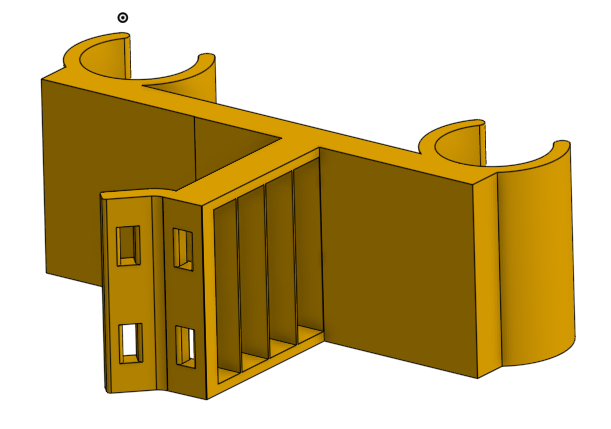
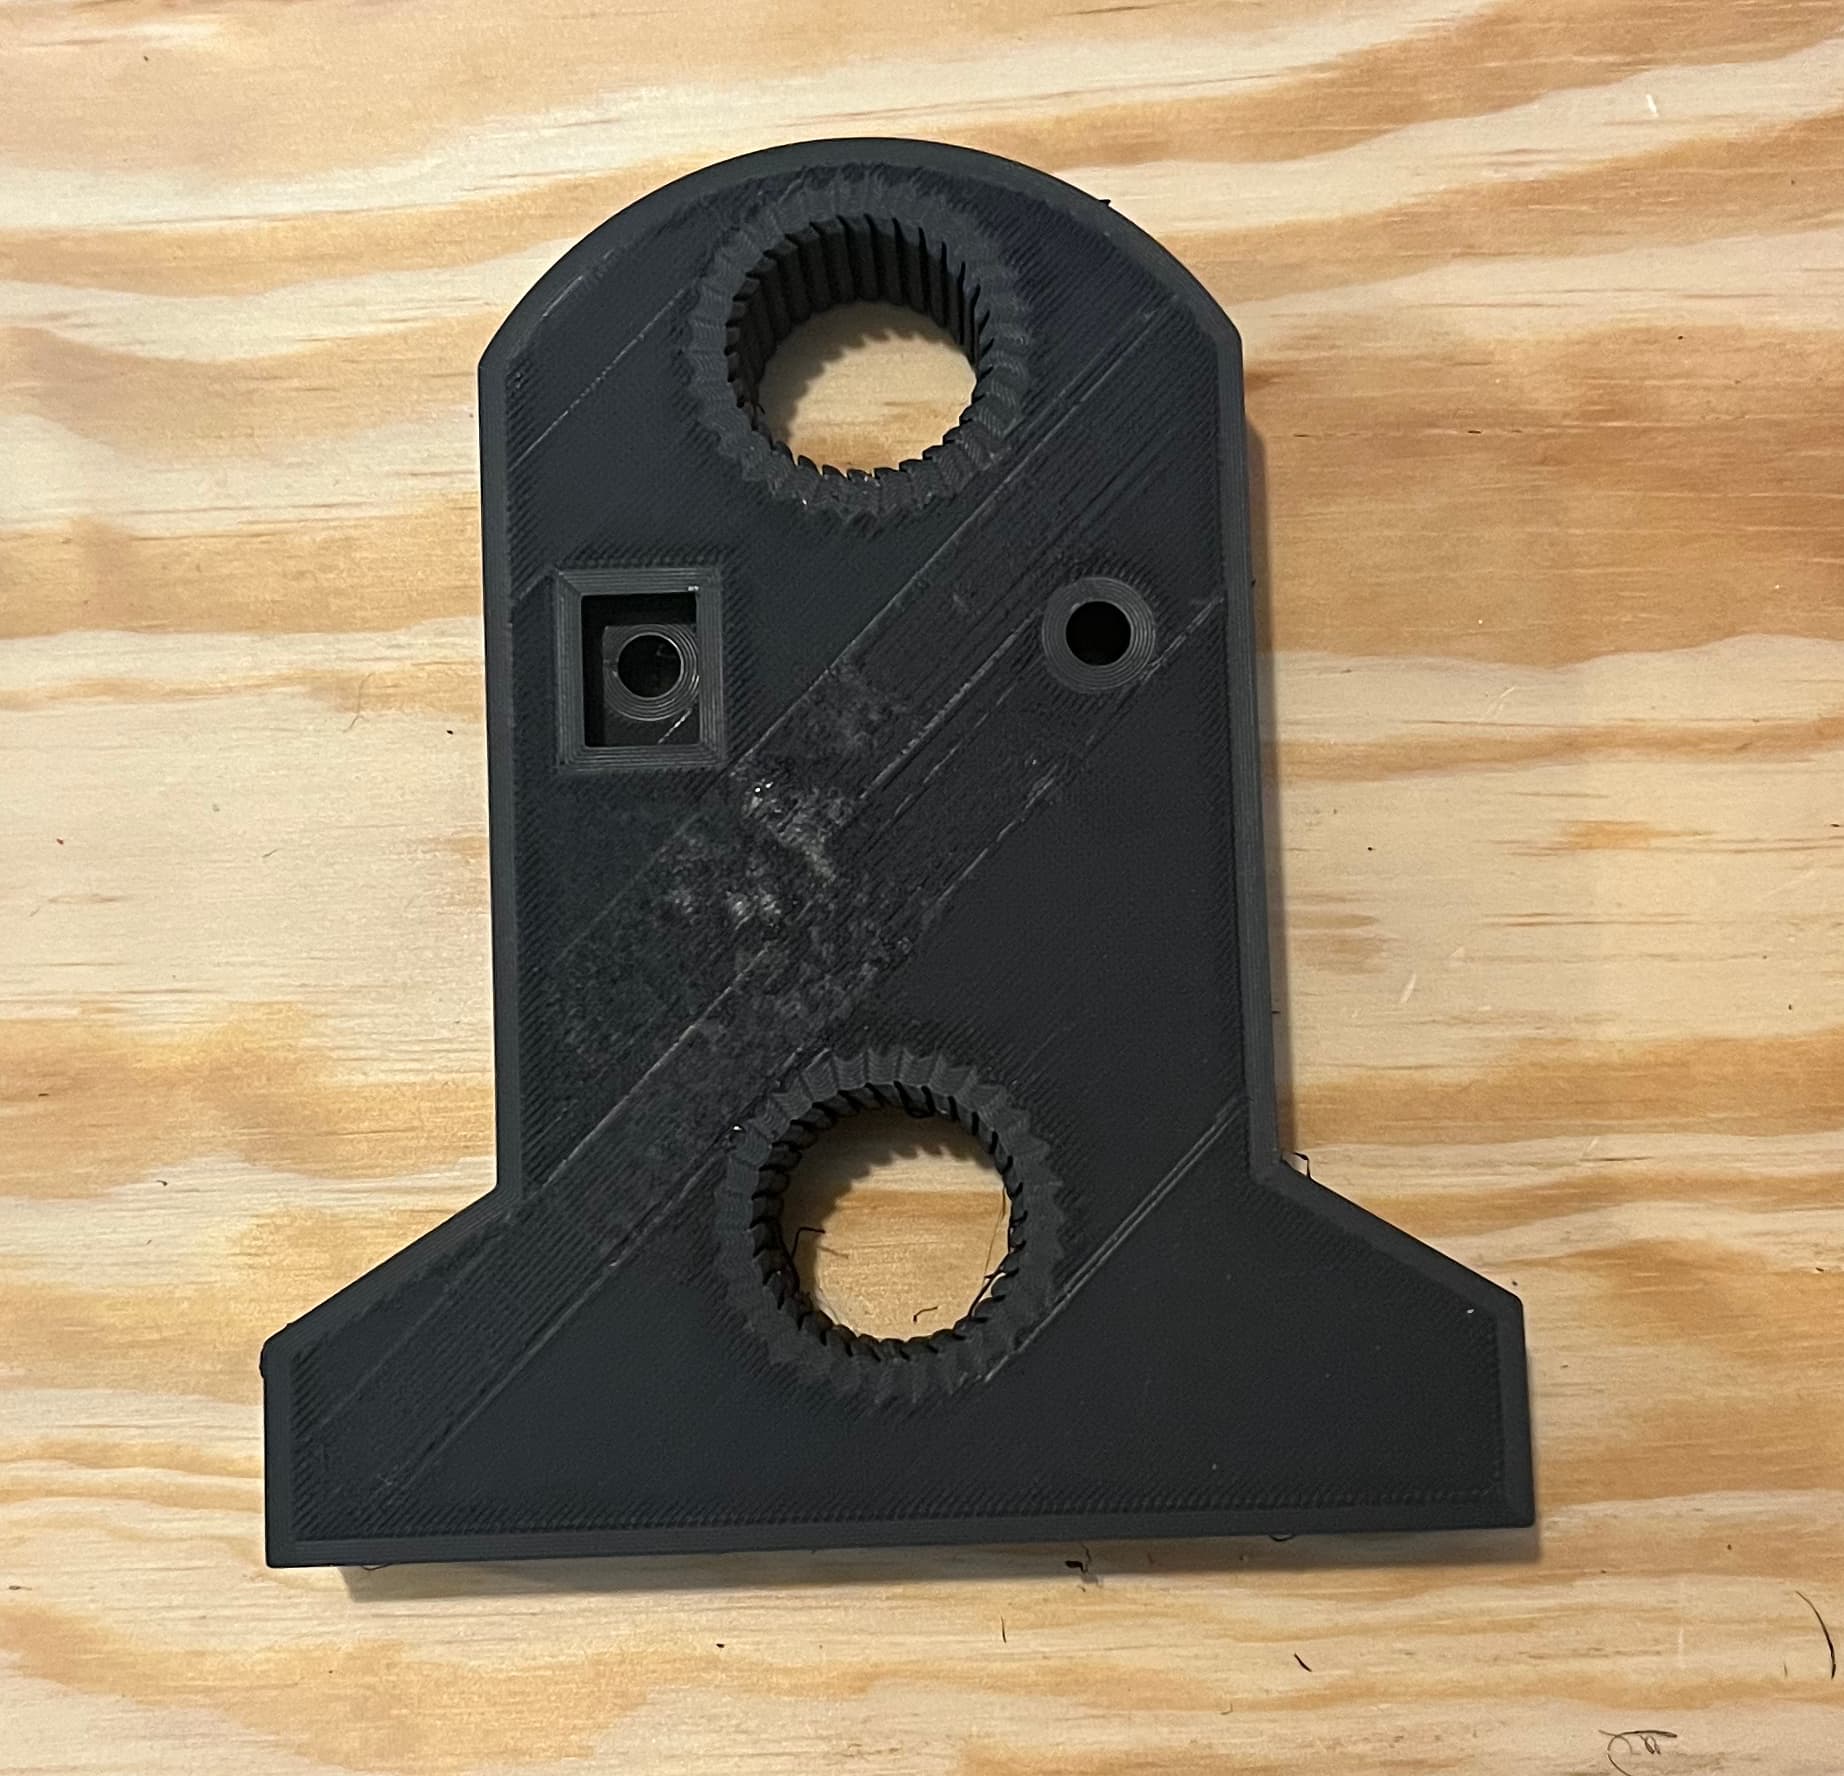
EDIT: Here are the Y end_supports if you need them…
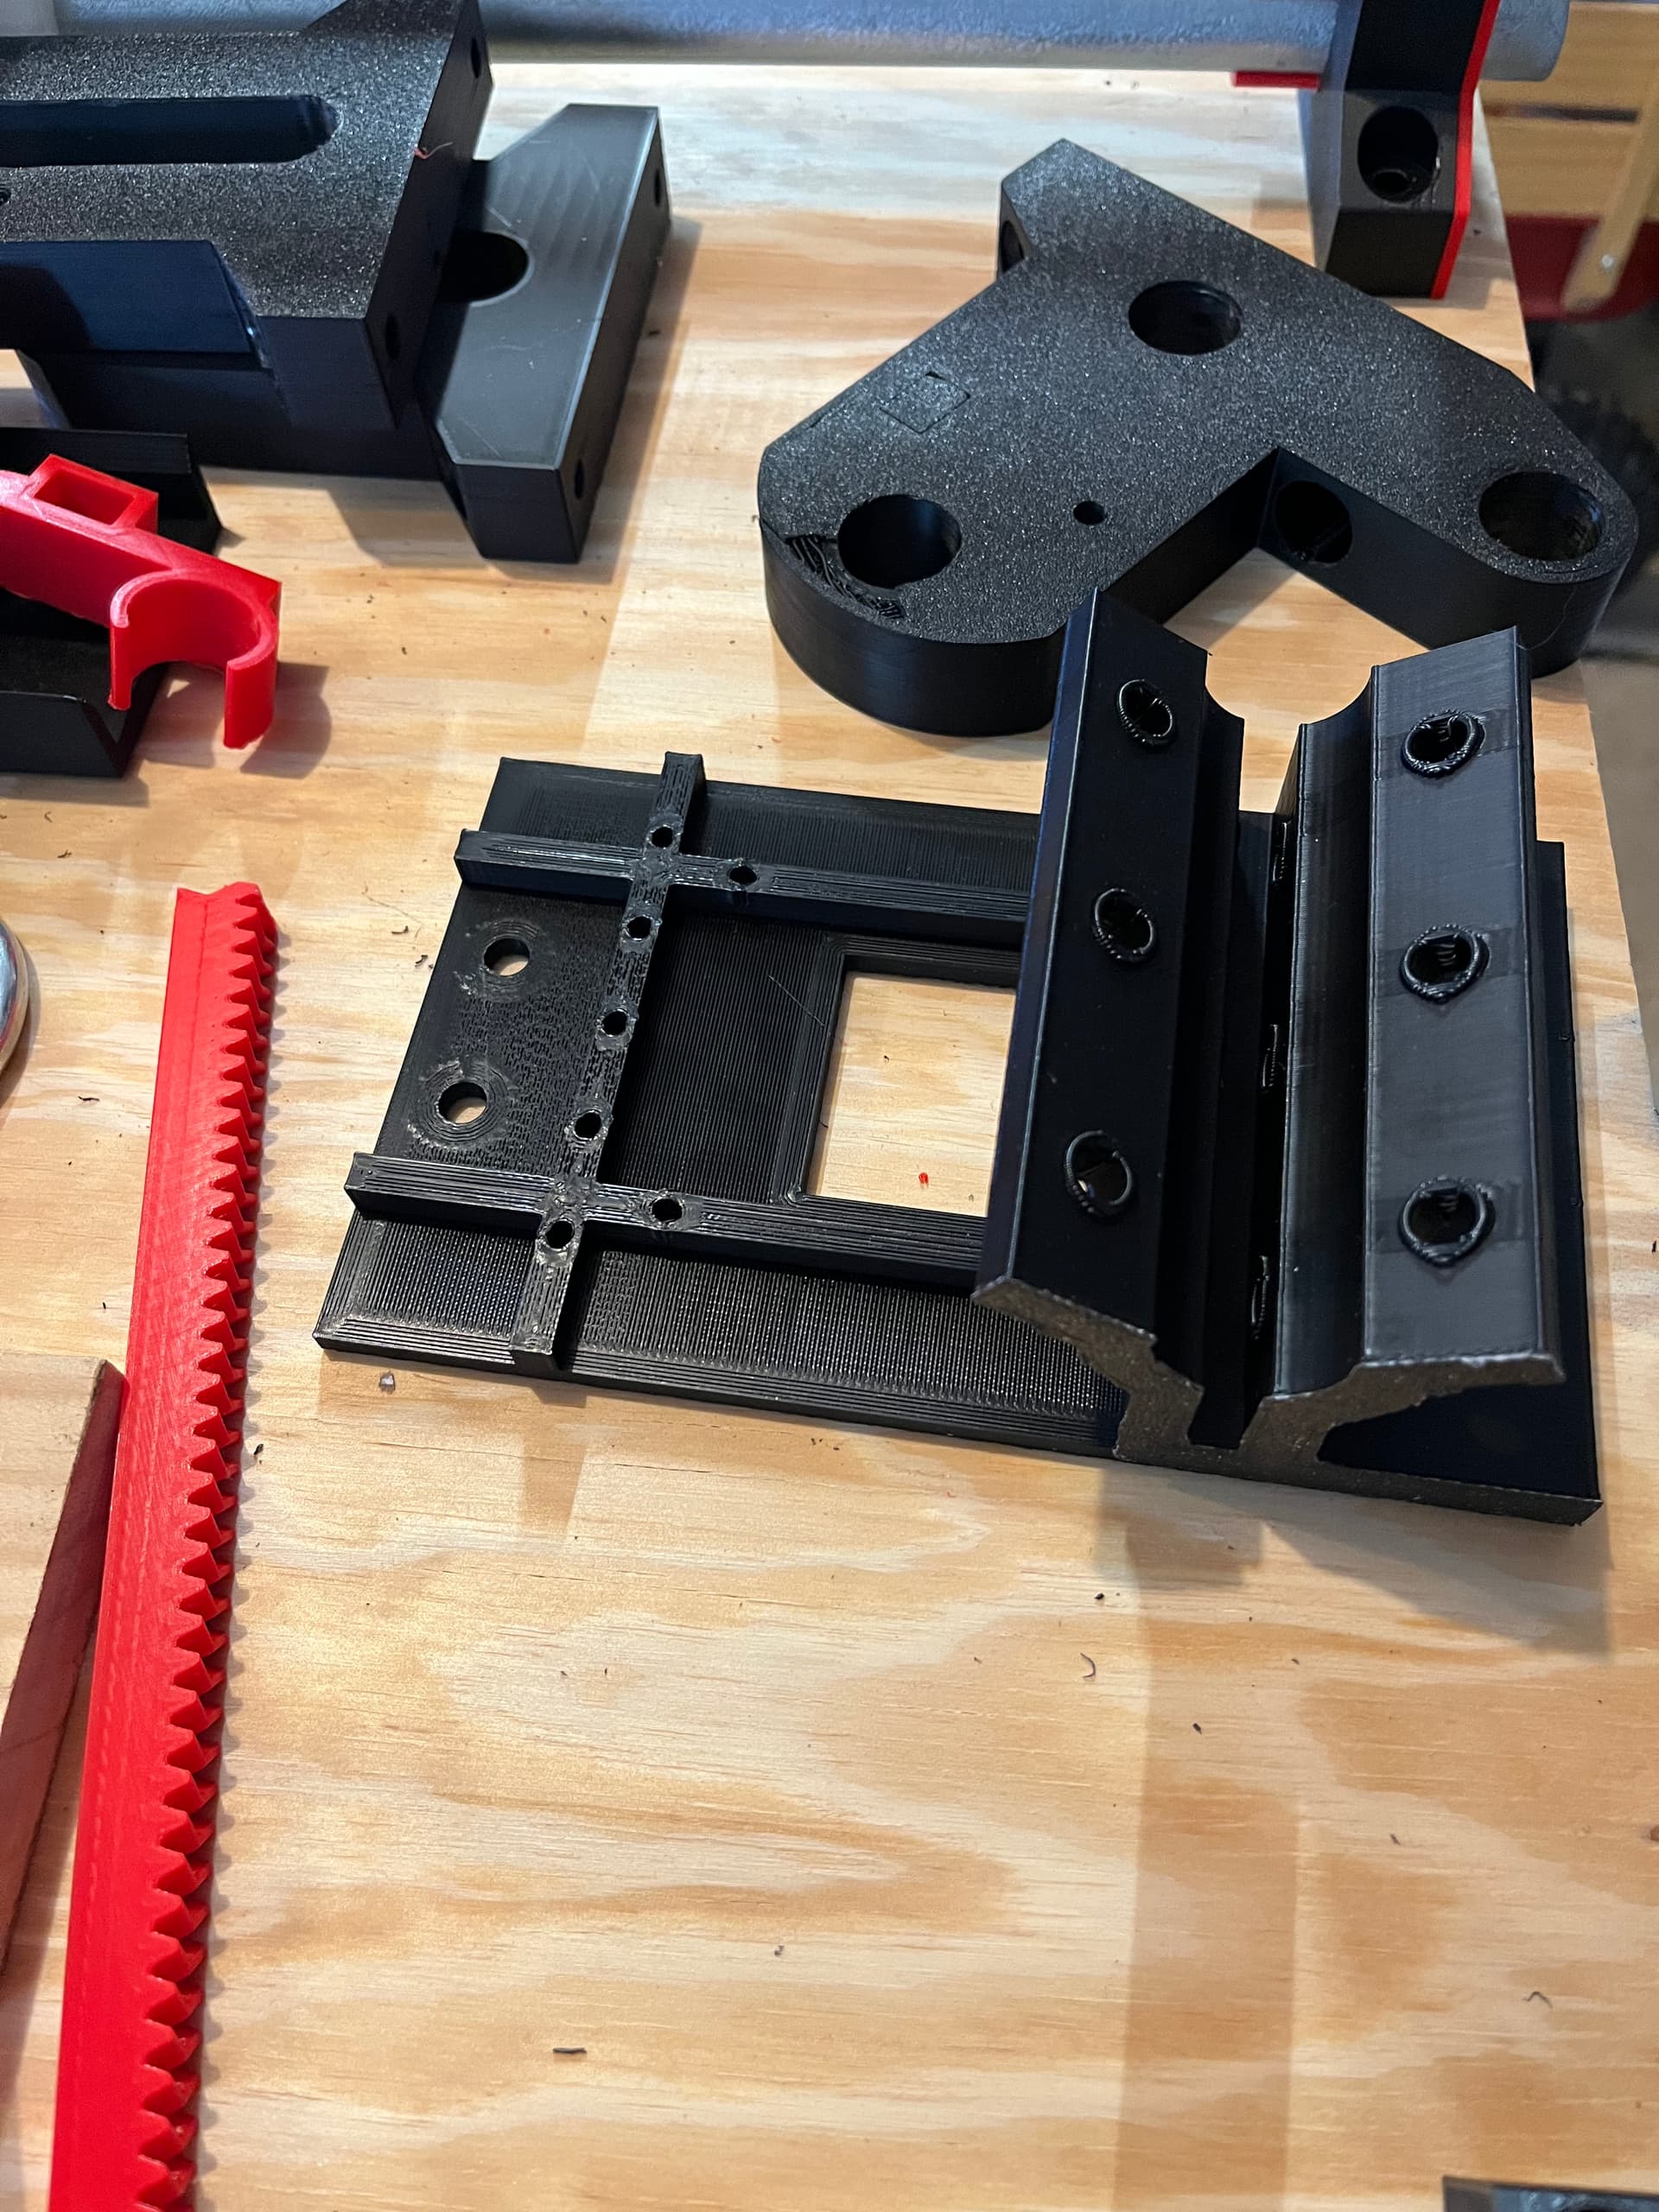
As you can see, my attempt at leaving some holes to install some M3 heat set inserts made for some really bad looking holes, but I bet they work fine (if I elect to use any of them).
There’s also a hint of another issue in that picture.
The tolerances on the new X axis 3-rail sides are just a bit too tight for the results I’m getting with the A5M. I couldn’t fit EMT through, it was just barely too small an opening. I eventually lined a tube up and had some success lightly tapping it through, until it broke the part as shown.
The hole above that I was able to tap a tube through but it’s nearly impossibly snug, and I don’t imagine I’d get three tubes in two ends to fit that way.
I might explore to see if OrcaSlicer has horizontal hole expansion settings. These need about .2 or .3 more clearance in my humble opinion. I could probably tap everything together but I’m going to stop here to fiddle with the slicer. If I can’t figure out how to add some tolerance in the slicer, I may try to do some light sanding of the other part to see if I can salvage it.
The modified back plate fits like a glove, looking forward to seeing how this fits tomorrow when I hopefully have another X axis end to try.
Sorry to hear those holes are impossibly tight. Here’s the gantry and Y end supports with the EMT holes enlarged by another 0.2mm in diameter (23.7mm → 23.9mm). Mine were indeed pretty tight but started and could be lightly driven in once I deburred and lightly beveled the EMT leading edge.
My MPR&P machine is a junk-box build, an unproven work-in-progress, and in no way intended to compete with, replace, or modify any existing V1 design. I’ve presented it as a simple, conventional, 3-axis platform using early MPCNC-inspired, plastic and conduit, skate-bearing style of construction… coupled with R&P drive on all axis. It is, for me, a “laboratory curiosity”… and simply a way to occupy time and satisfy my curiosity. Nothing more.
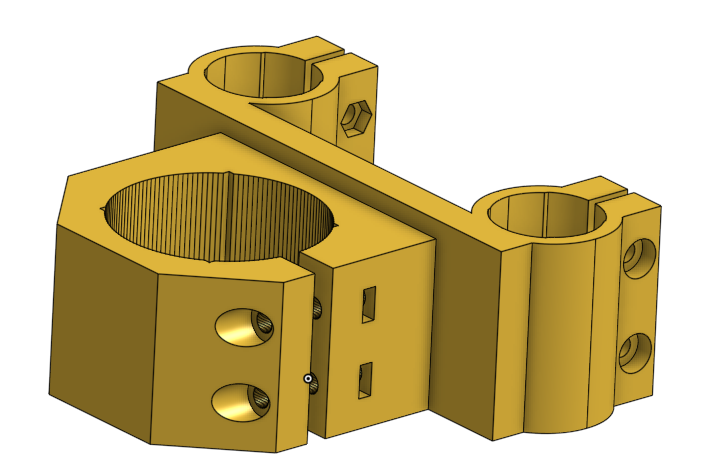
In a quest for more rigidity, I’ve been looking at possible ways to stiffen the Y-rail assemblies. If side plates of some sort were added it seems it should provide multiple benefits… added stiffness, dust/debris protection, and possible mounting points for cable chain, controller enclosures, etc.
I also want to address the conduit/end support connection to make it more immune to 3d printer variances… to avoid the difficulties of sliding multiple conduit rail ends into the supports’ too-hard-to-fit mating holes. I remember seeing somewhere (but can’t recall where right now…) someone “doctoring” the holes with small splines or fingers that reduce the surface area and provide a bit of “spring” or “give” to the conduit end when driven in… ala some of the printed LMxUU(?) linear bearing I’ve played with in the past.
More to come later- but these modified holes are THE way to do this. You can take the extra tolerances out, these things are awesome. The key is the shape masks slight over or under extrusion. Use these everywhere.
I’ve completely redone the MPR&P Printables page to reflect what I’m pretty sure will be close to a finished machine. I’ve not incorporated all the revisions yet on my prototype machine but with Jim’s feedback I’m pretty confident things are near finished form.
There are still things that can, and should, be done to make the machine more rigid, I’m sure… but I’m hoping that anyone brave enough to take on this project will know more about that aspect of the design to share back their thoughts and findings.
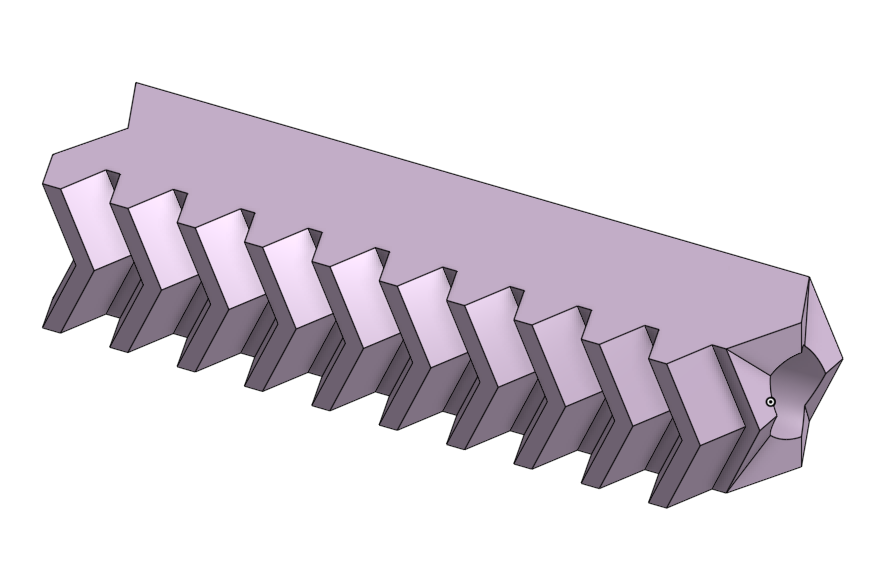
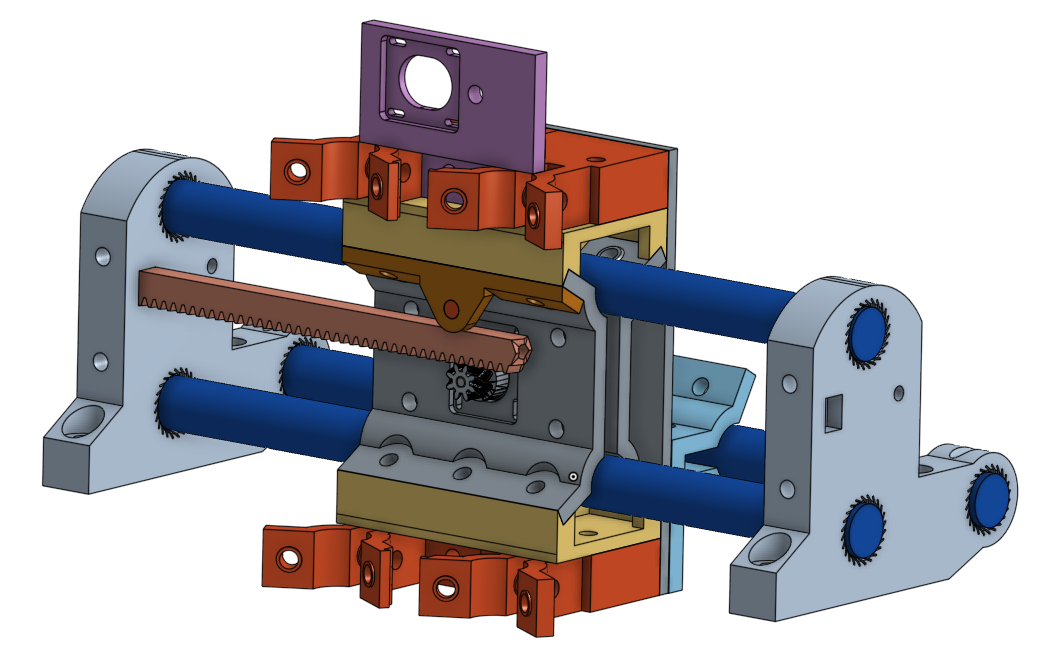
And thanks to a clever @MakerJim suggestion, I’ve provided three rack sections – 10, 20, and 40 teeth – which will allow racks of nearly any length, in ~2" (10 teeth) increments, to be combined and strung together on 1/4" threaded rod. I’ve also provided STL versions of the Z-axis backplate and the Y-axis sideplates but they will probably be better if a DXF is created to adjust for the length of your axis and then laser-cut from thin plywood (~5mm underlayment from Lowe’s seems to work well). Or, simply print the end of the STL’s to get a hole template and then cut and drill the plywood with normal woodshop tools.
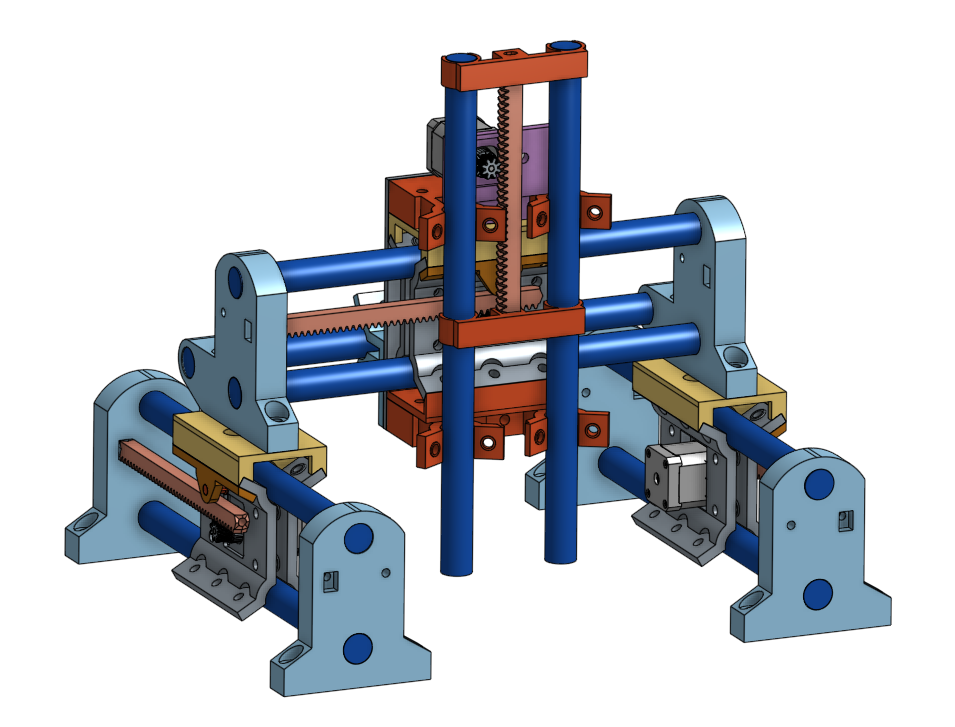
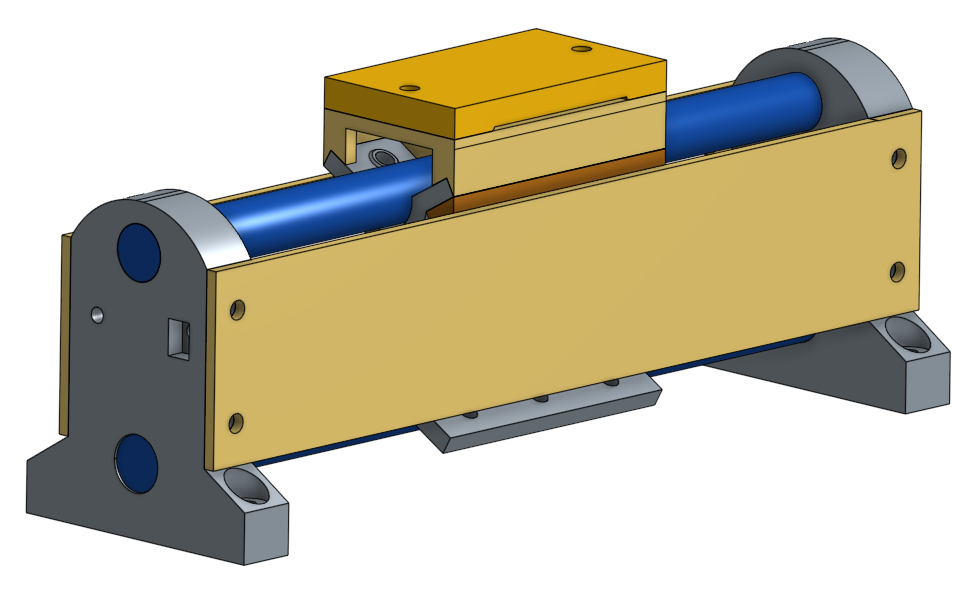
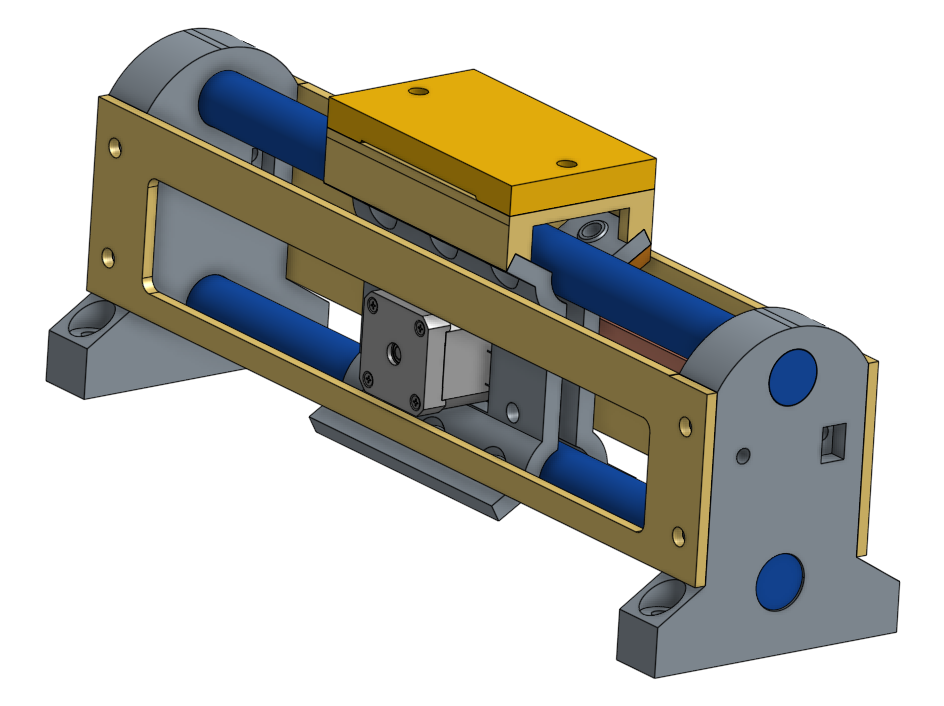
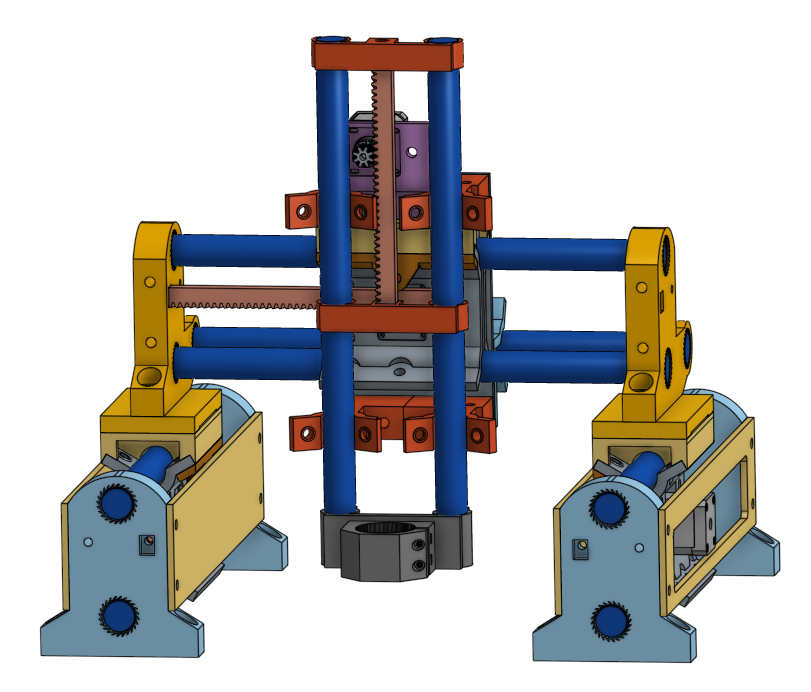
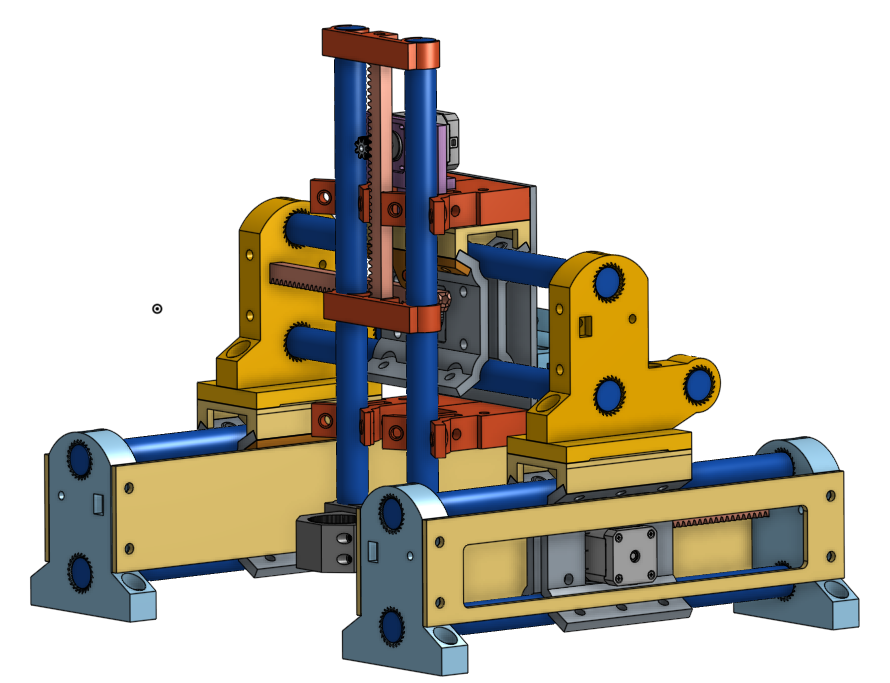
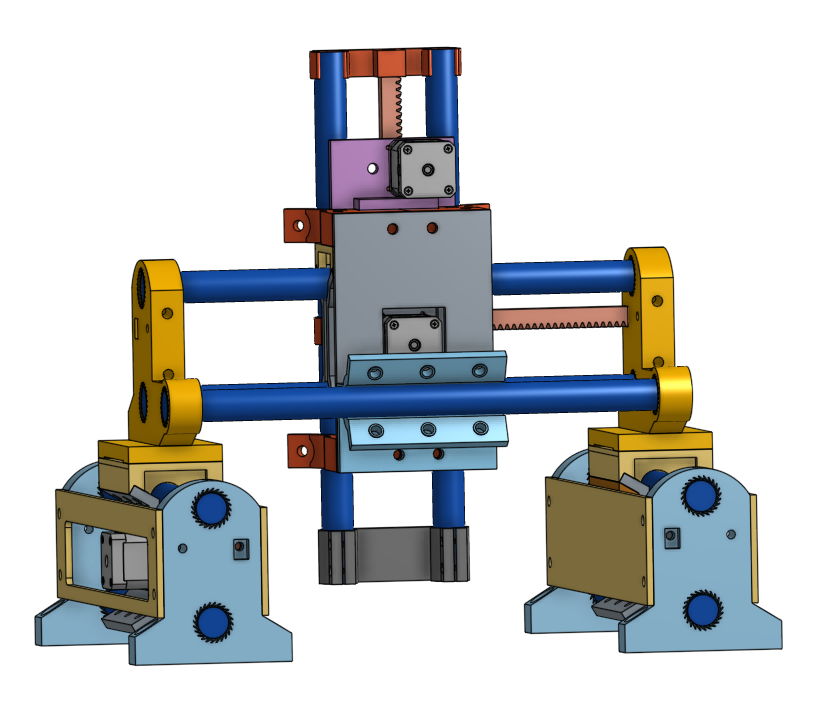
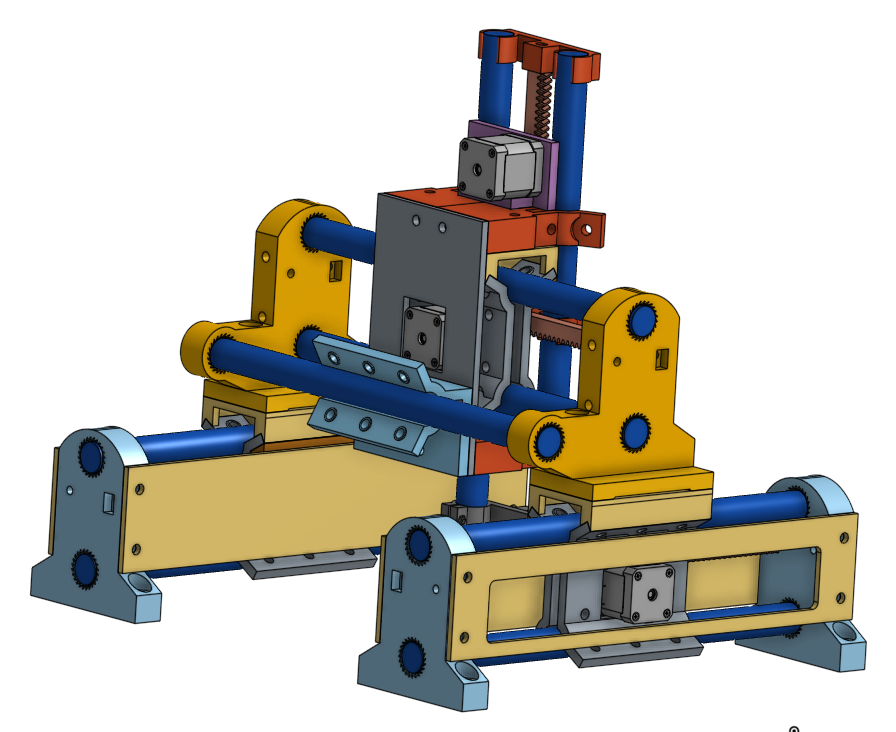
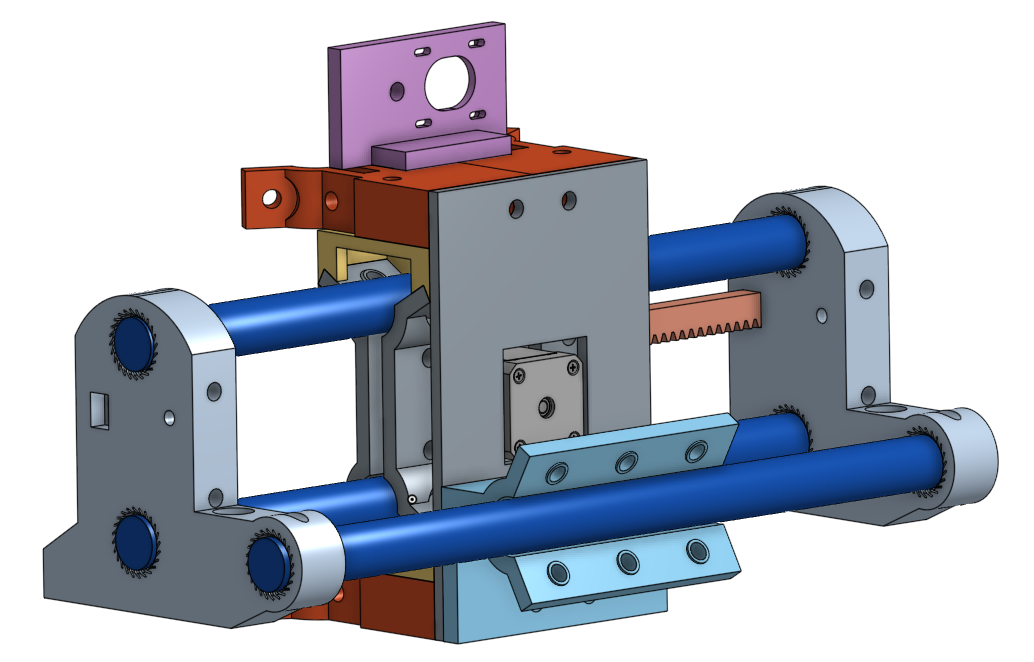
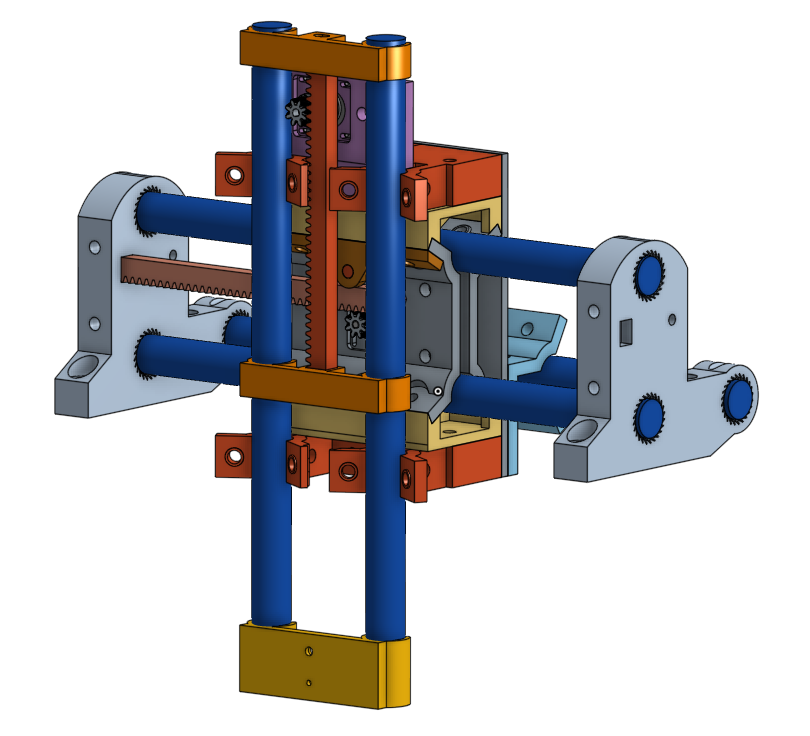
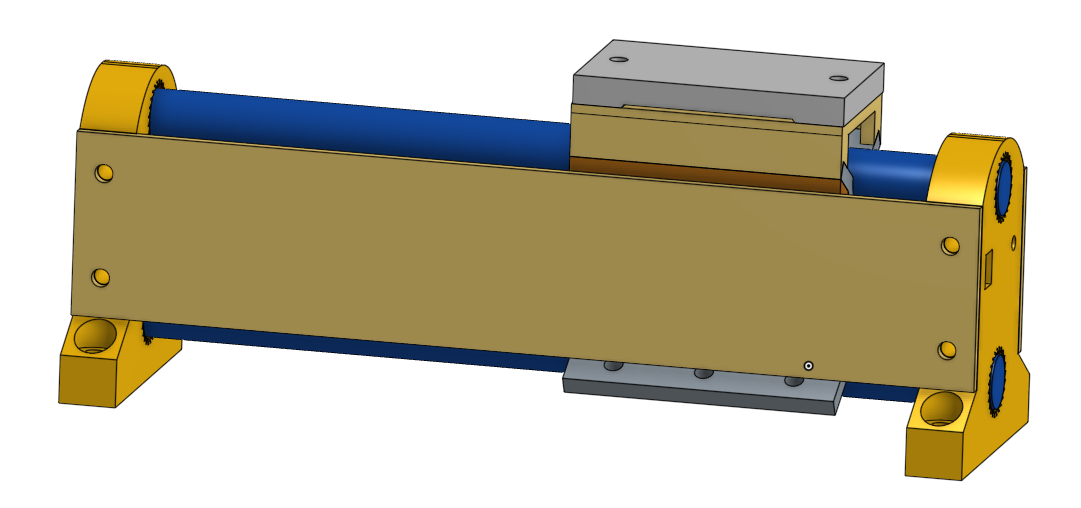
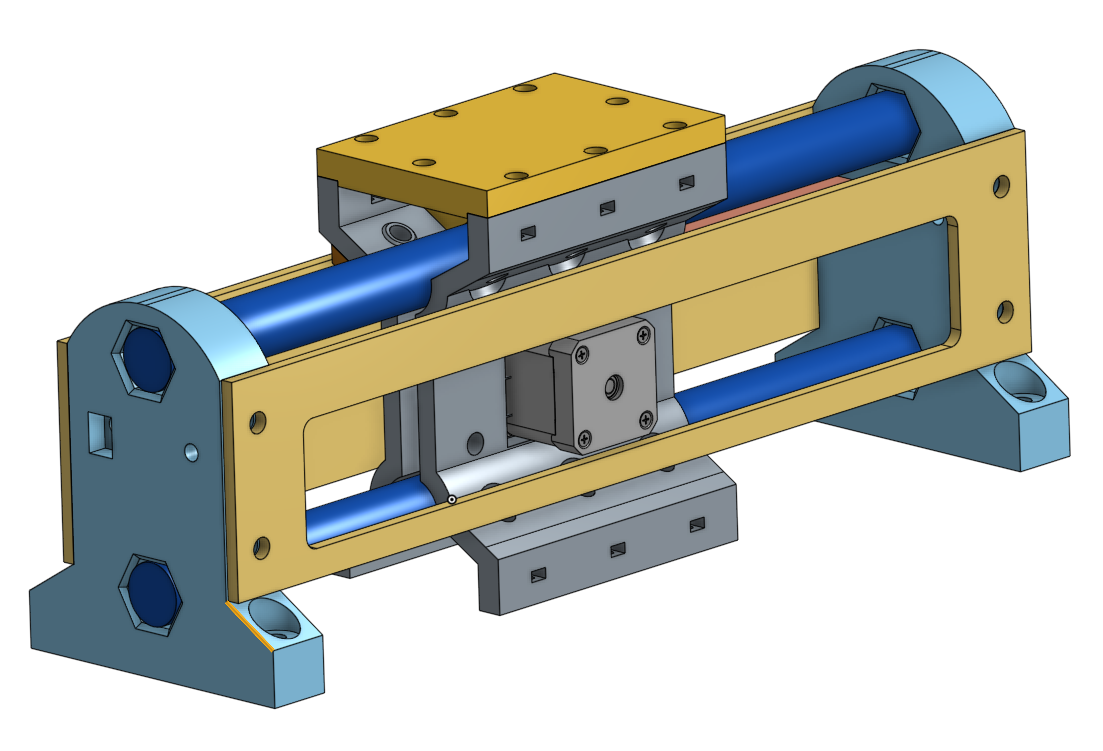
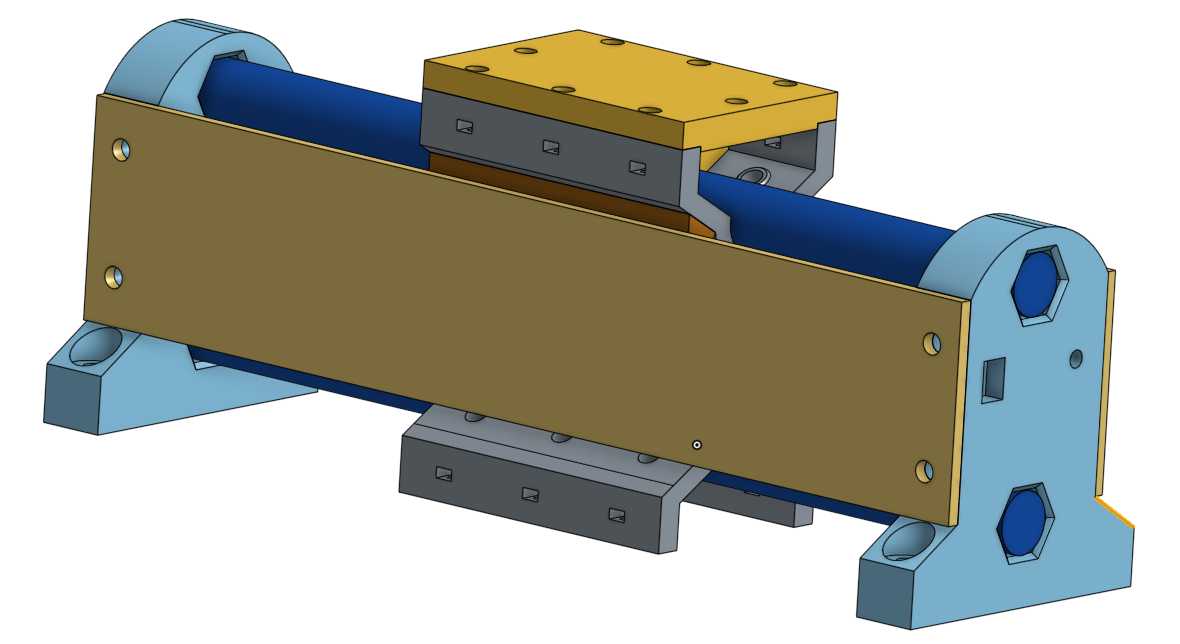
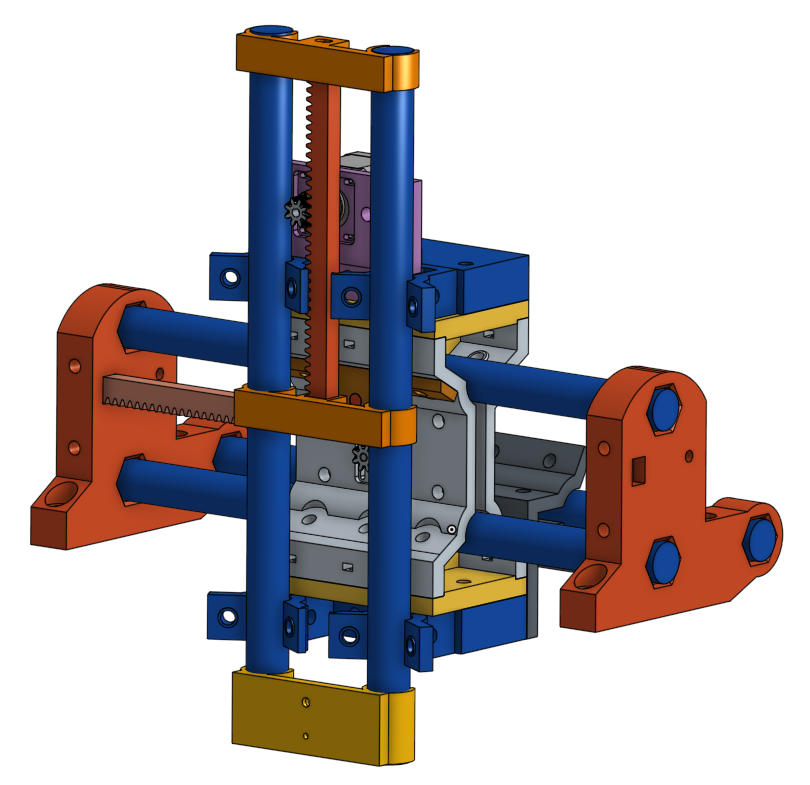
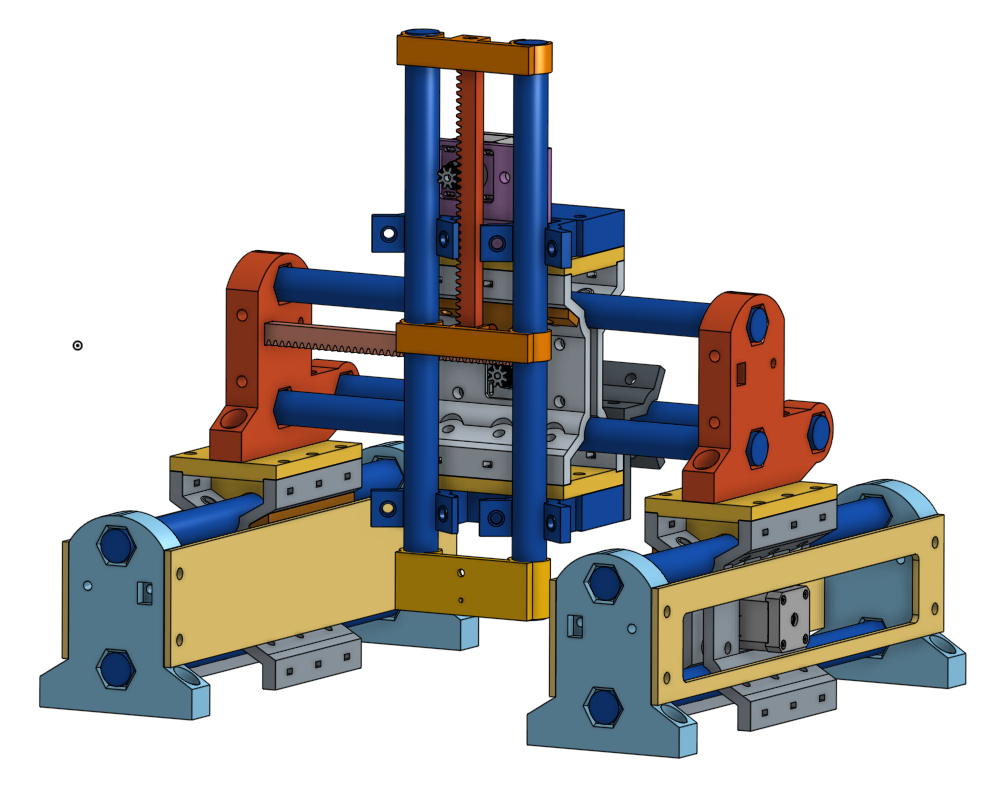
The basic machine should look something like this…
I’m going to post a make there for my build-in-progress.
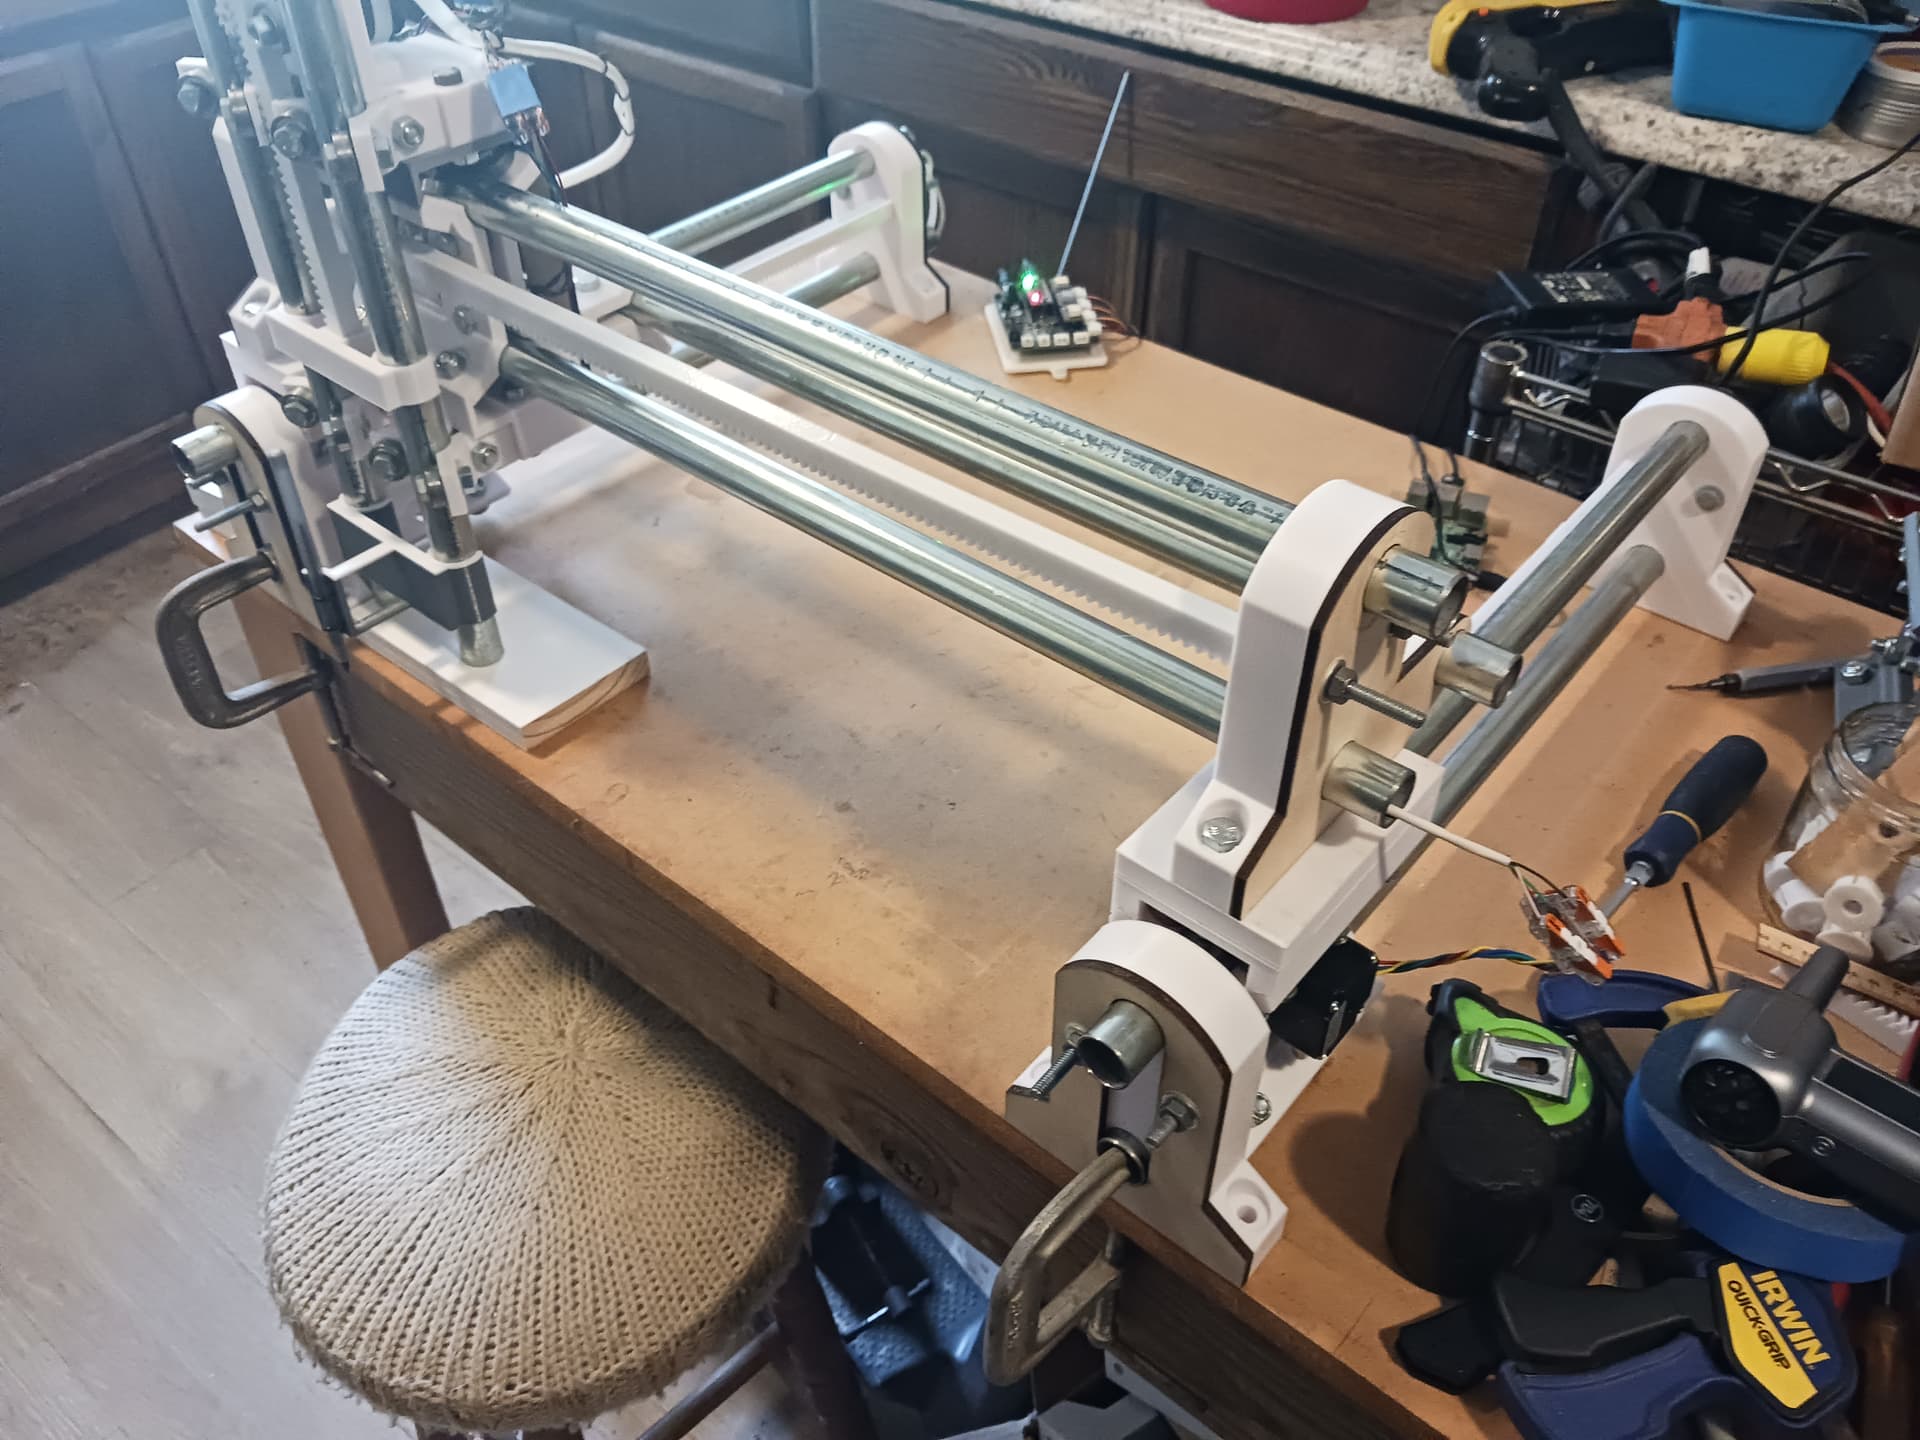
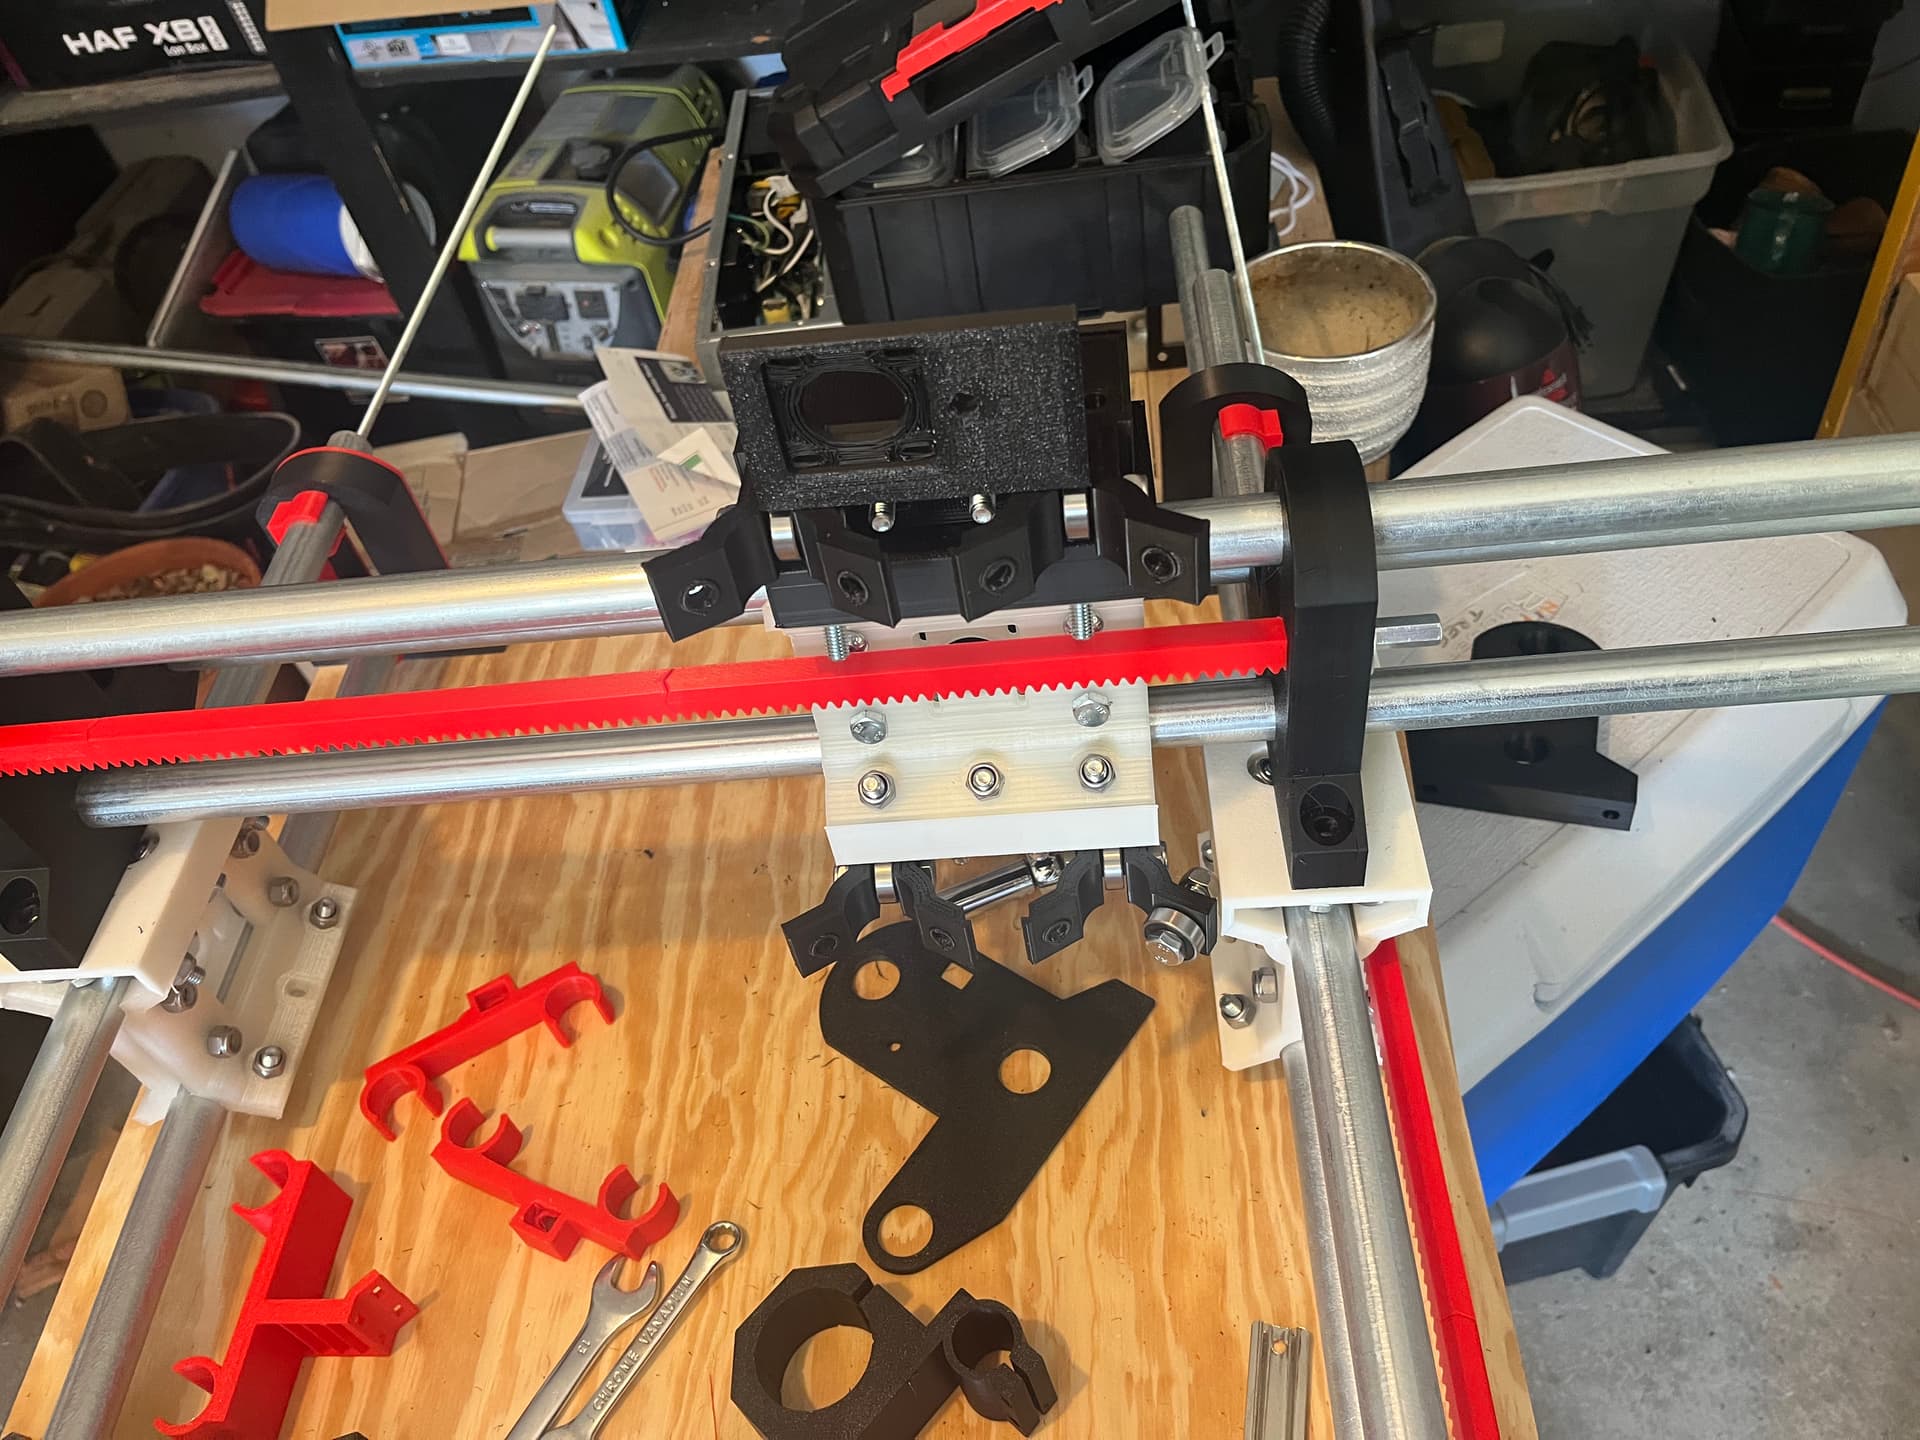
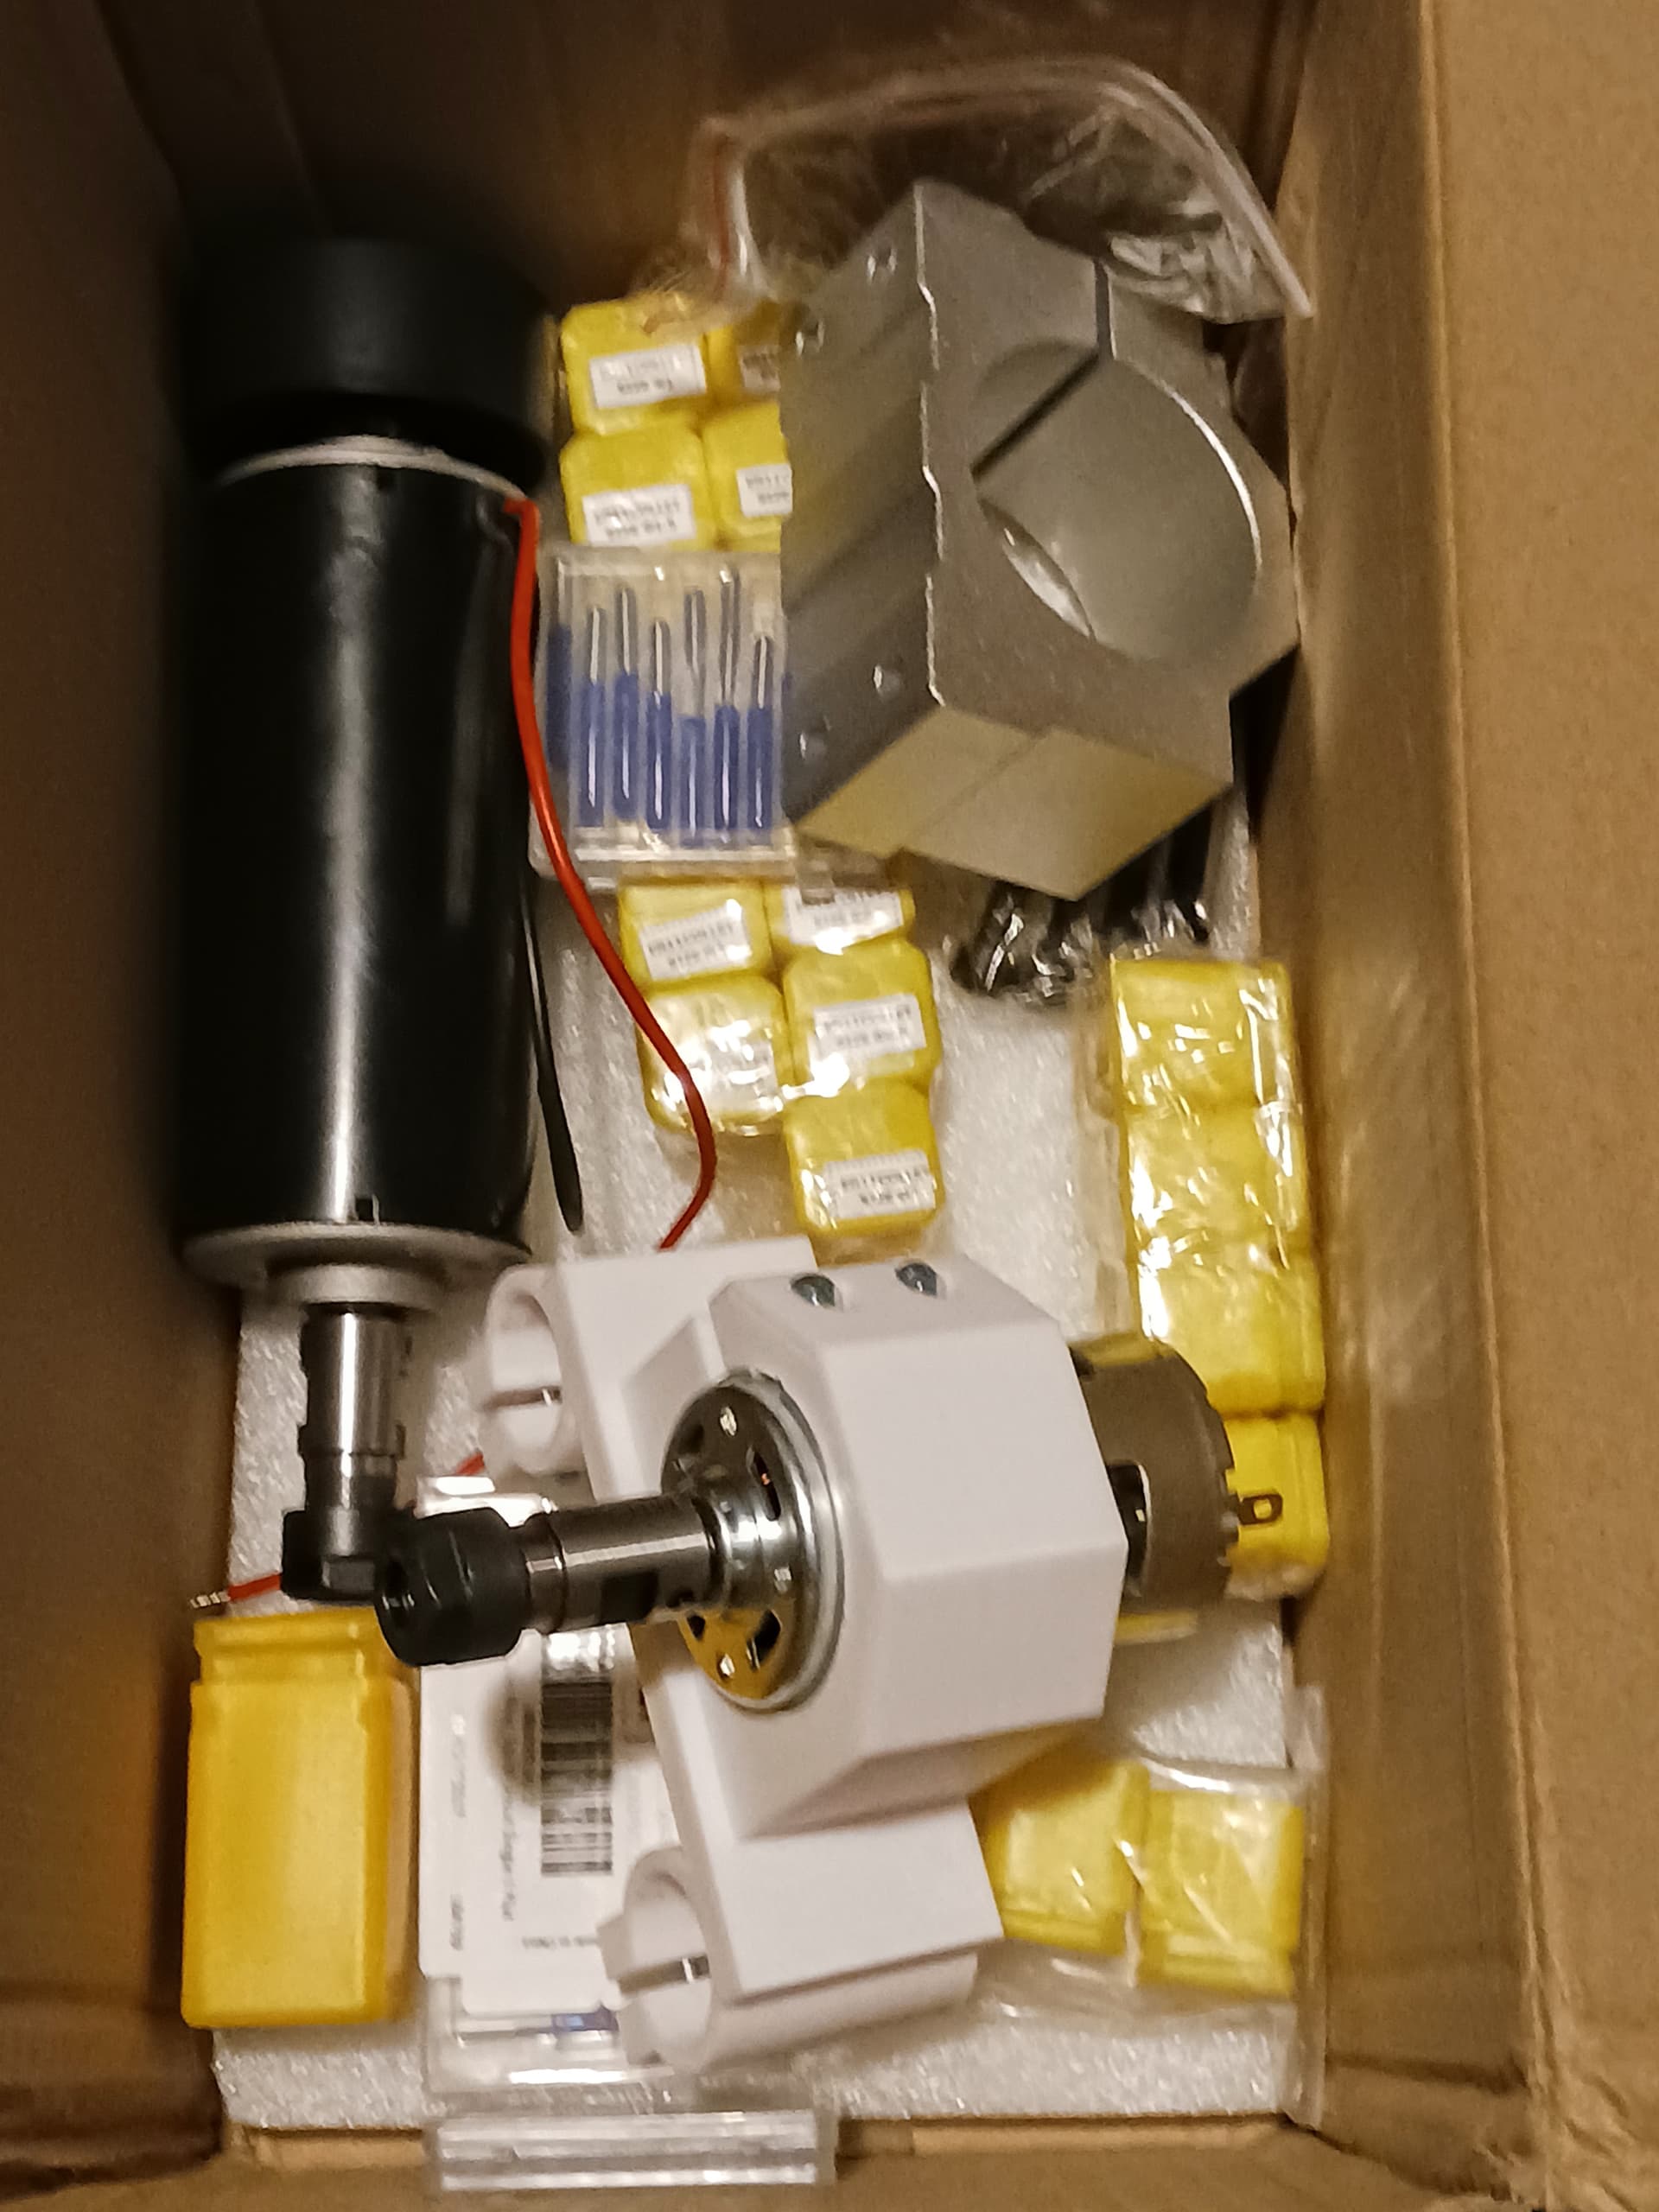
Pardon the clutter. The garage blew up with clutter even worse than usual this past week.
Have the new parts fit but not closed out. I finally found my stash of bearings, so will be working that. It was 88F today, was over 100F in the garage when I got home.
Switched to the next old roll of filament I’m running through the A5M, and it promptly started misbehaving. I could tune it and will work on it, but just burning filament through at this point.
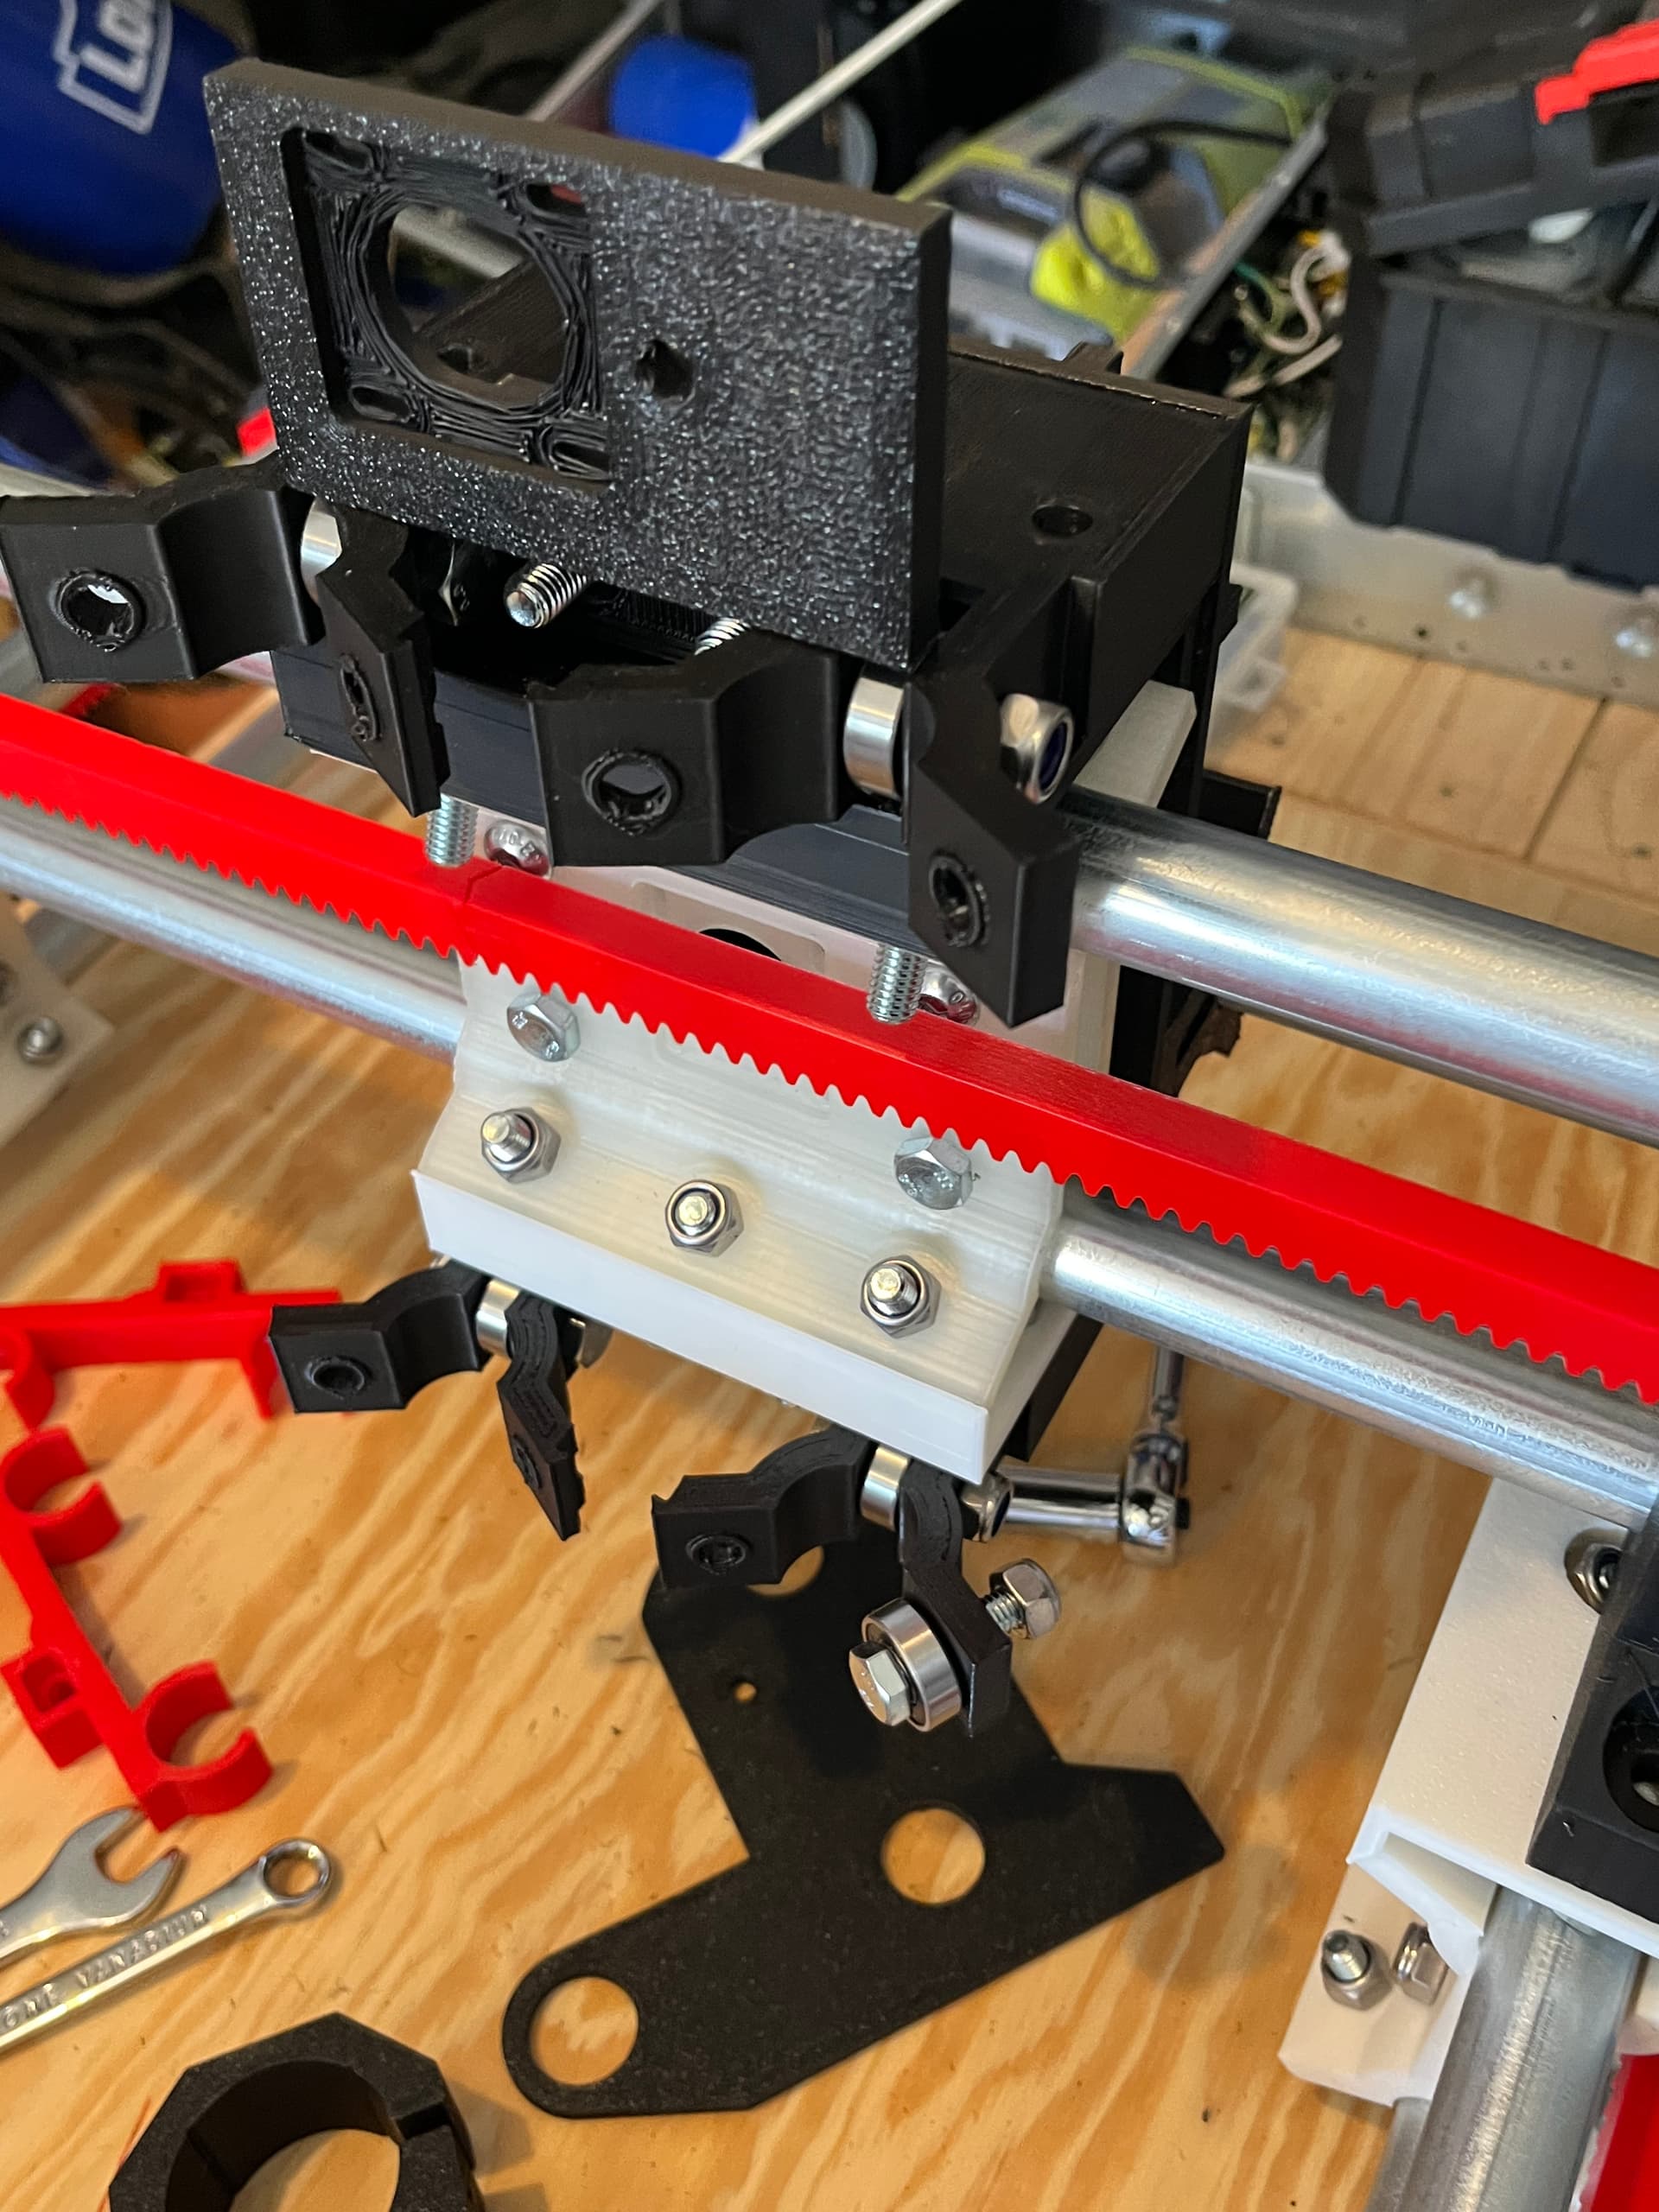
The new bearing-derived hole design is AWESOME in my opinion. (ignore the surface finish. Darned spool of lemon filament. )
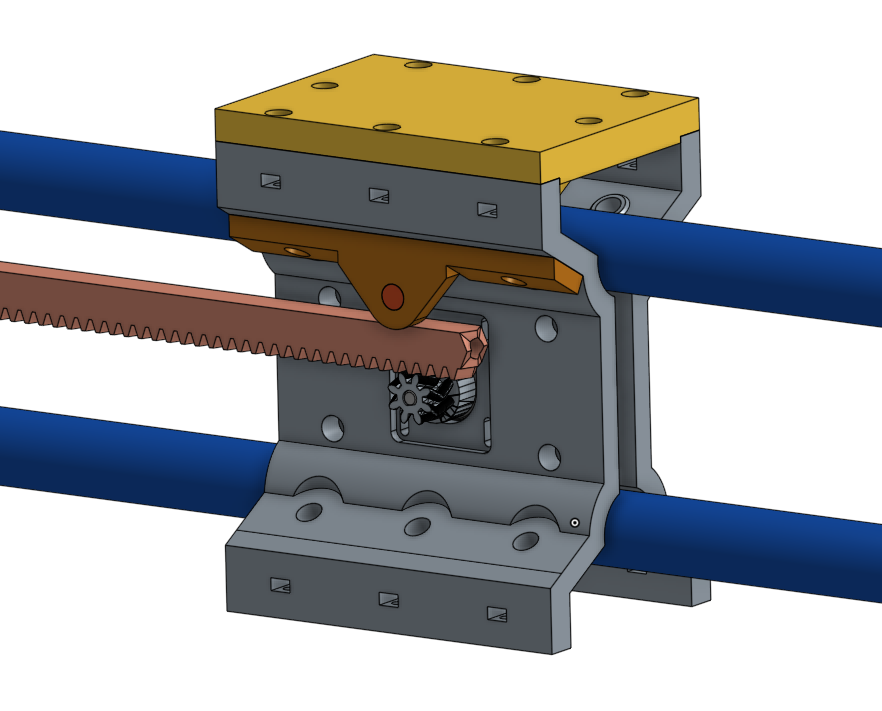
As I’ve continued to look at and play with and adjust things on MPR&P and clean up the CAD files… I’ve determined one on the weakest (least rigid) parts of the current design is the Y-carriages to gantry end supports interface. As I’ve “laid hands” on it, and while rocking the Z-rails, I can feel slight movement in the attachment seams between parts, primarily the old “gantry supports” and carriage halves.
So, in Onshape, I’ve extended vertically and squared off the “angled ears” of each carriage half to accommodate a stronger and better supported connecting plate to interface with the gantry end supports…
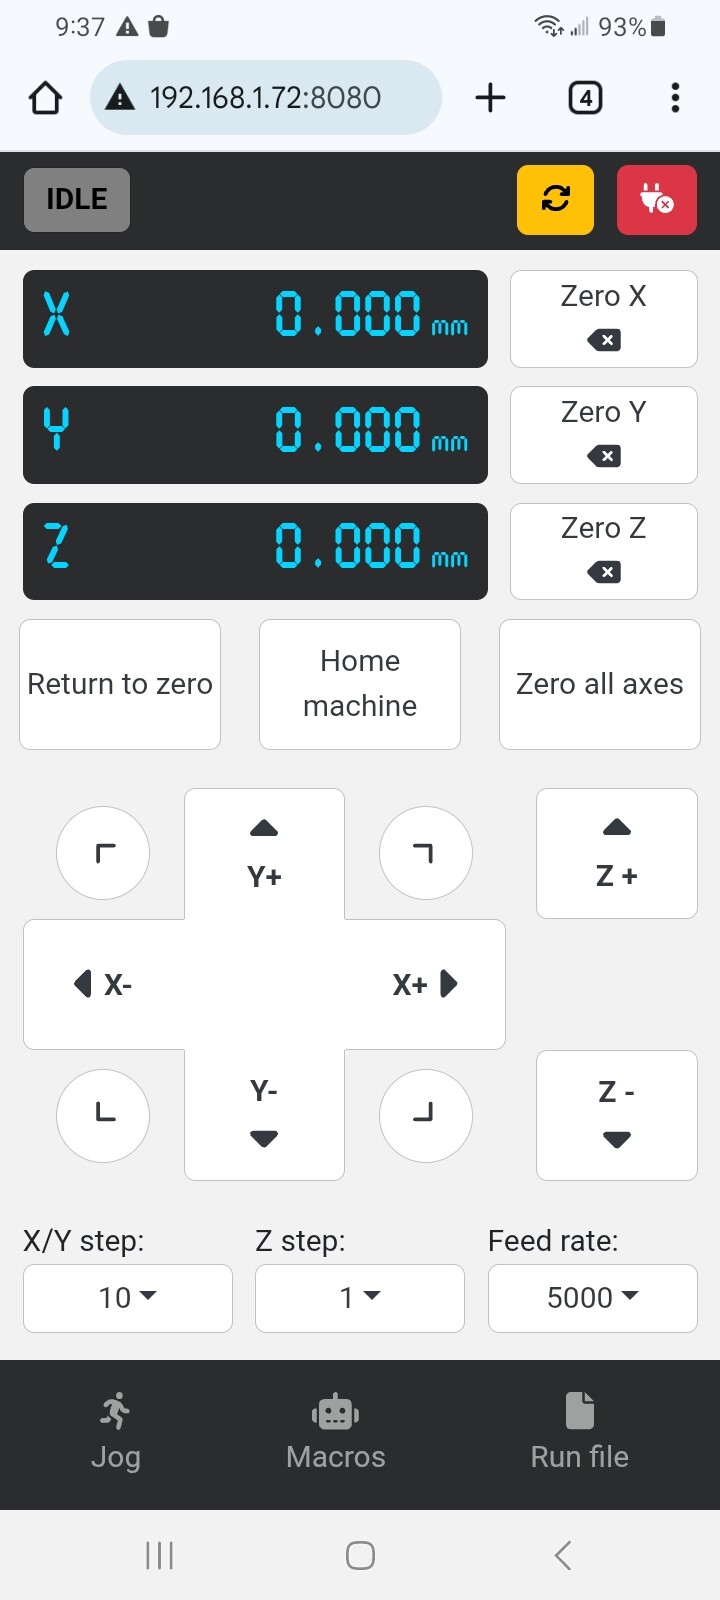
Another fun thing I’ve found is that Universal Gcode Sender (UGS) has really come a long way since I last took a look. It’s now called UGS Platform and can be installed and run on RaspberryPi 4 and above… as well as Mac, Linux, and other OSes. Using VNC, I can create and transfer gcode files to RPi4/UGS across wifi… and then use UGS’s nifty pendant functionality (that uses my Android phone!) to locally control and run jobs on MPR&P without hauling my laptop into the same room.
I’ve never thought a pendant was really necessary but after watching a few of Doug’s fabulous YT videos, where he uses a pendant to control his LR4, I can see how handy that really is. I can only hope that someday I’ll grow up to have some of the CNC skills he demonstrates in his videos.
Hopefully, as I continue to make MPR&P a little more rigid and robust, I’ll eventually be able to do a few simple CNC jobs to validate the design. To that end, I have started gathering a few parts to play with but being “accessories” I won’t count them as essential parts of MPR&P… and count it against its “junkbox build” status.
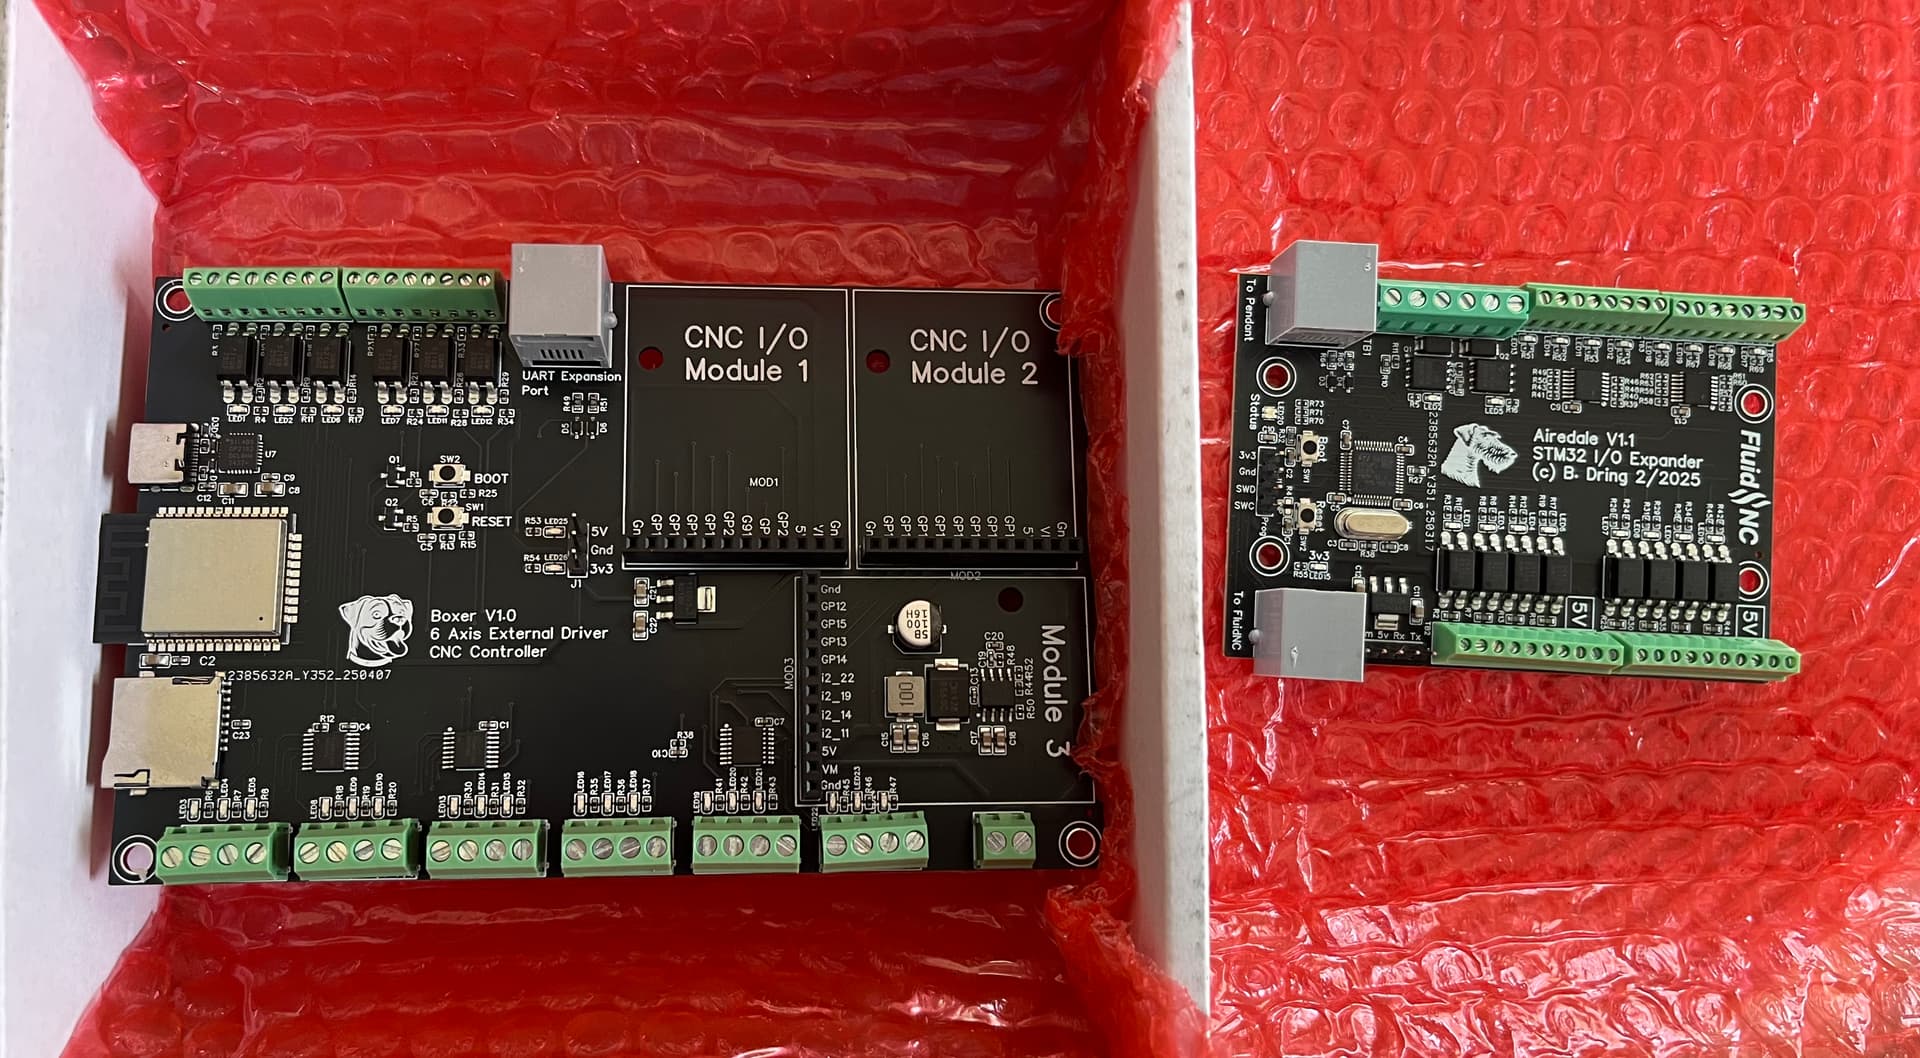
I’ll be resuming work on my machine as well staring in a day or two. Hope to get a controller on and a crude attempt at being able to easily swap between different controller boards. Will be playing with Jackpot and Boxer, maybe SKR Pro (Marlin and Klipper) if I have some free cycles.