Long story short… I bought this years ago, an MPCNC Burly, had to set it aside and just put it together. I just bought a Jackpot 2 (not knowing that there was now a 3) and put it together.
My problem is I am not very knowledgeable when it comes to this type of installation. I know that the Jackpot comes configured for the LowRider. I know that I need to load the appropriate config.yaml file. I can log in to the Fluid NC and the little page that loads up automatically. But, even when opening 192.168.0.1 I cannot get to the part of the interface that shows “Manage Local Files” and the Green folder, no matter which device I try. Is there another way to load it, like on a SD card?
Can you show us a screenshot of what does come up?
It should look like this, https://docs.v1e.com/img/jackpot/LUI.jpg
You can load files directly through the webinstaller but either way you will need to be able to see that screen so we might as well figure out what is going on.
What devices are you using to view the jackpot controls, please be specific, device type and browser used.
I believe mine is the same… I have been trying to use my Macbook Air with Chrome.
All I have found shows that you need to have a screen that shows folders that you can add the new config.yaml from.
I tried to use it as is with the two steppers plugged into a little board that runs 2 steppers from one socket for one axis but it is very weak…will jog around but stalls when you just touch it with a hand, that is on a 12V 5A power supply.
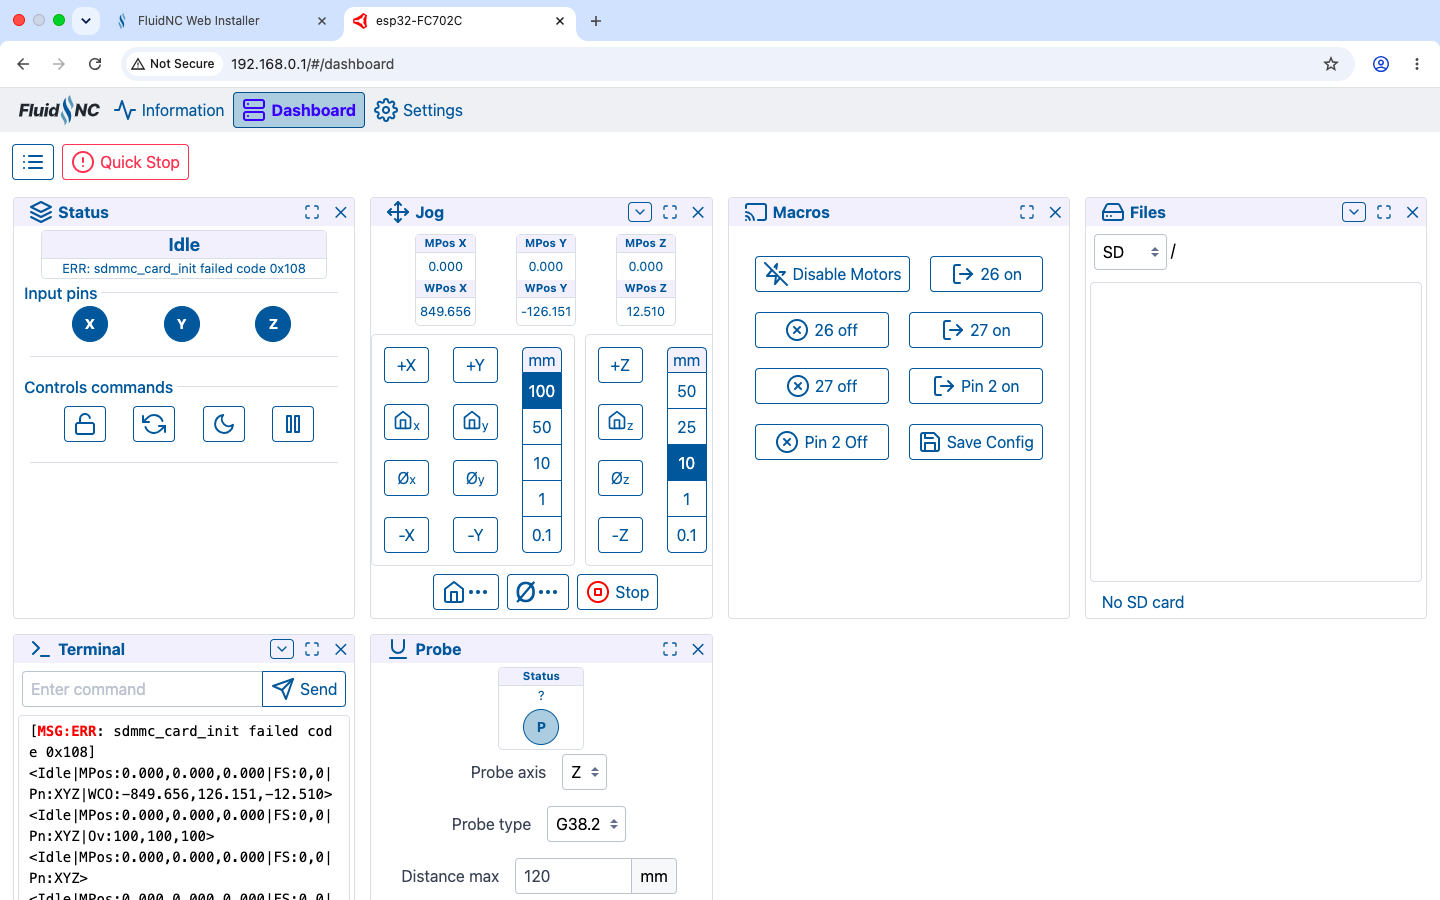
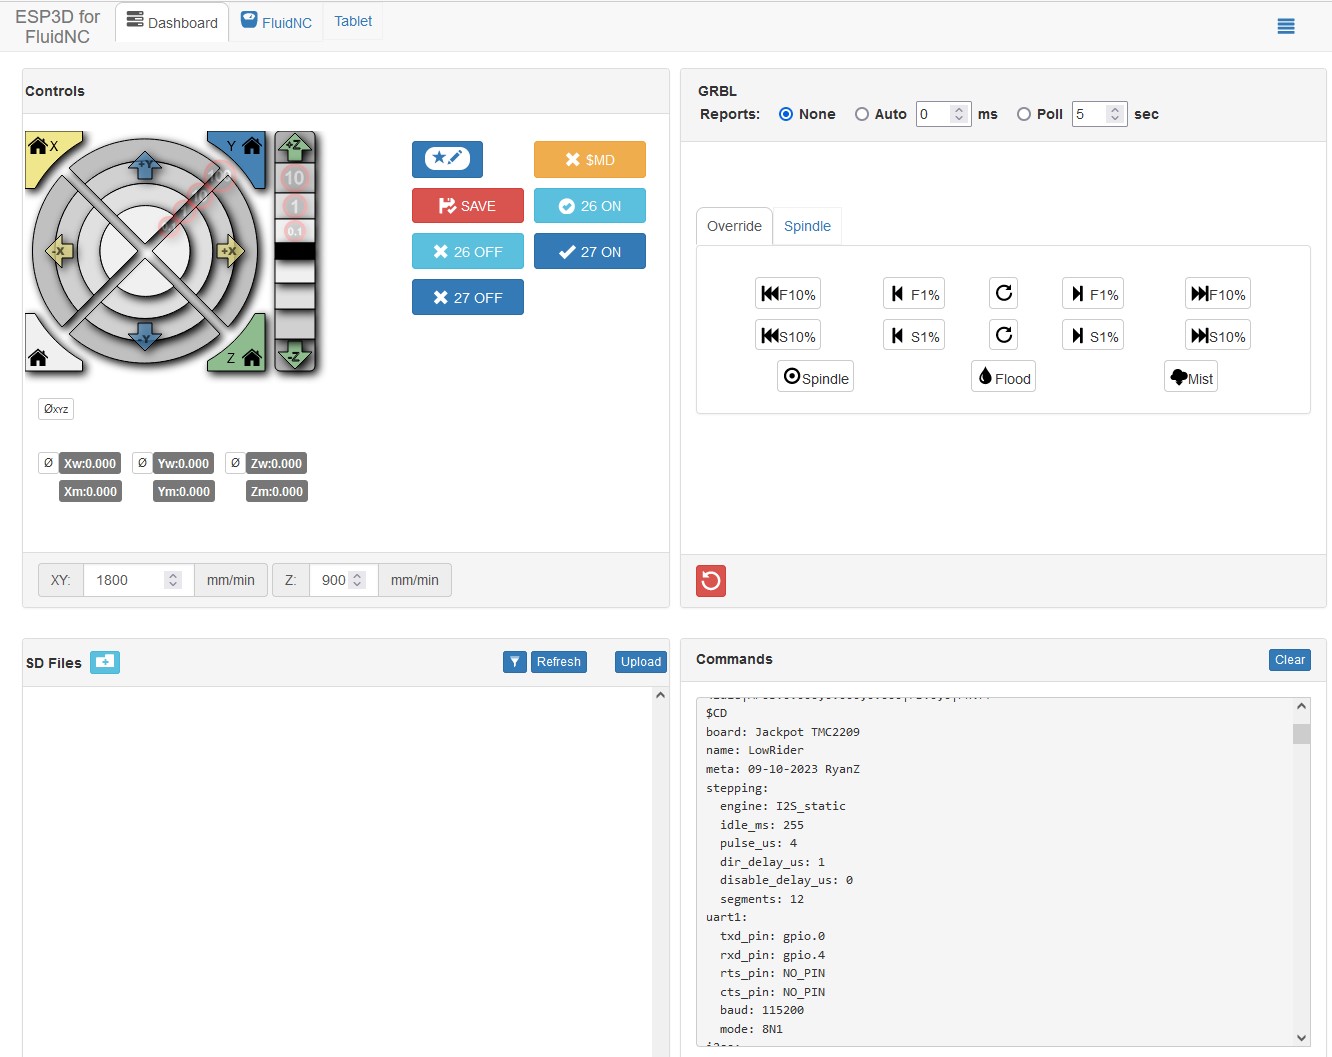
Under files change from SD to Flash. Then you can upload the config.
Wow! That did it…. and the second set of steppers working now and has more oomph. Very appreciative of the help. Have not made a cut yet but on my way now.
Not sure if I should start a new post for this… I am unable to use the STA mode on the Jackpot… I tried to go to the Fluid NC Web installer and it could not “see” that my machine was there to update. I would like to be able to be connected to the machine as well as have internet access if that is possible?
You need to install the drivers for the USB on the Jackpot. Click on the link to the Silabs CP2012 drivers. Download and install them. Then you should be able to connect with the Webinstaller.
I tried to install the drivers, seemed to go OK but when I plugged into my Macbook through USB to USB-C on Jackpot, still did not “see” that it was there.
Tried with an old laptop and it was the same.
Tried a couple different USB cables.
Is there anything else that I might be missing?
I don’t have enough experience with Mac’s, but I am also not aware of any connection issues. Be 100% sure you are not using charging only cables, that is by far the most common issue. Hopefully a mac user can step in and offer advice.
With that said. I urge you to just use the machine in AP mode for a while. I understand having internet is very convenient but there are many ways to connect as you gain some experience. For now, you can just connect and start your job then disconnect and use your device on the internet, there is no need to stay connected.
Get some cut time under your belt to ease the frustrations of connectivity that is very hard for use to help with and get to some making stuff that is very easy for us to help with.
I use a MacBook too. How are you trying to connect to the Jackpot over USB? Are you using the webinstaller?
Thank you for the insight… I will set it aside for now, and concentrate on the machine itself… easy enough to have wifi access on an Ipad right next to it. Britt to answer your question I am trying to access it from that link, but when the box comes up from that prompt my machine is not listed there.
Was able to successfully run a few programs in Millmage and seemed to be running properly, Still in the pen stage and will fine tune that before using the router. Exciting times.
This one bit me. While attempting to update firmware with the web installer, I ate up at least 2 hours trying to install drivers on different machines and OSs (WIndows and Linux, I have Macs but wasn’t using them for this) - but I was taking the same cable along with me as I went. Once I had a data cable the whole process took about 5 minutes, including rebooting.
Once the firmware is in place, don’t boot with the USB cable still attached. Power up from the power brick connection. Booting the ESP from USB prevents some of the elements on the board from being activated.
Thank you, I will implement this soon. Got to the point yesterday that everything was predictable with a pen and working as expected… lots more to learn when I actually start making sawdust. But, it was very gratifying to see the machine move as instructed and expected.
I tried three different cables… all the same result. Then I read a bit online about how to tell if it is a data cable or charge cable.
If you plug Iphone into Mac or PC and it reads it like a disk drive (rather than just charging phone) it is a data cable. I grabbed the cable from the car for Carplay, and worked! Very much appreciate all the help.
Have now done a few successful and predictable programs on foam insulation. Getting there.
I should have done more trial runs…. I set my nicely veneered 1/4 inch plywood piece nice and secure then ran the program same as I did with the foam. 1/8 inch router bit dug in and broke the router mount right off! Then I had a runaway router. Will reprint better, faster, stronger and slow down my feed speeds. Luckily I can reveneer and give it another go.
That’s pretty extreme! Care to share your first 100 lines or so of your gcode?
Something has to be seriously amiss to get that result.
I am using Millmage, but I cannot figure out a way to export the G code… may be because I’m using the trial version? I will keep trying. But I think a big part of my problem was that my print was pretty weak… reprinted in ABS with a stronger profile
How did you print the first one/ what material.
ABS is a worse material for a LowRider
Unfortunately I am also a novice at 3D printing… so can’t be much help there. First time was with PLA on standard… Just finished the piece with ABS tweaked for higher strength settings and seems much stronger. This is a Burly that I am getting up and running.
This is the file, I did slow the feed rate way down. Hopefully this is what you were asking for 100 or so lines of code.
;MillMage Core 0.8.01
;Custom GCode device profile, absolute coords
;Bounds: X2.3908 Y2.8652 to X15.8908 Y7.6152
;Project Units: Inch
;Safe Retract = 0.5
;Stock Thickness: 0.2
;Z Zero: Top
;Workpiece origin is at the Bottom Left
G00 G17 G40 G20;Restore imperial mode
G54
G90;Restore absolute mode
G0 Z0.5
G90;Restore absolute mode
;Profile @ 60 in/min, 5000 RPMs
M3 S5000
G0 Z0.5
G0 X2.3908Y2.8652Z0.5
G0 Z0.0644
G1 Z0F100
G1 X2.4662Z-0.0312
G1 X2.3908Z-0.0625
G1 X6.3614F60
G0 Z0.322
G0 X2.3908
G0 Z0.0019
G1 Z-0.0625F100
G1 X2.4662Z-0.0937
G1 X2.3908Z-0.125
G1 X6.3614F60
G0 Z0.322
G0 X2.3908
G0 Z-0.0606
G1 Z-0.125F100
G1 X2.4662Z-0.1563
G1 X2.3908Z-0.1875
G1 X6.3614F60
G0 Z0.322
G0 X2.3908
G0 Z-0.1231
G1 Z-0.1875F100
G1 X2.4662Z-0.2187
G1 X2.3908Z-0.25
G1 X6.3614F60
G0 Z0.322
G0 X6.3614Y3.393Z0.322
G0 Z0.0644
G1 Z0F100
G1 X6.2859Z-0.0312
G1 X6.3614Z-0.0625
G1 X2.3908F60
G0 Z0.322
G0 X6.3614
G0 Z0.0019
G1 Z-0.0625F100
G1 X6.2859Z-0.0937
G1 X6.3614Z-0.125
G1 X2.3908F60
G0 Z0.322
G0 X6.3614
G0 Z-0.0606
G1 Z-0.125F100
G1 X6.2859Z-0.1563
G1 X6.3614Z-0.1875
G1 X2.3908F60
G0 Z0.322
G0 X6.3614
G0 Z-0.1231
G1 Z-0.1875F100
G1 X6.2859Z-0.2187
G1 X6.3614Z-0.25
G1 X2.3908F60
G0 Z0.322
G0 X2.3908Y3.9208Z0.322
G0 Z0.0644
G1 Z0F100
G1 X2.4662Z-0.0312
G1 X2.3908Z-0.0625
G1 X6.3614F60
G0 Z0.322
G0 X2.3908
G0 Z0.0019
G1 Z-0.0625F100
G1 X2.4662Z-0.0937
G1 X2.3908Z-0.125
G1 X6.3614F60
G0 Z0.322
G0 X2.3908
G0 Z-0.0606
G1 Z-0.125F100
G1 X2.4662Z-0.1563
G1 X2.3908Z-0.1875
G1 X6.3614F60
G0 Z0.322
G0 X2.3908
G0 Z-0.1231
G1 Z-0.1875F100
G1 X2.4662Z-0.2187
G1 X2.3908Z-0.25