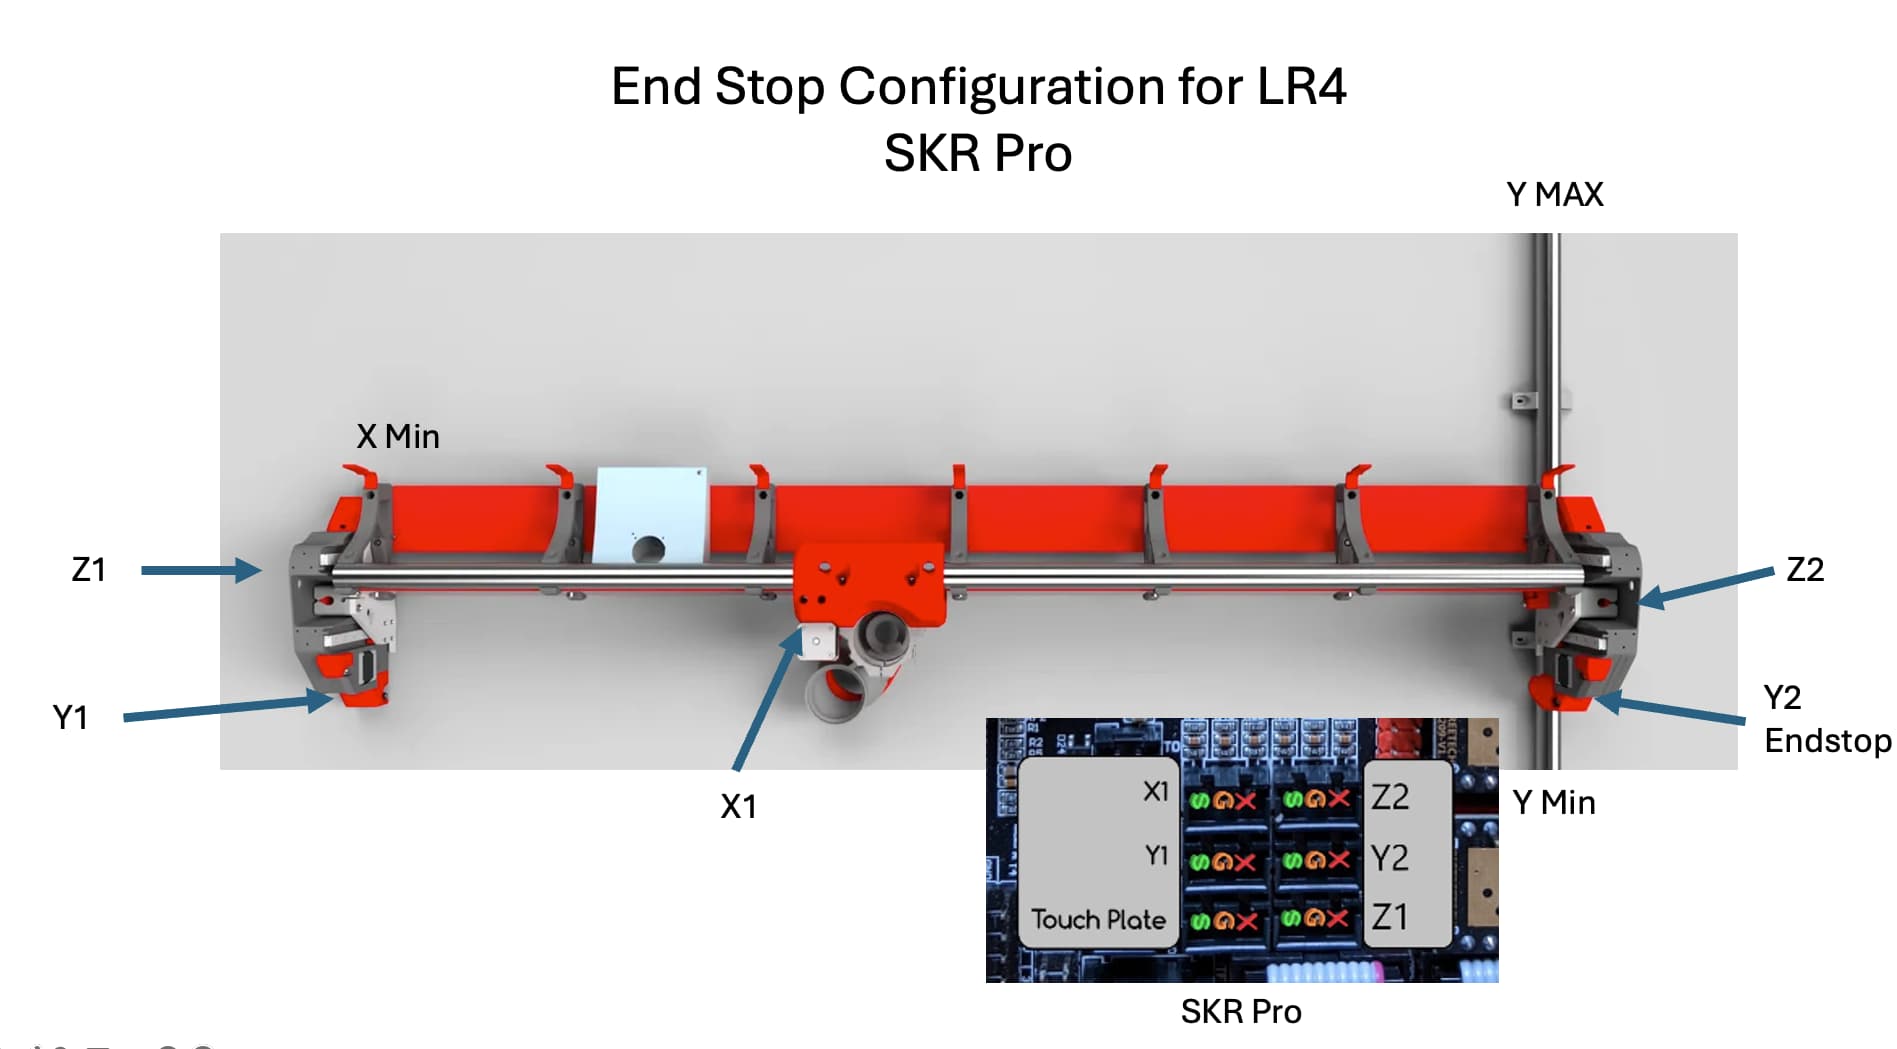
Found this image somewhere on this forum:
I found this very helpful
I thought homing Y was at the back of the X gantry, and then the machine travels from there to my drawing bottom…anyway before I do any moves on the LR4 I’ll double-check how I have my motors connected ![]() because I’m really bad at all these electronic thingy.
because I’m really bad at all these electronic thingy.
Thanks, will keep it in my LR4 PC folder…
But I want to make clear it’s not my naming policy, but V1 assembly page policy ![]()
“Typically, as you face the machine, the left side is Y0 and Z0, and the right side is Y1 and Z1”
Hehe, homing per the normal configuration is to the front. Everything else needs changes to the firmware and is not recommended for beginners. ![]()
I’d also add that Z homes up but probes down.
So, as a new build, it should move up to top of Z, toward the front to home Y, then to the left to home X.
But the first moves should be very small since it is possible that one motor will turn incorrectly which can very quickly rack your machine if it’s a big move. I move 1 mm at first, then 10 mm. Only homing once I’m sure the motors are all cooperating.
Good luck!
when I built my LR3, I had a different control board on, and when I swapped control boards, I had to re-crimp end stop and motor wires.
The result was that in the process, I lost track of which Y and Z motors/end stops were which. So as it sits, Z1 is on the left, and Y1 is on the right. And it works fine. So long as the end stop is controlling the same motor, it doesn’t matter which side each is on. Once homed, both Y motors turn the same amount, and the Z motors are the same. Which side is 1 and which is 2 don’t matter. It does matter during homing, and if you have any squaring/levelling of course the correct motor has to pull off the stop, but after that, both motors are Y (or Z) and will react the same way.
Edit: I would, for ease of troubleshooting recommend that you have both “1” motors on the same side, but it isn’t actually necessary.
Ryan took over both tags. Whoever (at) Ryan is, they never responded and our Ryan took over the tag. So either should work.
![]()
Which aluminium should be used for milling parts for a 3D printer or a CNC?
I’ve been reading about different qualities (depending on blends) but yet I can’t figure out which would be the minimum standard to go for.
Cheers
In this application I don’t think it’ll make much difference, whichever you can most easily get (and is easiest to machine) would be my guess.
Ok, thanks.
Just found out that most people talk marvels of 6061 T6 blend (as a good all-purpose aluminum), at the moment I’m just being curious for future projects.
Cheers,
My Z plates are 5083 purely because that’s what the engineering place I got the material from uses (they make lifeboats). It machined just fine
Edit: and apparently it’s good for cryogenics, so that’s good to know when I need to do that!
Interesting to know.
As we say over here where I live, you won’t get into bed without learning something new.
Cheers
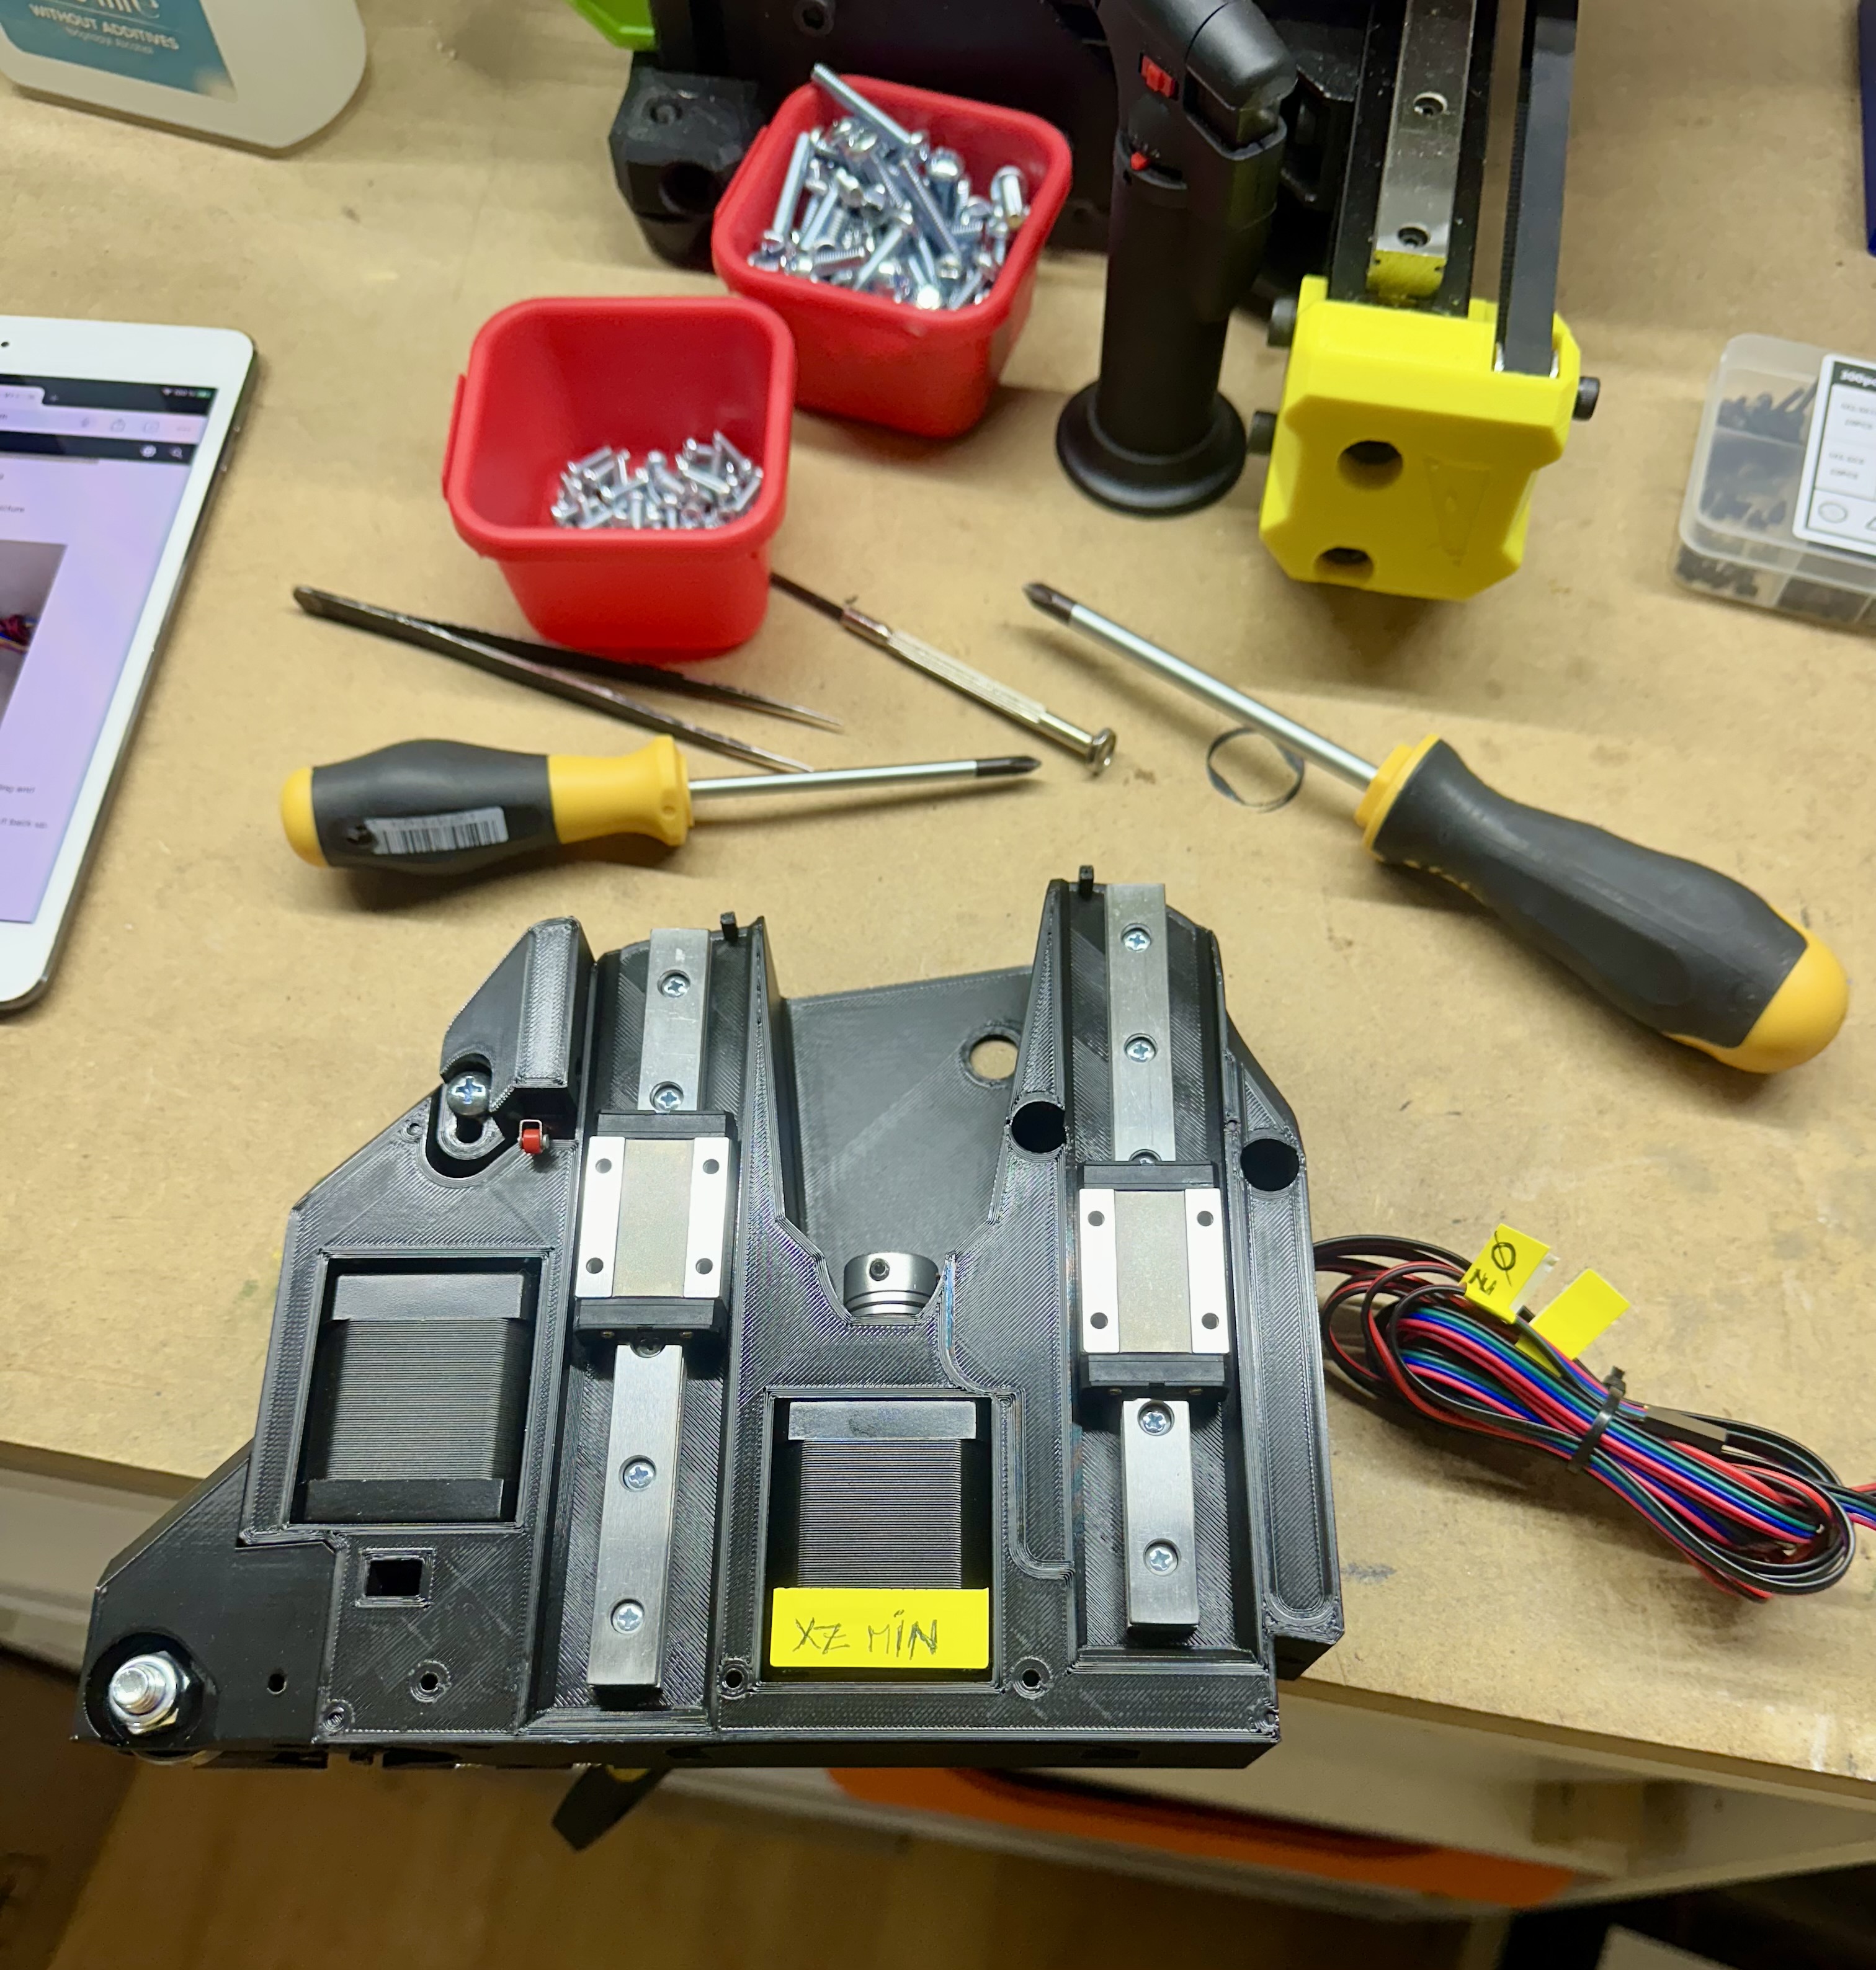
XZ Min done, waiting for V1 order to arrive to finish it.
Wiring has been a test, finally found out the best way is to get all motor wiring through holes first and then the rest.
It’s not the first language for most of the people around here… Take that for what you will. ![]()
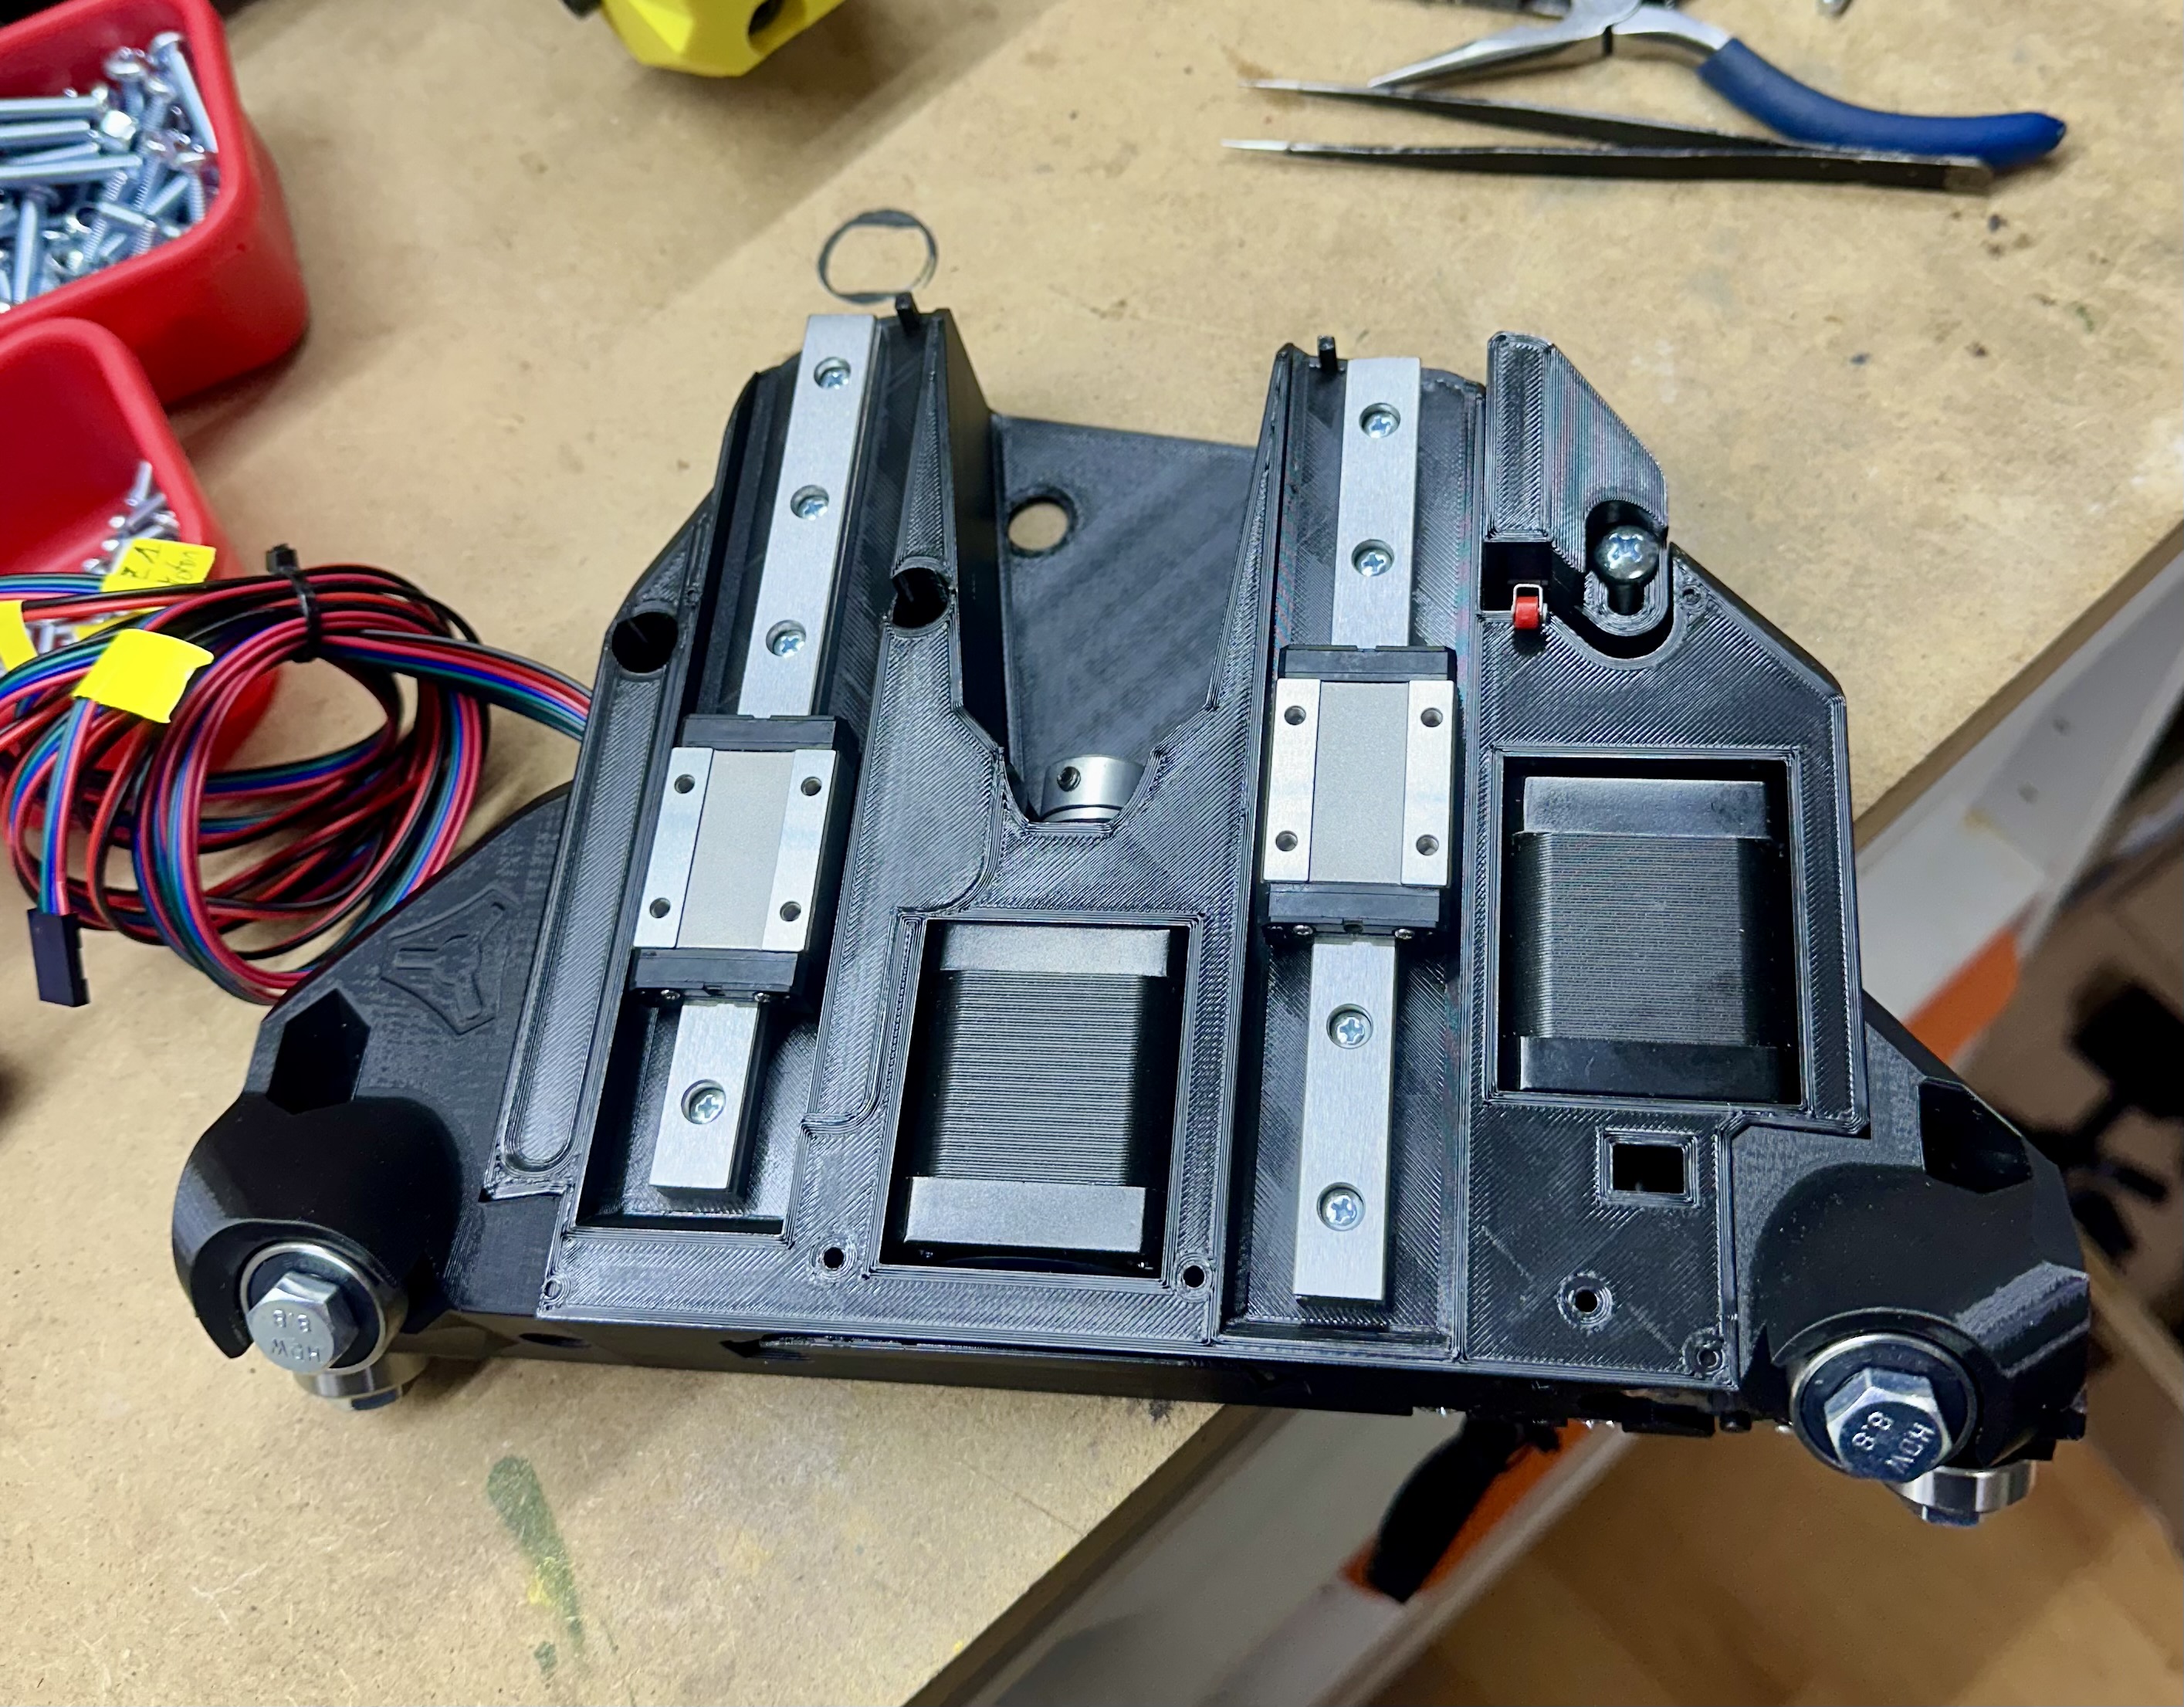
Time to start XZ Max…and find the T8 lead screws I used on the never finished built of the LR3. Don’t ask why never got it to run, it’s a too long story.
Probably silly question, but I understand that Core only has 1 end-stop installed as per assembly guide???
I ask because I’ve seen somebody building his Core with 2 end-stops.
Thanks
Àlex
The second endstop is for those special people who want to do everything different. ![]() If you are looking at the core from the front, it’s the left one you need.
If you are looking at the core from the front, it’s the left one you need.