It would be easy to tell. Just take your calipers and check thickness both sides if one is bigger that’s your issue. Congrats on getting the cuts!
I’m with the others on testing your printer. I know you did come calibrations but did you measure the Z axis? This is one many miss to check for and can cause bigger issues with elephants foot.
Second most common issue causing the problem is overtightening the strut bolts. Those M5 screws can exert a LOT more force than those were meant to take.
The screws shpuld be tight enough that you can’t pop the rails out but they don’t need to clamp it super hard. We tend to think that we need the screws to be tight to enforce rigidity, but the strut plate will do that a lot sooner than the screwdriver will give a lot of reaistance. I think “just seated” is enough clamping force for those, especially without the strut plates installed.
Well I guess I gotta do some reprinting. I got the final assembly done with the struts and the core is binding all over the place. Especially on the bottom of the core. Its hitting almost every brace. I guess I will reprint braces first since they are a smaller print. Then the core if it still binds. Not looking forward to reinstalling braces. I was hoping to be cutting not redoing!
I recommend being sure you know what is causing the binding before reprinting. There are sharp minds no here who can help you figure it out. Perhaps try to do some process of elimination or something.
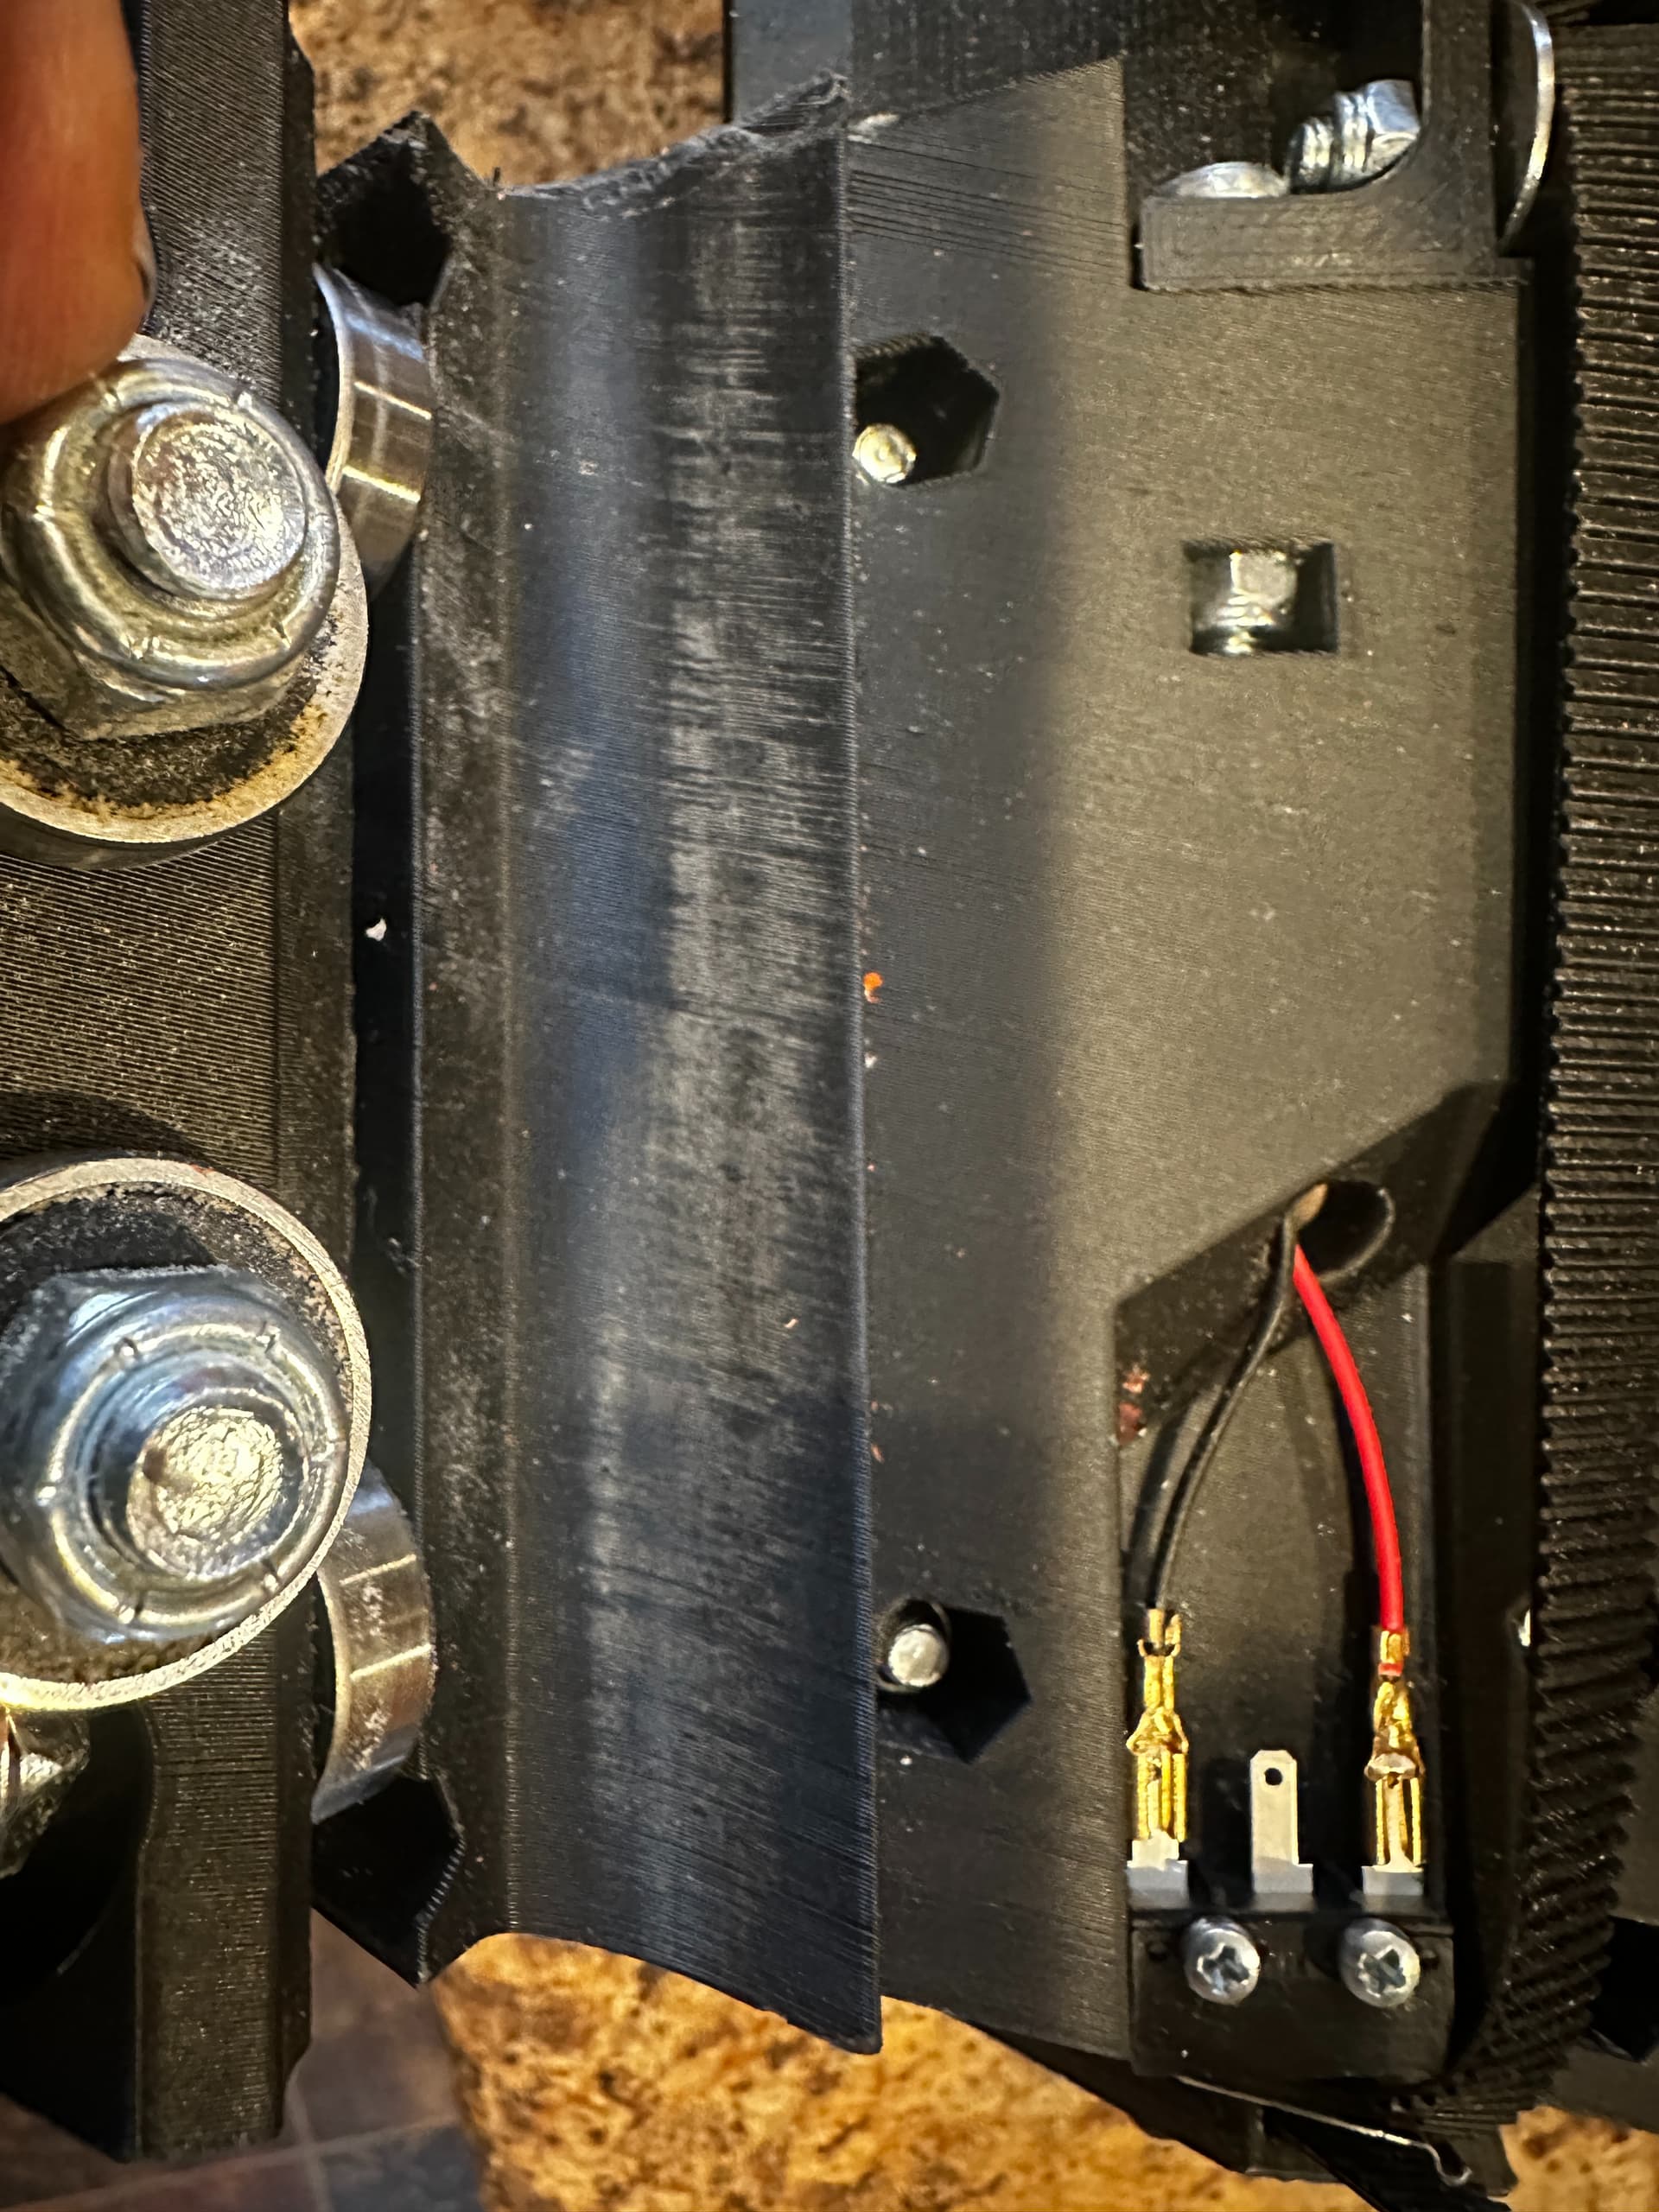
Im all for ideas. I know that the leading edge of the core hits the bottom braces going either direction. At the two points in red below. I guess it could be the braces or the core. I assumed braces cause there are like 2 that it doesnt hit. The rubbing, making the light grey on the core, is the other binding.
Im not really sure where to get measurements to test? I mean the bolt heads, x motor, endstops, all fit nicely and things like that. So I kind of assumed. Theres way more measurements obviously but I ran with it.
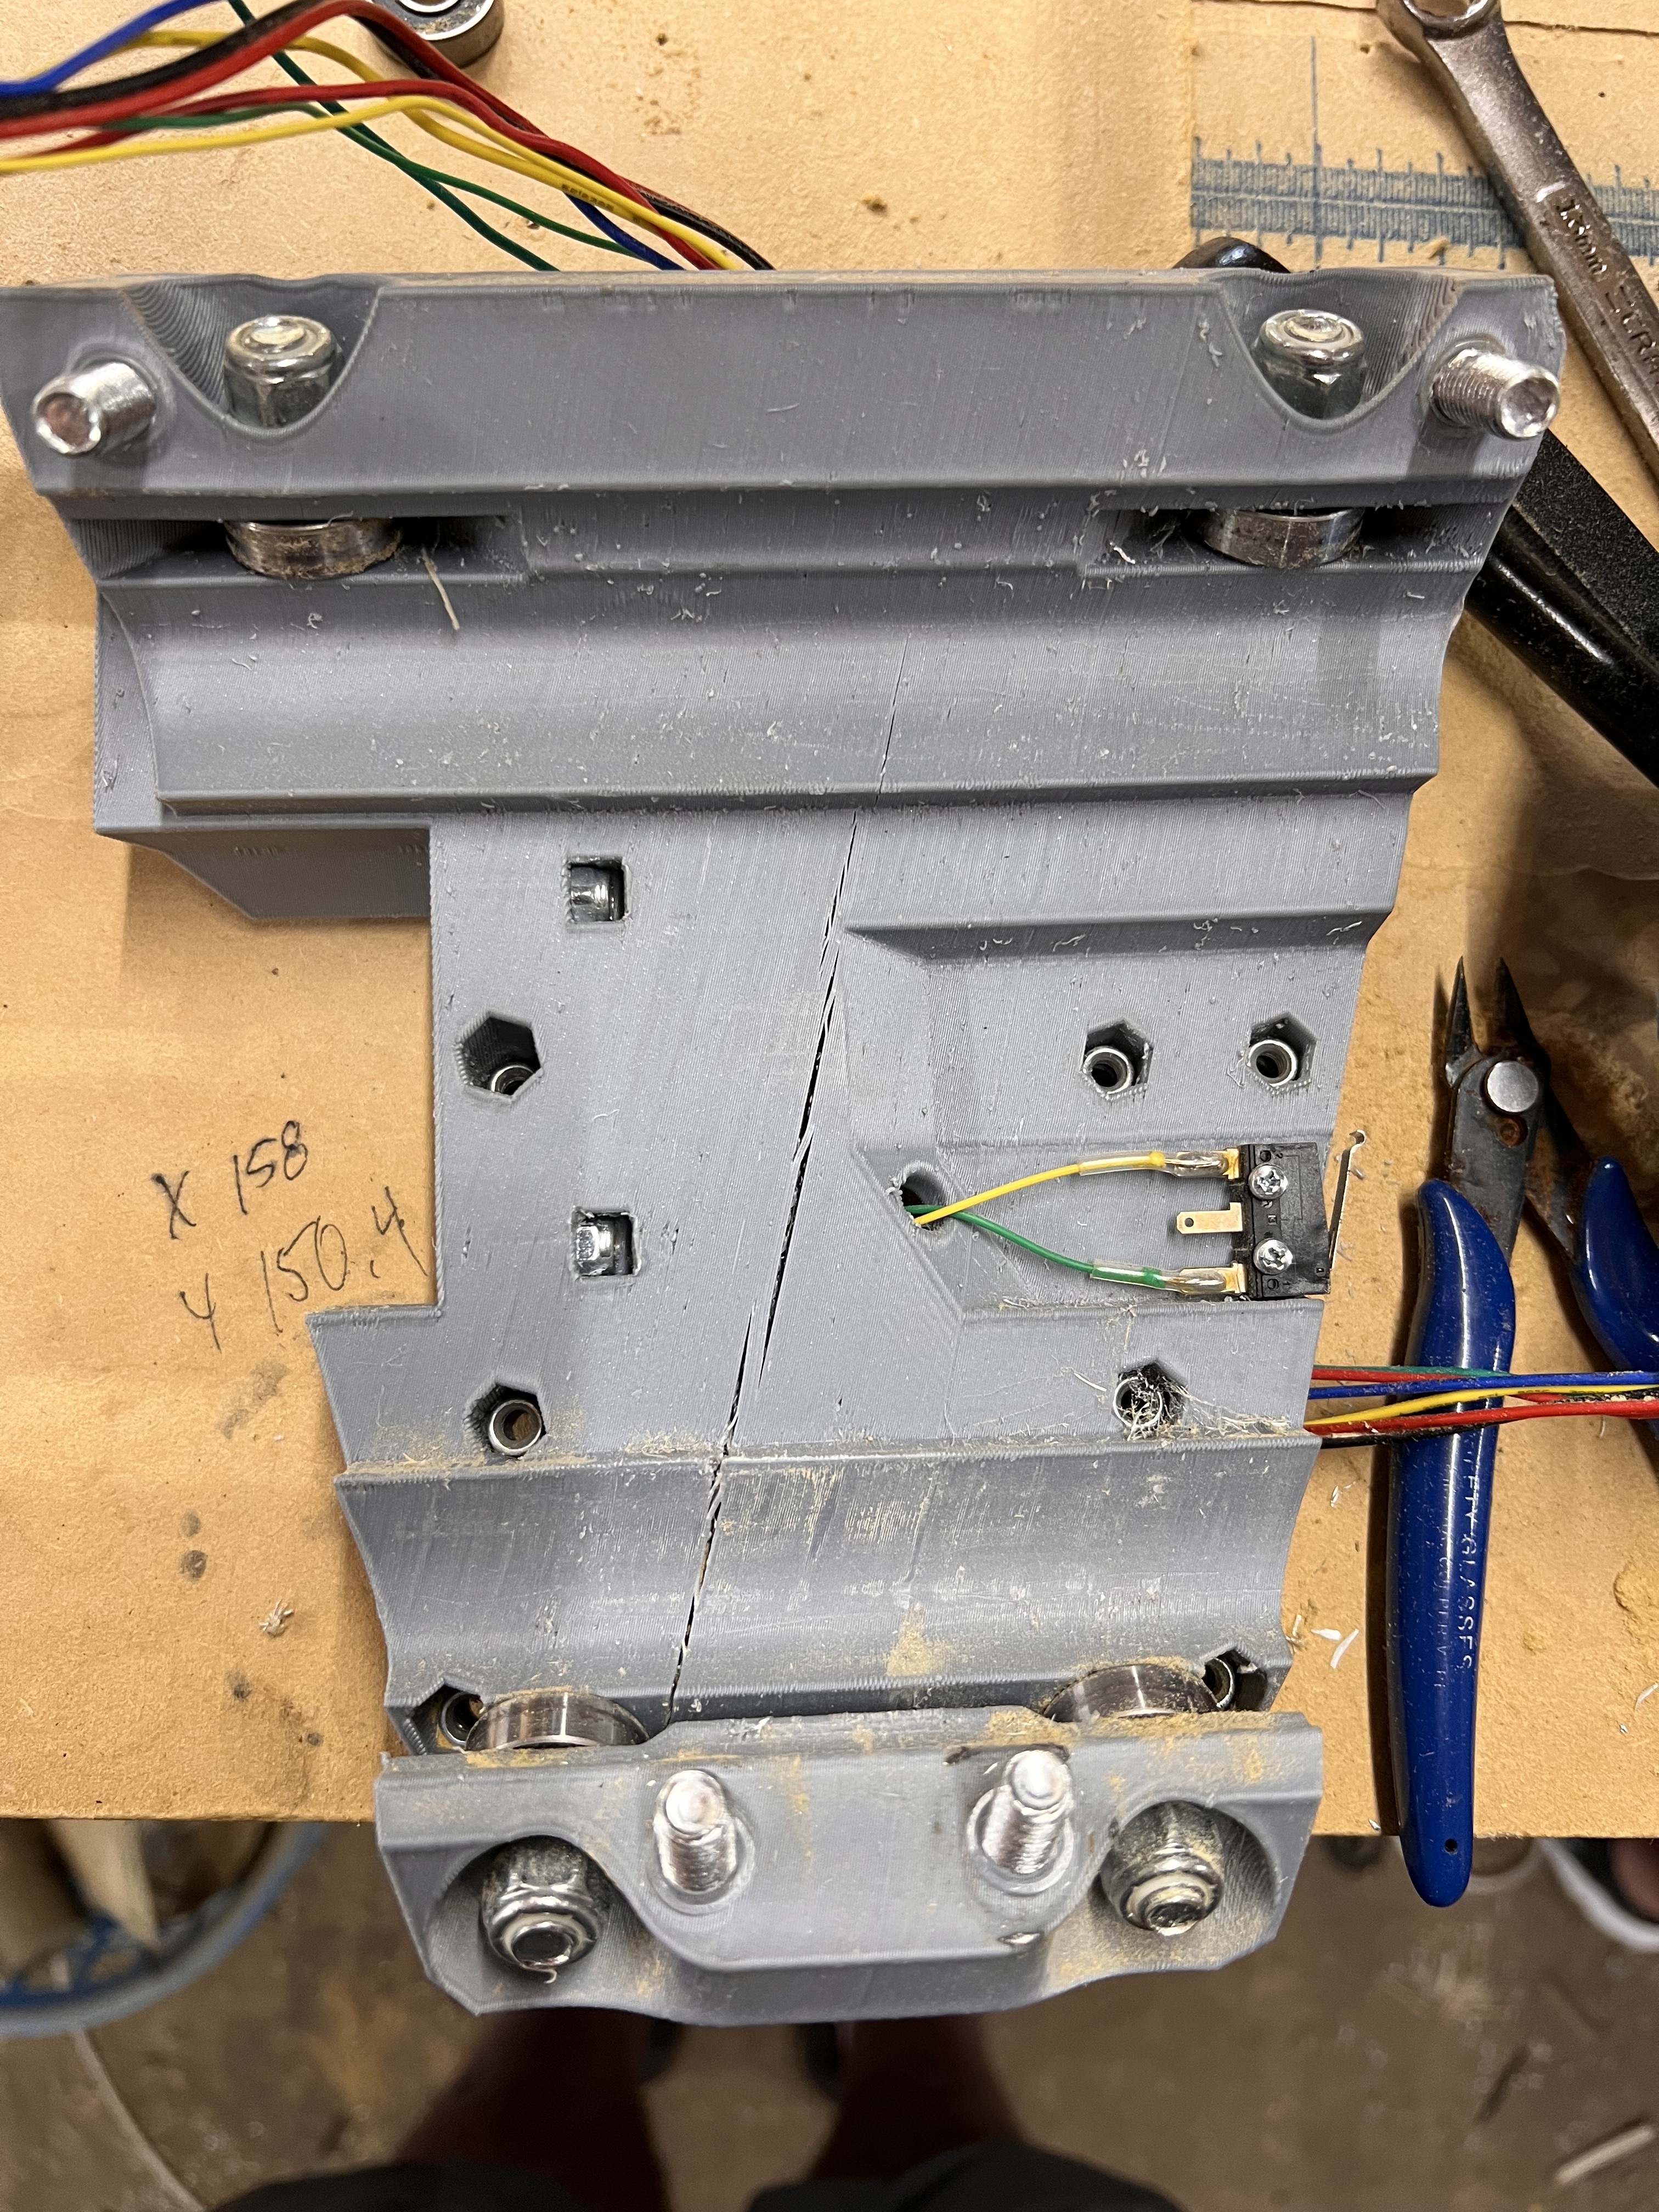
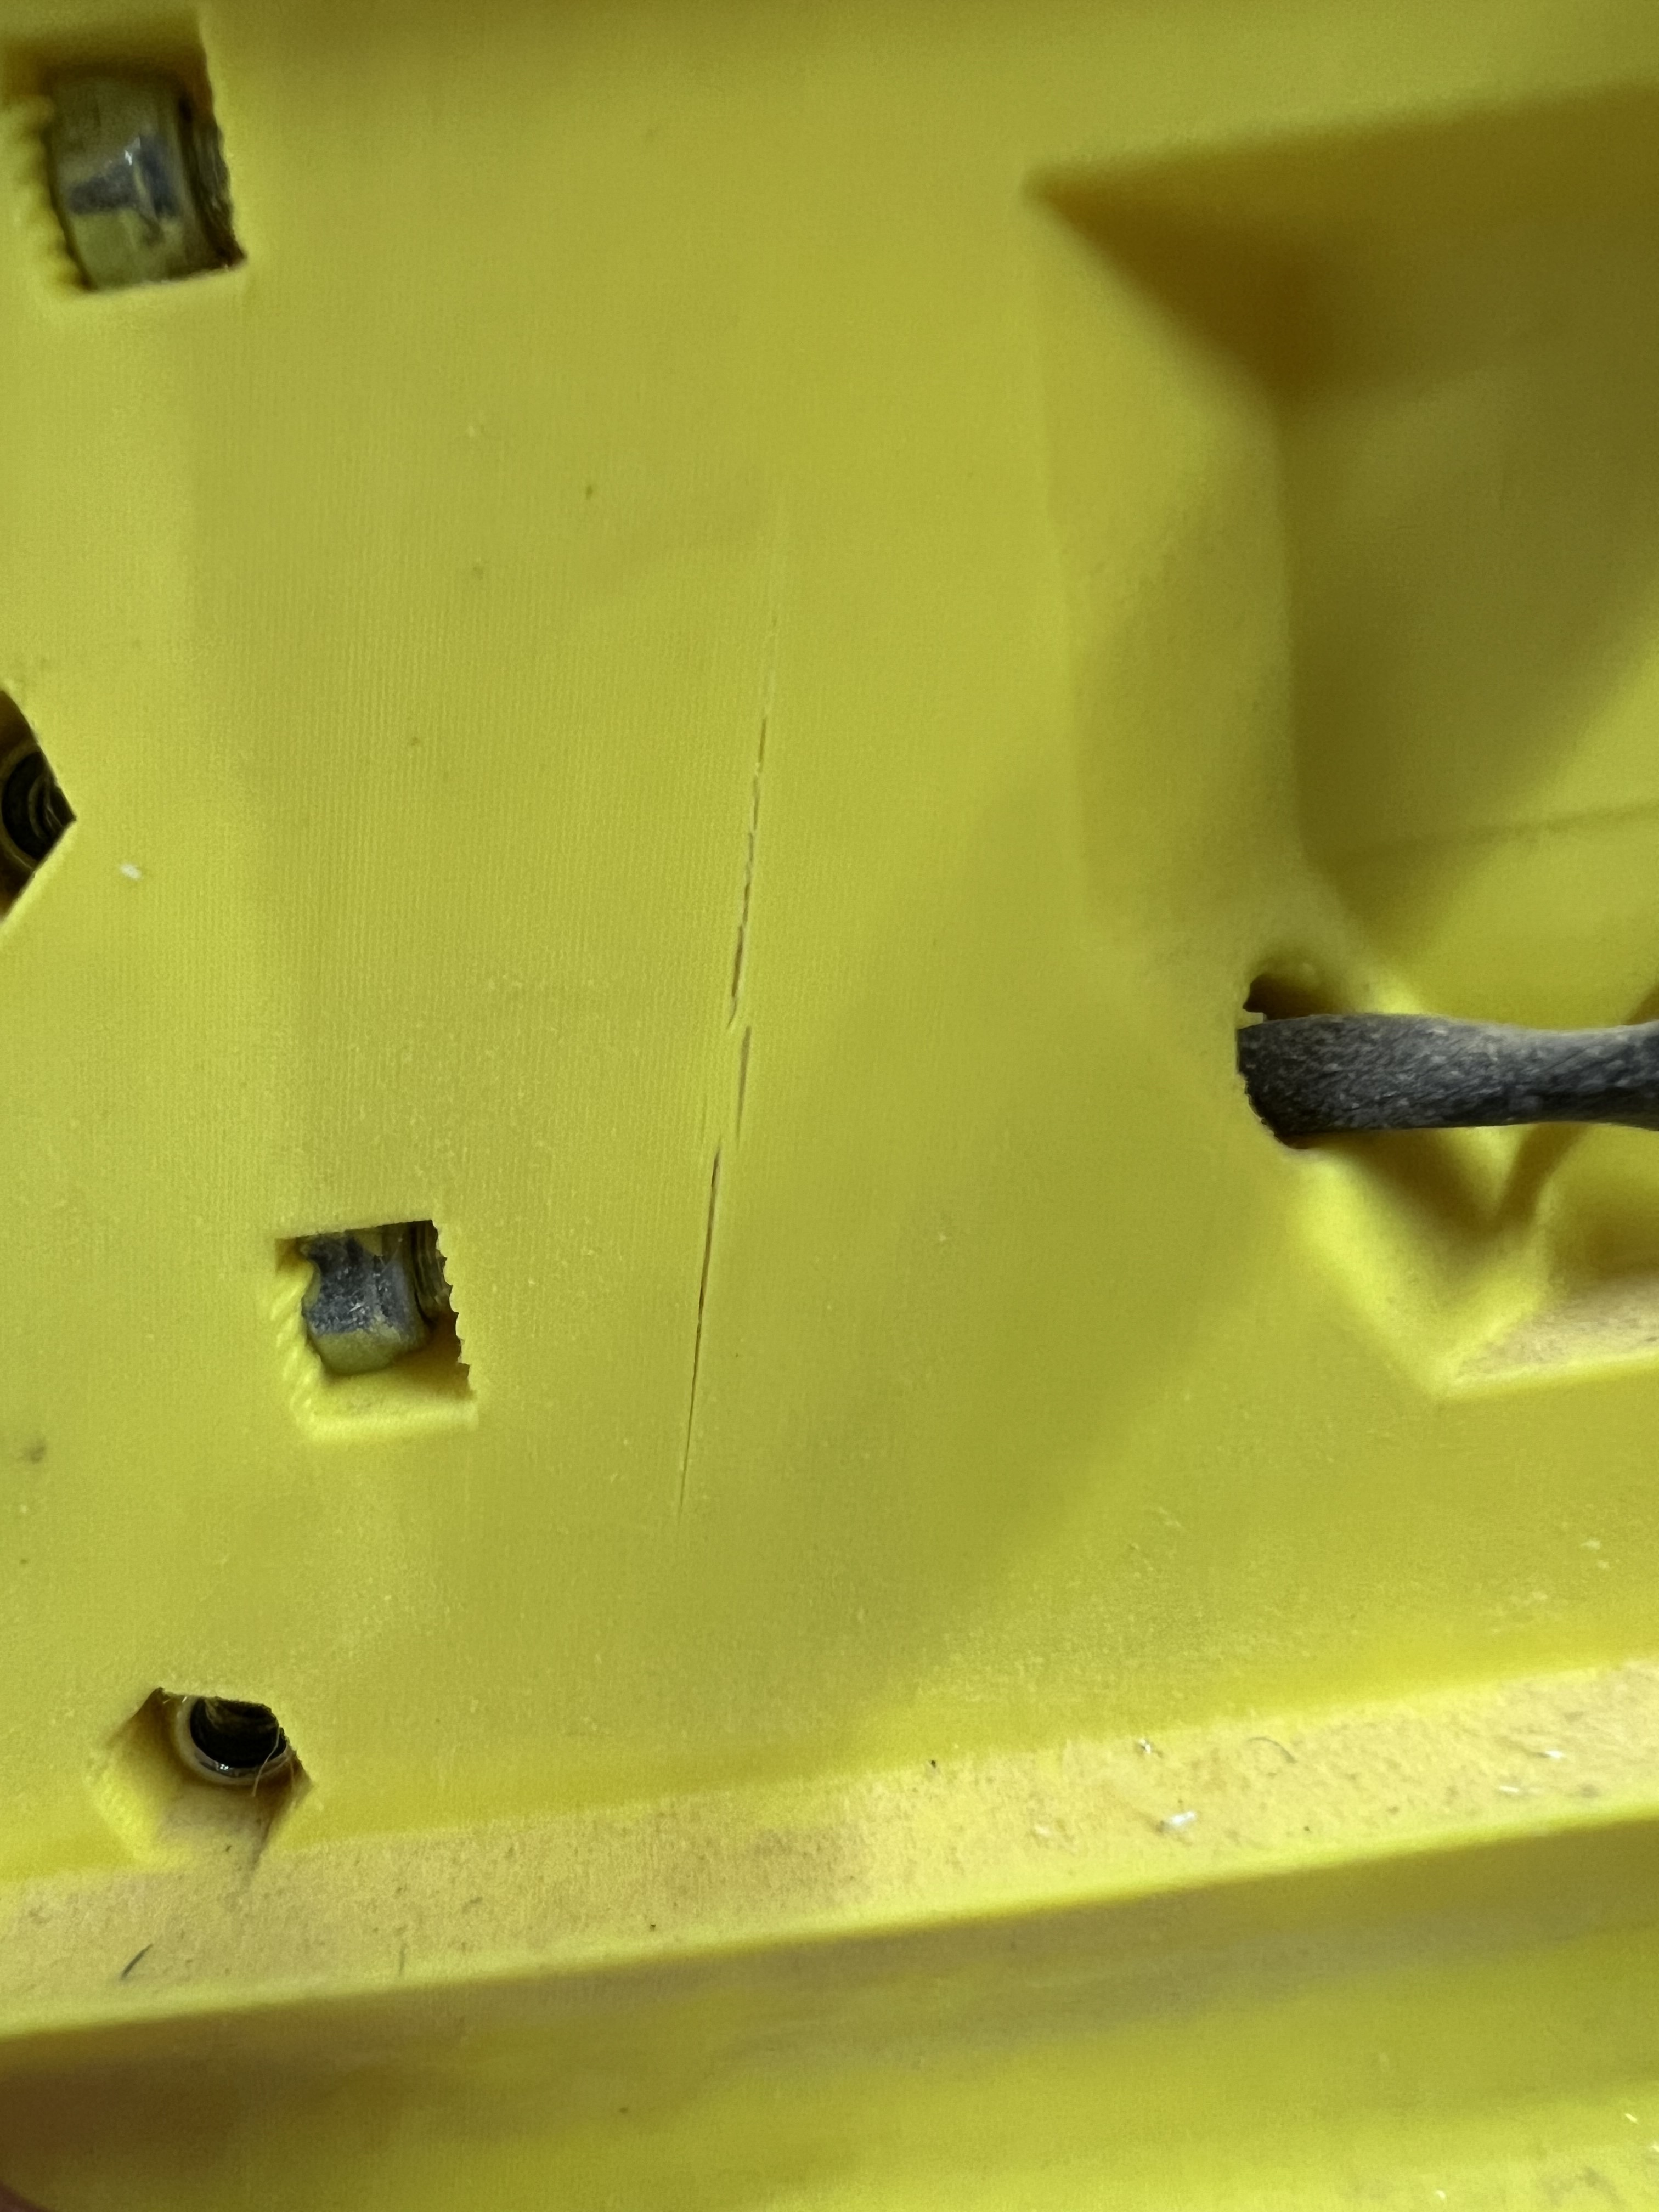
I put the 3mf files in prusaslicer and used the measuring tools there. If those measurements can be trusted then it would appear its a brace issue. Definitely some measurements that are larger than they should be. The weird thing is that some of the measurements on the core are right and some are off. However, I found some cracks so unfortuantely I think I am reprinting braces and core.
Here’s my thoughts. Sorry a lot going on so these maybe jumbled and/or mentioned already
Braces could have elephants foot
Core could be tighten on too much
Braces could be wrong for the tube size or printed wrong so the radius is smaller than the tube (would be significant-ish-ly out couple of mm at least)
I appreciate any and all help! No apologies needed. Rather go over it 2x than miss it.
I definitely think this is part of the issue. I dont know why the core would hit both ways but Ive confirmed some braces are not the right size so those are definitely getting reprinted.
Ive had a war with this. Idk what Im doing wrong. If I tighten it to where there isnt any play it seems way to tight. (maybe it was the right tension and its really a brace issue) If I loosen then I can actually watch the router deflect on a cut. But I think it has to be reprinted either way because of some cracks as best I can tell.
Unless I am totally missing something I have confirmed this isnt the case. Regular USA 3/4 emt. And the 23p4 braces.
For printing are you using two/more printers? Have you made a scaled test print and measured the Z-axis (how tall the item is) and/or done other calibration?
I would double check everything before starting the prints again.
Also check how tight you’ve made the bolts on the braces. If those are too tight, they can skew everything. I recall seeing other, similar posts here where that was the issue. You want the nylock nut to be just snugged up against the inside of the brace, not very tight.
When originally printed it was 2 printers. I had calibrated them before hand with several different things. All axis’ as well. But I have since sold those as I had a good offer so I’m using my dads prusa. Ill do some calibration prints before reprinting for sure.
I tried to be pretty careful with this as well. They’re just making contact as best I can tell. Im sure there are a couple that are too tight but it was definitely not an afterthought.
Yeah I would calibrate. Print a part at a time and check measurements as well as check for elephants foot. Once I have a couple that measure correctly go to town.
The wrong sized rails were used, check the text on your braces and actually measure your rails’ diameter.
The two lower tension bolts on your core are not all the way tight, usually they are almost all the way loose. The core probably rolls real gritty in this case as well
Check to see if you split your core in the center overtightening the tool mounts.
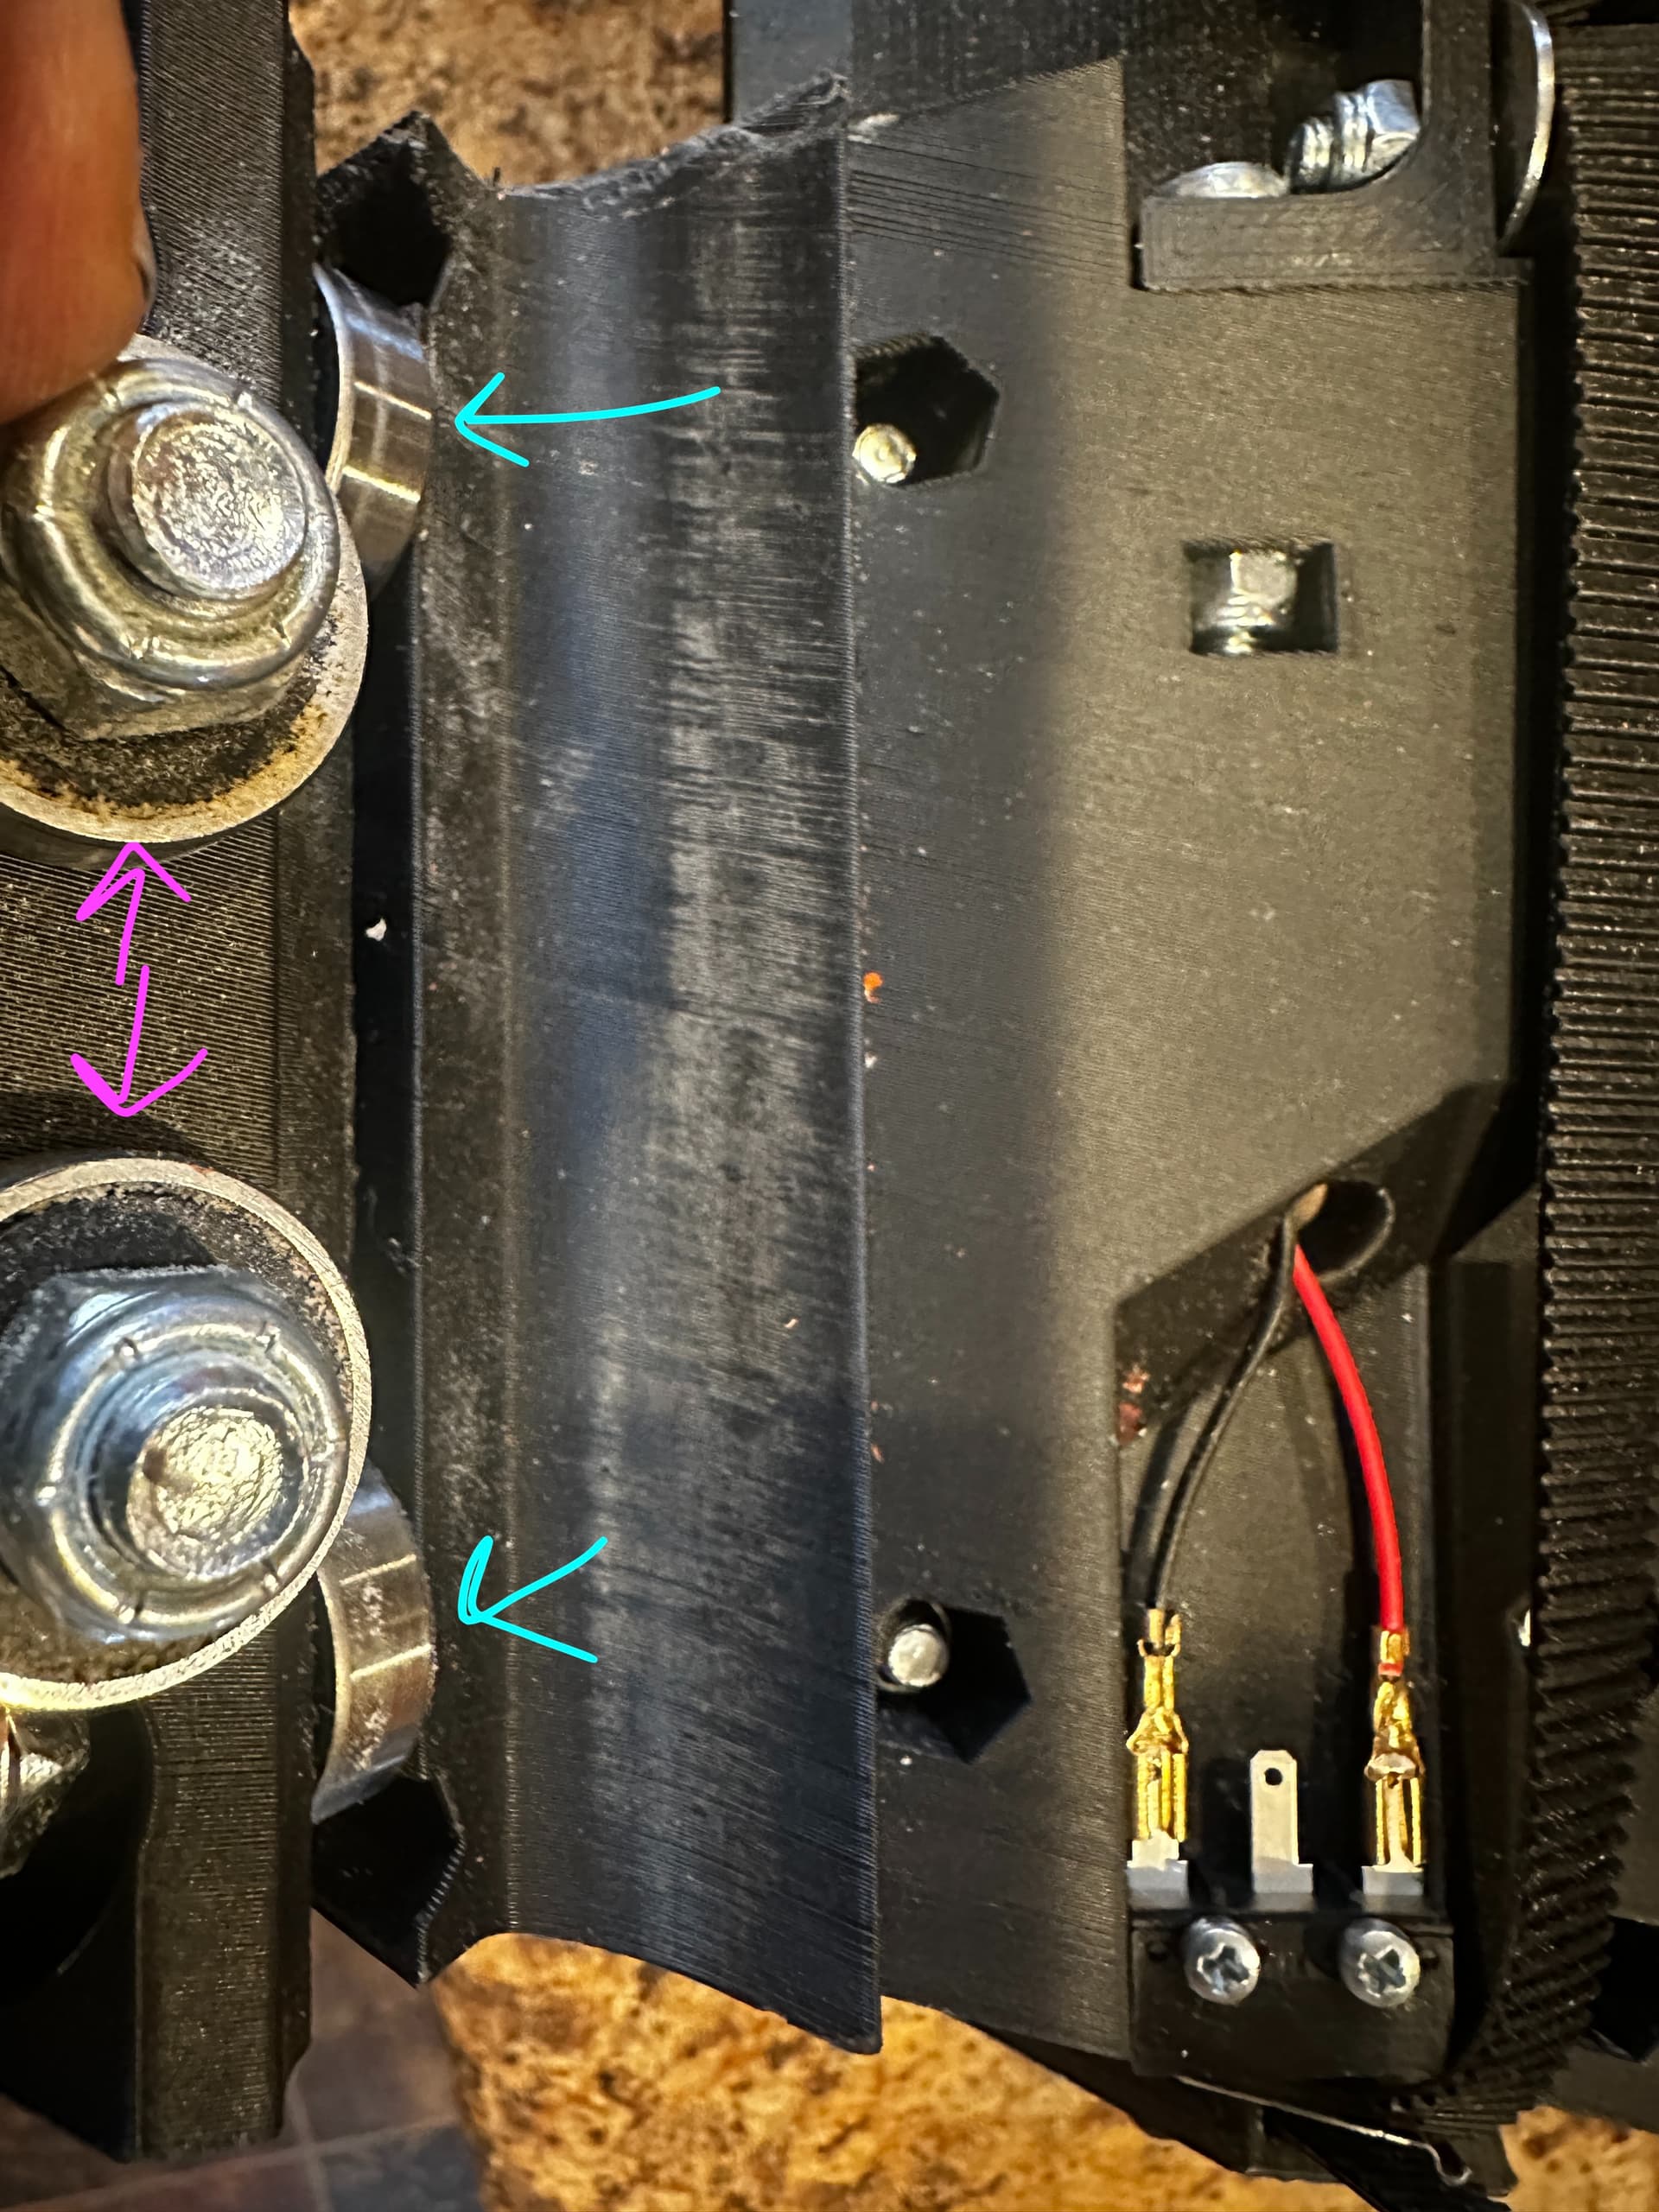
I believe this is a reference primarily to the ones you have highlighted in blue. If you look carefully at the design, you’ll realize there’s a cupping action there, and the bolts from the bearings that you have marked in blue… span the base of that cupping action. By tightening them, you can squeeze that “cupping” gap more closed. In this way, a LowRider can have variable control over how tightly it grips the EMT tubing.
Exactly. Just because you can tighten it doesn’t mean you should go to town over tightening it. You want it tightened just enough so that the core grips the tubes enough to be held firmly, but not so tight as that you can feel the core bumping over each brace.
Ok that makes sense. I think the issue I ran into is again, related to the braces. Because loosening those bolts to where they wouldnt rub meant that the core moved around and deflected substantially. Tightening them to where there was very little movement meant they rubbed the braces. But as I said, after measuring them I definitely think it was a brace issue.