Nice! Congrats!
1 Like
That looks real nice. Seems to be about the same size as mine.
1 Like
Just doing tiny stuff for now as I try things out. These things are probably better suited to a laser but they still came out great. Compared to 3D printing, it feels so fast.
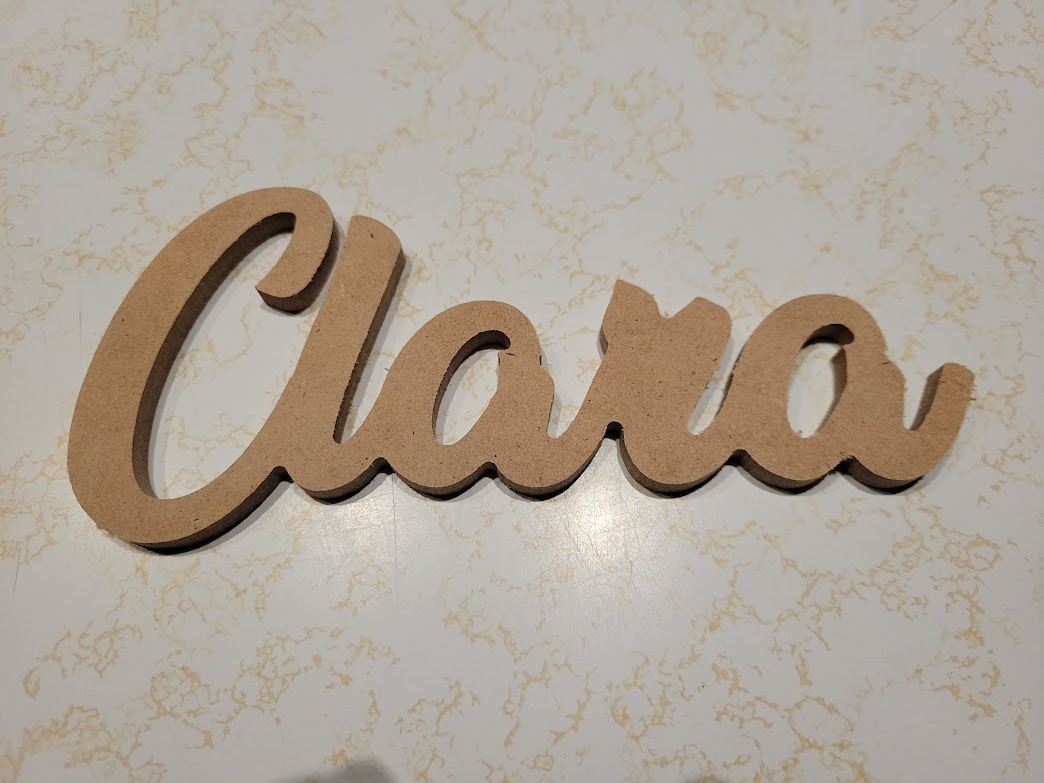
#1 - Name
This is my daughter’s name in a cursive font in 1/4 inch MDF. I’m sure she’ll be painting it soon. I used Inkscape to create the vector. At first, Estlcam showed the letters as separate vectors, so I did have to combine them in Inkscape. I forgot to put tabs on it, so it popped out before doing the finishing pass but it still came out good.
Font - Nature Beauty Font | dafont.com
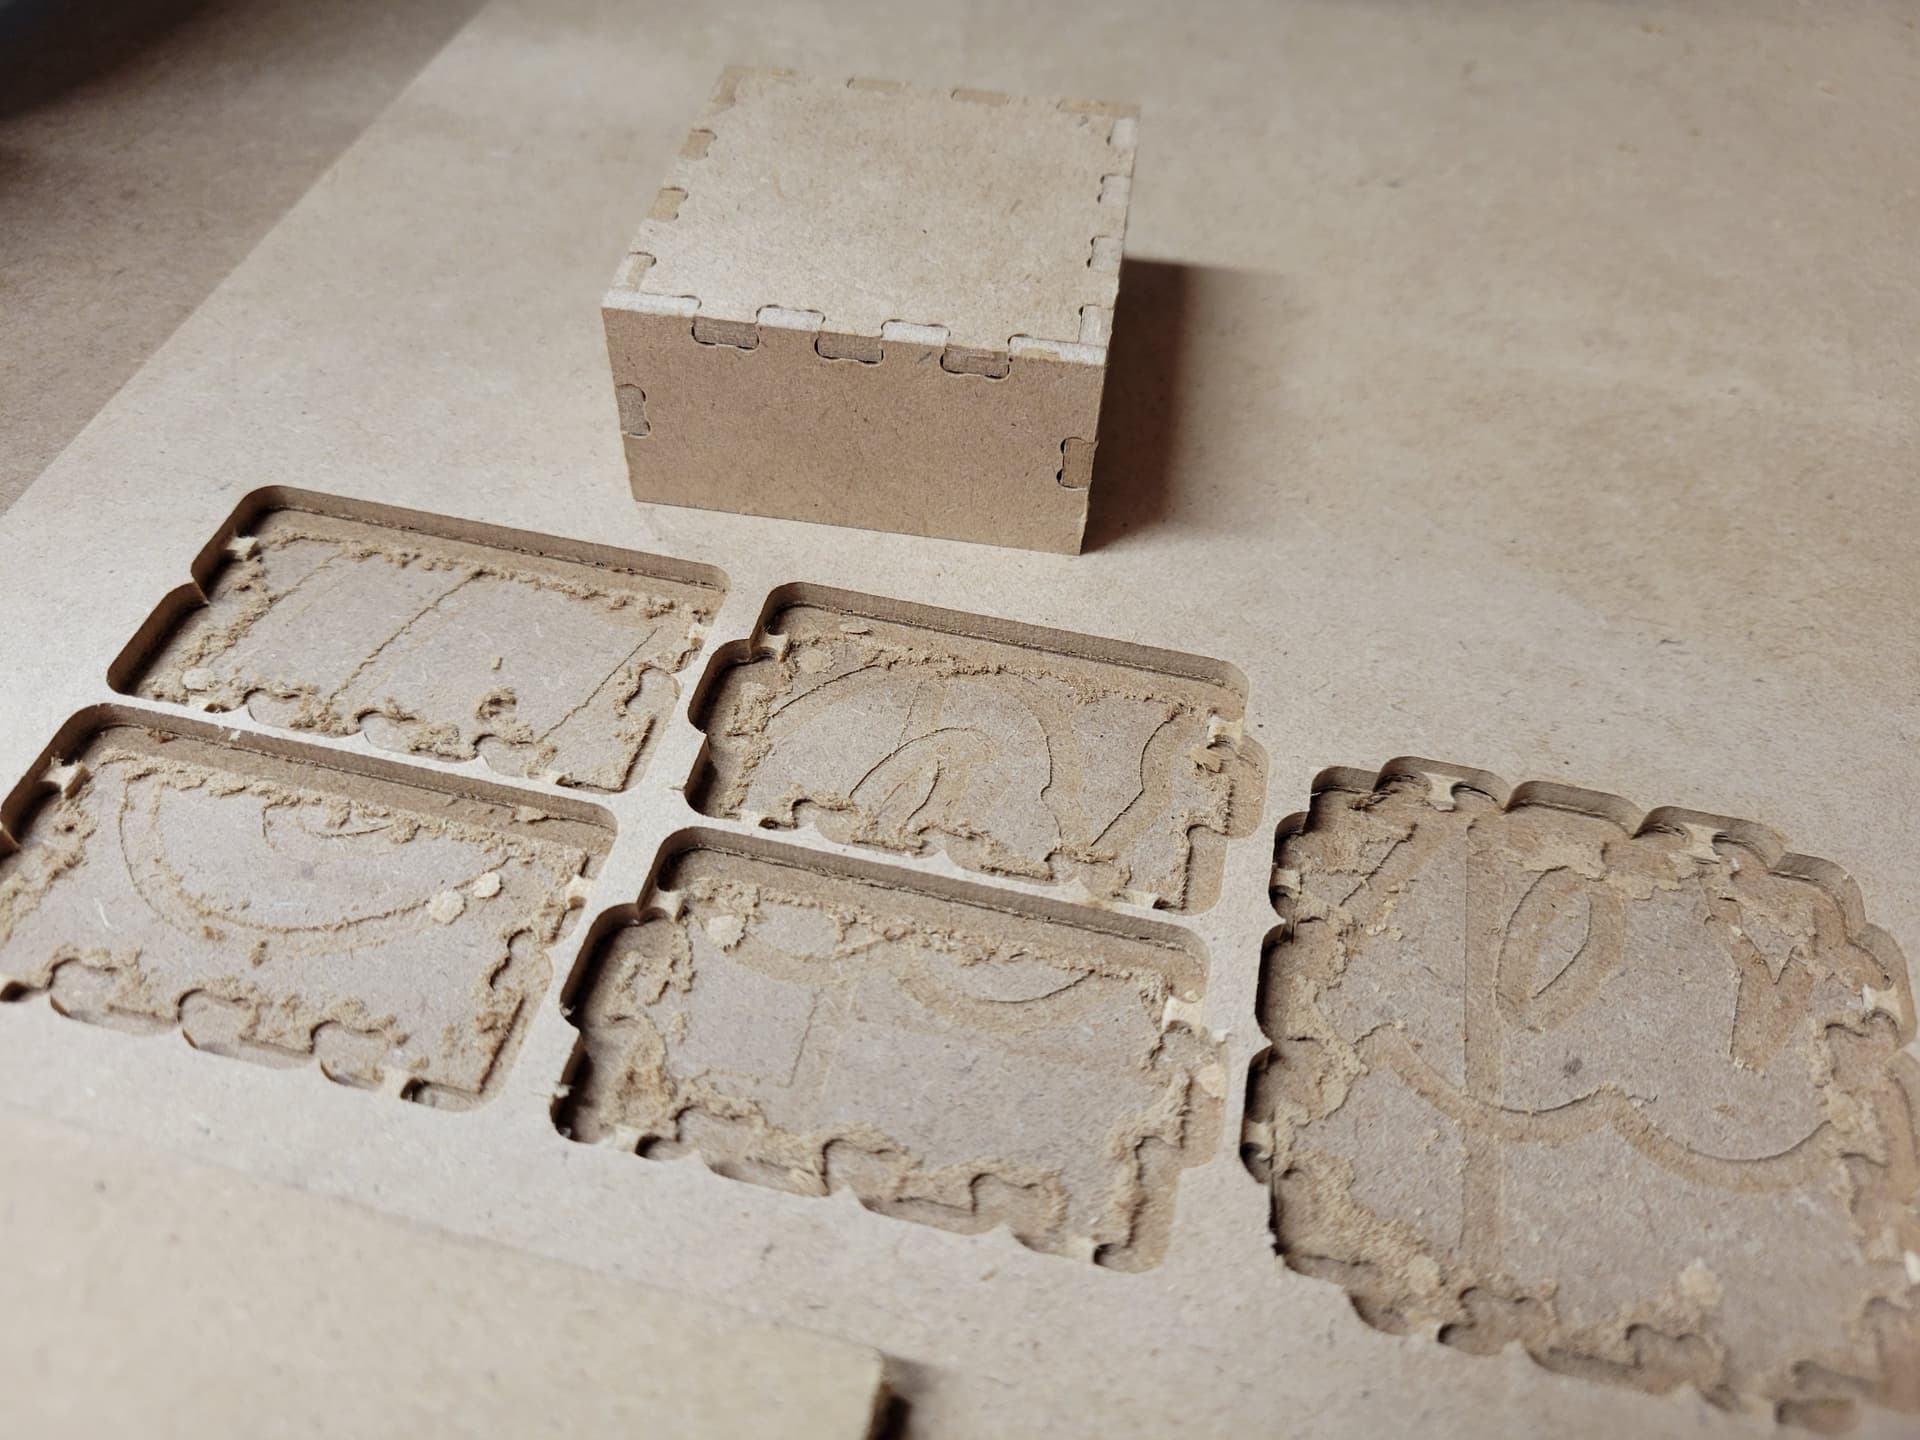
#2 - A Tiny Box
I made this tiny 2 inch x 2 inch x 1 inch box in 1/8 inch hardboard. Mostly I wanted to try out making a box. It also required doing overcut corners in Estlcam. It gave me a good idea of the precision capabilities. It also showed me that an overcut with an 1/8 inch bit doesn’t look bad.
Website - MakerCase - Easy Laser Cut Case Design
#3 - Unicorn
As a girl dad, my life is unicorns and rainbows. This was the first time I did a tool change. The outside was cut with an 1/8" endmill with a 1/16" endmill for a finishing pass (since the 1/8 was too big for a few spots) in 1/8 inch hardboard. The lines were engraved at 0.5mm deep with a 45 degree V bit.
Vector - Free FREE Unicorn SVG | Manadala Unicorn SVG Cut File for Cricut, Cameo Silhouette – Caluya Design

8 Likes
Great work and congrats on some perfect tool changes!
3 Likes
The dogbones look as if they were included in the file, were they? If you did them with Estlcam, they should have been smaller. Especially the tab on those boxes show you very well whether your cut settings are right. Ask me how I know. ![]()
The page you linked looks interesting as well. I often use https://www.festi.info/boxes.py/Menu to get an idea of what is possible (though it’s for laser originally).
2 Likes
Nice work! Looks great.
1 Like
I did the dogbones in Estlcam, even though it was an option on the site. I briefly looked at boxes.py before but wow I didn’t realize how extensive that is. It definitely helps with ideas. At some point, I want to play with hiding finger joints by not going full depth.
1 Like
Then they should be a bit smaller. Those are really a good indicator whether the settings are good or a little off. I was searching for ages where my problems were (and it was really simple in the end):
You can see on the very left piece how dogbones should look when everything is working as intended. To be fair: this is the ultimate test, because those boxes and the rapid changes in x and y amplify every little error. „Normal“ cuts normally don‘t suffer from those problems, when using a finishing pass you will never notice because the flex is not a problem then.
Please don‘t take me for an ass, I just know that I was getting really annoyed by it and want to help. ![]()
/edit: I just figured that your box is really tiny, then it is alright. ![]() Ignore everything that I said.
Ignore everything that I said. ![]()
2 Likes
There‘s a great generator for this as well, it‘s called Kaestle. You can get it in a German forum somewhere, sharing of links is not allowed. ![]()
2 Likes
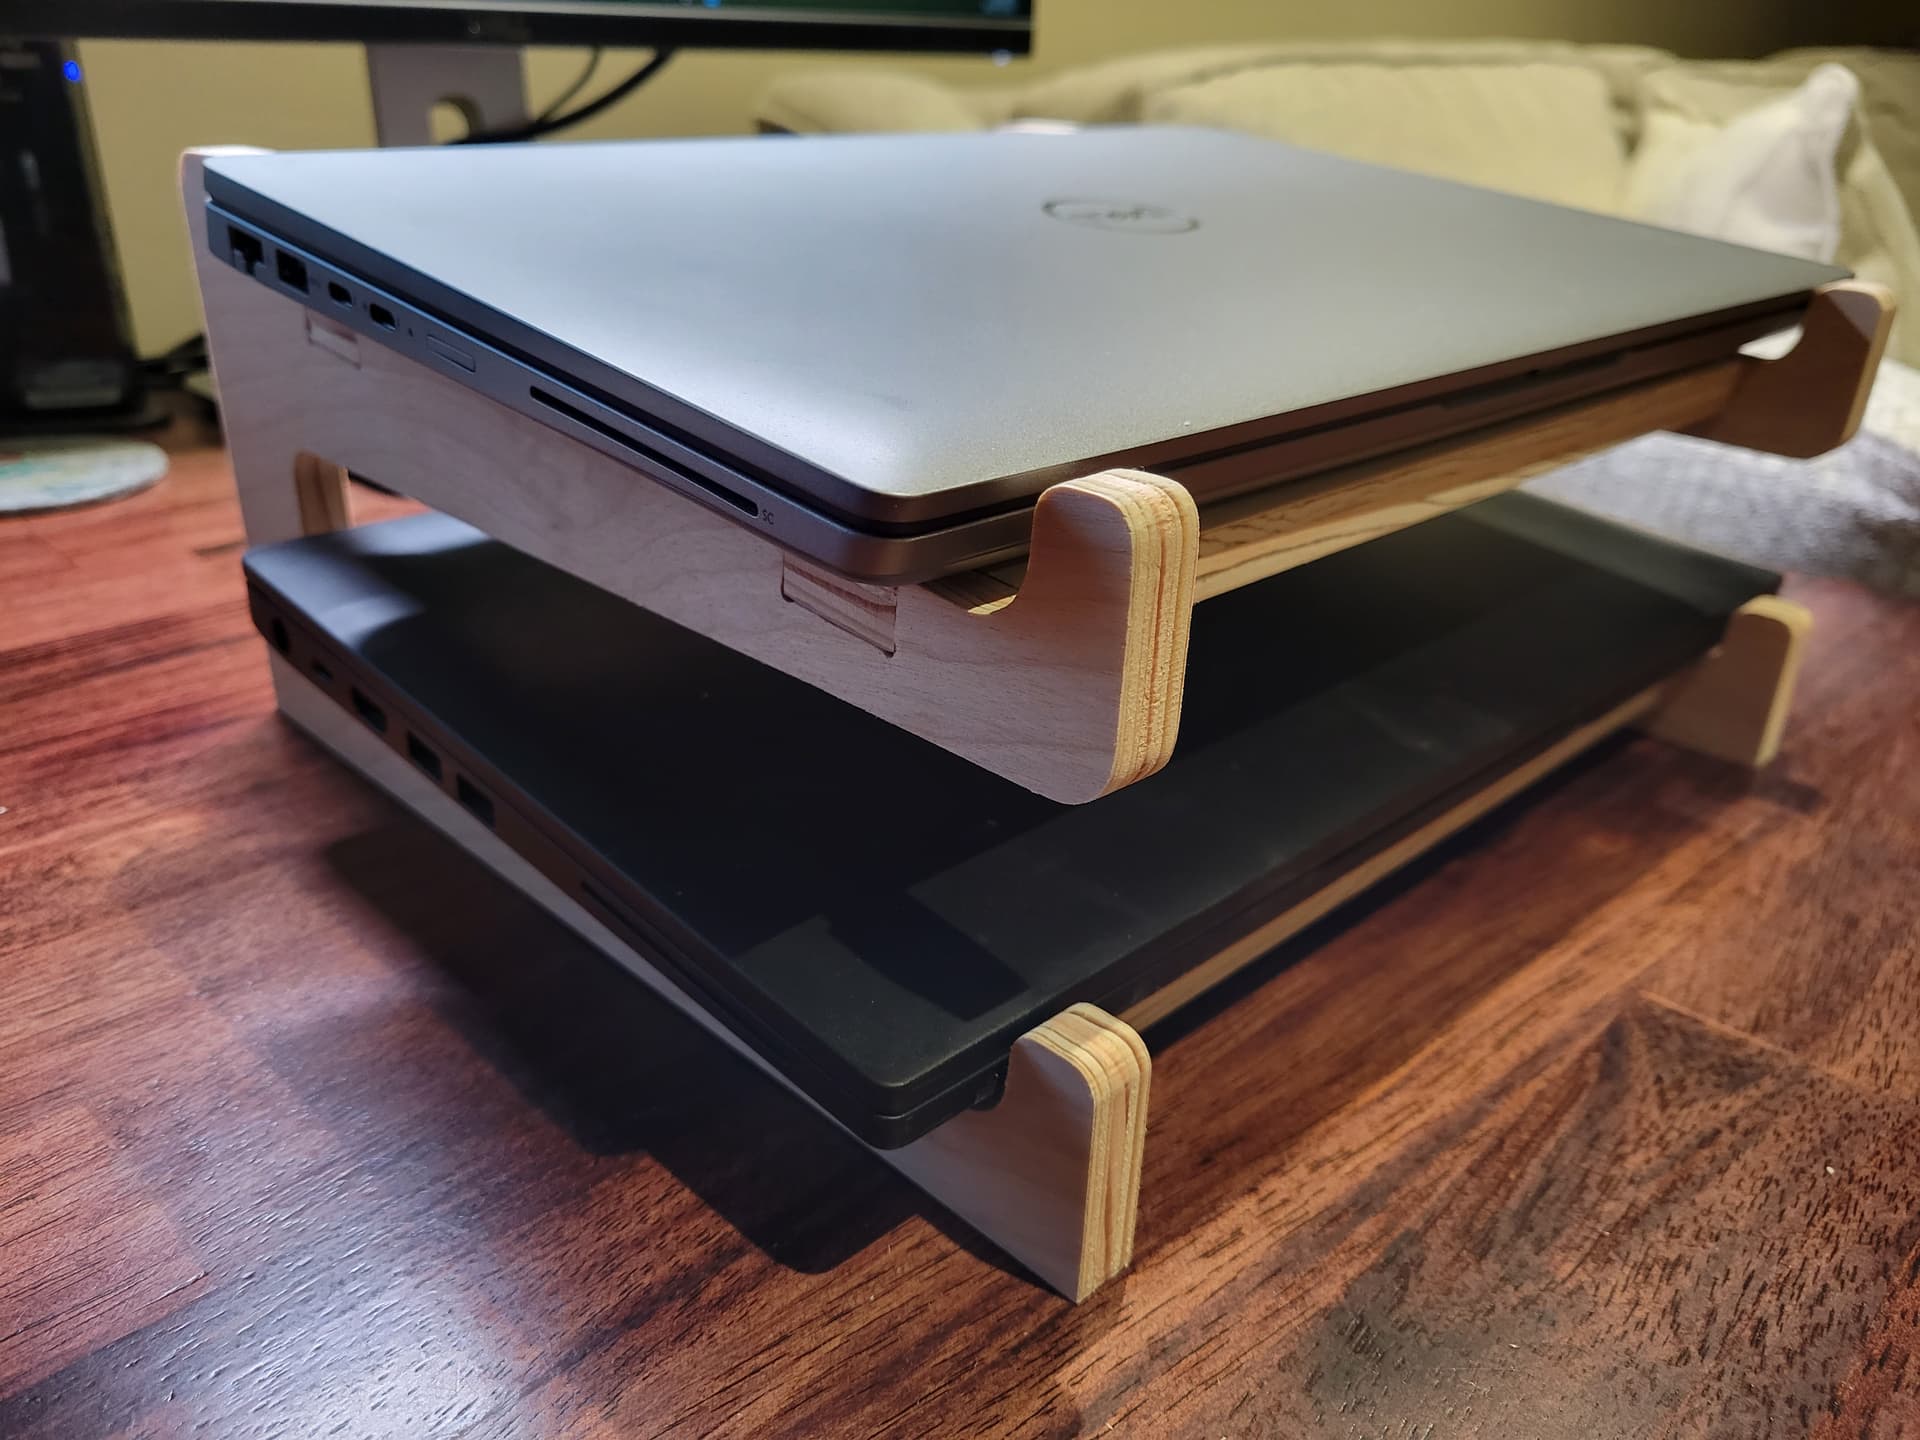
First real project!
At work, I have 2 laptops. Normally, they’re docked so I don’t ever open them. I wanted to create a stand so I could stack them. If I wanted to, I could open the top one.
This was done with 1/2 inch birch plywood. I made some mistakes but it still came out great. I still need to do a little more sanding and decide how I’m going to finish it. I’ll probably stain it dark and put on a couple coats of polyurethane.
This is my own design created in Fusion 360. I parameterized it far more than I have previously. I had to brush up on my trigonometry. It took a bit to sort out how to not get extra lines when exporting to DXF.

For the sides, I tried skipping the tabs and using double side XFasten tape, but that wasn’t sufficient. I still managed to save it with some sketchy finger holding.
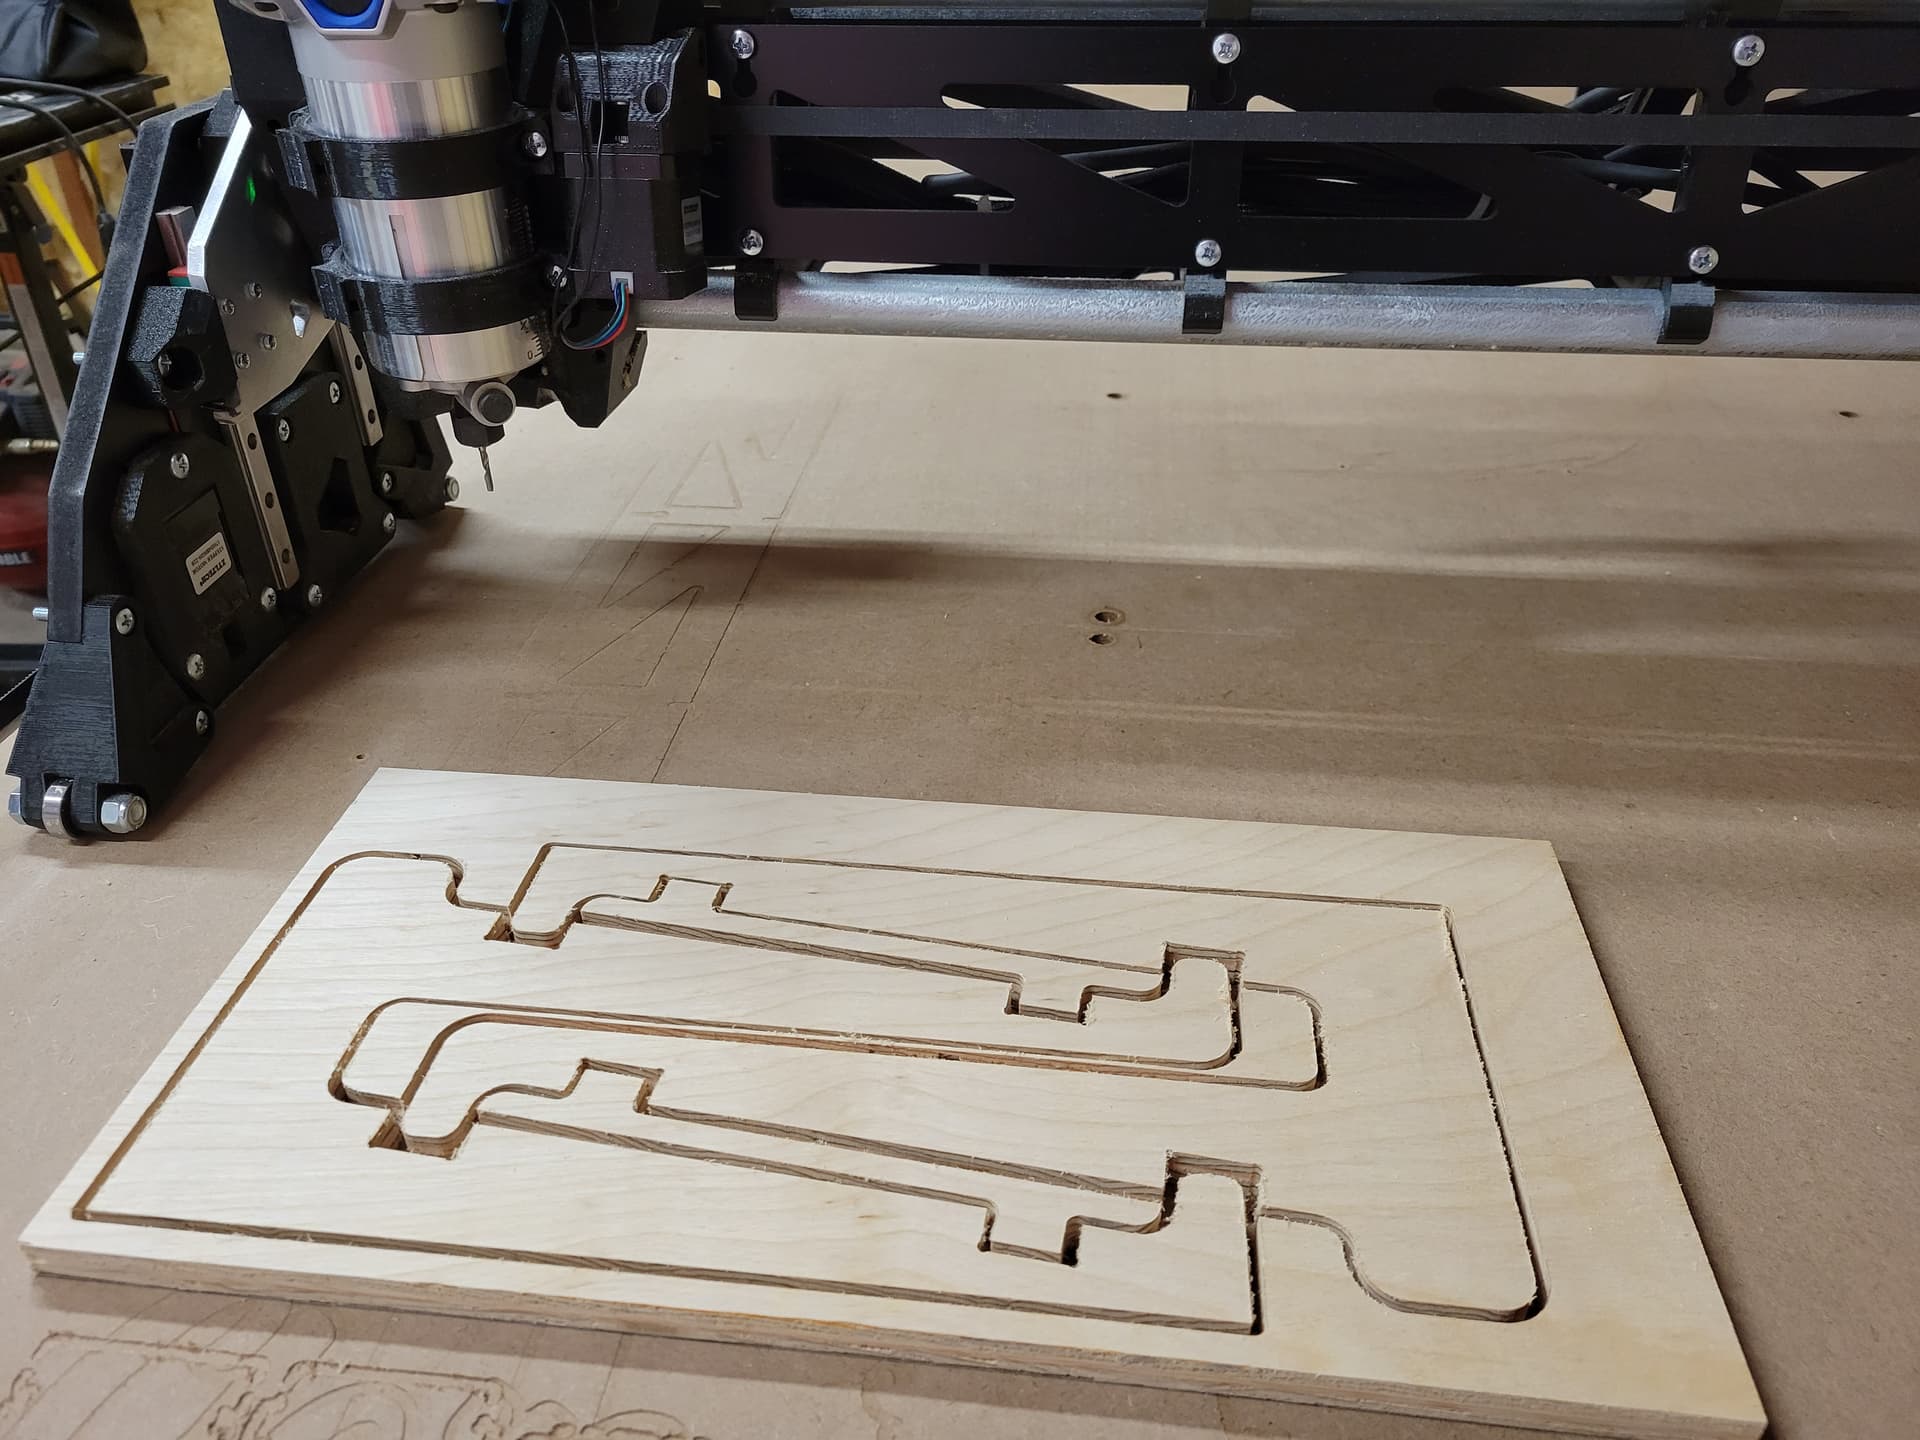
For the braces, I resorted back to tabs. I did them one at a time. The first one required a bit of sanding for proper fit, but a slight tweak to the width and the last 3 fit with the perfect amount of force required.

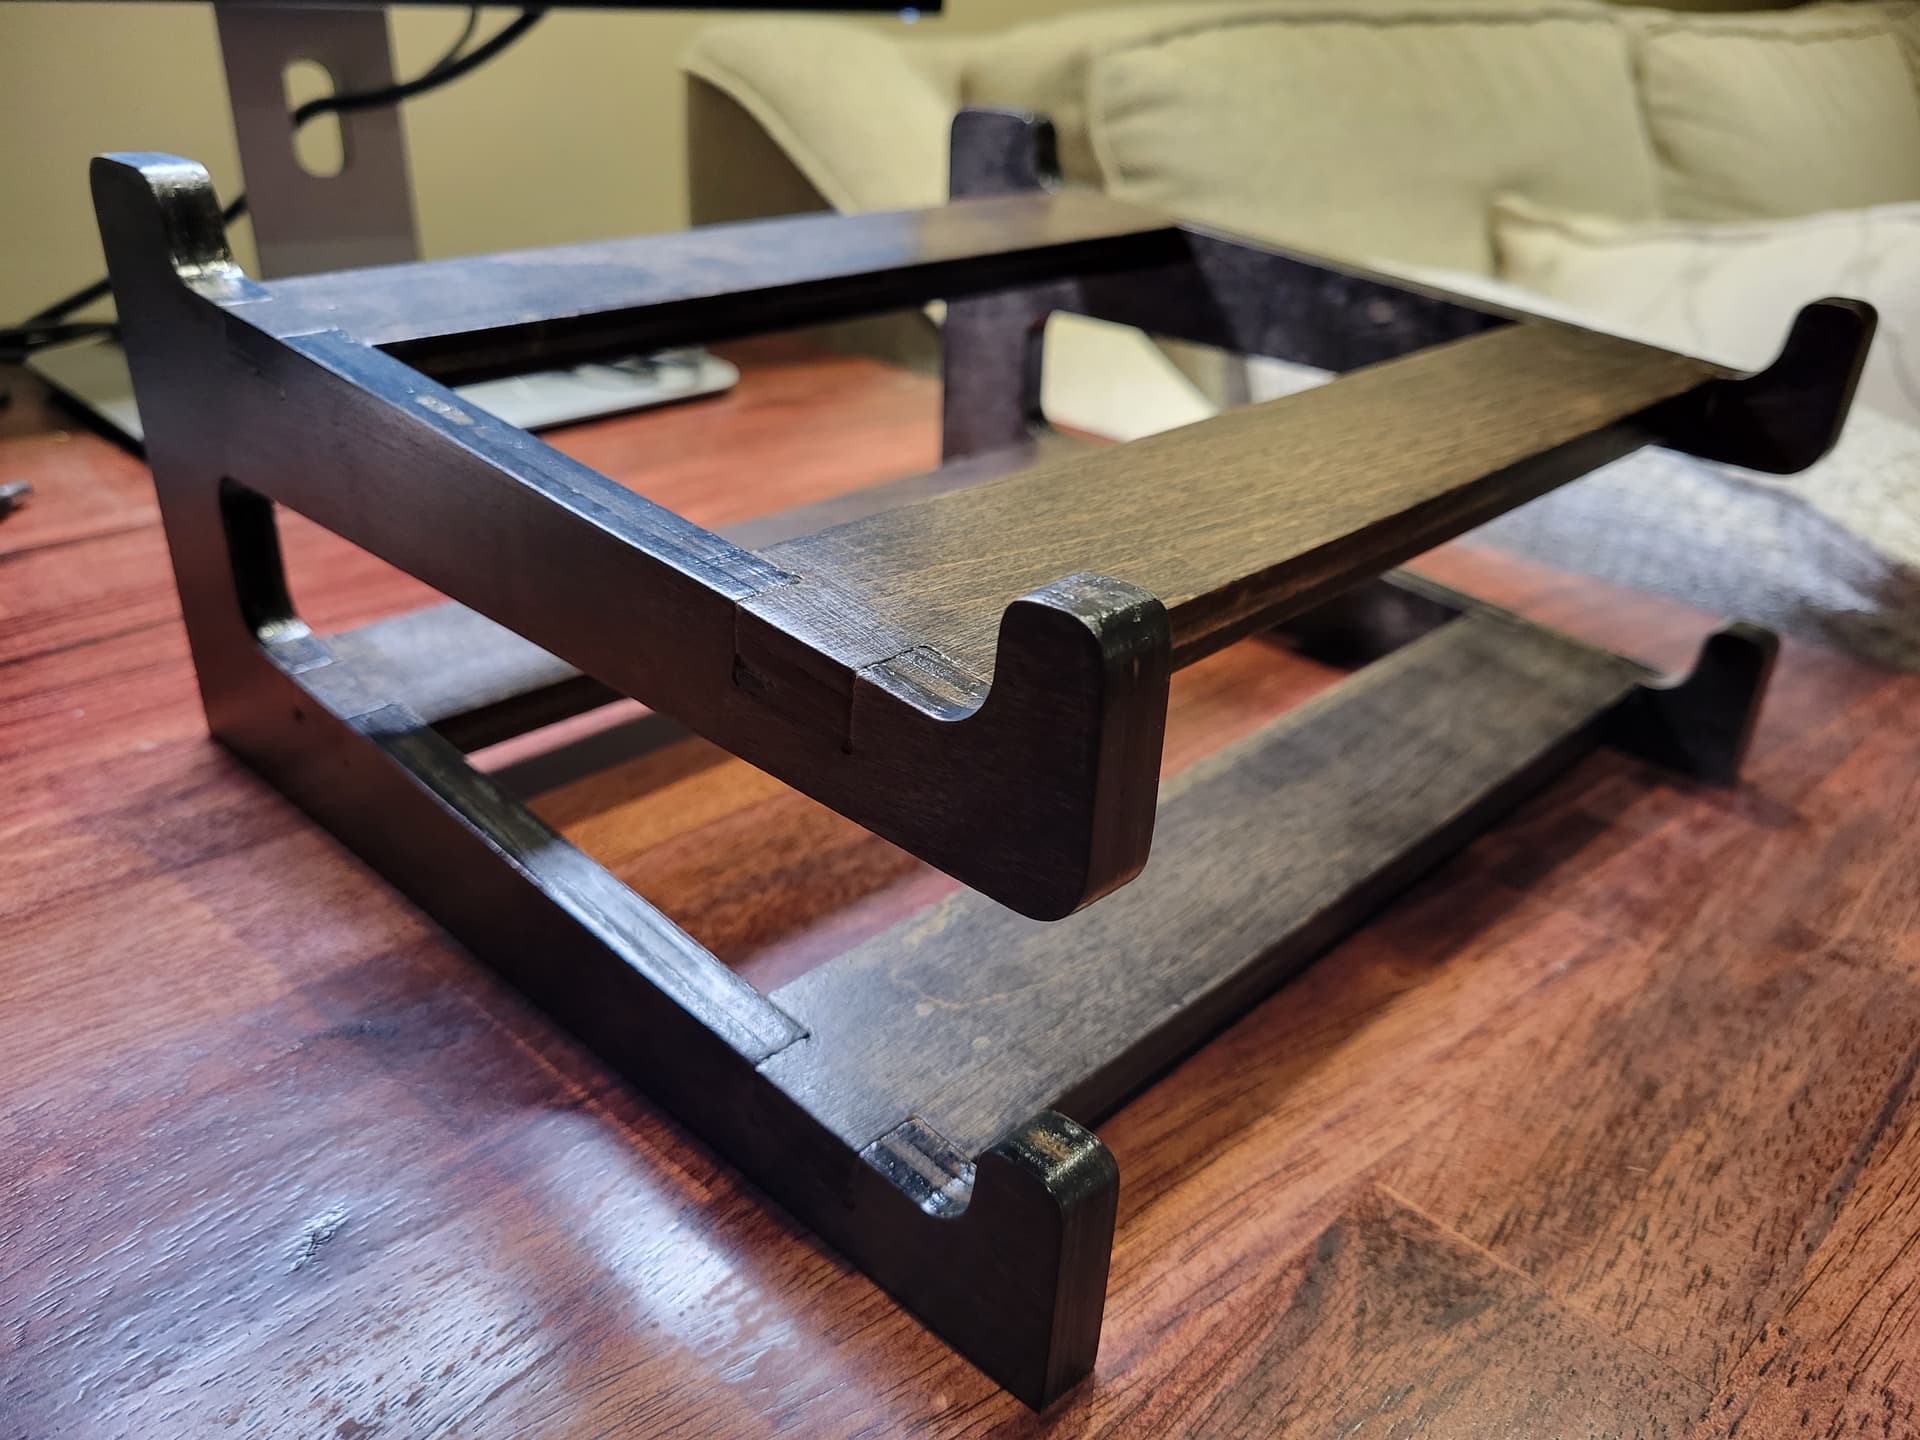
Assembled.
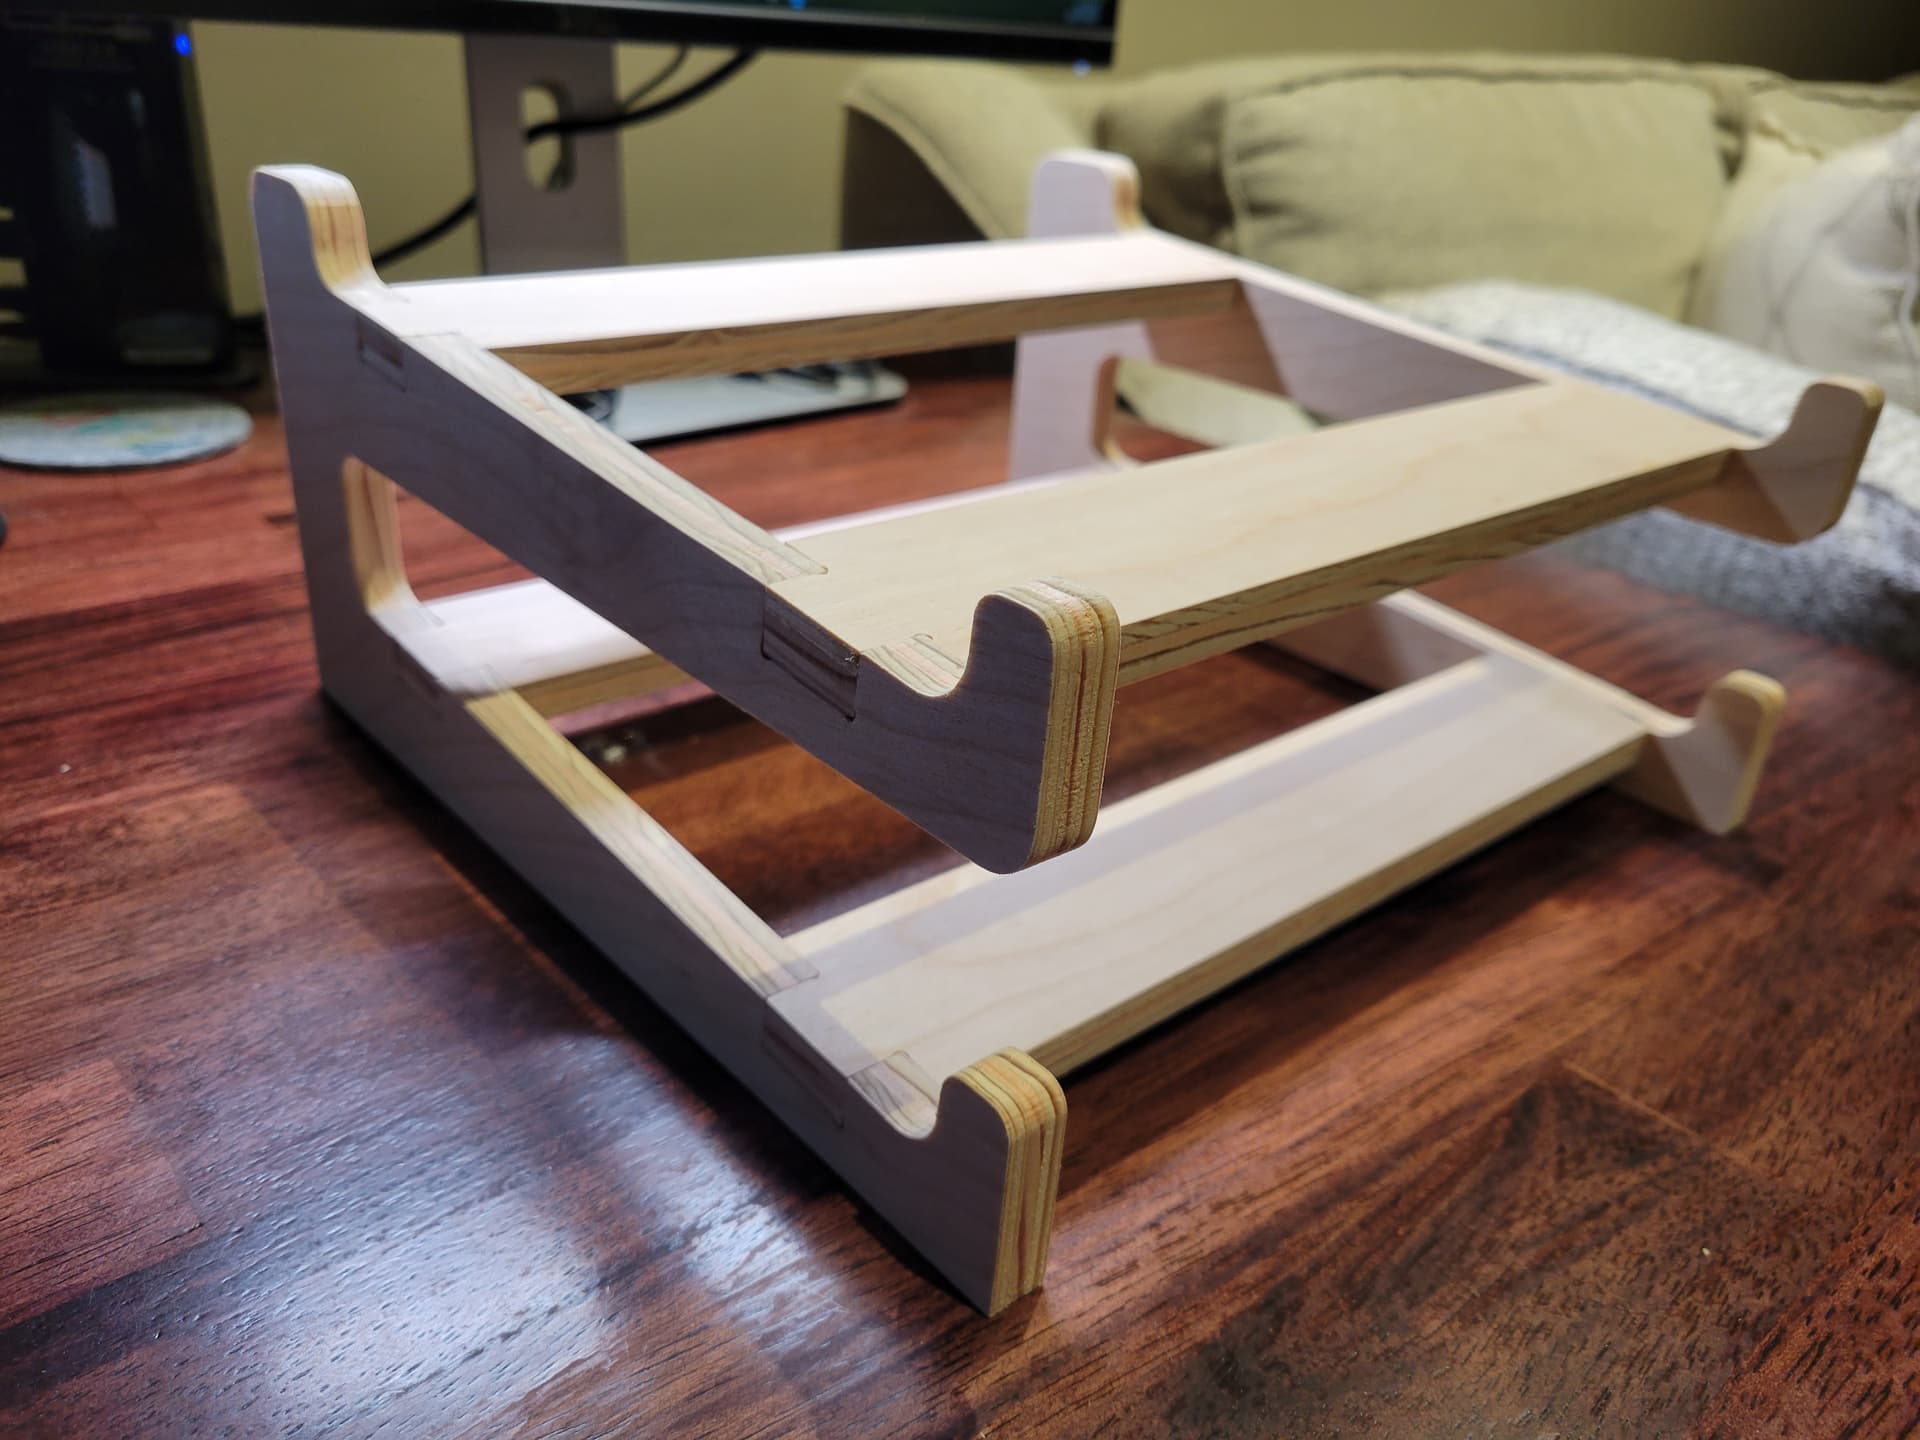
With laptops.
I’m still fascinated by going from idea to digital to physical.
9 Likes
Wow, looks great! ![]()
4 Likes
Well, that was a fun little adventure. I switched my Jackpot from AP to STA mode. I left it on DHCP only to realize I didn’t know what IP address it now used. So, I logged into my router, found it, and set a static IP. I then updated the FluidNC config with those settings.
I don’t know how, but somehow it lost the config (which I didn’t realize right away). It was showing an alarm and it wouldn’t move or home or anything. Then I updated to FluidNC 3.7.12 (firmware only) but that didn’t make any difference. Once I realized that the config was lost, I uploaded a backup and all was well.
It works fine and I love not having to switch wifi networks.
1 Like
Did you turn off SSDP? That helps prevent out of memory errors. You dont need it since you’re static assigned an IP.
2 Likes
Yes, it’s off. I didn’t see any low memory warnings during any of this.
3 Likes
Finally got around to finishing my laptop stand. I definitely prefer the CAD and CNC side to the finishing part.
3 Likes
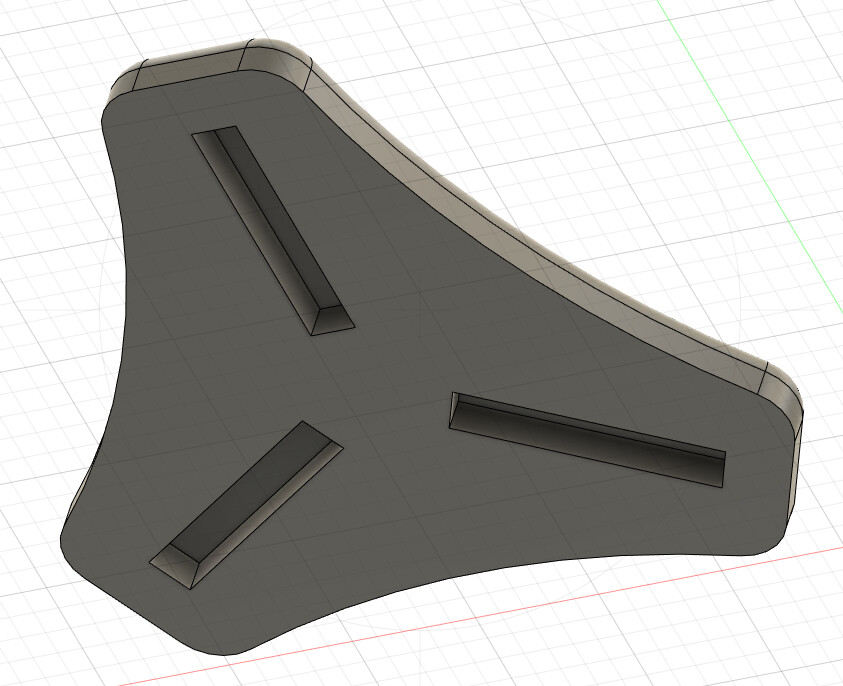
In the works is a 3 legged stool for in the shop. I’ve got the seat figured out but the legs are still a work in progress. Proportions are different but it might look familiar…
I’ll end up doing that roundover on my traditional router table.
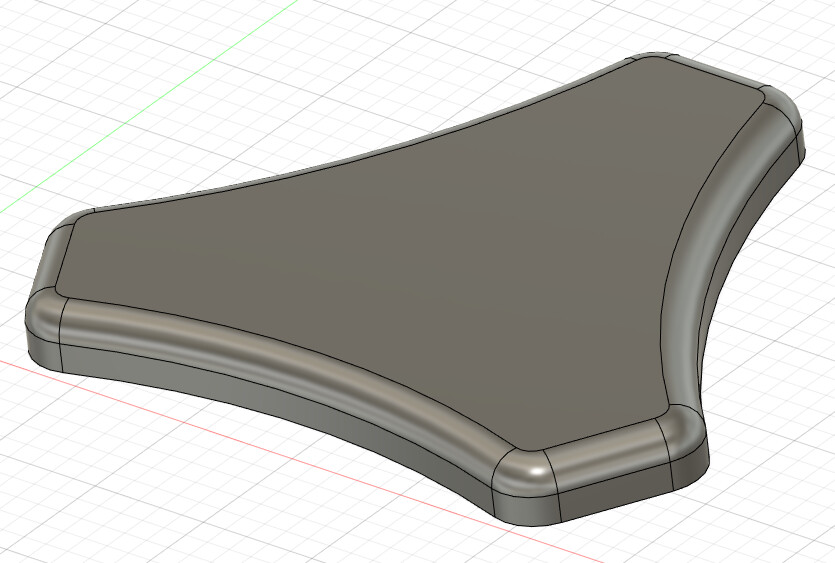
The leg slots might change a bit . Intentionally not going all the way through.
3 Likes
Ohhhhh now you have my full attention!!
1 Like
It was pretty interesting that I landed there. I wanted a 3 legged stool since it wouldn’t wobble. So, I started with a triangle seat, cut the points off, and had an epiphany. It makes sense from an ergonomic standpoint.
My other wild idea for a seat involved sitting in sand and using my 3D scanner to digitize my butt print…
The legs are a bit trickier since they look dumb if they’re too thick so I’m figuring how I can support it. I’m iterating through some ideas. I want it to have a footrest with a similar shape to the seat but larger for some consistency. I also think the same shape can be used as a support in the center, since otherwise joining 3 legs together would be difficult.
Current thoughts of the leg itself are in this ballpark but skinnier plus a footrest and braces but I haven’t settled on any real direction yet.

1 Like
That stool is just a stones’ throw away from being a full-on V1 logo in its’ own right!
2 Likes
There was a period where I tried to make it exactly the V1 logo, which I still think could be done but I couldn’t make it work. You could run the legs all the way through the seat and use a large dowel in the middle. Although, joining the legs to the dowel would be tricky. Then to allow for the slots to be 3/4" plywood, you might need to make an inlay or something so you can add an extra border around the seat since otherwise it’s too small. This is beyond my skill level.
I could get it back to the exact shape by just adjusting parameters.

2 Likes