One thing I know I’m not is an artist…
But, it seems a contrasting inset circle in the bottom would make it artistically “correct enough”
One thing I know I’m not is an artist…
But, it seems a contrasting inset circle in the bottom would make it artistically “correct enough”
I’m equally fascinated. I really feel like I’m living in the future when I can wake up with an idea, spend some time on the computer designing it, then either print or machine it (or both) before the day is over. Something in my life I never realized I was missing.
Blockquote You could run the legs all the way through the seat and use a large dowel in the middle. Although, joining the legs to the dowel would be tricky.
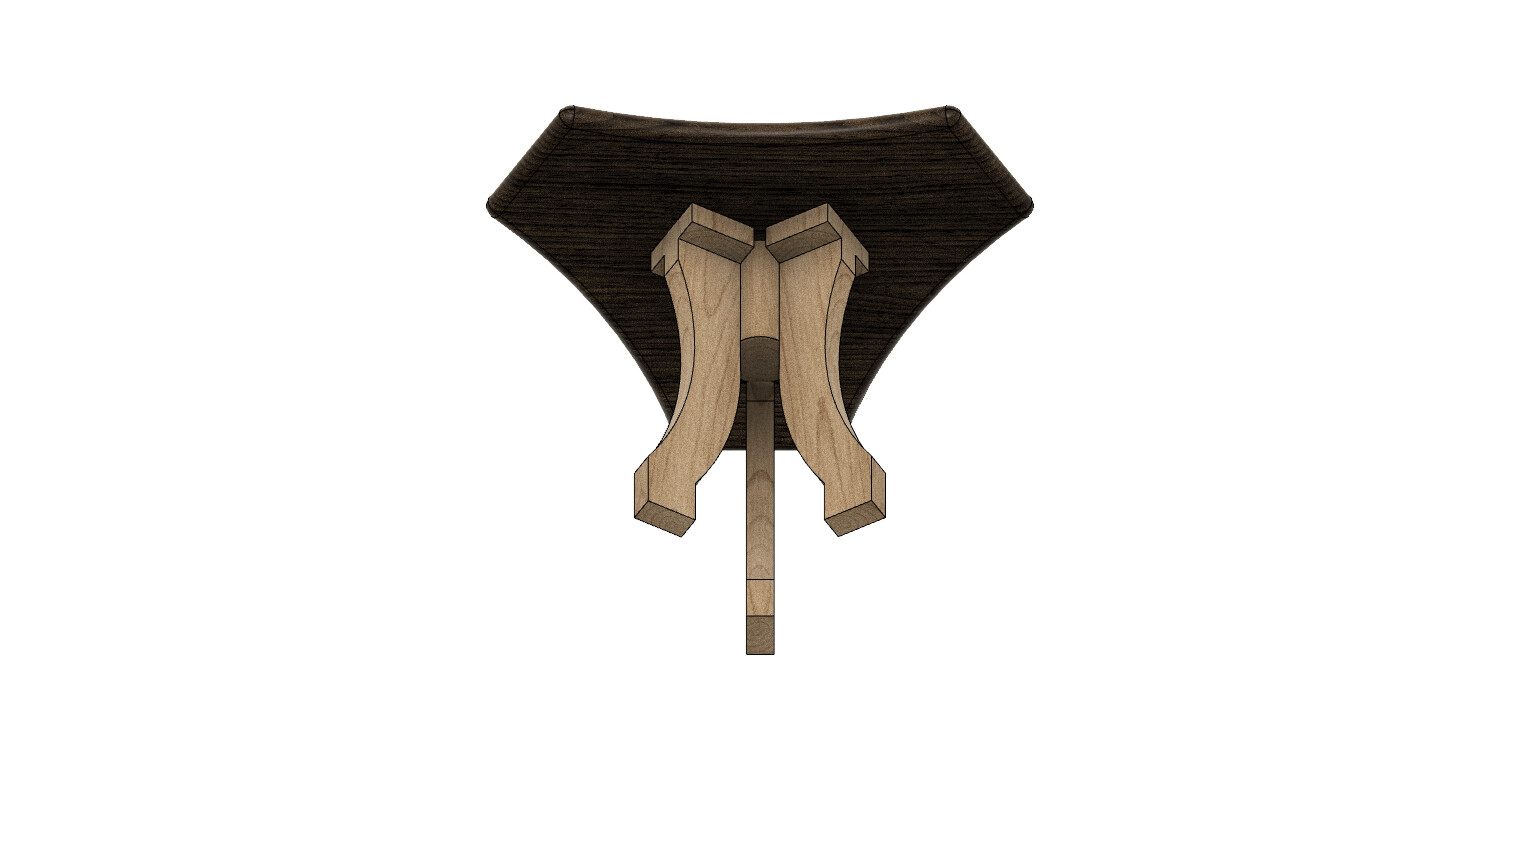
You could make the seat out of a darker wood like Walnut and then the legs and center dowel out of a lighter wood like Maple or Oak and it would look just like the logo… Not sure about the joinery for bearing weight, as that would be highly uncomfortable if it failed while you were sitting on it. ![]()
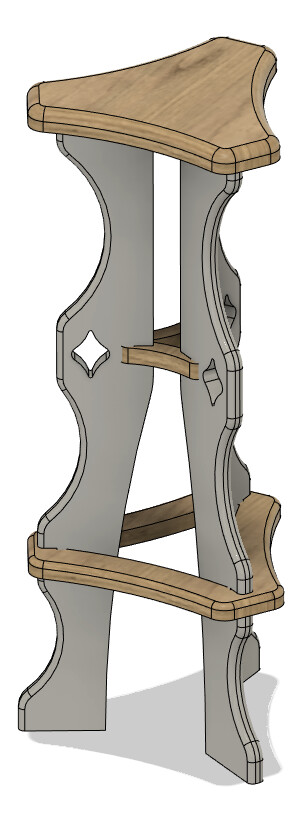
Hi Jason, I liked the idea of your stool, so I tried to model it following the V1 profile.
The height is 590 mm but I can easily change it to taste.
I designed it for 18mm plywood
If you are interested, I can give you the dxf of the pieces that compose it and possibly modify it according to your preferences.
bye
Stool.zip (32.5 KB)
![]() I think it would probably be ok. Worse case scenario, you drill a hole through the dowel sideways and put a smaller dowel in that sticks out both ends that rests against the seat.
I think it would probably be ok. Worse case scenario, you drill a hole through the dowel sideways and put a smaller dowel in that sticks out both ends that rests against the seat.
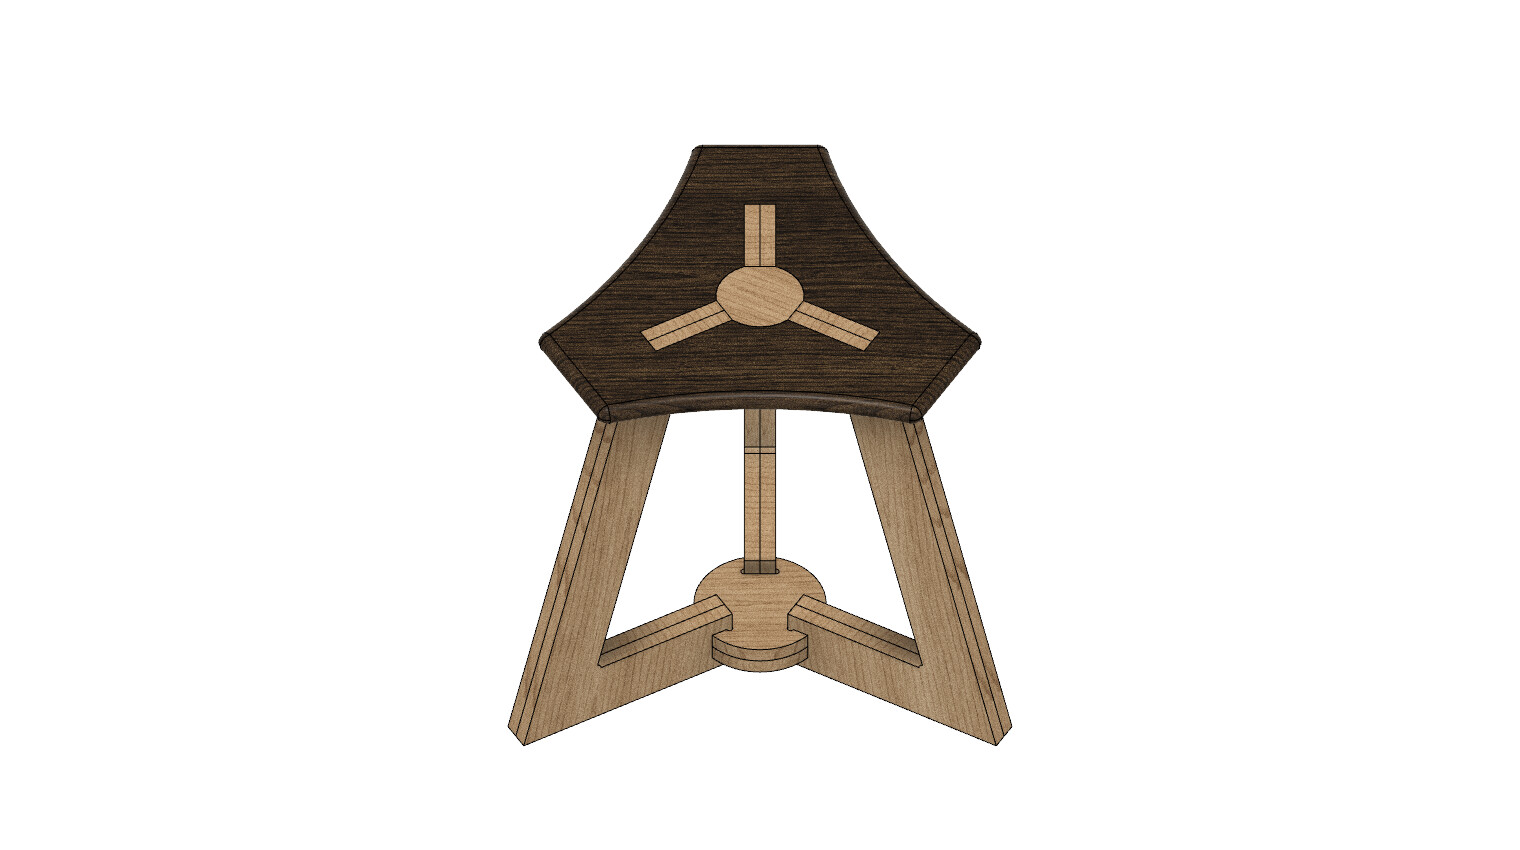
I’m still working on it. It might take me awhile but it’s a fun project and a good CAD challenge for me. At this point, I’m no longer trying to make it look overly like the V1 logo as it’s a design constraint I don’t want to limit myself to. If someone wants to go off in that direction, that’s fine with me.
Nice! Now, adjustable height with a pin… go! ![]()
Thanks for the motivation to spend some late nights finishing my build this coming weekend!
(First the crown test, second the v1e logo stool cutting test?)
Not sure how CNC-able those legs are. Also not sure the bottom of the legs are wide enough for good stability. If you make them go out further, they might need additional support.
Here’s the latest iteration of my stool. It’s about 700mm tall. I need to cleanup the notches for the supports before I give it a shot. It’s designed for 3/4" plywood. I might scale it down and print a smaller version with 1/4" plywood as a test.
I was sizing the seat to use a stair tread I had laying around but I might skip that and make it bigger. I’m thinking about getting this to cut the seat out of:
RELIABILT 1-in x 15-in Radius Edge Unfinished Teak Board in the Appearance Boards department at Lowes.com
I agree with everything you mentioned. That was a quick and dirty rendering that I whipped up on the iPad while laying in bed to get a basic idea out there and the proportions are definitely wrong. My cnc table top sits 32” (800 mm) off the floor and I want to be able to roll up to it and work comfortably. Just off the top of my head, I think I want a 20-24” (500-600 mm) seat height including casters and probably a seat and leg diameter of 18-22” (450-550 mm) to fit that idea.
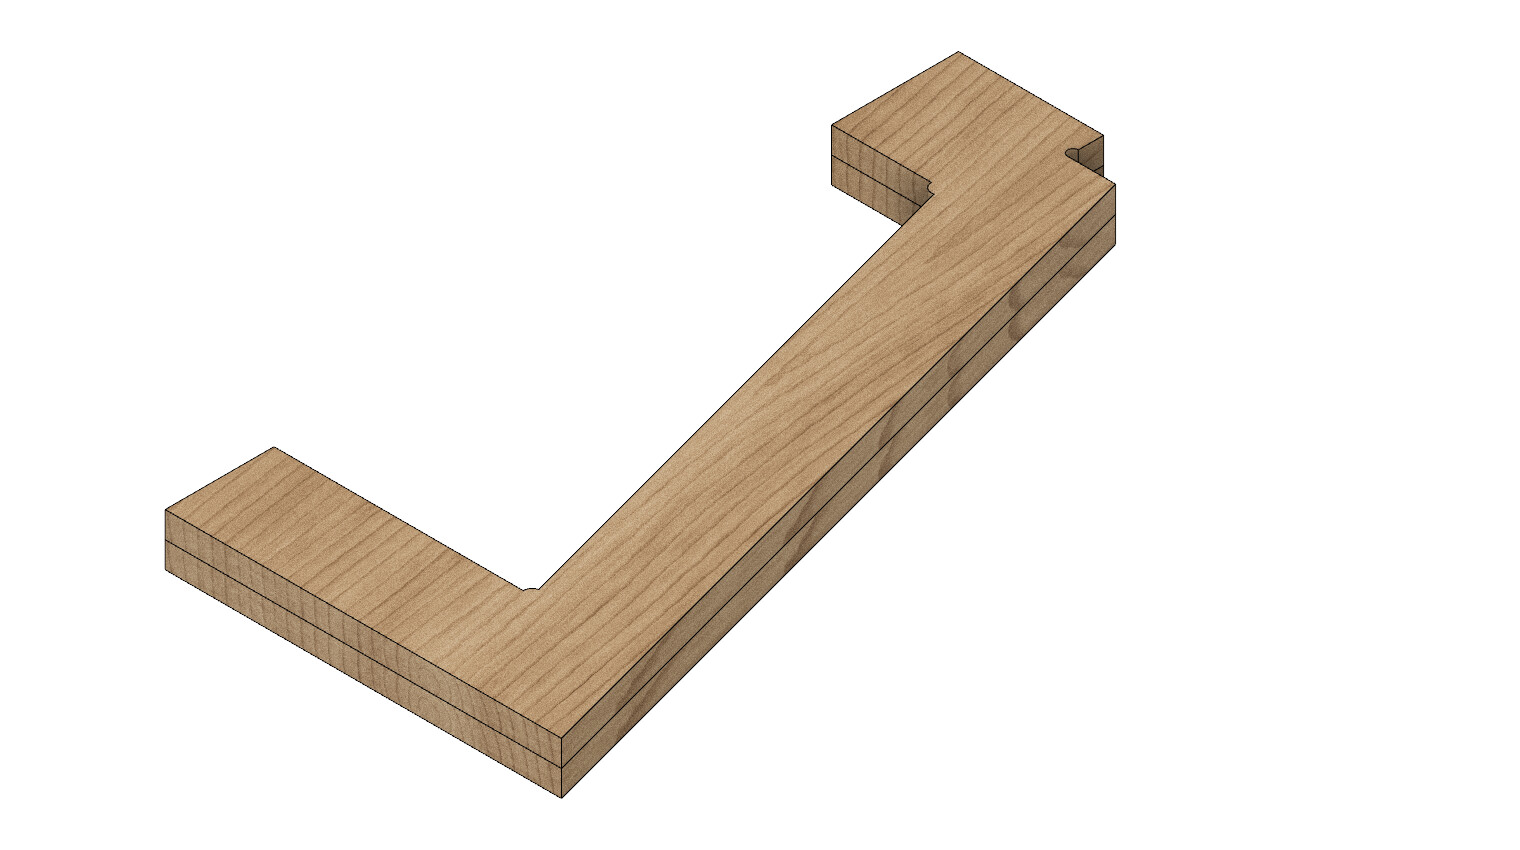
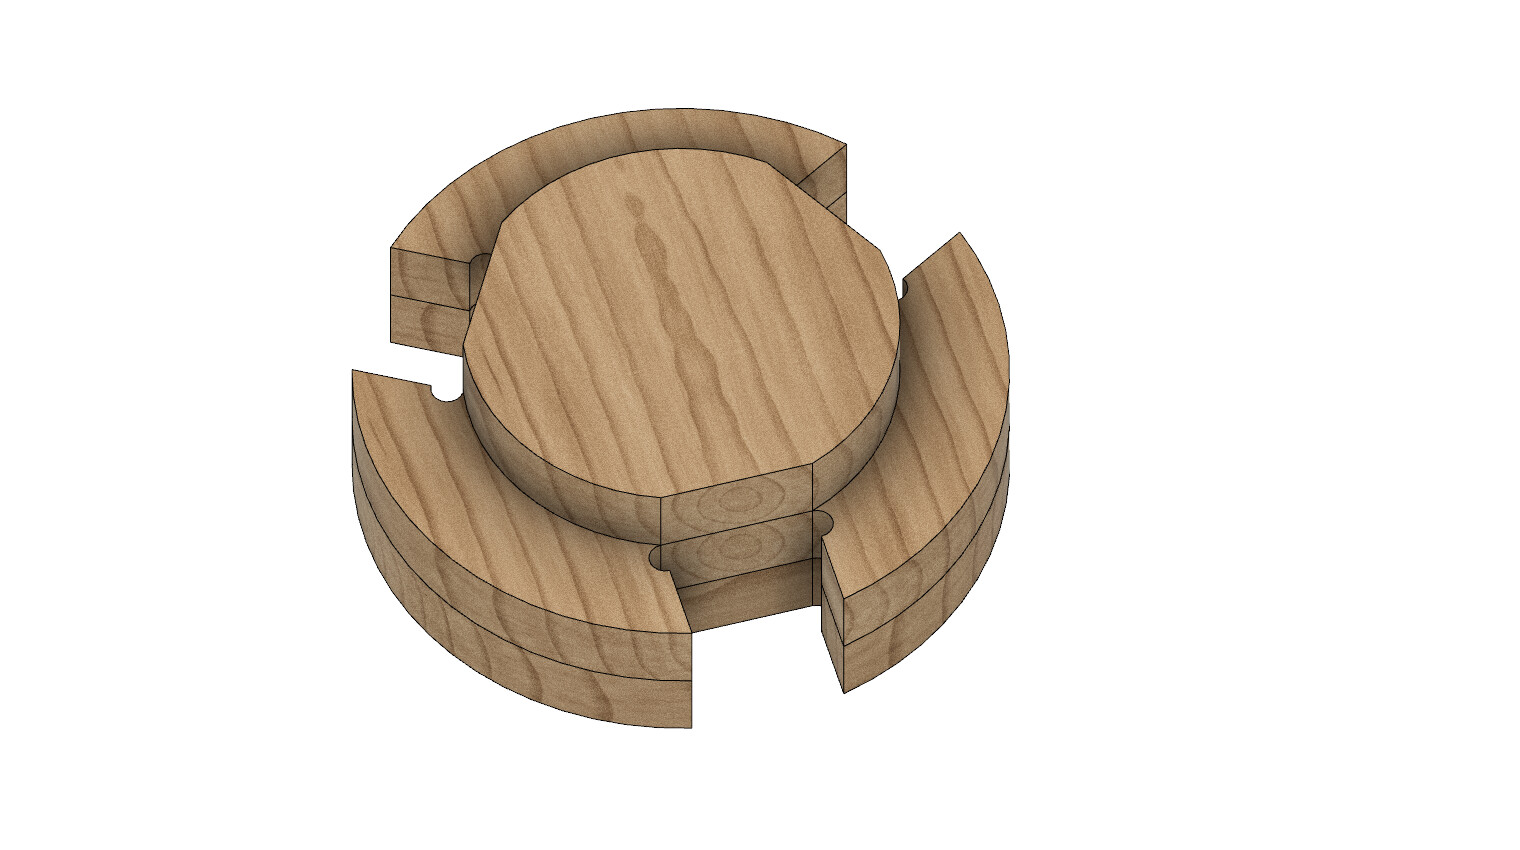
My plan on each of the legs was to cnc a 2 piece glued castle-ish joint that would then slot up into the seat flush with the seat surface. I’m debating changing the circular central column to something more fitting for a cnc as well while still maintaining the v1 aesthetic and a strong core. I’m a big guy, so I think the legs may require a second layer for thickness below the seat to add strength.
I’ll throw a more finished design and some cut ideas for 3/4” stock out here when I have more design time this weekend.
Alright, went with something a little less curvy and a little more geometric that I’m fairly certain will hold up over time, yet keeps with the v1 aesthetic and can be cut on the CNC. I threw in some Fusion 360 files in case anyone wants to look more closely or modify.
Nice! That looks great.
I think that looks great!
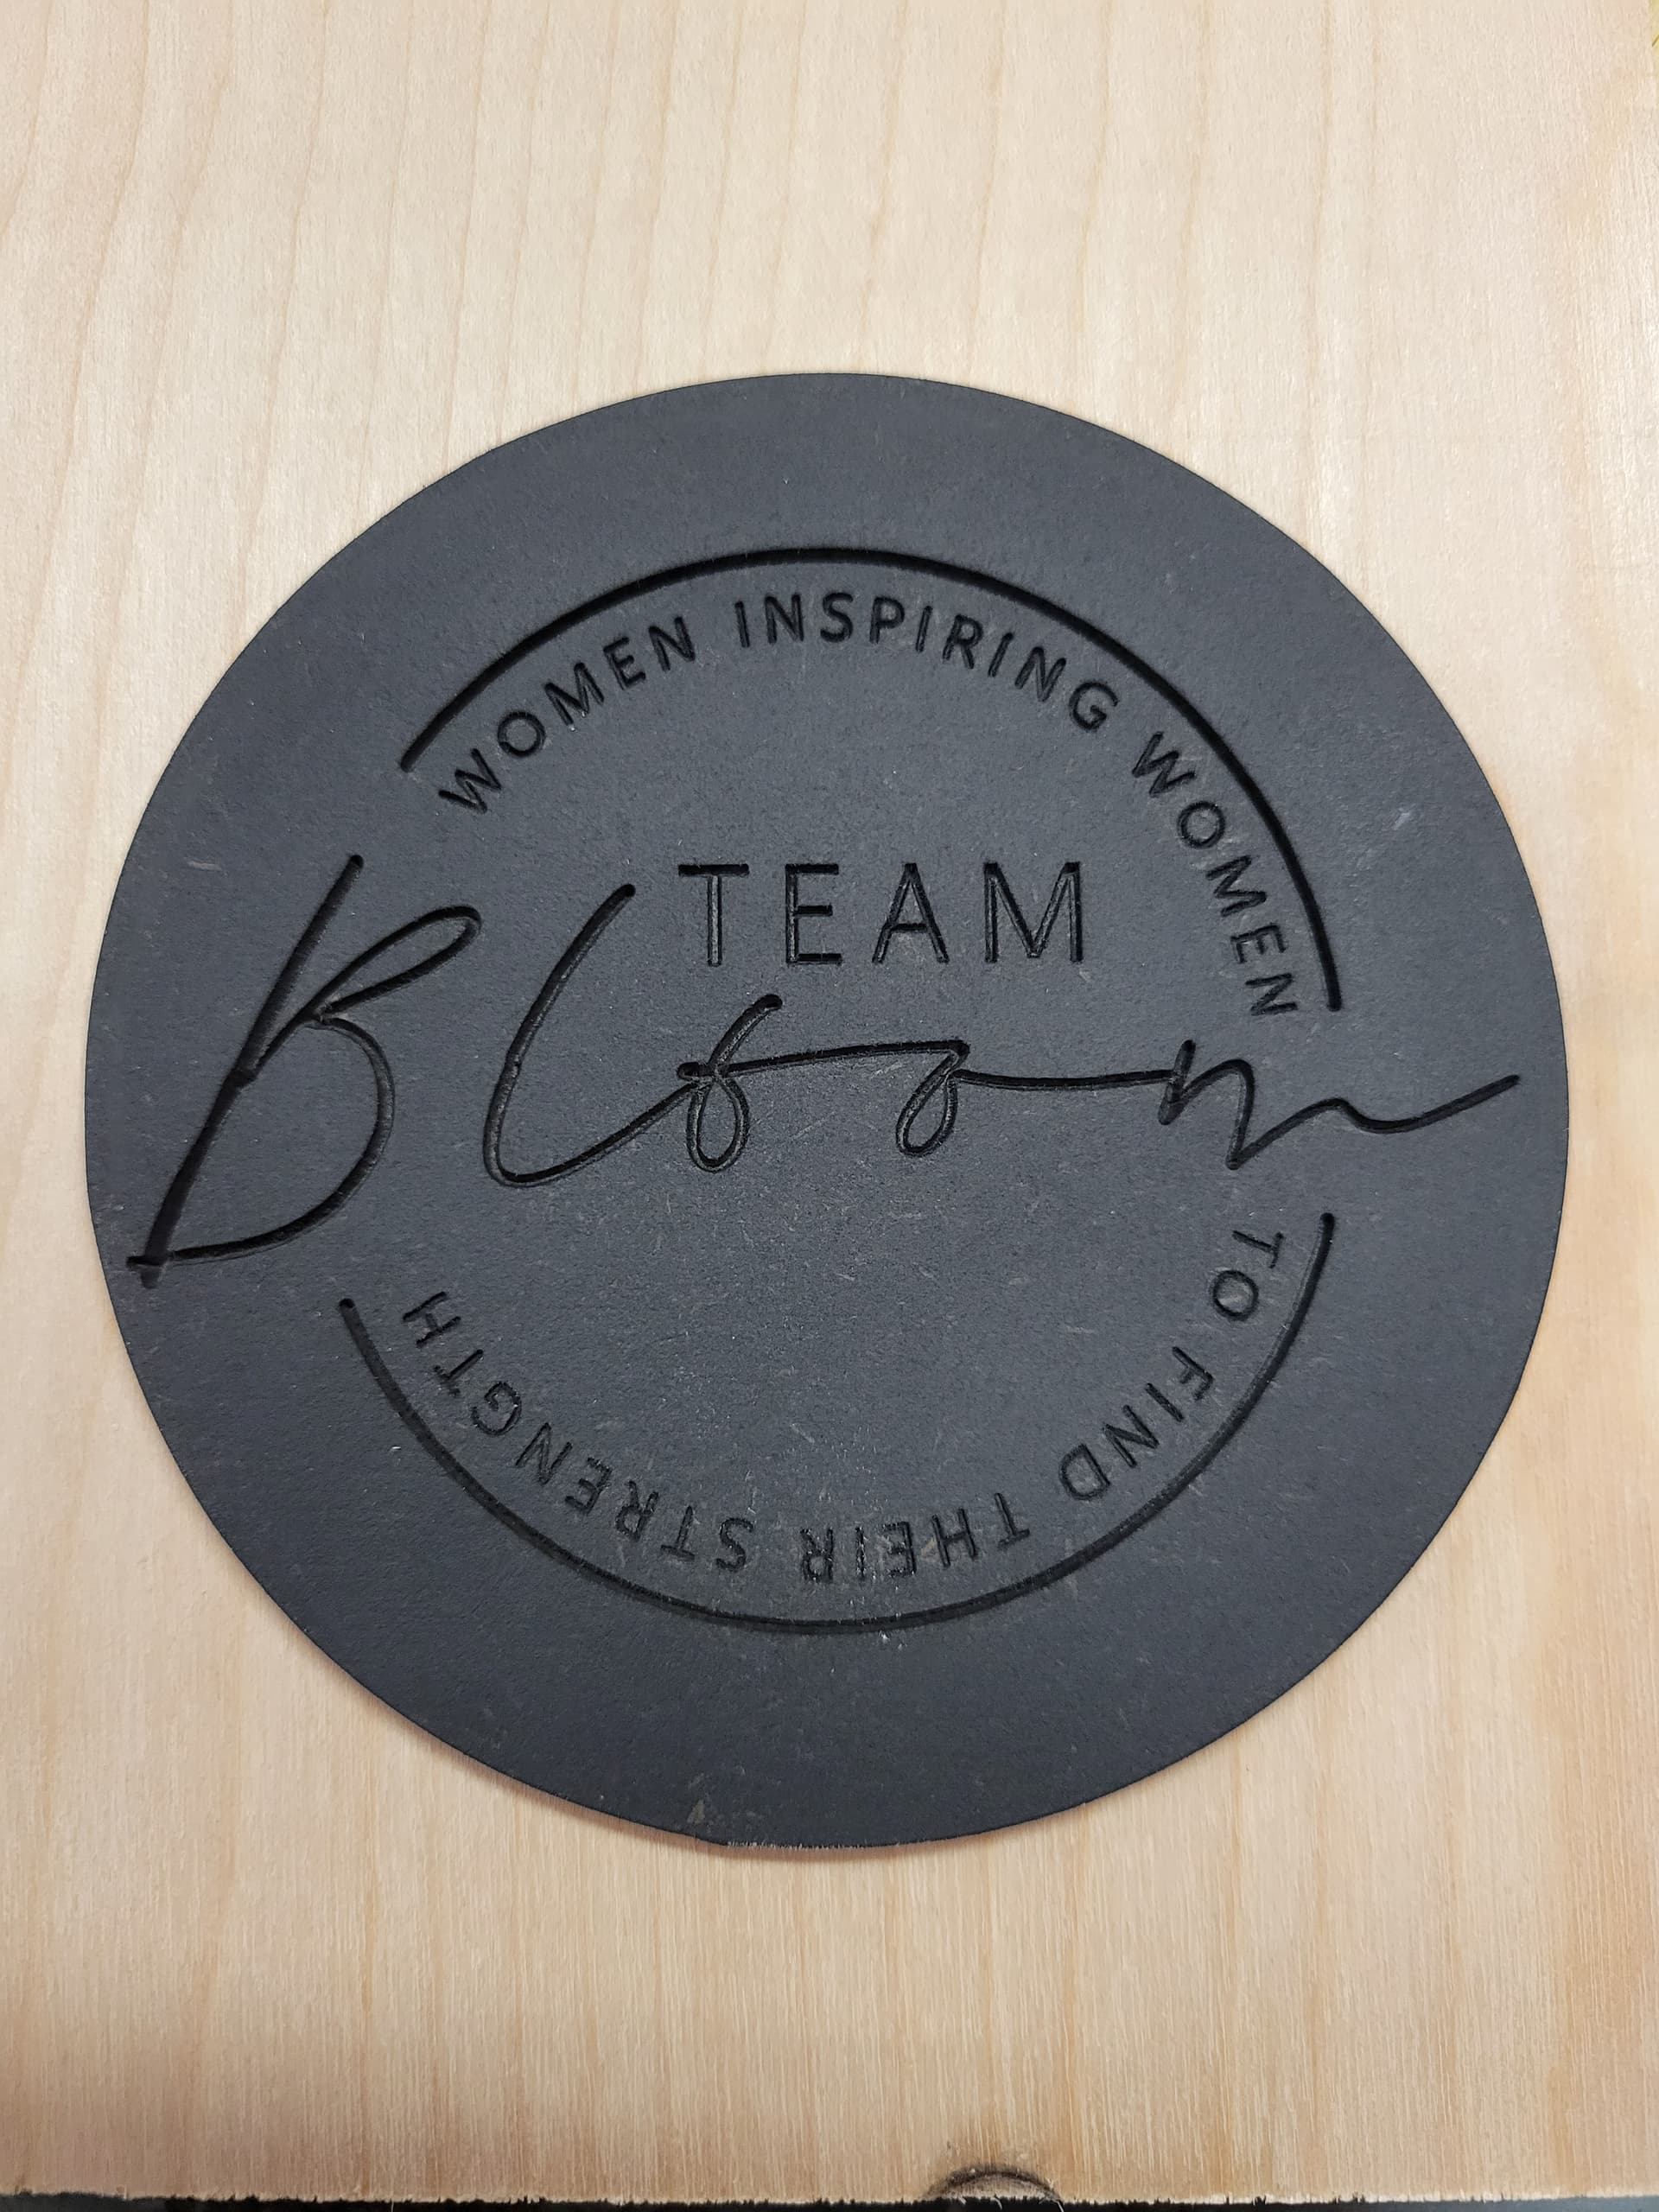
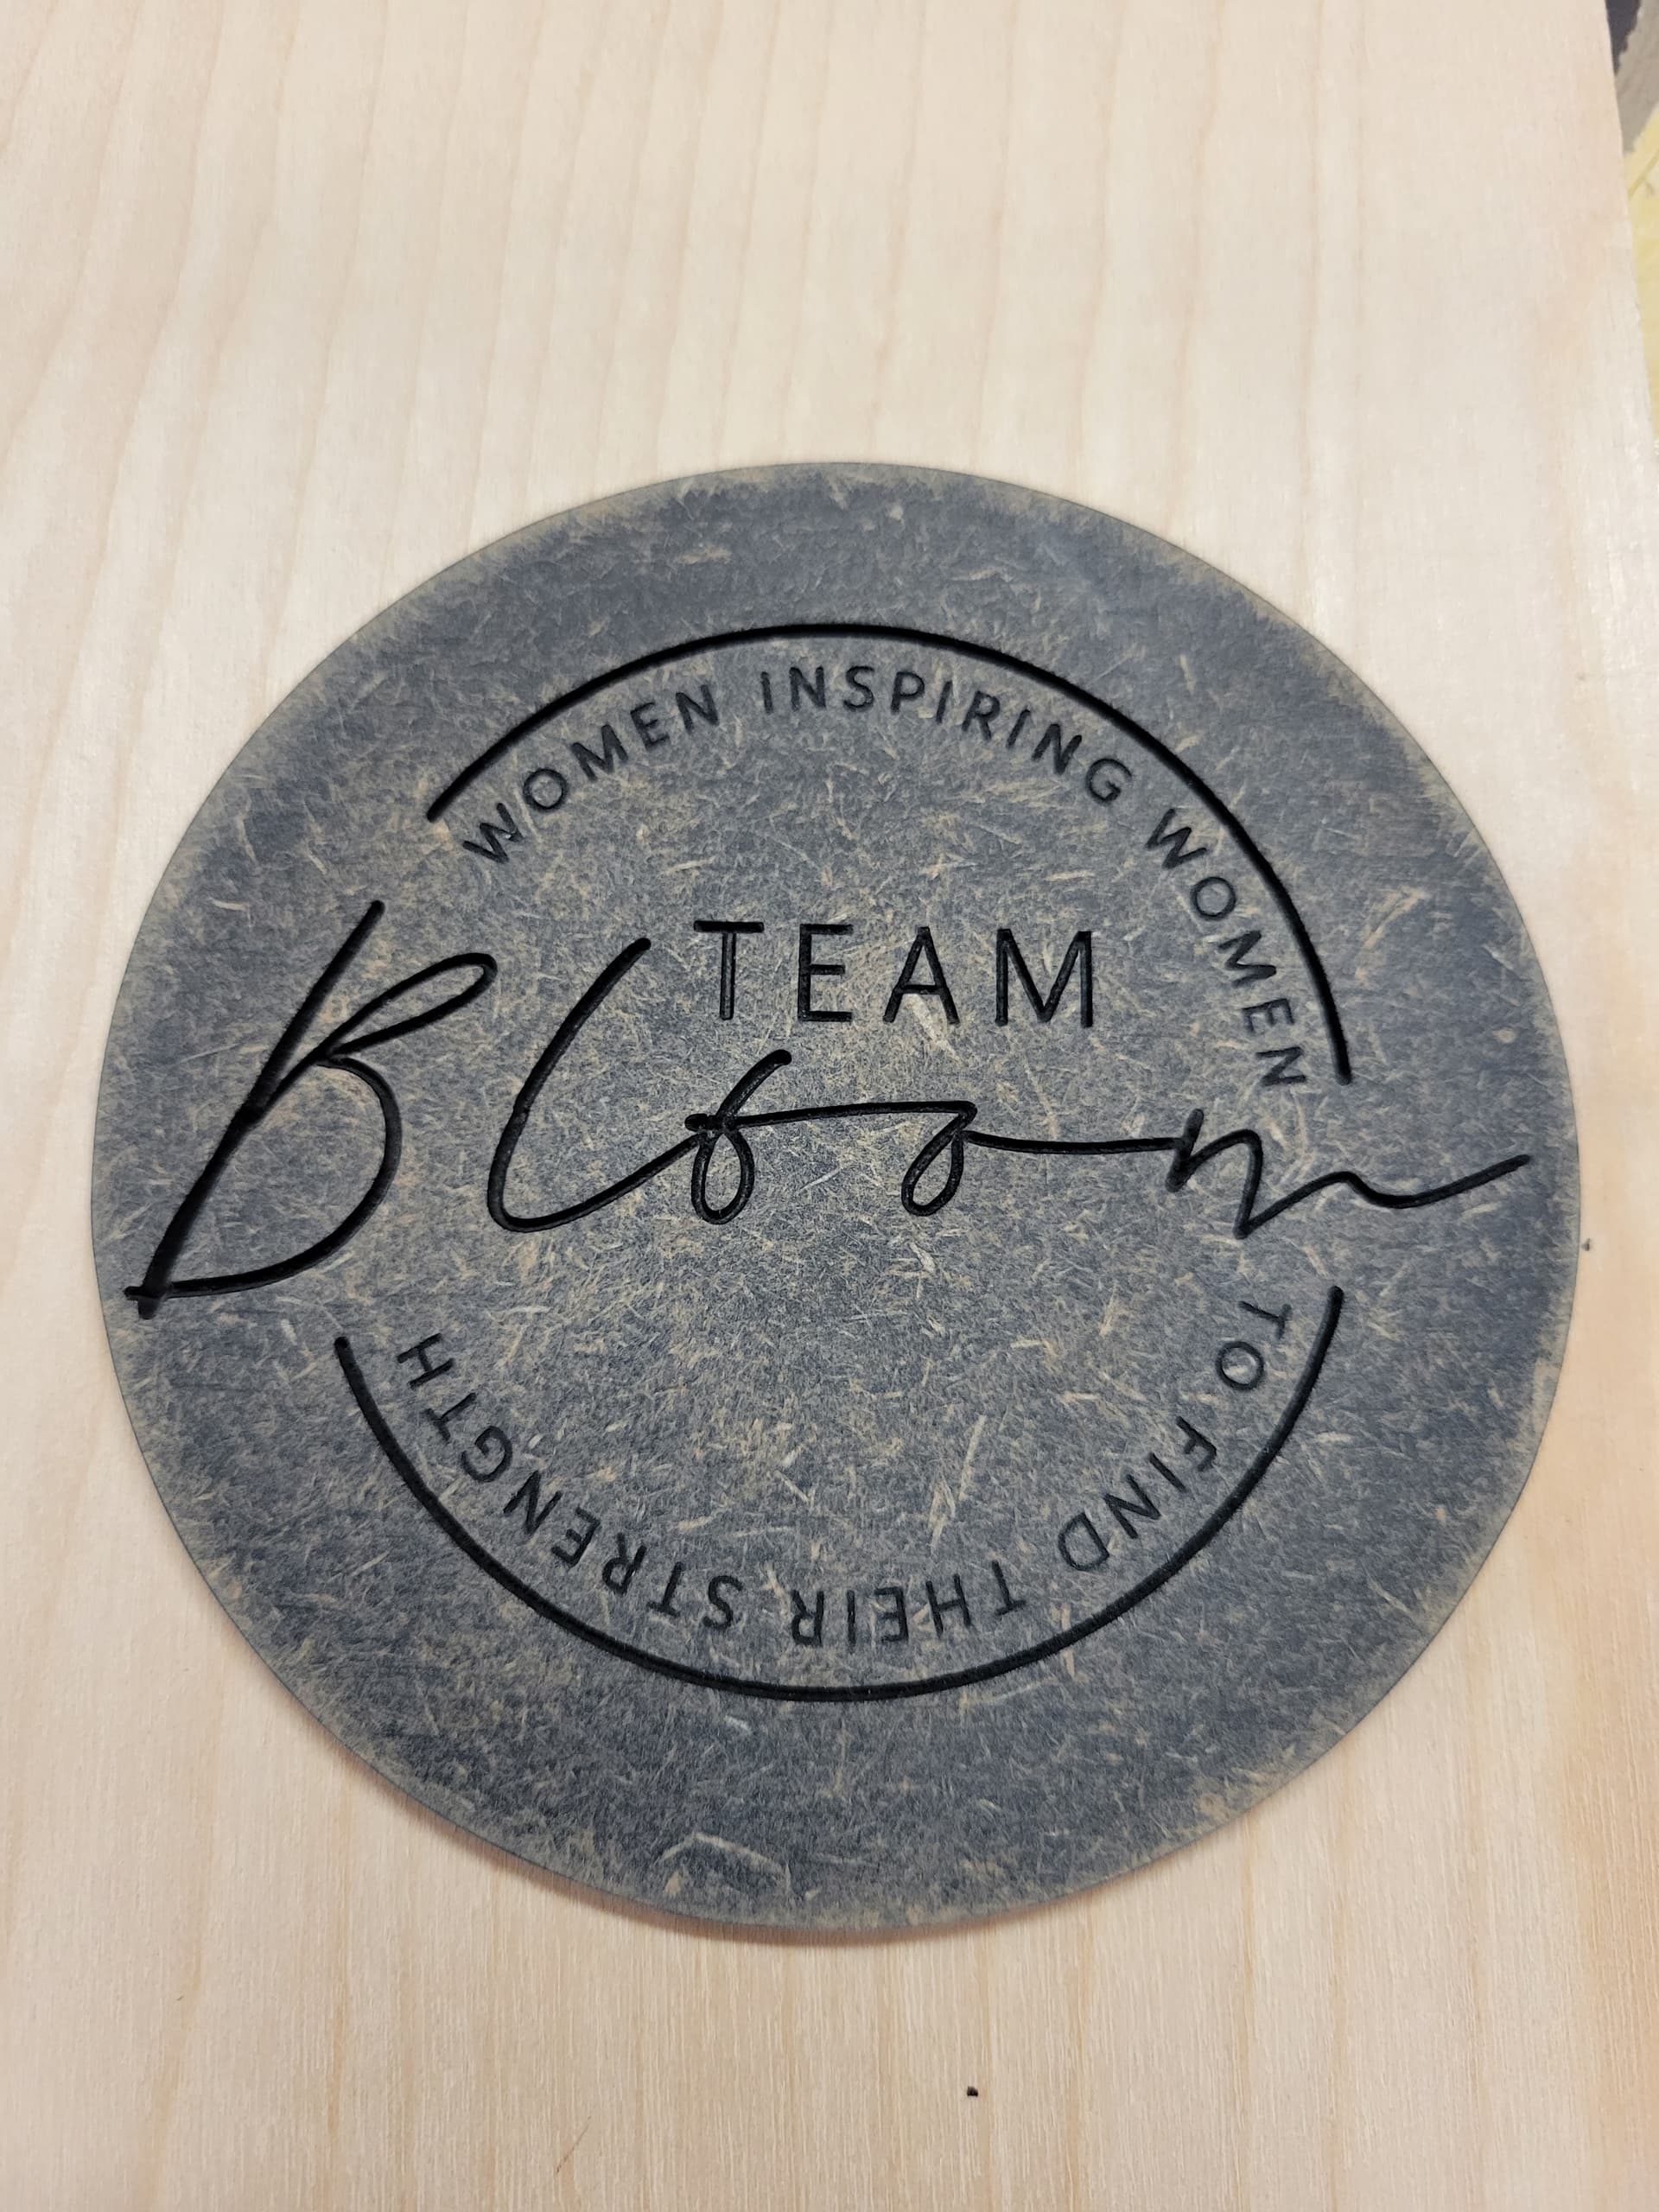
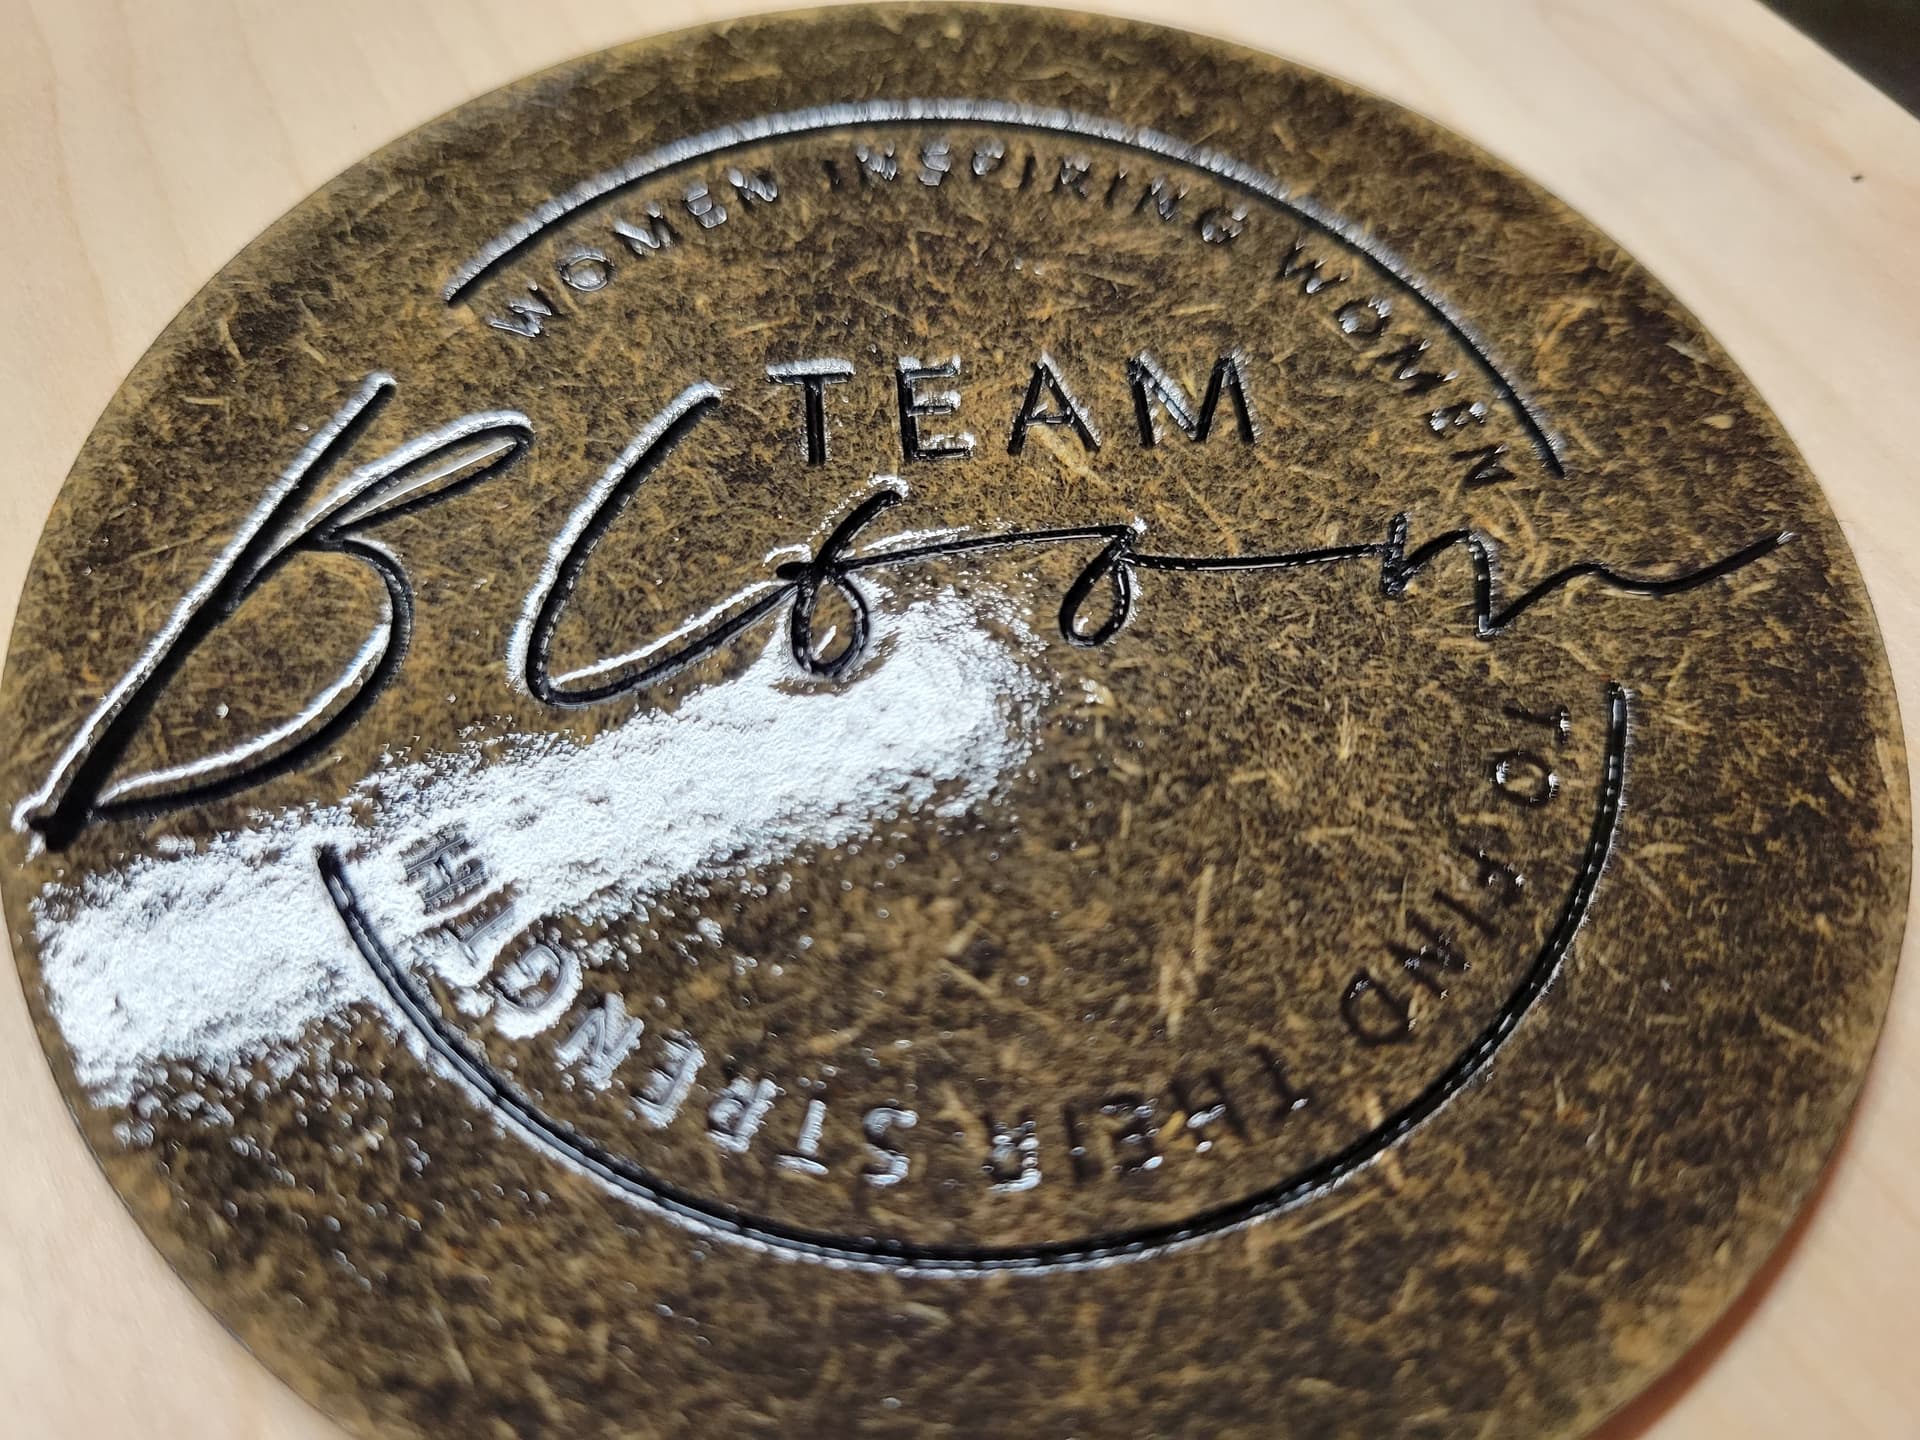
It’s helpful if you have a hobby and can get your wife to appreciate it (so you can expand the current hobby and/or add more hobbies ![]() ). Most of my hobbies are merely tolerated. My wife runs this women’s wellness/exercise/something group and she’s got vector logos and such for it. So, I did a test of a coaster on hardboard. That’s probably not the best material for a coaster, but it’s just a test. However, it came out pretty cool.
). Most of my hobbies are merely tolerated. My wife runs this women’s wellness/exercise/something group and she’s got vector logos and such for it. So, I did a test of a coaster on hardboard. That’s probably not the best material for a coaster, but it’s just a test. However, it came out pretty cool.
The engraving wasn’t super visible so I decided to spray it with some black primer.
Then the intent was to sand it off to leave the original color other than the engraving. However, it weirdly stained the hardboard and looked cool.
And then I clear coated it.
If she wants like 50 of these, I’ll gladly cut them out, but I’m not volunteering to finish them.

I think the ‘weirdly stained hardboard’ looks the best of these.
That might be better with a matte finish than gloss?
And, yes Bob Ross’ quote is right on the money here.
I was thinking the same. Although, that picture makes it look glossier than it really is.
Today I learned that this line of gcode for the tool change is important:
G0 X0 Y10 F2520
I was assuming that during a tool change, it went back to the same location as the initial probe at 0,0 not 0,10. I was cutting out a circle and had a screw in that position to hold my work piece. I changed the bit, went to Z probe, drove my endmill into the screw and lifted the whole gantry. I quickly just touched the bit with the touch plate to get it to stop.
I should have just abandoned it there, but no, I decided to continue, forgetting about the part that it raised the whole gantry. It was lowered back down when it raised Z after the probe. So, of course it plunged deep and I quickly killed the power.
Not an expensive mistake, but definitely will remember this in the future.
My LR3 should be getting a new home within the next couple months. It’s been in my garage but am in the process of tearing down my old 8’x12’ shed to replace with a new 16’x20’ shed. Everything that was in the shed will now live in the garage, so the new shed will basically be a dedicated workshop and I can keep the dust out there.
Since I’m running power to the shed, I plan to also run ethernet so I can wire an access point for the Jackpot and have internet. My wifi reaches out there, but could be stronger, and prefer to hard wire when feasible.
I haven’t made much with it for a couple months. I was absorbed into making FluidNC UI v3 themes and extensions for awhile. I get hyper fixated on things sometimes. I still have more I want to do there. Last extension I was working on was to backup Flash files to SD. I have some other ideas around surfacing.
Once it moves to the shed, I’ll probably shrink it down a bit and build a torsion box table. If that new LR3 beam comes out, that would be good to do then. The shed itself should prompt some organization related projects.
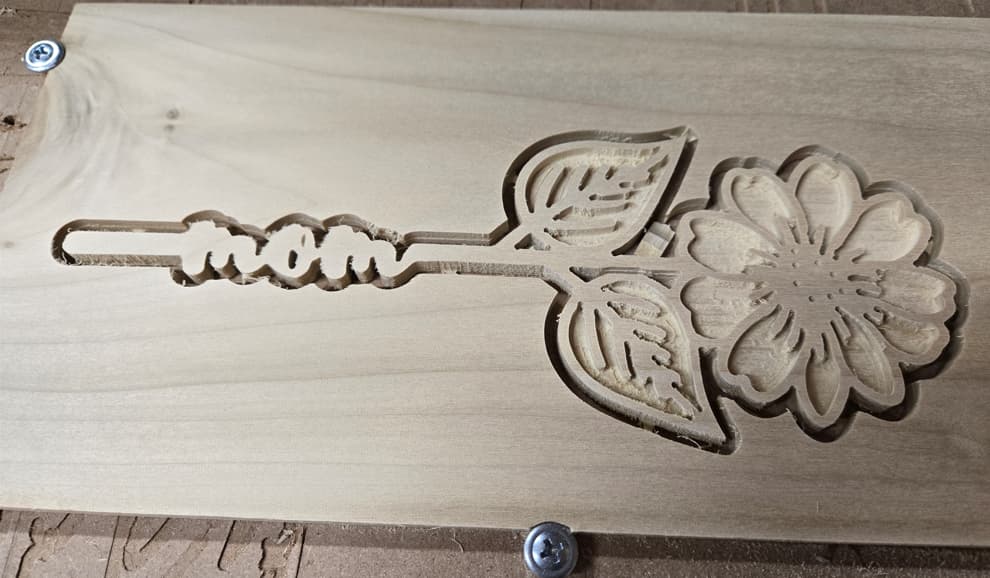
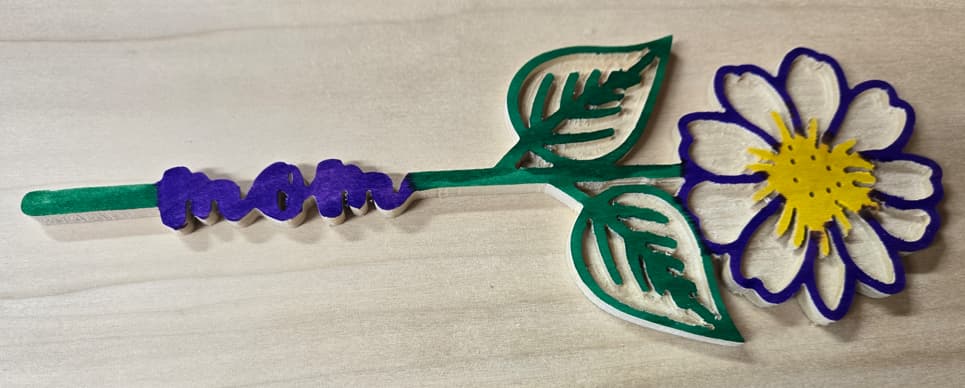
Here’s a quick little project today that I cut out for Mother’s Day. My daughter colored it. I was going to clean it up a bit more, but she wanted to color it immediately.
Mom Flower (marker on poplar)
I’ve also come to the realization that a laser would be handy.